14. Networking and communications
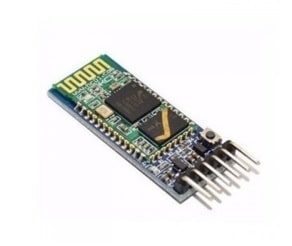
For the development of these works it has been seen convenient to work the connection via bluetooth. The one that will be used is the HC05 bluetooth module.
Description
The HC-05 Bluetooth module allows us to connect our projects with Arduino to a smartphone, cell phone or PC wirelessly (Bluetooth), with the ease of operation of a serial port.
Technical specifications
- Operating voltage: 3.6V - 6V DC
- Current consumption: 50mA
- Bluetooth: V2.0+EDR
- Frequency: 2.4GHz ISM Band
- Modulation: GFSK(Gaussian Frequency Shift Keying)
- Transmit power: 4dBm, Class 2
- Sensitivity: -84dBm at 0.1% BER
- Range 10 meters
- Communication interface: Serial TTL
- Transmission speed: 1200bps up to 1.3Mbps
- Default baudrate: 38400,8,1,n.
- Security: Authentication and encryption
- Working temperature: -20C to +75C
- Android-compatible
- Dimensions: 37*16mm
- Weight: 3.6 grams
When pointing out instructions in the Arduino programming language, it is important to have the structure of the Attiny44A microcontroller within reach. This will allow us to define the transmission variables (RX,TX) in the program.

Working in group
It has been seen convenient to work the connection with a cell phone via bluetooth.
For the development of the work in this block, an application will be created that allows data to be sent from the infrared sensor to the cell phone. When the person's hand is detected by the sensor, the message “Sensor activated” should be displayed and when it is removed “Sensor deactivated”.
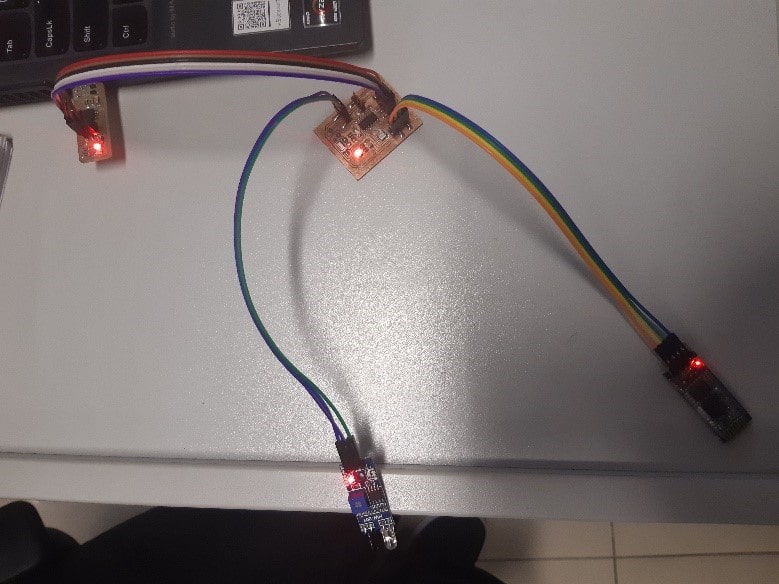
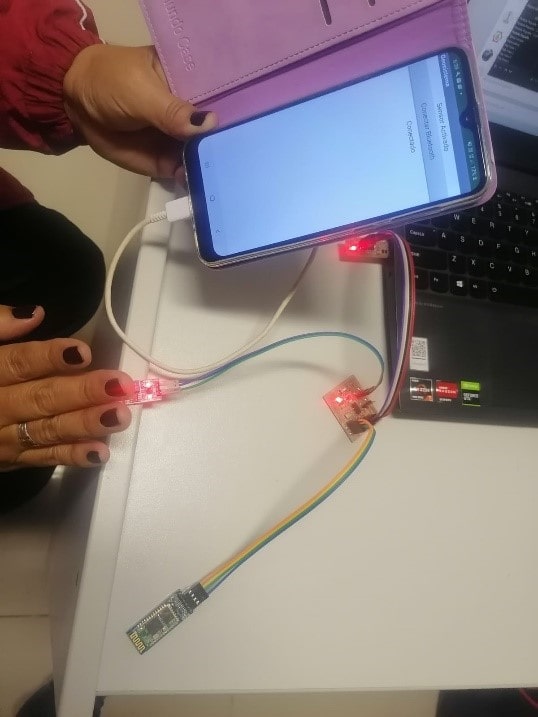
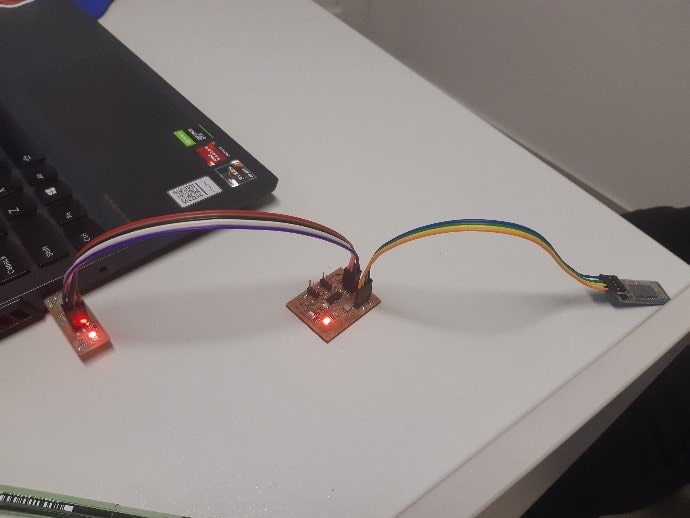
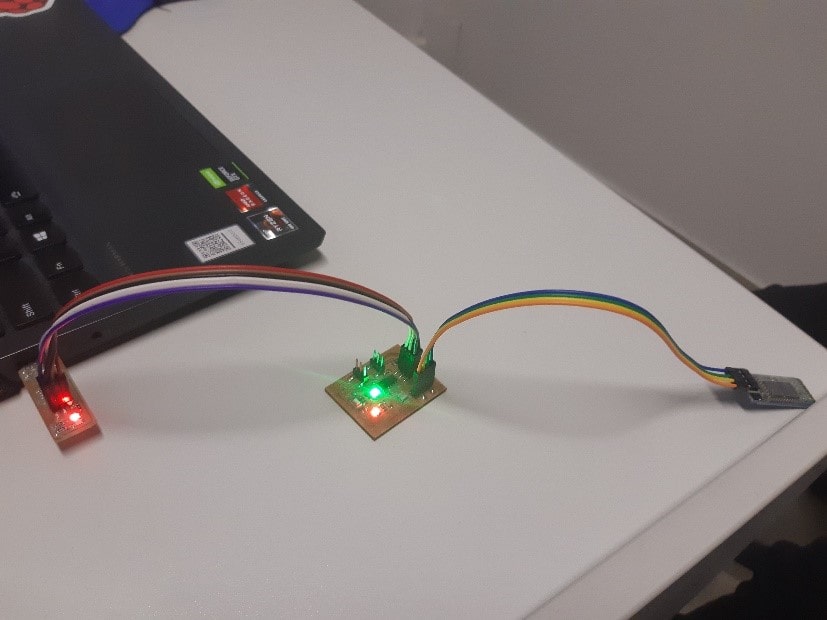
The physical assembly is the one shown in the following image:
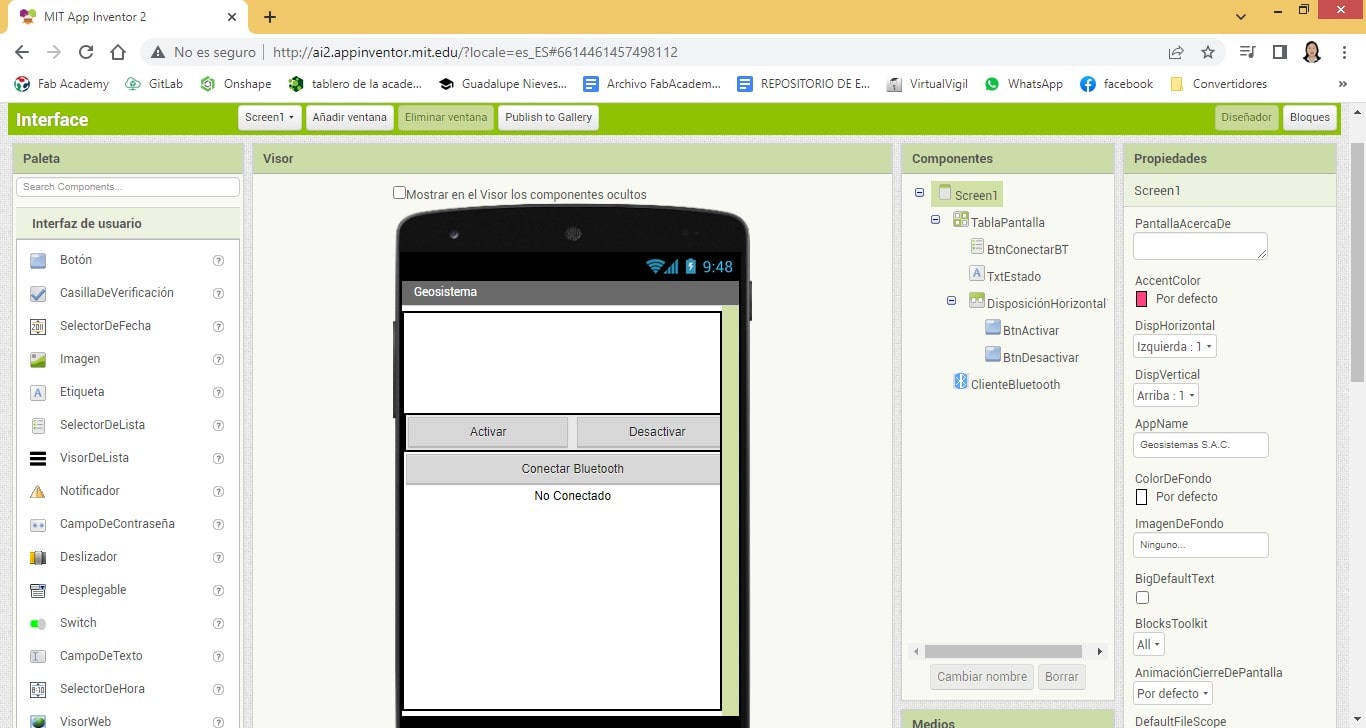
Due to its simplicity and speed in its handling, the MIT app inventor application will be used. Described as a web tool for creating mobile applications. Its URL is http://ai2.appinventor.mit.edu/

MIT inventor features two work environments; The first is the design one, where the necessary resources are provided to build the interface of a certain application.
When loading the application, one has a default presentation or interface that can be edited to our liking. In our case, the presentation is useful for us, so it is not necessary to edit it.
Now it is time to go to the block environment and indicate the instructions that must be carried out in the process.
Basically 03 processes will be carried out:
These processes are shown on a block basis.
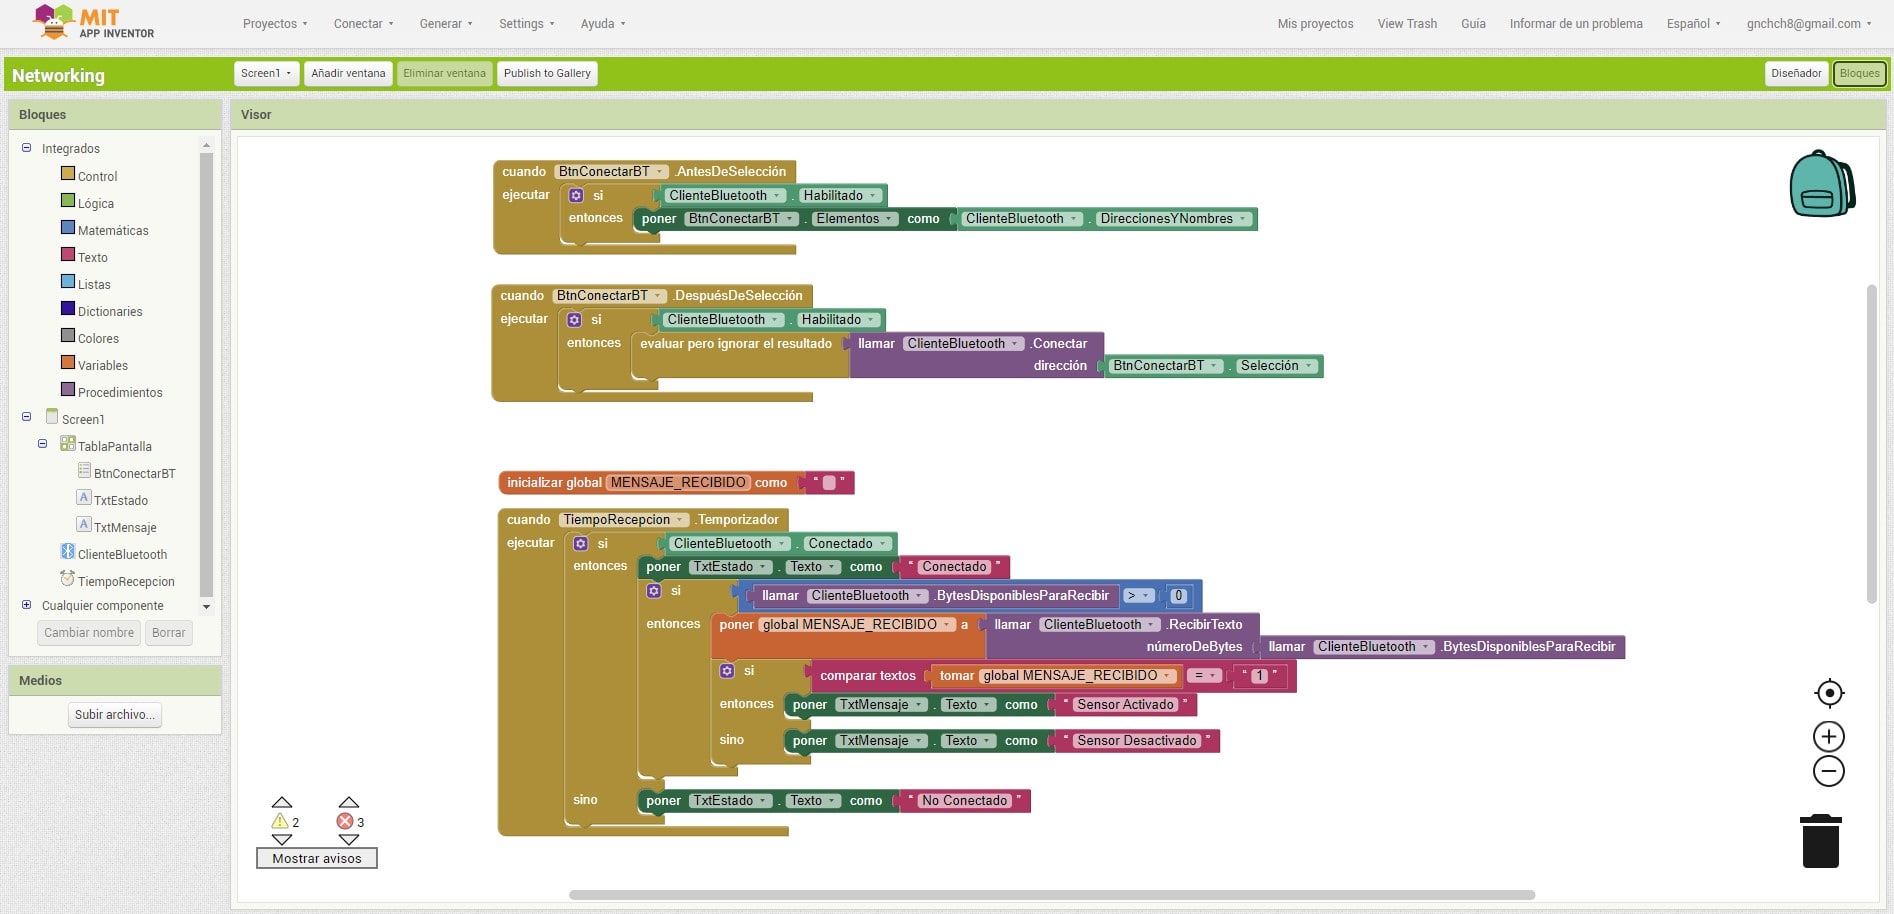
Showing processes individually
Device reading

Device connection

Reception of messages
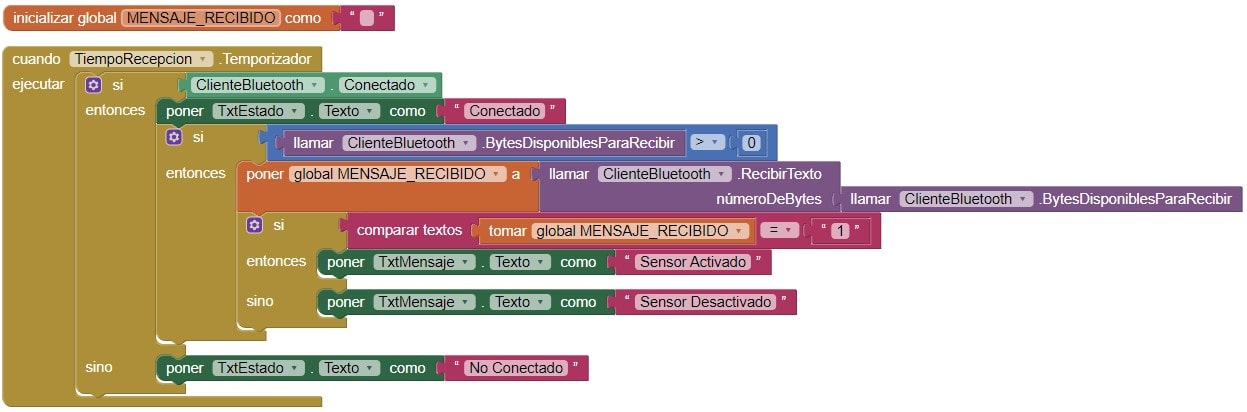
Everything is ready to point out the following instructions:
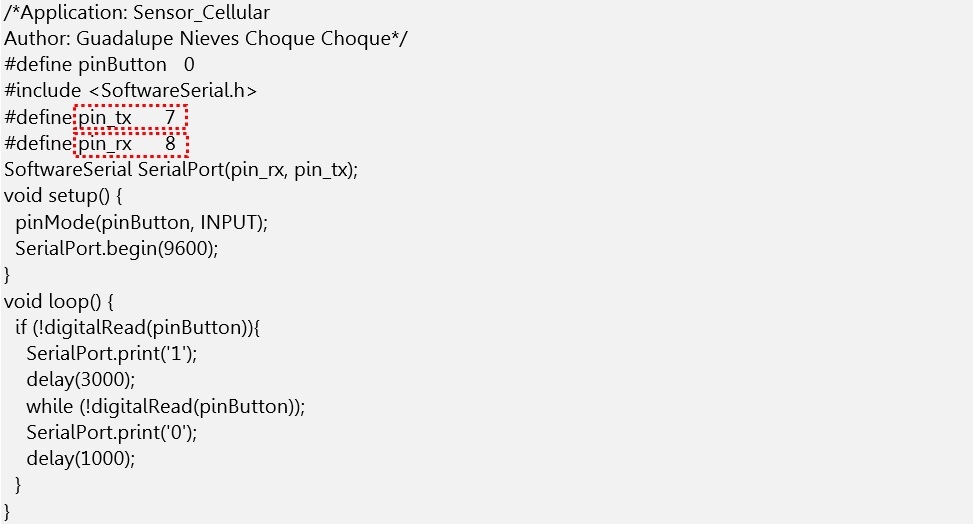
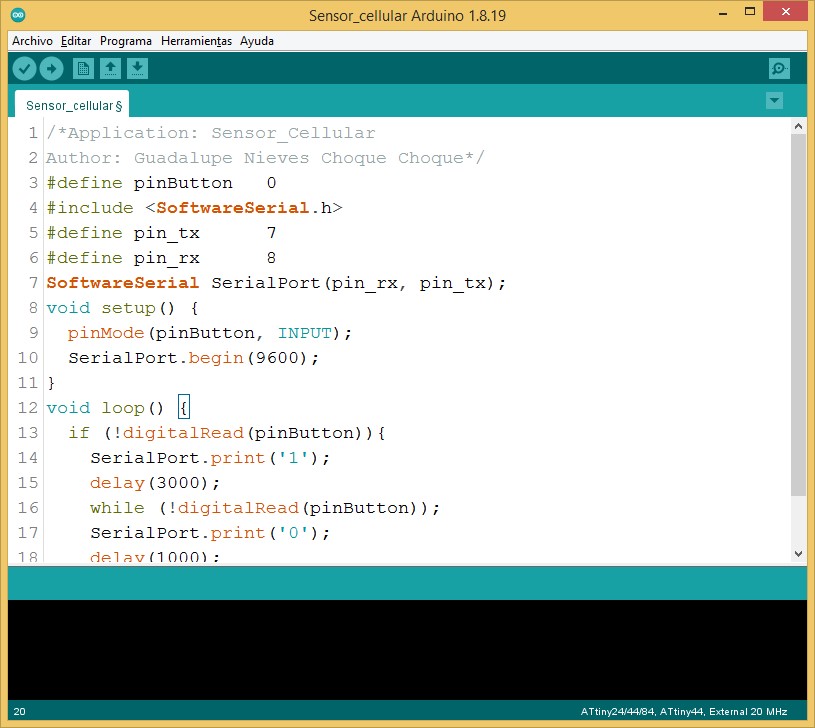
Already in the Arduino coding window.
Running the application:
In the interface.
Observing the execution physically.
Working individually
What is finally intended through the following application is to achieve the connection and recognition of bluetooth, having as an intermediary the previously manufactured PCB.
Customizing the use of bluetooth in the work team
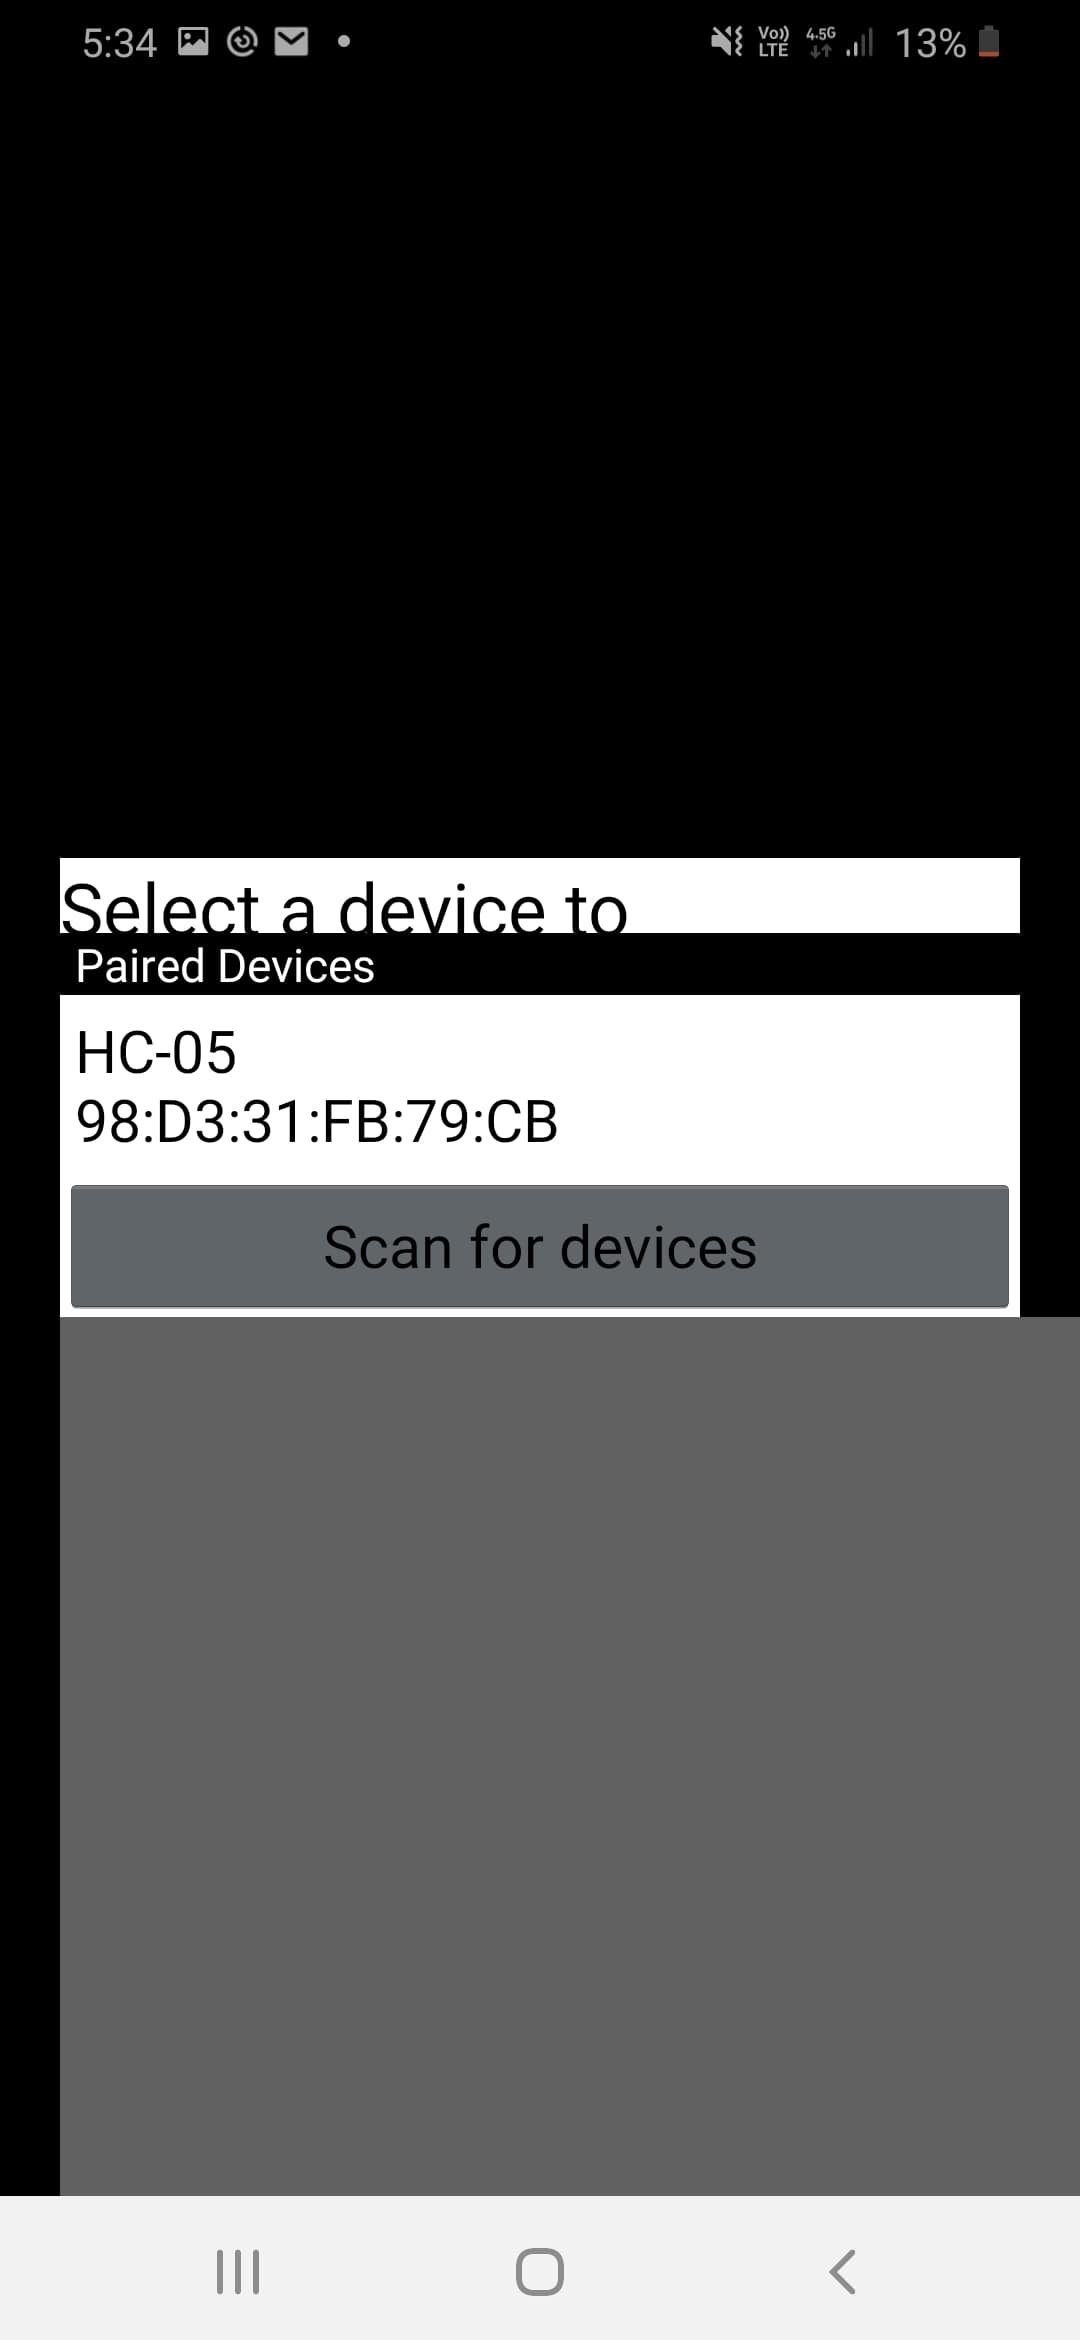
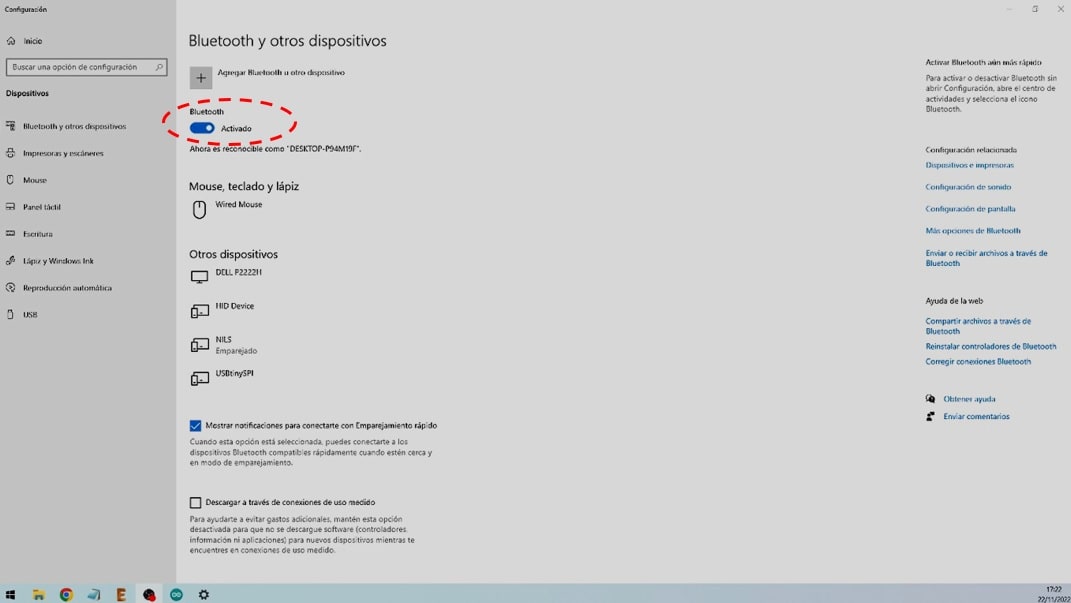
We go to Settings for Bluetooth and other devices and I verify that Bluetooth is activated.
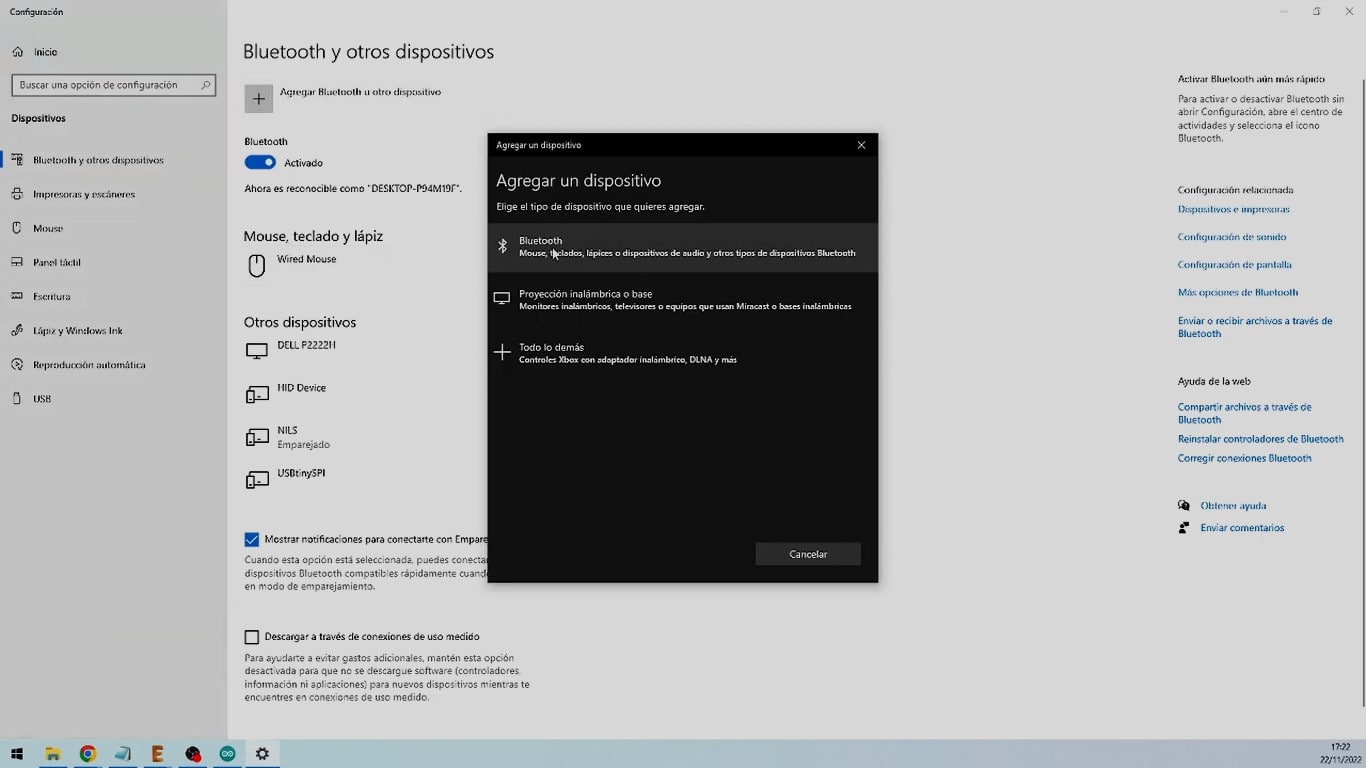
I click Add Bluetooth and other devices.
Once Bluetooth has been selected, the bluetooth identifier is expected to appear.
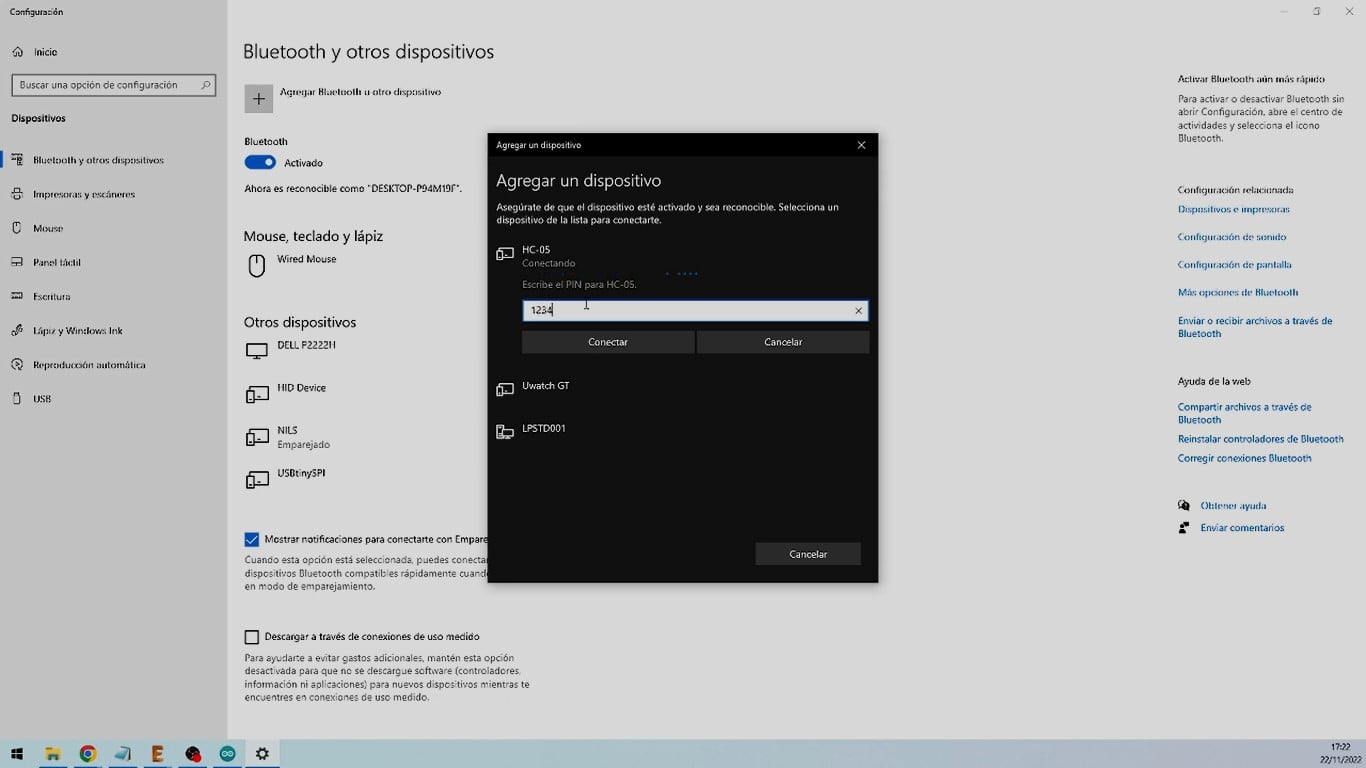
Once the name or identifier has appeared, click on it and enter the corresponding PIN (1234) and click on Connect.
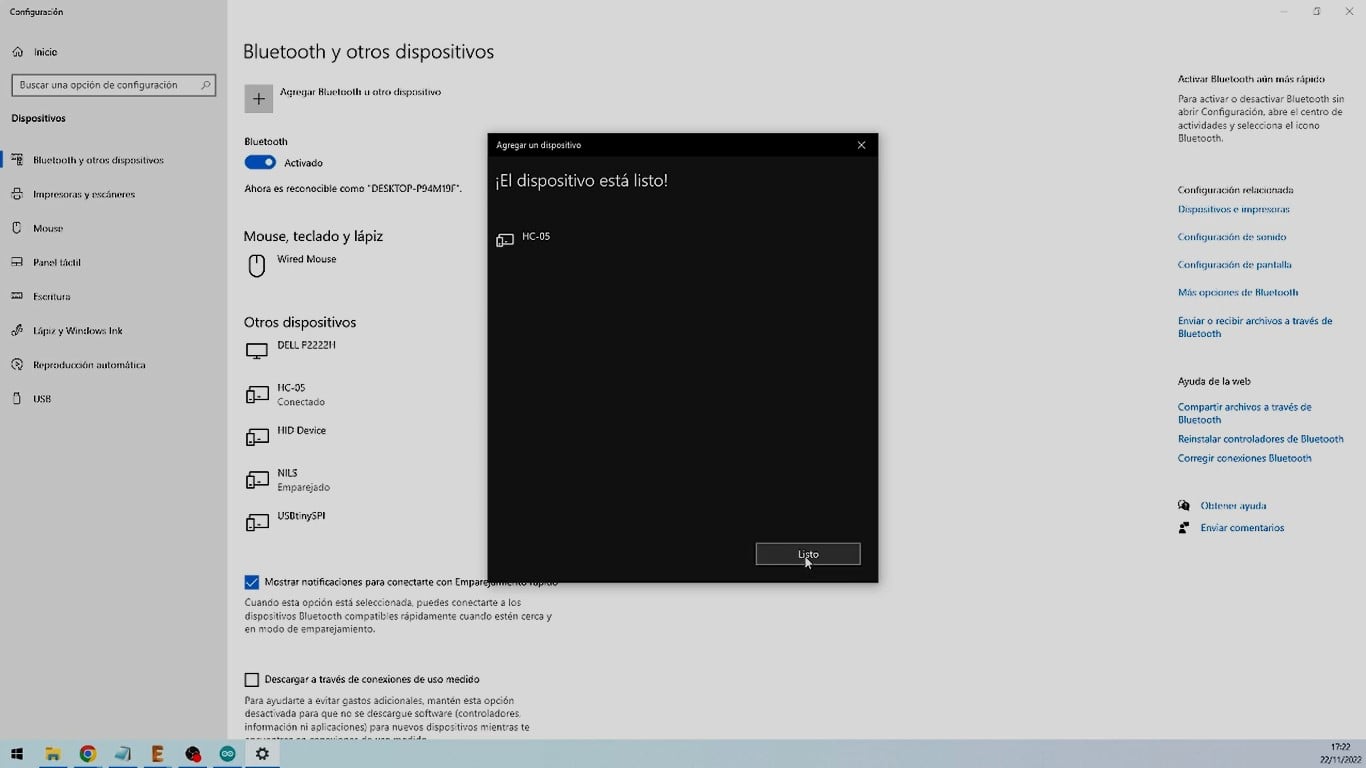
And voila, the bluetooth was connected.
Programming
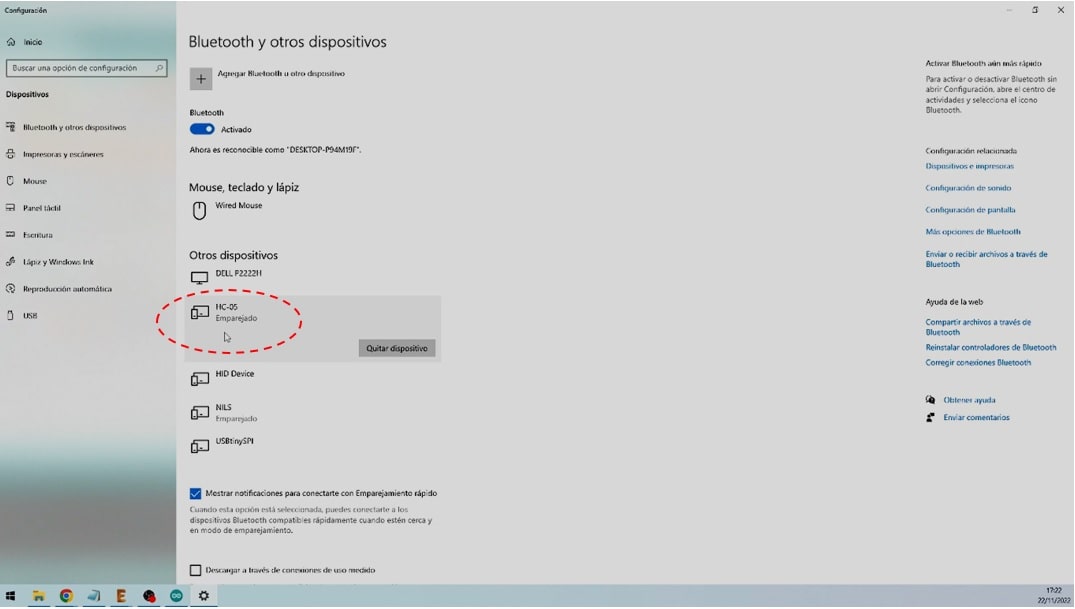
The bluetooth is already paired, as can be seen in the image. So, you can now go to the Arduino and point to the following instructions:
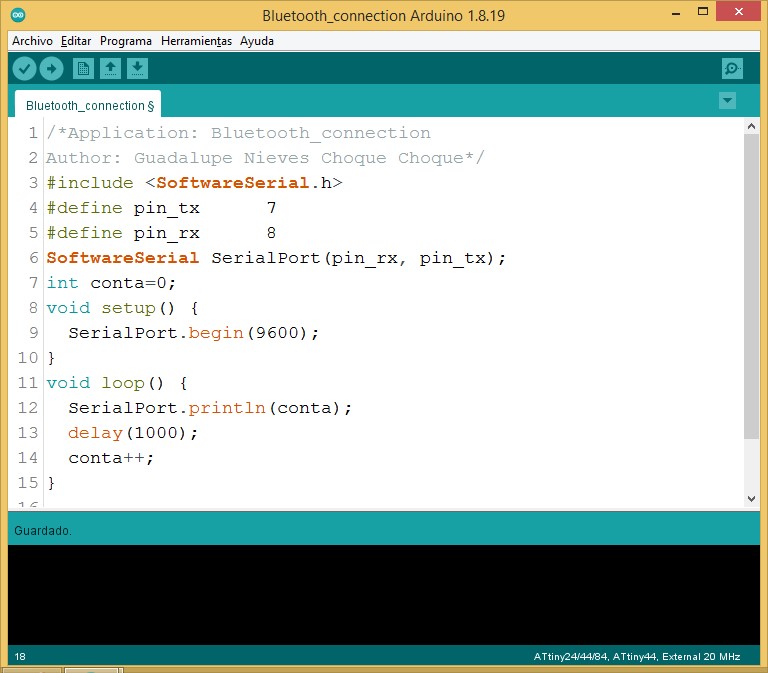
*Application: Bluetooth_connection
Author: Guadalupe Nieves Choque Choque*/
#include <SoftwareSerial.h>
#define pin_tx      7
#define pin_rx      8
SoftwareSerial SerialPort(pin_rx, pin_tx);
int conta=0;
void setup() {
  SerialPort.begin(9600);
}
void loop() {
  SerialPort.println(conta);
  delay(1000);
  conta++;
}
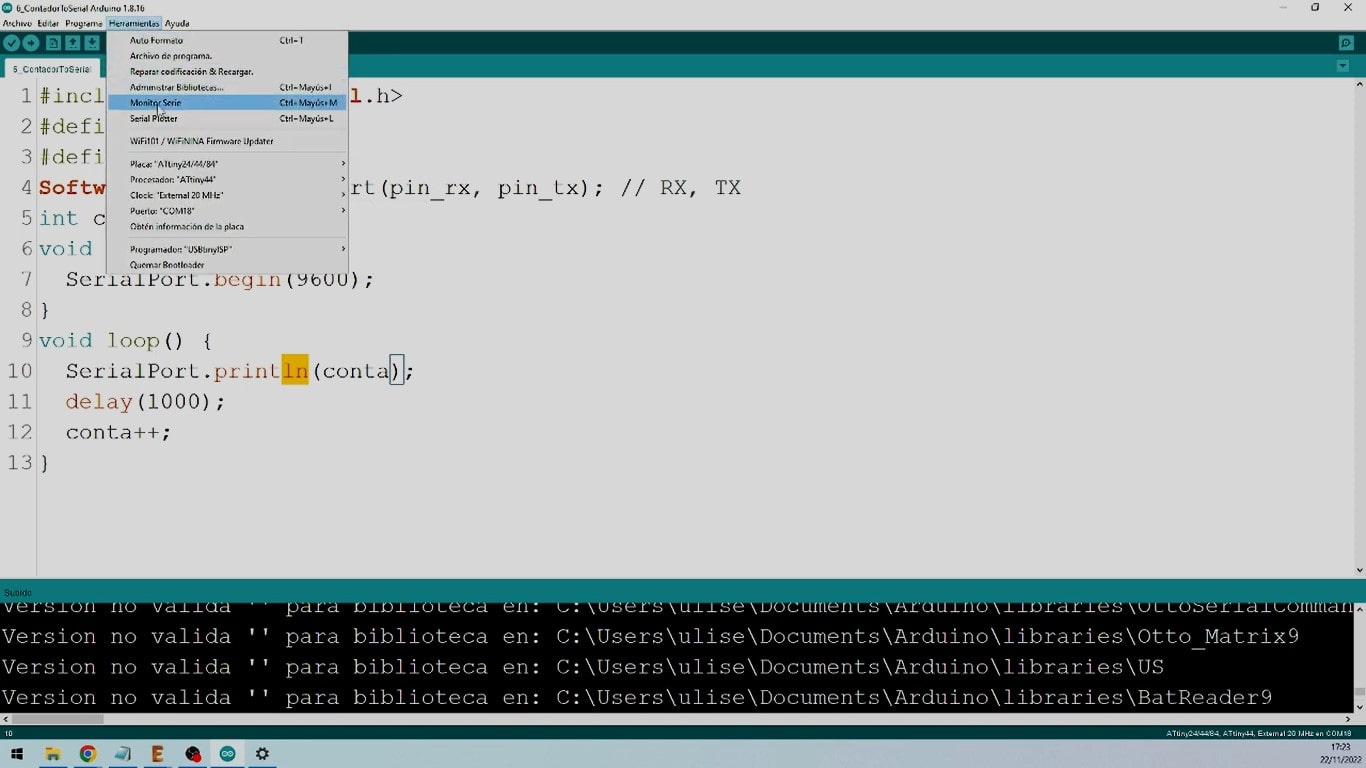
Port configuration
Before running the application, the port must be configured. For this you must go to Tools/COM18 Port (You must always choose the smaller of the two generated).

Then select Tools/Serial Monitor, so that a new window will appear where the execution of the application will be displayed.
The execution begins and at the same time the led turns on, confirming the activity of the bluetooth.
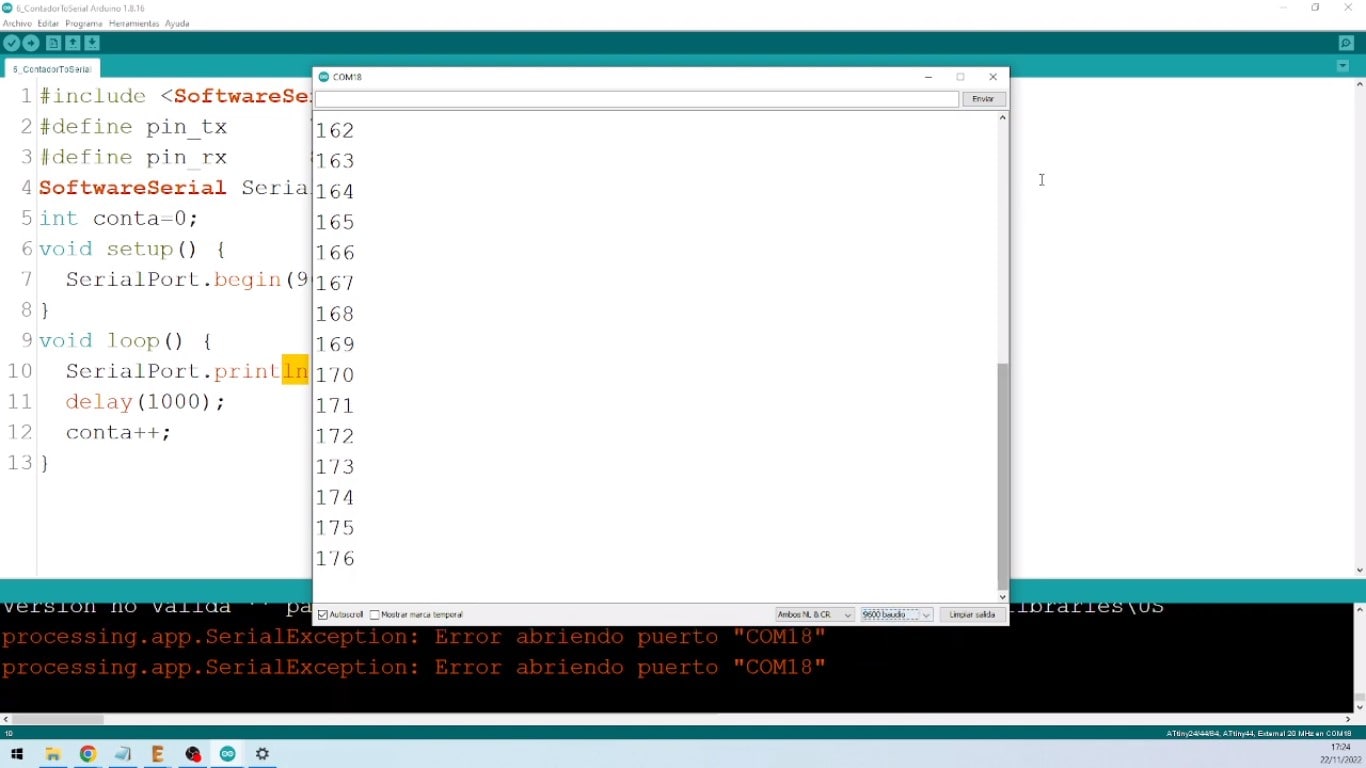
Effectively, it is verified that data corresponding to the serial port is being sent at 9600 bauds.
And in the video:
Natives files
| Ord | Description | Files |
|---|---|---|
| 1 | App Flicker | Bluetooth_connection.ino |
| 2 | App Interlock | Sensor_cellular.ino |