3. Computer Aided design
Continuing with the execution of the proposed project "Automatic gel alcohol dispenser", it is now time to elaborate the design, specifically I am referring to the computer aided design (CAD), which has been developed in two parts: 2D design (Inkscape - Corel Draw) and 3D design (OnShape - Autodesk Fusion 360).
2D Design
Inkscape is a software for vector graphics. It is the tool that will be used to elaborate the 2D design.
Once downloaded and executed the program presents a screen similar to the following one:
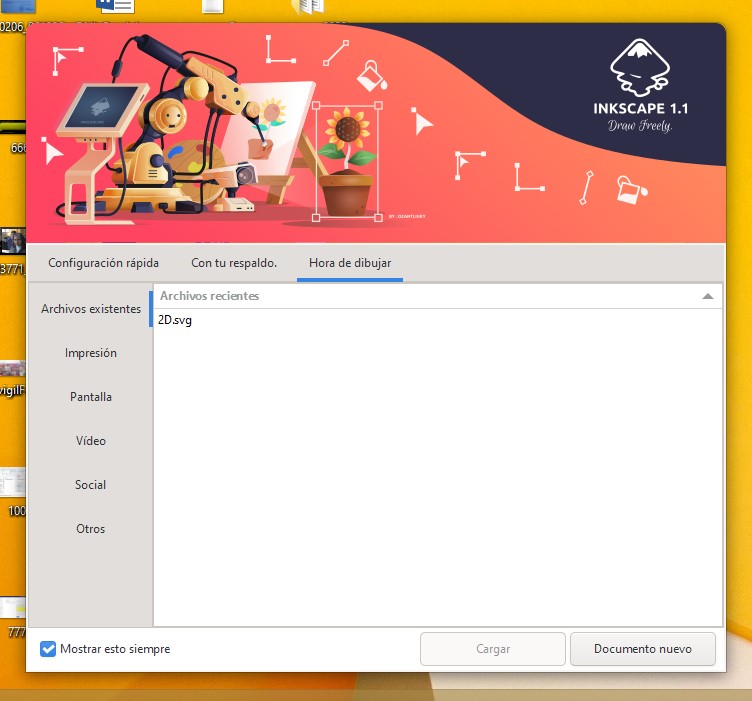
By clicking on the New Document button, you can enter the Inkscape interface to start the development of a new application.
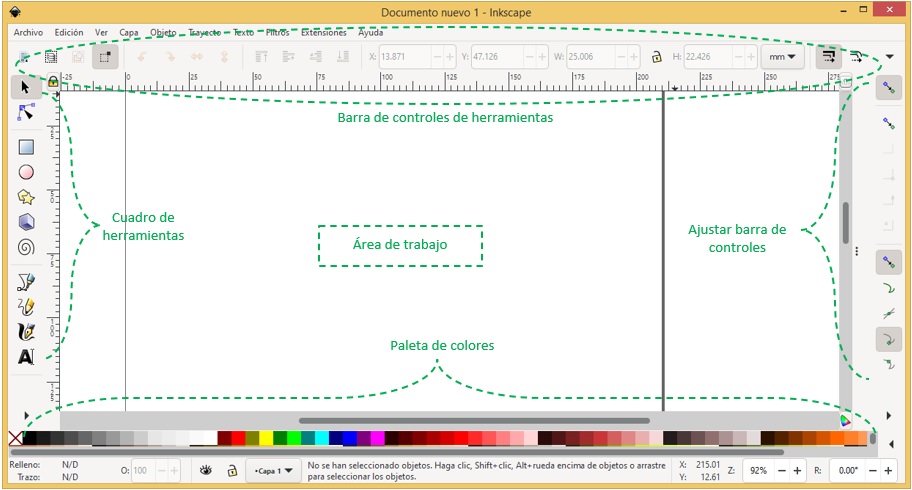
The work area is the concatenator of objects that are inserted from the toolbox, which with the assignment of their properties give shape to a design.
App
Continuing with the execution of the proposed project "Automatic gel alcohol dispenser", we proceeded with the design stage.
The idea is to design a protector or casing for the arduino card and another for the automatic gel dispenser.
The idea is to finally obtain a product similar to the following presentation:

Each of them has been designed in different layers, as well as their contents.
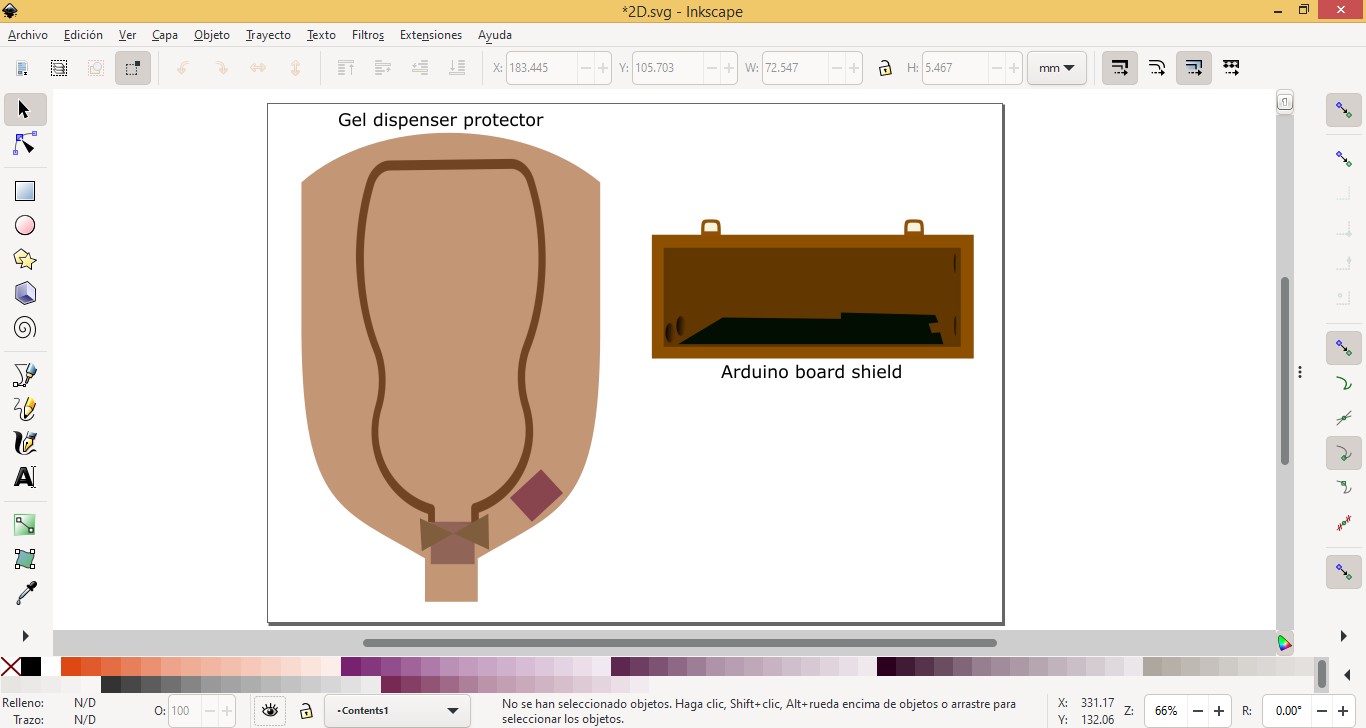
The contents of the dispenser protector are: the alcohol gel in its respective container, sensor and motor. It should be noted that this protector has holes that allow, through cables, the connection with the sensor and motor.
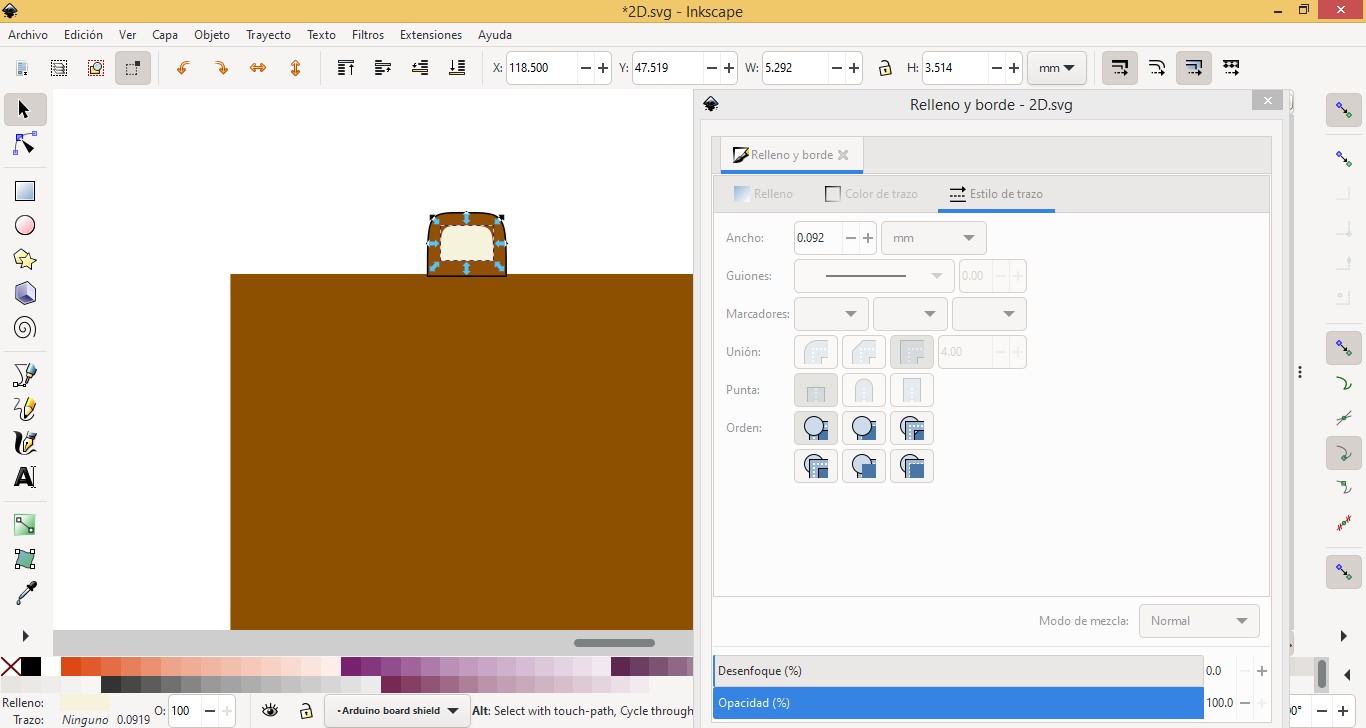
The board protector contains precisely the arduino board, with holes that allow the connection with wires between the board and the power button, as well as with the power supply.
The work began with the design of the arduino board protector, where with the resources of Inkscape, I was shaping it according to the initially presented sketch. Here is included the design of the door and the board.
The objects in the toolbox were the main resources used to shape the design, which together with the color palette improved the presentation.
The specifications of the type and style of the edges of the objects gave a better finish to the design.
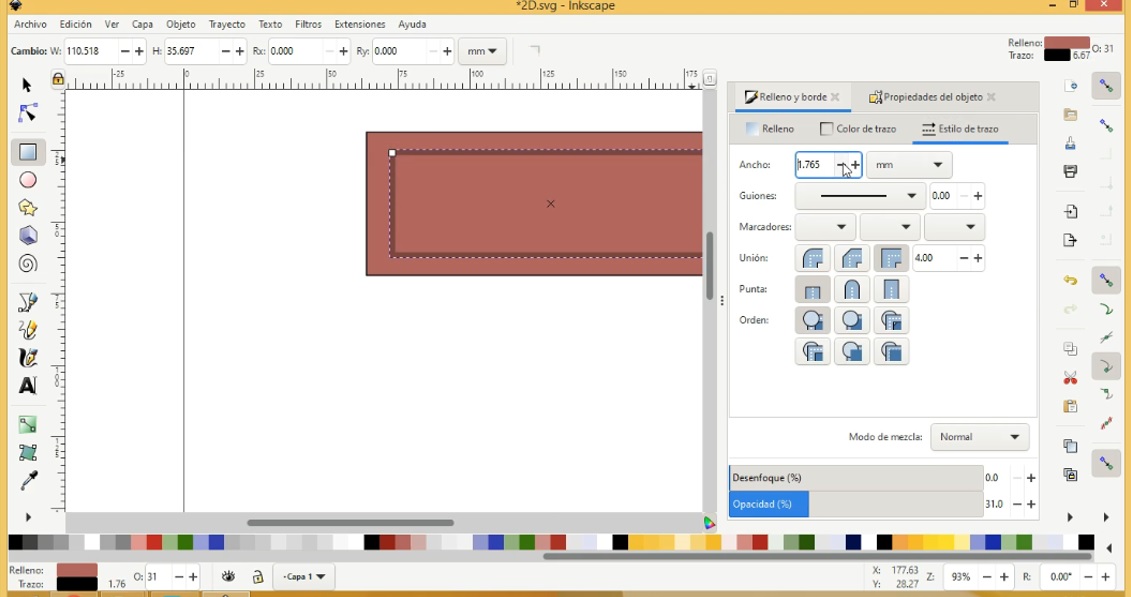
Characterizing the properties of the objects allowed me to further customize the design.
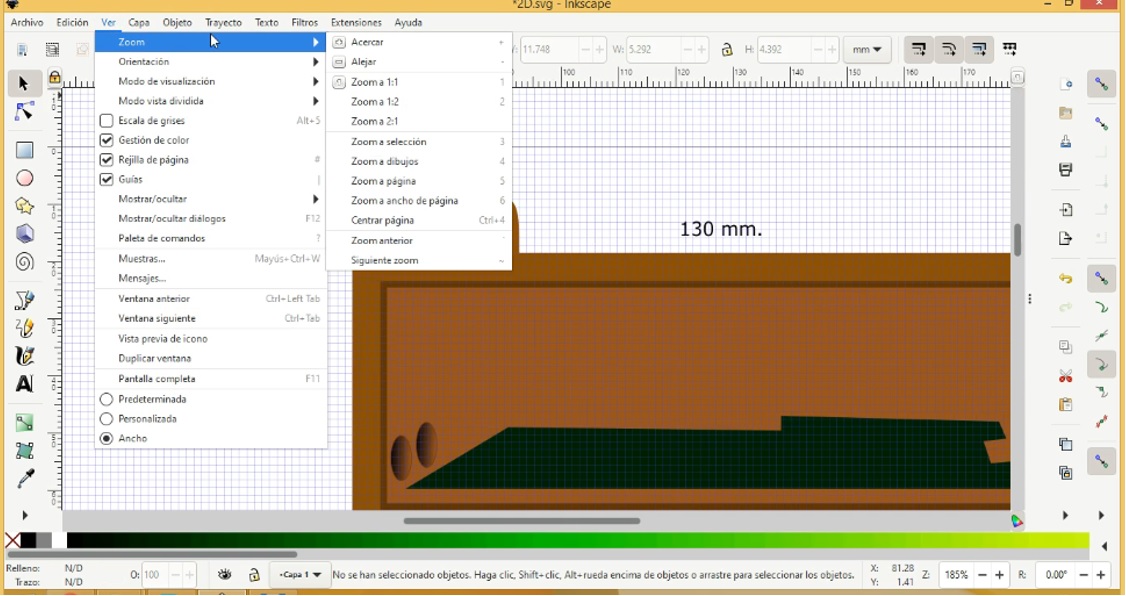
The zoom in and zoom out features allowed me to more accurately draw the design.
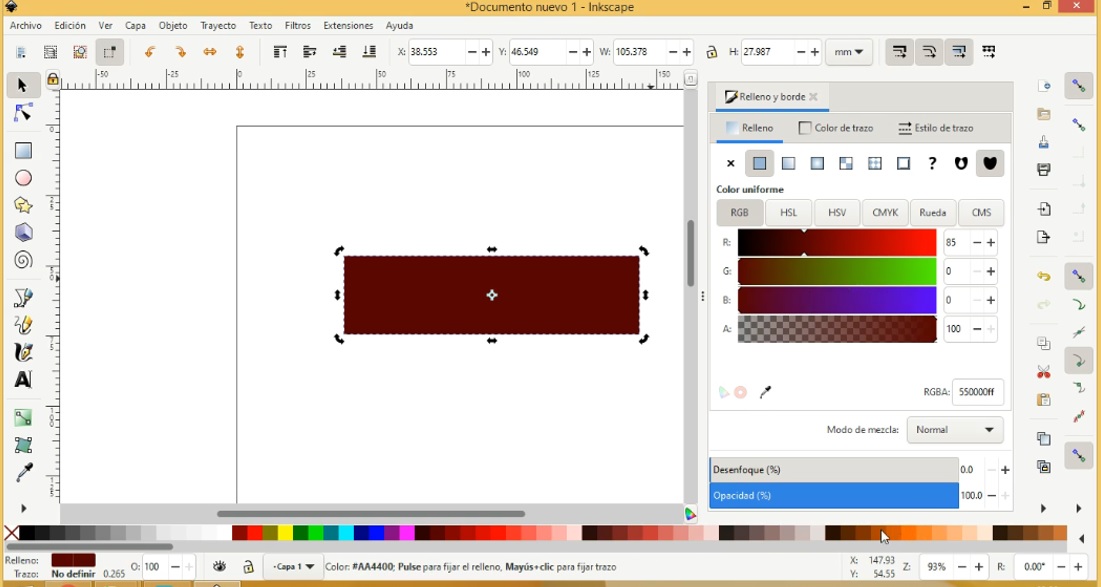
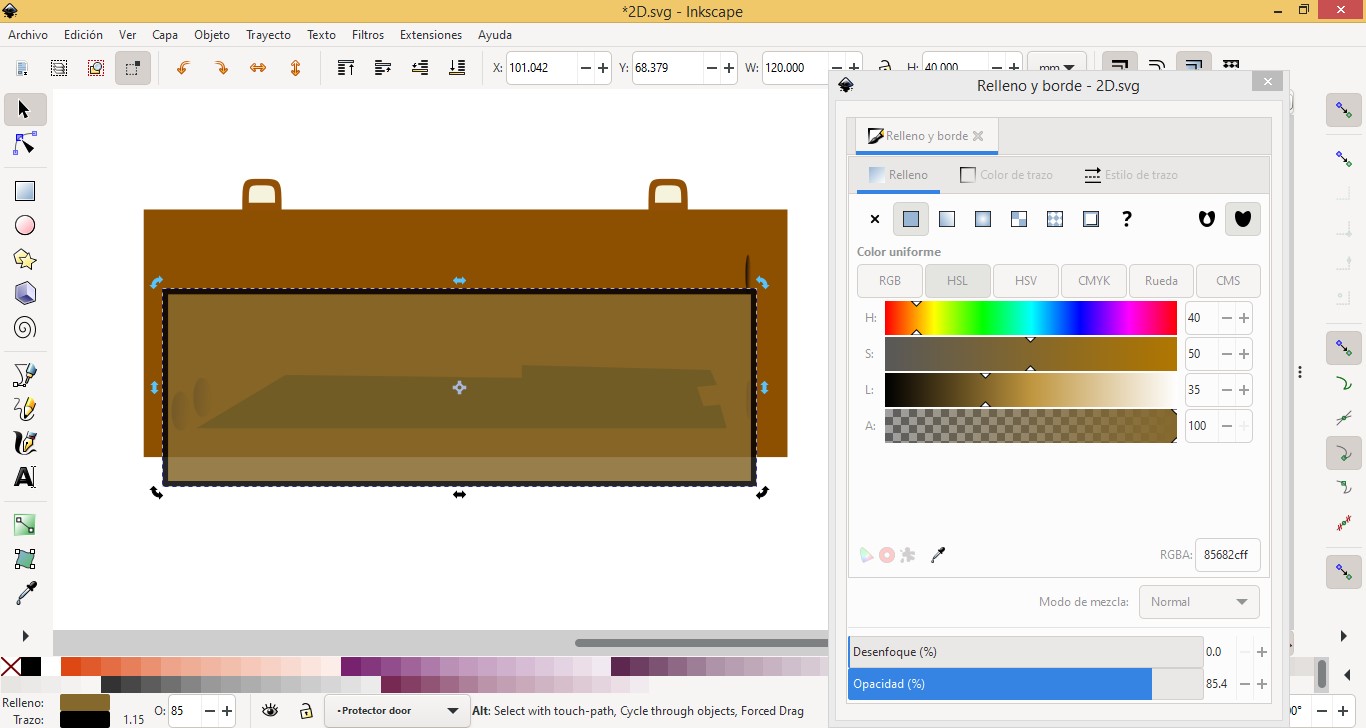
Solid colors were assigned to certain objects giving them a certain degree of transparency to their presentation.
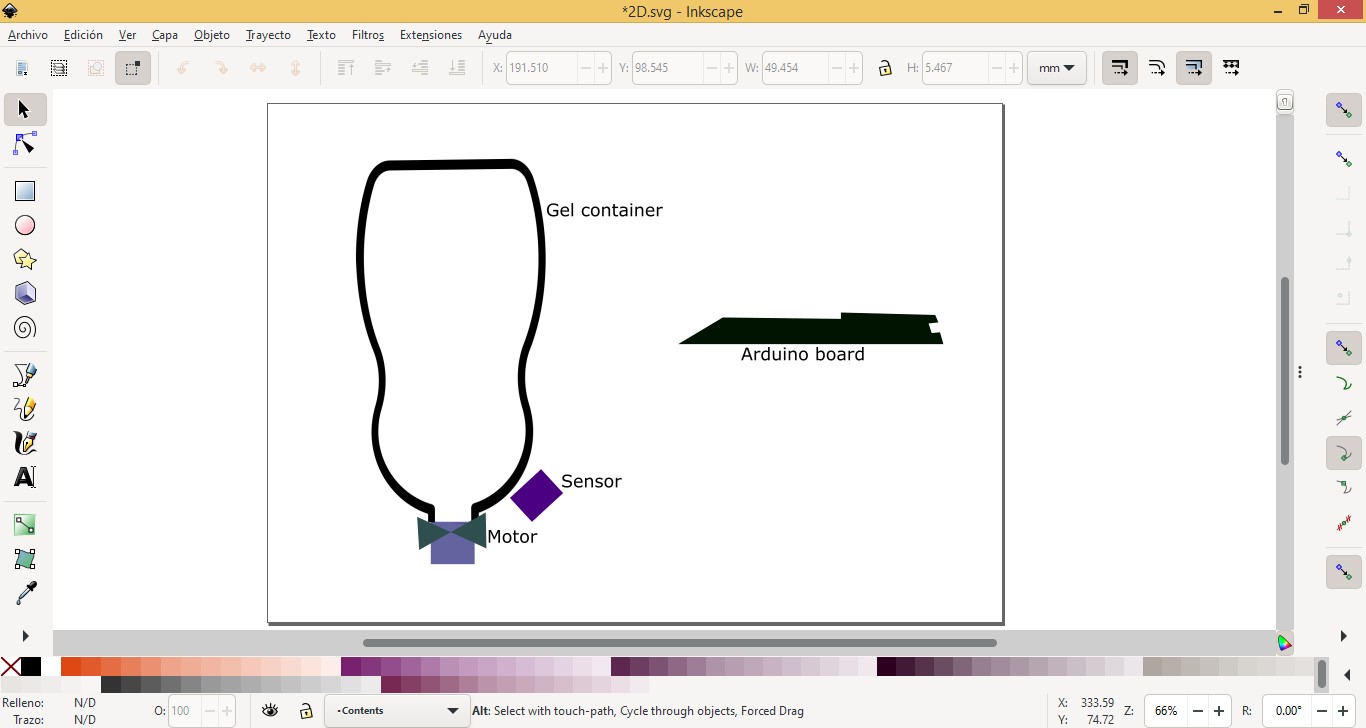
Secondly, the dispenser protector and its contents were designed.
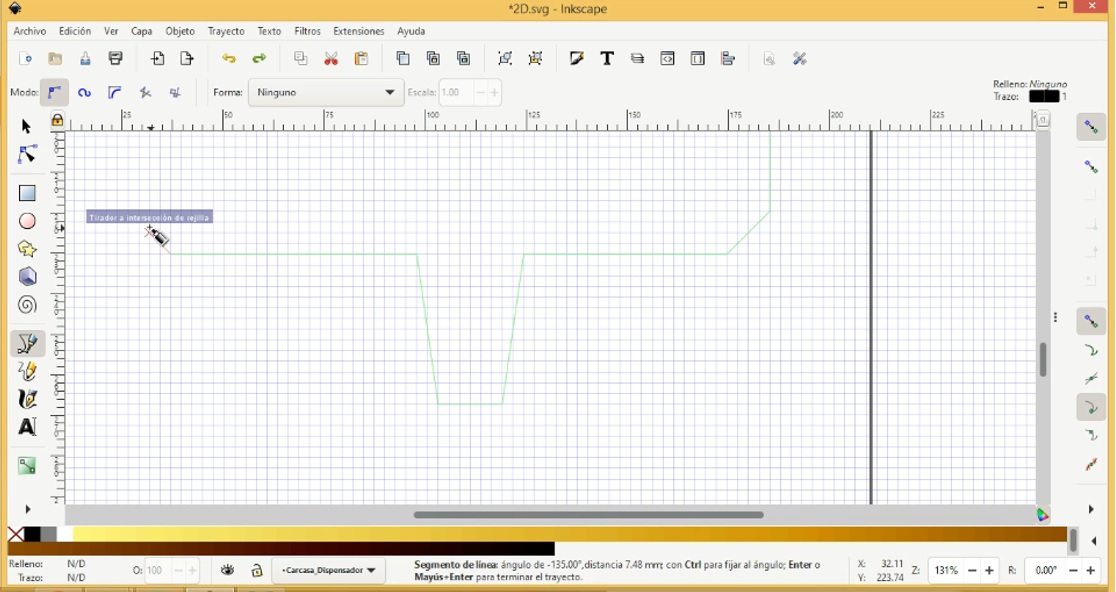
The freehand tool collaborated in shaping the silhouette of the object, taking the measurements shown on the ruler as a reference.
It was a shade of colors that were used in the protector.

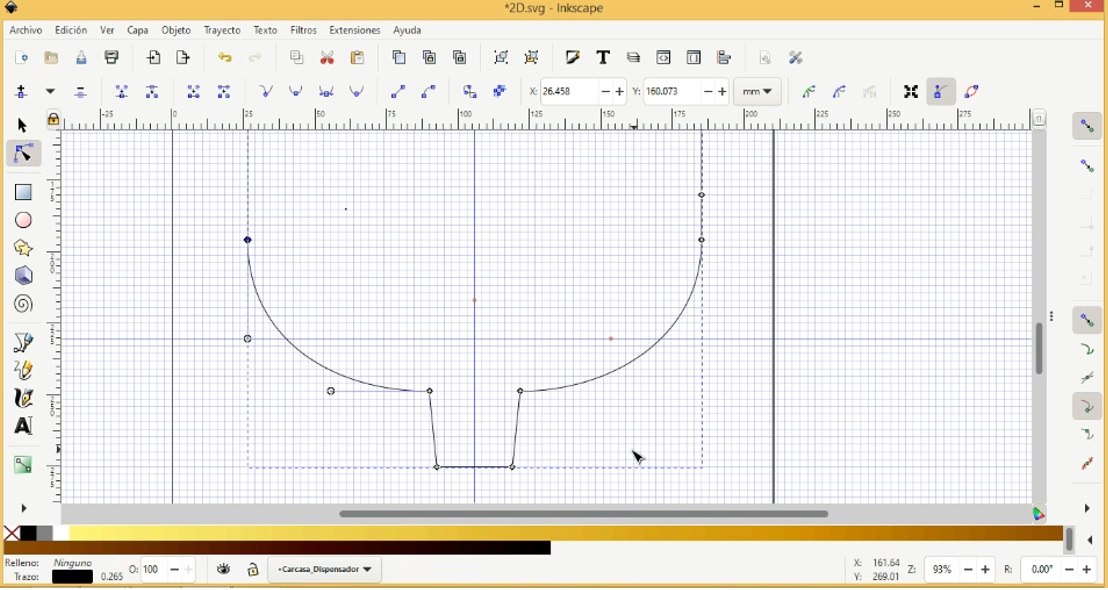
For the content of the protector, an image was inserted in the shape of a container and the freehand tool was used to design the sensor and the motor.
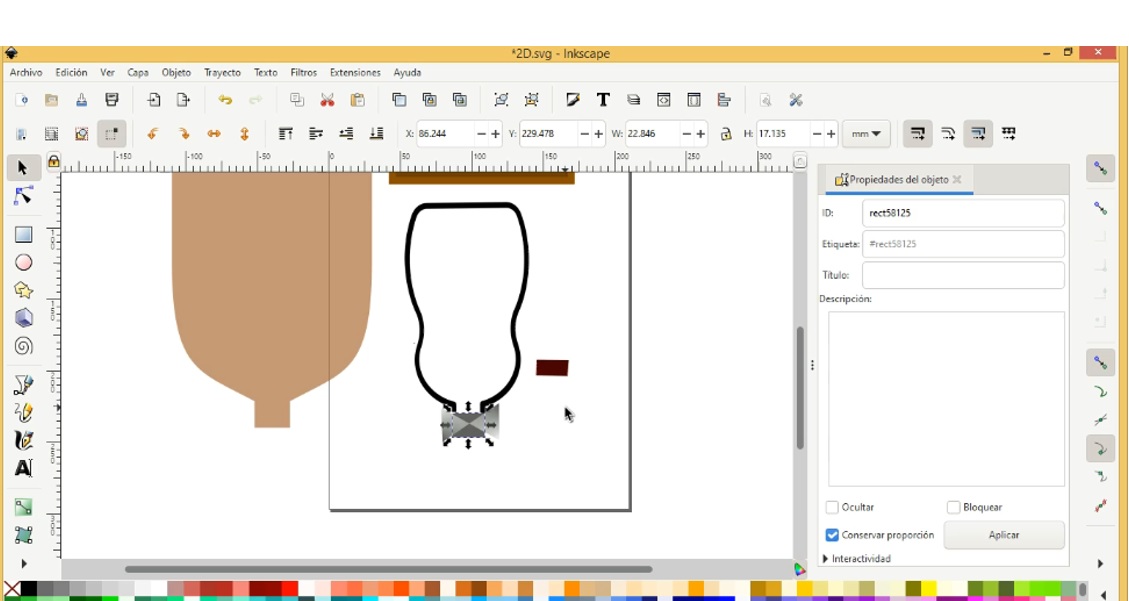
The presentation of the design of the dispenser protector and its content was as shown in the following screenshot:
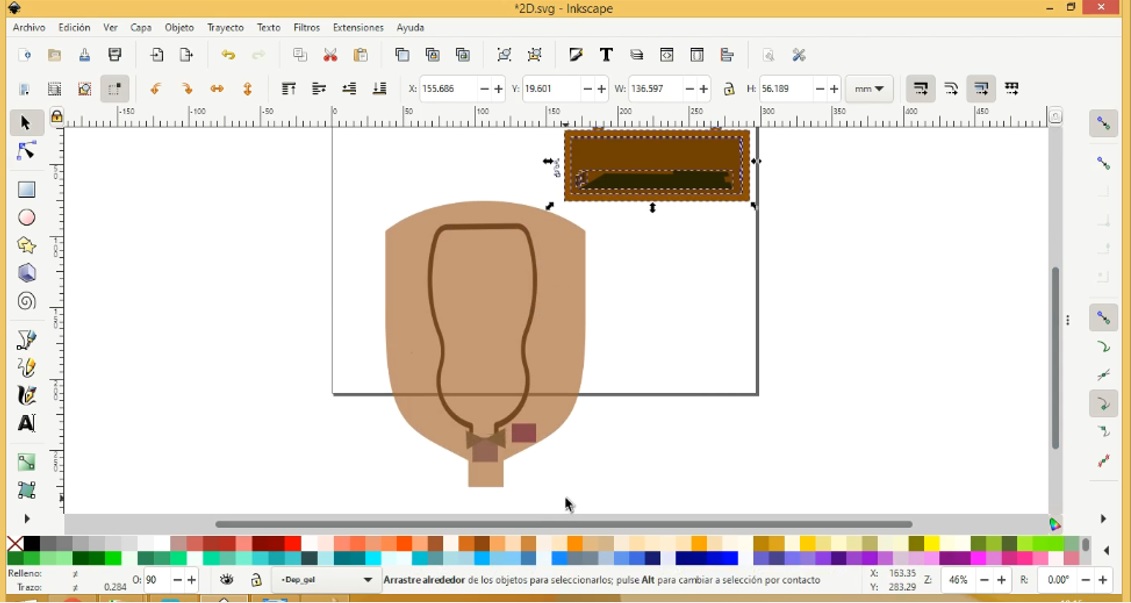
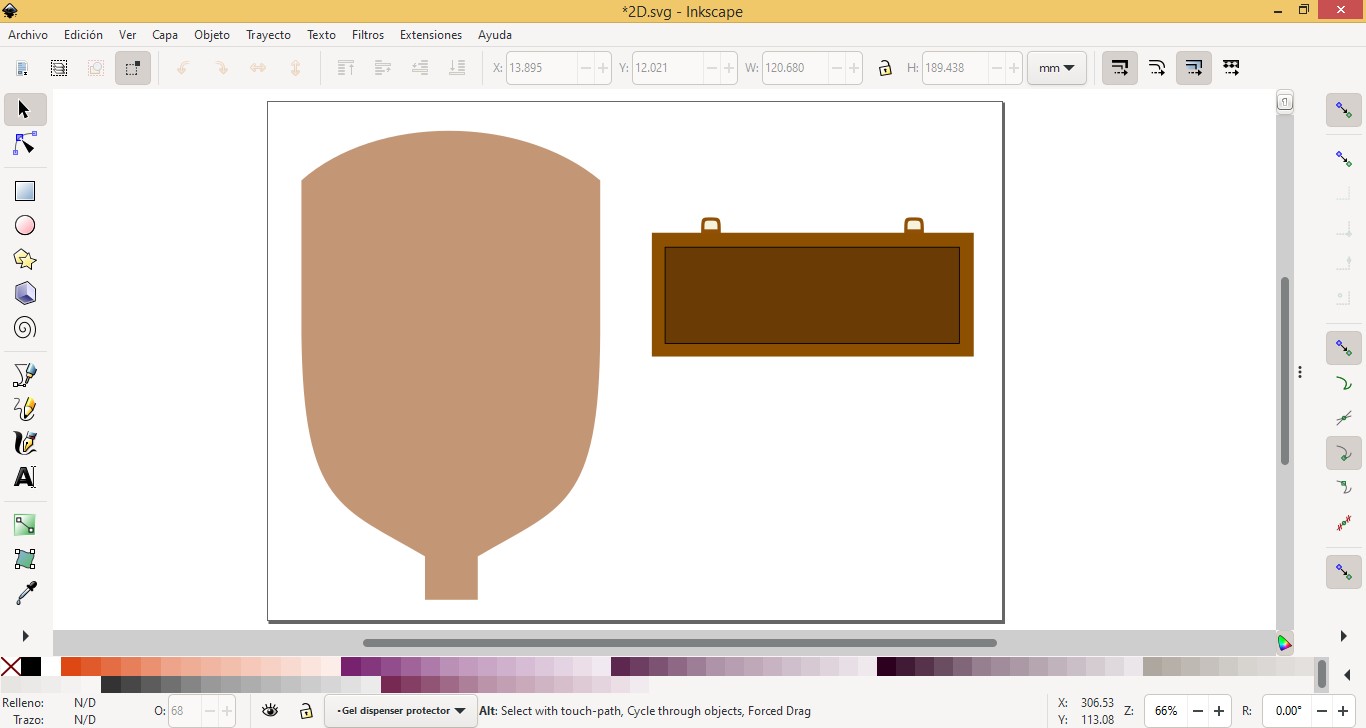
The sample of both integrated objects turned out like this:
Corel Draw is an advanced digital graphic editing computer software, oriented to the creation of vector graphics. Corel Draw is considered a tool that comfortably allows you to produce, edit and transform images on a digital level. Significant support in graphic design, advertising, web design, architecture, industrial design, digital marketing and editorial design tasks.
Corel Draw presents an interface with components that are not at all complicated to interact with and that are summarized in the following presentation:

Corel Draw makes various tools available to the user located in the Toolbox that allow users to start the design just by inserting them on the Design Page, either starting to shape an object or editing it from one already defined in the same software.
App
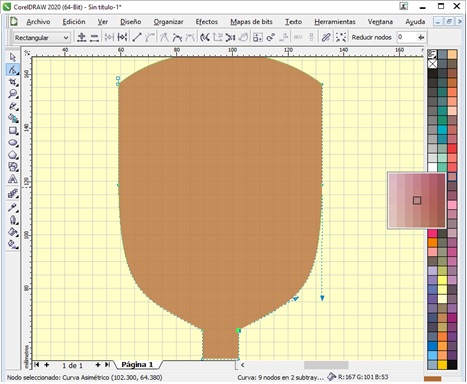
The design begins with the object that corresponds to the housing of the gel dispenser.

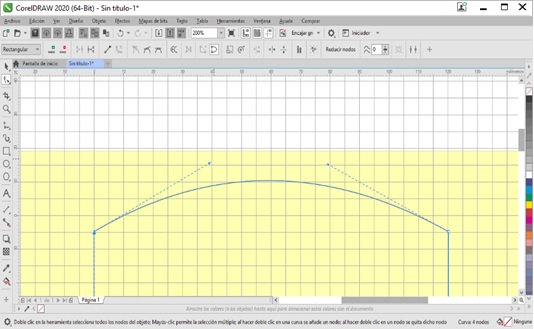
One of the most used and productive tools in Corel, when it comes to shaping an object, is to do it using nodes. This tool is quite user friendly, which easily allows you to shape the case.
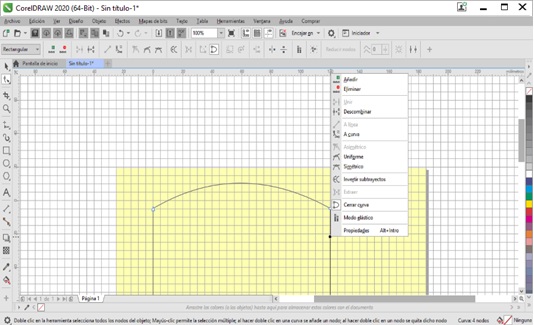
Each node allows, through pullers, to shape the object, in this case curvilinear.
Using the color palette, the corresponding colors are assigned to the casing.
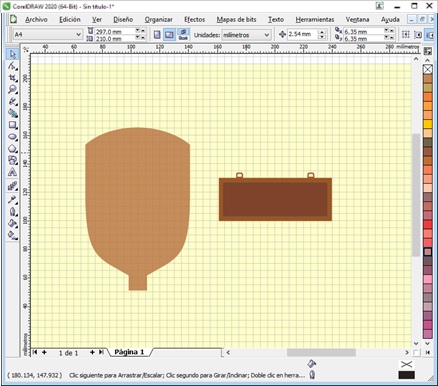
In a similar way, the case of the Arduino card is worked on, firstly, shaping the object and then assigning the corresponding colors. Finally, the finished product has the following presentation:
Comparison between Inkscape and Corel Draw
Both Inkscape and CorelDraw, working as graphic designers, are quite useful when it comes to making 2D design works. As well as having advantages, they also have disadvantages.
Compared to Inkscape, Corel Draw's interface is more busy. This can be clearly seen in the property bar. Similarly CorelDraw, present a greater number of tool subtypes in the Toolbox.
In CorelDraw, editing the contours of objects, based on nodes, is much more flexible than in Inkscape, since in the second software the resources for managing nodes, to define linear or curved shapes, are limited.
On the other hand, Inkscape features a more diversified color palette than Corel Draw, including tints.
One of the disadvantages that Corel Draw has compared to Inkscape is that it is a paid software, while the latter is free software, that is, open source, which does not require any license for its use.
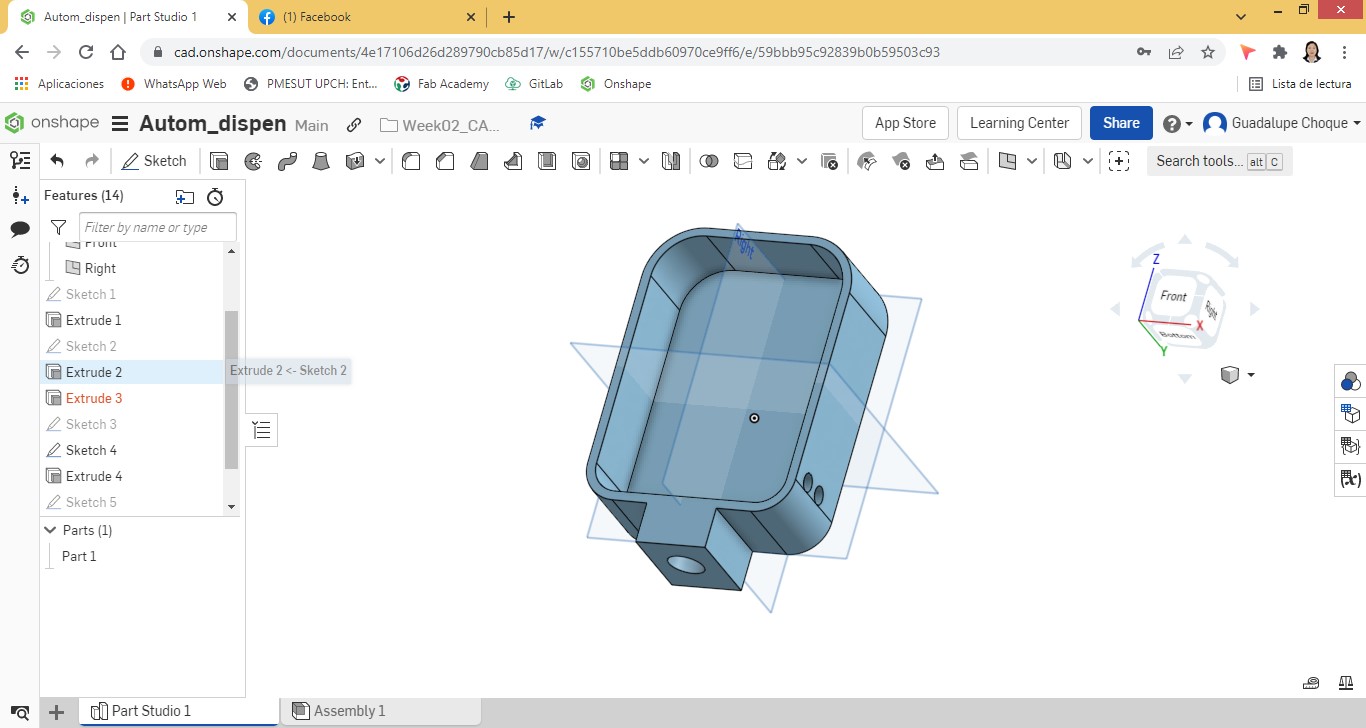
3D Design:
OnShape is a cloud-based CAD (computer-aided design) software. It is a collaborative tool.
When loading the Onshape, its interface opens with a presentation similar to the following image:
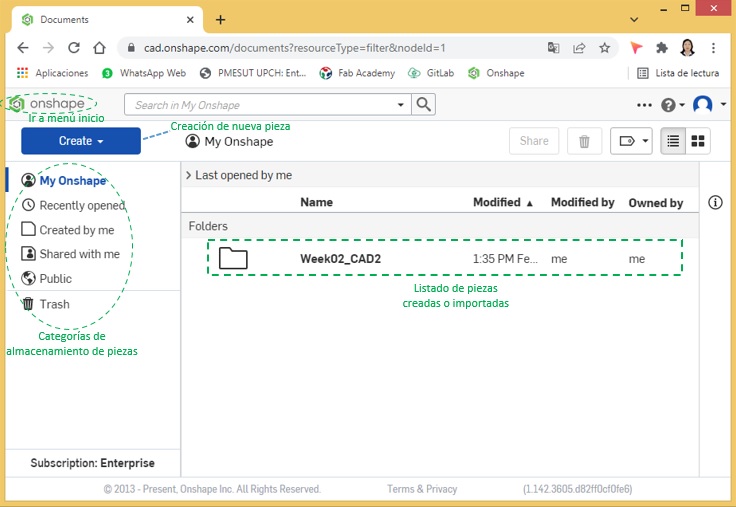
When you have chosen to work on a new piece, the following presentation appears:
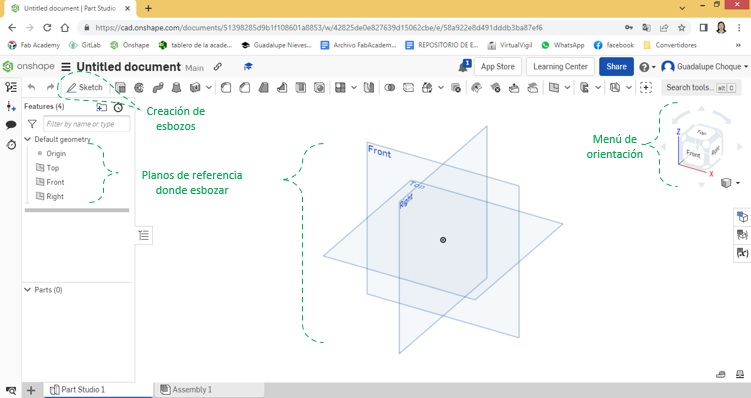
App
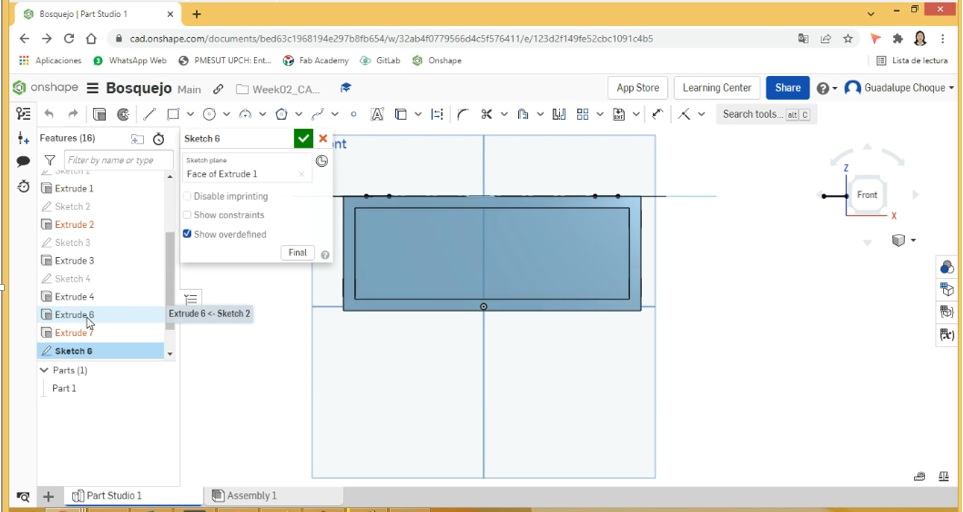
In the same way as in the 2D design, a protector or casing for the arduino card and another for the automatic gel alcohol dispenser were designed in 3D, with the same characteristics that were considered in the 2D design.
The construction of the objects was carried out taking as reference the drawings in their different positions. Objects with a defined shape were considered as well as those that allowed me to mold them according to my preferences.
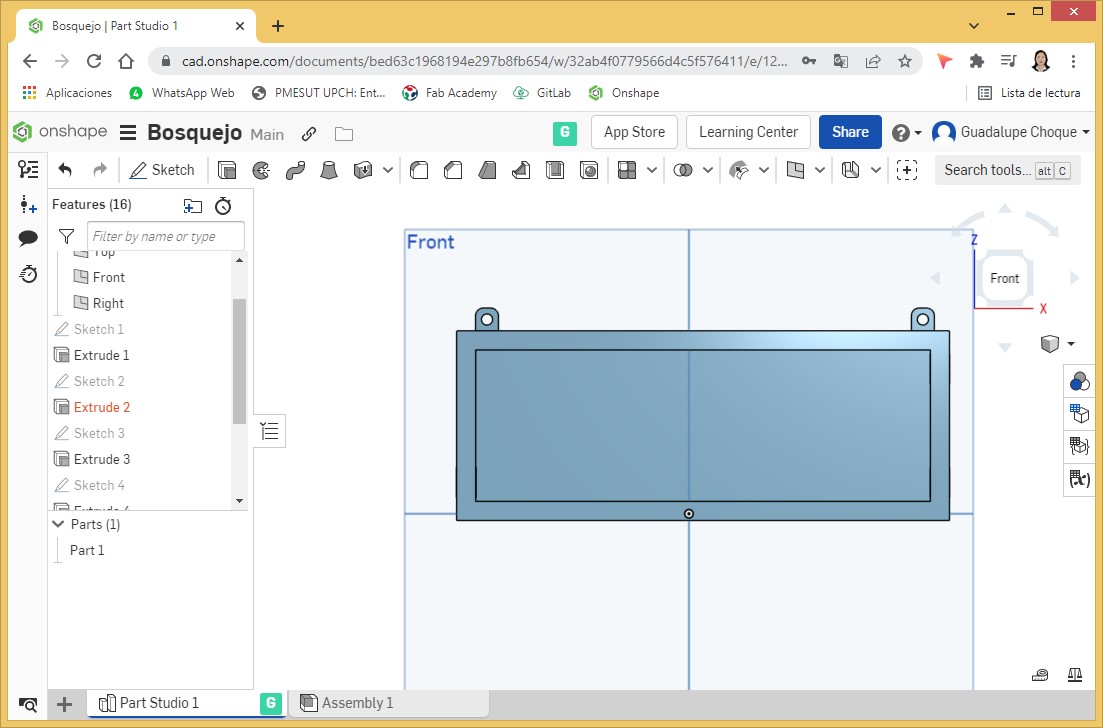
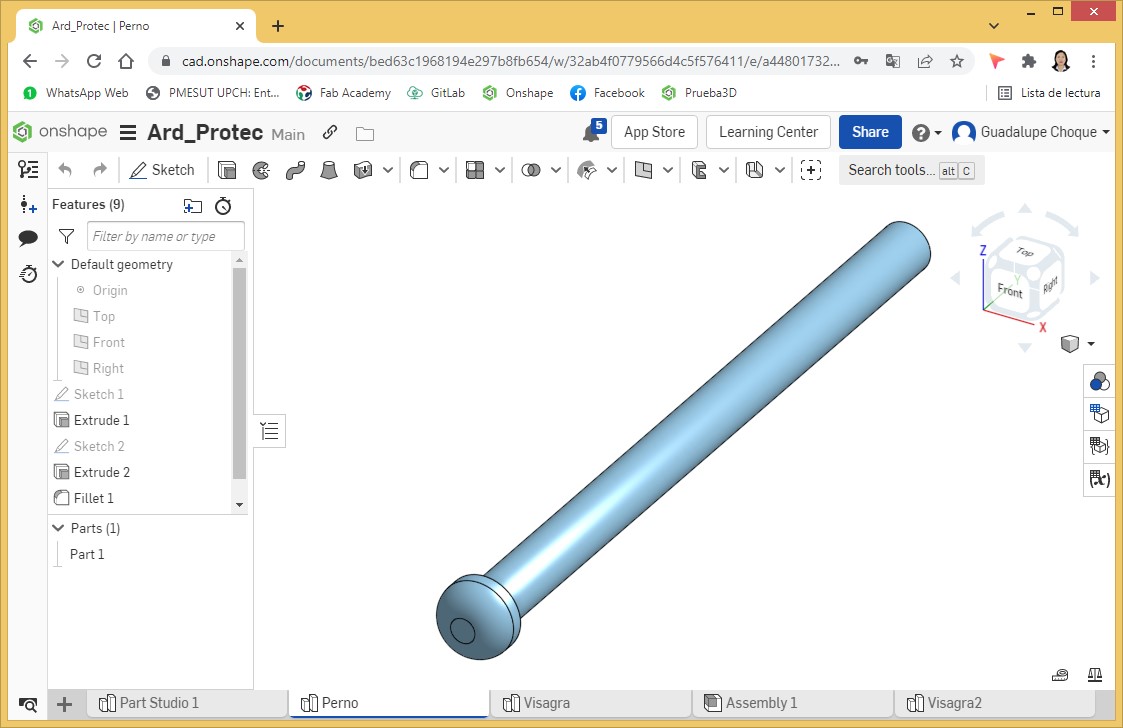
With the insertion of a first sketch, I started with the design of the arduino board protector with measures of 130x50x100mm.
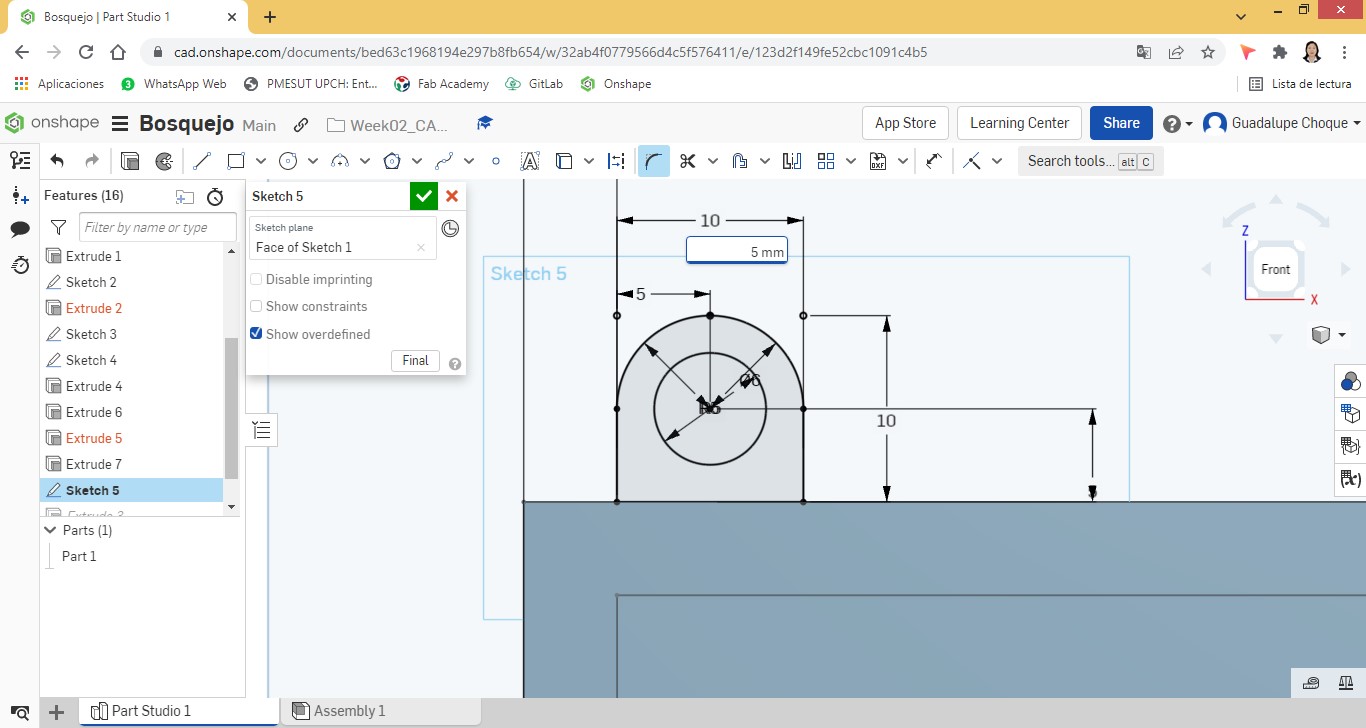
Sketches were added to include circular objects that would be used as cable entry/exit holes.
The Extrude tool was applied to the protector.
Sketches were added to design the fasteners that with the help of the tools; Sketch fillet, the corners were outlined and Extrude was assigned a depth of 5mm. giving it a 3D appearance.
The card protector from a front view.
The appearance of the 3D card protector from different angles.
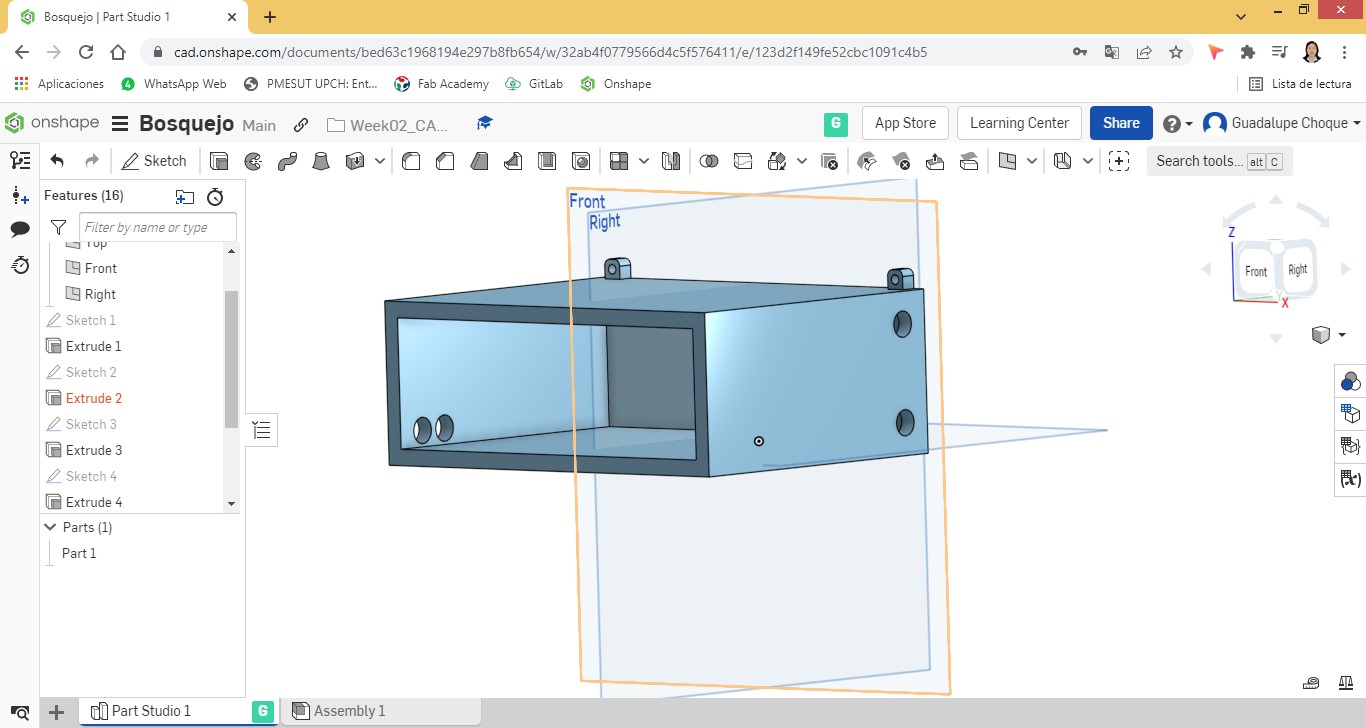
A door was added with its respective measures to fit perfectly with the protector housing.
The Extrude tool was also applied to the door. The result can be seen in the following screenshot:
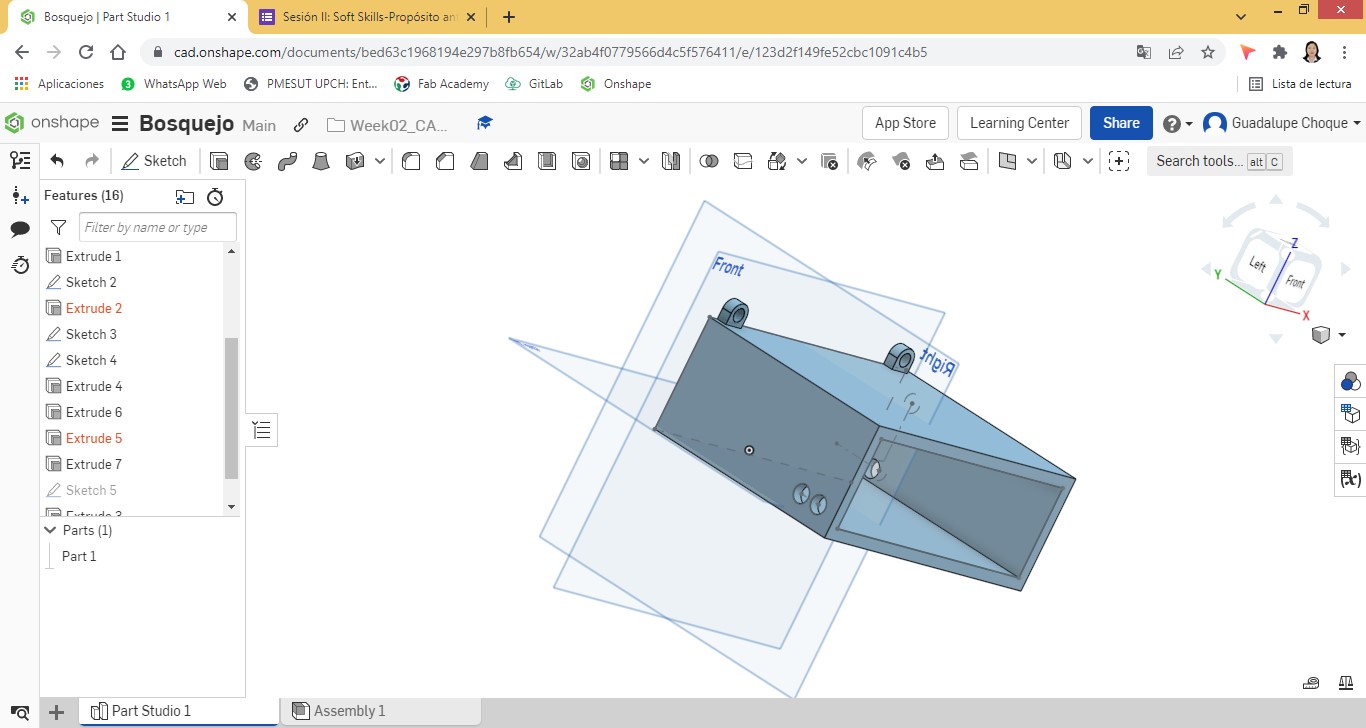
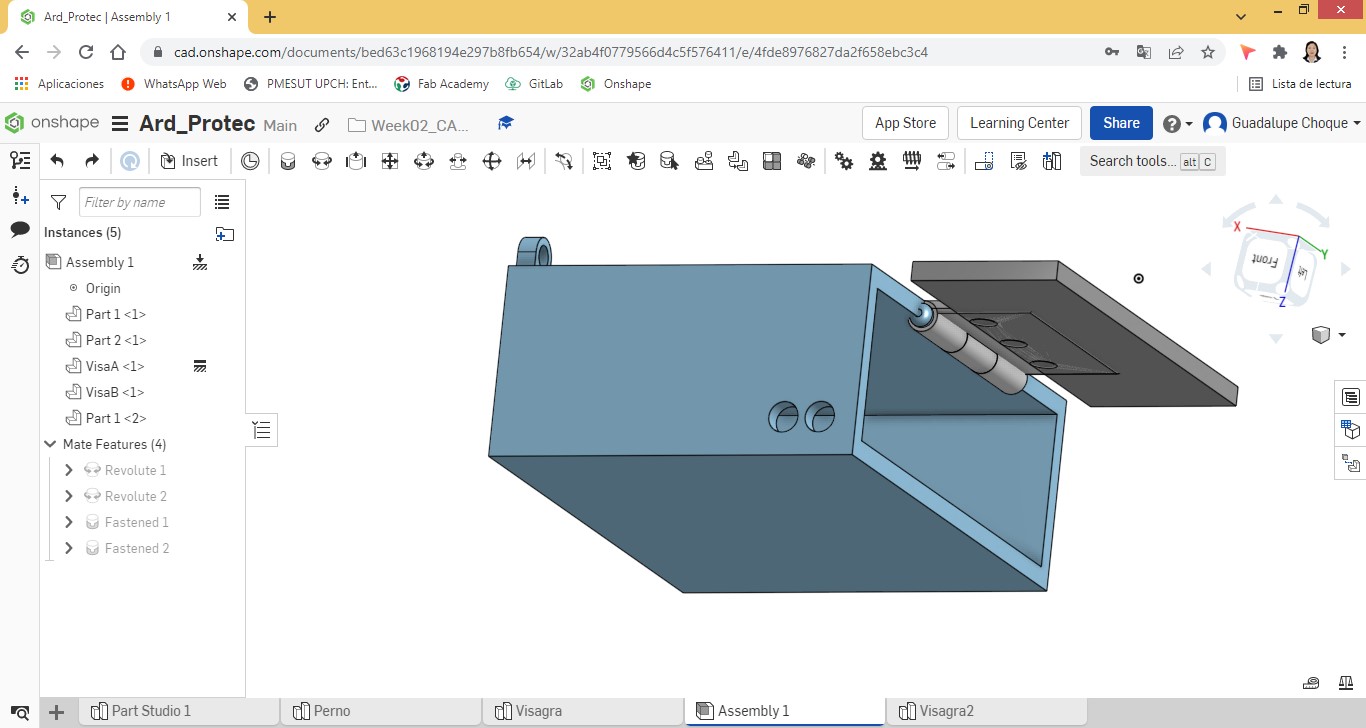
In different sketches the elements of a hinge were designed, which would serve as a connecting component between the door and the protector.

The assembled components gave shape to the hinge.
The card protector, door and hinge were assembled and the result is shown from different angles.

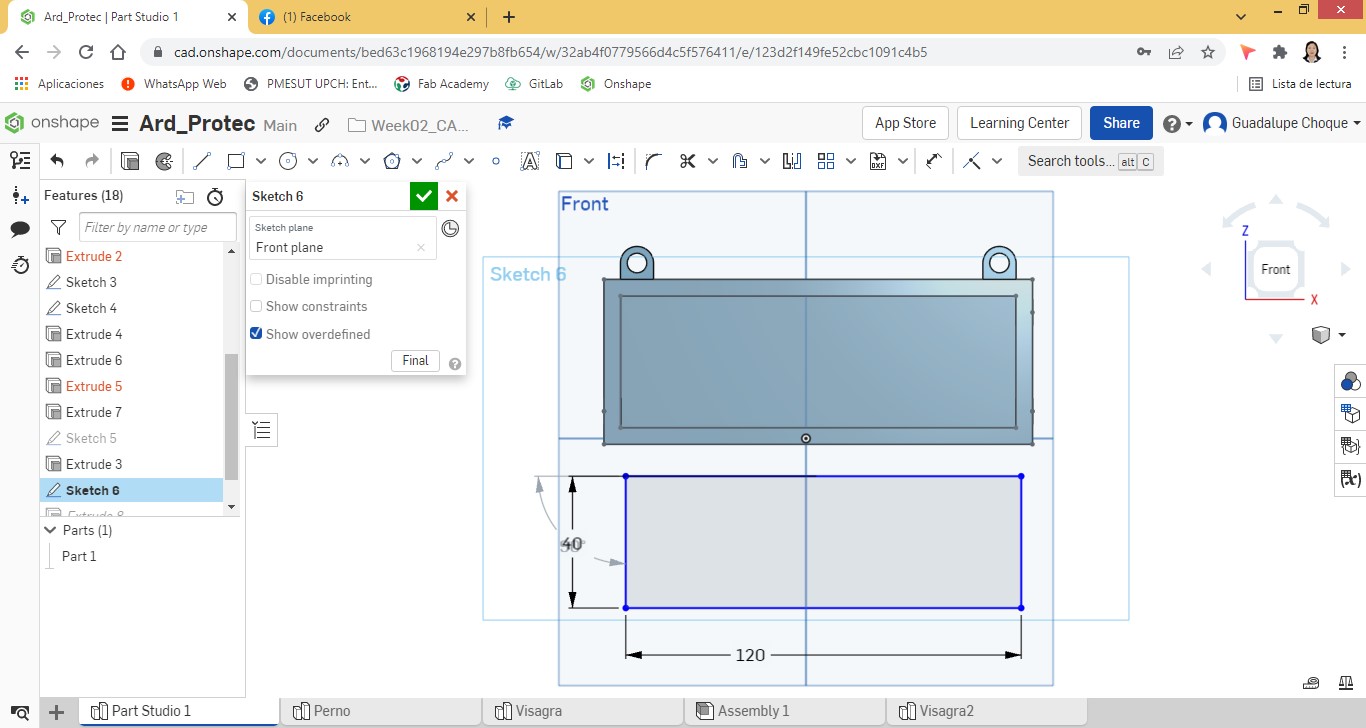
Once the design of the arduino board protector was finished, the next step was the design of the automatic gel dispenser protector.
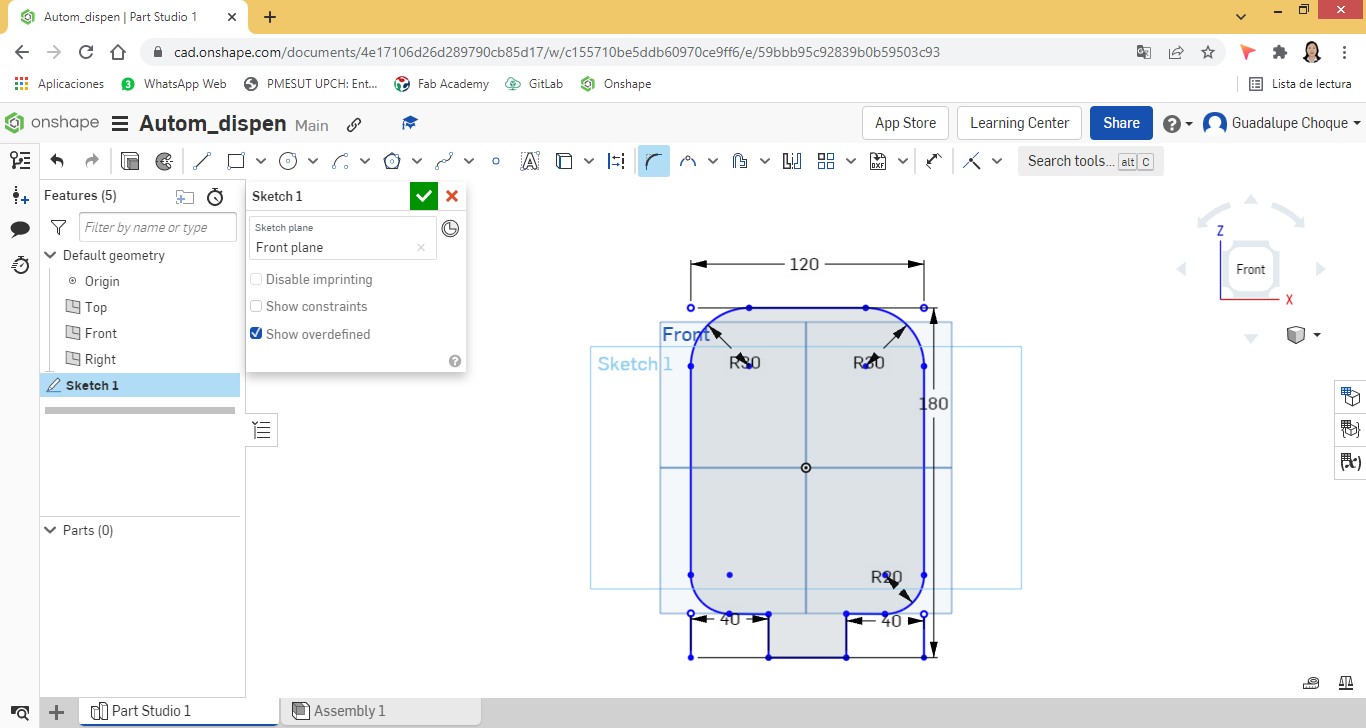
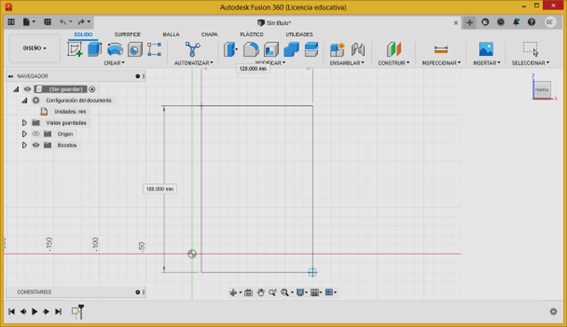
Similar to the previous design, corner rectangle, line, and sketch fillet resources were used to shape the silhouette of the alcohol gel dispenser protector. Its dimensions were 120x180mm. Holes for cable entry and exit were also included.
To give a 3D appearance, the Extrude resource was used, with a depth of 50mm.
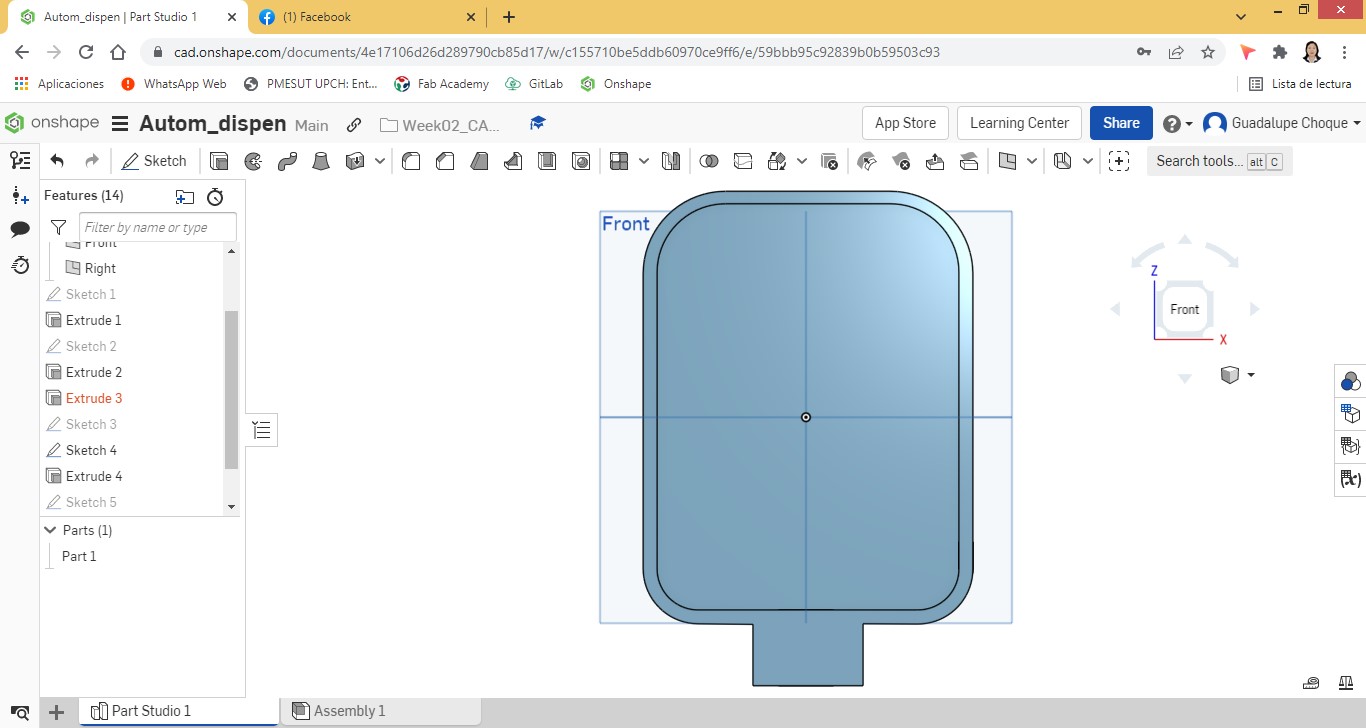
The view of the gel protector from different perspectives.

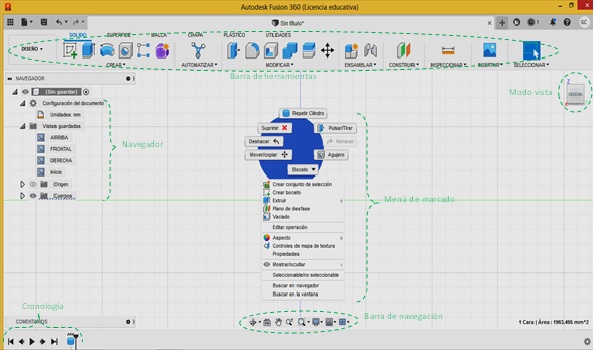
Fusion 360 is a 3D CAD program developed by Autodesk. It covers the entire process of planning, testing and executing a 3D design. It is capable of simulating both the construction of the designed components and the limitations they will face once they are used.
The resources and design tools, Fusion 360 makes available to the user through its interface, which has the following presentation:
A sketch must be created and the plane indicated to start the design.
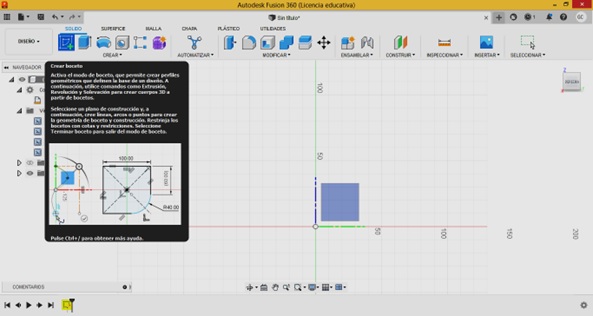
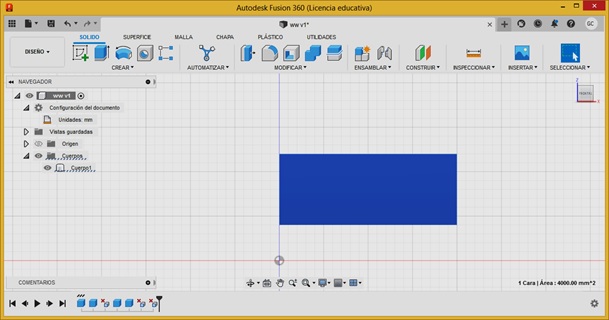
And then insert an object. In this case, a rectangle will be inserted to design the housing of the Arduino board, with its respective measurements.
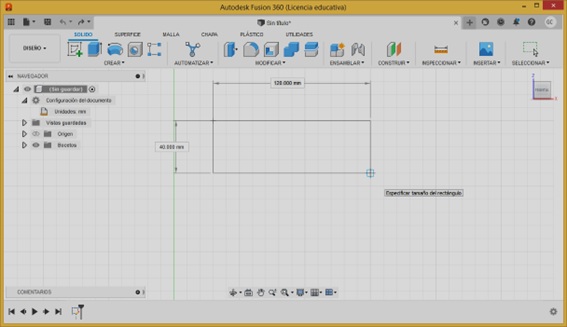
The casing initially takes the following form:
Using the Shell tool, we subtract from the object the mass equal to 95mm.
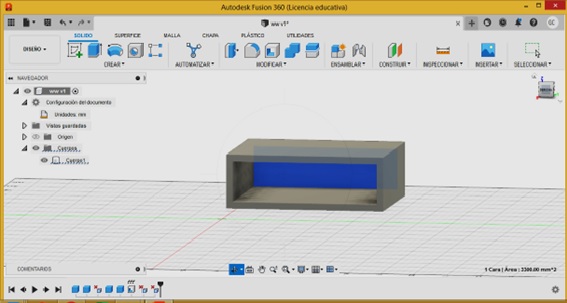
Corresponding fasteners are added to the casing. Using the splice and hole resources, in addition to adding the door, the arduino card casing is finished, obtaining as a final product what is shown in the following screenshot:
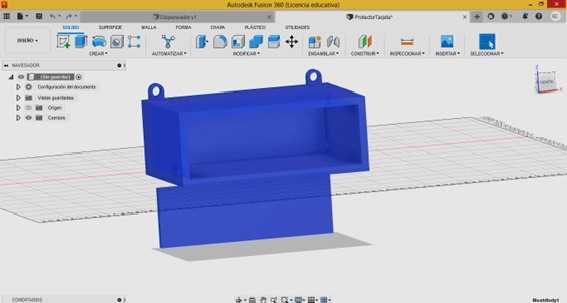
Showing the final product from different views:
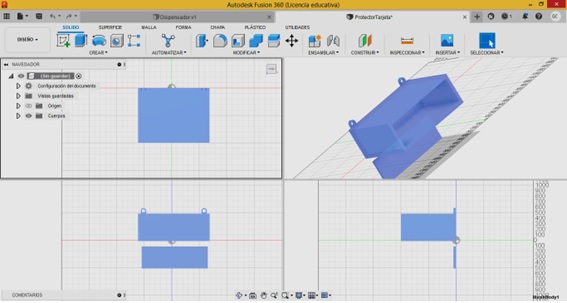
Starting the design of the casing of the alcohol gel dispenser with its respective measurements.
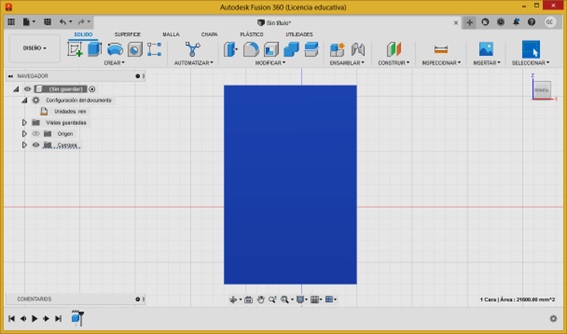
Initially the object looks like this:
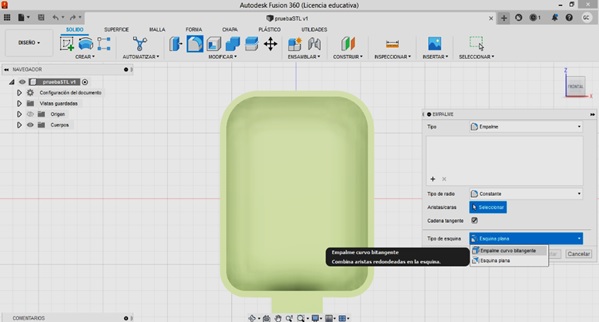
Initially using the splice tool on the top ends of the casing,
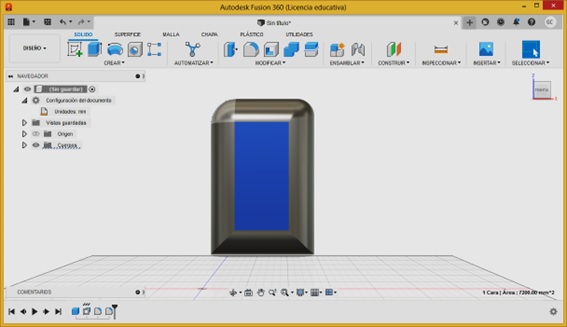
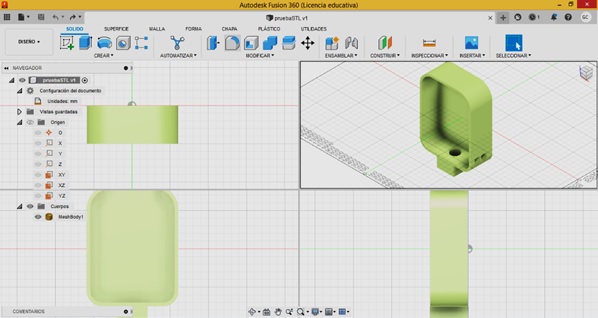
Finally the object looks like this:
Looking at the carcass of the finished alcohol gel:
Comparison between Onshape and Autodesk Fusion 360
Just like Autodesk Fusion 360, Onshape has a variety of very useful resources that allow you to shape a good design in 3D. The main advantage of Fusion over Onshape is that apart from allowing the development of CAD and CAM applications (Onshape only works with CAD designs), it provides the user with simulation and visualization resources.
Fusion 360 is apparently easier to operate, has better support. Work files can be stored on a computer or in the cloud, while with Onshape, you can do it only in the cloud. One downside of Fusion 360 versus Onshape is that it requires a web app to just access the cloud, however, Onshape doesn't require anything from its users to get the software. What we do want to highlight is that either of the two software provides the user with the necessary tools to design an object in 3D.
Natives files
| Ord | Description | Files |
|---|---|---|
| 1 | 2D Inkscape design | Worked Inkscape |
| 2 | 2D Corel Draw design | Worked CorelDraw |
| 3 | 3D Onshape design | Worked Onshape1 - Worked Onshape2 |
| 4 | 3D Autodesk Fusion 3D design | Worked Fusion1 - Worked Fusion2 |