15. Interface and application programming
This weeks mission:
- Compare as many tool options as possible.
- Write an application that interfaces a user with an input and/or output device that you made
As I’m a group of one, I’ll see what I can do. During my earlier studies and tinkering I’ve come across some of them. Since time is of the essence, I’ll pick something that I’ve always wanted to try out.
Electron
Electron is a open source cross platform framework for building desktop applications. It uses HTML, CSS, and JavaScript to create native applications that run on Windows, Mac, and Linux.
There have been plenty of criticism about Electron, most complaining about its resource usage. Let’s put that and all other politics aside and try it out.
Install
Prerequisites
- npm
- Node.js (comes with npm)
- git
As described in the quick start guide, you can install Electron using the following commands:
# Clone this repository
git clone https://github.com/electron/electron-quick-start
# Go into the repository
cd electron-quick-start
# Install dependencies
npm install
# Run the app
npm start
Usage
Quick start example app
After running the commands, starting the app, we are presented with a window. The window has a titlebar, a menu, and a content area.
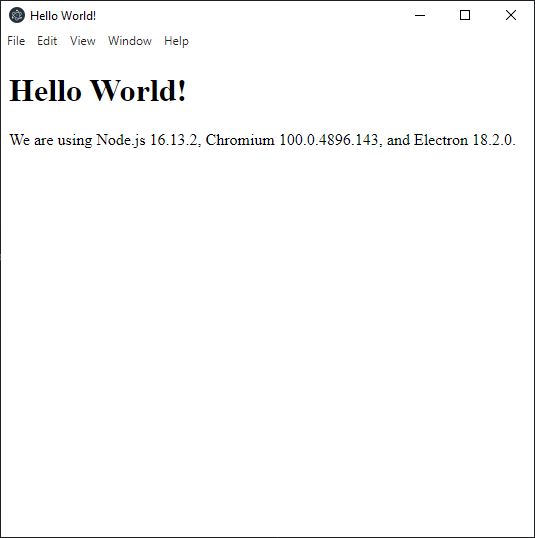
It works as expected! Now I want to create my own application and throw the old one away.
Getting something presentable up and running is really easy!
Creating a new application from scratch
I create a folder called w15electron and move into it. Once there I run npm init which prompts me to fill in information to create a package.json file.
This is what is generated:
{
  "name": "w15electron",
  "version": "1.0.0",
  "description": "Week 15 Electron experimentation",
  "main": "main.js",
  "scripts": {
    "test": "echo \"Error: no test specified\" && exit 1"
  },
  "author": "Arni Bjornsson",
  "license": "ISC"
}
Next command is: npm install --save-dev electron which installs the electron dependency. It runs successfully.
I modify the scripts section so:
"scripts": {
 "start": "electron ."
}
Next step is to create a file called main.js which is the entry point for the application. It is the main process, which runs the Node.js environment and controls the lifecycle of the application, including the creation and destruction of the browser window.
I create main.js in the root directory and leave it empty for now. I can now run the application with npm start but nothing happens, since there is nothing to do!
Next I create a file called index.html and fill it with the following:
<!DOCTYPE html>
<html>
  <head>
    <meta charset="UTF-8">
    <!-- https://developer.mozilla.org/en-US/docs/Web/HTTP/CSP -->
    <meta http-equiv="Content-Security-Policy" content="default-src 'self'; script-src 'self'">
    <meta http-equiv="X-Content-Security-Policy" content="default-src 'self'; script-src 'self'">
    <title>Hello World!</title>
  </head>
  <body>
    <h1>Hello World!</h1>
    We are using Node.js <span id="node-version"></span>,
    Chromium <span id="chrome-version"></span>,
    and Electron <span id="electron-version"></span>.
  </body>
</html>
Following the guide linked above, I add the two modules needed to display an actual application; app and BrowserWindow.
app is responsible for creating the browser window and handling events such as window-all-closed and activate.
BrowserWindow is responsible for creating the content area of the window.
Next we add the following to the main.js file to handle exiting the app on different platform (mac, linux, windows).
// Windows and Linux
app.on('window-all-closed', () => {
  if (process.platform !== 'darwin') app.quit()
})

// macOS
app.whenReady().then(() => {
  createWindow()

  app.on('activate', () => {
    if (BrowserWindow.getAllWindows().length === 0) createWindow()
  })
})
Connecting node.js with the renderer with a preload script
When we look at websites, we are looking at the DOM. The DOM is the structure of the web page.
Since Electron apps are basically webpages, we need to be able to communicate with the DOM.
To do this, we need to add a preload script, preload.js.
In that file, we add the following:
window.addEventListener('DOMContentLoaded', () => {
  const replaceText = (selector, text) => {
    const element = document.getElementById(selector)
    if (element) element.innerText = text
  }

  for (const dependency of ['chrome', 'node', 'electron']) {
    replaceText(`${dependency}-version`, process.versions[dependency])
  }
})
This code will replace the text in the node-version, chrome-version, and electron-version elements with the versions of the three dependencies.
Next we modify our main.js file to include the preload script.
At the top we add: const path = require('path')
We replace the earlier createwindow() function with the following:
const createWindow = () => {
  const win = new BrowserWindow({
    width: 800,
    height: 600,
    webPreferences: {
      preload: path.join(__dirname, 'preload.js')
    }
  })

  win.loadFile('index.html')
}
Last thing before we start experimenting on our own is to add a script to our index.html file. In that file we can use normal JavaScript and other front-end frameworks to add functionality to the page.
We create a file called renderer.js and add the following to index.html:
<script src="./renderer.js"></script>
Packaging the application
Just because I saw it at the end of the page, I just need to test it out!
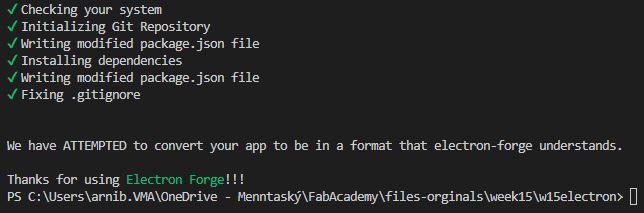
The guide recommends Electron Forge to build the application. Let’s try it out!
I install the forge: npm install --save-dev @electron-forge/cli
Next I run npx electron-forge import
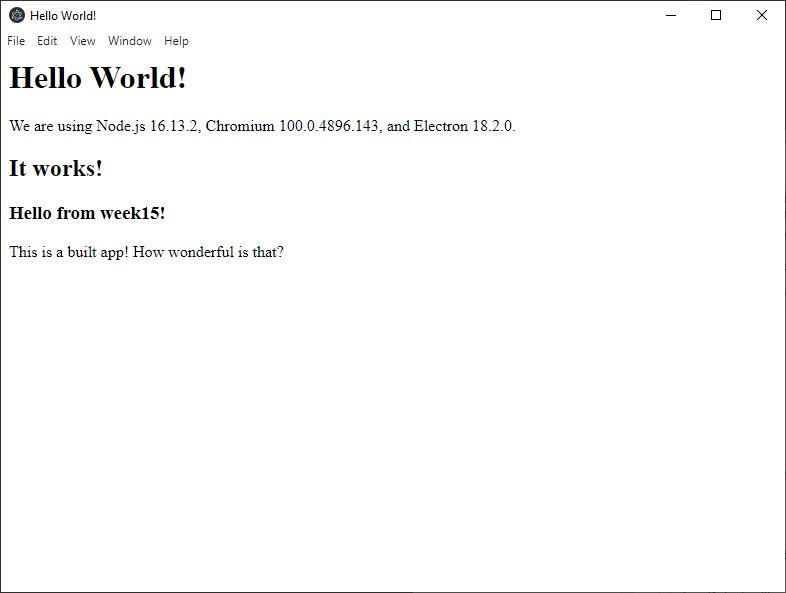
Next I run the following command: npm run make. It outputs to a directory called out. There I find a directory called w15electron-win32-x64 which contains w15electron.exe!
I run it and it actually works as expected.
| File | Note |
|---|---|
| Test app | Install with: npm install |
Couple of notes:
-
The output directory contains 111 files, 21 folders and is ~194 MB in size. Checking task manager show that it takes about 80MB in memory.
-
npm run makeactually crashed for me, but it still works. I found out that the command did not like that fact that I was working in my corporate OneDrive location, whose path contains both spaces and non English characters! I copied the folder to another location, closer to c:\, rannpm installandnpm run makeagain and it worked fine!
This is valuable lesson to all system admins out there, please do not force spaces and non English characters naming conventions on your users computers!
Try to stick to naming conventions such as Camel case.
Anyways, enough of that! Let’s to get some functionalities going!
Serial
I wanted to interface to the board(s) with my computer serial port.
I started by getting the code from here and uploading to my boards.
To my ATtiny412 board, I uploaded the following:
  // Wire Master Writer
// by Nicholas Zambetti <http://www.zambetti.com>

// Demonstrates use of the Wire library
// Writes data to an I2C/TWI Peripheral device
// Refer to the "Wire Peripheral Receiver" example for use with this

// Created 29 March 2006

// This example code is in the public domain.


#include <Wire.h>

void setup()
{
  Wire.begin(); // join i2c bus (address optional for master)
}

byte x = 0;

void loop()
{
  Wire.beginTransmission(4); // transmit to device #4
  Wire.write("x is ");        // sends five bytes
  Wire.write(x);              // sends one byte
  Wire.endTransmission();    // stop transmitting

  x++;
  delay(500);
}
To my ATtiny1614 board, the one writing to USB-Serial, I uploaded the following:
// Wire Peripheral Receiver
// by Nicholas Zambetti <http://www.zambetti.com>

// Demonstrates use of the Wire library
// Receives data as an I2C/TWI Peripheral device
// Refer to the "Wire Master Writer" example for use with this

// Created 29 March 2006

// This example code is in the public domain.


#include <Wire.h>

void setup()
{
  Wire.begin(4);                // join i2c bus with address #4
  Wire.onReceive(receiveEvent); // register event
  Serial.begin(9600);           // start serial for output
}

void loop()
{
  delay(100);
}

// function that executes whenever data is received from master
// this function is registered as an event, see setup()
void receiveEvent(int howMany)
{
  while(1 < Wire.available()) // loop through all but the last
  {
    char c = Wire.read(); // receive byte as a character
    Serial.print(c);         // print the character
  }
  int x = Wire.read();    // receive byte as an integer
  Serial.println(x);         // print the integer
}
Once uploaded and running, this is what I see in the serial monitor:
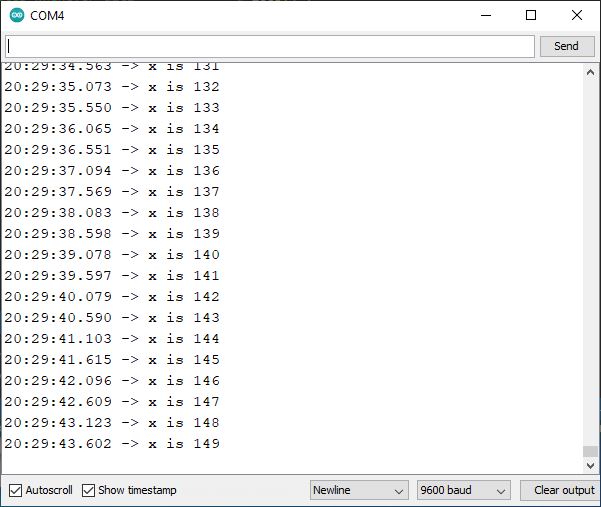
Great!
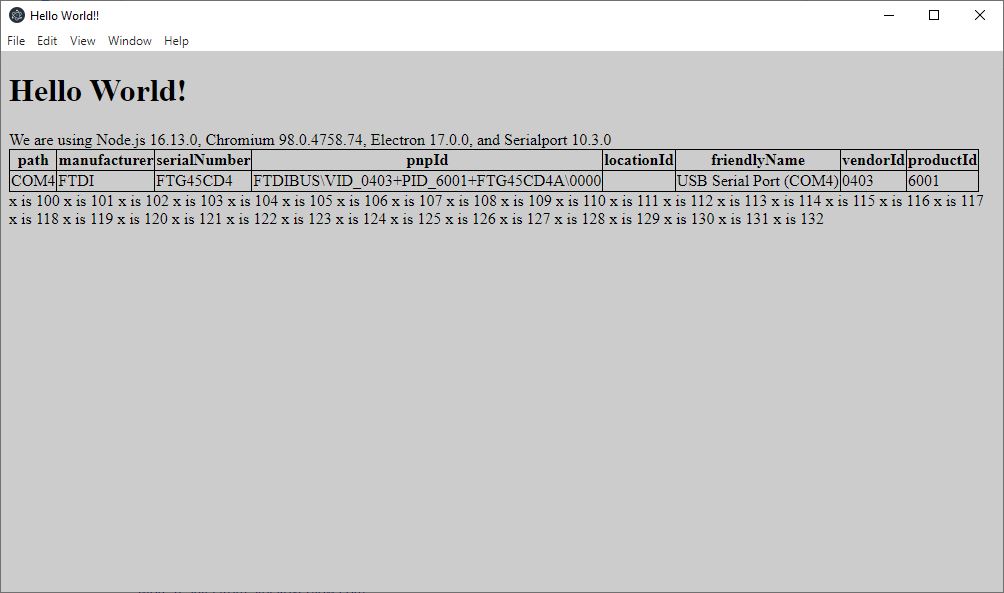
Getting serial data into Electron
When looking around for what to do, I found this example.
I copied it per the guide and modified fiddled a bit with it until it added the data from serial to the Electron window.
It’s far from perfect but it works, enough for now!
I include the modified project below:
| File |
|---|
| Modified serial project |
Install with: npm install, run with: npm start
Trigger transmission with the button
Altering the code on the ATtiny14 board slightly enabled me to trigger the transmission with the button.
#include <Arduino.h>
#include <Wire.h>

const byte ledPin = PIN_PA3;
const byte btnPin = PIN_PA7;

volatile bool btnPr = false;

void setup() {
  Serial.swap(1);
  Wire.begin(); // join I²C bus (address optional for writer)

  pinMode(ledPin, OUTPUT);
  pinMode(btnPin, INPUT_PULLUP);

  // Attach the button interrupt
  attachInterrupt(btnPin, buttonPressed, FALLING);

  digitalWrite(ledPin, LOW);
}

void buttonPressed() {
  btnPr = true;
}

byte x = 0;

void loop() {

  if (btnPr) {
    digitalWrite(ledPin, HIGH);
    Wire.beginTransmission(4);  // transmit to device #4
    Wire.write("x is ");        // sends five bytes
    Wire.write(x);              // sends one byte
    Wire.endTransmission();     // stop transmitting
    x++;
    delay(100);
    digitalWrite(ledPin, LOW);
    btnPr = false;
  }
}
And in action:
Comparison
This task is challenging! I keep returning to this interesting page, which lists hello world in most, if not all, programming languages in the world.
Unfortunately, there is only so much time in the world! But I really wanted to try interfacing with the board with another programming language or framework I wanted to test it out with Python. Python is a very popular programming/scripting language. It’s upsides are that it’s easy to learn and it’s easy to use, enabling newcomers to learn it and experienced programmers to get stuff working very fast. Speed is often what is considered it’s downside, along side with more technical difficulties, such as packages and environments. But enough with that, let’s get to the fun stuff!
As I already had Python and pip installed, getting started was easy.
I created a new file called pyserial.py and wrote the following:
import serial
import serial.tools.list_ports
import time

def connect_serial(portname):
    print("Connecting to serial port:", portname)
    ser = serial.Serial(portname, 9600)
    print("Connected to serial port:", portname + " at 9600 baud!")

    # Try to read from serial port
    # Enclose in try/except to return to main loop if serial port becomes unavailable
    while True:
        try:
        # Readline from serial
            line = ser.readline()
            print(line.decode('utf-8').strip())

        except KeyboardInterrupt:
            # Close the serial port
            ser.close()
            break
        except serial.SerialException:
            # Close the serial port
            ser.close()
            break
        except:
            # Close the serial port
            ser.close()
            break

# Main loop, checks if there is a serial port connected
while True:
    ports = list(serial.tools.list_ports.comports())

    # If there are any found, attemt to connect with the function above
    if len(ports) > 0:
        for p in ports:
            print("Found: " + str(p))
            print("Attempting to connect...")
            connect_serial(p[0])
    else:
        print("No ports found")

    time.sleep(2)
I then ran the file with python pyserial.py, with no device connected. I connected the USB-serial cable after a few seconds, waited for the program to tell me it’s connected and pushed the button a few times. Then I disconnected the cable for a few seconds and connected it again, pushing the button a few times.
This is the result:

Grrrreat!