16. Wildcard Week
This week I worked on design and produce something with a digital fabrication process. [Reference]
No group assignment needed this and all week after, so lets jump to individual assignment.
Individual assignment
Heroshot

PartPro200 xTCS
For this week, I decided to use PartPro200 xTCS for this week assignment.

According to official website, It can scan and print in full color and upgradable laser engraving. In other words, it have 3D scan, 3D colored print and laser engrave function.
| Specifications | |
|---|---|
| Work Area | 200 x 200 x 150 mm (Mono Color Printing), 185 x 185 x 150 mm (Full Color Printing) |
| Layer Resolution | 100 - 400 mm |
| Build Speed | 180 mm/s |
| Source |
So I will mainly use its 3D colored printing to do this week work.
Ink Test
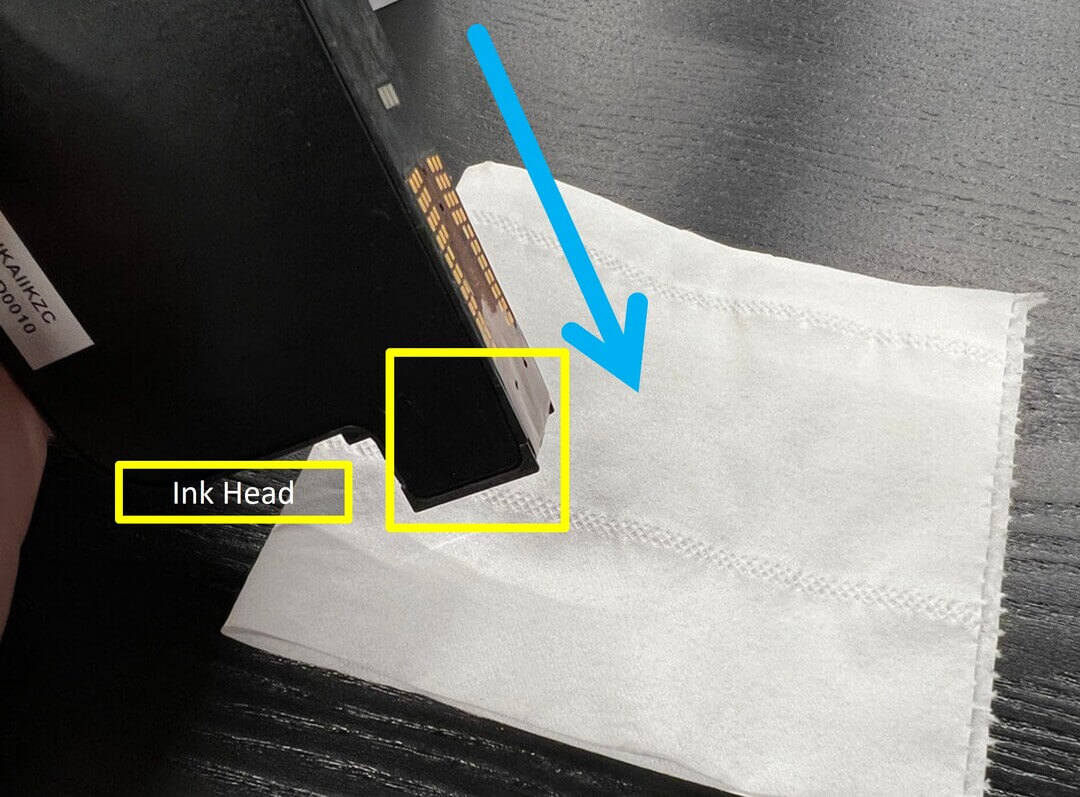
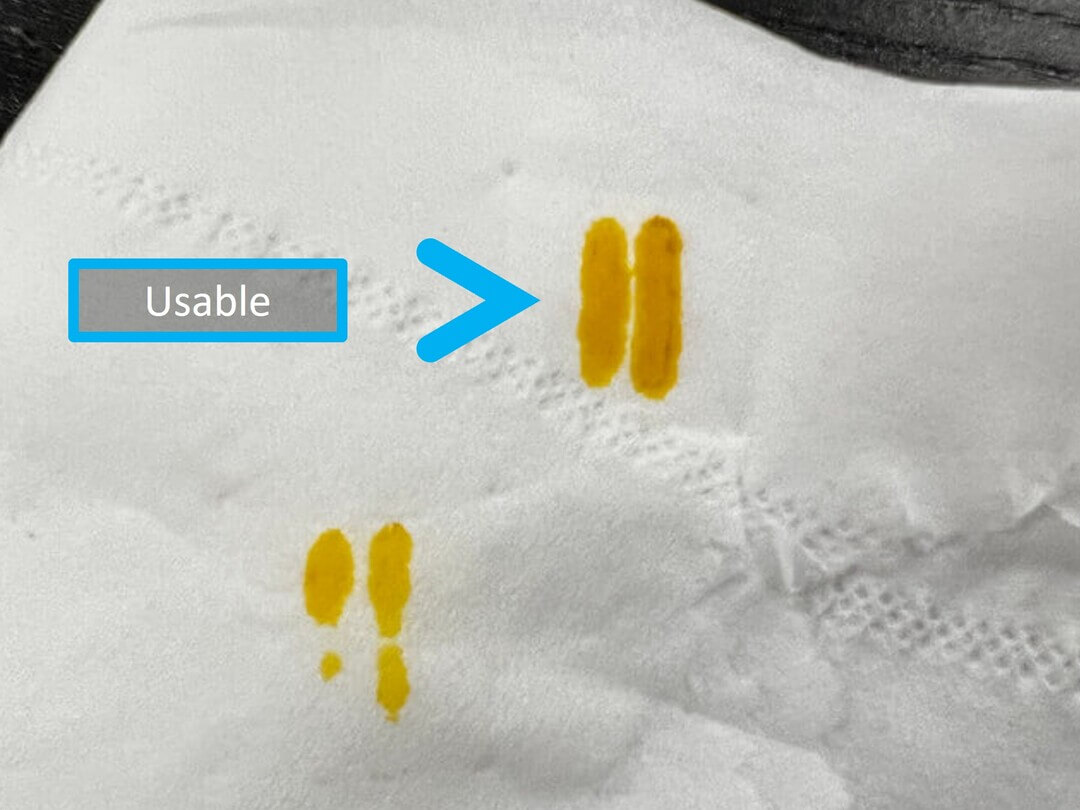
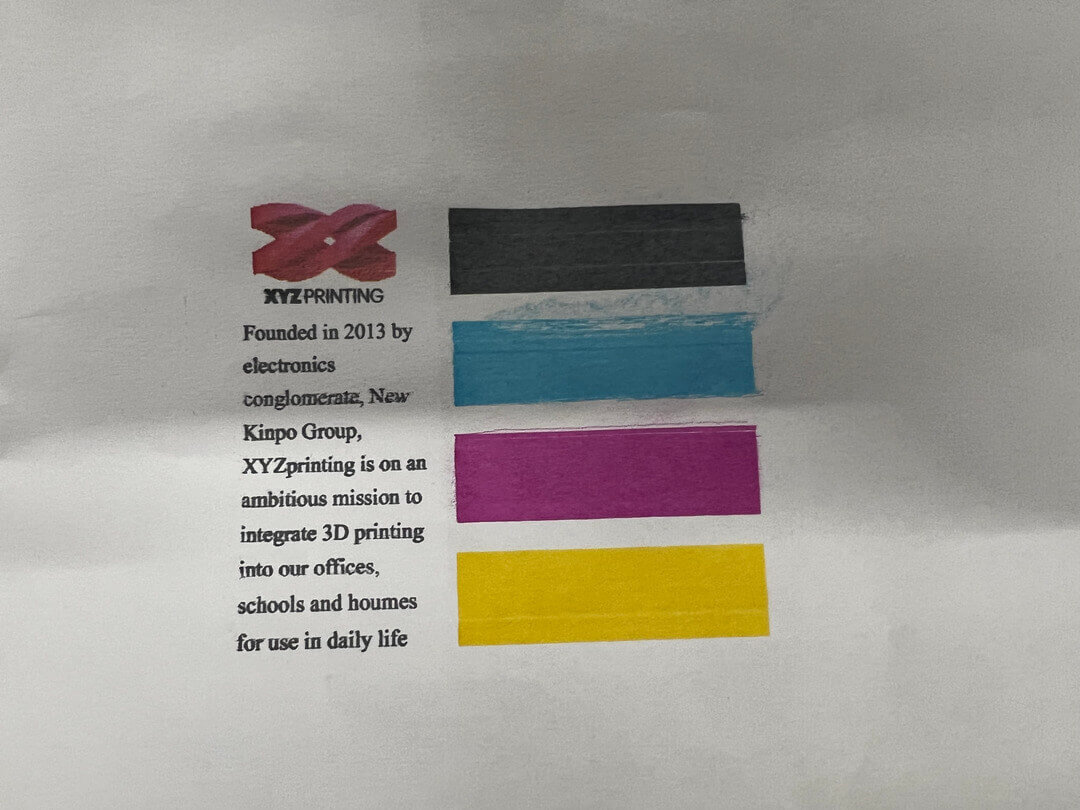
First thing first, for safety measure, I’ve wear my gloves on. And I’ve test out the ink is usable or not. For tesing the CMYK ink, the supplier teach us the steps, 1. Put the ink head on a tissue for twice or more, and see is two colored line dyed on it. Yes: Ink is usable. No: Jump to next step.
- Put the ink head on a tissue that absorb ethanol for few seconds, then do the first step.
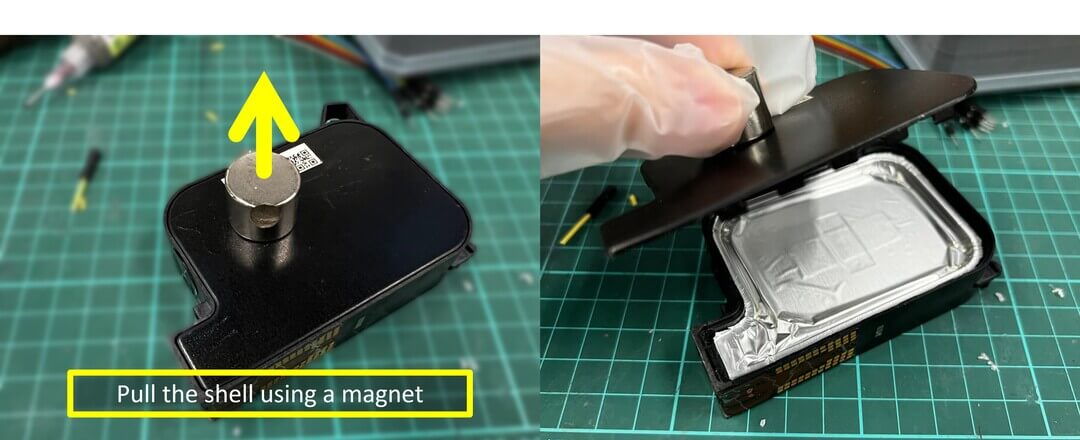
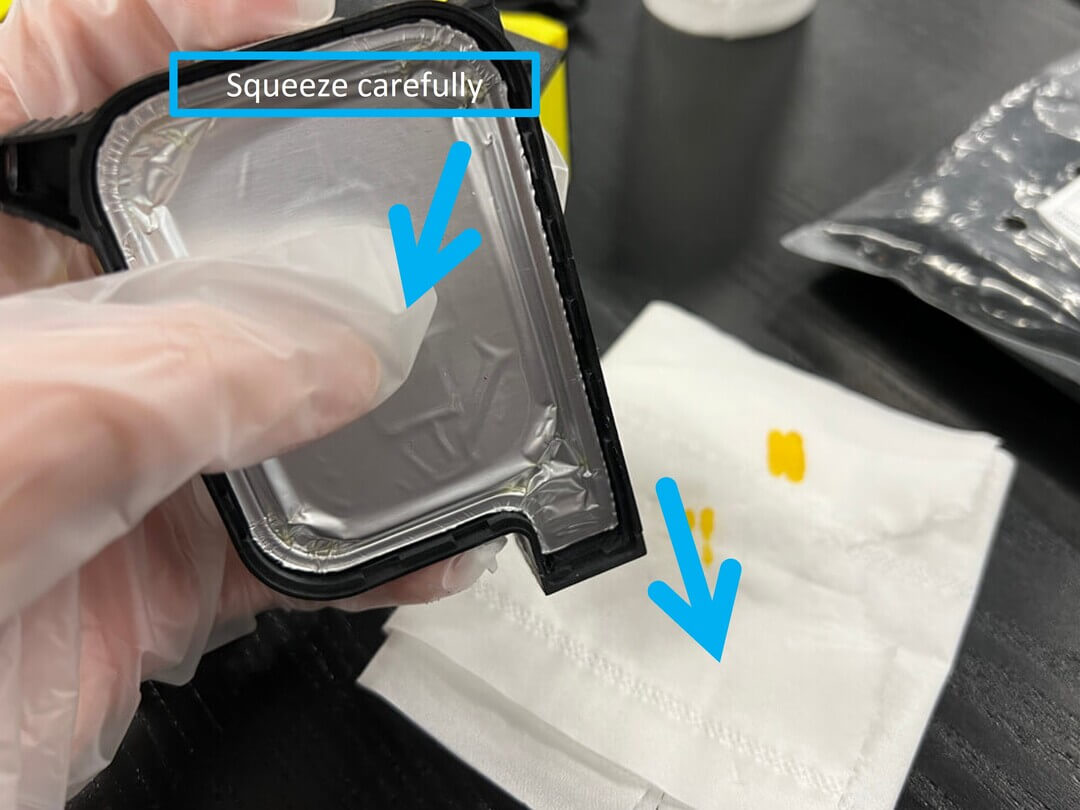
- If still fail, use a magnet to pull the matel shell off, and squeeze the surface inside carefully on a tissue.
- If still, do step 2 and 3 and the same time.
That’s all, if problem no been solve, maybe it’s broken or empty.
Then I’ve do print test, seems fine.
Colored Print
After testing the ink, I went further on using its colored printing.
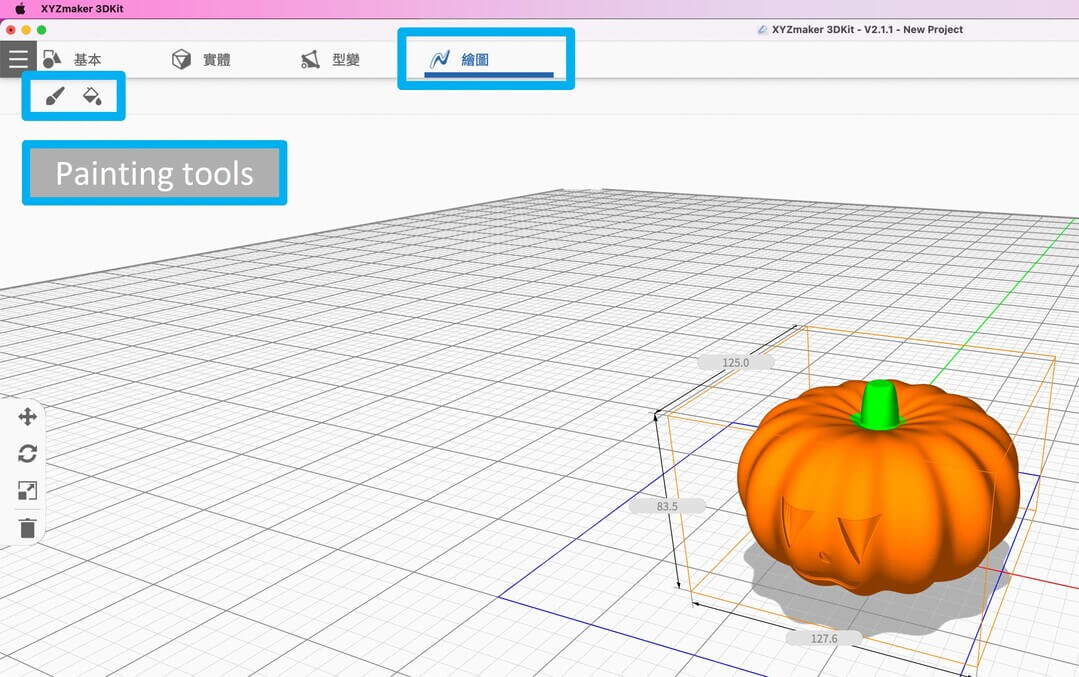
I’ve used XYZmaker to paint the color on the object.
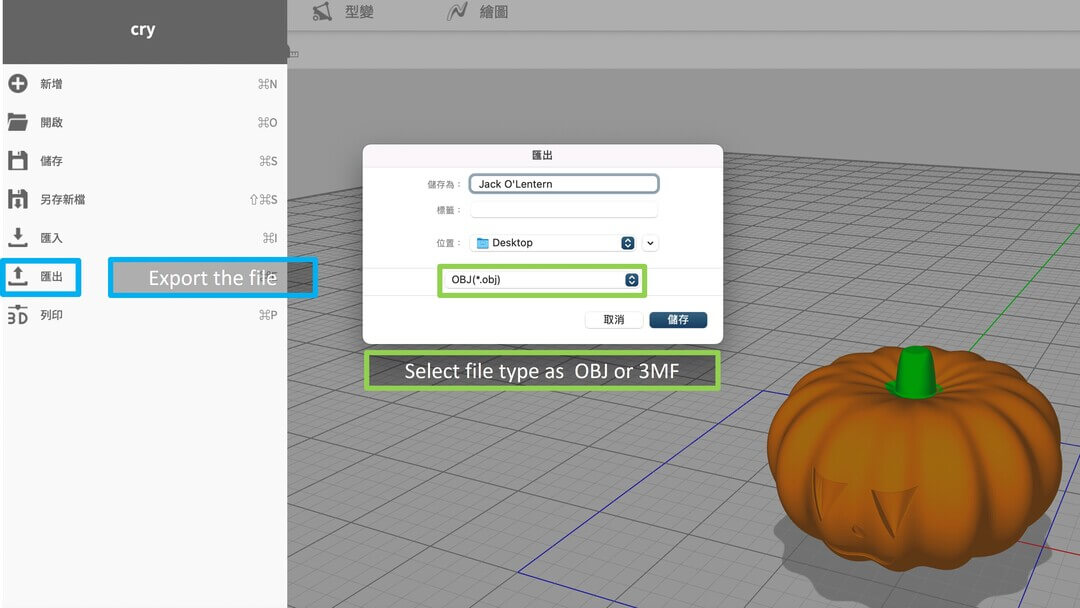
Then export the colored object to .obj or .3mf.
I’ve imported the file that I just export from XYZmaker into the XYZprint.
Then select the machine which I am going to use.
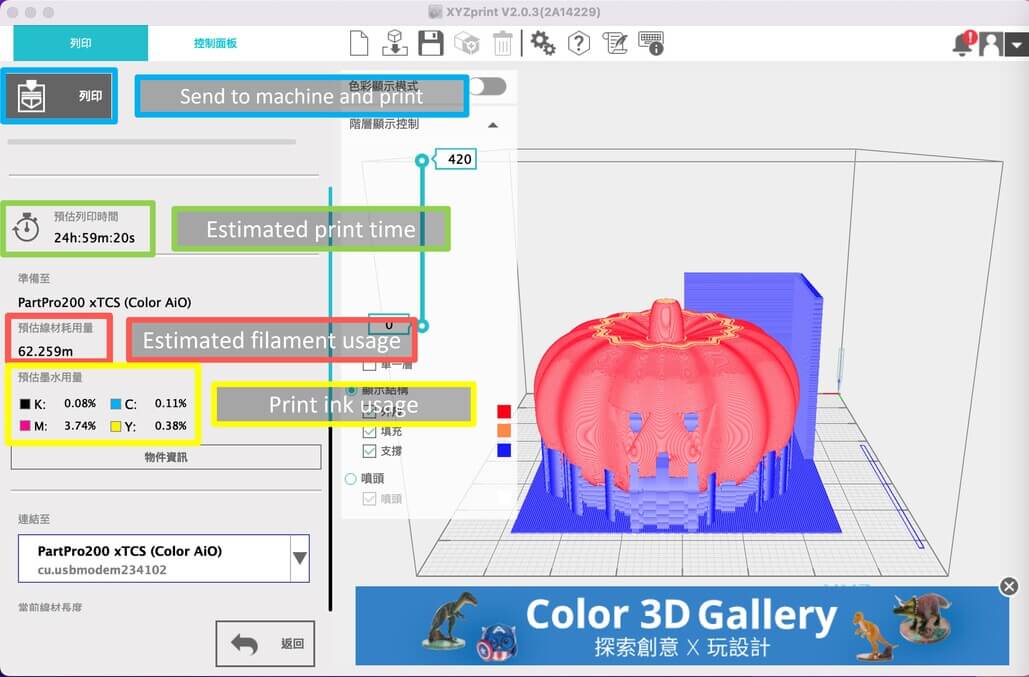
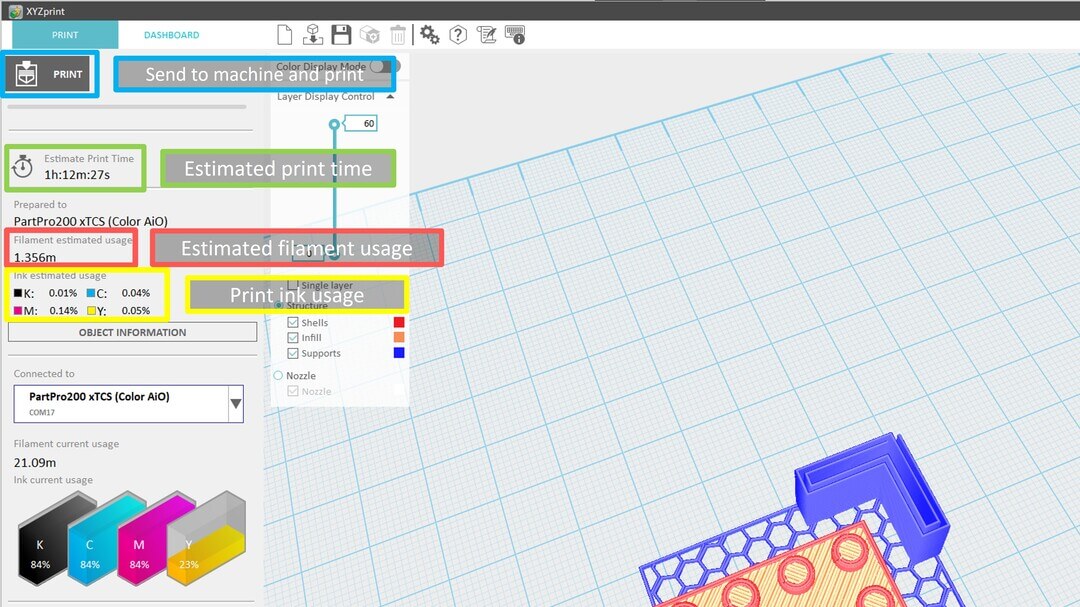
And I can set the settings, such as print speed, type and density of infill and support, etc…
After all the settings, I’ve do generation for 3D print.
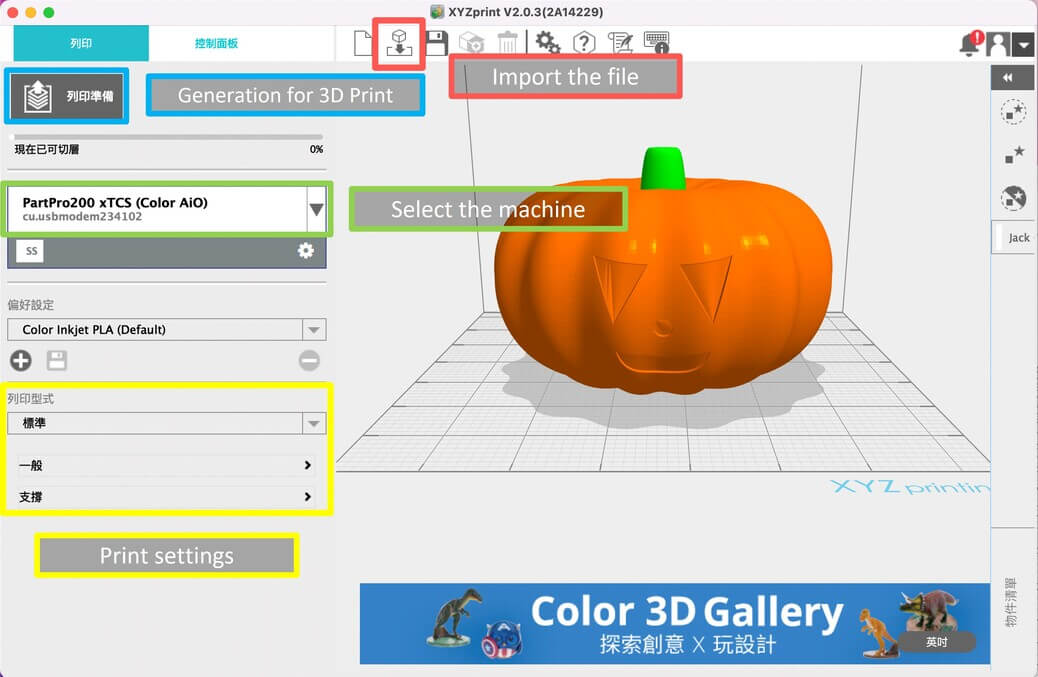
Then you can see the estimated print time, filament and ink usage.
After making sure there are no problems, click ‘Print‘
1st trial
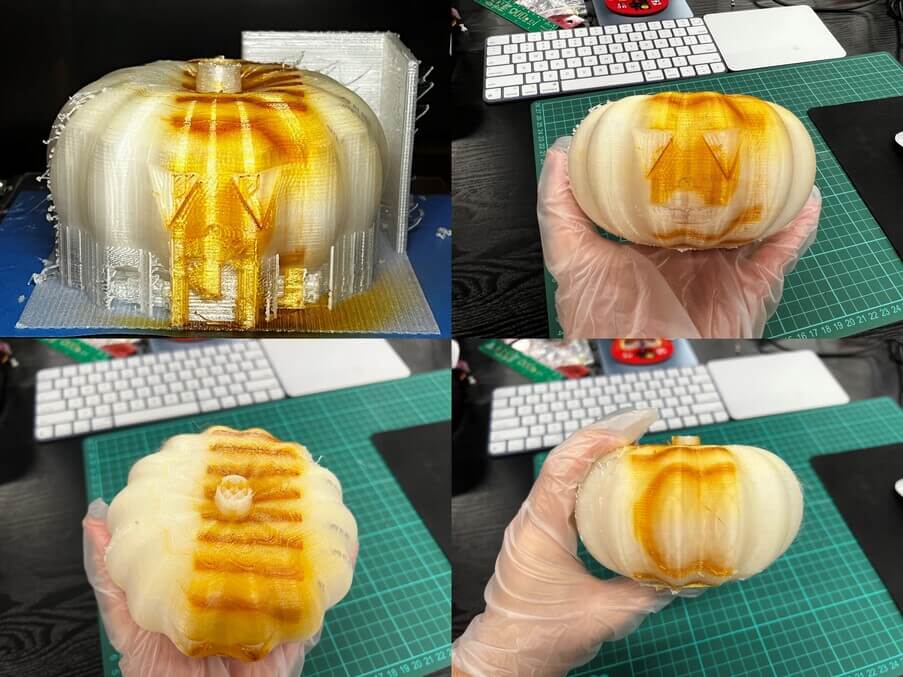
After one day of printing, I saw failure.
So, I thought the machine had some problems with printing something big, and I actually didn’t expect the Jack-o’-lantern will be that big.
Then I decided to print something small to test out can the machine print and color objects normally.
2st trial
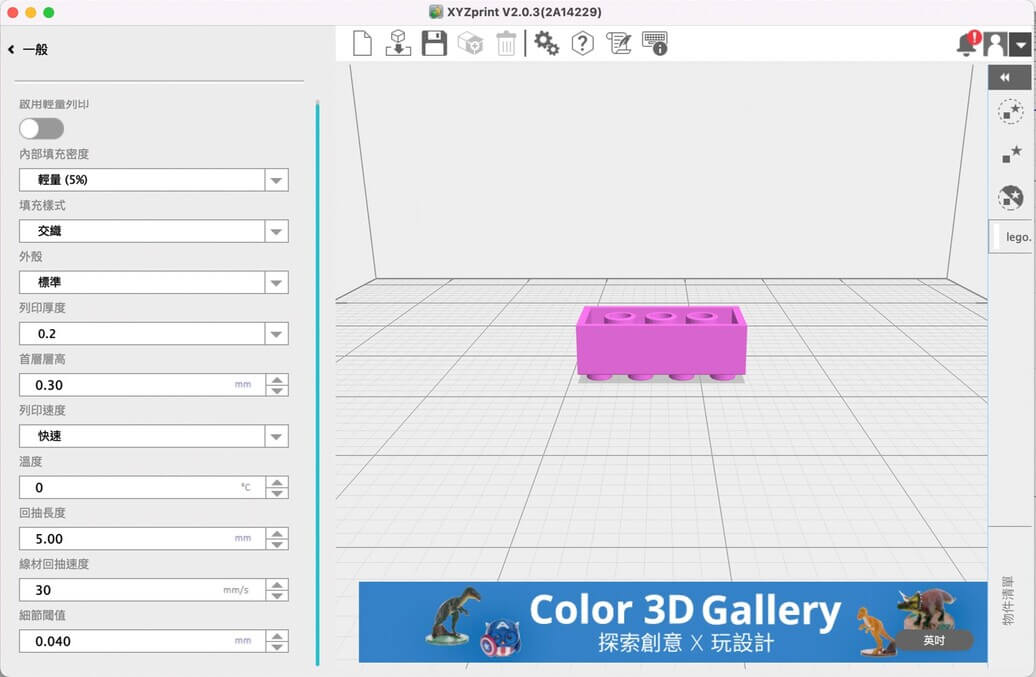
Then, I tried on printing something small, which is LEGO. I’ve colored it pink.
Then after around 1hr + 10min printing, I saw failure again.
And I started to realize maybe the problem doesn’t come from the machine because I’ve tested the ink and it can print color normally.
So I think what about using another computer to do it. Precisely, use Windows PC instead of Mac.
![]()
3st trial
This time, I’ve used Windows PC to send the print order to the machine.
And I film it using time-lapse.
It finally works!!! I spend a ton of time to figure it out.

4st trial
After confirming the colored print can function normally, I decided to print a rainbow LEGO because I think 1 color isn’t enough.
This time I didn’t use XYZMaker, I used the appearance function in the render of Fusion 360.
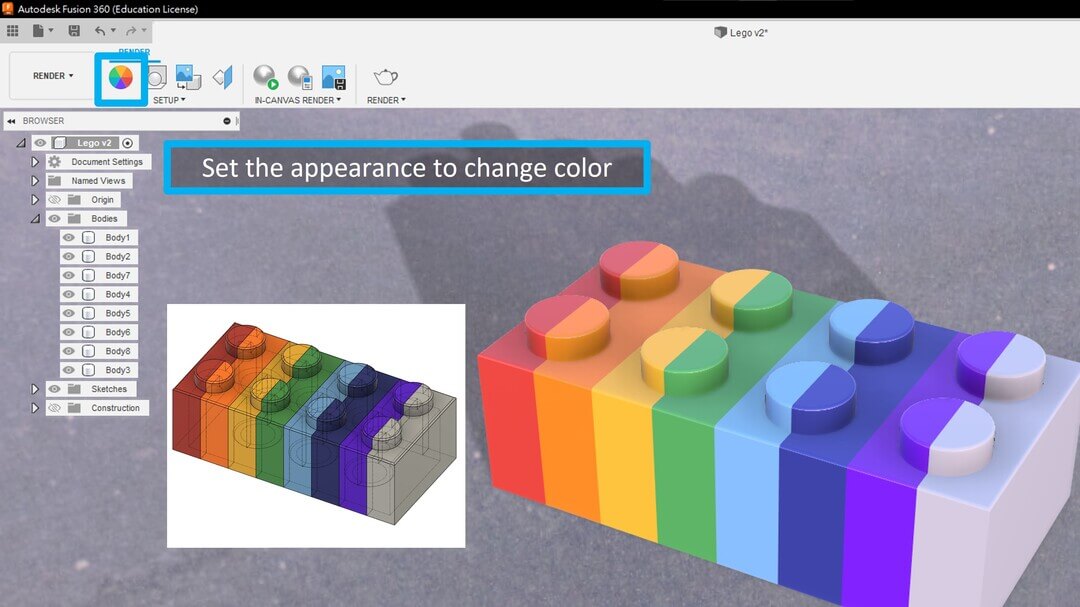
Then do the same stpes as previous to print it out.
TALA~~ ^^
Conclusion
This week I spent so much time on it because this is the new machine in our lab, and now I am now better than my mentor at using this machine. And I learned a lot from this week:
- The OS you’re using may cause you to fail
At the first, I’ve chosen to use Mac to do this week’s work, but then I figured out that the OS I am using caused me to fail in coloring the object, I think maybe there are some problems in doing generation for 3D print when using Mac.
- Different 3D printers may be using different printing methods
As you can see in the image below, there is a conner printed, but I didn’t mean to do it. The reason is that it’s calibration and printing out the colored excess part which you don’t want to see on your lovely object.

Downloads
Jack-o’-lantern CAD - .obj
LEGO CAD - .obj