2. Project management
This week I worked on managing my Fab Academy website using GitLab and Visual Studio Code.
This is my first taste of using git to do project management. I used to use Google Drive to upload my project for backup and manage my files, so using git is a little bit complicated for me. But I have looked up some Chinese tutorials about Git, like Learn GitLab in 7 minutes and Work flow of GitLab.
Git
First, you need to set up your SSH key.
Download Git
After installation, open Git Bash and type.
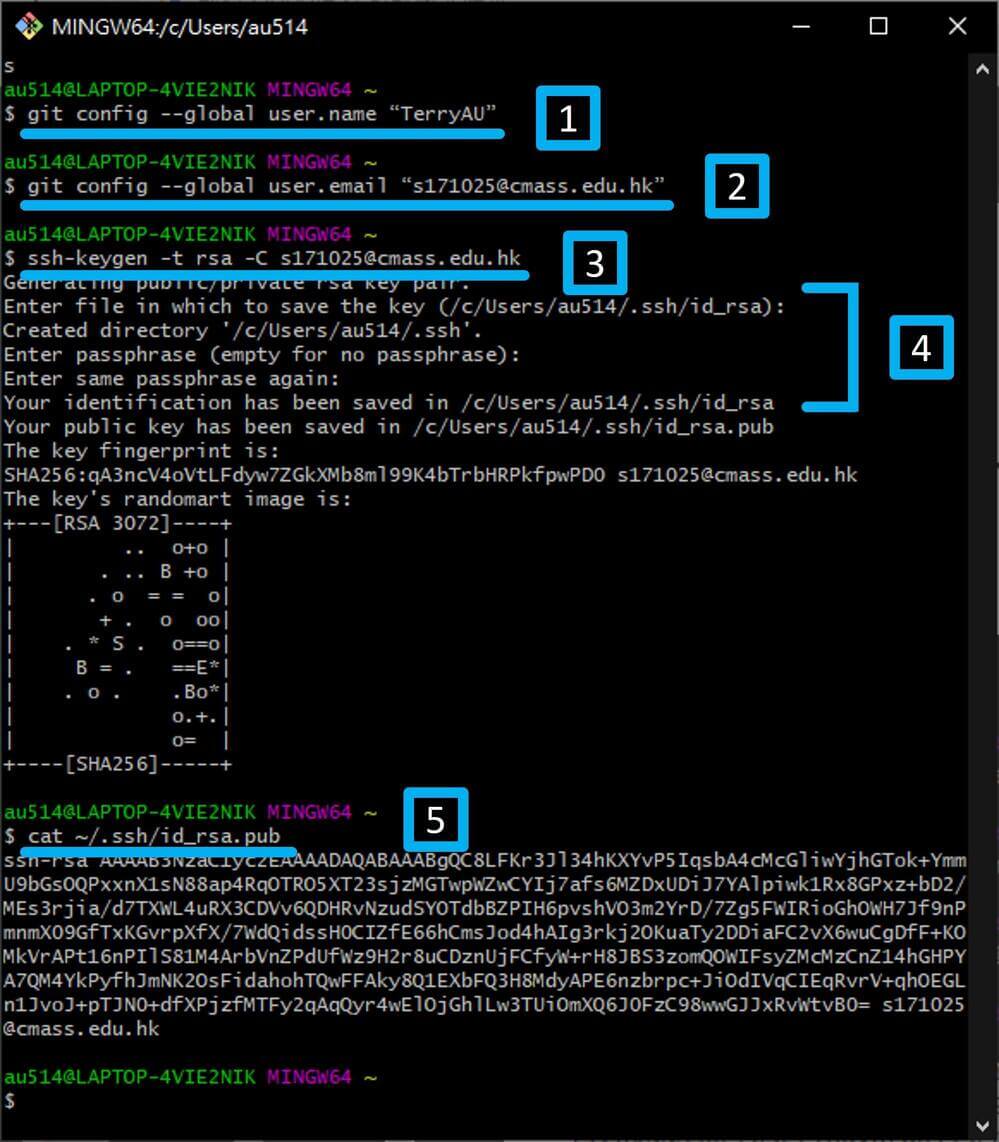
1.1 | Config the user name
1.2 | Config the user email
1.3 | Generating SSH Key
1.4 | Just press ‘Enter‘ if
‘Enter file in which to save the key‘
‘Enter passphrase‘ and enter same again showing up
1.5 | Retrieving public key of SSH Key
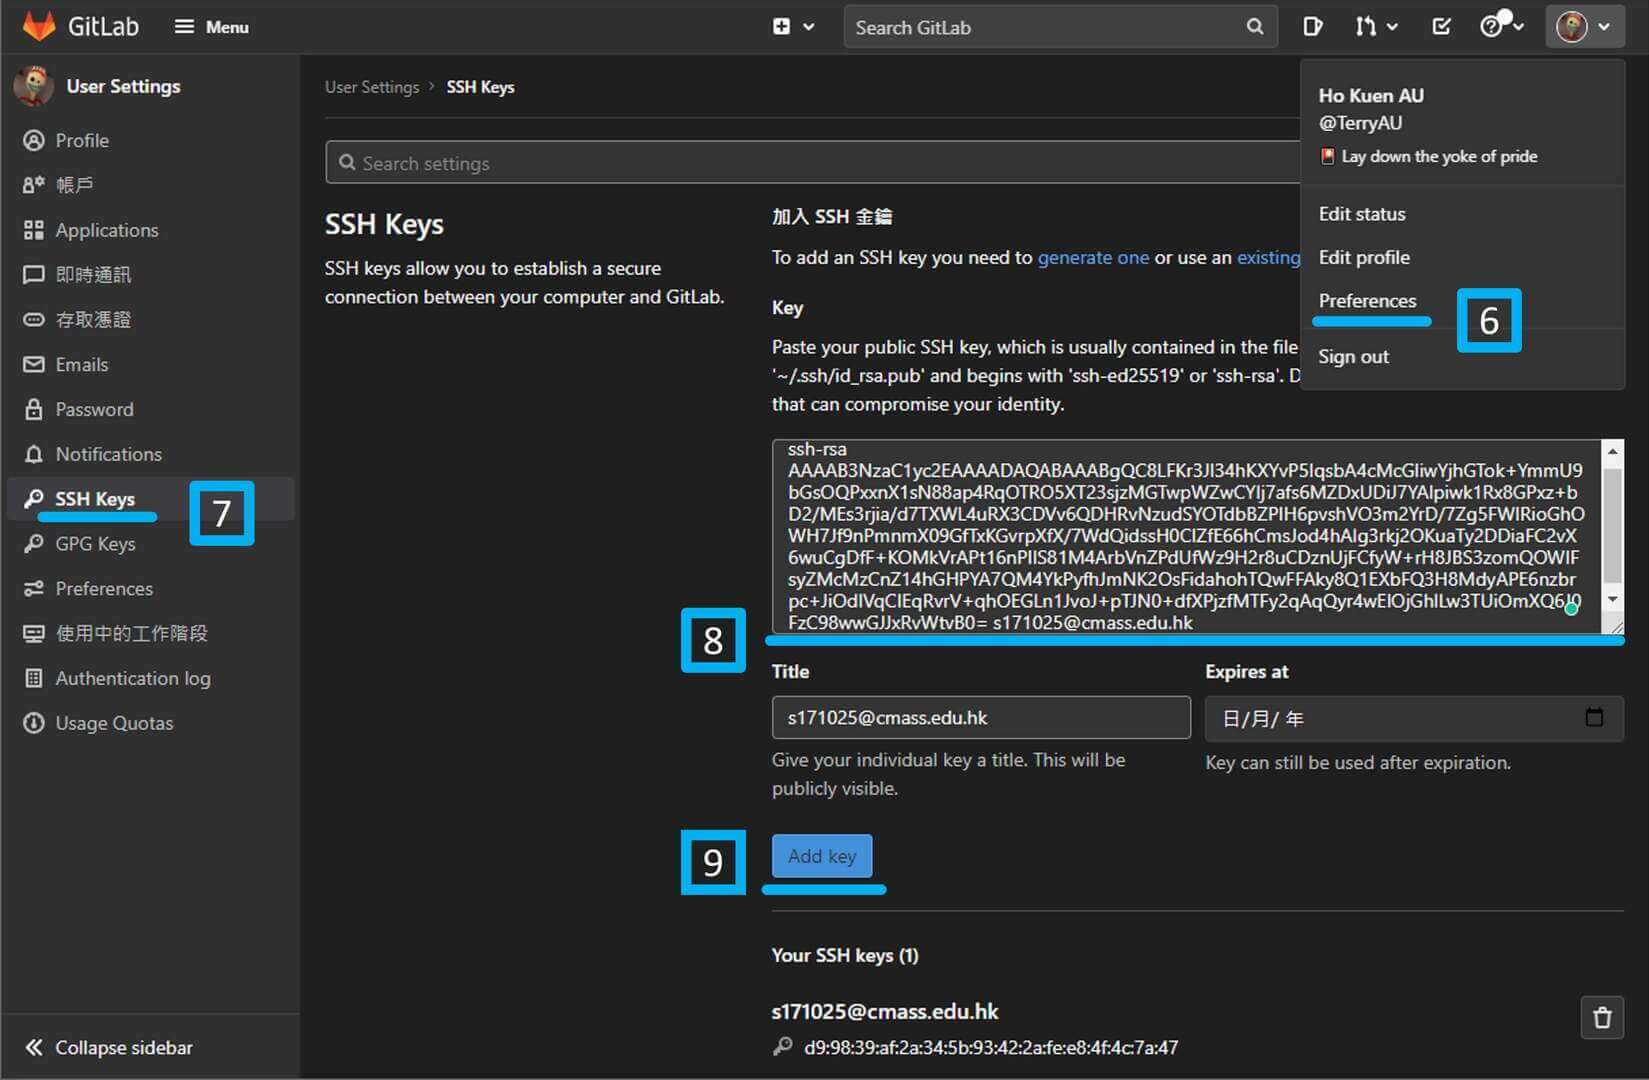
1.6 | Login to GitLab and get into users settings
1.7 | Click ‘SSH Keys‘
1.8 | Paste the public SSH key to the text box
1.9 | Hit the ‘Add key‘ button
GitLab
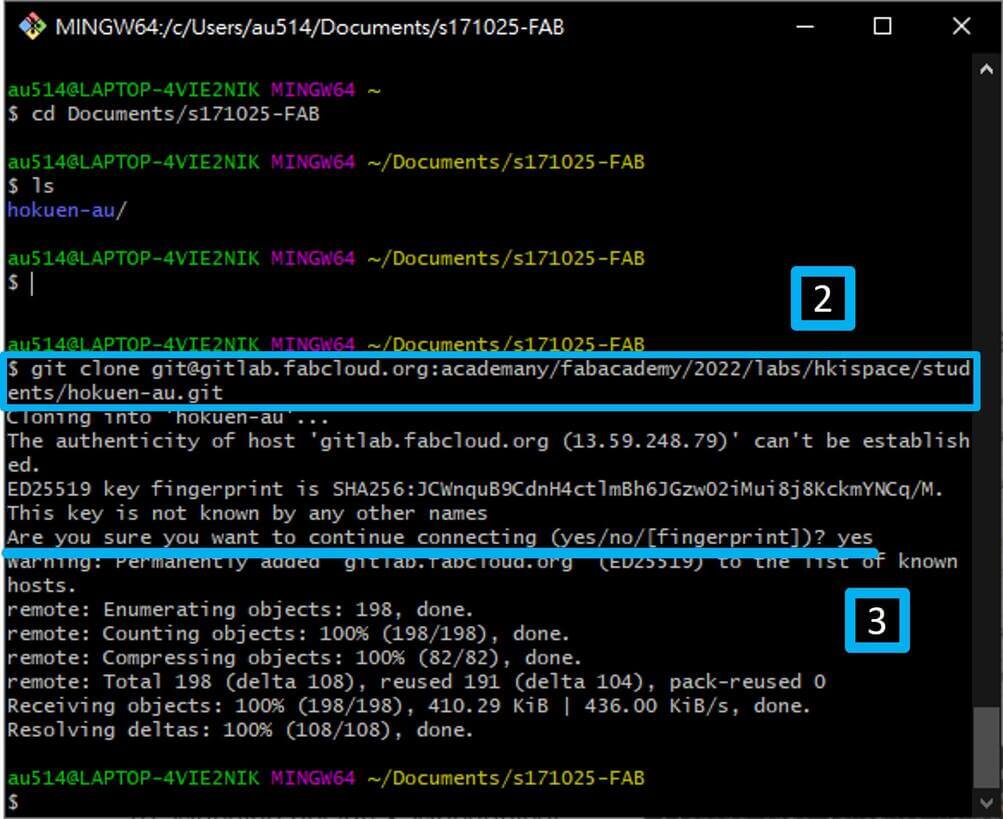
Second, you need to clone the project to your computer.
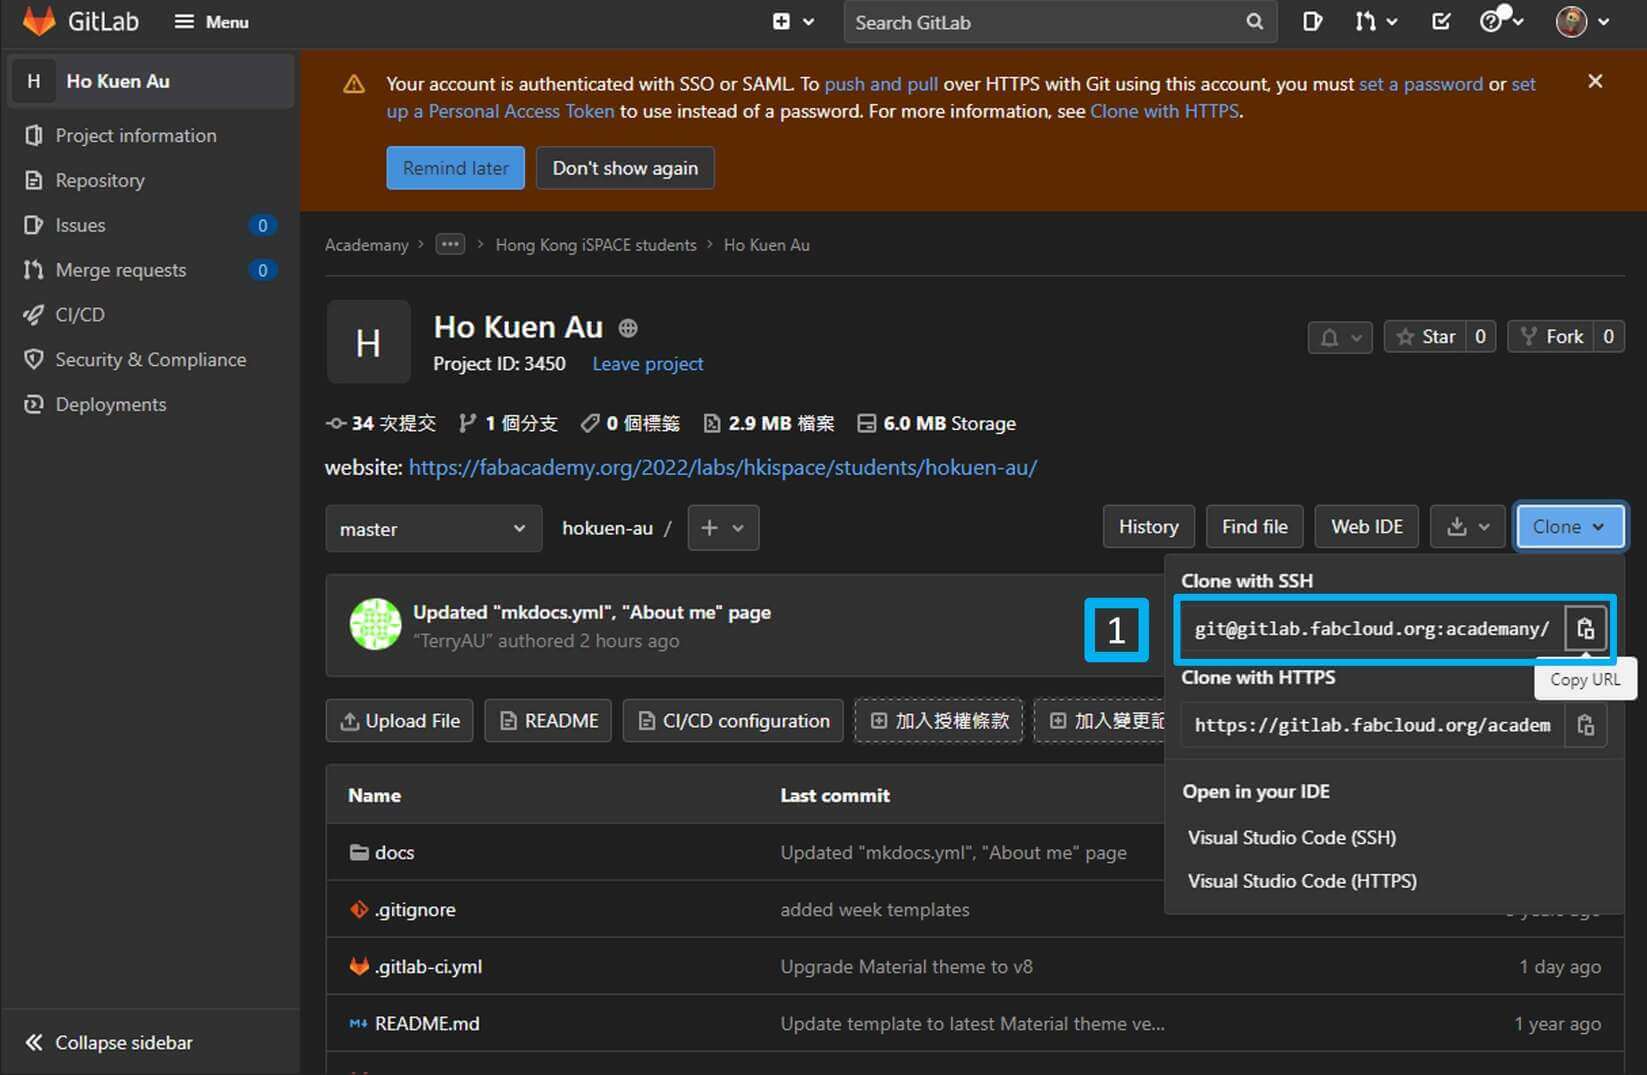
2.1 | Copy the ‘Clone with SSH‘ in your GitLab project
In your Git Bash, you can use
cd <dir>to change directory,mkdir <name>to make directory,lsto list what files are in the current directory.
2.2 | After your are in the directory you wanted, type git clone and paste the ‘Clone with SSH‘
2.3 | Type ‘yes‘ when Are you sure you want to continue connecting asked
Visual Studio Code
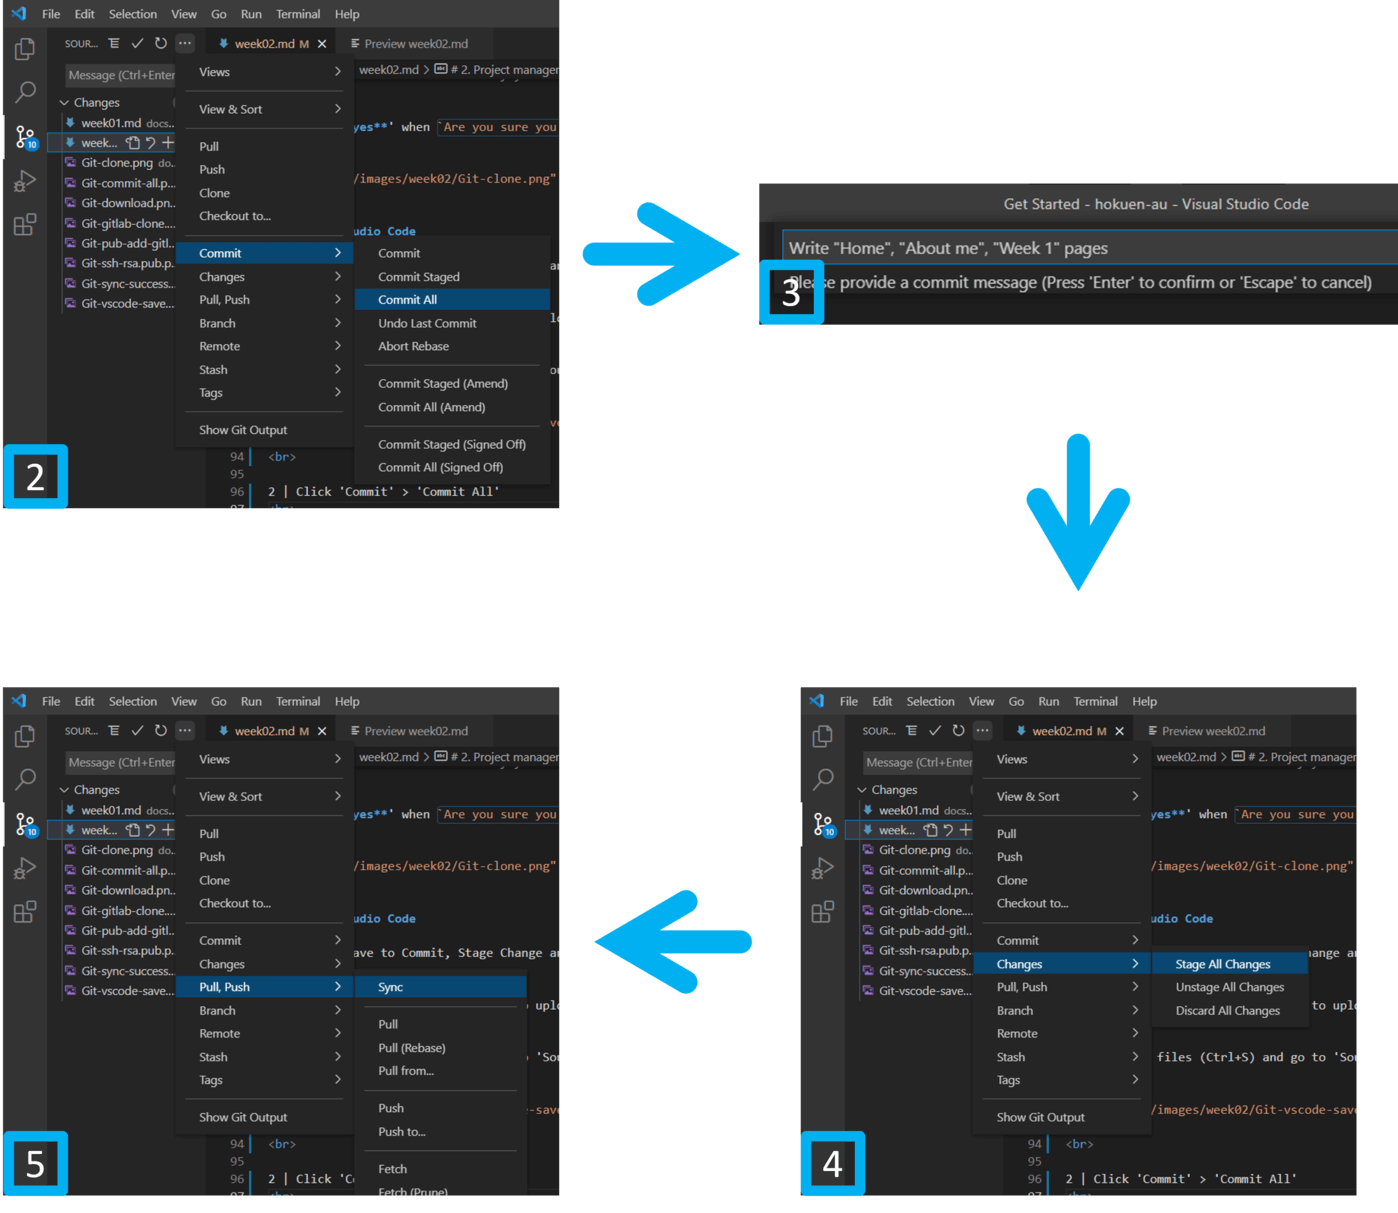
Third, you have to Commit, Stage Change, and Sync the project.
After you do some changes and want to upload them on GitLab, you need to:
3.1 | Save you files Ctrl+S and go to ‘Source Control‘ Ctrl+Shift+G
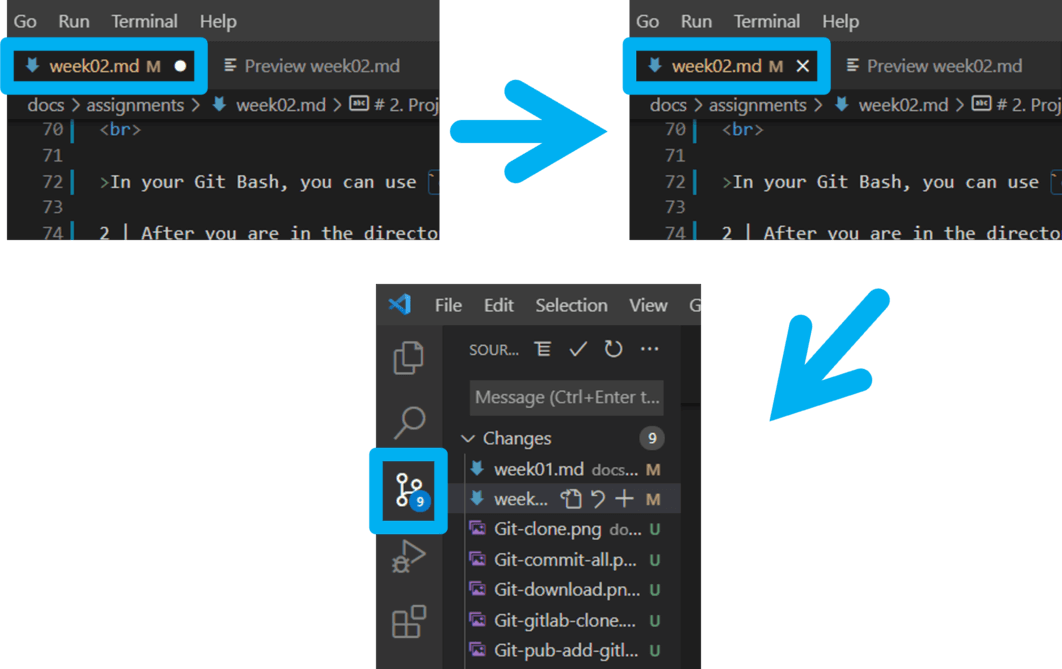
3.2 | Click ‘Commit‘ > ‘Commit All‘
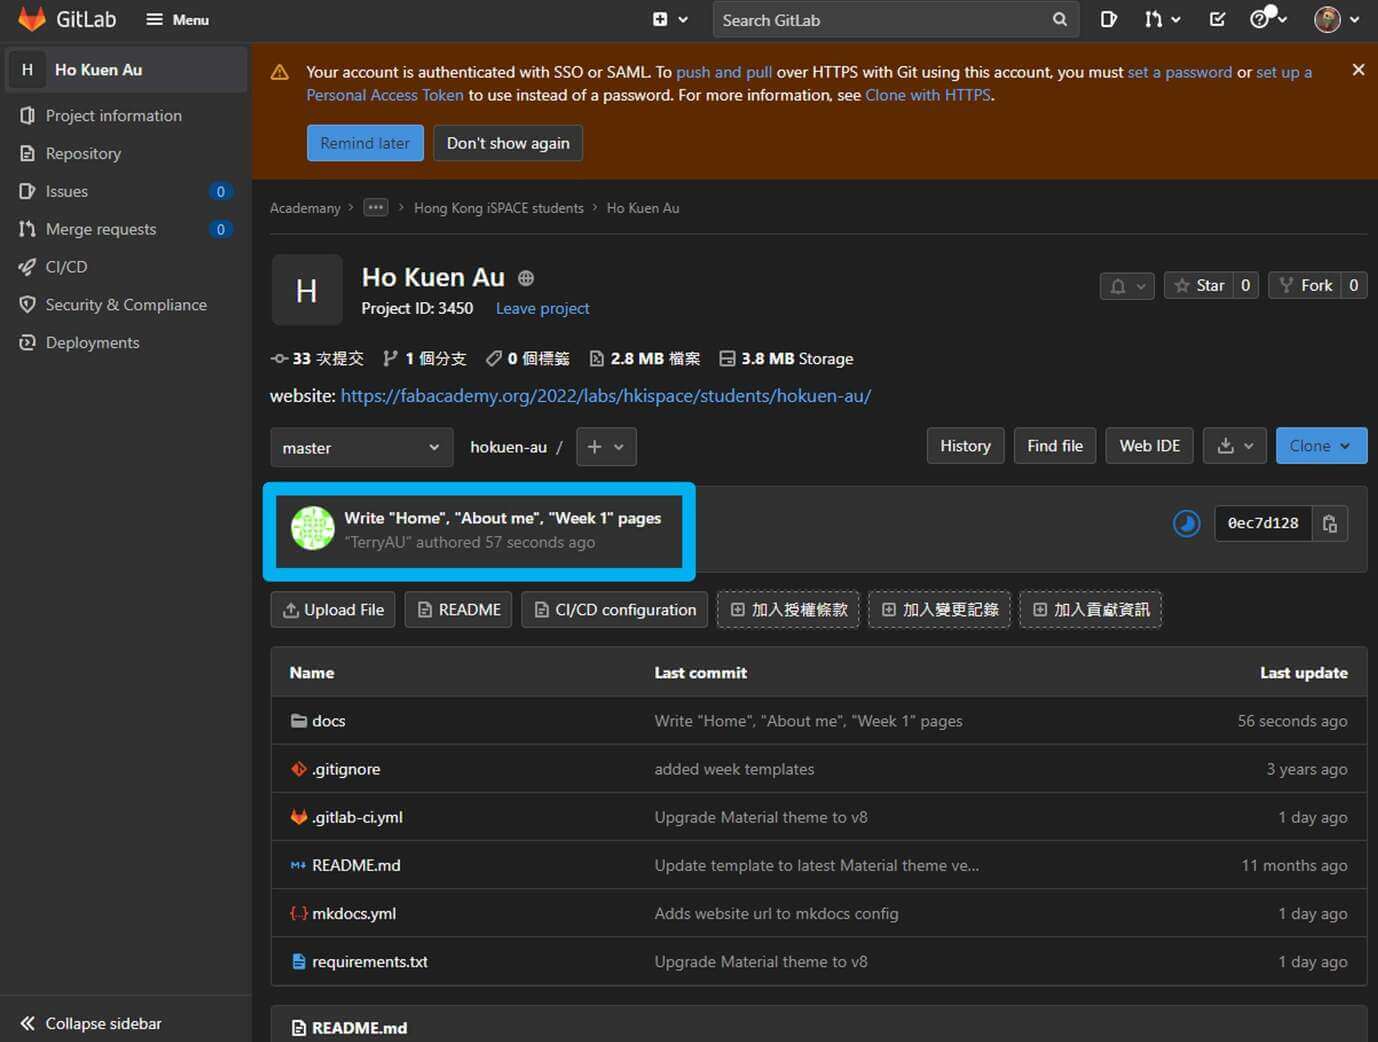
3.3 | Write what you want to note, like changes
3.4 | Click ‘Changes‘ > ‘Stage All Change‘
3.5 | Click ‘Pull, Push‘ > ‘Sync‘
✅Done.
Tips
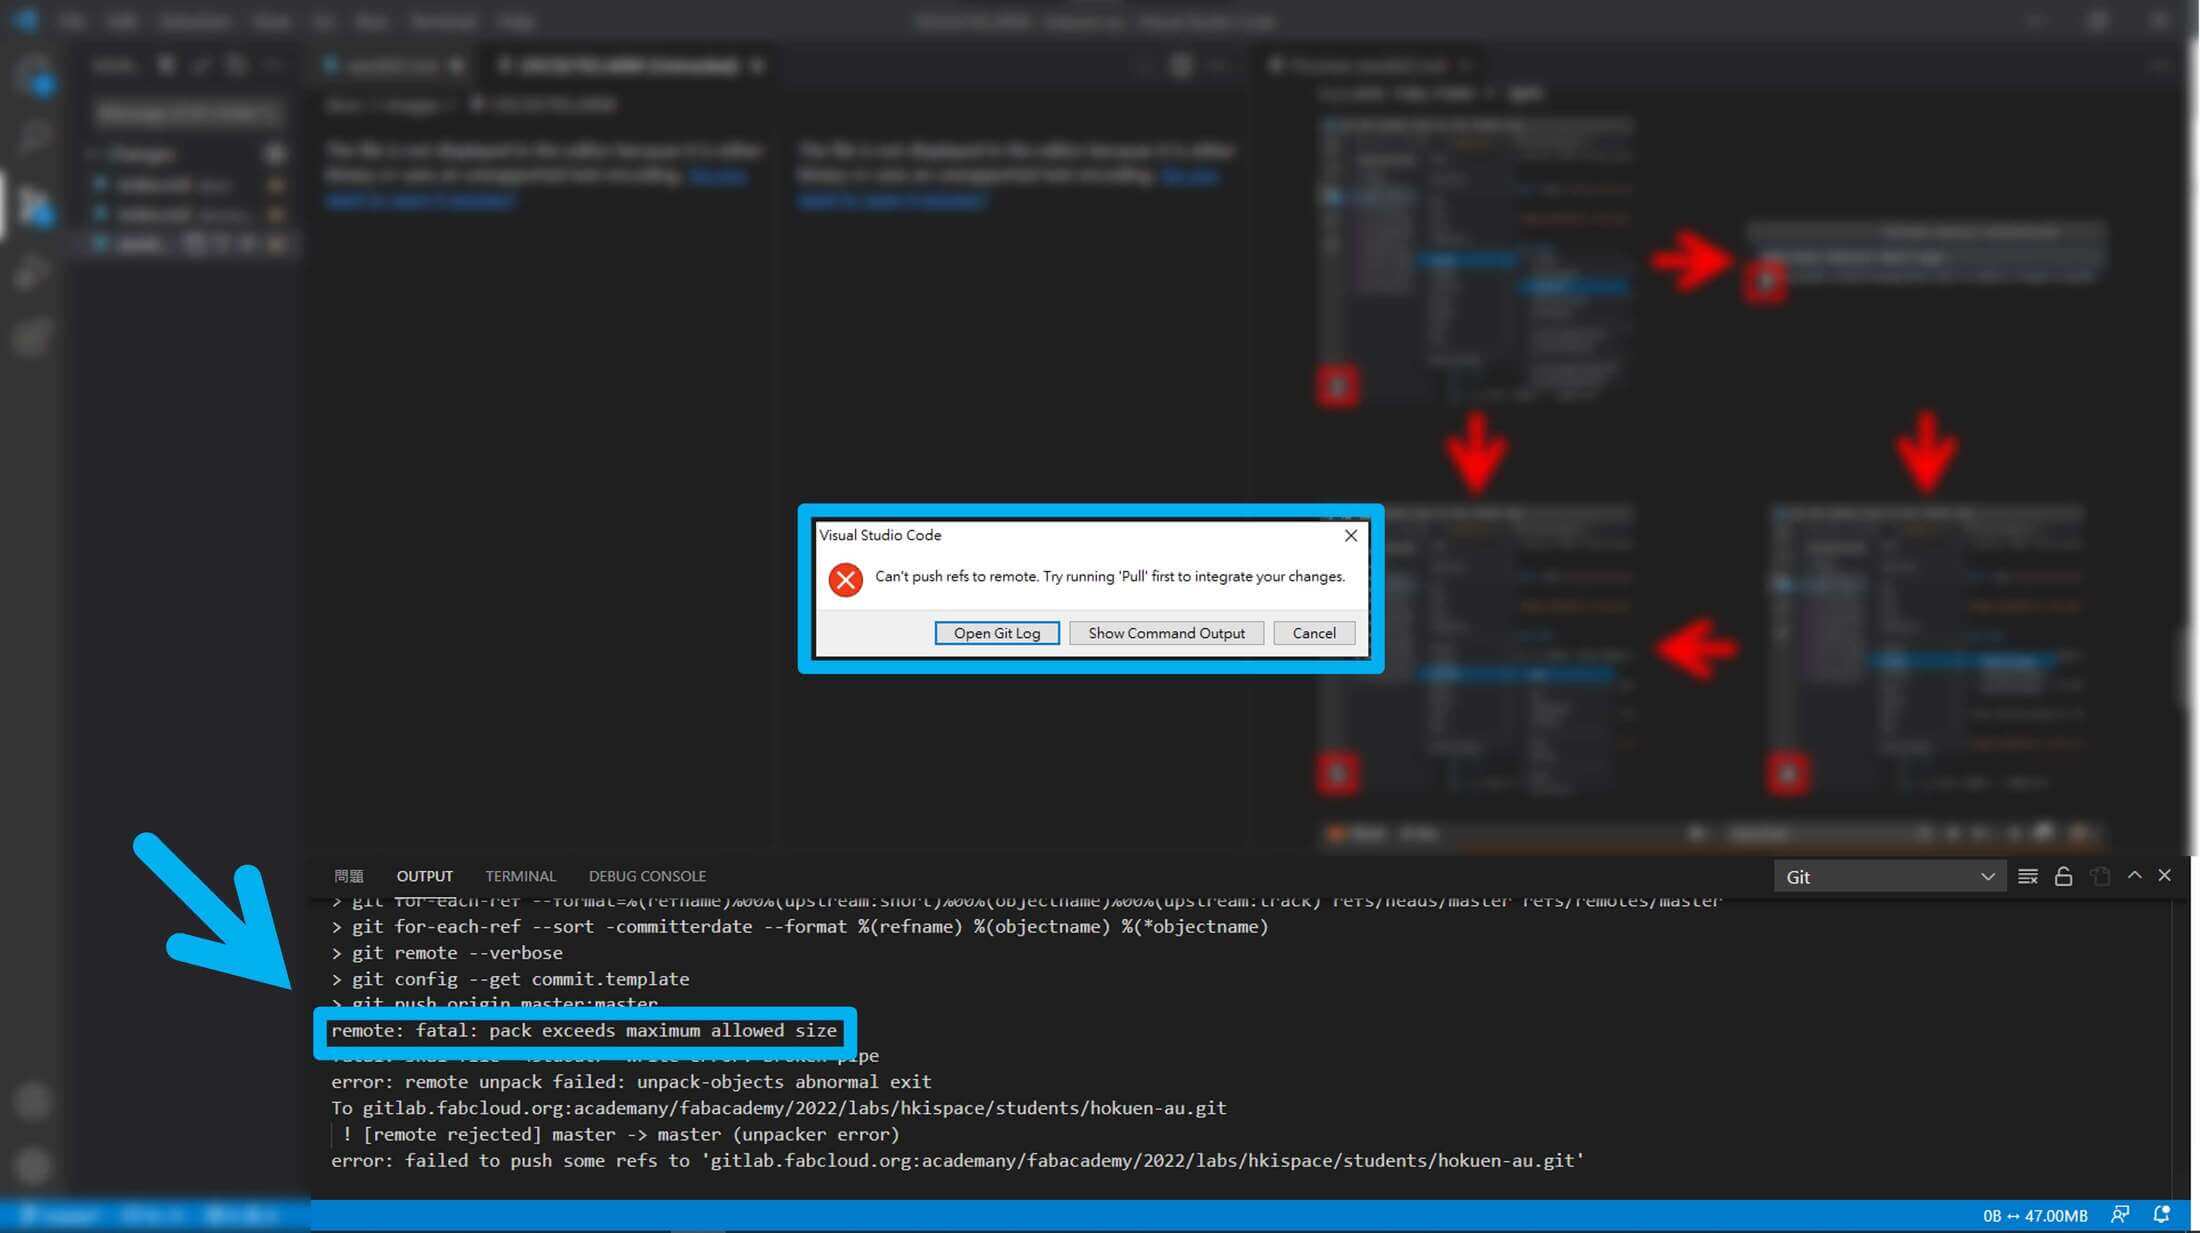
pack exceeds maximum allowed size
I had tried to upload a bunch of photos but failed. And I discovered that the files I commit were too large.
If you saw your vscode appear a text box said ‘Can't push refs to remote. Try running 'Pull' first to integrate your changes.‘ when you commit and want to push. Go look at the output and see what the error is. If one of the outputs is ‘remote: fatal: pack exceeds maximum allowed size’, here are some steps to solve this.
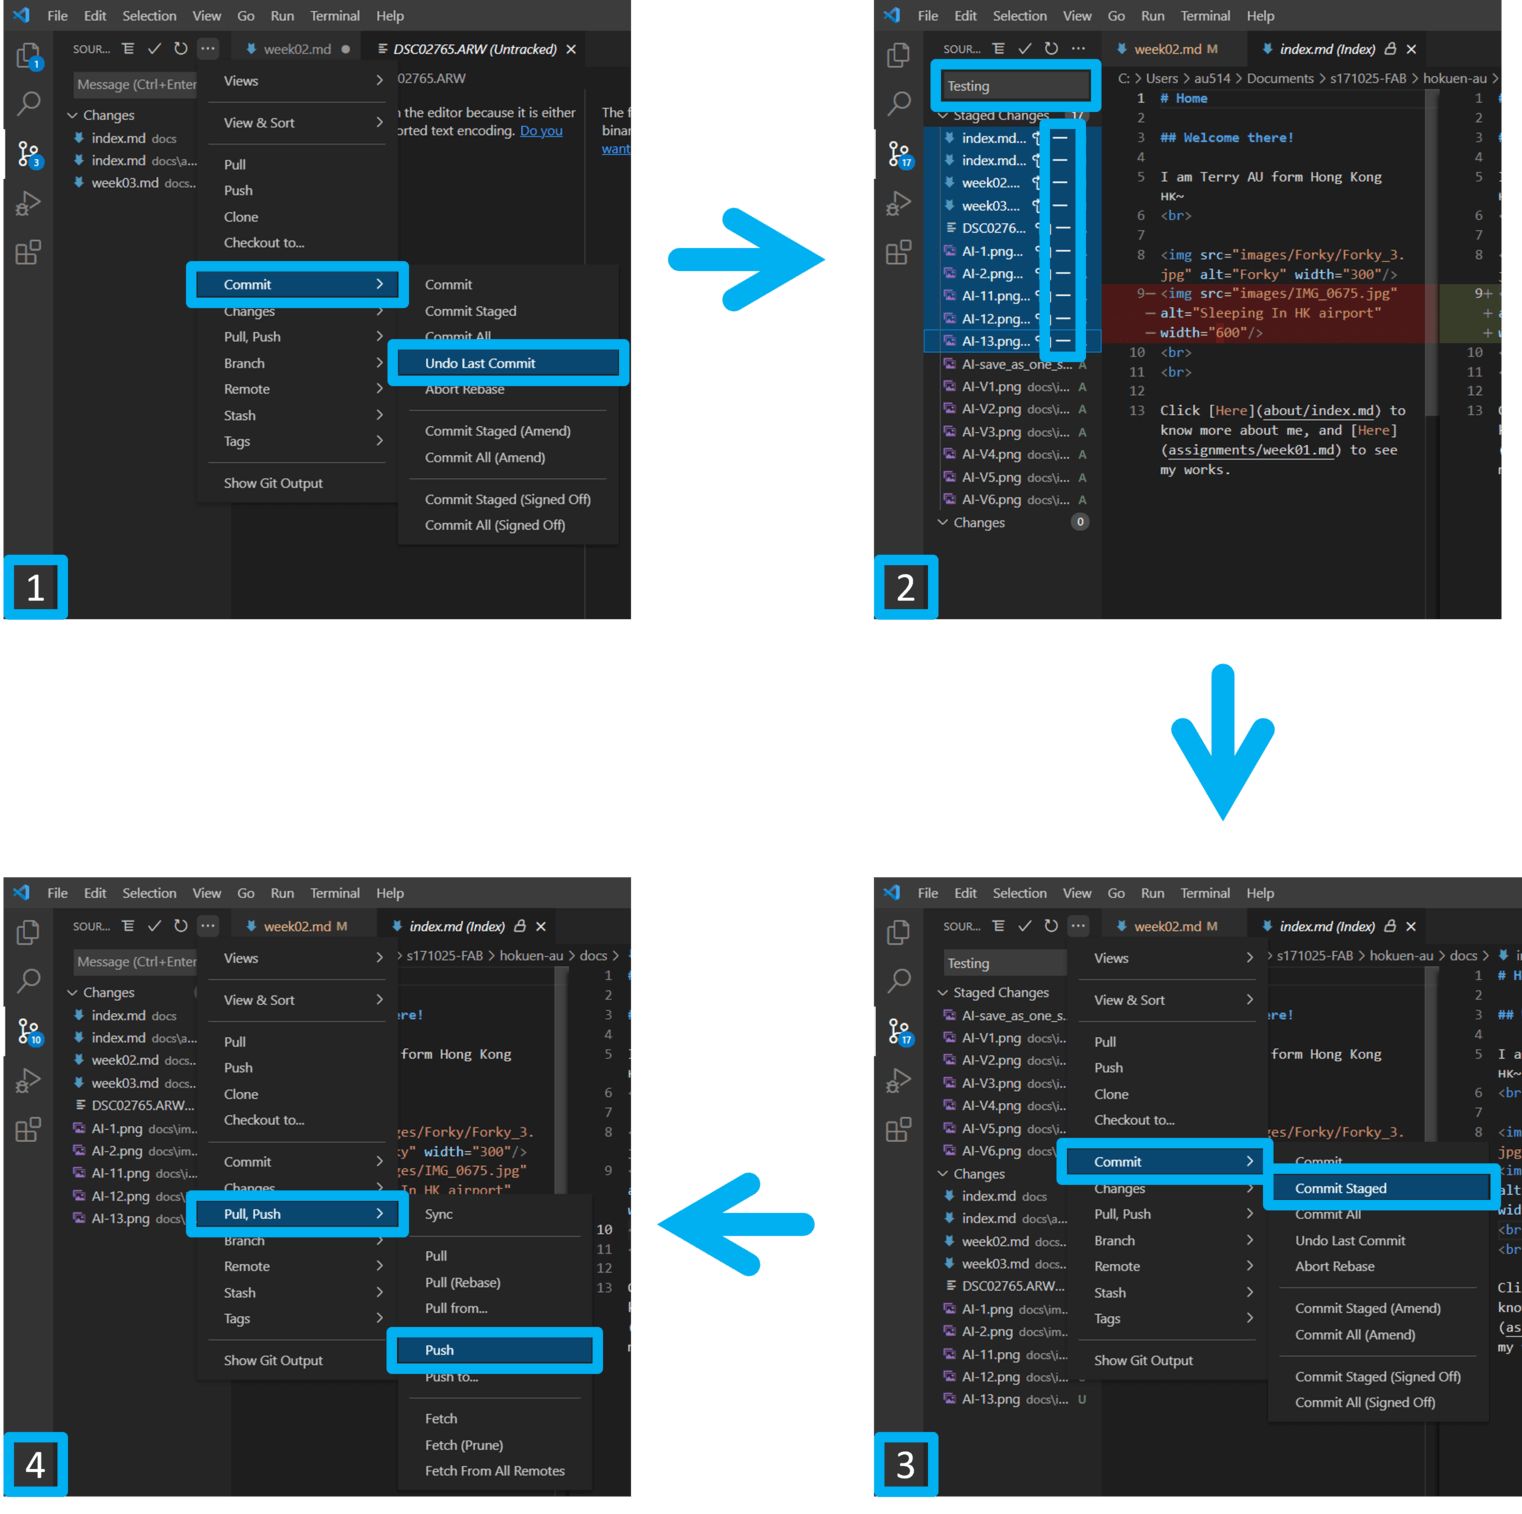
4.1 | Click ‘Commit‘ > ‘Undo Last Commit‘
4.2 | Select files to make the rest of the files are less than 10MB, and hit - to unstage it. You can also edit the commit message at the top of the list.
You will see the files are moved to the ‘Changes‘ instead of ‘Staged Changes‘
4.3 | Click ‘Commit‘ > ‘Commit Staged‘
4.4 | Click ‘Pull, Push‘ > ‘Push‘
Lastly, try to compress the files as small as possible.
I hope that may help you ˄_˄
File size on GitLab
Recently, Neil said he will keep checking the students’ repository size, and I saw I am on the top of the list. After, I try to compress the files to let the size smaller. Then, I go to GitLab to check my repository size, but the size hasn’t dropped, even larger. Then, I Google to try to figure out what the problem was. I discovered that the size will include all the commit, that’s mean all files which you push is keeping in the .git file and GitLab.
Then, I try to find ways to delete the old commit or clean up the .git and try to push it to the repository, but it needs to unprotect the branch, and I don’t have the permission to do it, so the mission failed. But after all those things happened, I learned that I should think more and keep the file size as small as possible before I commit, otherwise the size will go huge.