10. Molding and casting
This week I worked on design a mold, mill it and use it to cast parts. [Reference]
Group assignment
This week of group assignment, We try to review the safety data sheets for each of your molding and casting materials, then make and compare test casts with each of them. Click HERE to see more detail of the group assignment.
Individual assignment
So this week is very new for me, I don’t know much about the process of molding and casting. So I ask German, Queenie, and Darren a ton of questions, like
- What material should I choose for the positive mold, negative mold, and the final creation?
- What Milling tool should I use?
- How deep is proper?
- How to use Fusion to make the gcode?
- How long does the process of molding takes?
- How long does the process of casting takes?
- Should the final creation big or smaill? etc.
Designing
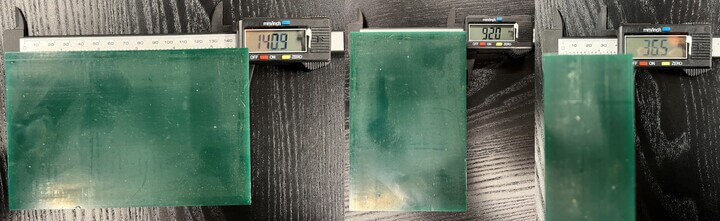
The first thing I’ve done is to measure the size of the material which will be the mold. After savvy the dimension of the material, then we can limit the design size to smaller than the material.
Then start to make the model.

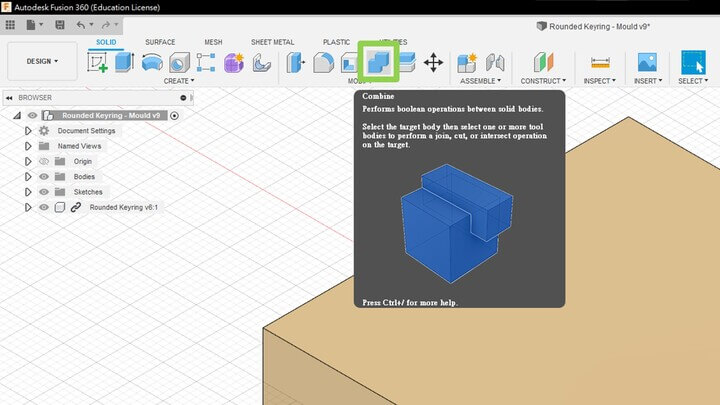
After finishing the final creation, I need to make the mold of the final creation. Using ‘Combine‘ to make the shape inside the object.
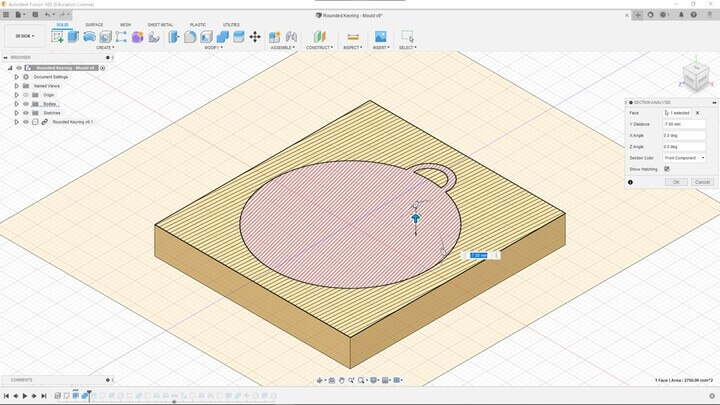
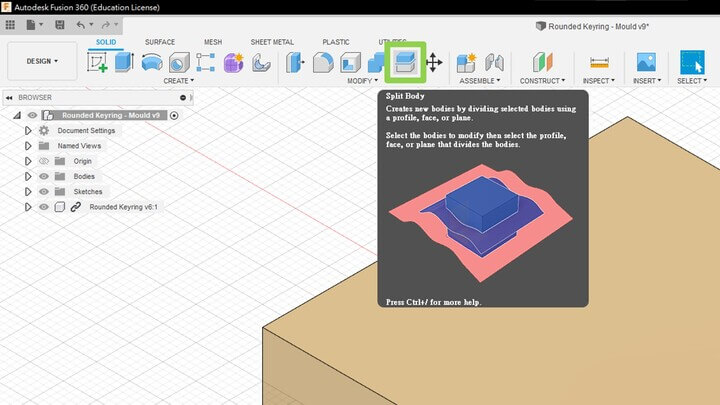
Then use ‘Split Body‘ to split top and bottom mold.
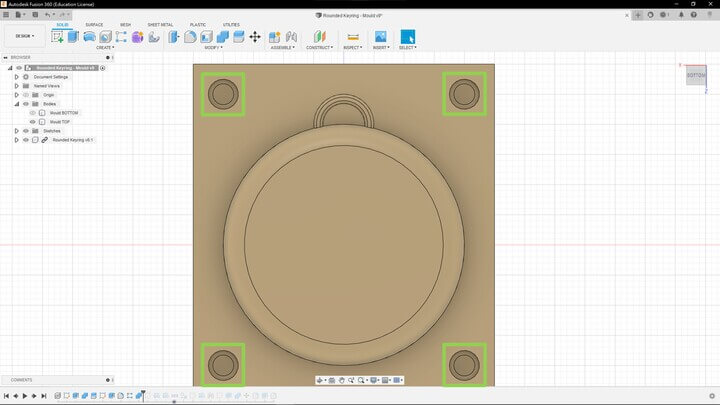
And I’ve add the pins at the conners.

And using the same function ‘Combine‘ to make the holes fit for the pins.
I’ve made a mistake here, I should consider the diameter of the tool, otherwise the tool won’t go down and cut deep.
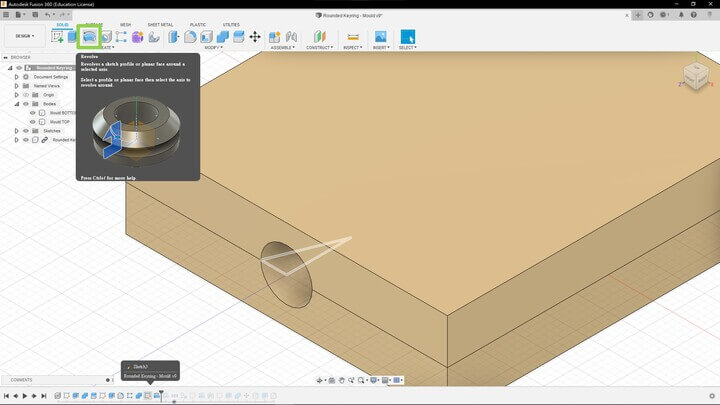
Then open a hole for casting.
And I’ve made an animation.
But that’s not enough, I need to make the mold of the final creation’s mold.

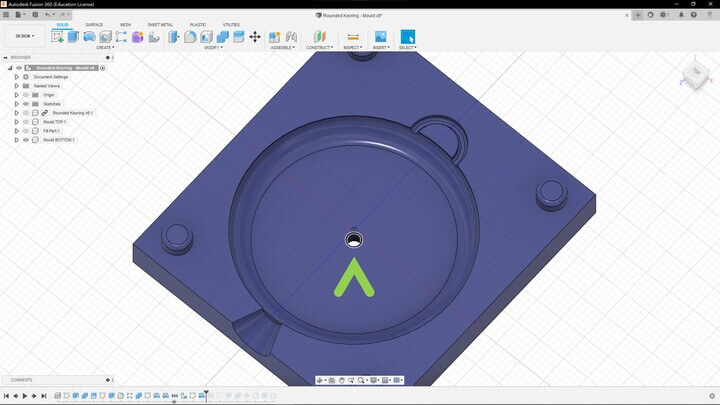
Then we need fillet the conners.

Mistake again! The final creation’s mould should be using a function called ‘Taper Angle’. Then the side of that will be slanting, that’s the corrent way to make it.
Then I’ve extended and fillet the pins

Toolpath
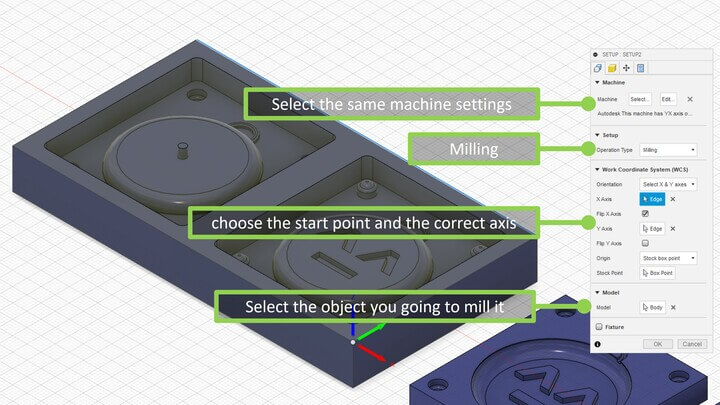
After finishing the model, I’ve used the manufacture mode to do the rest of the steps. To start with, make a new setup.
Then choose the machine which are going to use for milling. If the machine didn’t show up in the list like me, choose the same setup machine provided by Fusion.
Then set the operation type to milling.
And set the WCS, choose where the start point on the model is, and set the X Y Z axis same to the machine.
And the last setup is set the model which is going to be mill.
After finshing the setup, I’ve started on making the rough cut, I’ve choose to use ‘Adaptive Clearning‘ to do it.
![]()
And I’ve set the Tool settings.
![]()
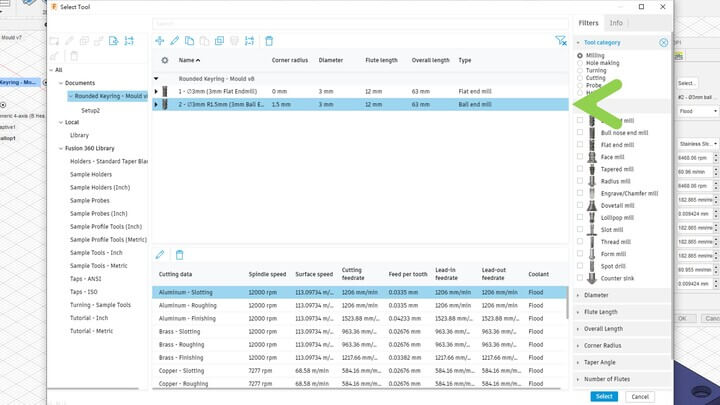
Then I’ve clicked the tool that I am going to used

I’ve select the stock area, and it won’t go out of the area.
![]()
Then I’ve select the proper stepdown settings and set it to leave 0.5 mm for finish cut.
After that, I’ve click OK. Then the rough cut is done.
![]()
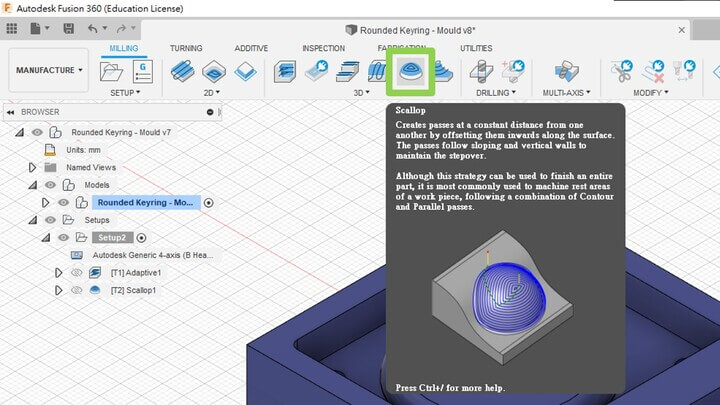
Then for finish cut, I’ve choose to use ‘Scallop‘ to do it.
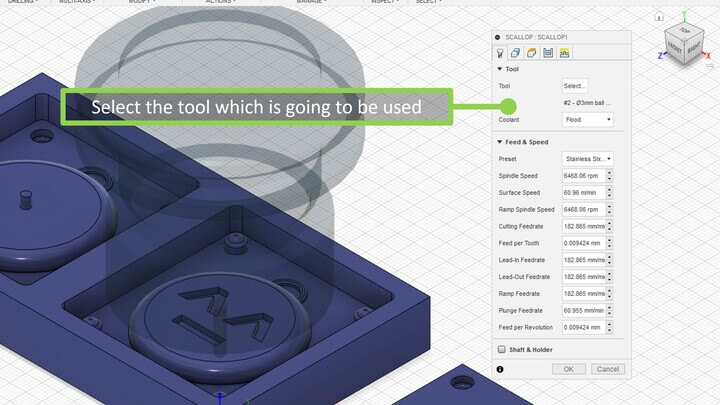
And same with rough cut, I’ve choose the tool settings that I am going to used
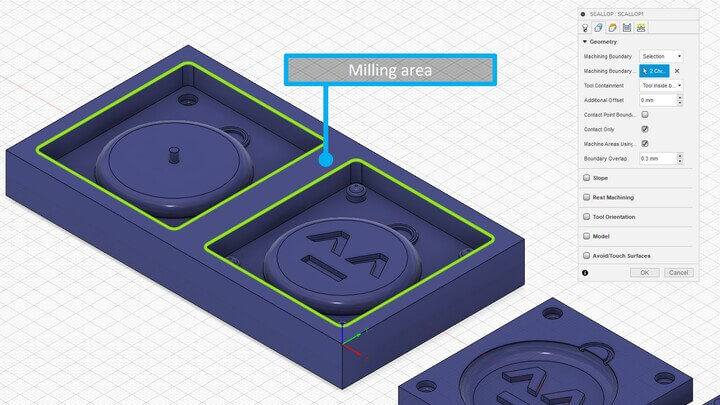
I’ve select the milling area, then it won’t cut the stuff that is out of that area.
After, I find out that the diameter of milling tool will be used isn’t exact 3 mm, so I need to change that. By clicking the pen icon on the top toolbar.
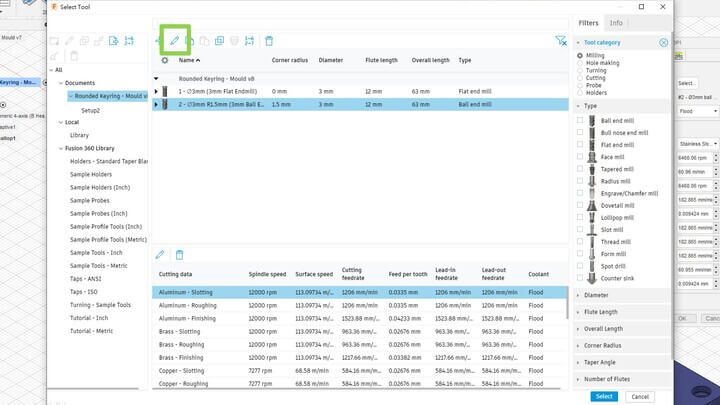
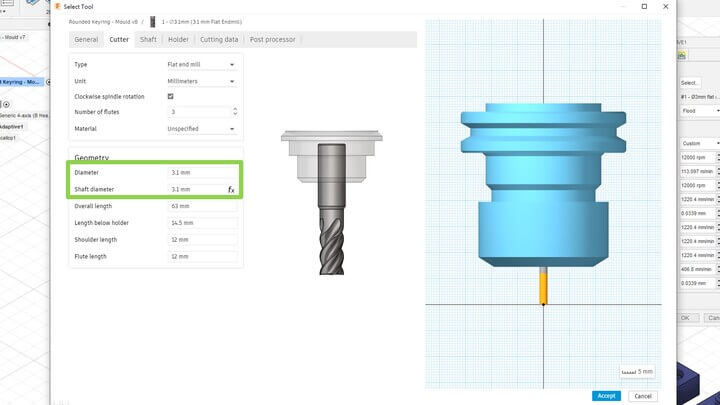
Then, in the cutter section, change the diameter to 3.1 mm.
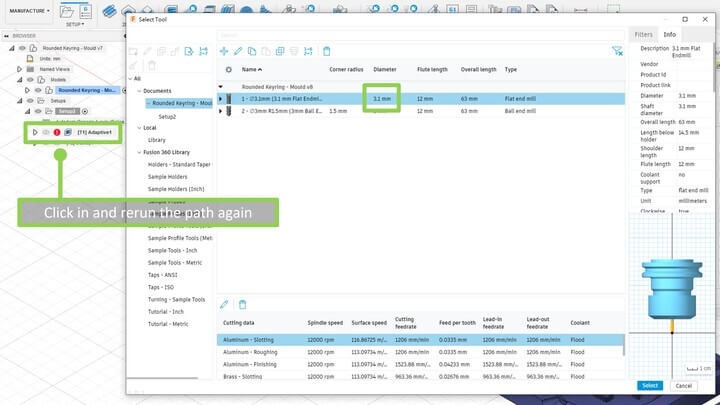
After correcting the tool diameter, I need to recalculate the toolpath. By clicing in to the toolpath and click OK.
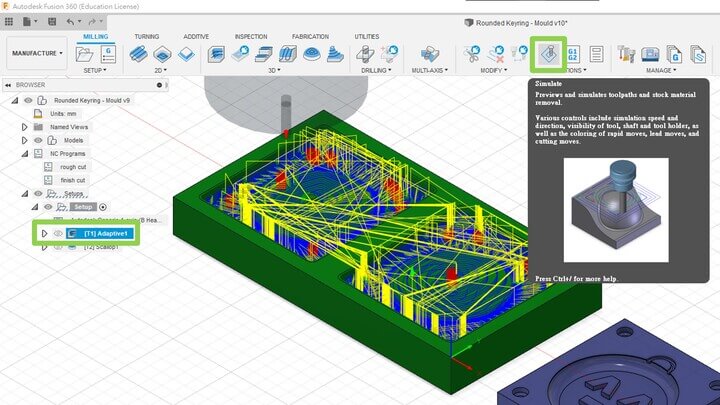
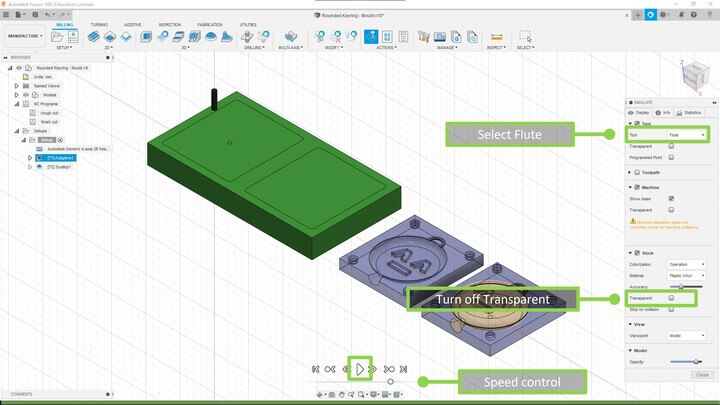
After both rough cut and finish cut is done, I’ve simulate and see is there any problems.
In the default settings, there are a lot of stuff that are block your view.
So I’ve select the tool to ‘Flute‘ and turn off the transparent.
Then it turns out a better view.
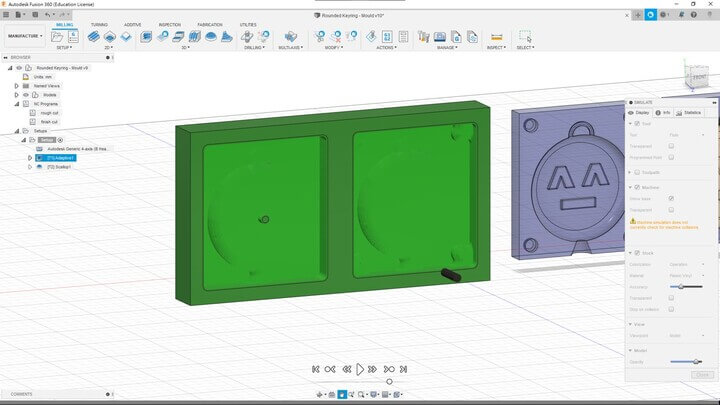
Simulation of rough cut seems fine
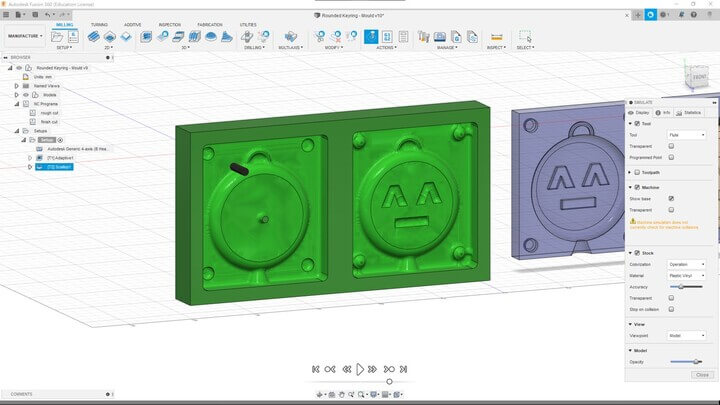
And the simulation of finish cut seems OK too.
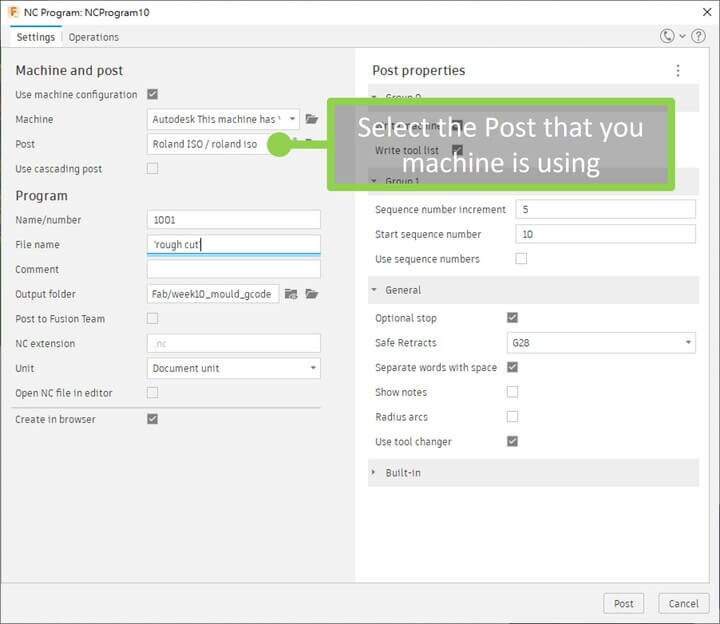
Then I’ve turn the tool path into gcode. By selecting one of the toolpath in the right list and click ‘Post Process‘
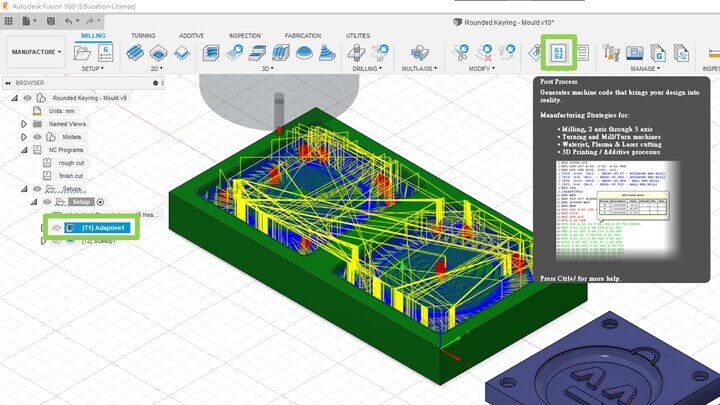
In the ‘Post Process‘ windows, select the post that your machine is using. Then name the file and set the output directory.
Then do that same to the other toolpath.
Milling
After I secured the wax on the working area, I sent the gcode of the rough cut to the machine.
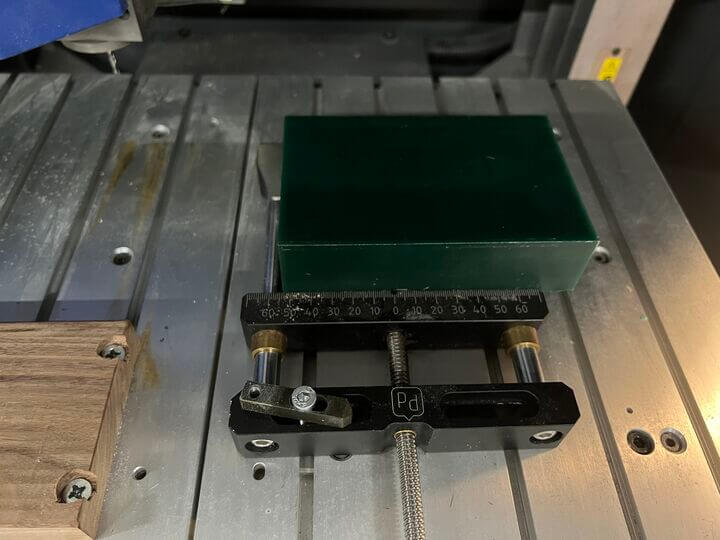
There will be a lot of wax drilling out so make sure the vacuum machine is ready.
rough_cut.mp4 from TerryAU on Vimeo.
After finished the rough cut, finish cut next.
finish_cut.mp4 from TerryAU on Vimeo.
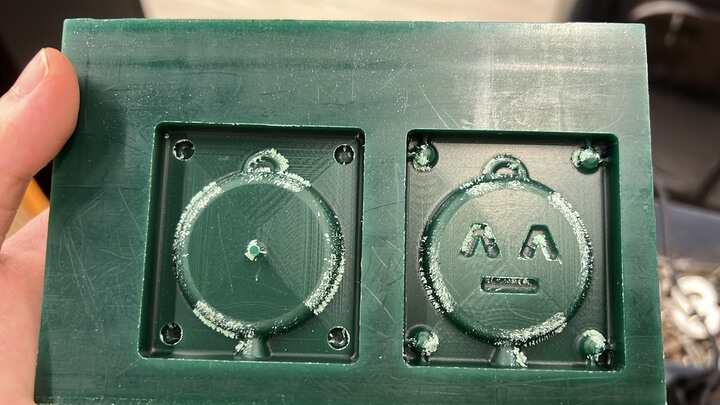
And here is the result:
Looking great.
Molding
Before molding, make sure to remove the excess.
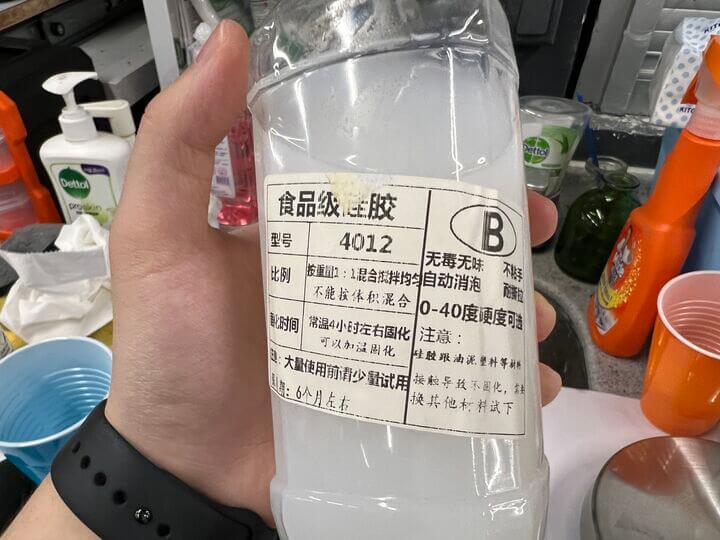
I’ve used formulate silicone used for molding [Datasheet]
Mix A and B together. The weight must be 1:1.

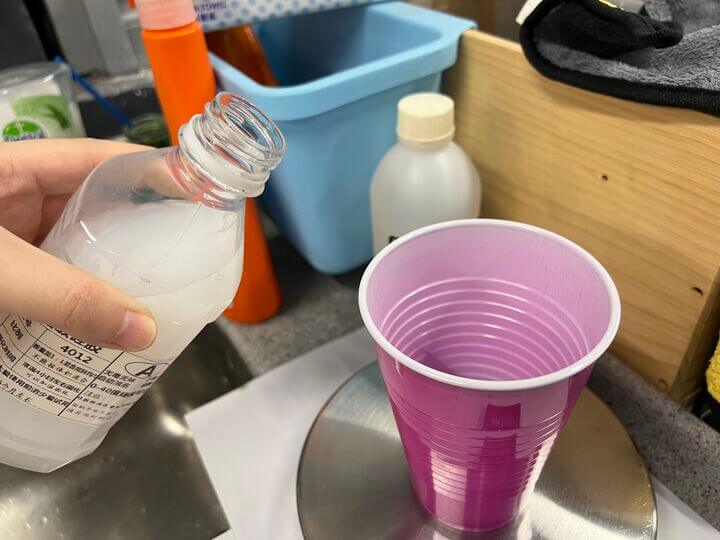
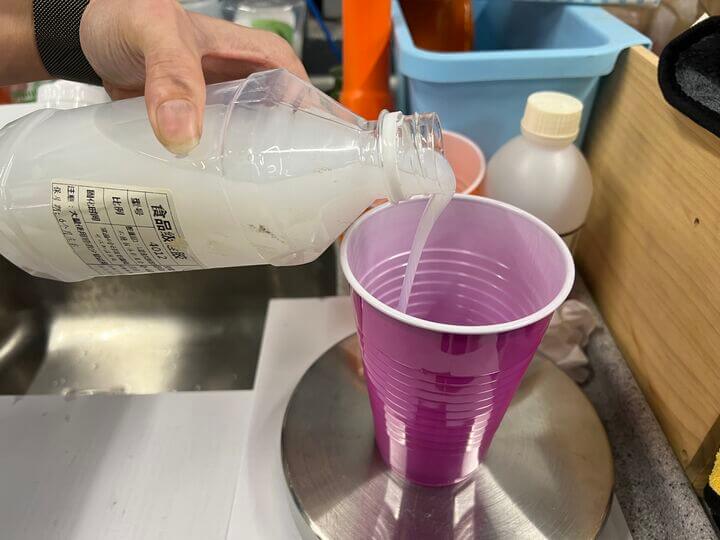
Then pour out the silicone slowly to make sure there won’t be a lot of bubbles.
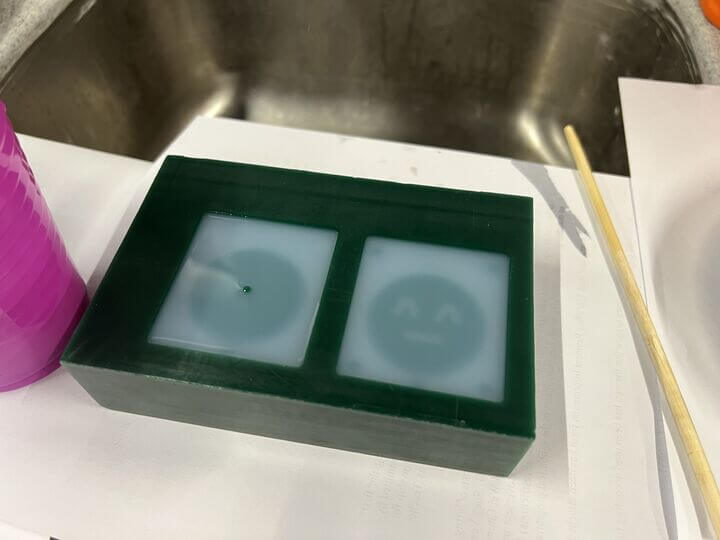
After around 1 day, here is the result.
I forgot to wear my gloves on, so I wash with water and wipe with alcohol. I should wear it next time, I must… I am still young.

Casting
Jelly
In first trial, I filled it with jelly. And because there are some tiny gaps, so I use tape to stick acrylic sheets with it.
Come out with a bad result.
Emmm…
RU-10 Epoxy
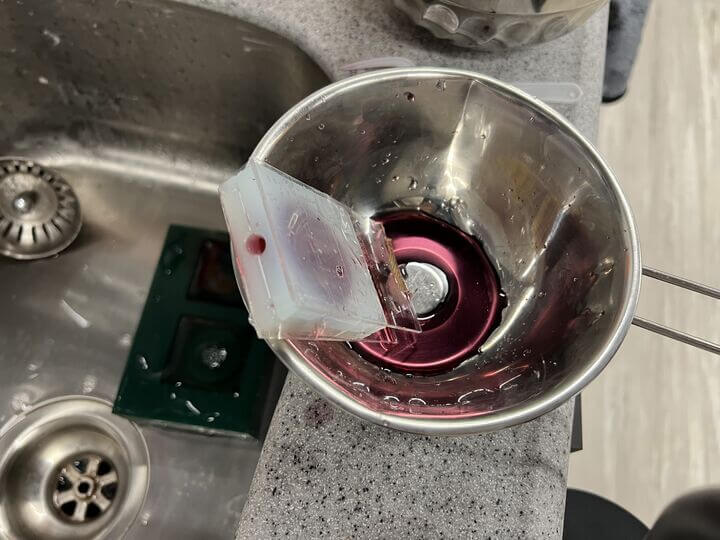
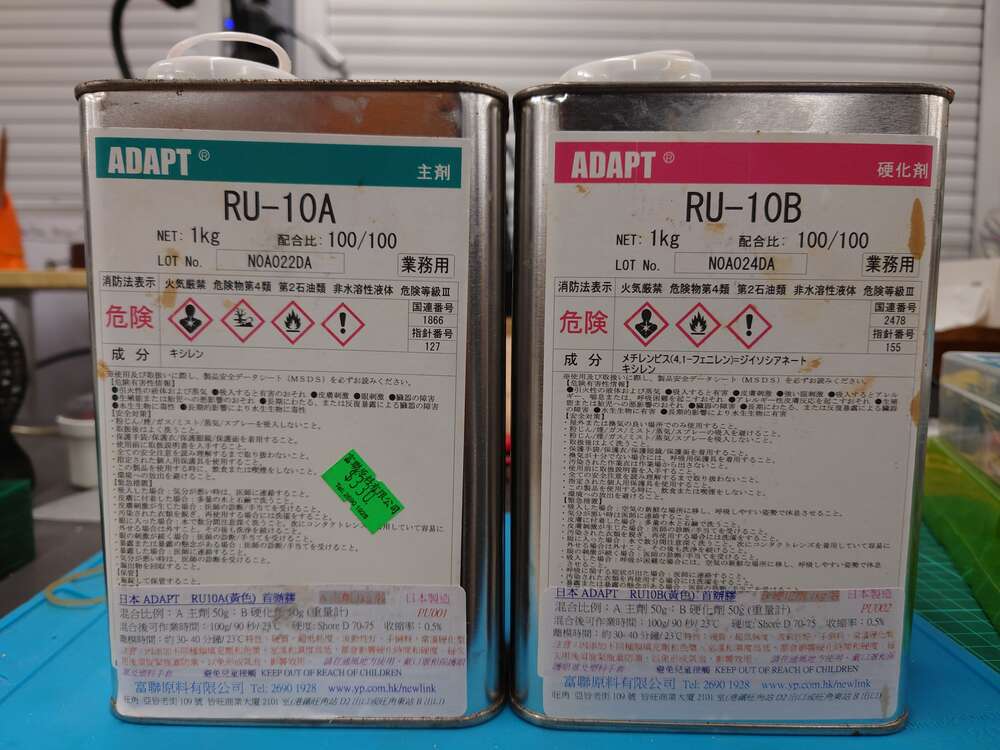
Then I also try with RU-10 Epoxy
Beware of the epoxy, it produces high temperature when A and B were mixed.
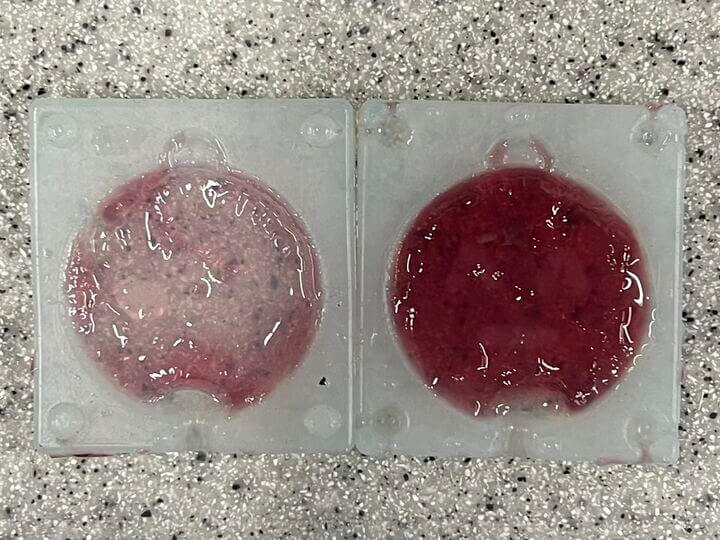
And fail for first trial.

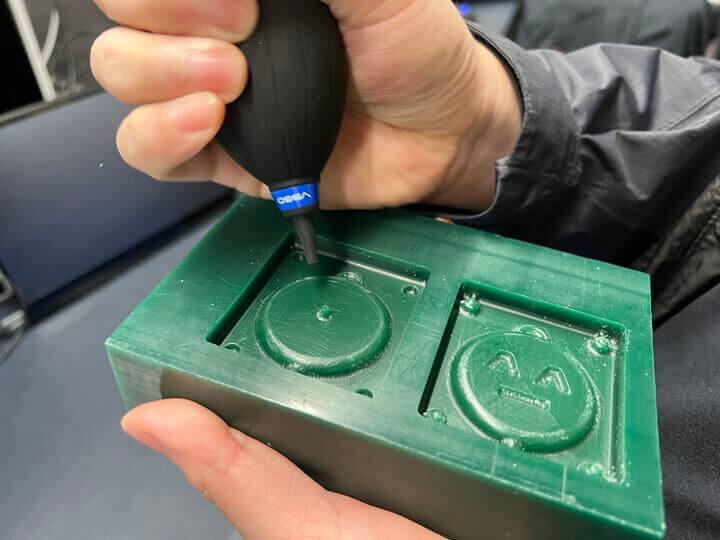
I found out that there are no air can come out when I pour the epoxy inside, so the epoxy cannot fully fill in.
Then I poke a hole for letting the air come out.
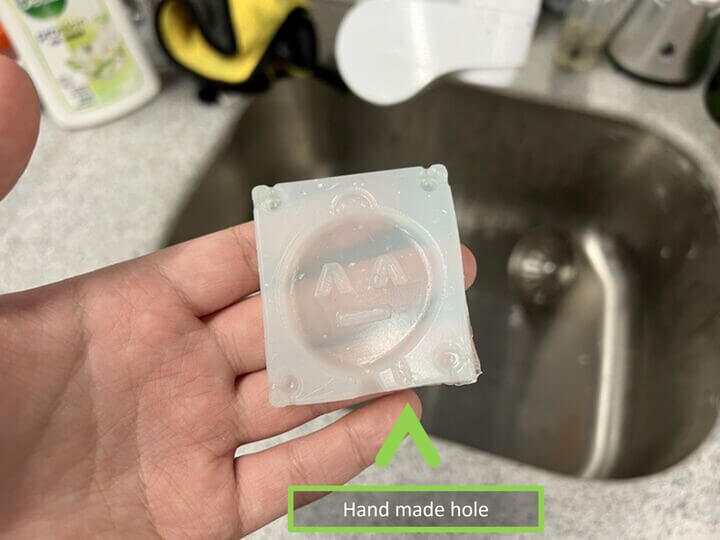
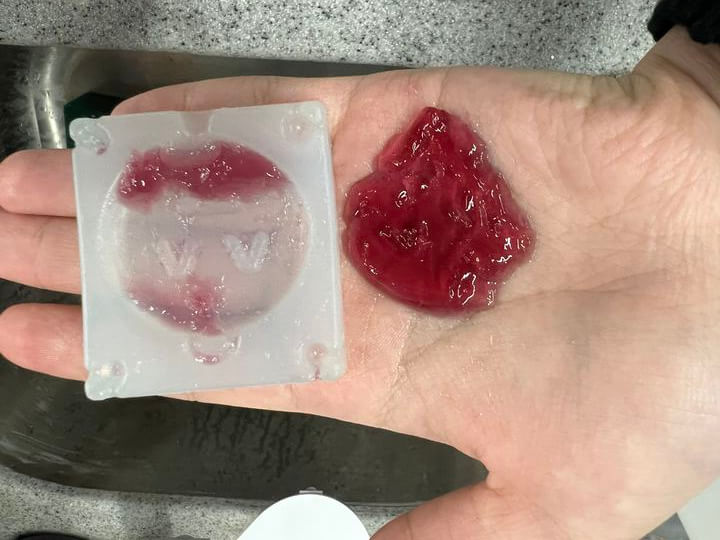
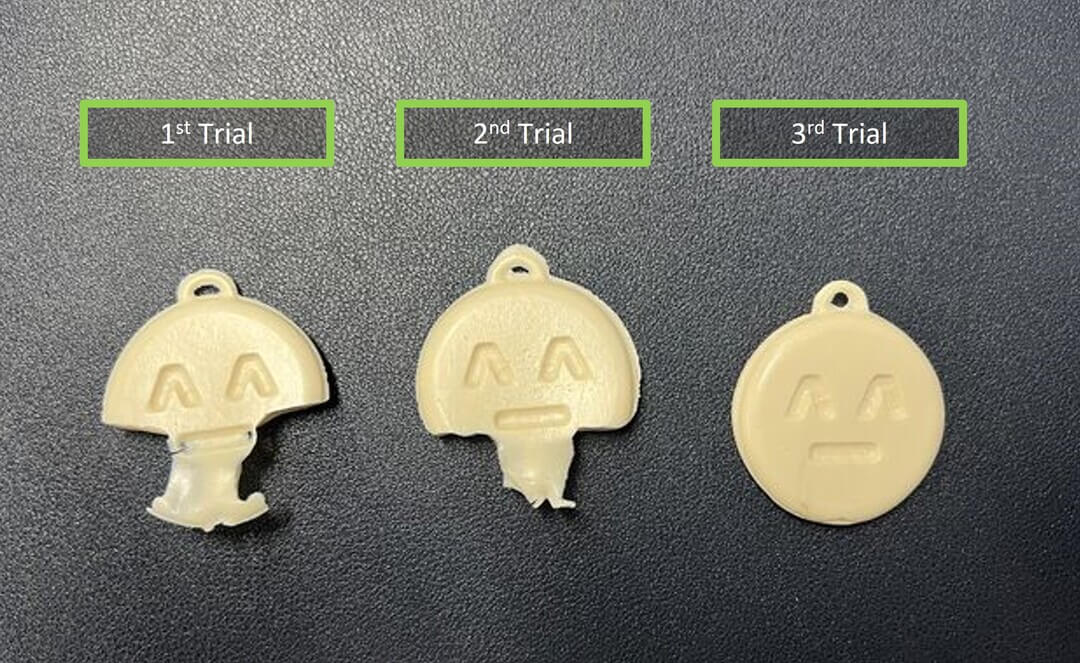
For the third trial, I successfuly made it. Then I removed the excess.
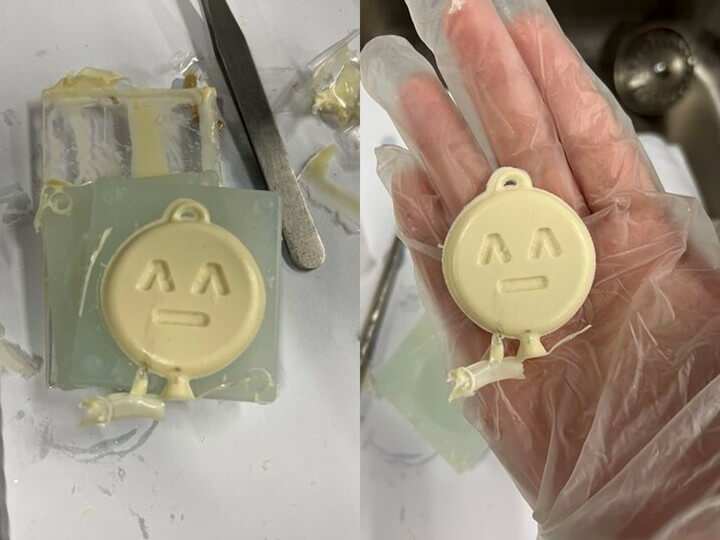
Looking perfect. ^^

It looks that someone bites at the 1st and 2nd trials. However, it success at the 3rd trial.
To Queenie, I’ve clean the place. Don’t worry that.
![]()
Downloads
Rounded Keyring - .f3d
Rounded Keyring Mould - .f3z (Google Drive)