Assembly
Enclosure done~~ Components done~~ PCB board done~~ Program done~~
Just one last thing, assemble all stuff together.
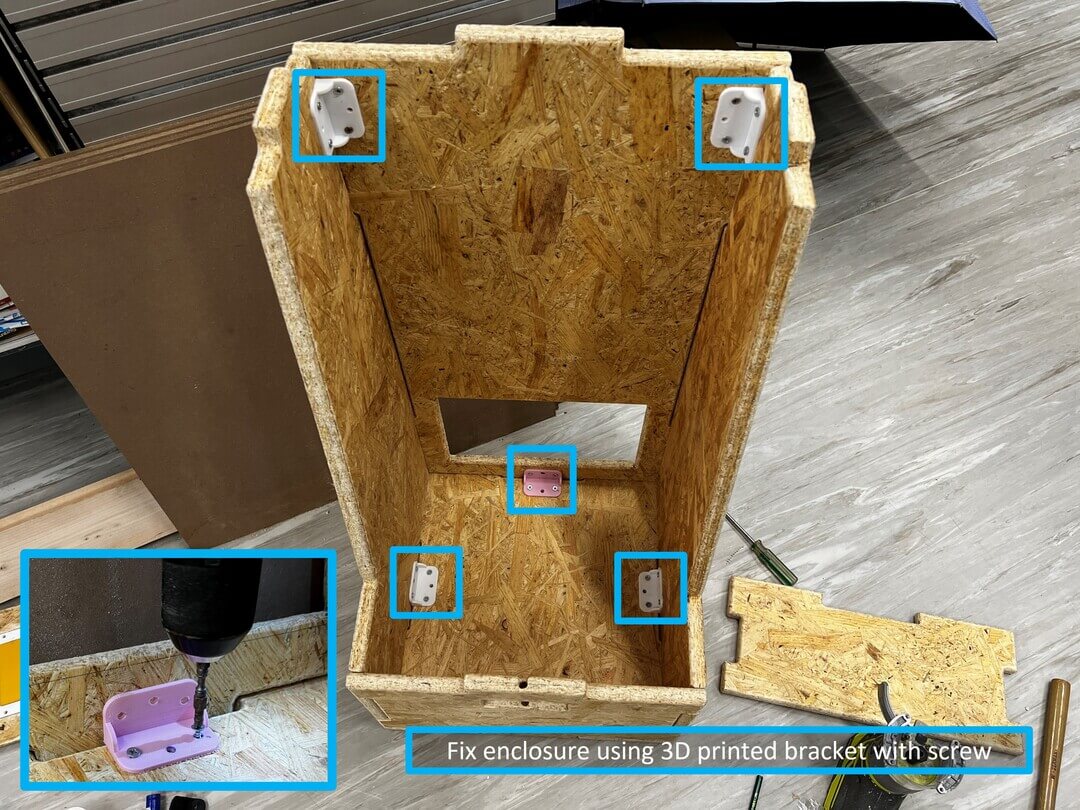
I’ve used 3D printed bracket with screws to fix most of the enclosure, the panel and the top were not fixed together, just jointed them.
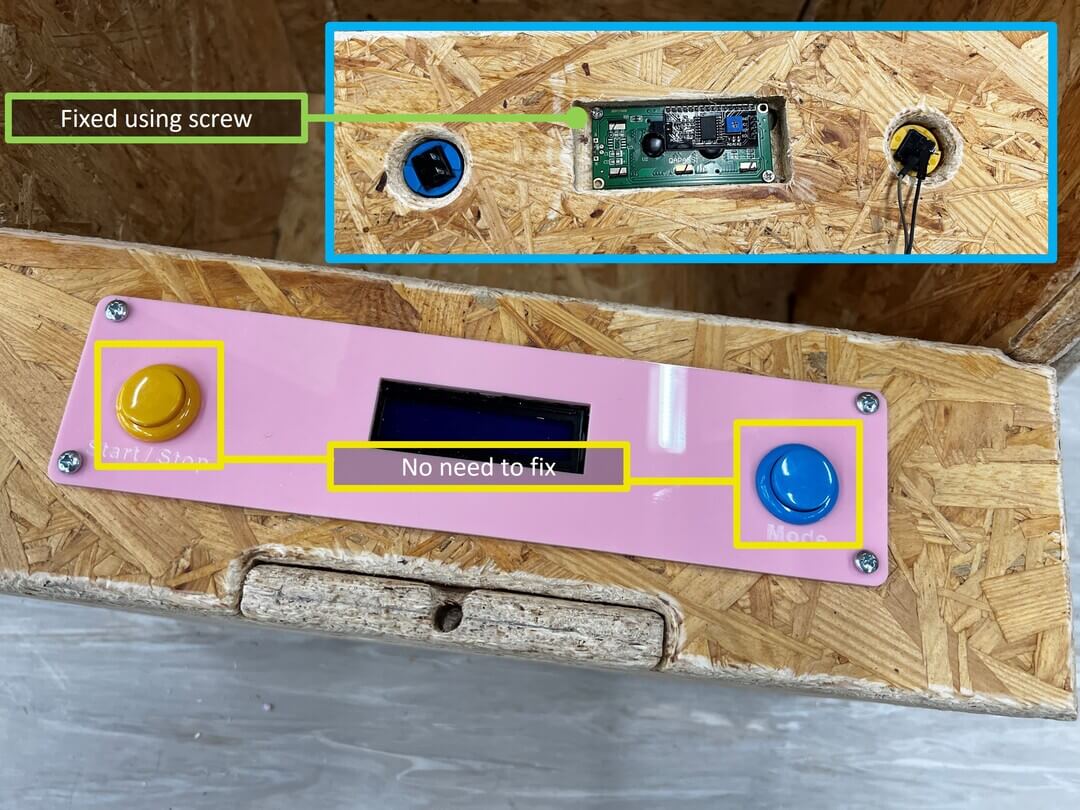
On the panel, the panel cover and the IC2 LCD were fixed with screws. The buttons were joined into the panel instead of fixing it.
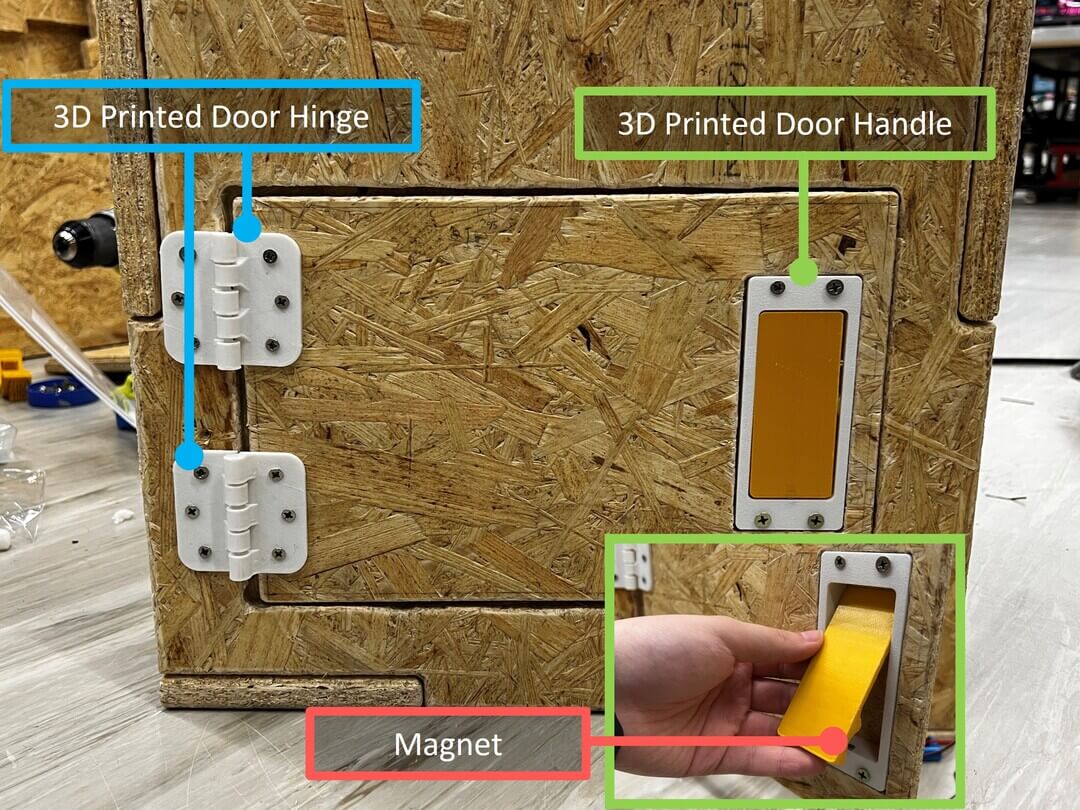
On the backdoor for the maintenance, I used 3D printing to make the door hinges and door handle with magnet and fixed with screws.
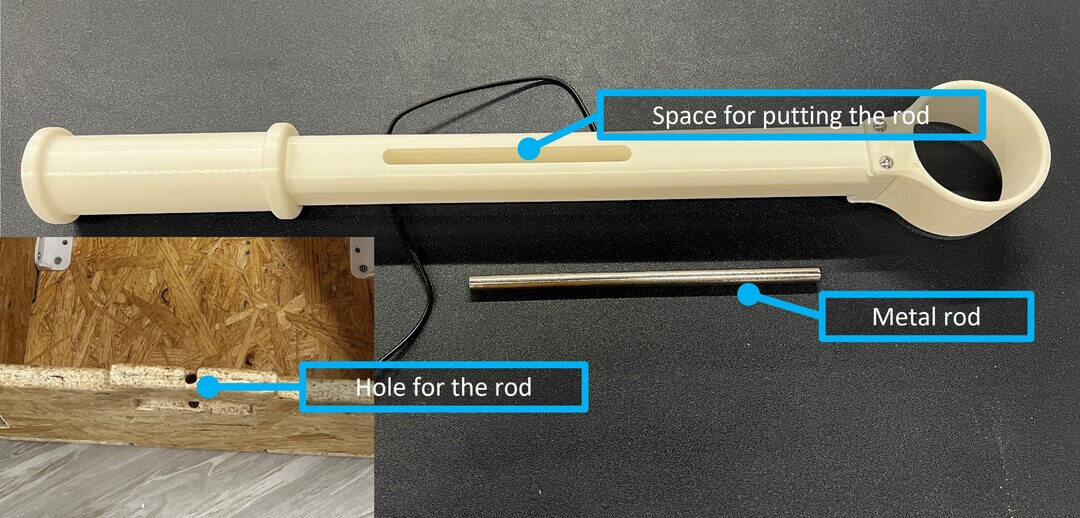
On the control stick, I left a space for putting the rod, and the rod is made of metal. The rod was cut perfectly enough to put it into the hole on the front enclosure.
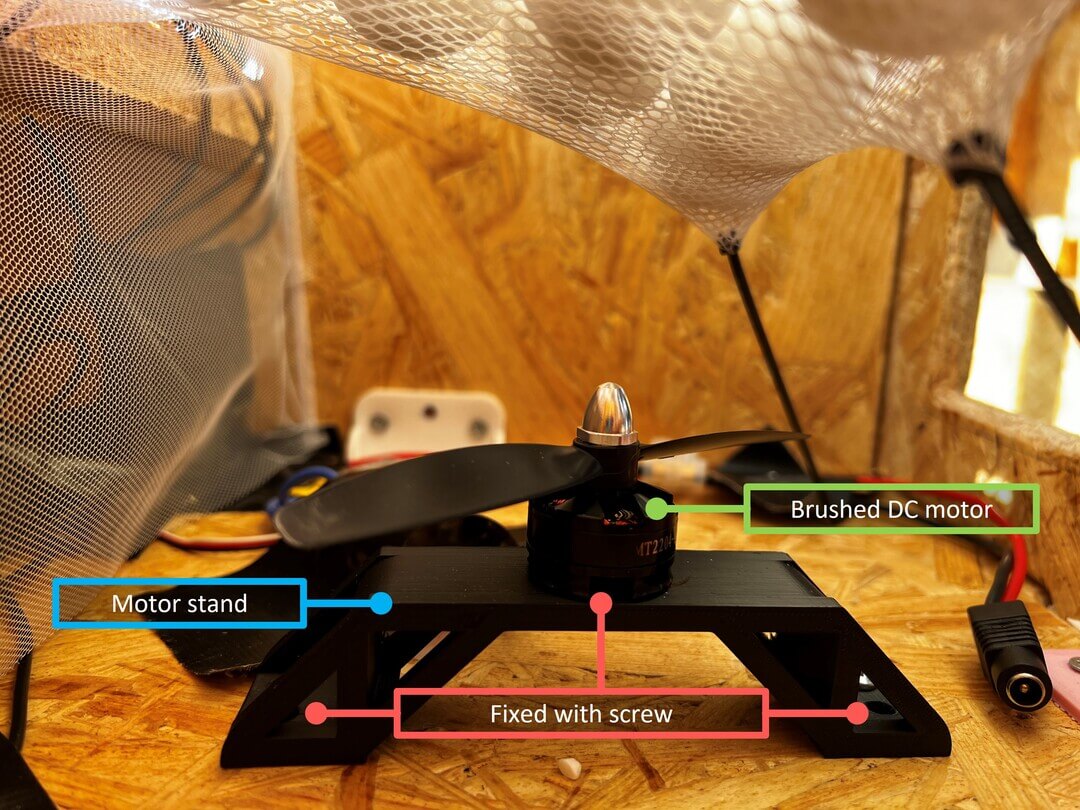
The motor was fixed on the 3D printed stand with screws, and I made sure that there were no wires in the air around the motor.
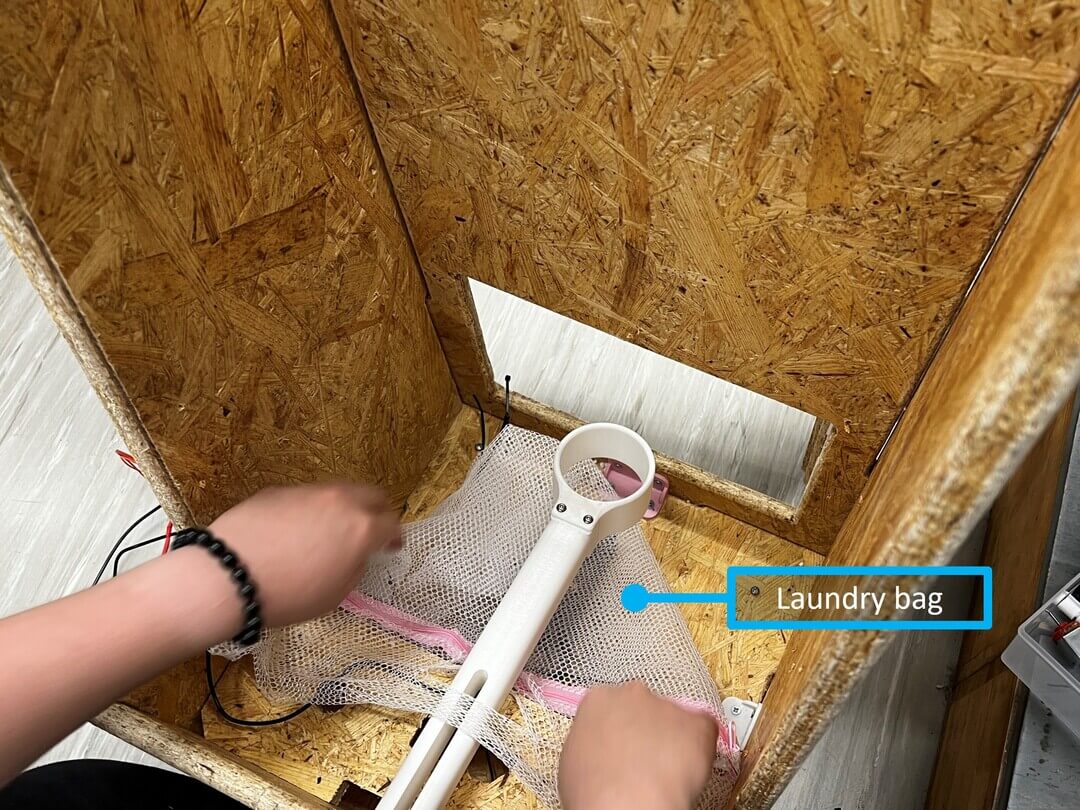
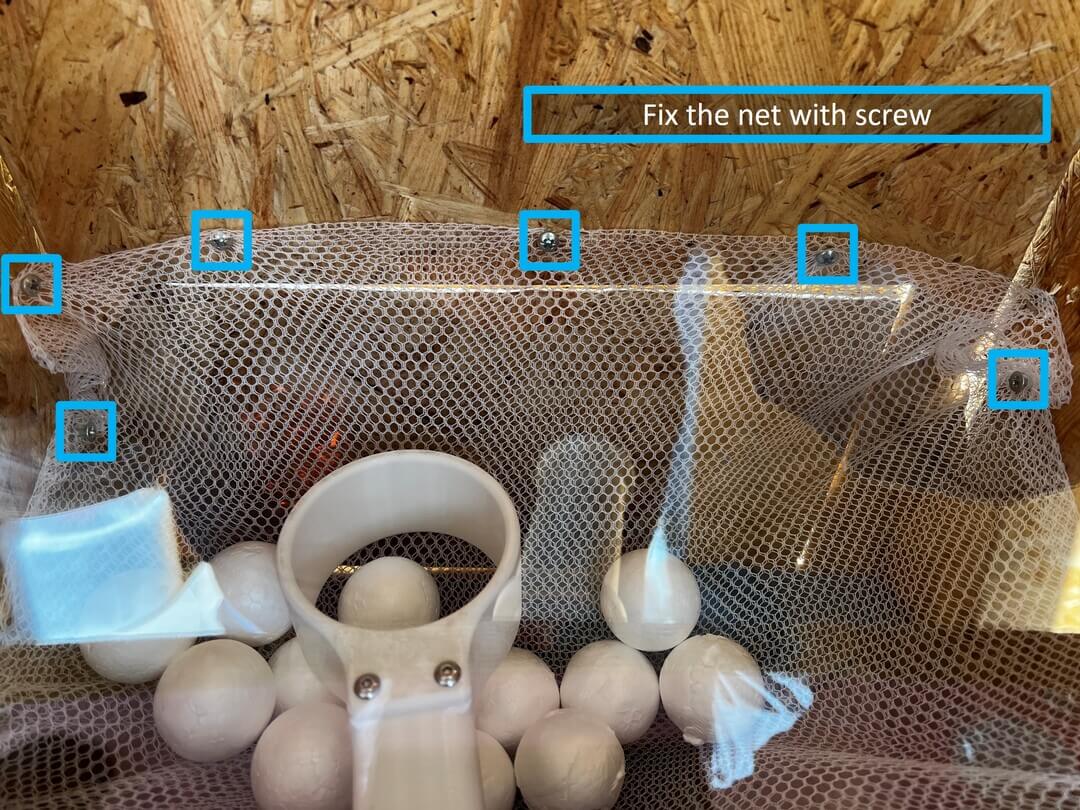
For the net that holds the balls, I choose to use a laundry bag and fixed the net with screws.
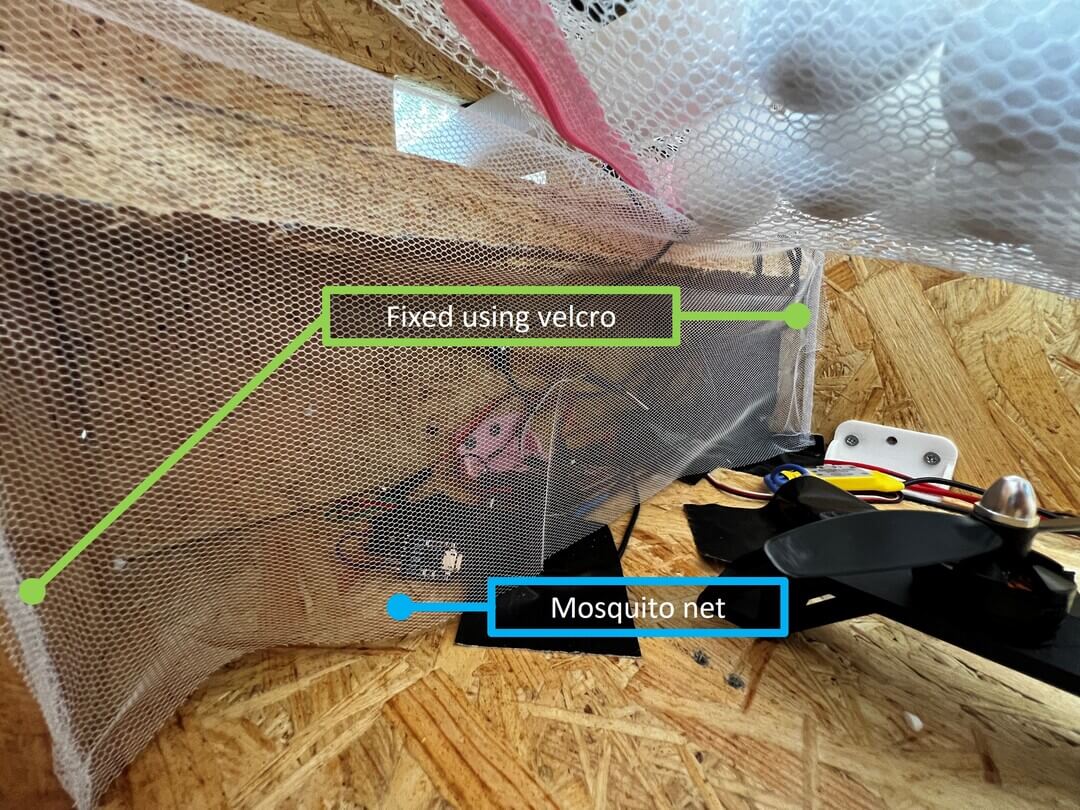
For safety, I’ve used a mosquito net to prevent the wires go near the motor. And the wires are mostly secured with duct tape.
After checking all wires were connected correctly, and nothing around the motor, Let’s operate it!
👏👏👏