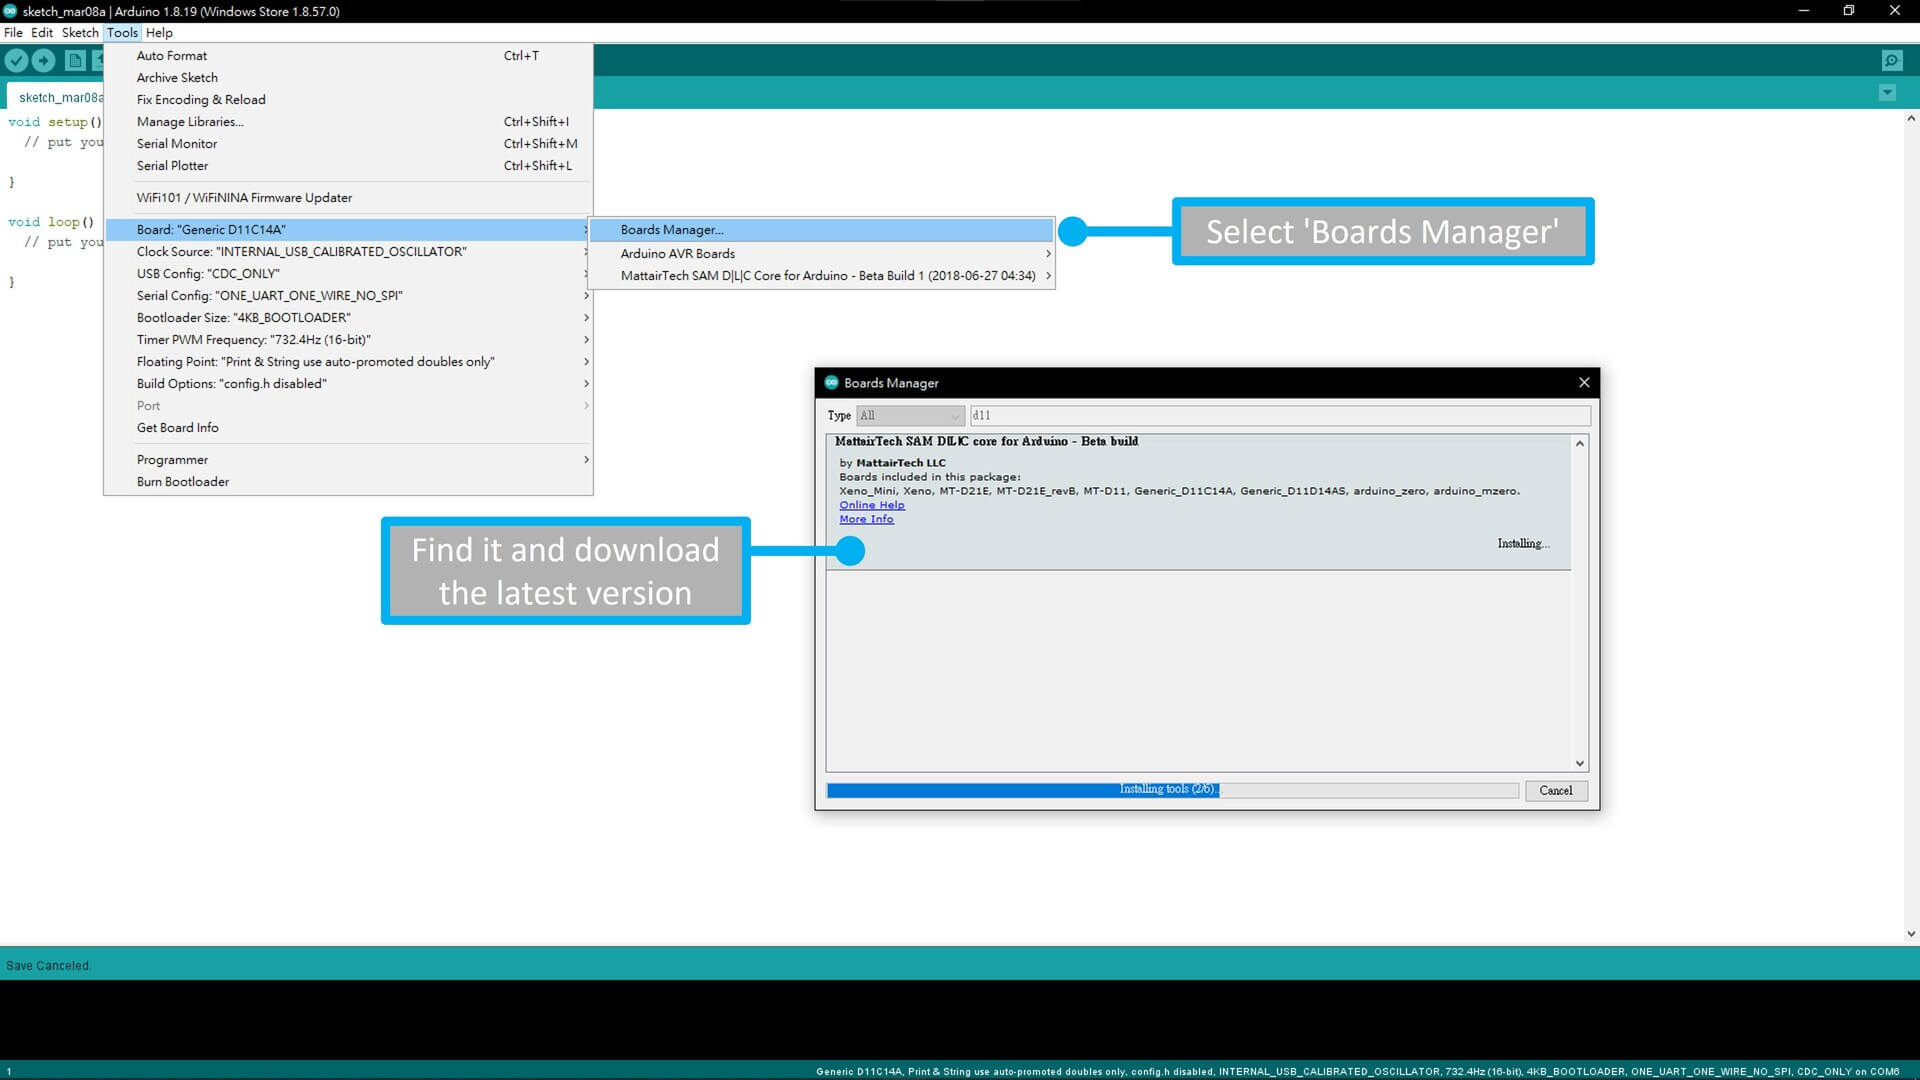
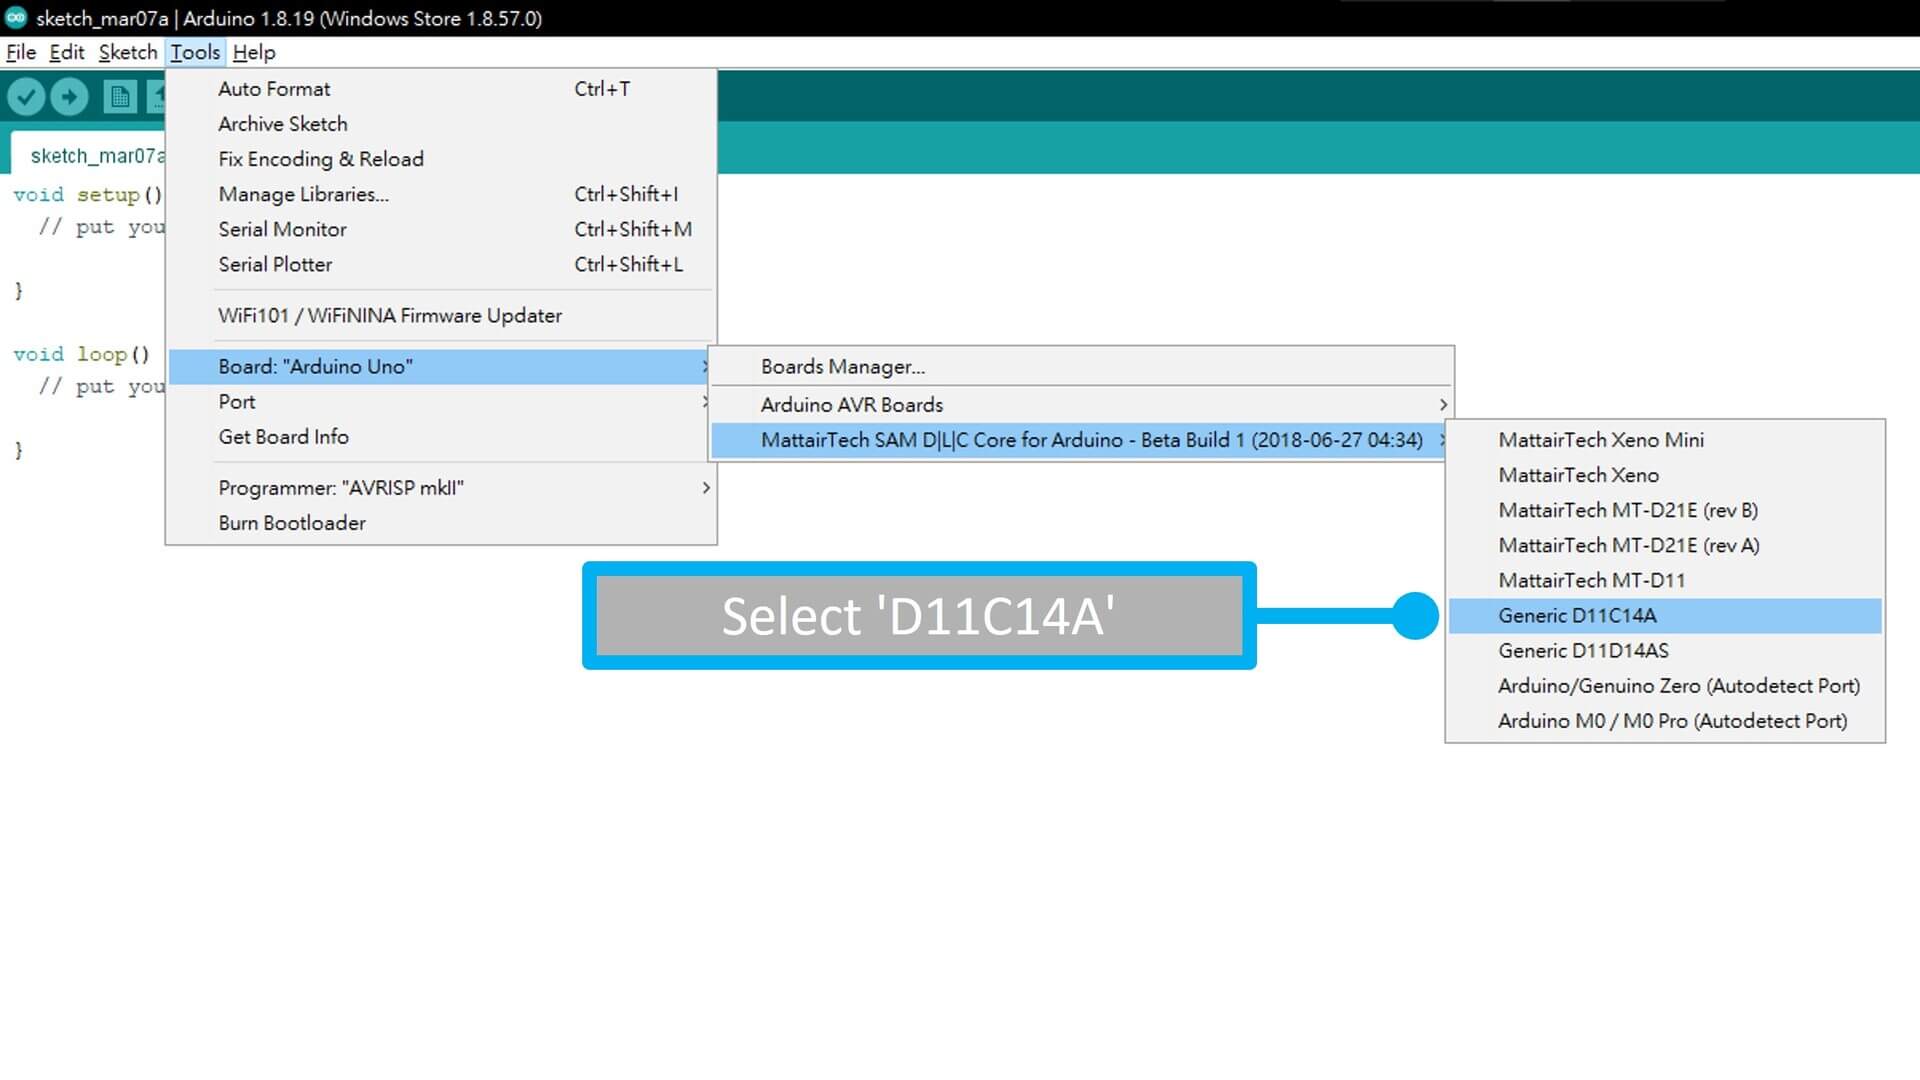
This week of group assignment, We try to compare the performance and development workflows for other architectures. Click HERE to see more detail of the group assignment.
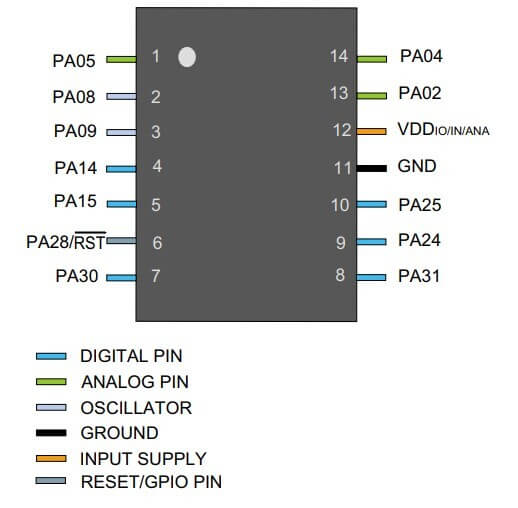
In the datasheet, I’ve read start from the ‘Table of Contents’. And browse the overview.
It will bring you to that page via clicking on the page number in the Table of Contents
Some contents are important, like the microchip pinout.
By reading the datasheet of my microcontroller, I have learned that:
- Some microcontroller does not have USB interface, like the main chip on micro:bit, it need to add another chip for doing the USB interface.
- There are diffent kind of pin type and amount, need to think carefully while choosing the chip to use
- Memory size limited the size of the program, choose a bigger flash size if your program size is large.
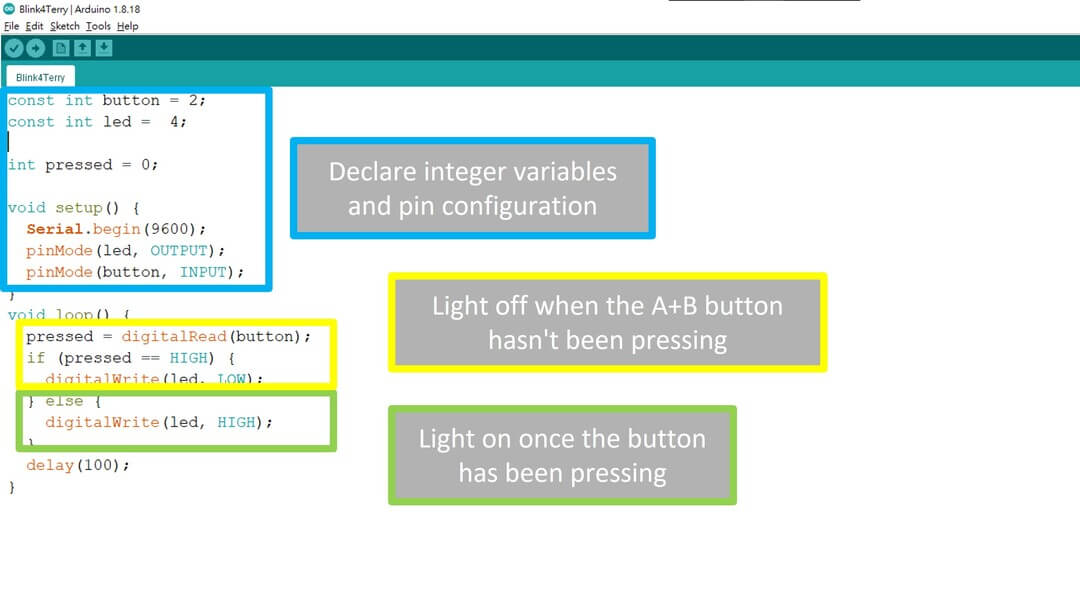
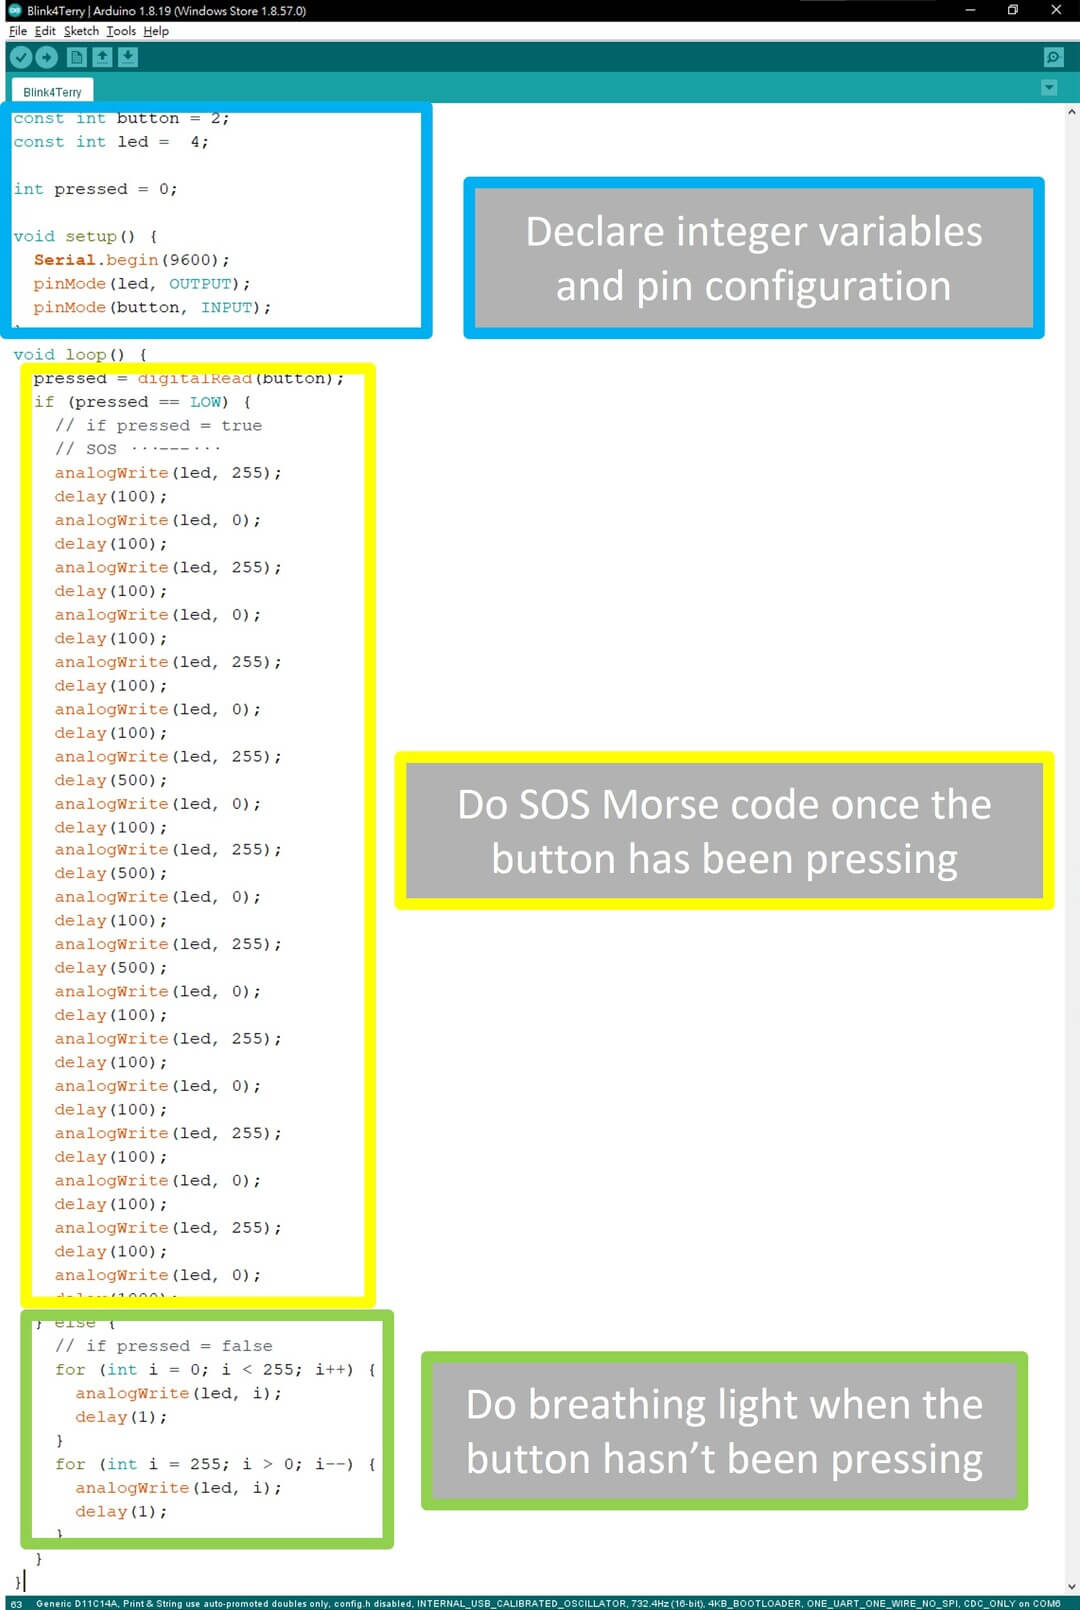
But the light on and off does not satisfy me, so I made a breathing and SOS light by using the ‘For’ statement according to For statement - zh-tw (Microsoft Docs)
constintbutton=2;constintled=4;intpressed=0;voidsetup(){Serial.begin(9600);pinMode(led,OUTPUT);pinMode(button,INPUT);}voidloop(){pressed=digitalRead(button);if(pressed==LOW){// if pressed = true// SOS ···---··· // Rico recommended to use Dot() Dash() to replace analogWrite()analogWrite(led,255);delay(100);analogWrite(led,0);delay(100);analogWrite(led,255);delay(100);analogWrite(led,0);delay(100);analogWrite(led,255);delay(100);analogWrite(led,0);delay(100);analogWrite(led,255);delay(500);analogWrite(led,0);delay(100);analogWrite(led,255);delay(500);analogWrite(led,0);delay(100);analogWrite(led,255);delay(500);analogWrite(led,0);delay(100);analogWrite(led,255);delay(100);analogWrite(led,0);delay(100);analogWrite(led,255);delay(100);analogWrite(led,0);delay(100);analogWrite(led,255);delay(100);analogWrite(led,0);delay(1000);}else{// if pressed = falsefor(inti=0;i<255;i++){analogWrite(led,i);delay(1);}for(inti=255;i>0;i--){analogWrite(led,i);delay(1);}}}
voidsetup(){pinMode(LED_BUILTIN,OUTPUT);}voidloop(){//Morse Code for SOSdot();dot();dot();delay(500);dash();dash();dash();delay(500);dot();dot();dot();delay(2000);}voiddash(){digitalWrite(LED_BUILTIN,HIGH);delay(1000);digitalWrite(LED_BUILTIN,LOW);delay(1000);}voiddot(){digitalWrite(LED_BUILTIN,HIGH);delay(200);digitalWrite(LED_BUILTIN,LOW);delay(200);}
And Zack gave me a link to his board’s code, Click Here to visit.
// Pin configconstintbutton=2;constintled=4;// values for morse code, https://morsecode.world/international/timing.htmlconstintunit=100;// base time unit for morse code, smaller is fasterconstintdot=unit;// same as dit (.)constintdash=unit*3;// same as dah (-)constintintra_char_space=unit;// the gap between dits and dahs within a characterconstintinter_char_space=unit*3;// the gap between the characters of a wordconstintword_space=unit*7;// the gap between two words// status values of buttonintpressed=0;voidsetup(){Serial.begin(9600);pinMode(led,OUTPUT);pinMode(button,INPUT);}// functions of breathing lightvoidbreathing(){for(inti=0;i<255;i++){analogWrite(led,i);delay(1);}for(inti=255;i>0;i--){analogWrite(led,i);delay(1);}}// functions of morse code// "_" is used for spaces in between words. Every char already ends with a inter_char_space of 3 time units.void_(){delay(word_space-inter_char_space);}voids(){// ...analogWrite(led,255);delay(dot);analogWrite(led,0);delay(intra_char_space);analogWrite(led,255);delay(dot);analogWrite(led,0);delay(intra_char_space);analogWrite(led,255);delay(dot);analogWrite(led,0);delay(inter_char_space);}voido(){// ---analogWrite(led,255);delay(dash);analogWrite(led,0);delay(intra_char_space);analogWrite(led,255);delay(dash);analogWrite(led,0);delay(intra_char_space);analogWrite(led,255);delay(dash);analogWrite(led,0);delay(inter_char_space);}voidloop(){pressed=digitalRead(button);if(pressed==LOW){// if pressed = true// SOS ···---···s();o();s();_();}else{// if pressed = falsebreathing();}}