Embedded Programming
Group Assignment
- Compare the performance and development workflows for other architectures
- Documented by Terry AU
Microcomputers
OSEPP™ Uno R4
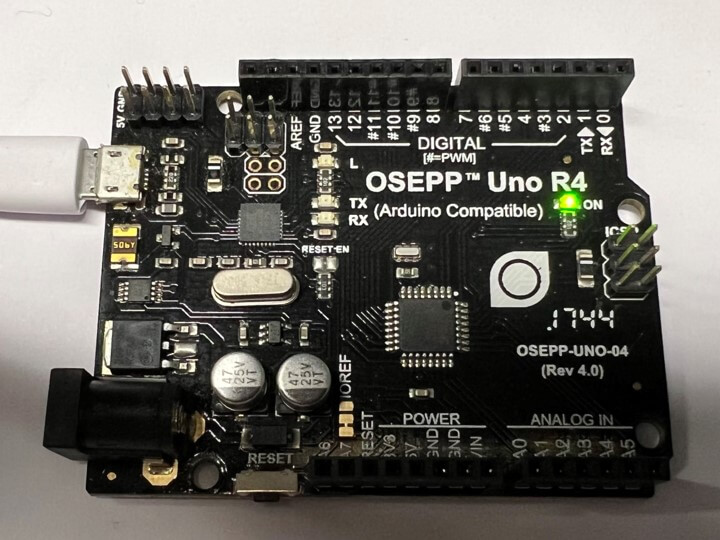
| Specification | |
|---|---|
| Microcontroller | ATmega328P (Datasheet) |
| Clock Speed | 16 MHz |
| Flash Memory | 32 KB |
| SRAM | 2 KB |
| Operating Voltage | 5V |
| Input Voltage | 6-12 V |
| Digital I/O Pin | 14 (including 6 for PWM output) |
| Analog Input Pin | 8 |
| Dimensions | 75.0 x 54.0 x 15.5 mm |
| Source | Schematic |
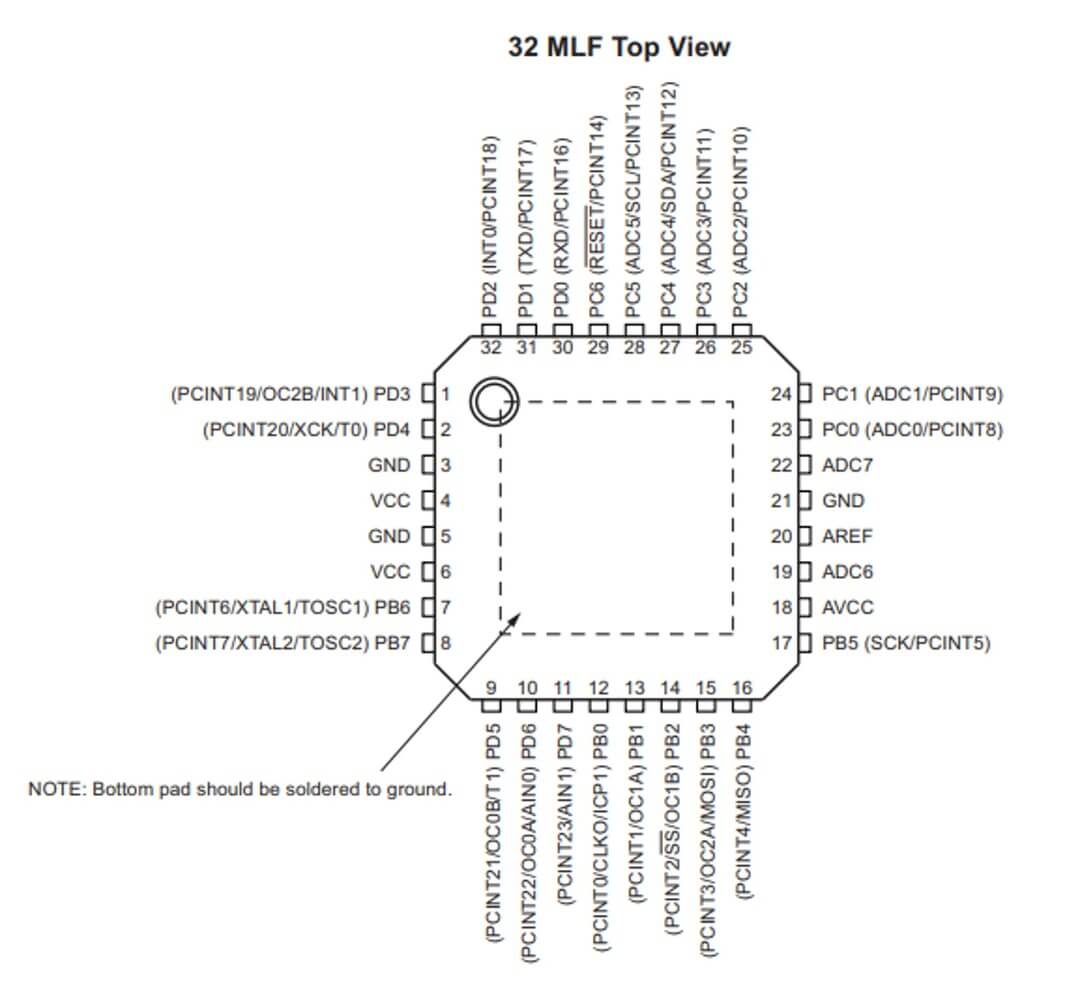
ATmega328P

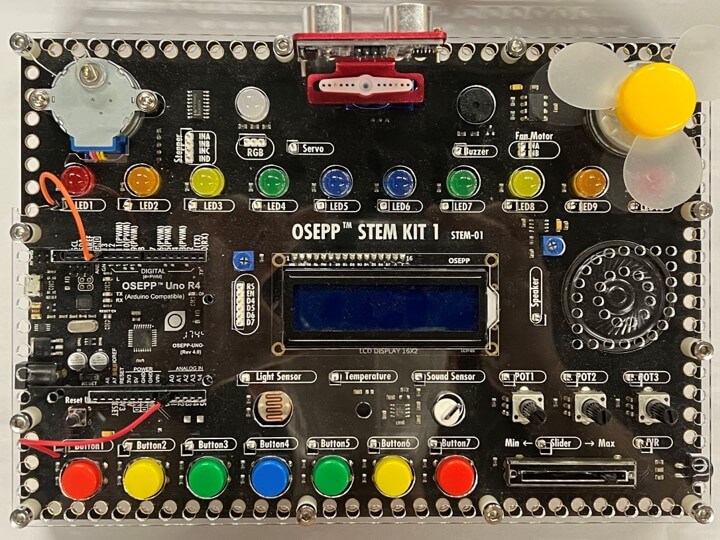
It has an all-in-one extension board that can get almost all basic input and output devices.
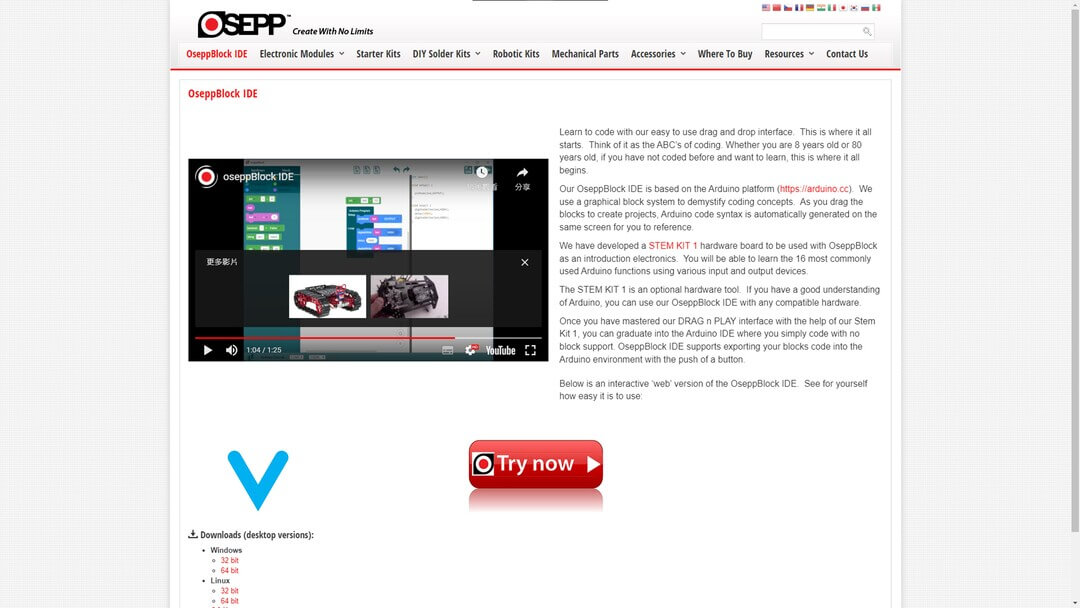
OseppBlock IDE
| Pros | Cons |
|---|---|
| Function based on the STEM KIT is available | UI and UX feels bad |
| C language preview available | Blocks only |
To program the board, it can either program by Arduino IDE or OseppBlock IDE. I’ve used OseppBlock IDE for this time.
Download the OseppBlock IDE first, then unzip the file then open the .exe file in the folder.
Then I can use the way of building puzzles/blocks to make code, it can build up the basic knowledge on logic training, but sometimes it is annoying to do something specifically.
You cannot modify it via programming language, although it can preview the C code.
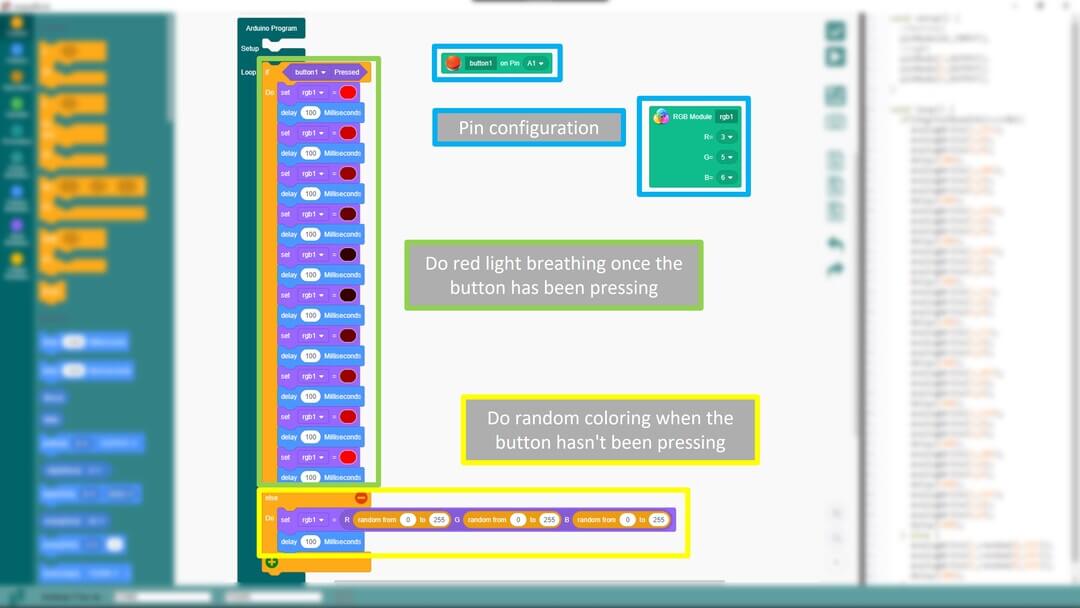
Then I made a simple program that will light random colors, and when I press the button, it will become a red light breathing.
Then I select the COM port and download it to the board.
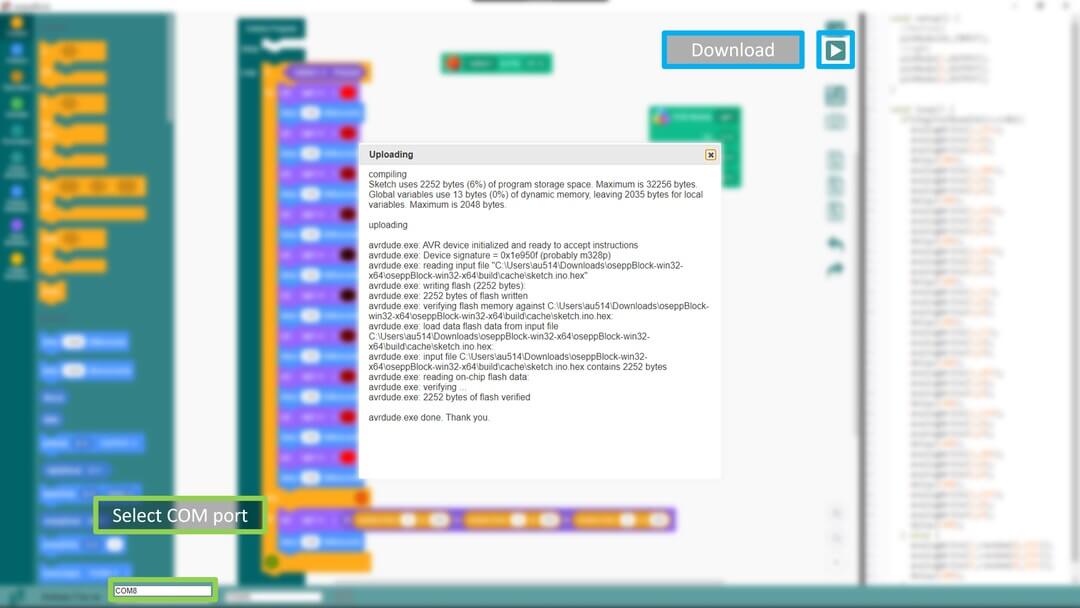
Result:
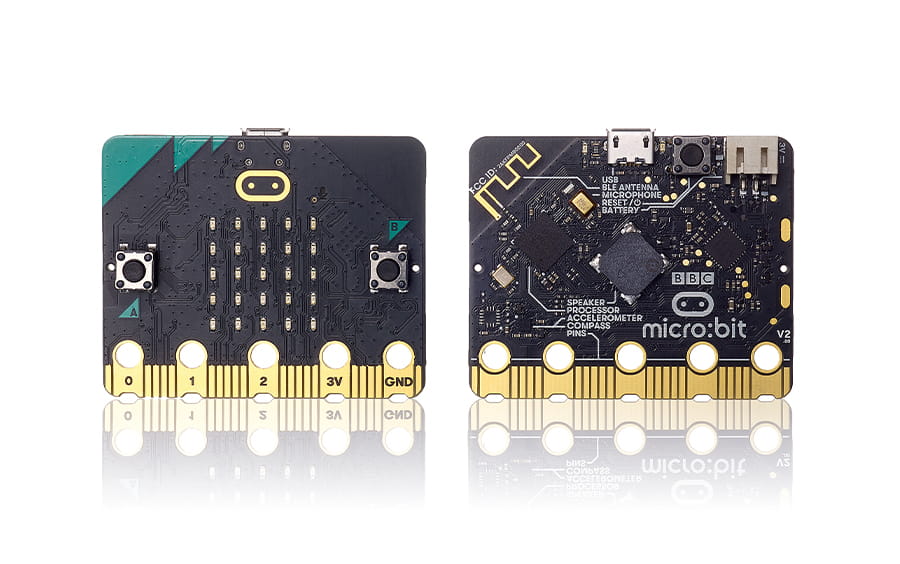
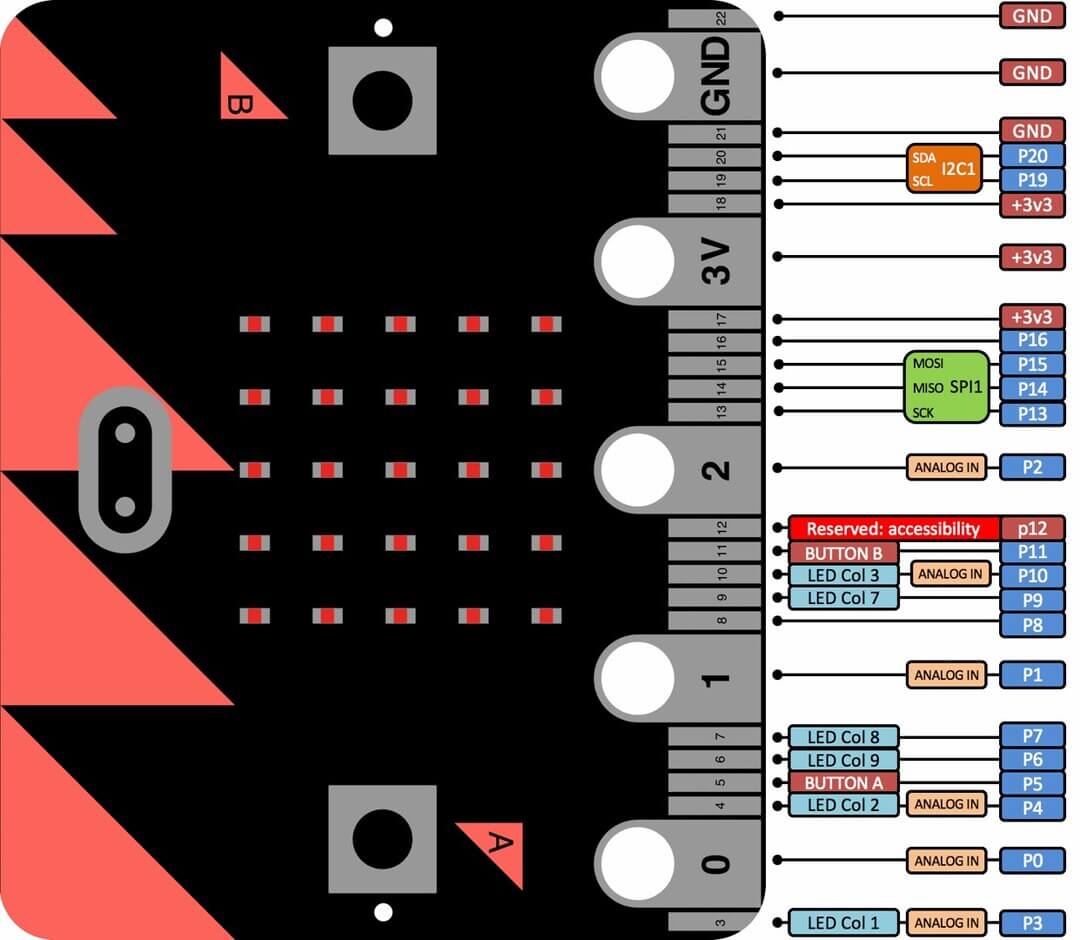
BBC micro:bit
| Specification | |
|---|---|
| Microcontroller | nRF52833 (Datasheet) |
| Clock Speed | 64MHz |
| Flash ROM | 512KB |
| RAM | 128KB |
| Operating Voltage | 1.8V .. 3.6V |
| Input Voltage | 3-5 V |
| Dimensions | 51.60 x 42.00 x 11.65 mm |
| Source | Schematic |
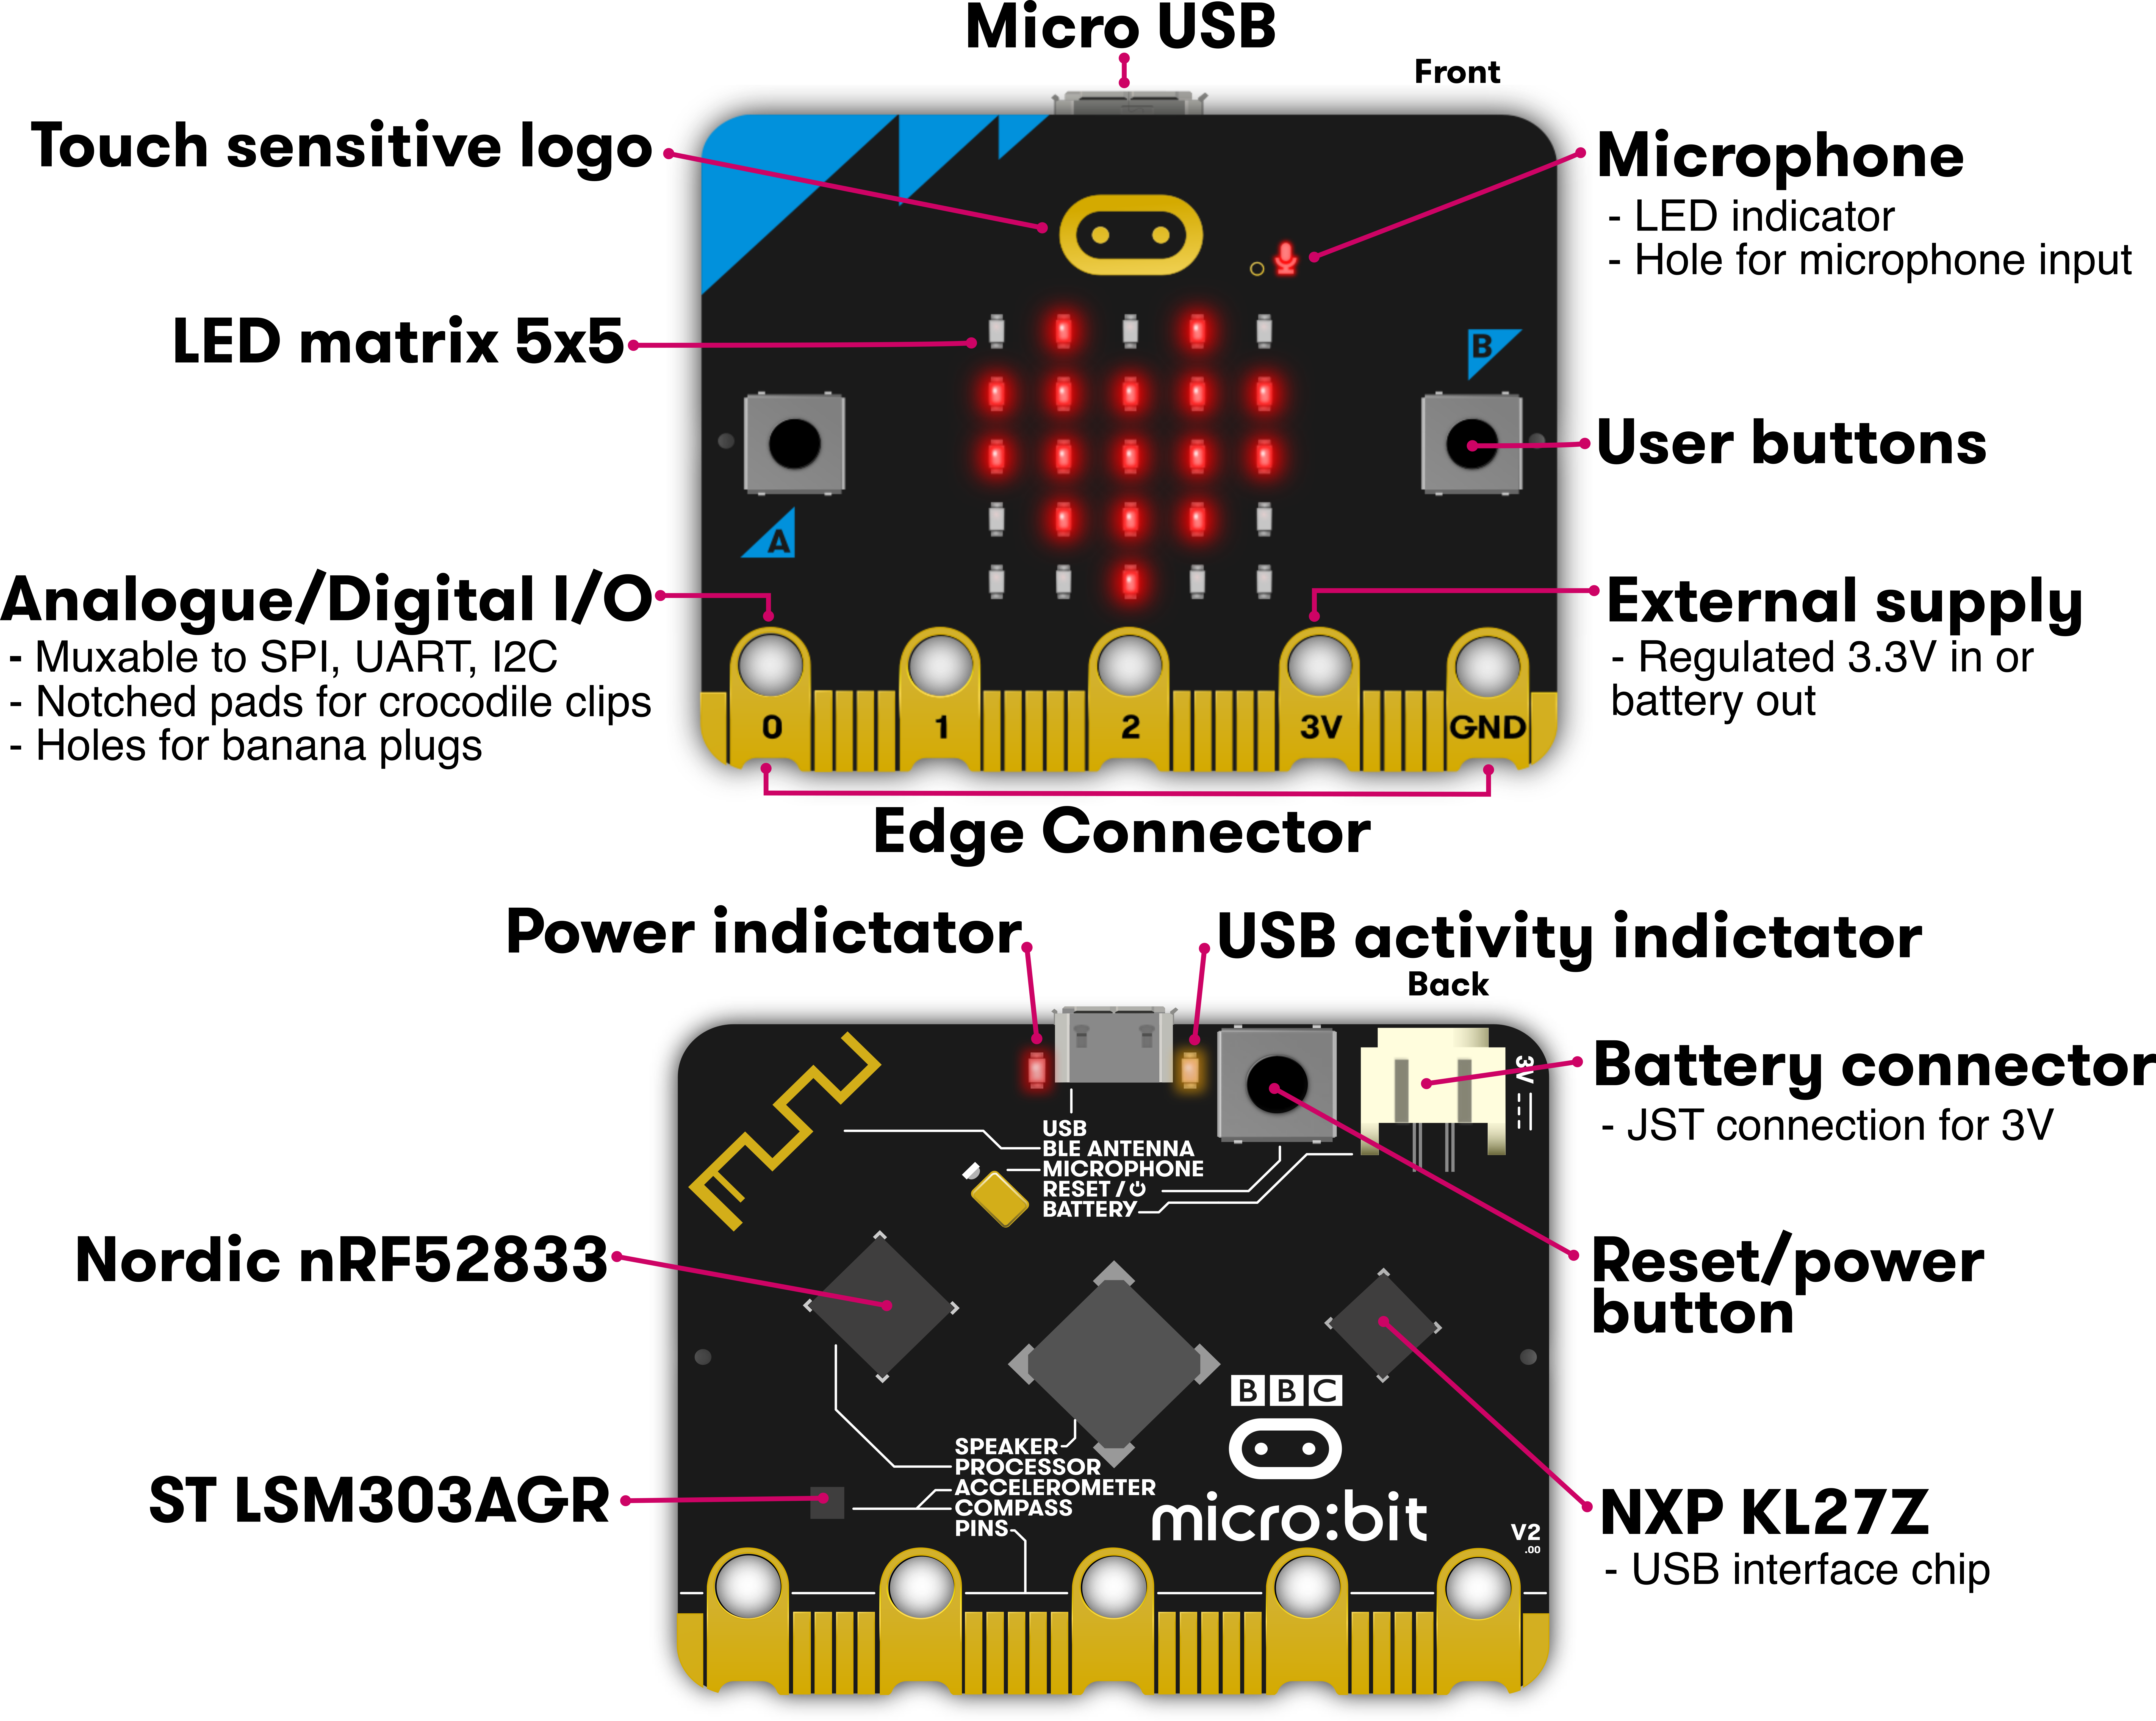

nRF52833


It has an extension board that can let users do more customize things, but I won’t use it this time.
Microsoft MakeCode for micro:bit
| Pros | Cons |
|---|---|
| Two programming language available, Python and Javascript | C language is not available |
| A lot of official tutorial which help you code step by step | Only mirco:bit board is usable |
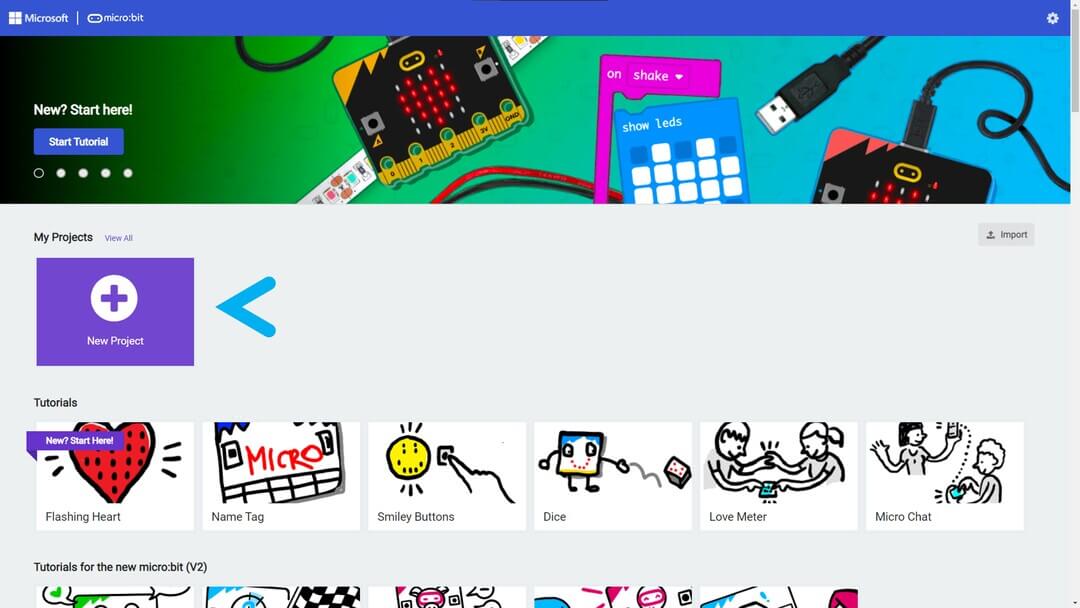
There is a web or software version to program the microbit. I’ve used the web version to make the code. Click Here to visit.
No login is required. Then click ‘New project’ to start a new workspace.
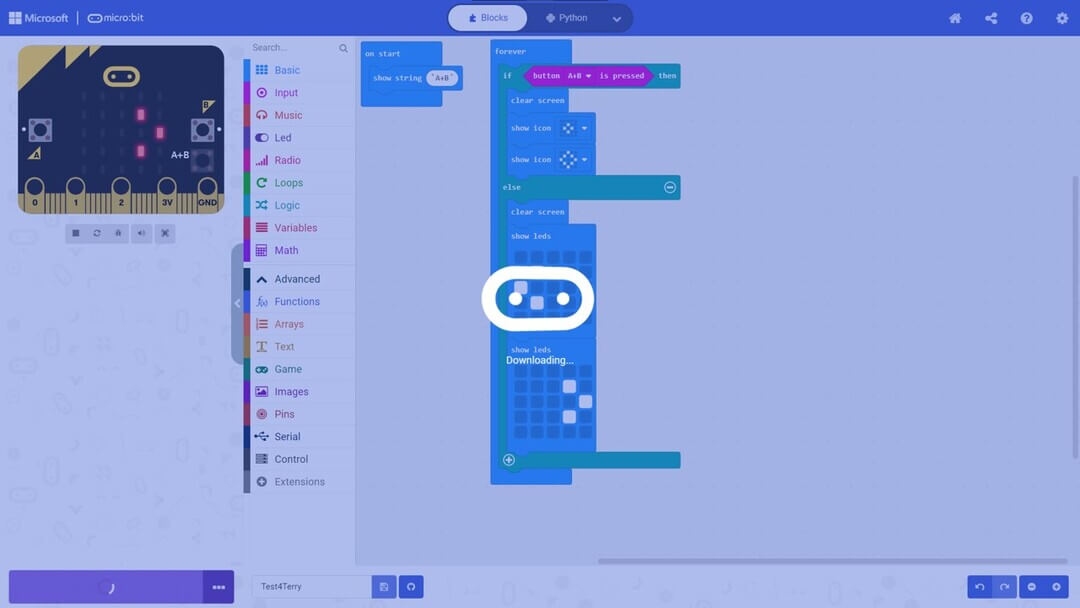
There are multi ways to program your code: Blocks, JavaScript and Python.
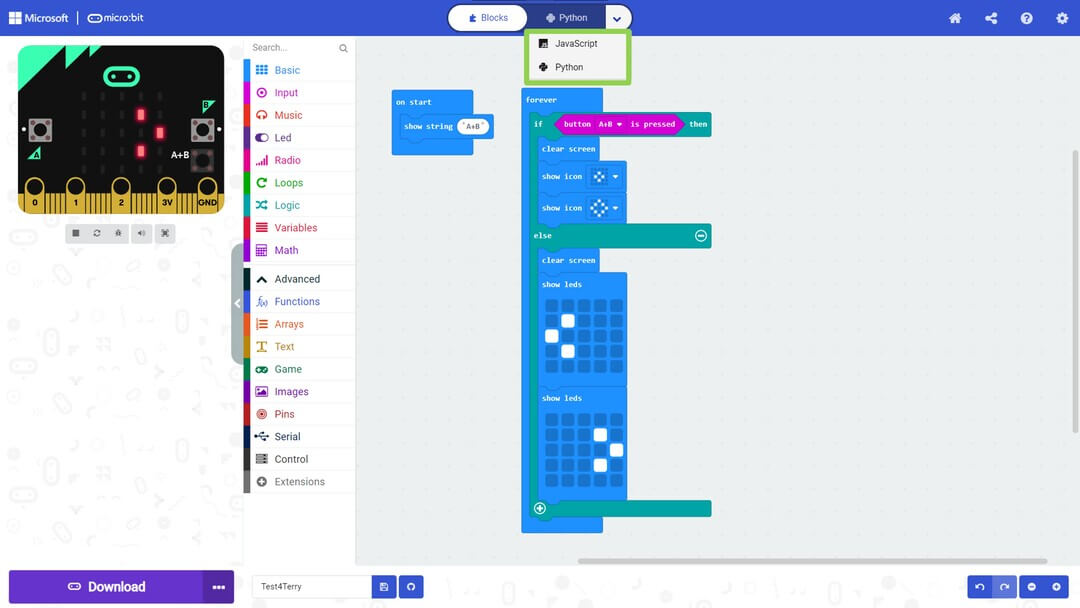
So if the A and B button has been pressed, the led will do a blinking diamond, then if isn’t, then do ‘<’ and ‘>’ icon.
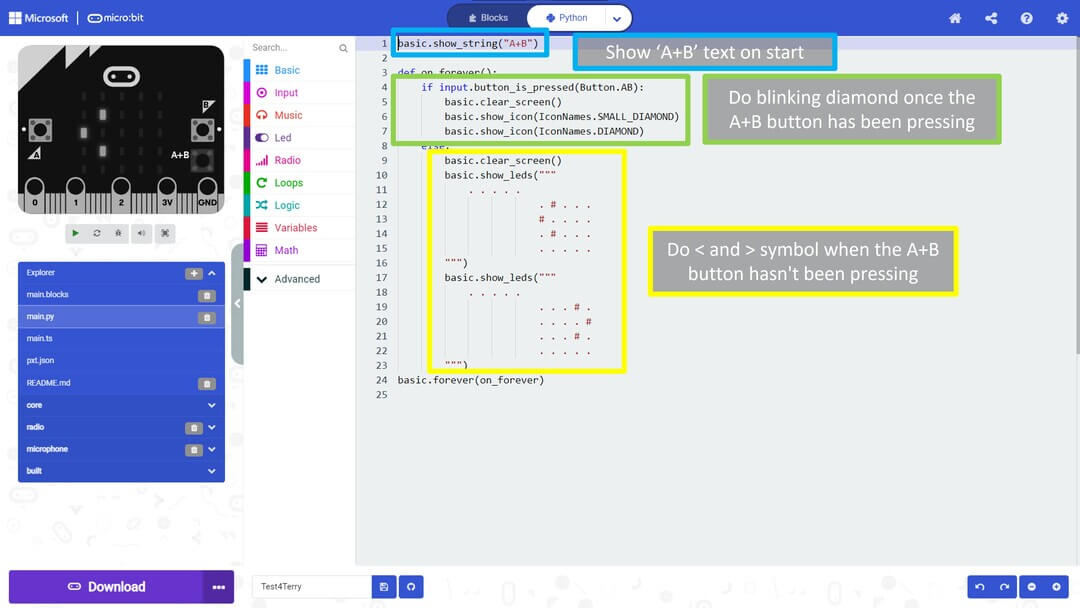
After finishing the codes, click the left bottom ‘Download’ button to send the codes to the board.
Result:
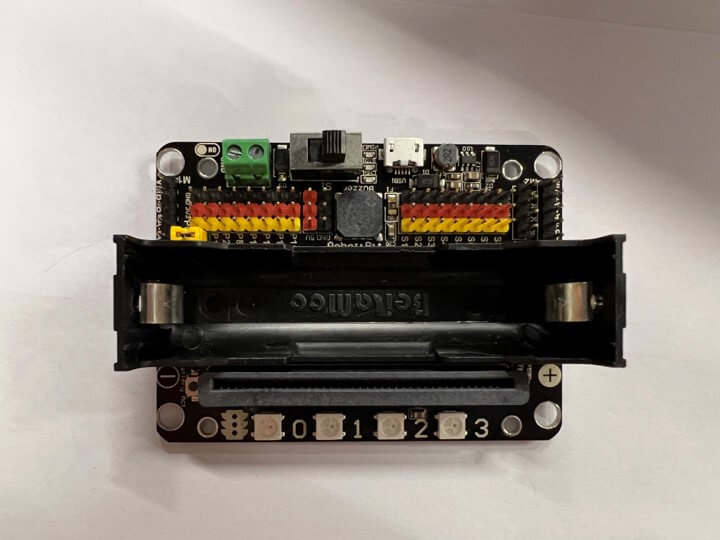
Blink4Terry
| Specification | |
|---|---|
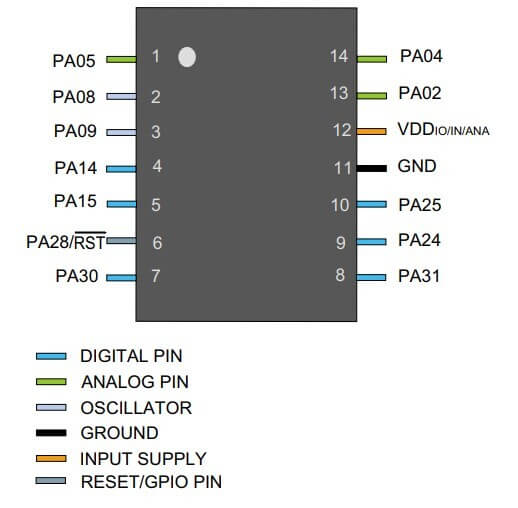
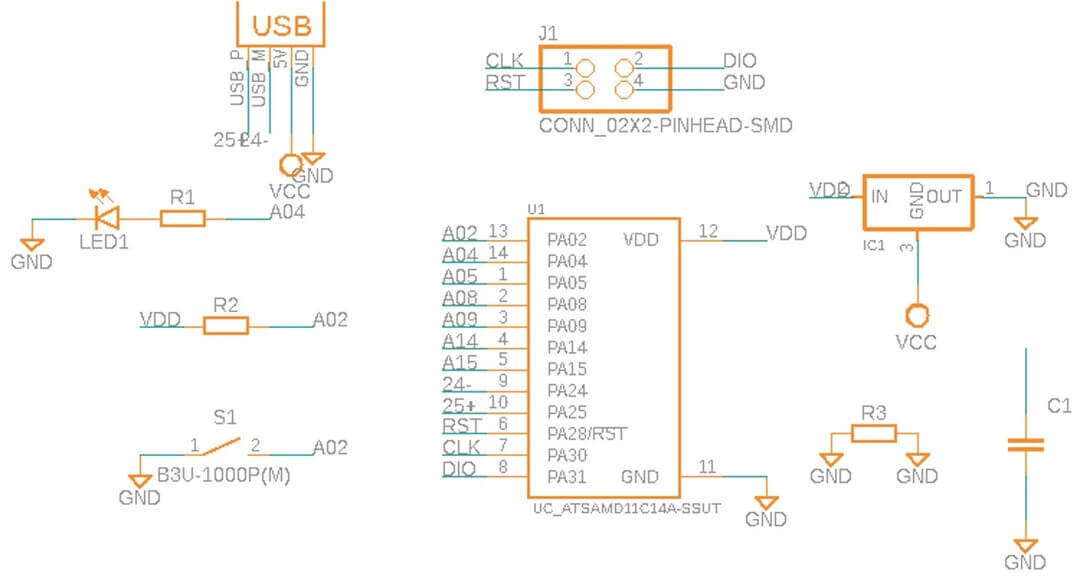
| Microcontroller | Atmel SAMD11C14A |
| Clock Speed | 48MHz |
| Flash Memory | 16KB |
| SRAM | 4KB |
| Operating Voltage | 1.62V – 3.63V |
| Input Voltage | 3.3 - 5V |
| Source | Schematic |
Atmel SAMD11C14A
Arduino IDE
| Pros | Cons |
|---|---|
| A lot of sample codes and easy to modify | C language only |
| Support board that is not Arudion board | The code highlighting sometimes go wrongly |
I made a simple light on and off code:
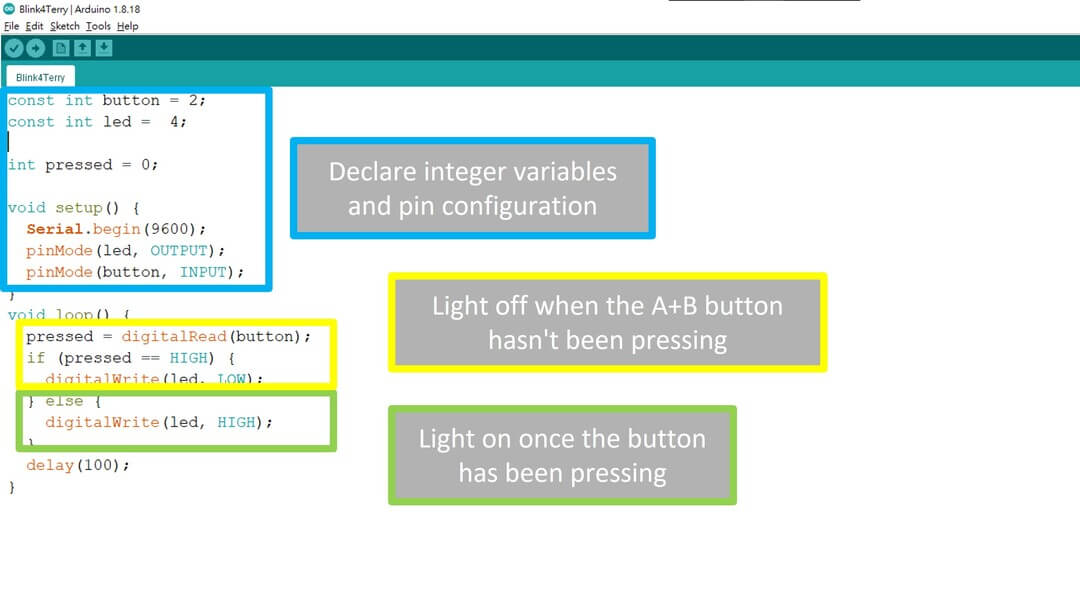
| C++ | |
|---|---|
Result:
Advance (for loop)
But the light on and off does not satisfy me, so I made a breathing and SOS light by using the ‘For’ statement according to For statement - zh-tw (Microsoft Docs)
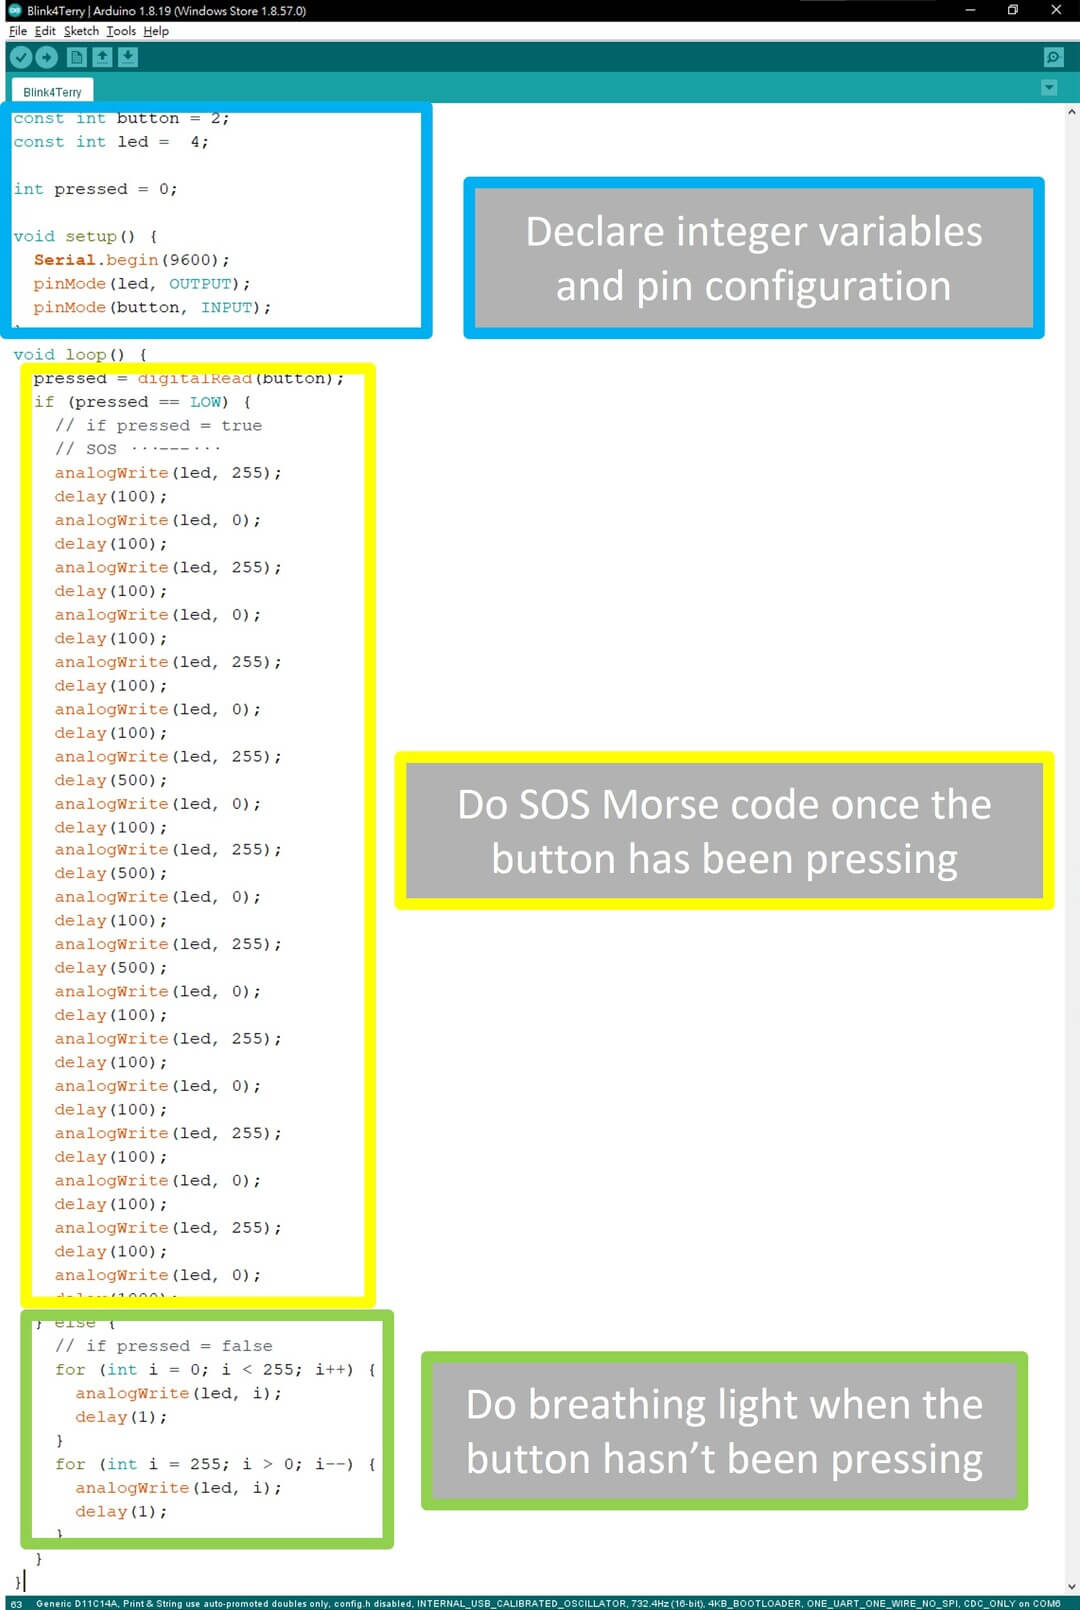
Result:
Downloads
Latest Blink4Terry code - .ino