Computer Controlled Cutting
Group Assignment
- Characterize your lasercutter’s focus, power, speed, rate, kerf, and joint clearance
- Document by Terry AU
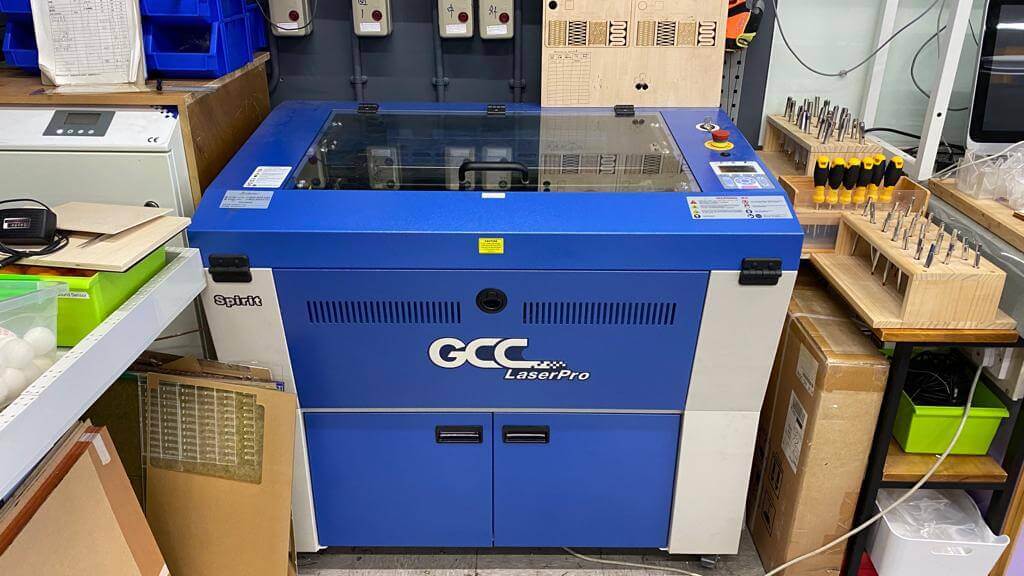
Fablab iSPACE’s Laser cutting tool
The lasercutter that mainly using in our lab is GCC LaserPro Spirit, User Manual
| Specification | |
|---|---|
| Work Area | 640 x 460 mm |
| Laser Source | 12-100W 10.6-μm sealed CO2 Laser |
| Speed Control | 0.1-100% (Adjustable) |
| Power Control | 1-100% (Adjustable) |
| Engraving Capability | 256-level gray scale |
| Source |
Focus
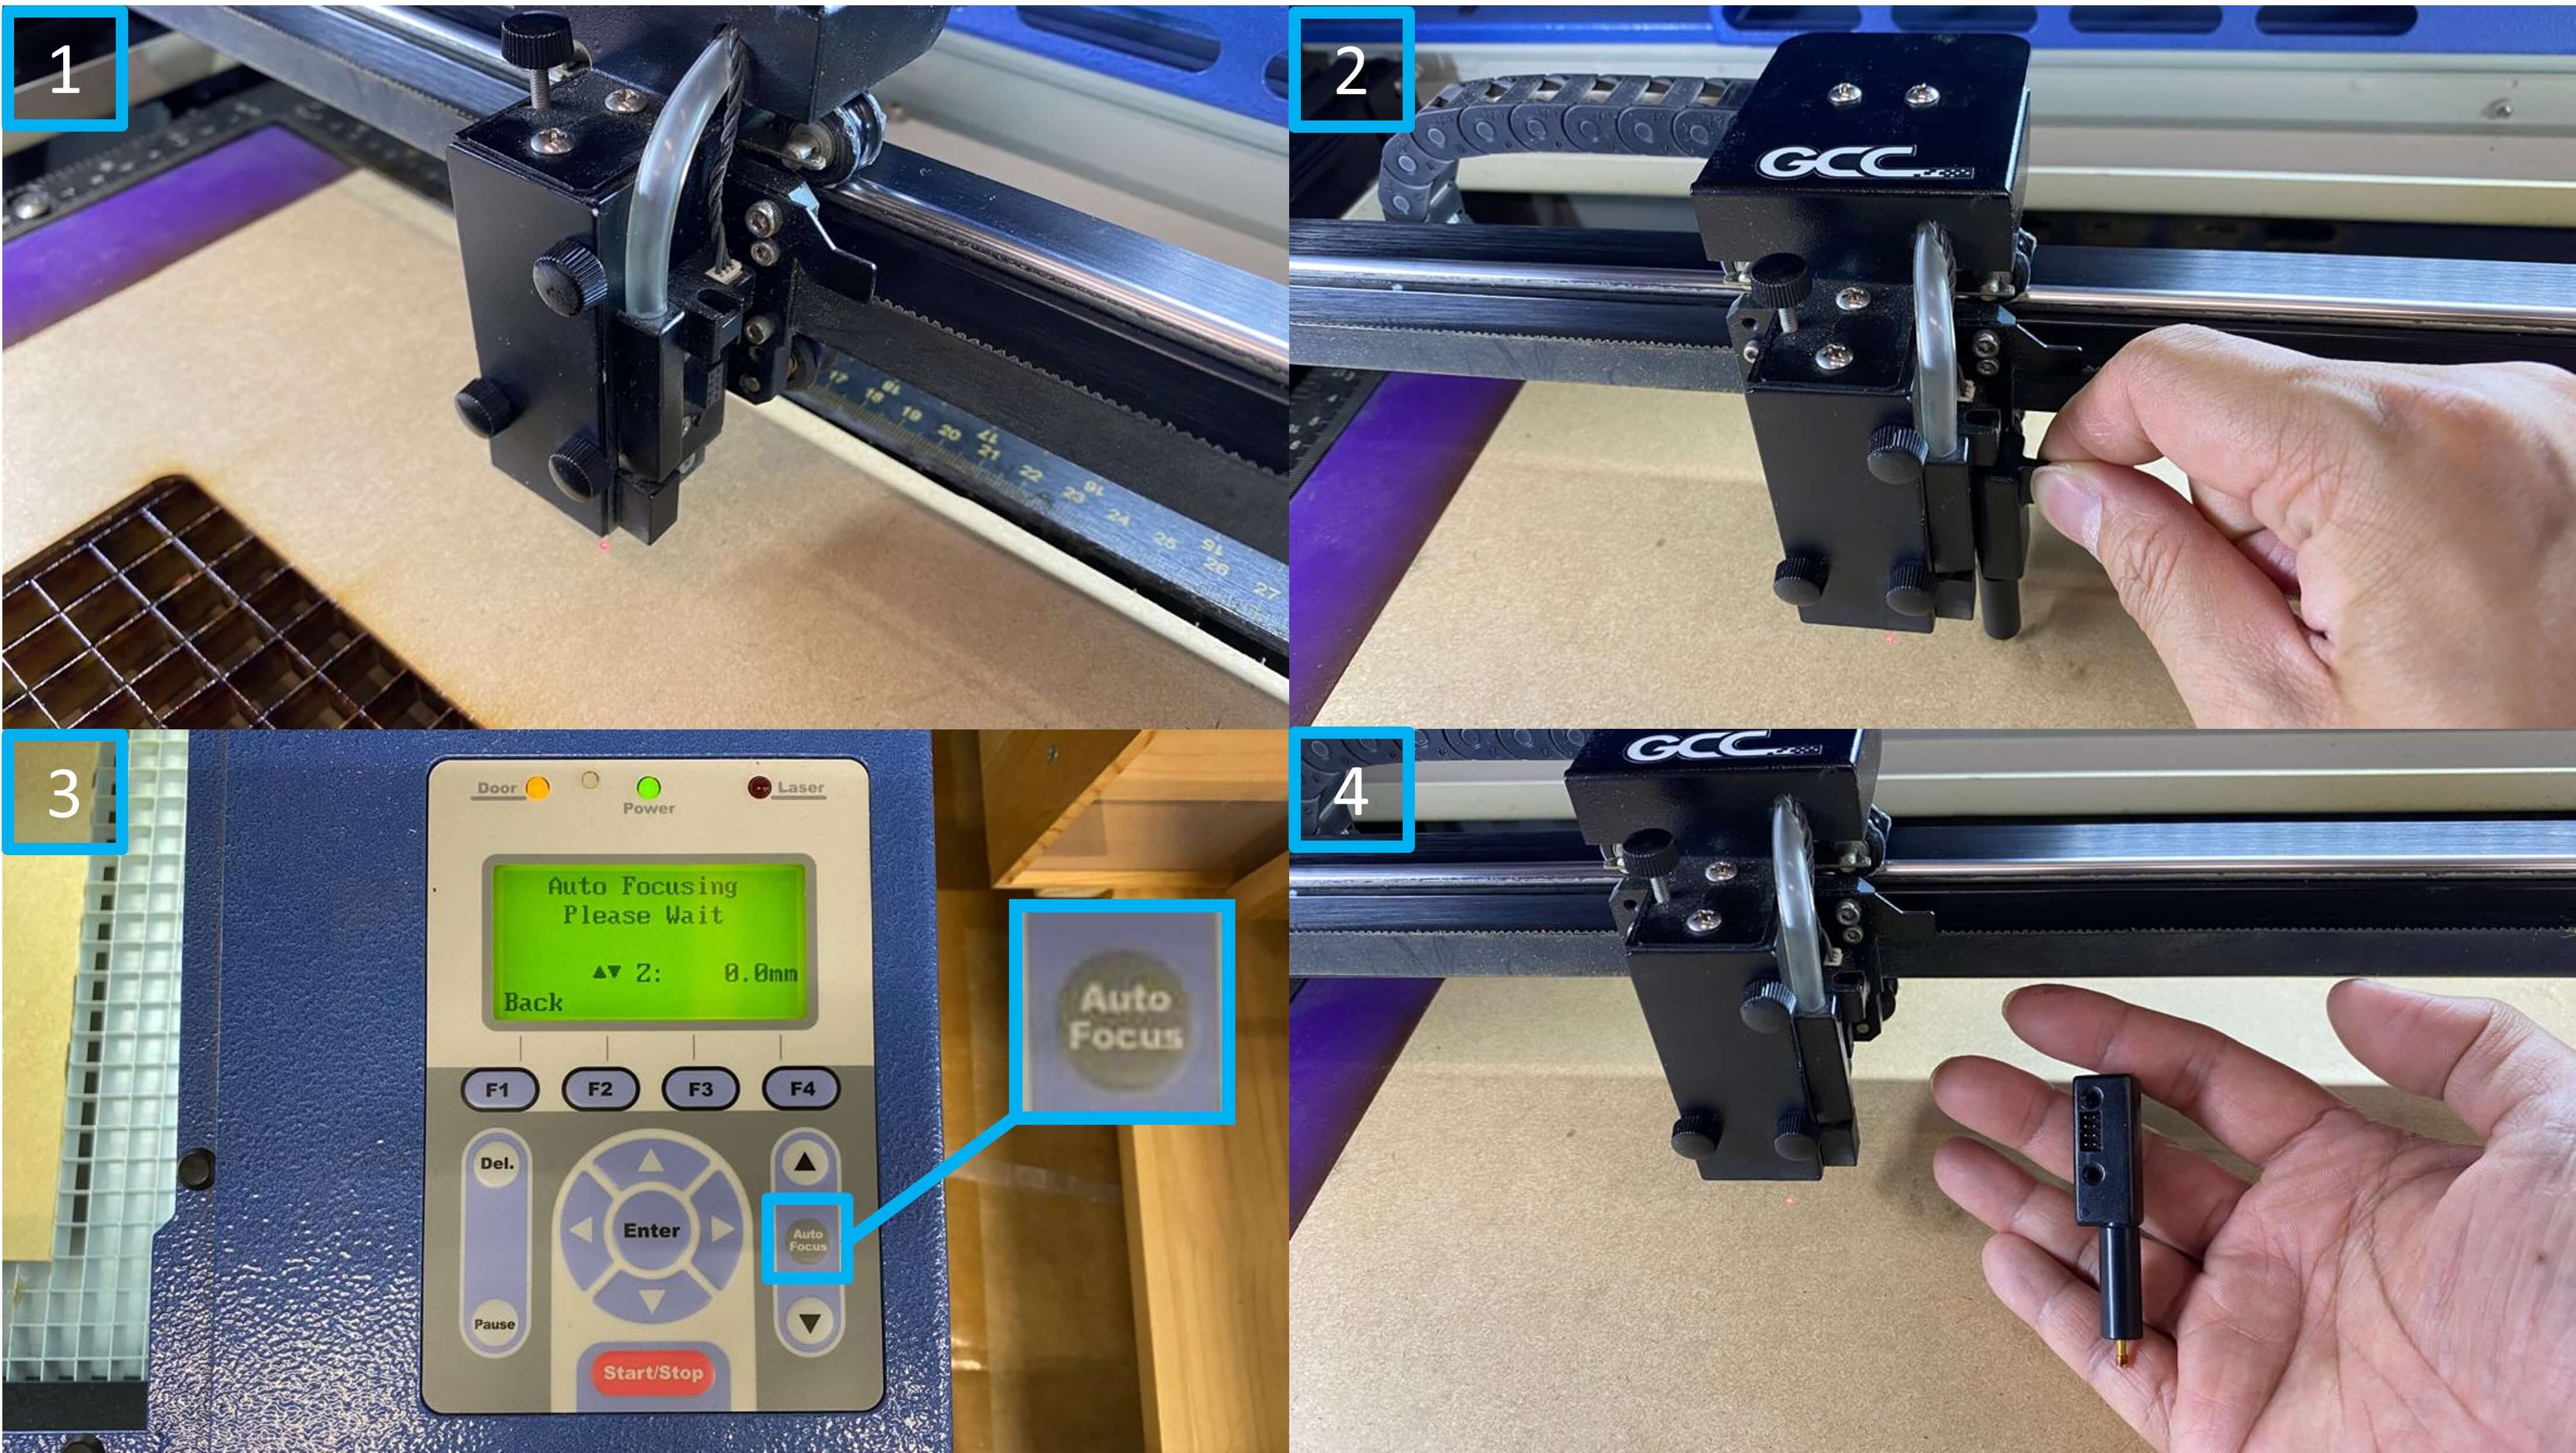
In focusing, Auto Focus is available in GCC LaserPro Spirit. Let’s do it in step with Jason.
Step 1: Touch the laser head until initialization was finished.
Step 2: Plug the focusing tool onto the side of the laser head.
Step 3: Press the Auto Focus button on the control panel.
Step 4: Unplug the tool after focusing was finished. Done.
Power & Speed
For testing power and speed, we need to find the parameters that the material is just cut and engrave clearly.
Therefore, Darren made a Laser Parameter Matrix. It marked the perfect setting for cutting those materials.
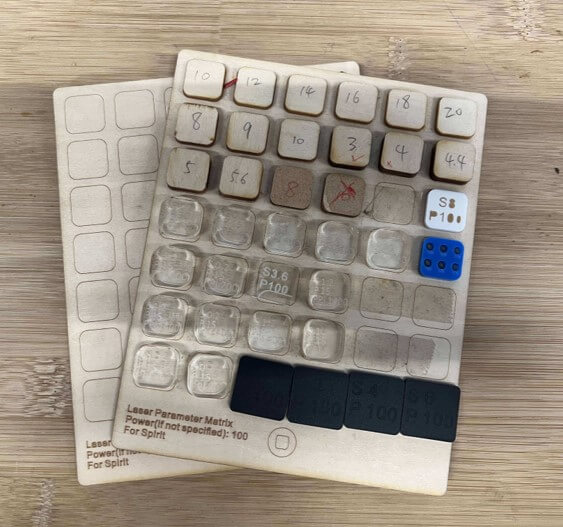
If there is no power are specified, then power is 100%. And the number marked on the material is equal to speed.
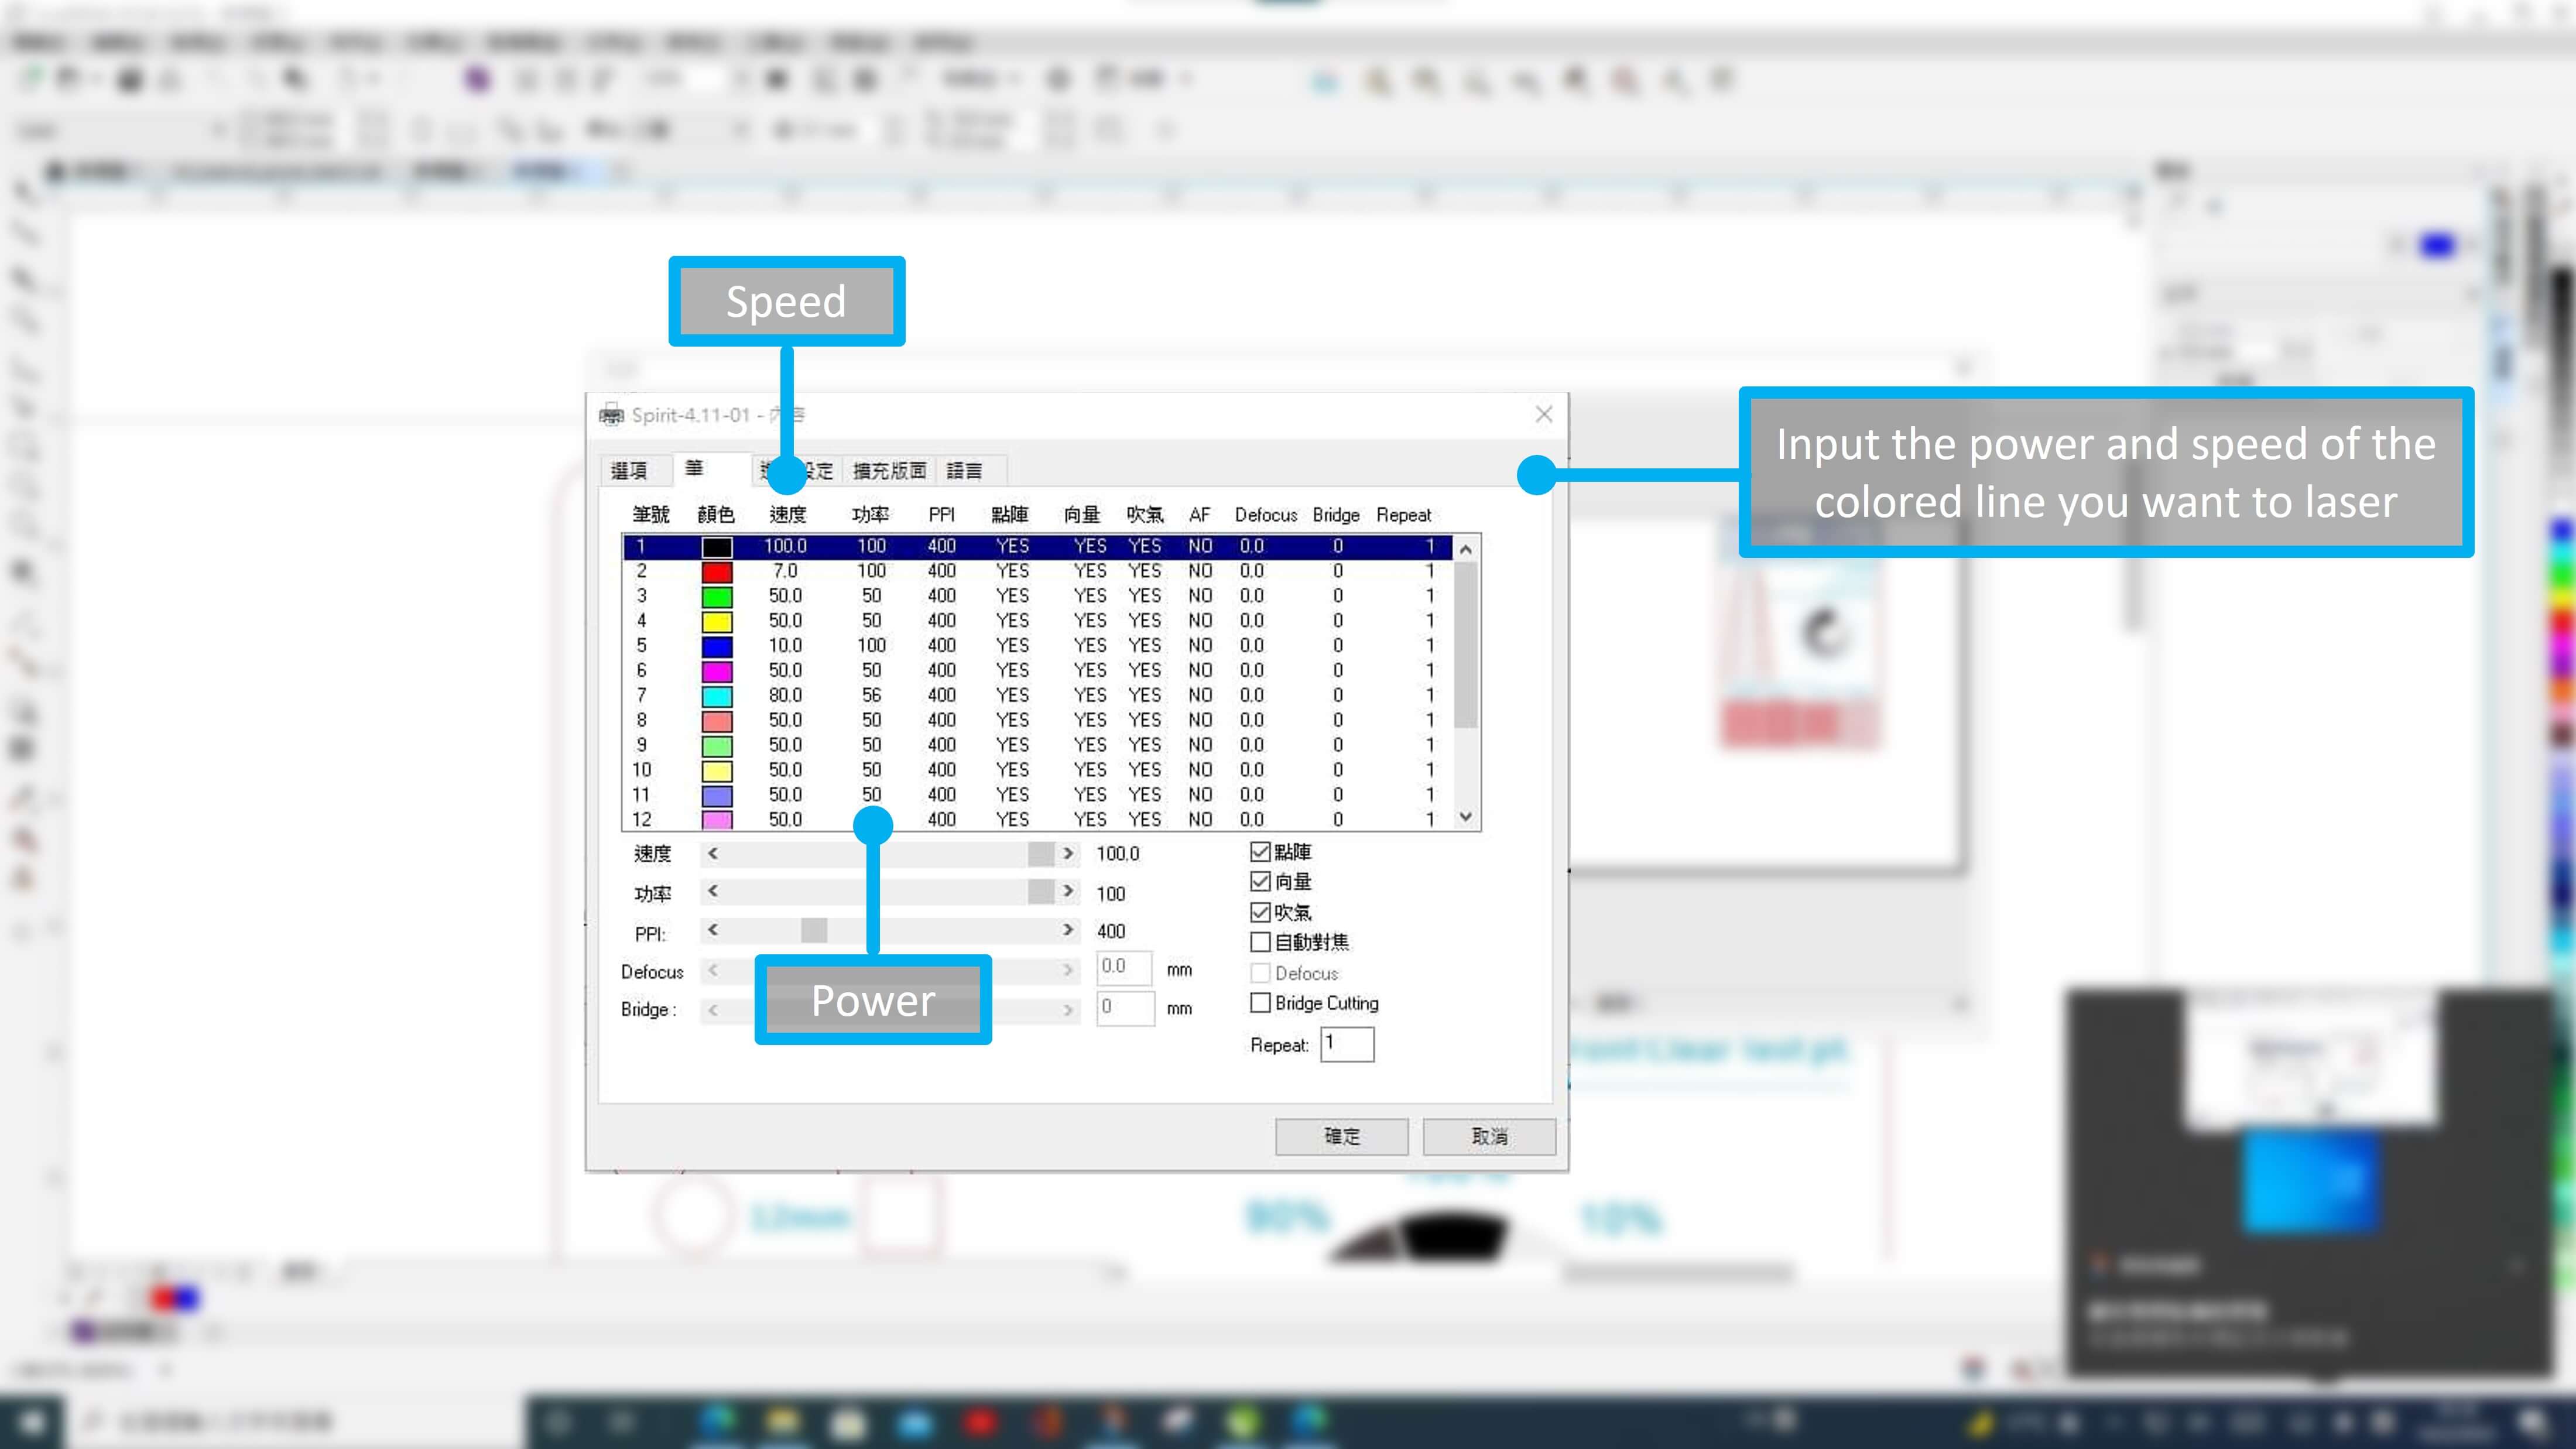
We use CorelDRAW to Draw, edit and output the file to the laser cutter.
Then will try with rough data the first time.
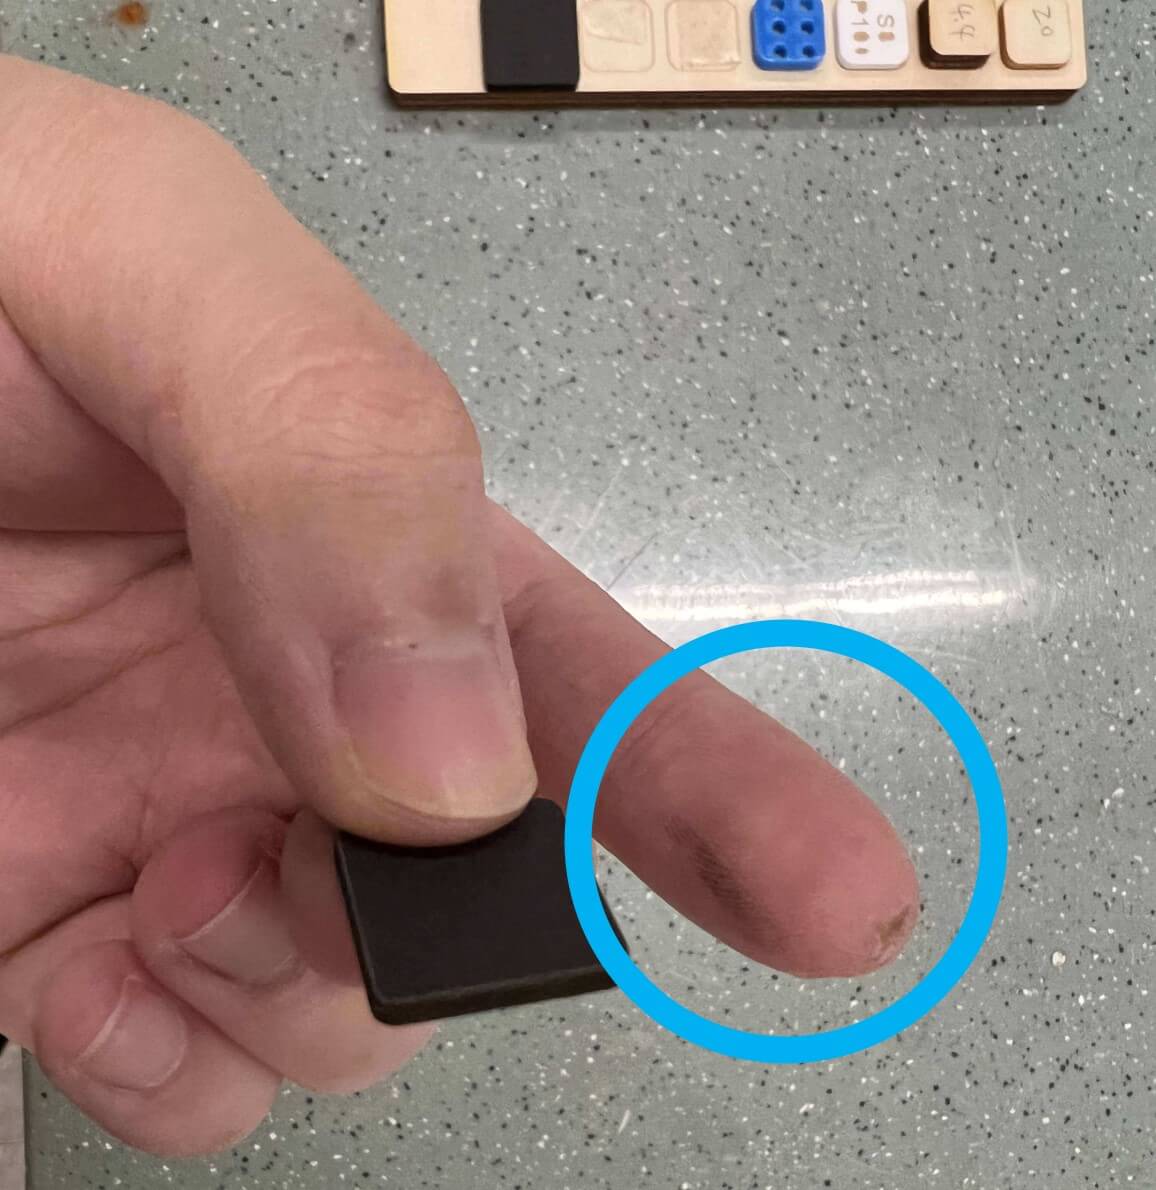
If there were too much dust left on the material, that means we can lower the power.
For cutting this 2mm card sheet:
| Test | Type | Power | Speed |
|---|---|---|---|
| 1 | Cut | 2.8 | 70 |
| 2 (Better) | Cut | 9 | 100 |
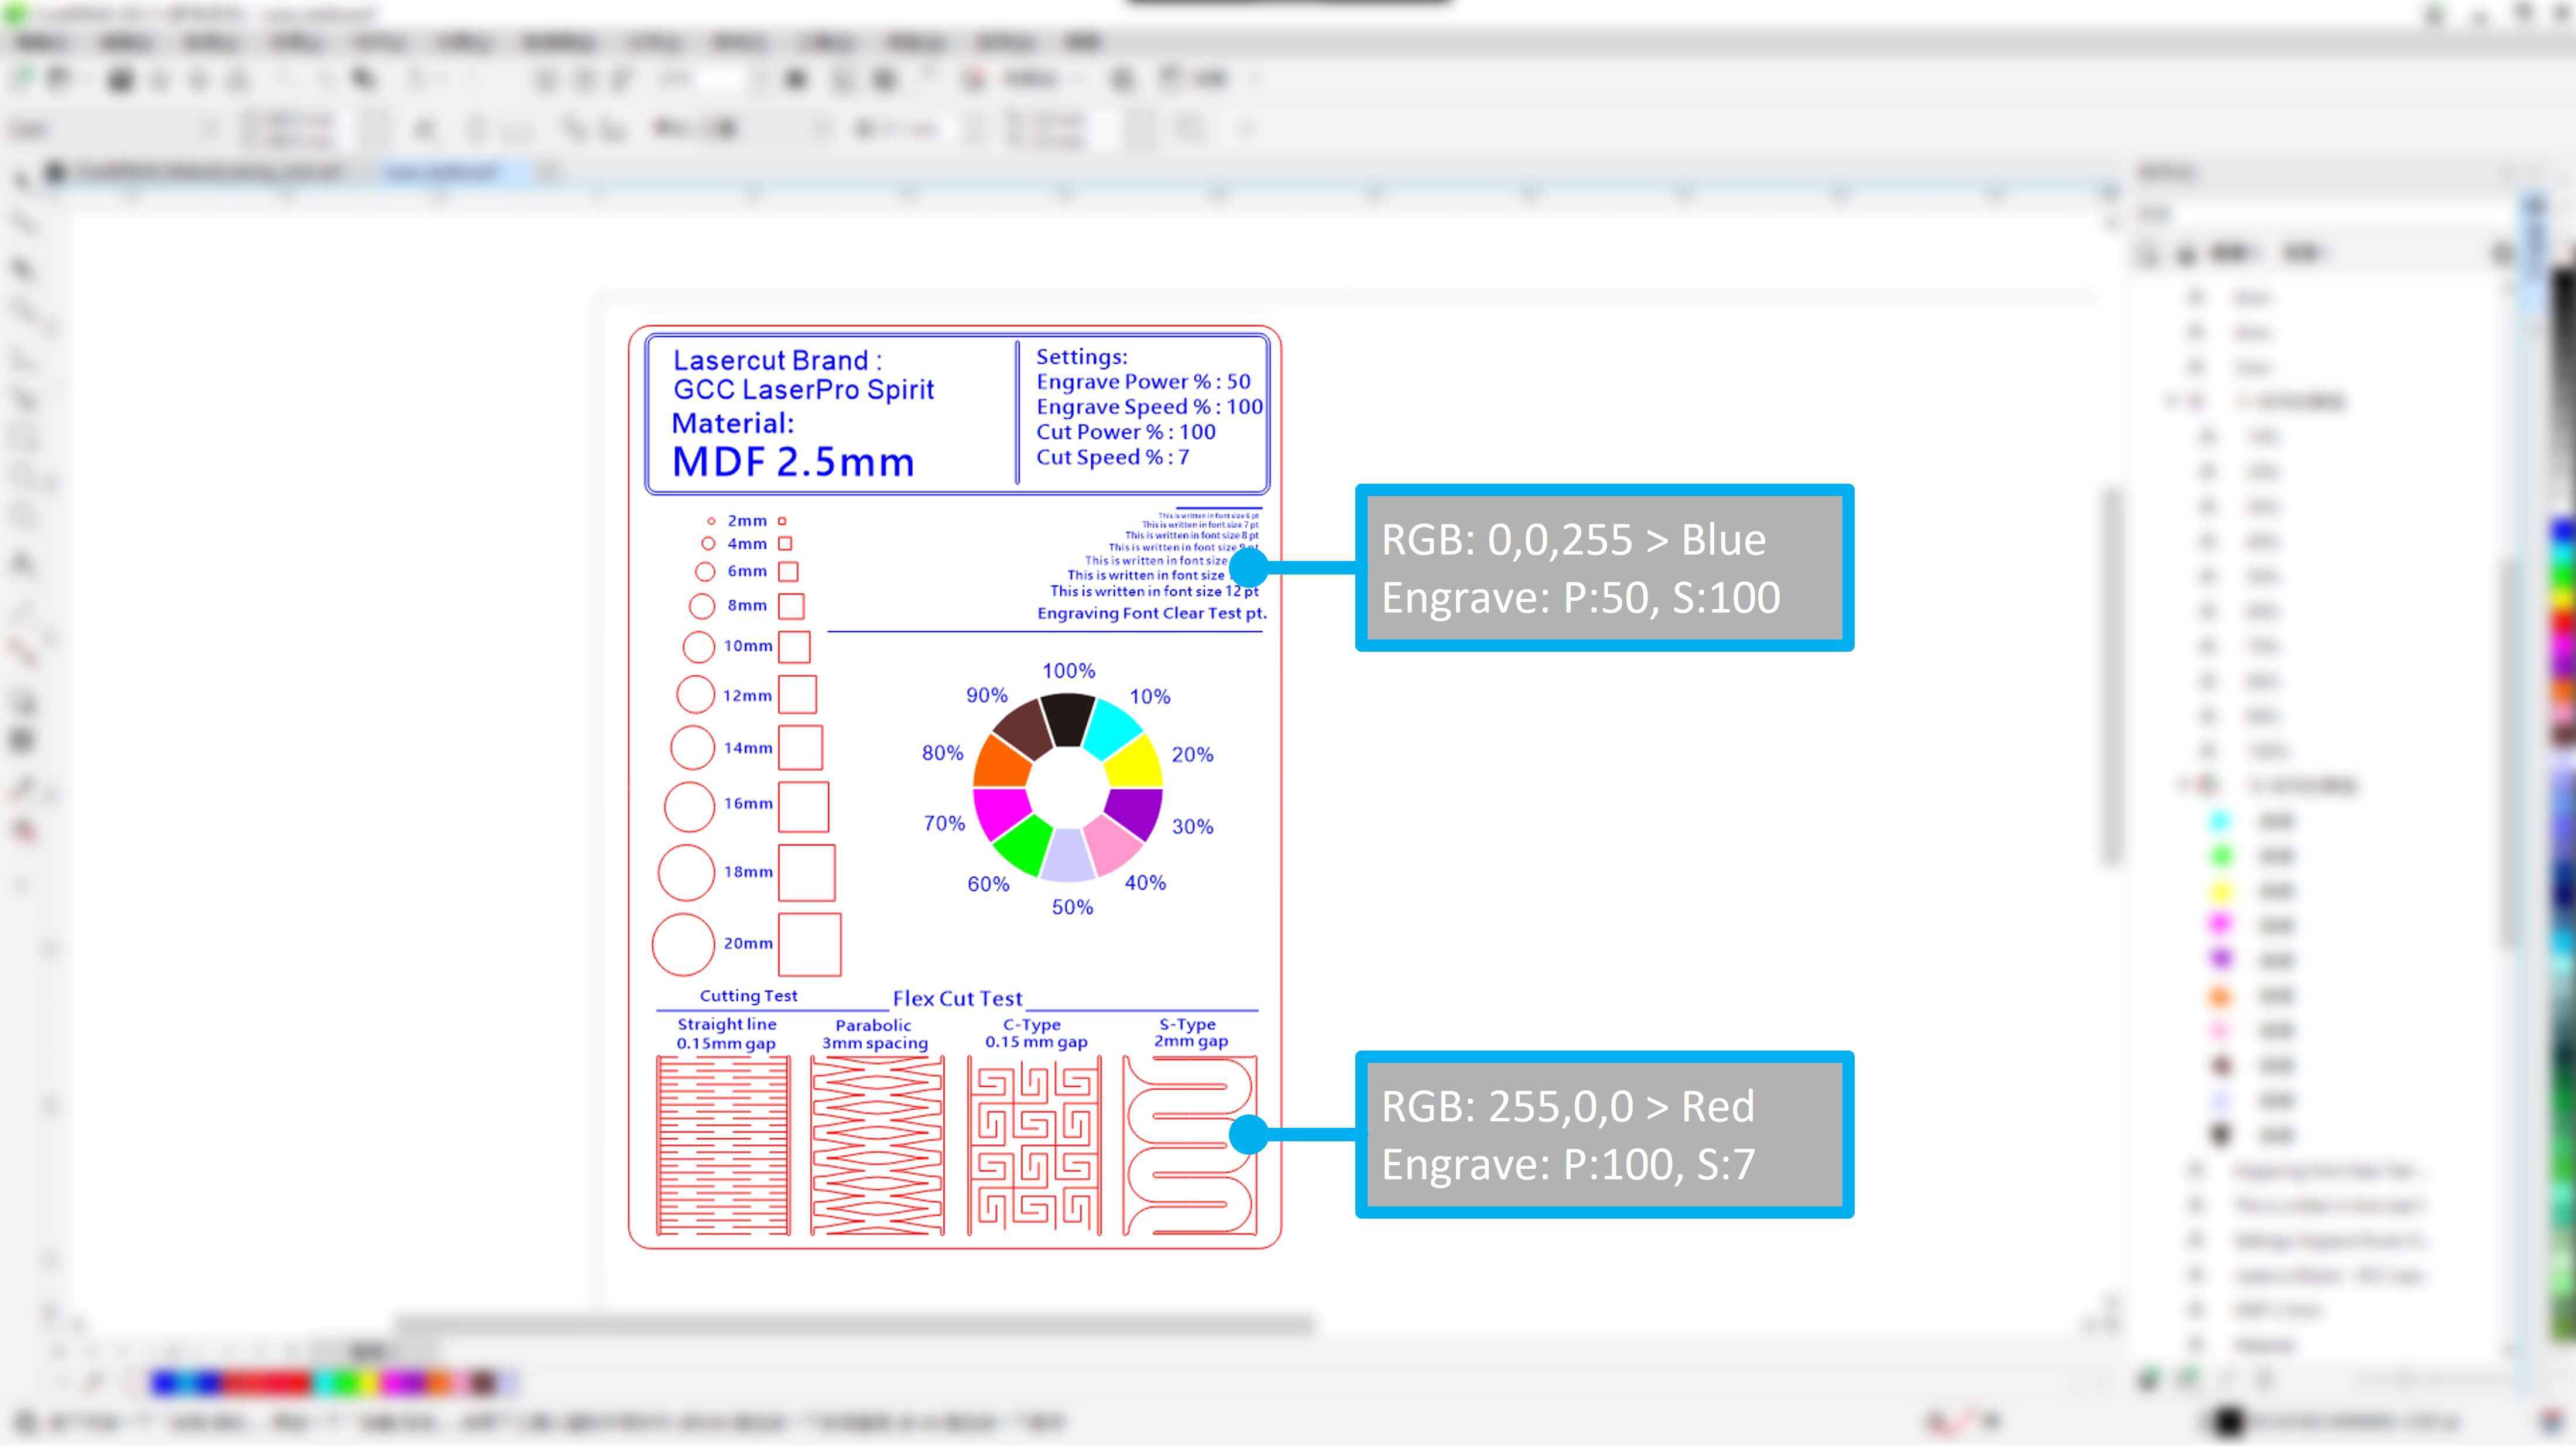
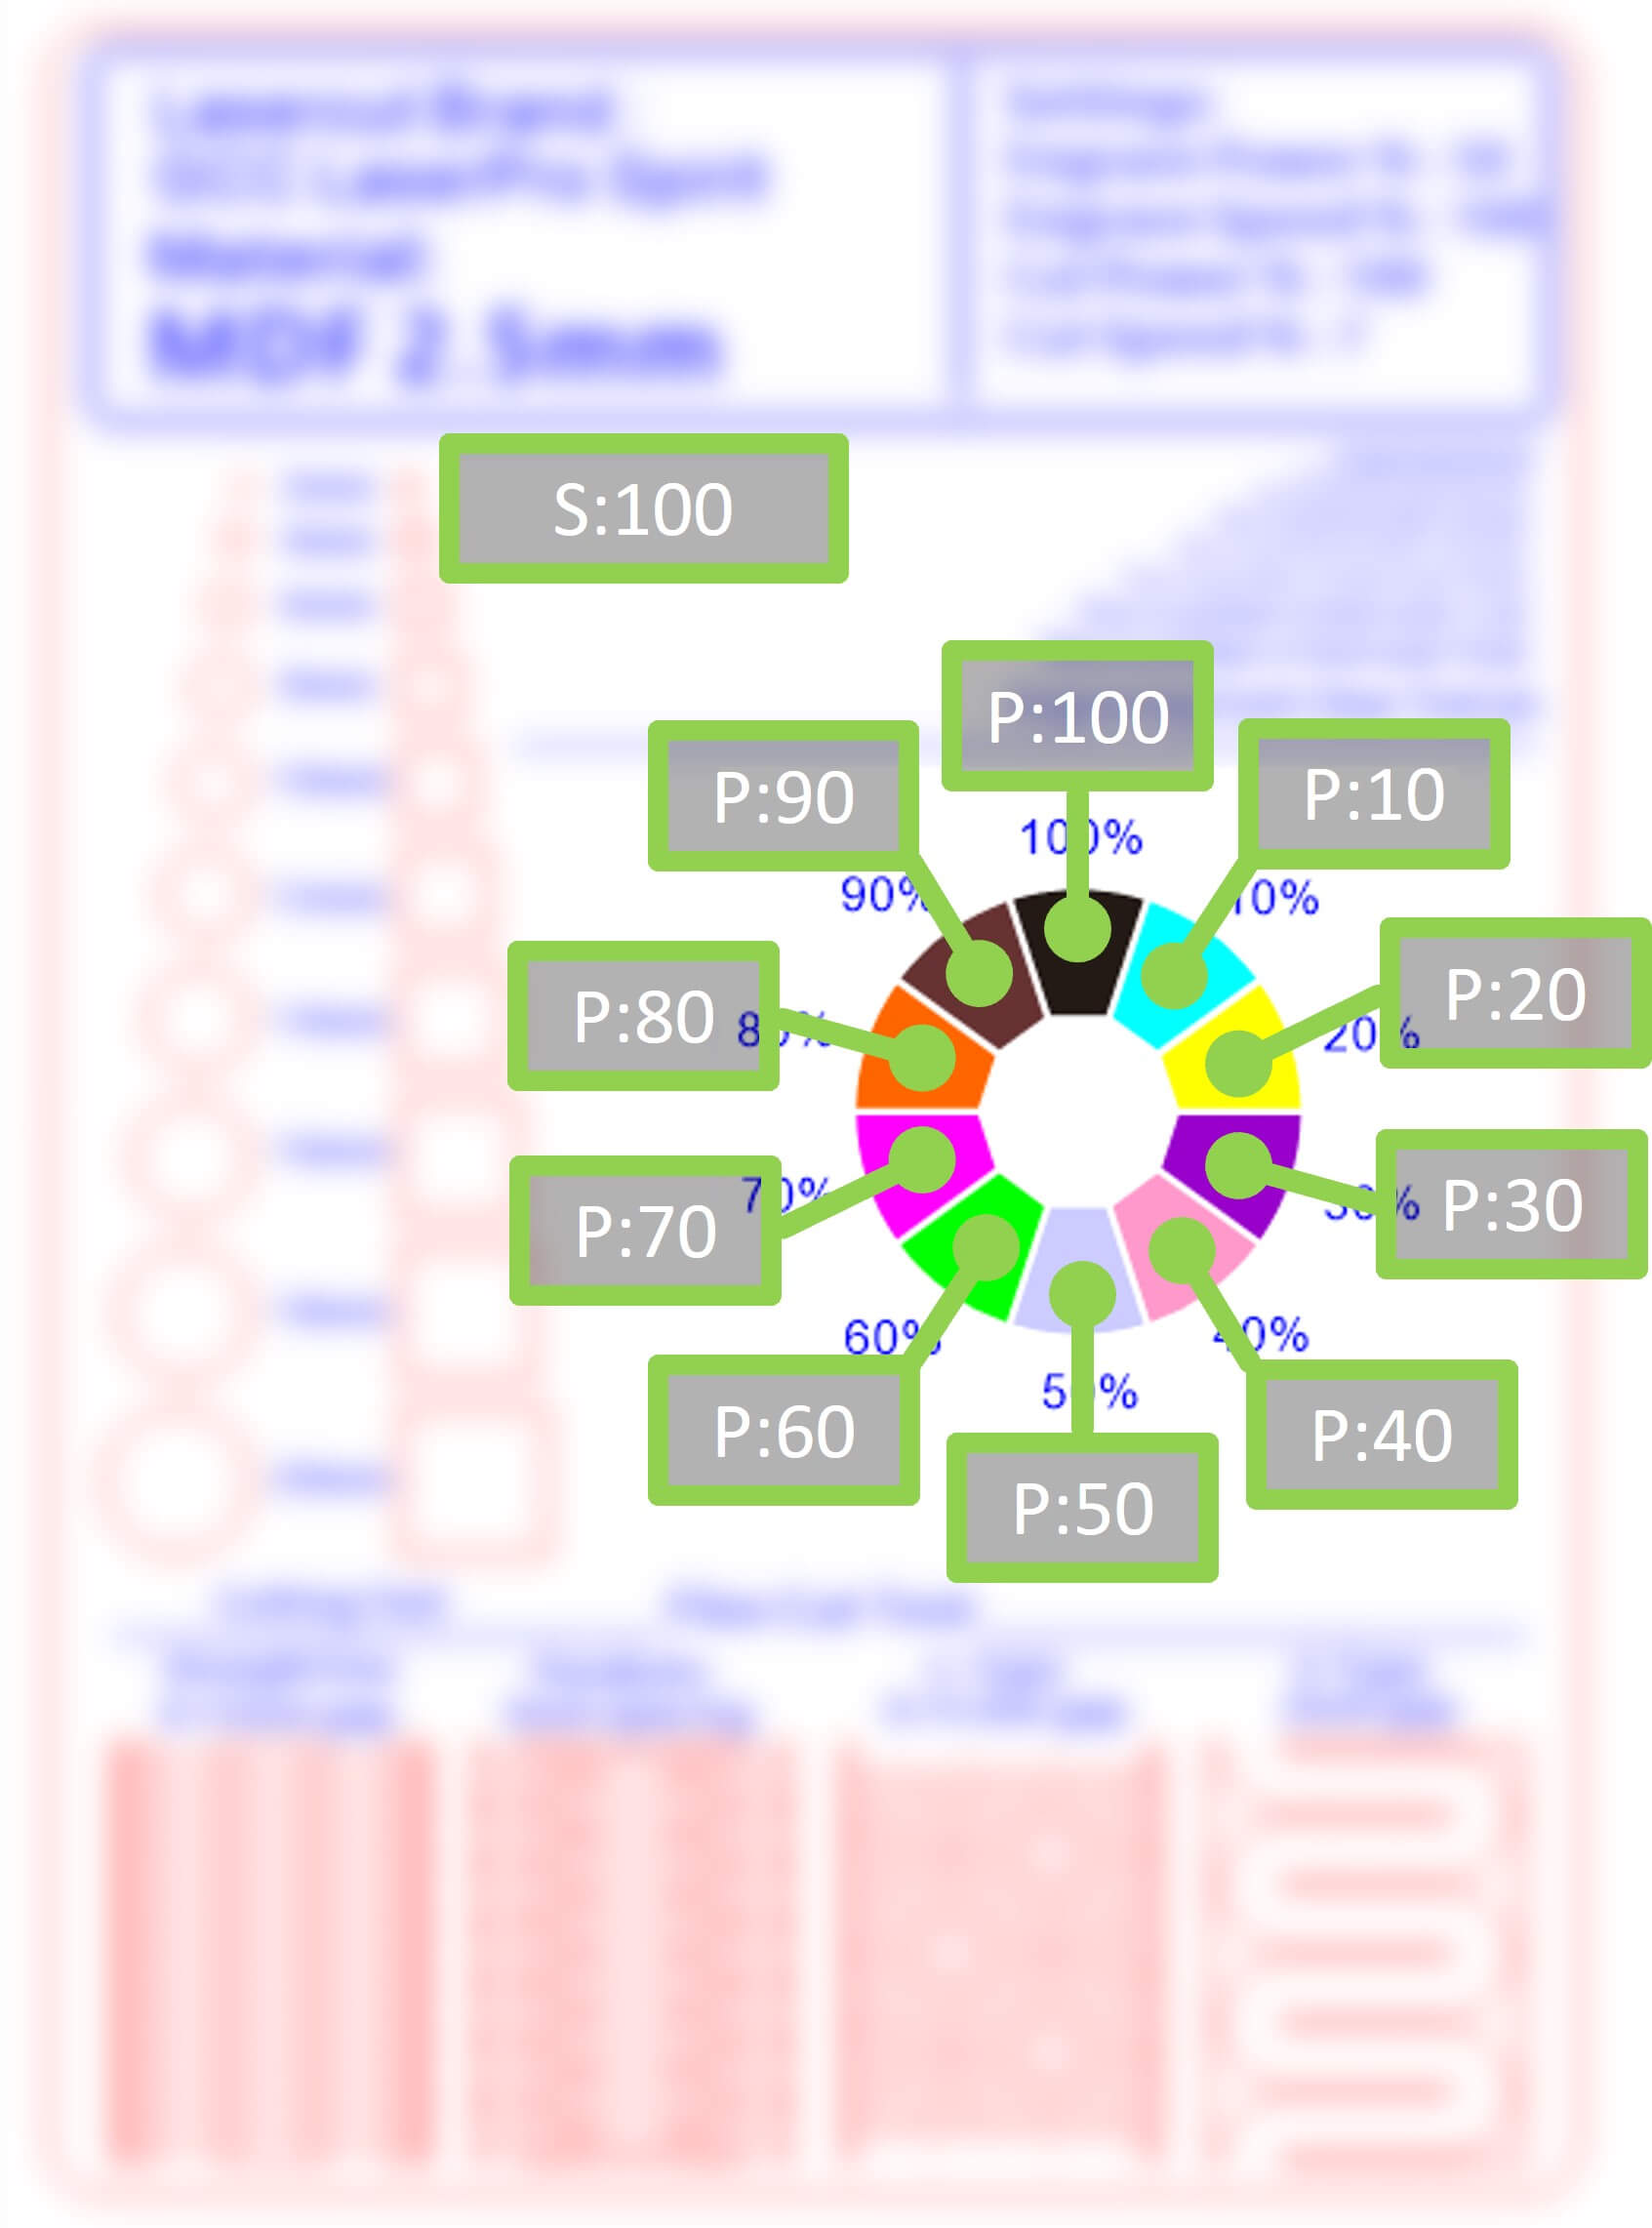
After that, I decided to make a test board. It can test the cut, engrave, flex cut. And users can use those data to do the same on their same material.
But we need to edit this testboard from online, like information on the board and CMYK to RGBs.
And I thought the material that I’m going to use is cardboard, and It turns out I misunderstood. It’s MDF… But it’s too late, I noticed after I started laser it. :[

2.5mm_MDF_testboard_cutting_clip from TerryAU on Vimeo.
*Is MDF, not cardboard. Sorry >_<
For cutting this 2.5mm Medium Density Fiberboard:
| Test | Type | Power | Speed |
|---|---|---|---|
| 1 | Cut | 100 | 6.4 |
| 2 (Better) | Cut | 100 | 7 |
| 1 | Engrave | 56 | 80 |
| 2 | Engrave | 60 | 100 |
| 3 (Better) | Engrave | 50 | 100 |
And I also try it on 2.5mm Acrylic Sheet
2.5mm_Acrylic_testboard_cutting_clip from TerryAU on Vimeo.
For cutting this 2.5mm Acrylic Sheet:
| Test | Type | Power | Speed |
|---|---|---|---|
| 1 | Cut | 100 | 2.2 |
| 2 | Cut | 100 | 3.6 |
| 3 (Better) | Cut | 100 | 3 |
| 1 | Engrave | 10 | 100 |
| 2 | Engrave | 20 | 100 |
| 3 (Better) | Engrave | 25 | 100 |
Kerf
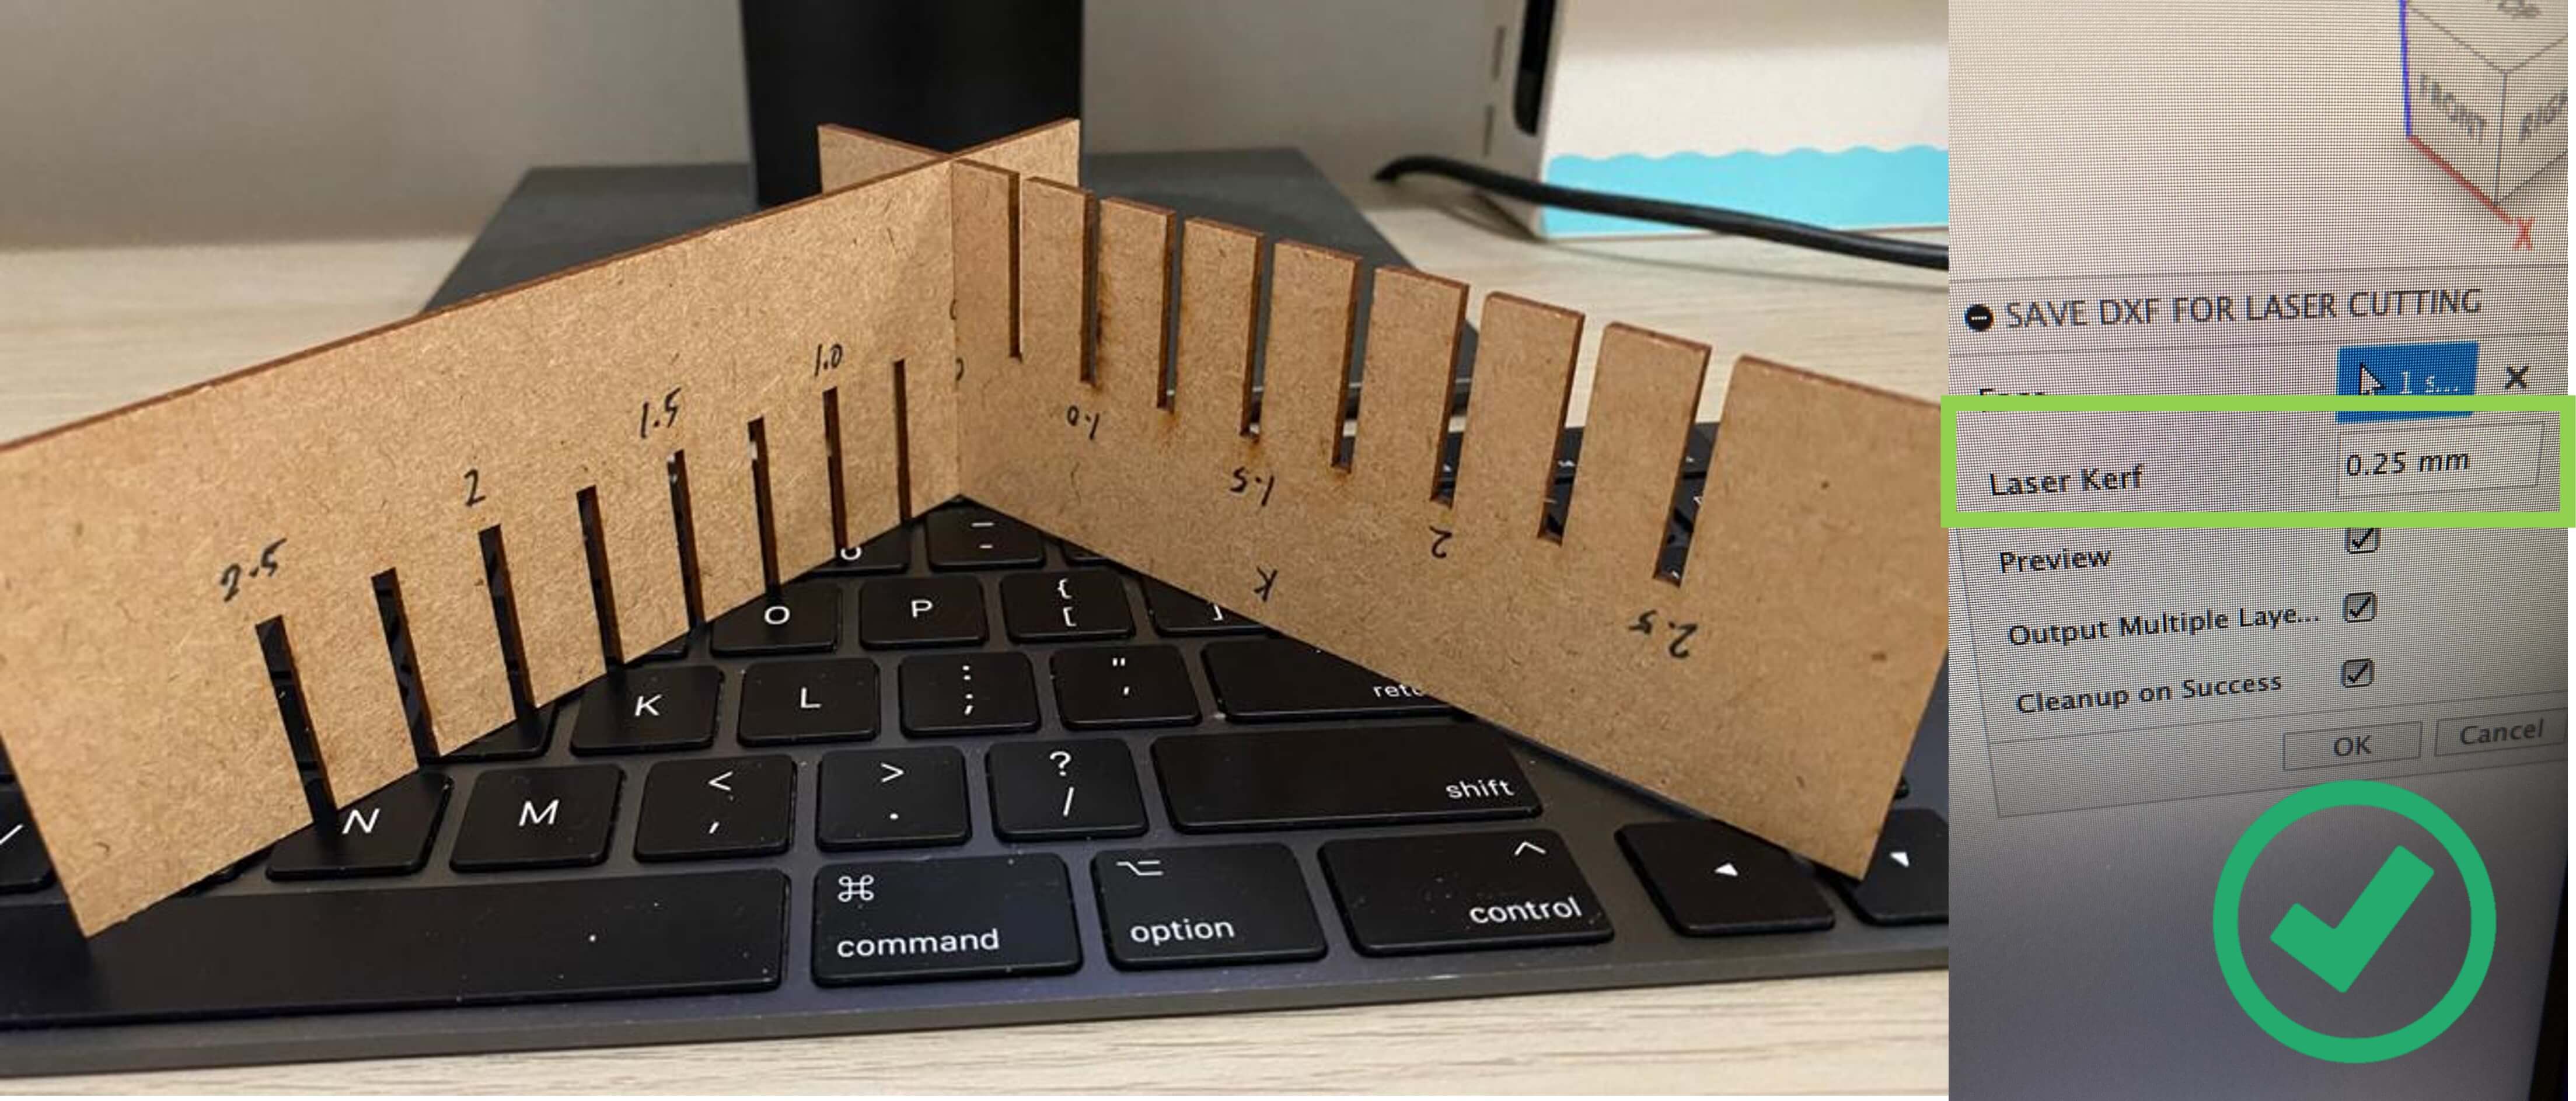
Before making something need to joint, it needed to be test what the kerf scale is between loose and tight for joint.
Therefore, I cut a kerf tester. Testing 3mm acrylic sheet from scale 2.81 to 3.10mm. And turn out that 2.86mm is suitable for joint.
3mm_acrylic_kerf_testing_clip from TerryAU on Vimeo.
Jason also did a test on 2.5mm MDF from laser kerf 0.50 to 0.25mm. The result is 0.25mm laser kerf suits well.
Joint
After clarifying the best kerf to use, the joints are ready to be worked on. I have made a model of different types of joint according to Neil’s joints.png
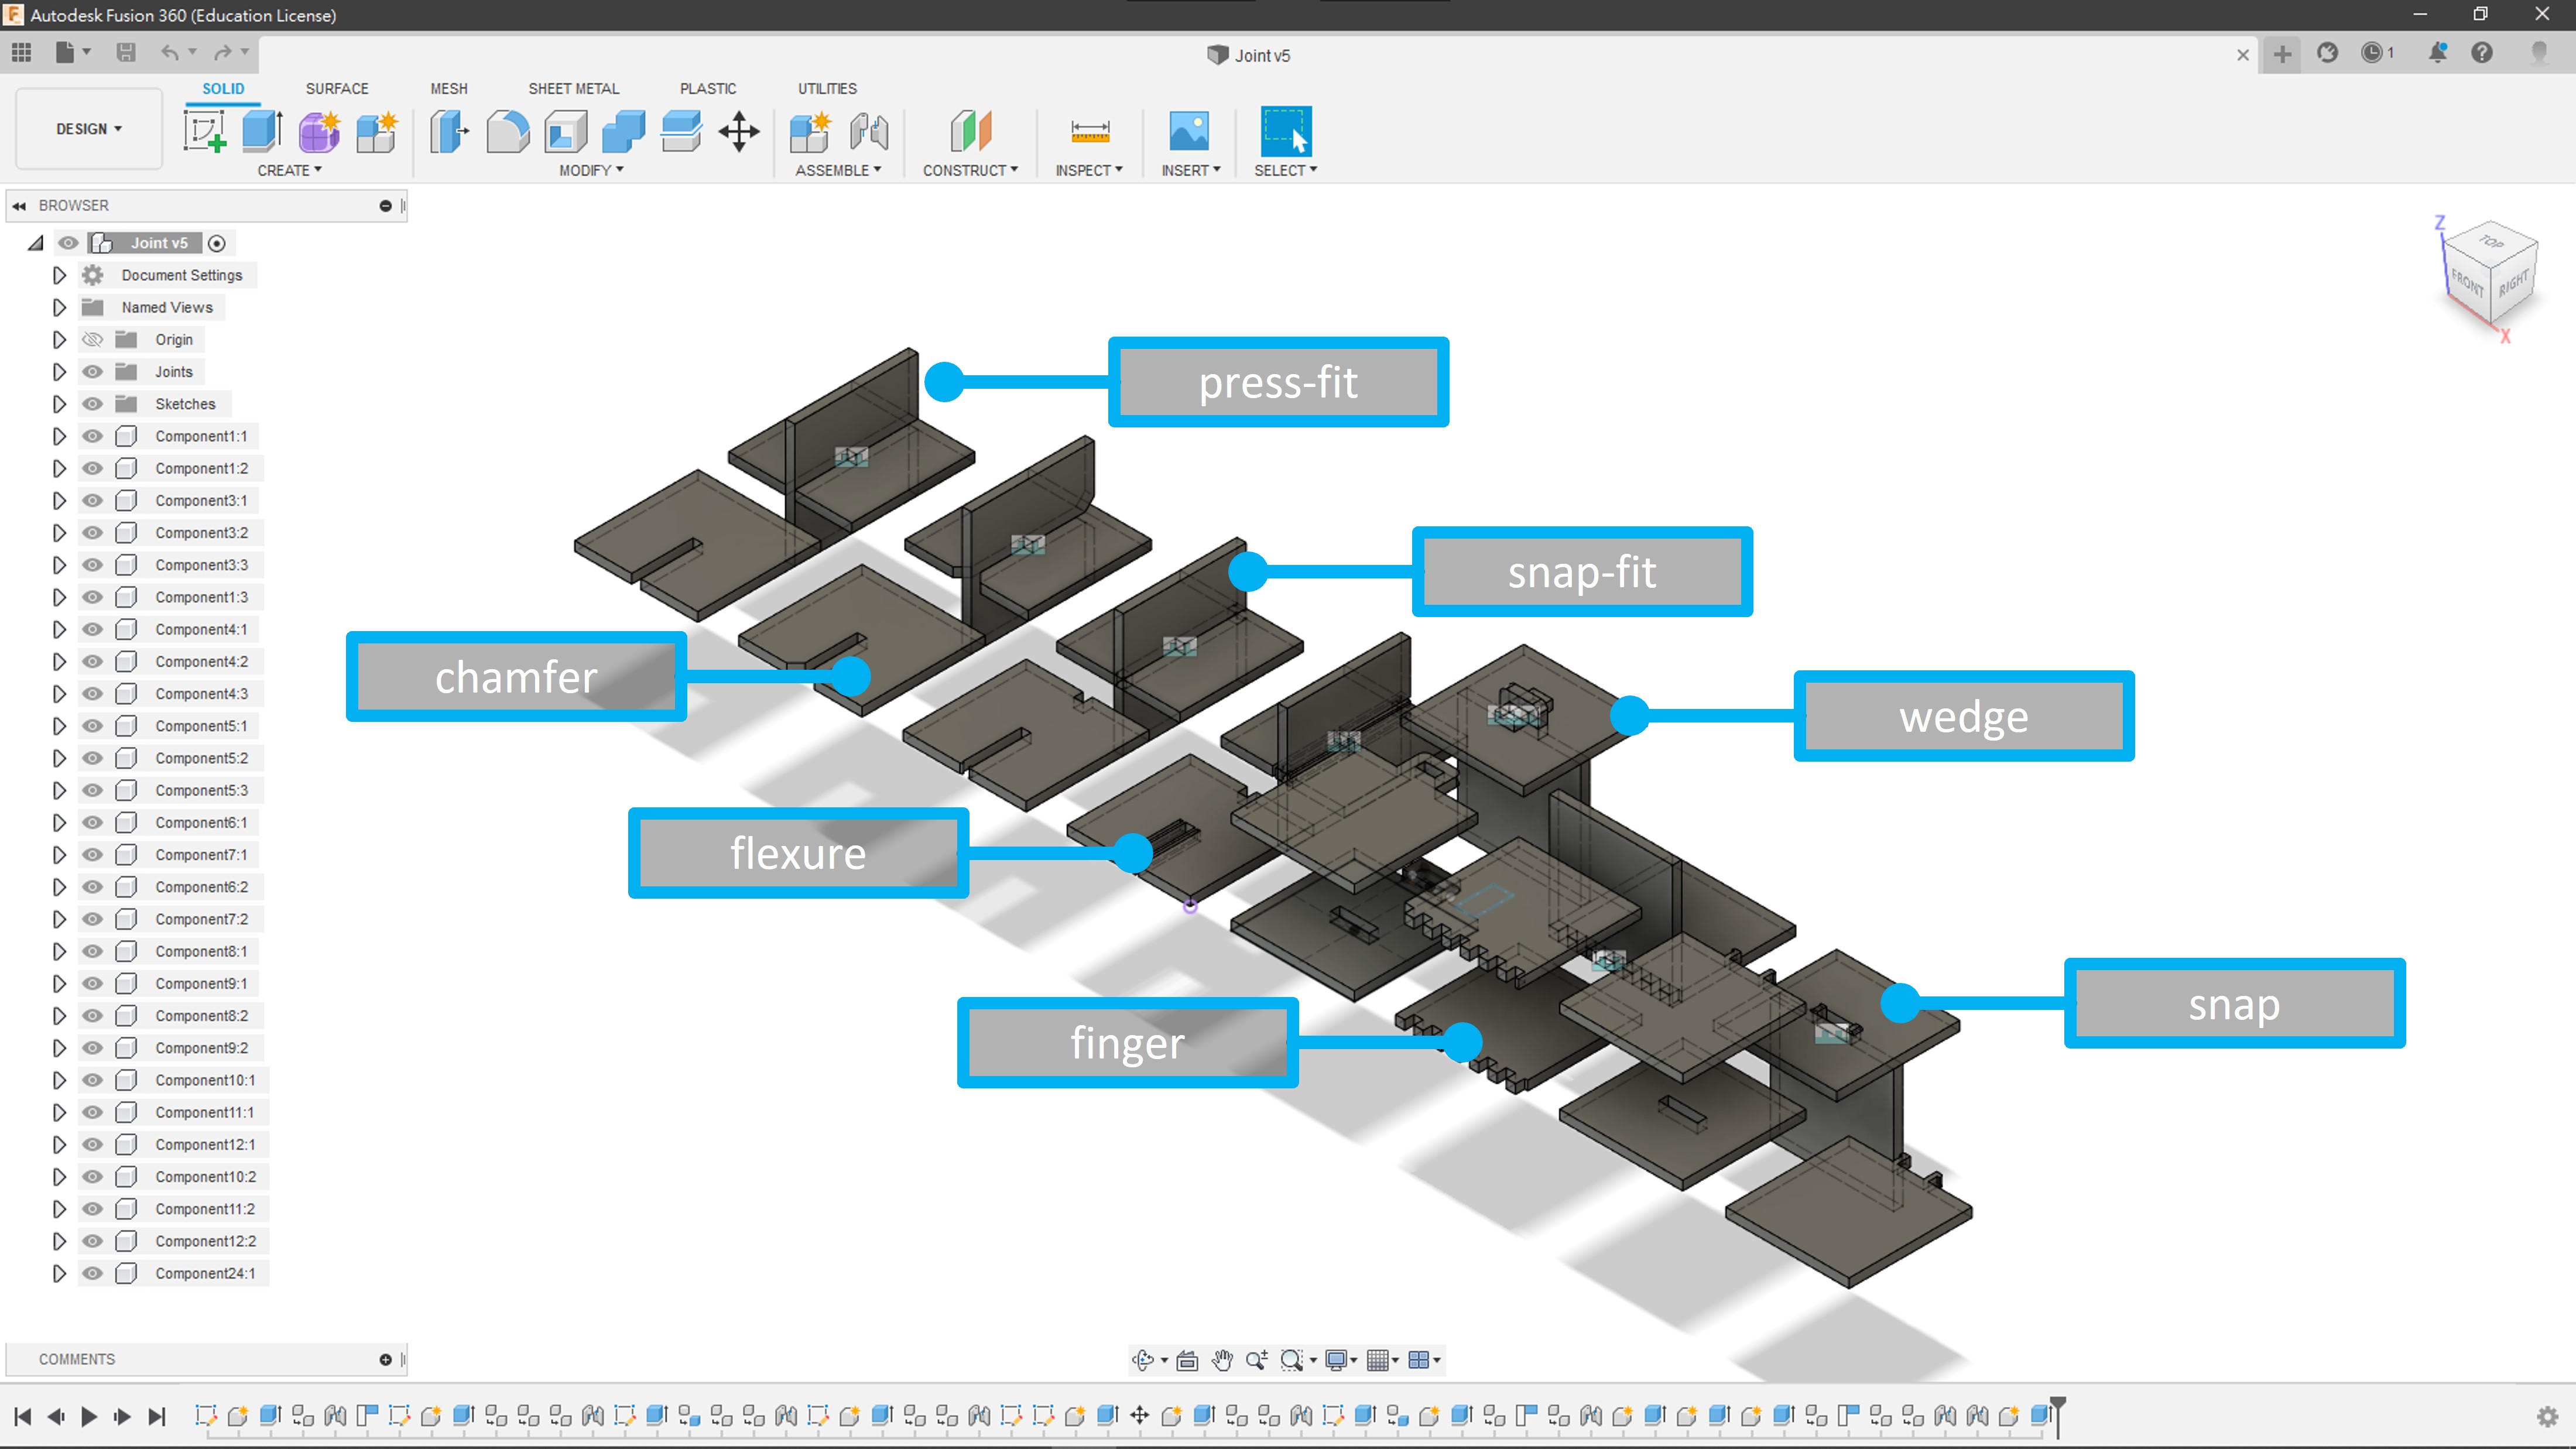
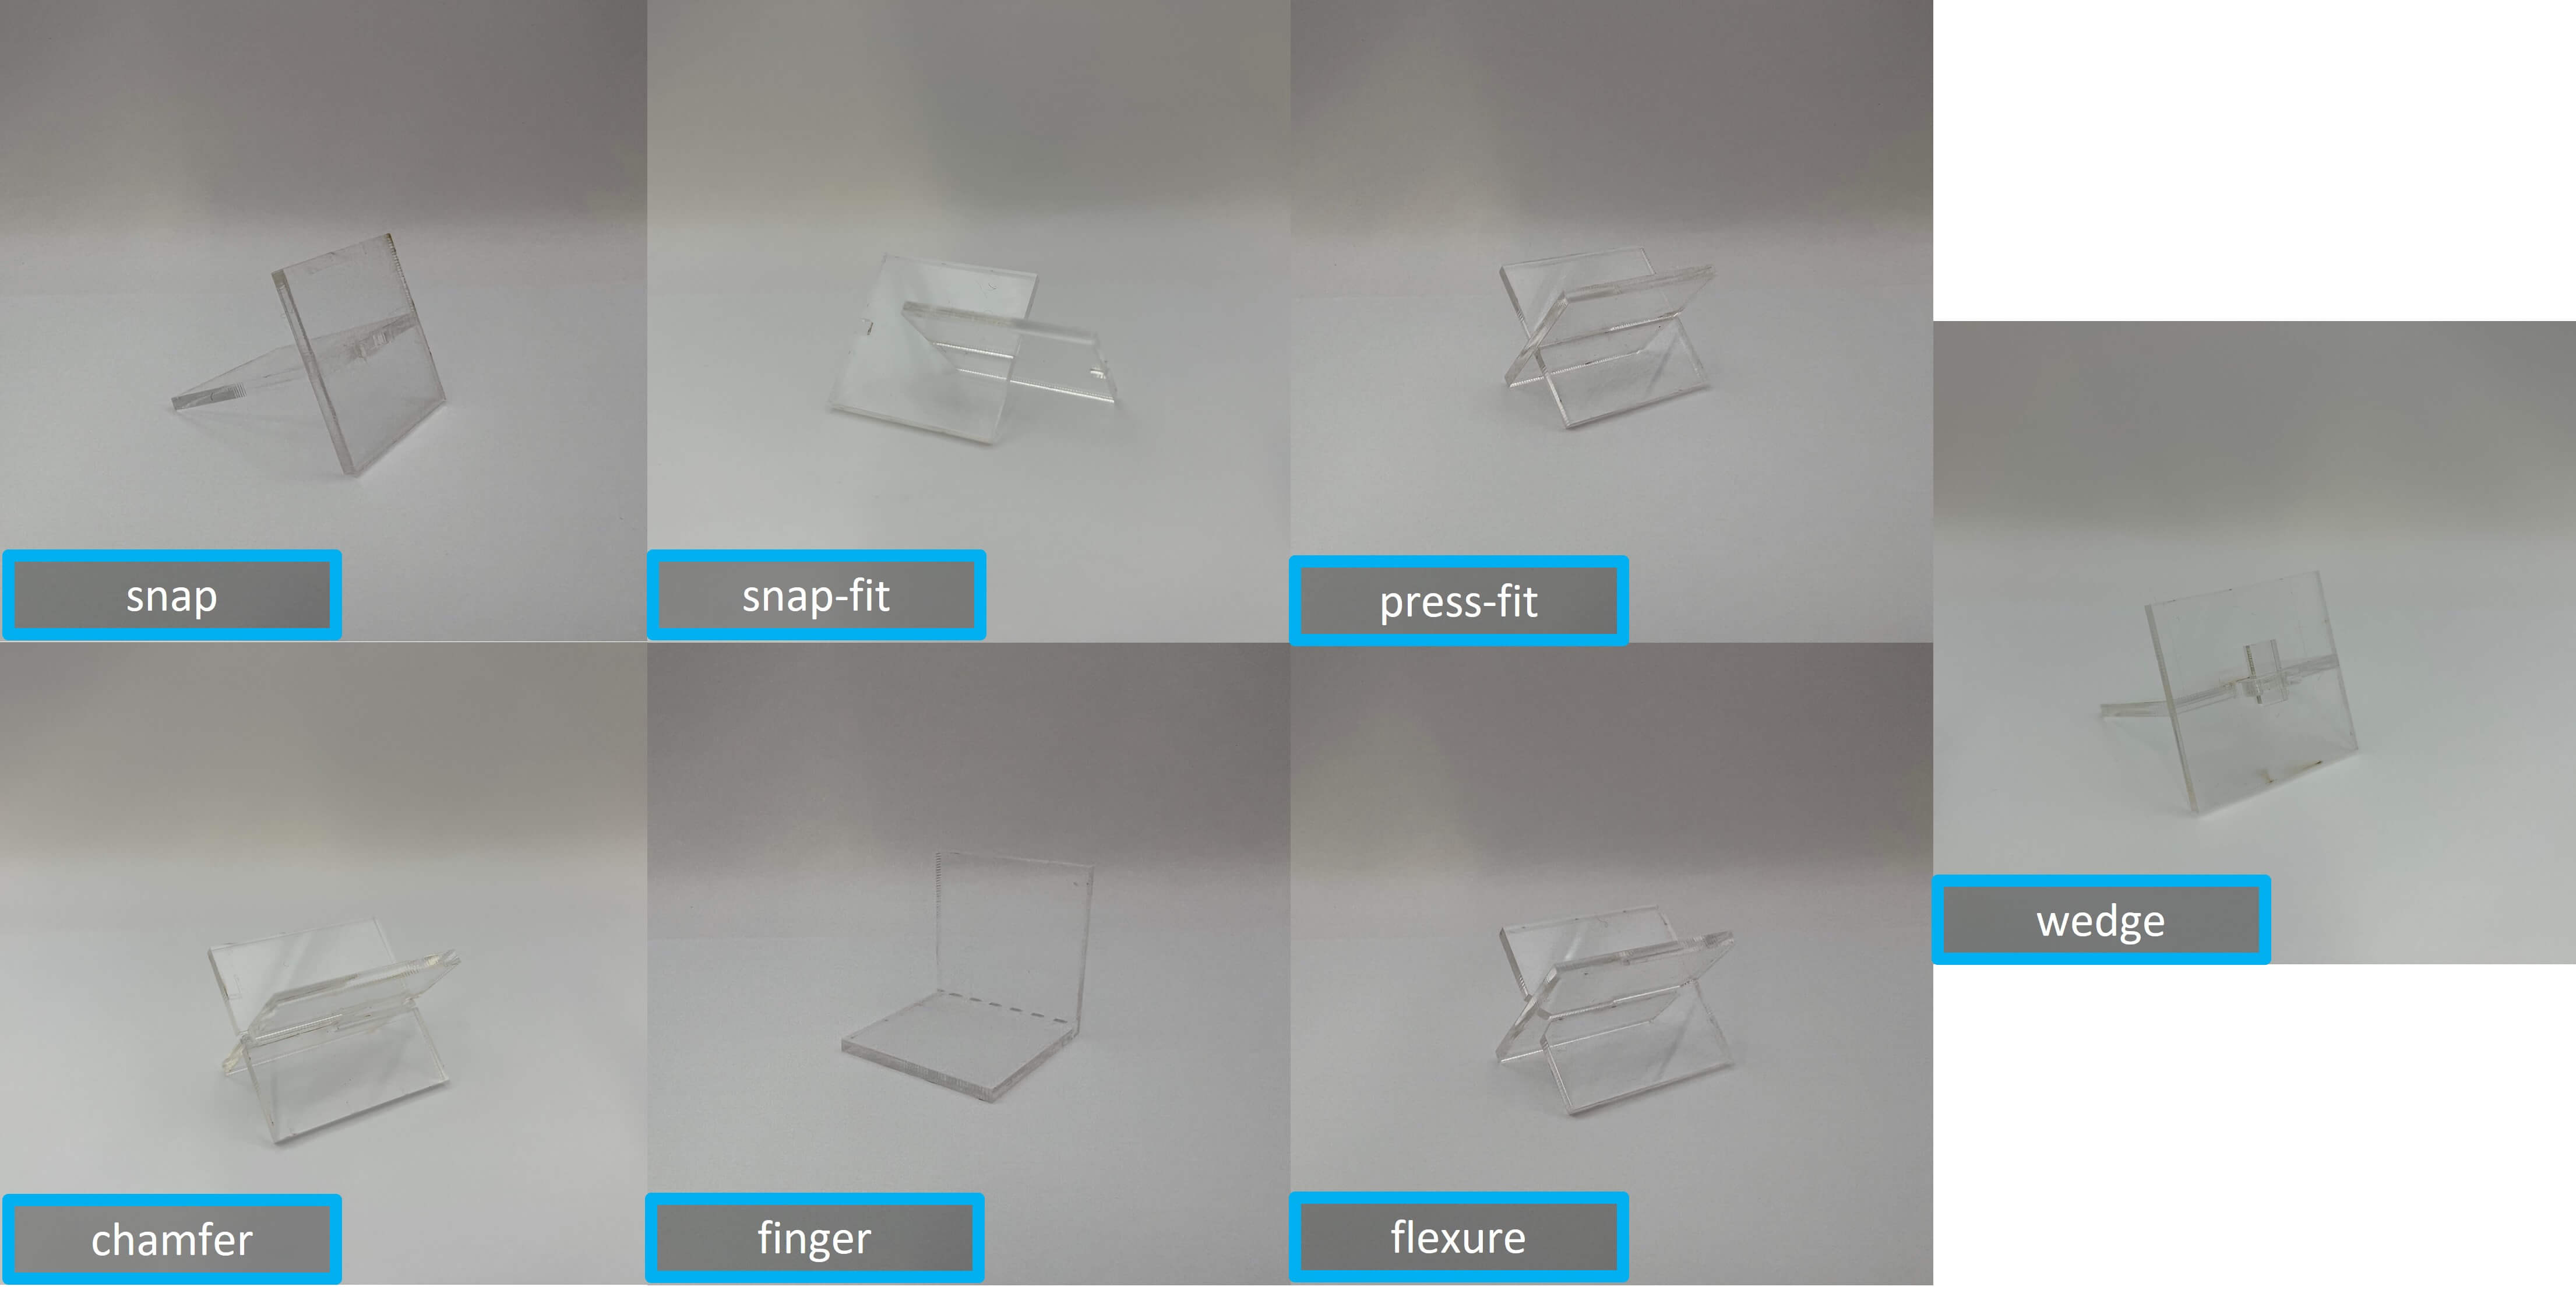
| Type | |
|---|---|
| press-fit | The simplest type of joint |
| chamfer | Similar to press-fit, easier to joint |
| snap-fit | Unable to joint if the material is less flexible |
| flexure | Not tight enough for joint, and easy to broke |
| wedge | Best for joint, but not suitable for every situation |
| finger | Required more pieces to joint, simple for design |
| snap | Very stable. Hard to unjoint if the material is less flexible |
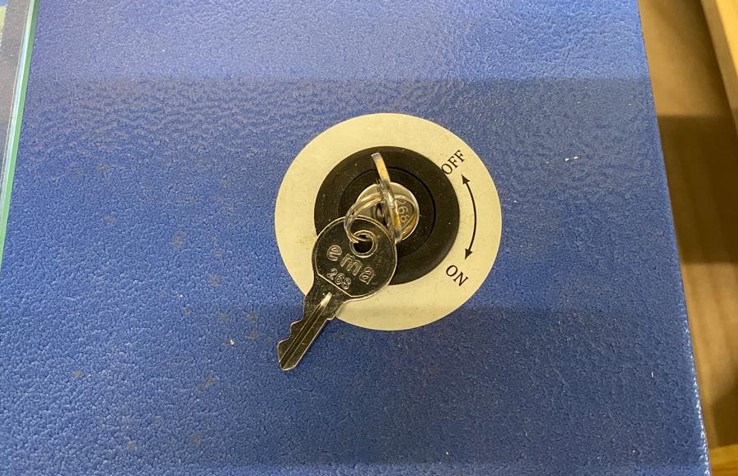
Funny Story
Lastly, I want to share something funny, which is I thought I literally broke the laser cutter, and I felt sad the whole day and night. After Darren and the instructor made a check on the laser cutter and found out that the laser toggle is off… em… well, what an idiot I am.
Downloads
GCC Mercury II Material Test Board (Origin - 3mm Cardboard) - Download
GCC LaserPro Spirit Material Test Board (2.5mm MDF) - Download
GCC LaserPro Spirit Material Test Board (2.5mm Acrylic) - Download
Laser Kerf Test (3mm Acrylic) - 2.81 - 2.90mm | 2.91 - 3.00mm | 3.01 - 3.10mm