Electronics Production
Group Assignment
- [✓] Characterize the design rules for your in-house PCB production process
- Document by Terry AU
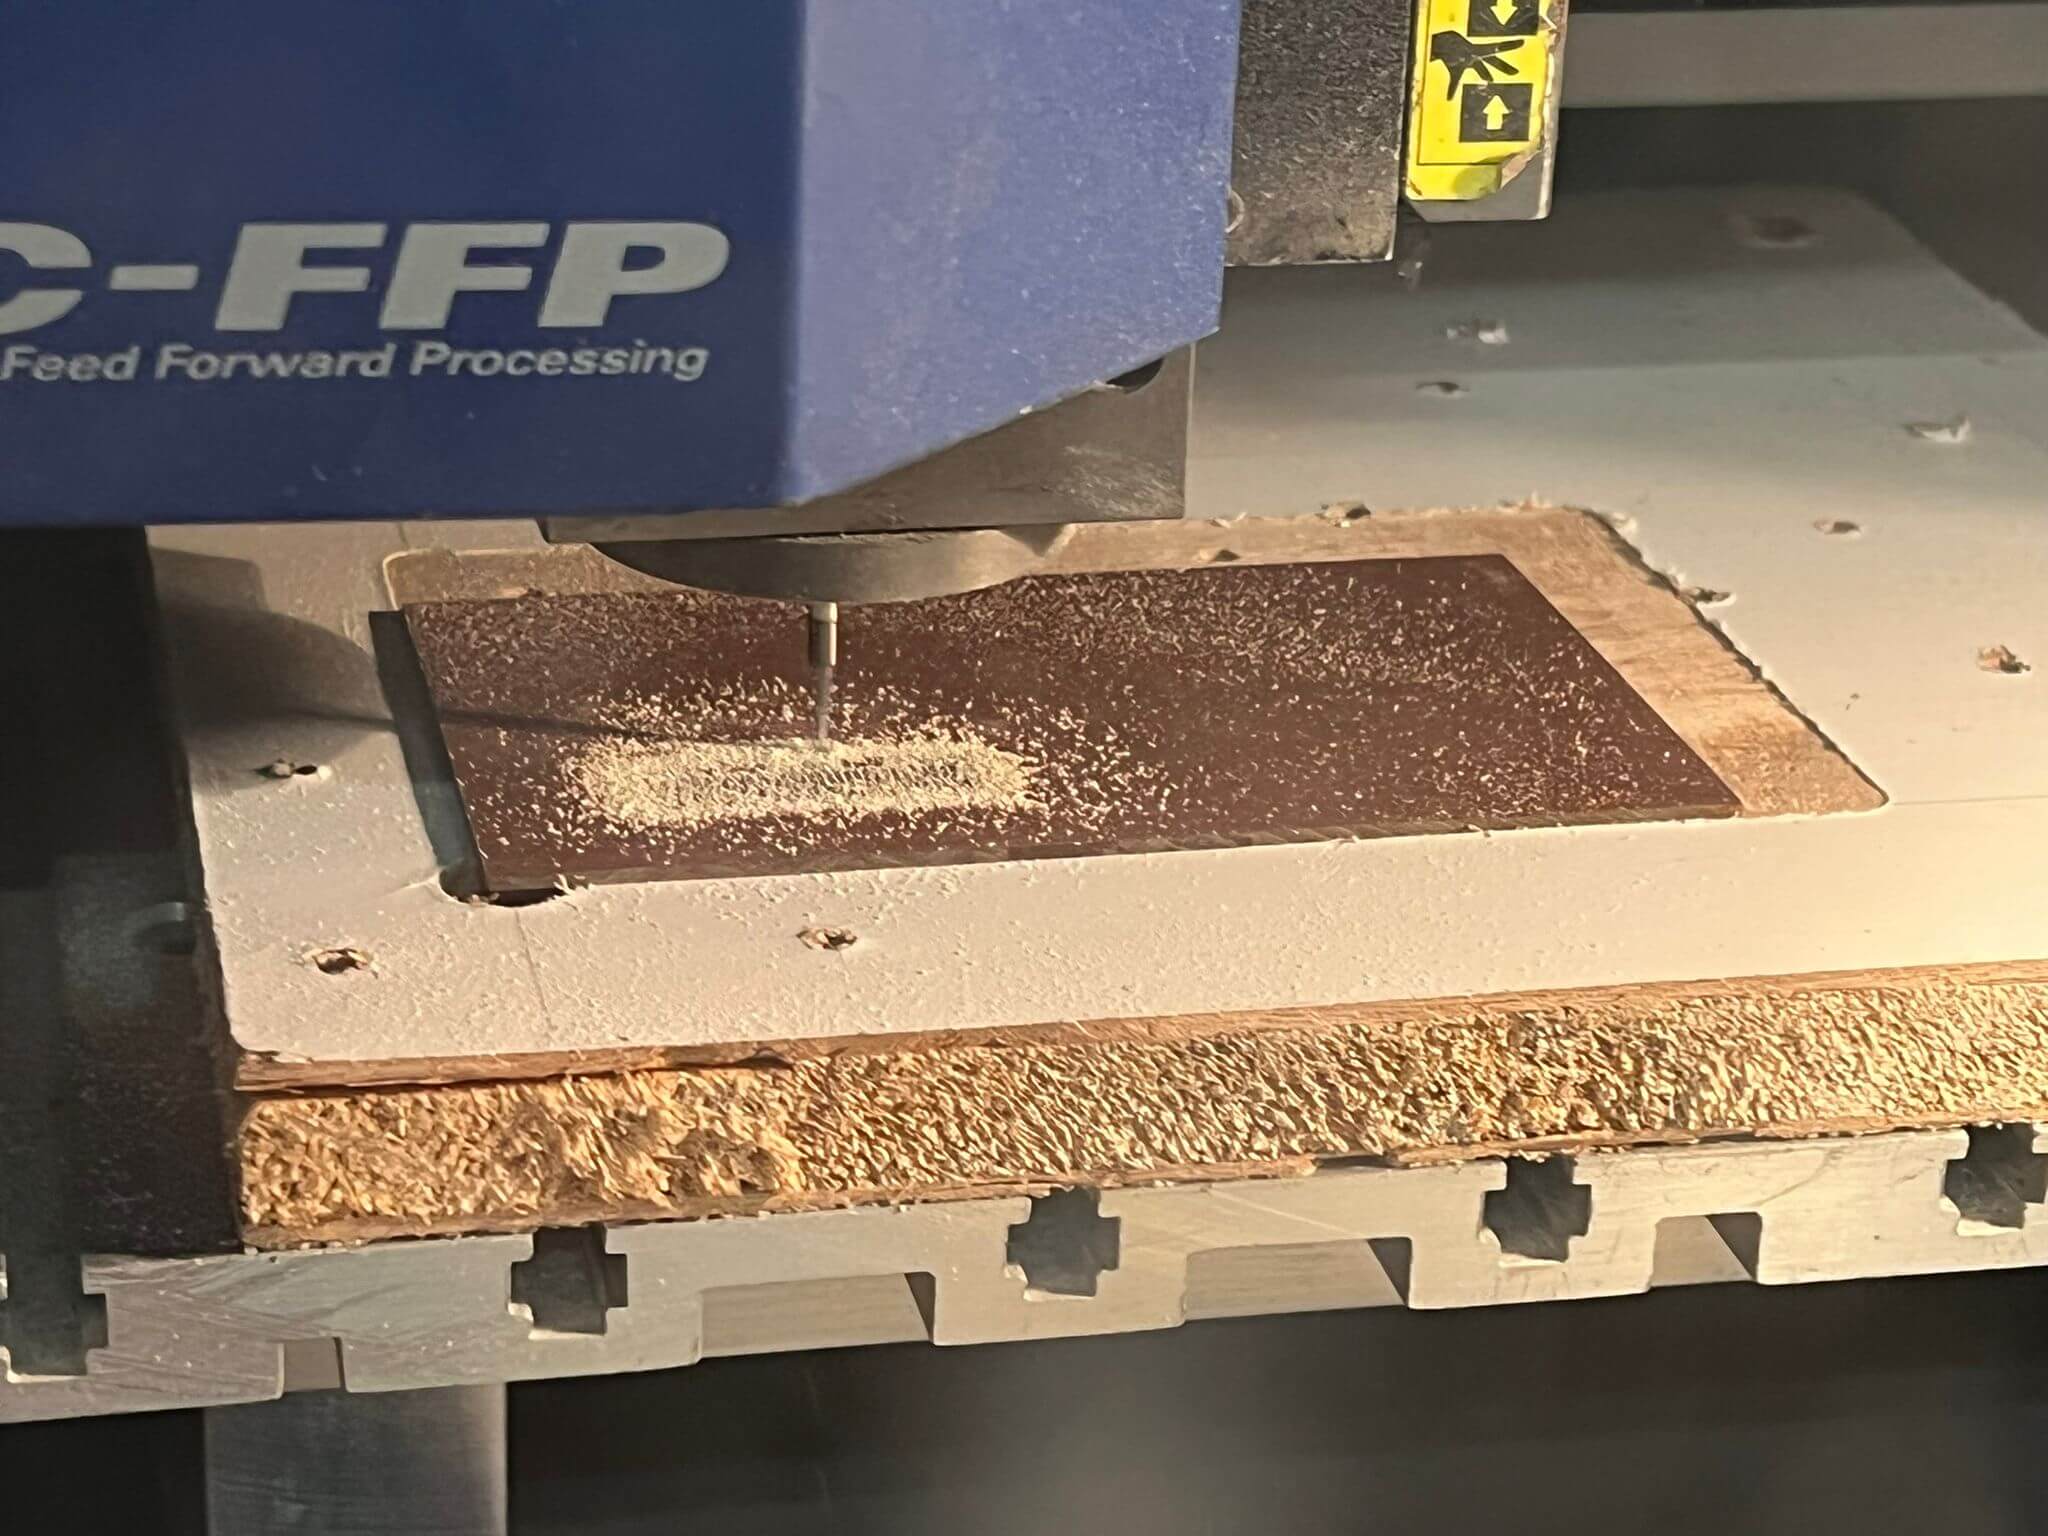
Fablab iSPACE’s Milling Machine
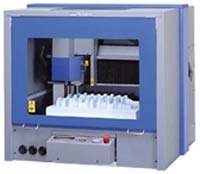
The Milling Machine we are using is our lab is Roland Modela Pro MDX-500
| Specification | |
|---|---|
| Work Area | 500 x 330 mm |
| Z Stroke | 105 mm |
| Spindle motor | DC brushless motor 400W |
| Spindle speed | 3.000 - 12.000 rpm |
| Dimensions | 740 x 840 x 670 mm |
| Weight | 92 kg |
| Source |
| User Manual | |
|---|---|
| User’s Manual 1 ★ | Setup & Maintenance |
| User’s Manual 2 | Cutting Using the Included Software |
| User’s Manual 3 | Cutting Using NC Code |
| Programmer’s Manual | NC code |
Setup
After turning on the milling machine, we need to set the origin ‘XY’ and ‘Z’ position. That postition will be the start of the milling will run.
After we are trying to mill the first board, we figue out we forgot to set ‘Z’ axis as well. So the drill spin in the air. Haha.
week05_wrong_milling from TerryAU on Vimeo.
So don’t forget to set all axis before milling!
week05_setup from TerryAU on Vimeo.
Document feeds
We used Mods to generate .nc file which needed for the Roland Modela Pro MDX-500 Milling Machine. Then we used EdytorNC for communication.
Here are the procedures for generate the file and send the file to machine.
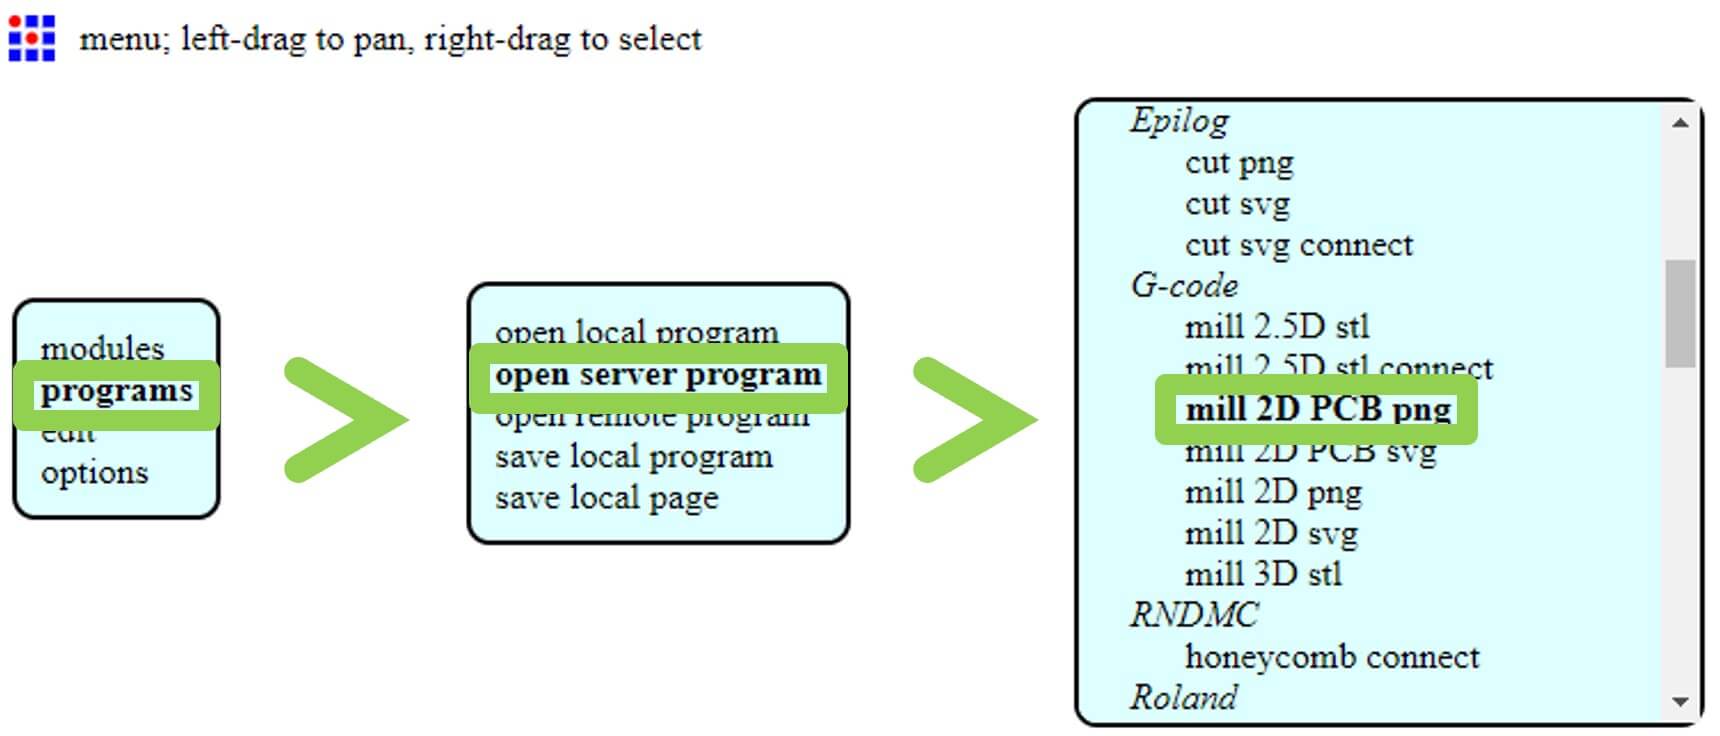
Step 1: Open Mods > Right click > programs > open server program > G-code: mill 2D PCB png.
select ‘mill 2D PCB svg’ if you input file type is svg.
Step 2: Select the image, and change the settings to you wanted or the machine needed, like tool diameter, cut depth, speed, offset… After all settings done, click calculate.
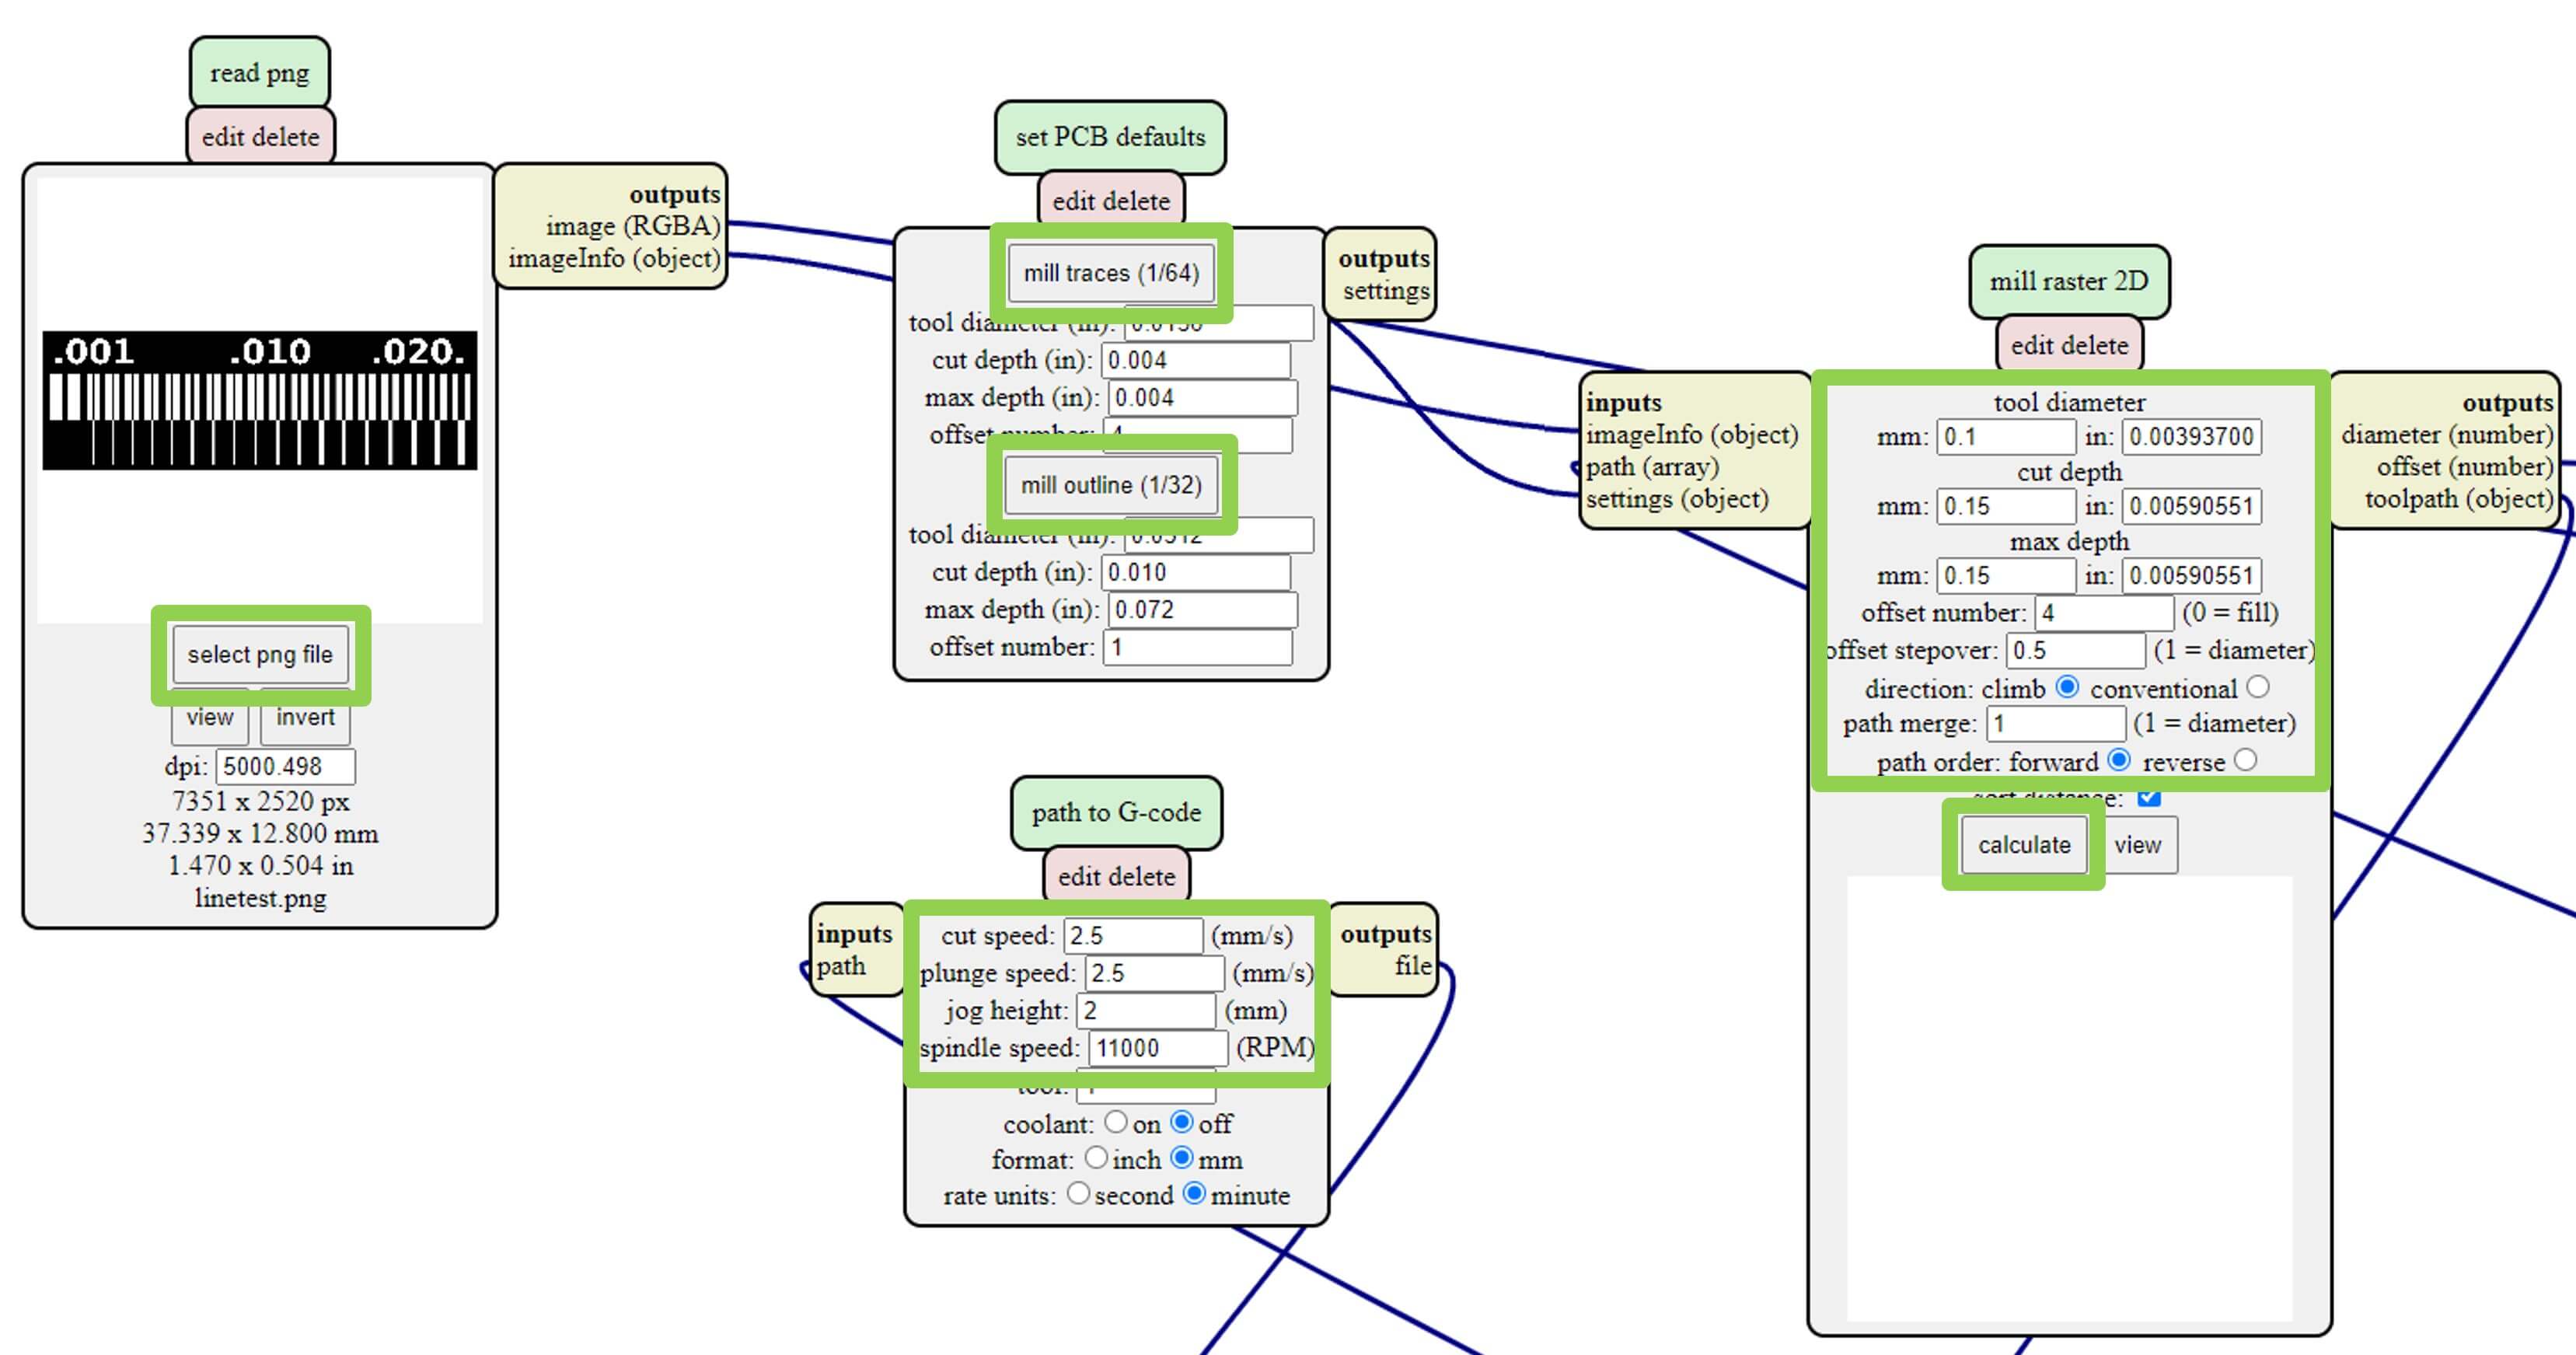
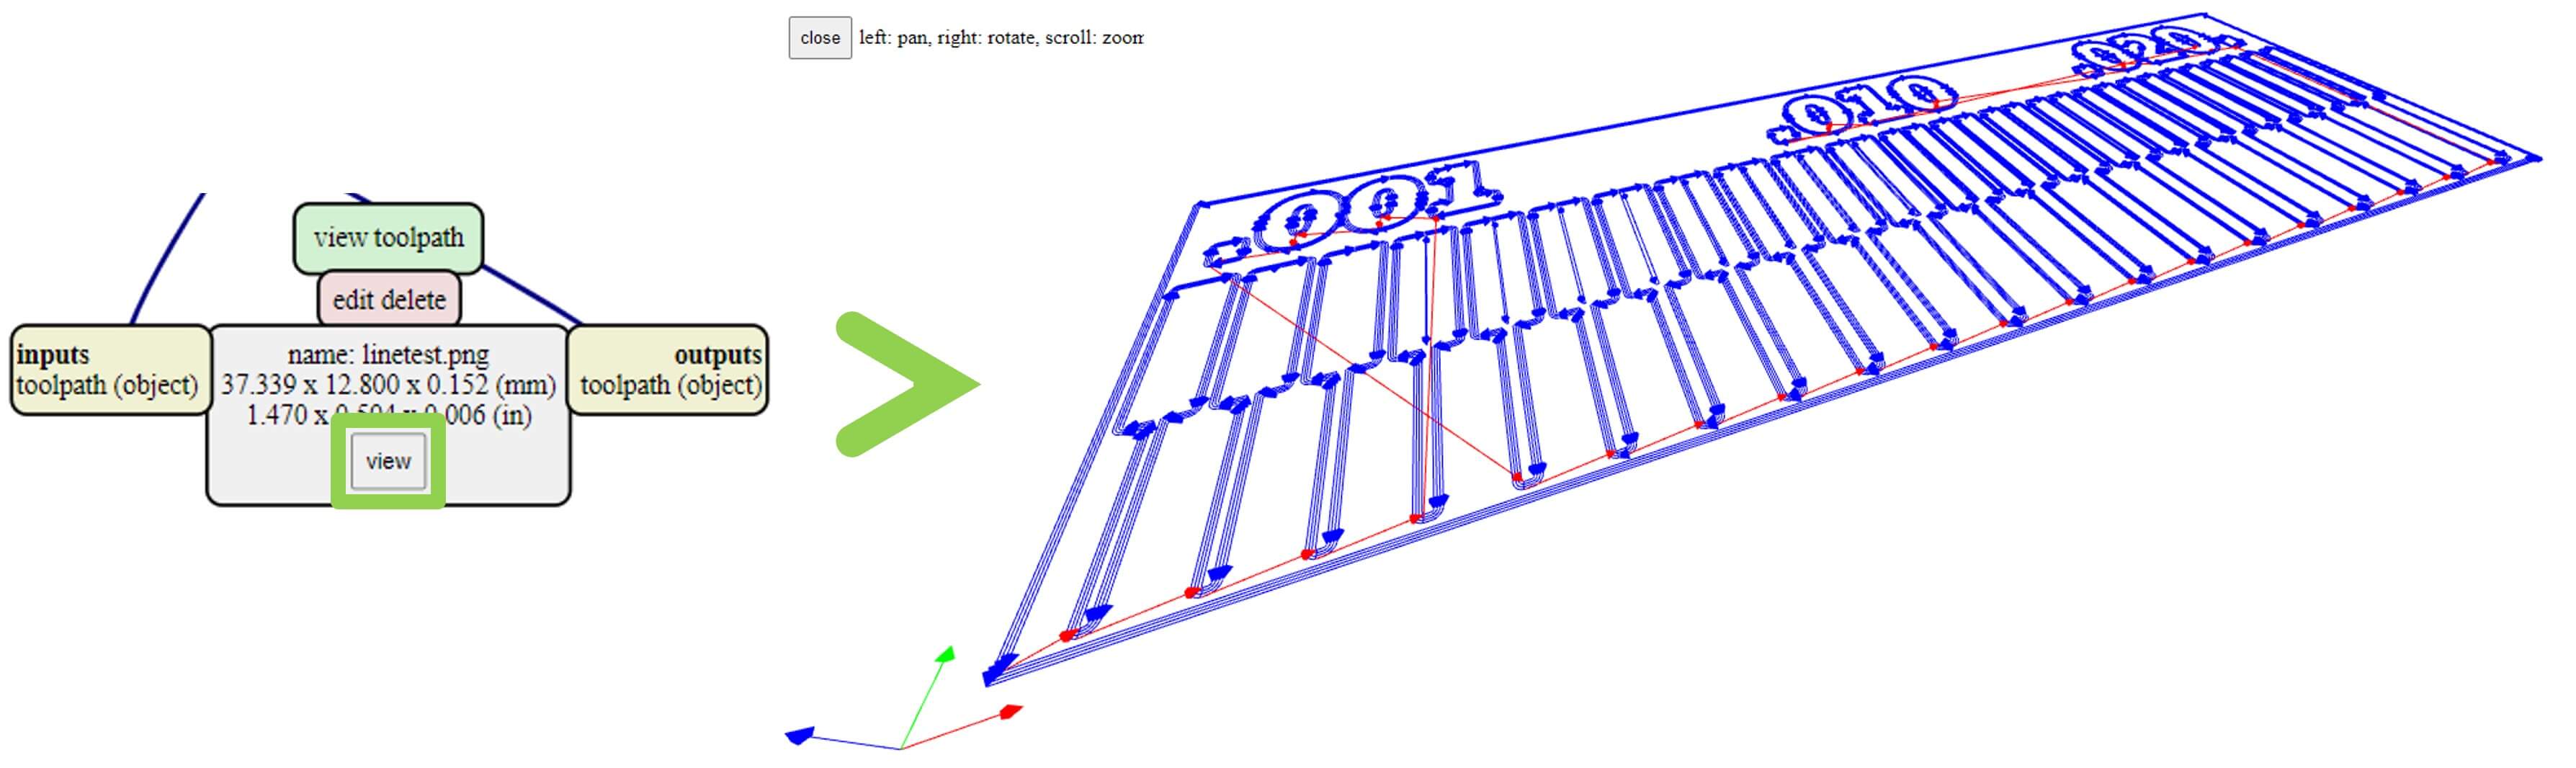
Step 3: Inspect the generated cut path files in the ‘view toolpath’ module at the bottom by clicking ‘view’ button.
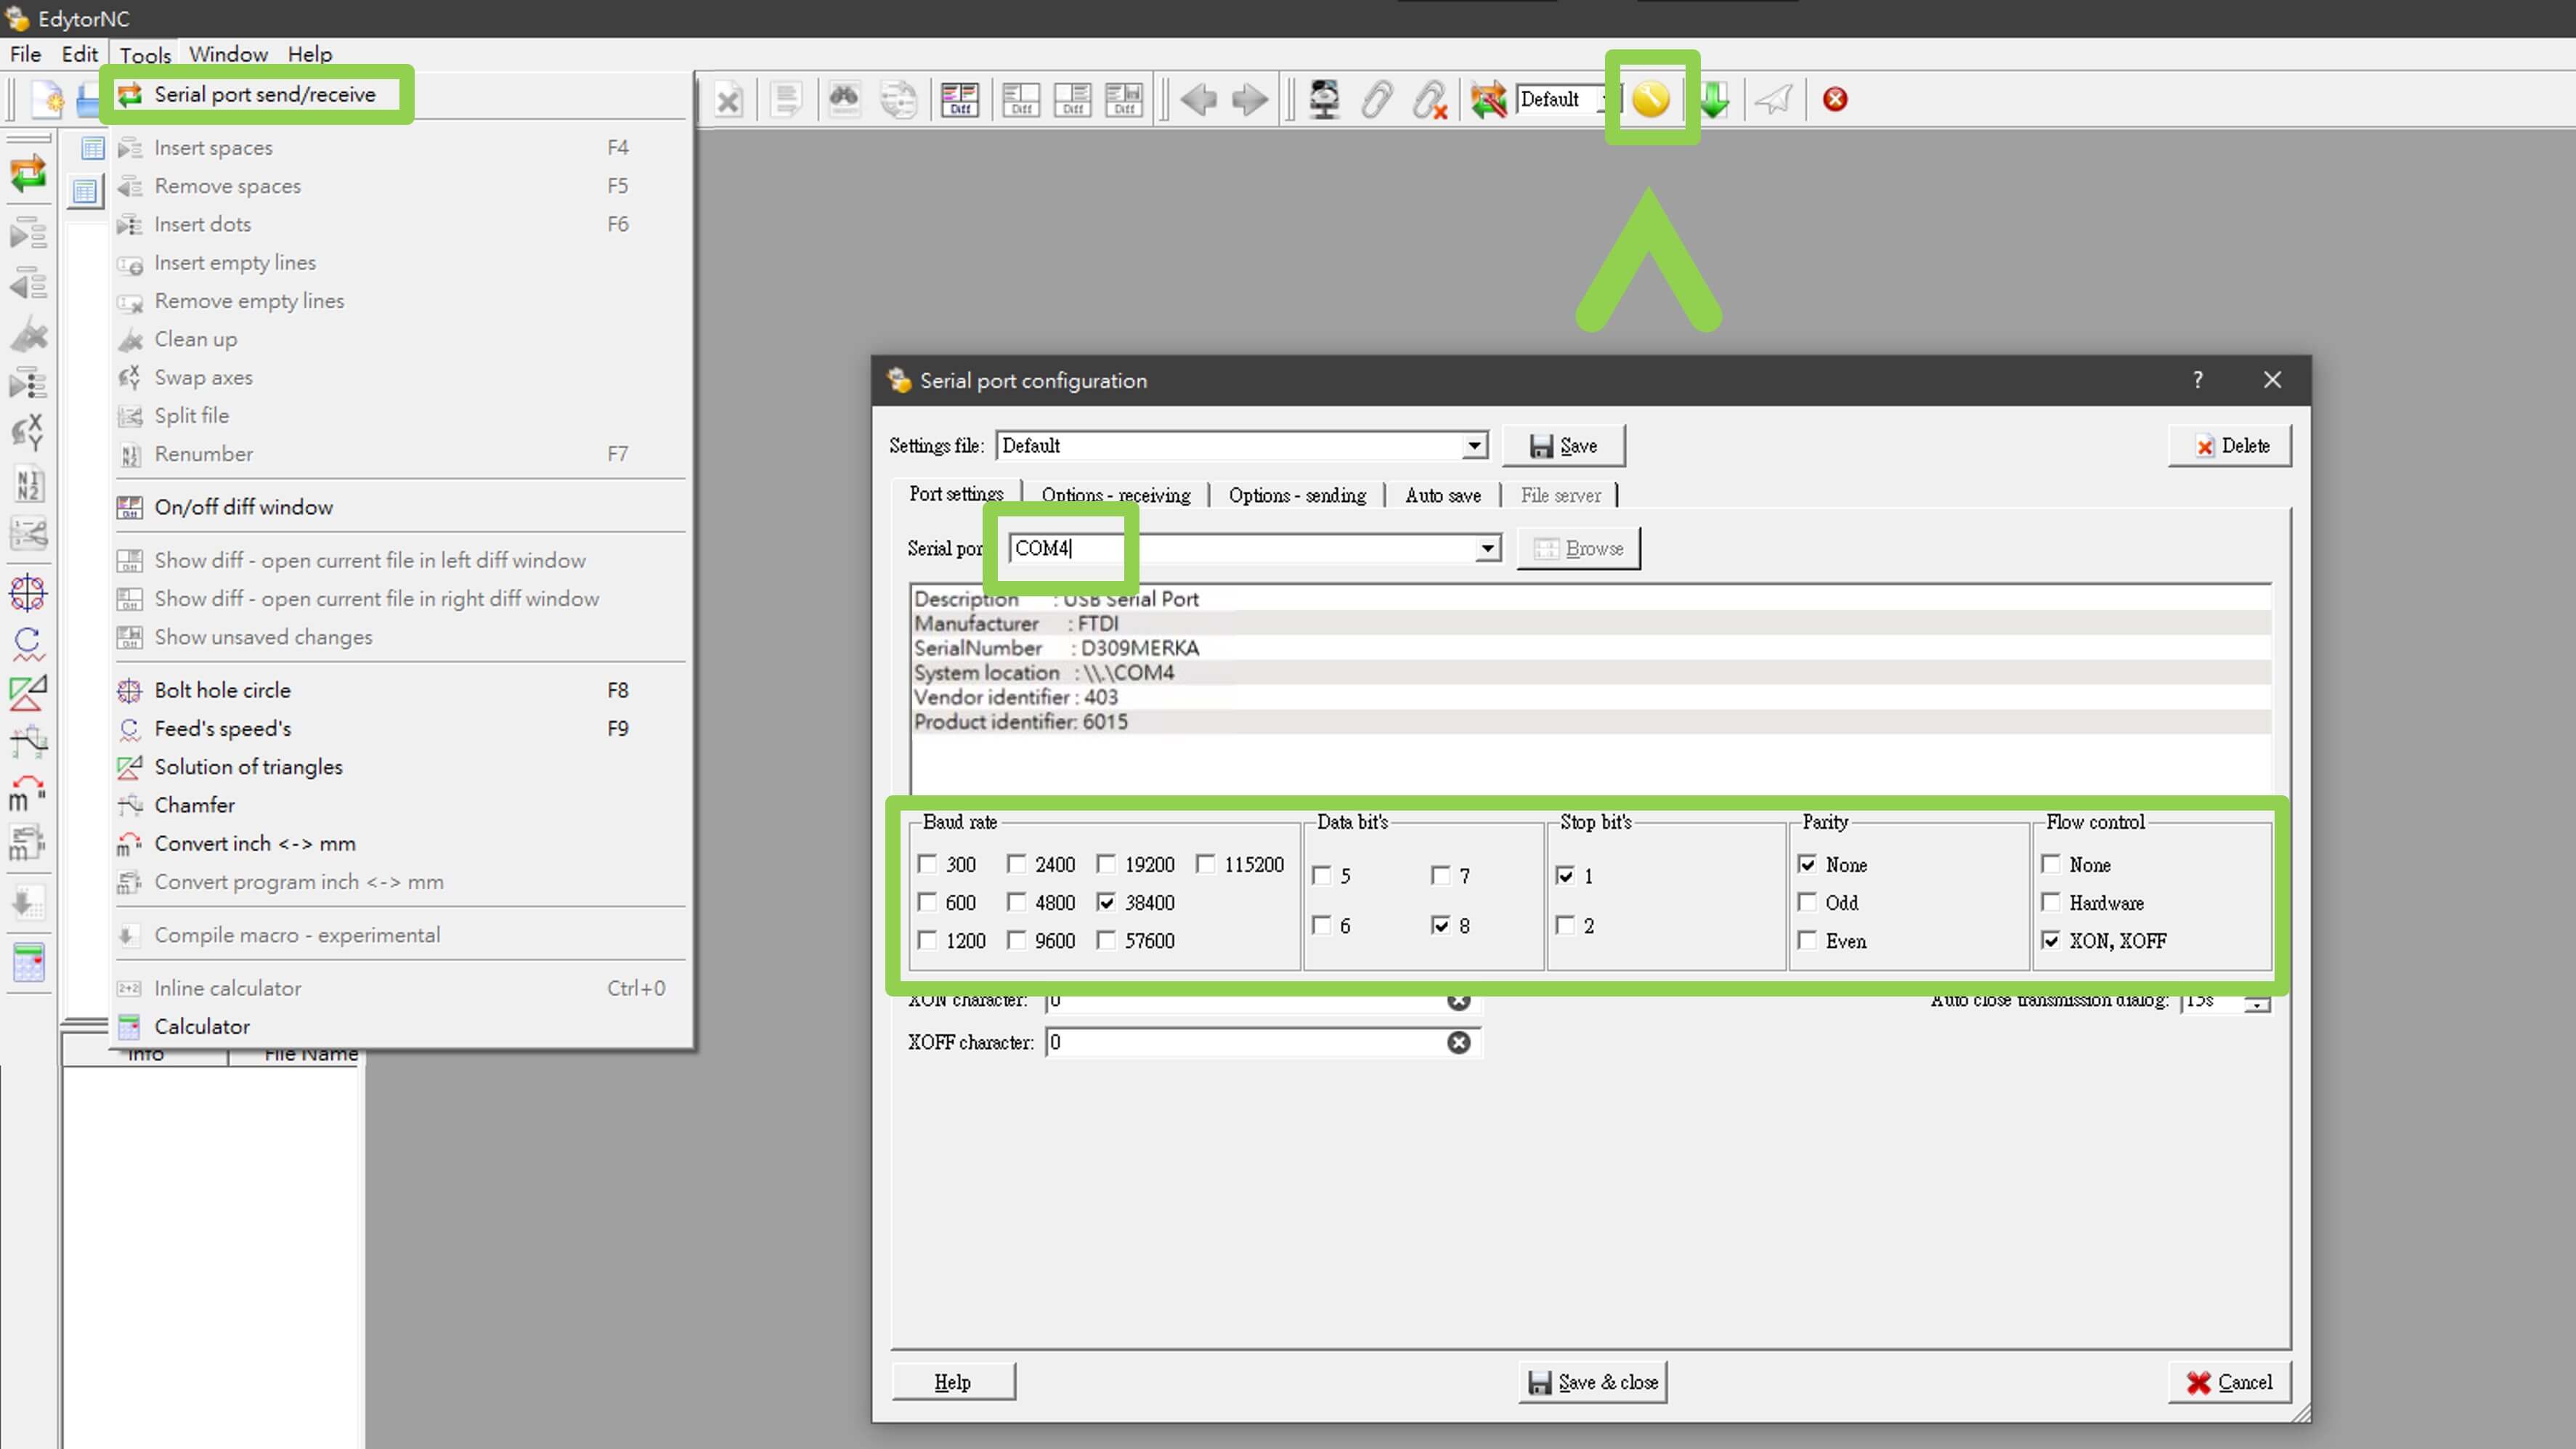
Step 4: After saving the .nc file, open EdytorNC and click Tools > Serial port send/receive.
Step 5: Click on the yellow button on the function bar, and select the correct COM port and settings.
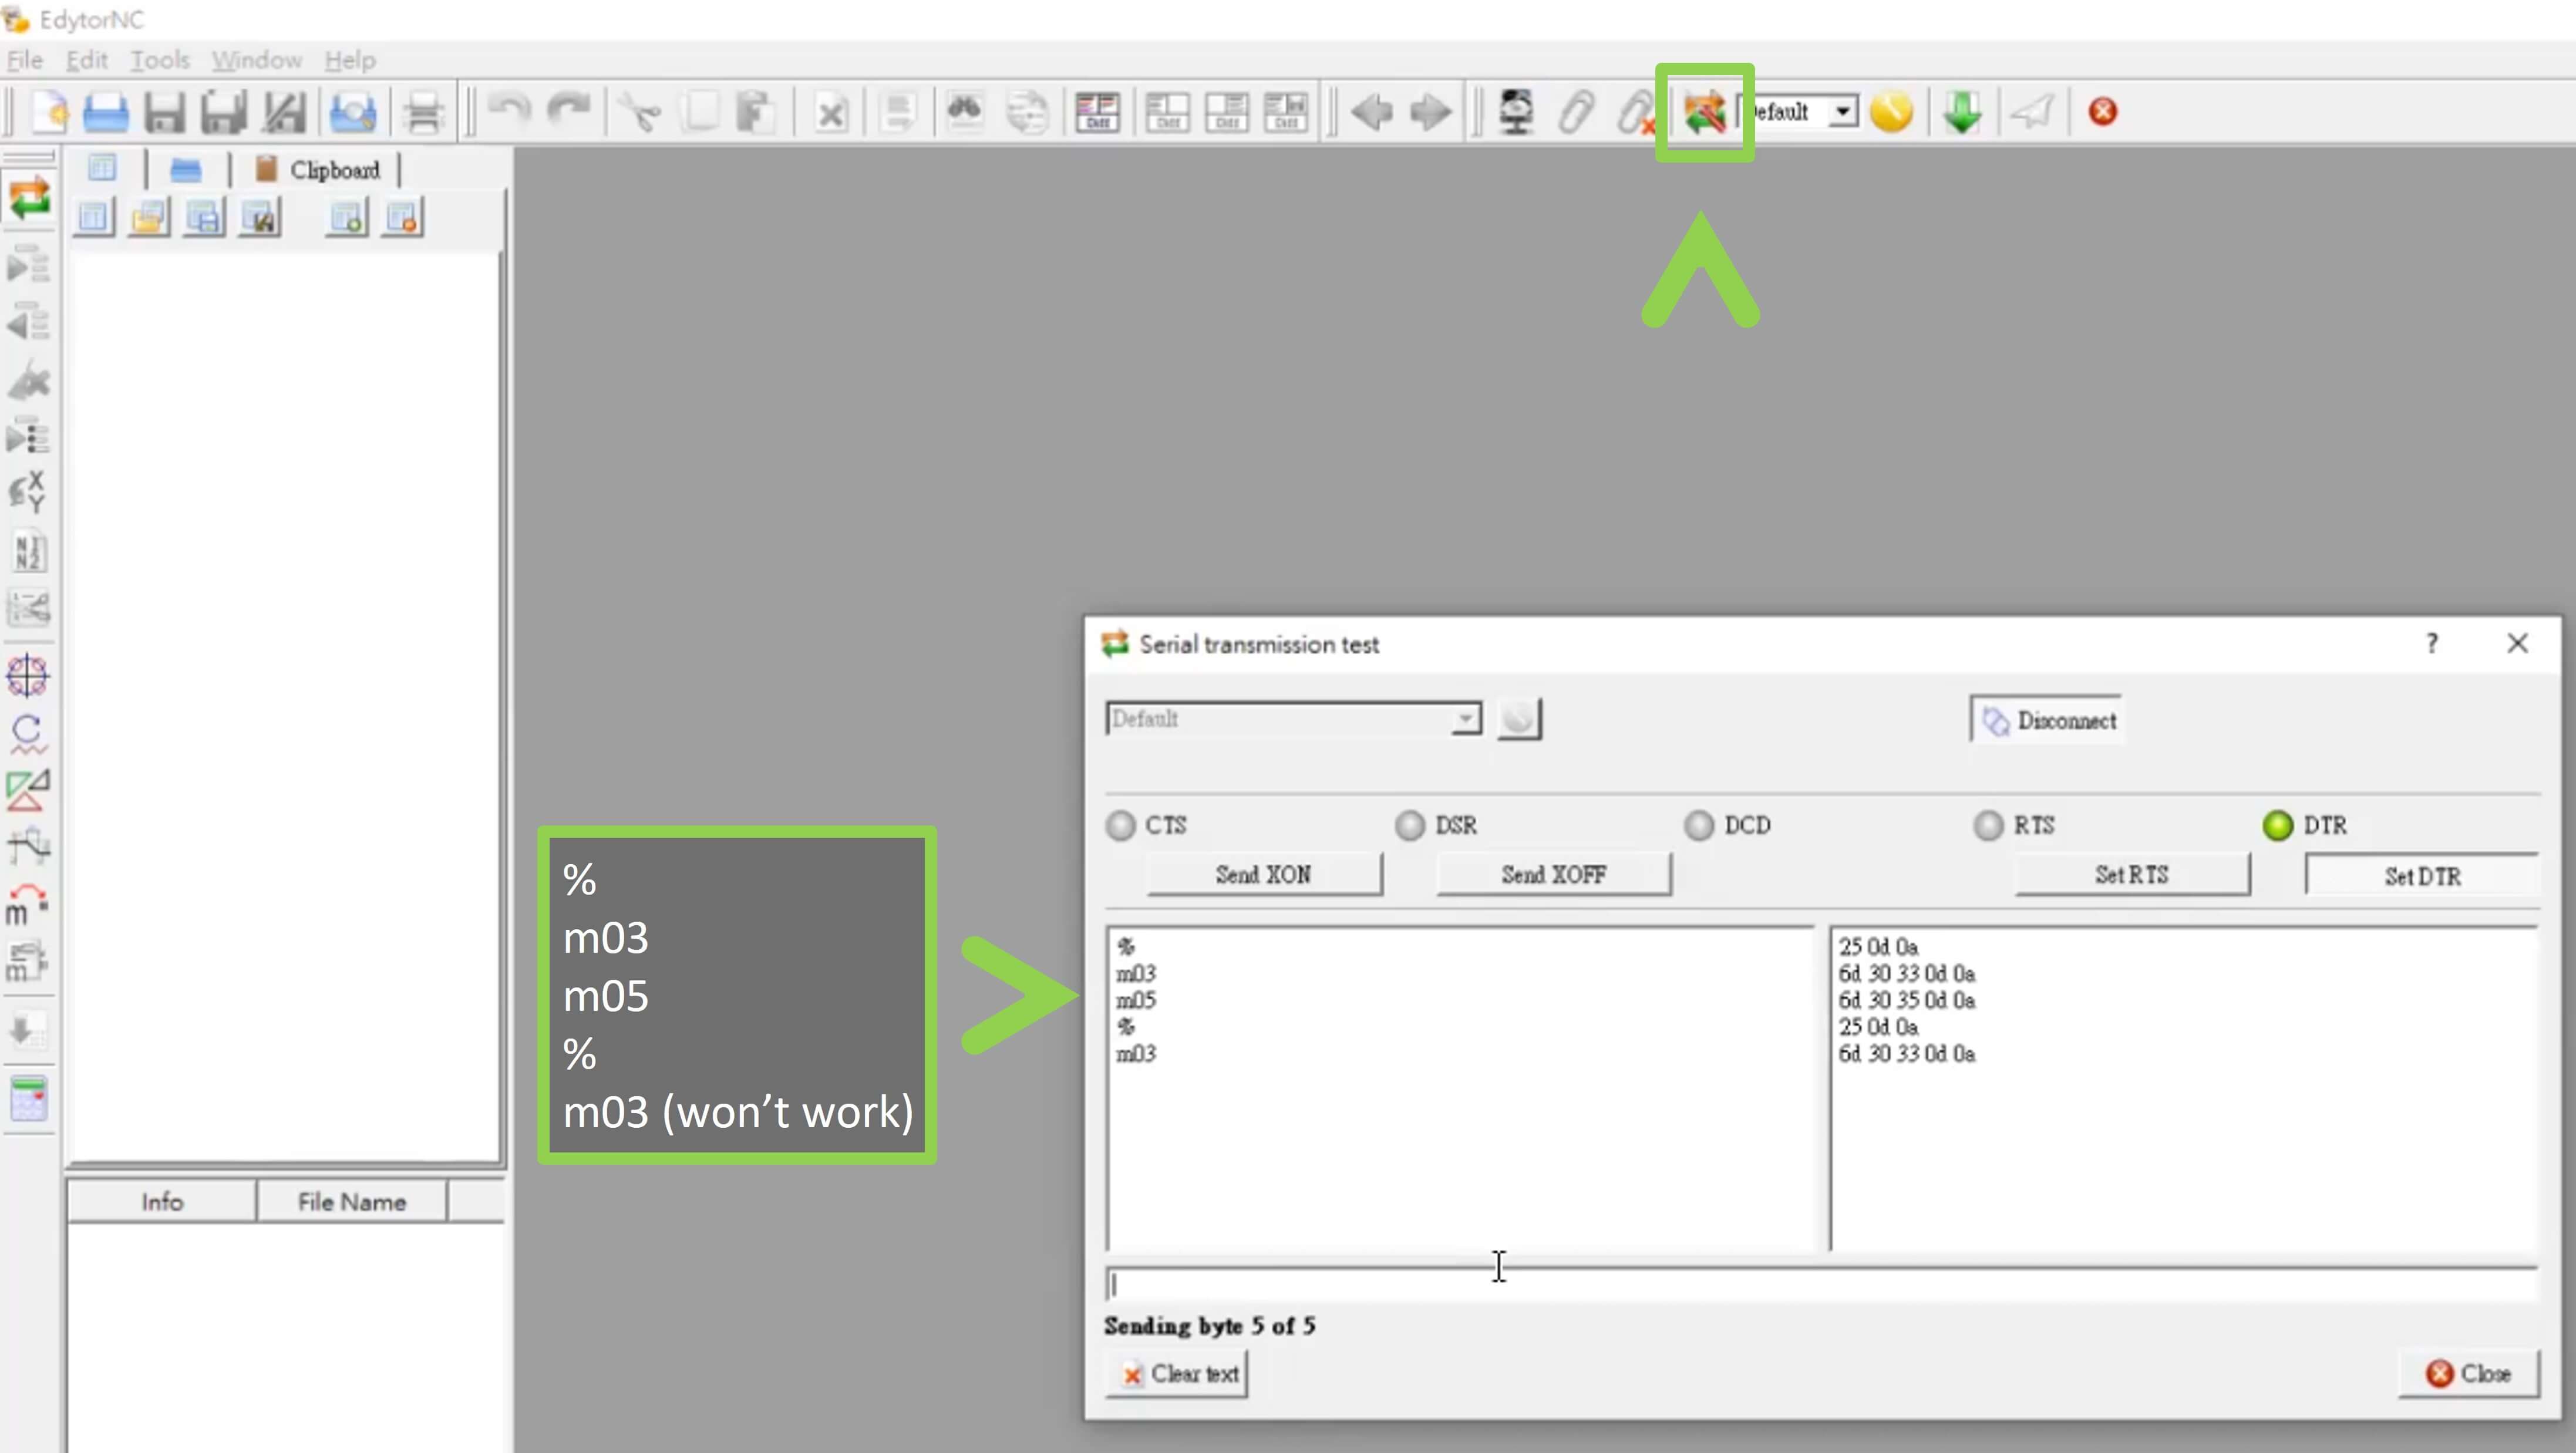
Step 6: Test for the communication between the computer and the machine. Click the button on the left of the selection textbox. and type ‘%’ to let know machine know this is the beginning, then ‘m03’ to test is the machine do run your command. If it is ok, then ‘m05’ to stop the spindle from turning, and % for denote the end.
Command % To denote the beginning and end m03 To start the spindle turning clockwise m05 To stop the spindle from turning Here are some Chinese documents of using code on CNC machine
CNC銑床程式製作功能一覽表
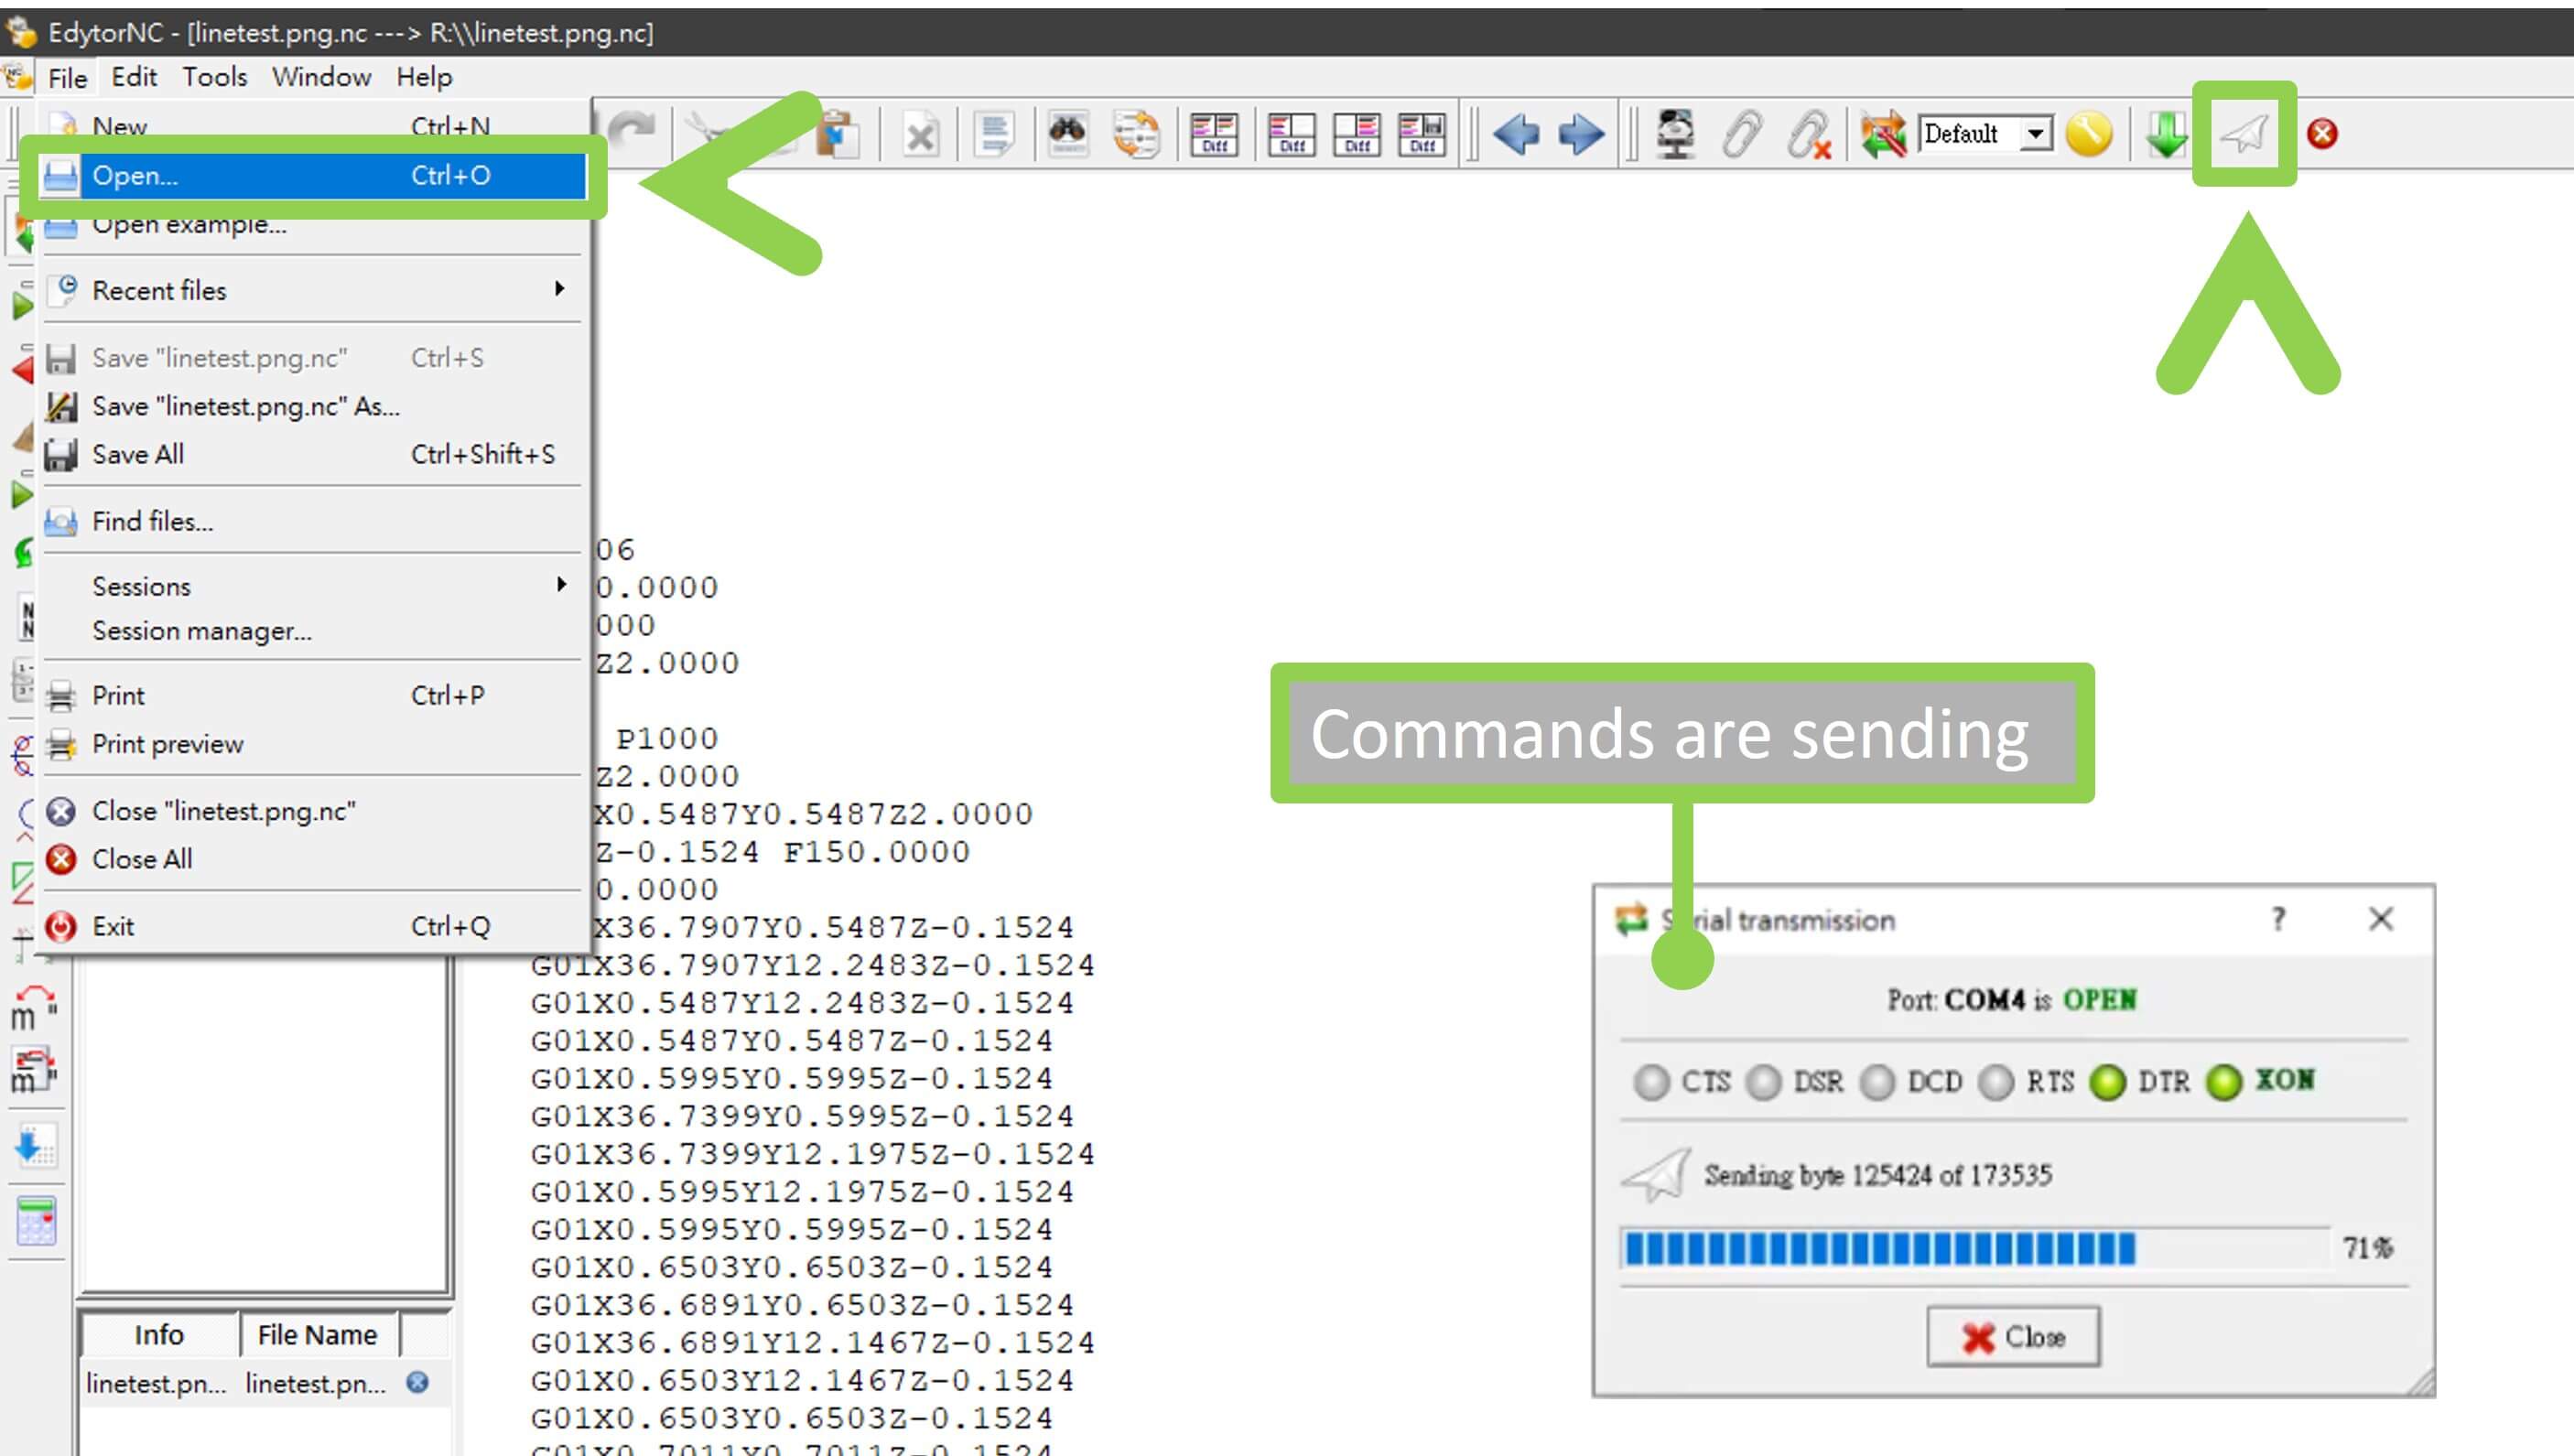
Step 7: Select the file and send it to the milling machine by click the paper airplane button.
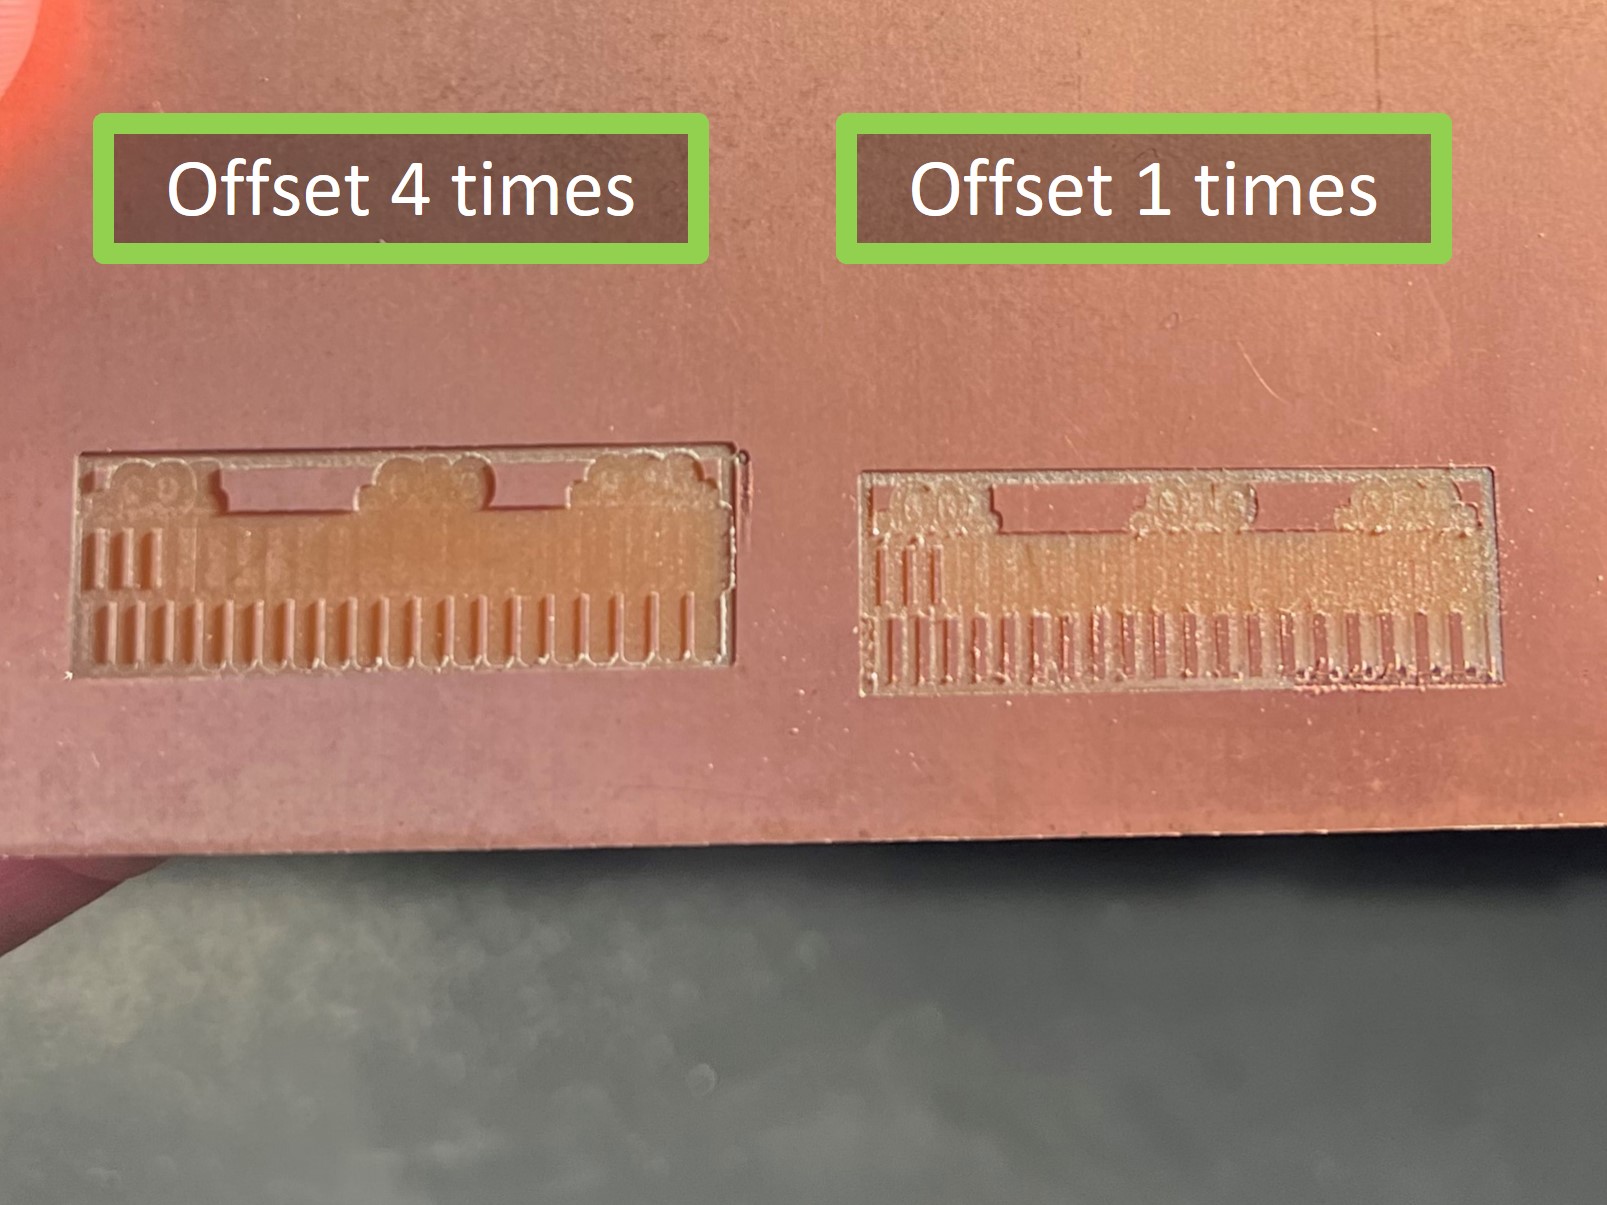
Milling and Observations
We use different blades for comparing the differences
0.1mm 10 degree V-bit
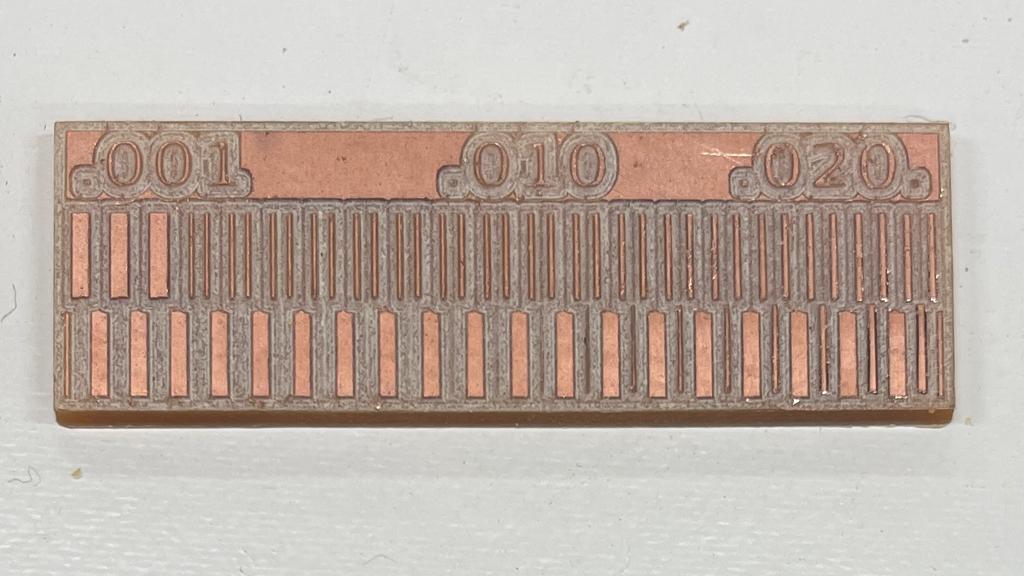
0.1mm contouring bit