8. Computer controlled machining
This week I worked on making something big.
Group assignment
This week of group assignment, We try to test runout, alignment, speeds, feeds, and toolpaths for our machine. Click HERE to see more detail of the group assignment.
Individual assignment
Heroshot
For the individual, I decided to use the Parametric design, Game Machine Shell in Week 4 for this week assignment.
TigerCNC
In our lab, we are using TigerCNC for the milling wood machine.

For this week material, I used 18mm OSB for the assignment.

Alpha
To start with, I changed the Game Machine Shell model to 18mm think which is the thinkness of the material I going to used, and make the whole size bigger on scale, otherwise it won’t big enough, make sth big right?

Then, I’ve add dogbone corners for give me tight-fitting parts.
This video Here, in 0:00 - 1:10 explain how dogbone corners work to give you tight-fitting parts. But I won’t do it in Easel, I’ve done it in Fusion 360
By doing dogbone in Fusion 360, since Fusion doesn’t have this function so I’ve install an add-in.
Go to AutoDesk App Store and seach ‘Dogbone’ and click in ‘Nifty Dogbone for Autodesk® Fusion 360™’.

Then select the OS you using and download it.

After installation, restart Fusion and see is there a tool added in modify called ‘Nifty Dogbone’. Then click it and choose the body. Then on the left side list, enter the tool diameter.

After do it to all of the bodys, you can see the gif below, dogbone complete.

Moving to the part of using Easel
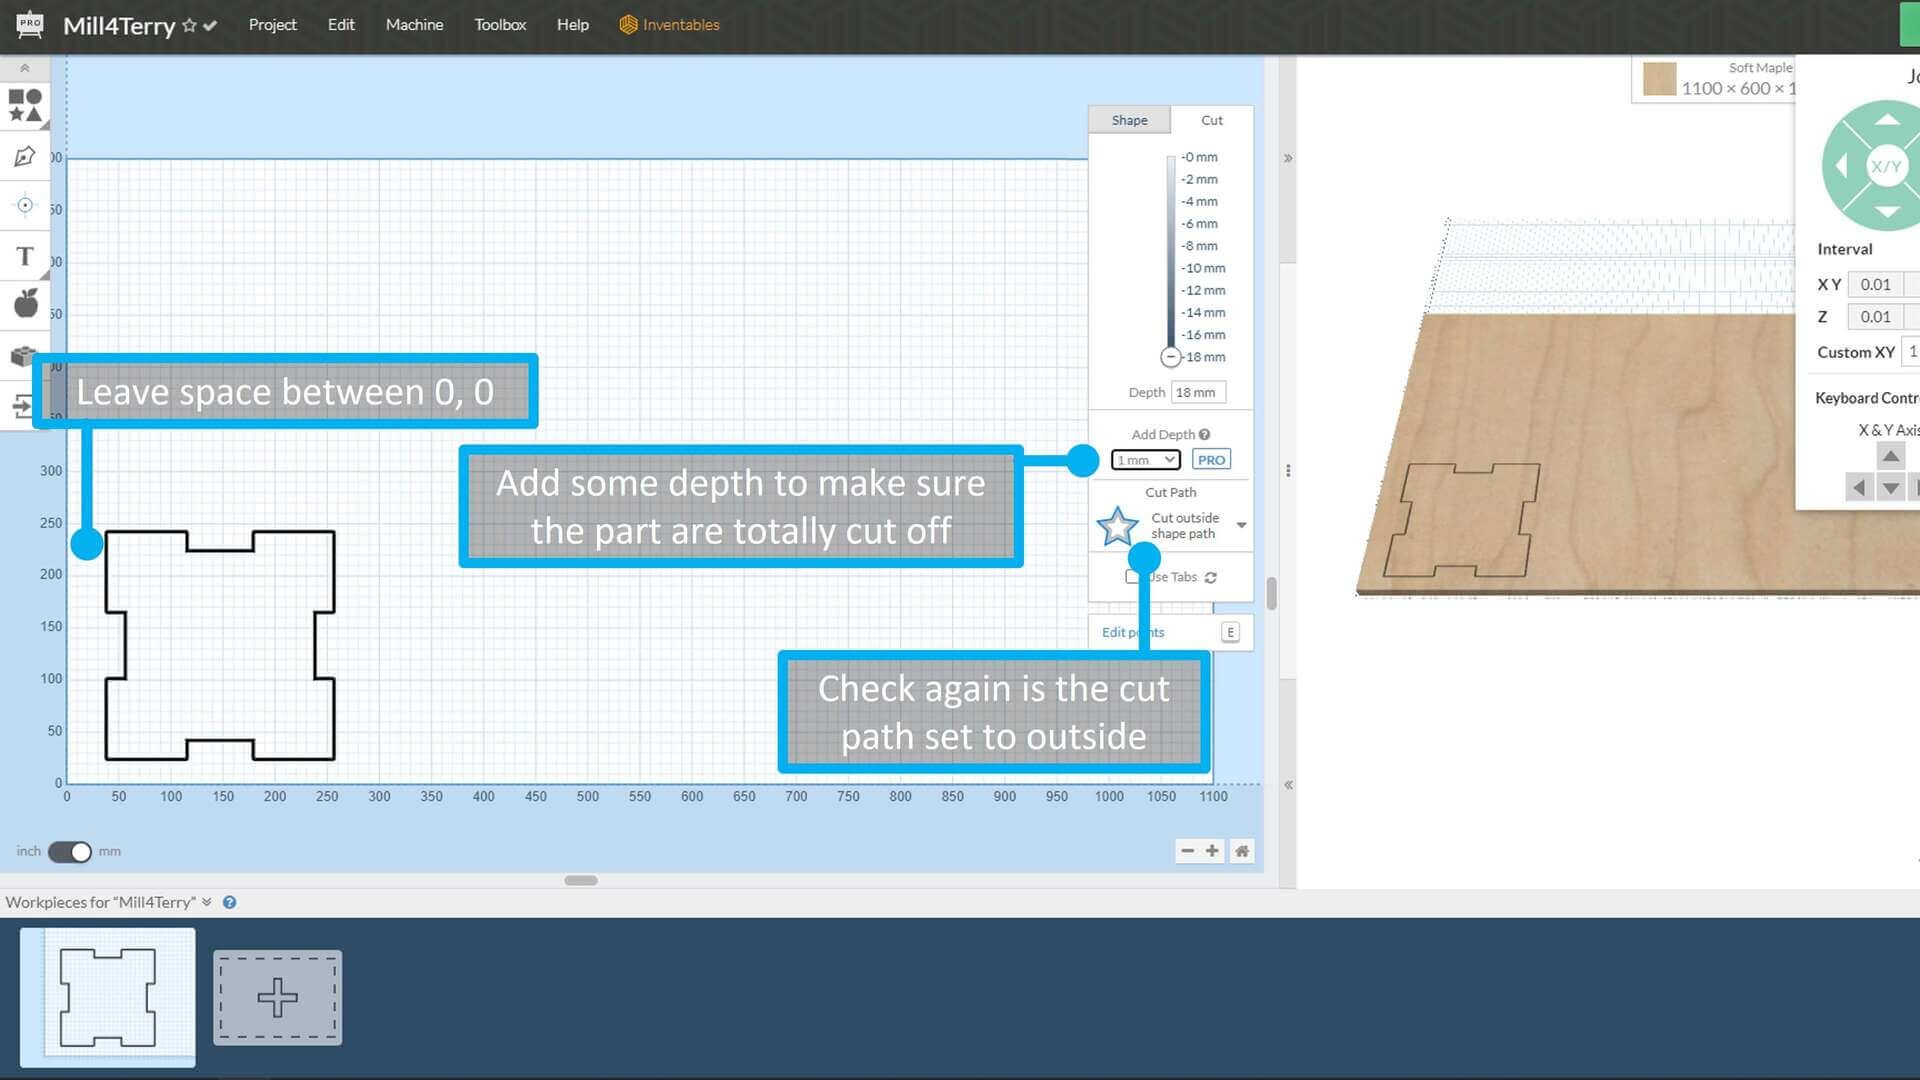
In the control panel, Alought I am using OSB for my material, but I’ve selected Soft Maple because it’s much more faster.
I’ve also set the size to 1100 x 600 x 18mm according to the material.

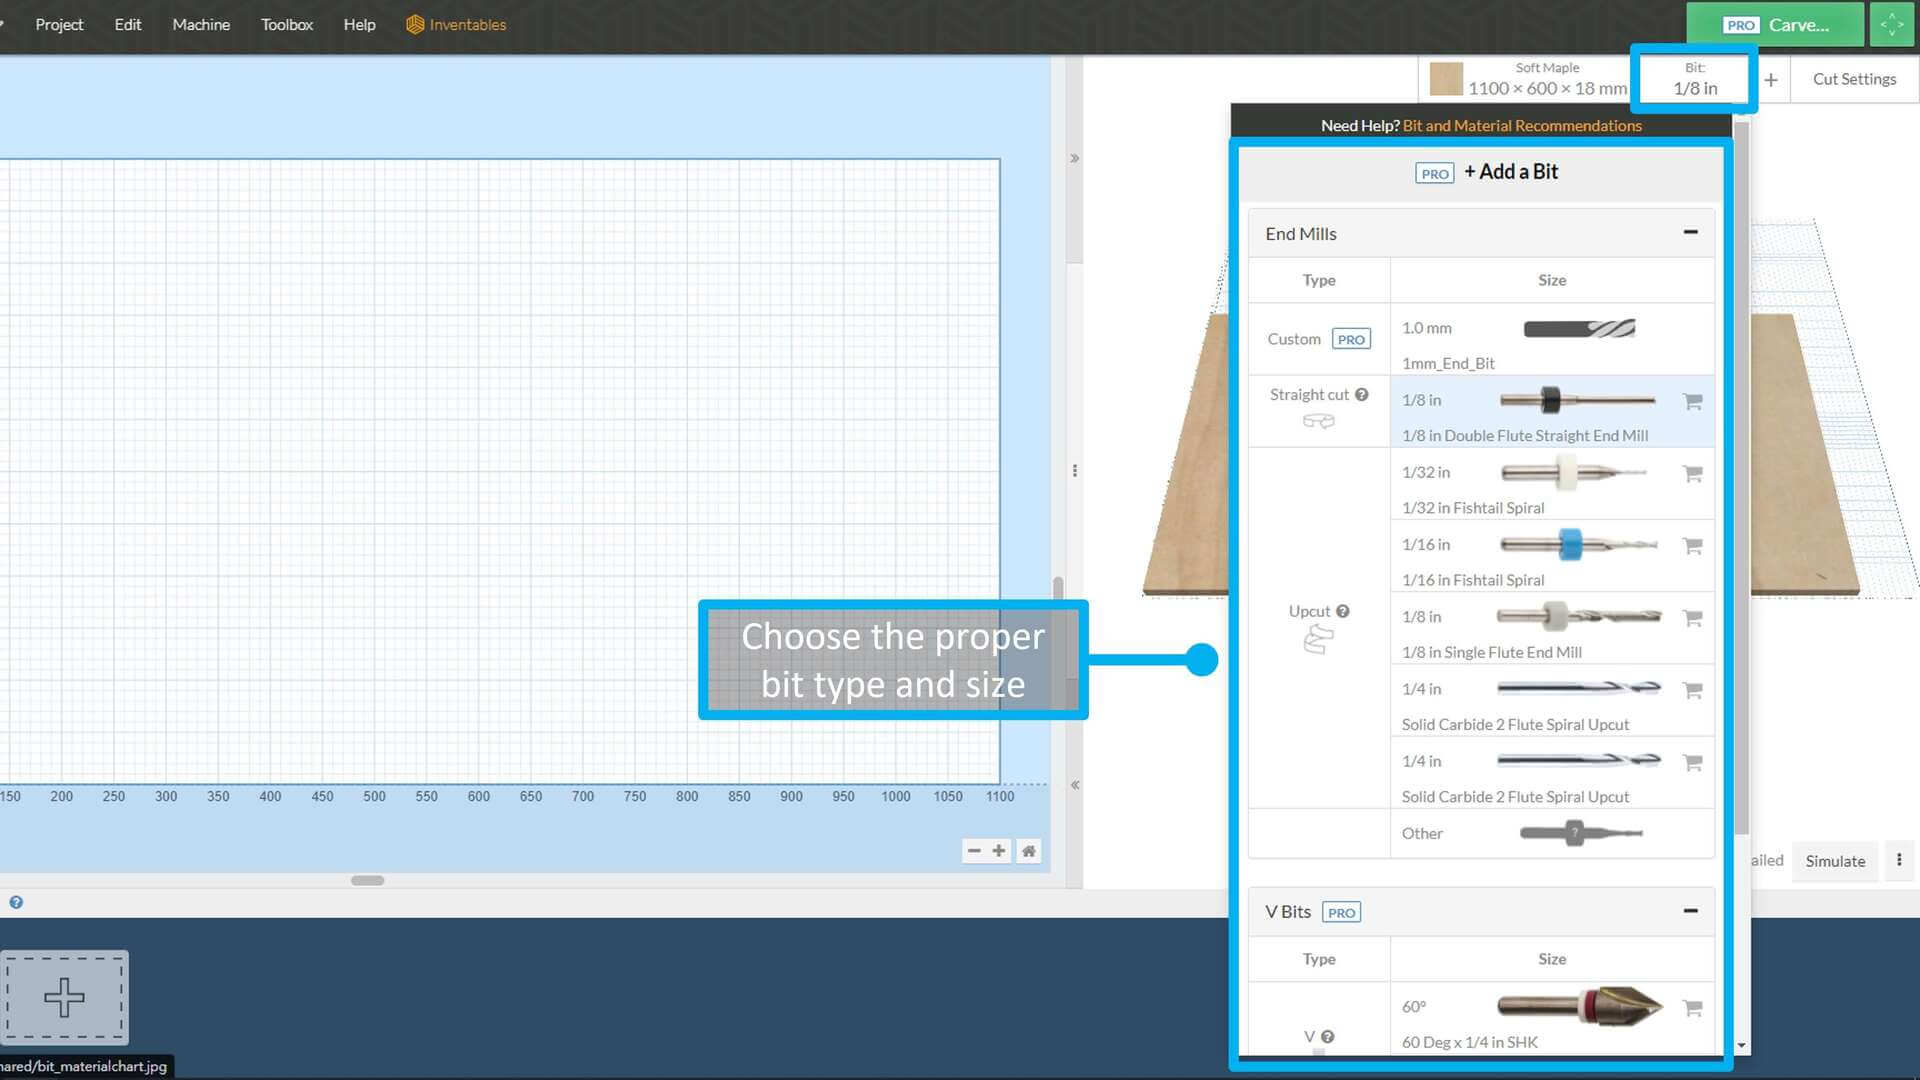
Bit, I’ve choose 1/8 in Double Flute Straight End Mill.
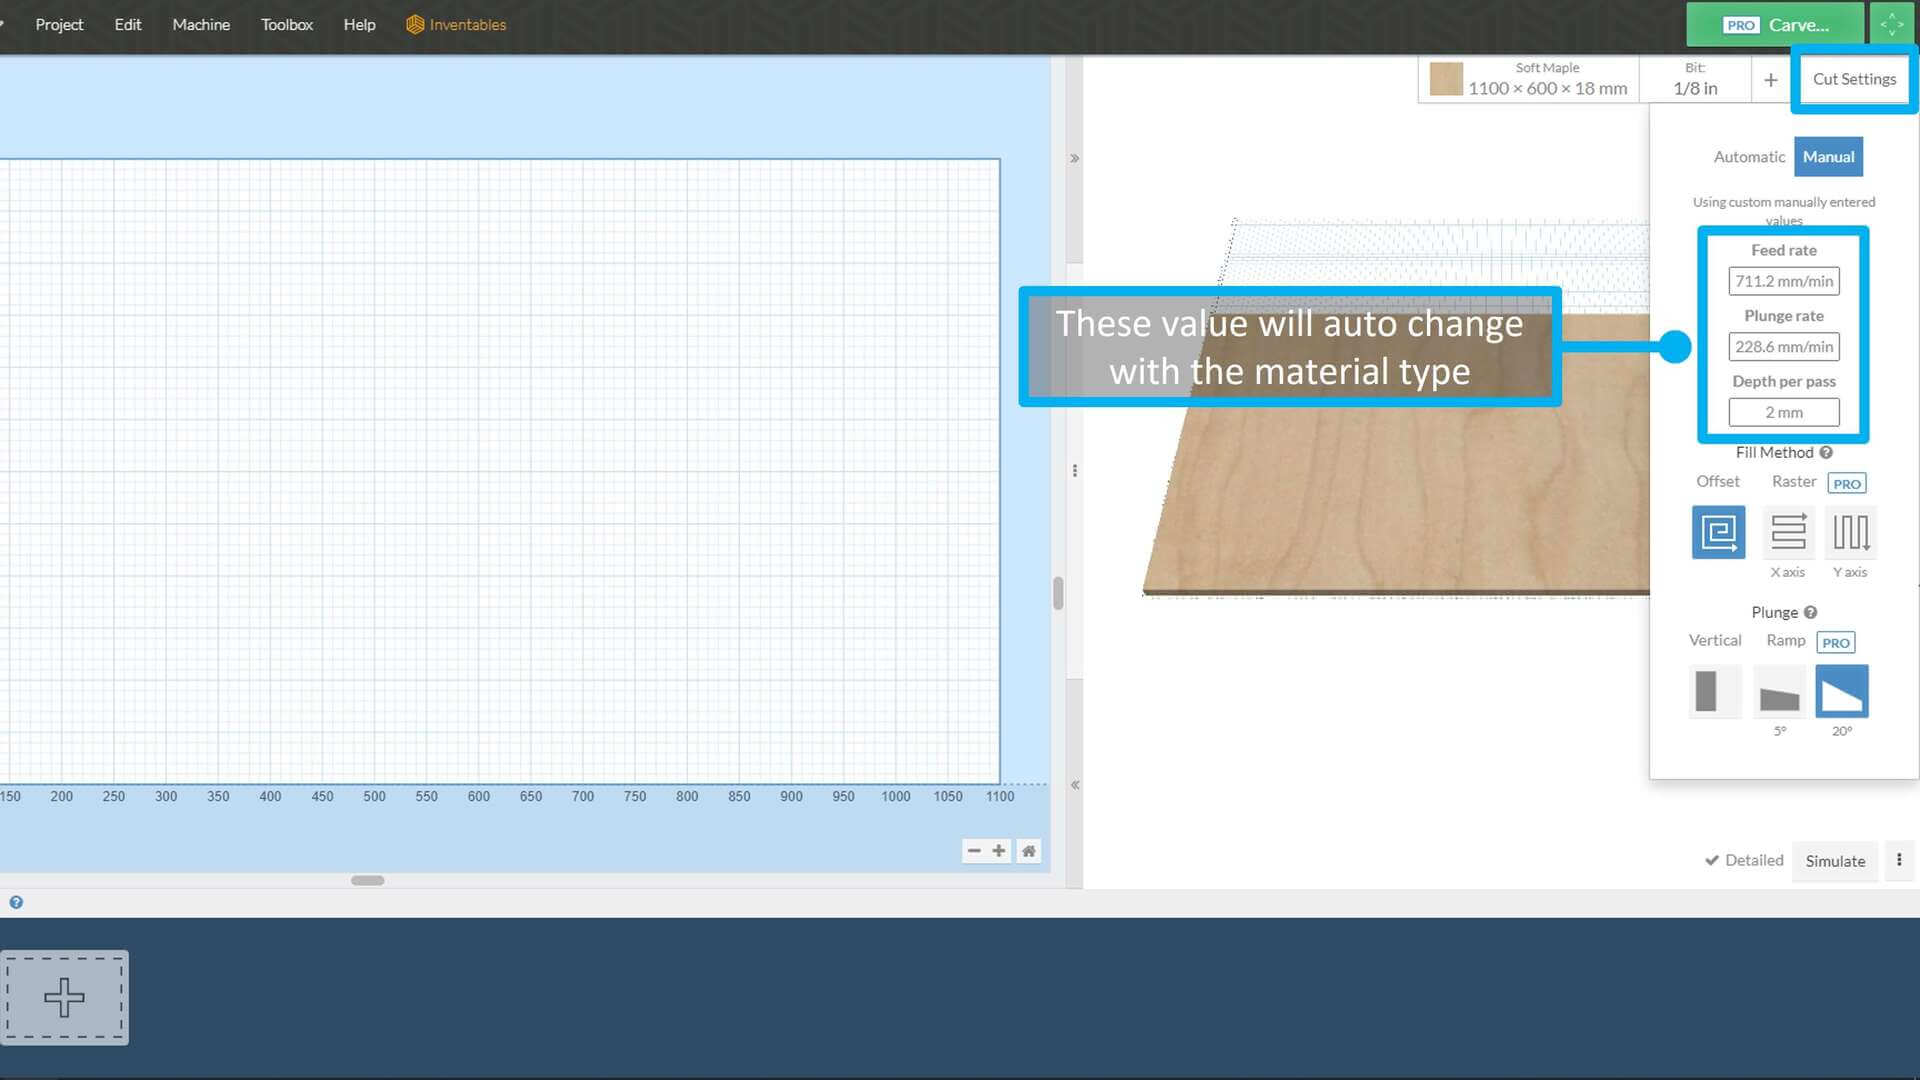
And these value will auto change with the material type.
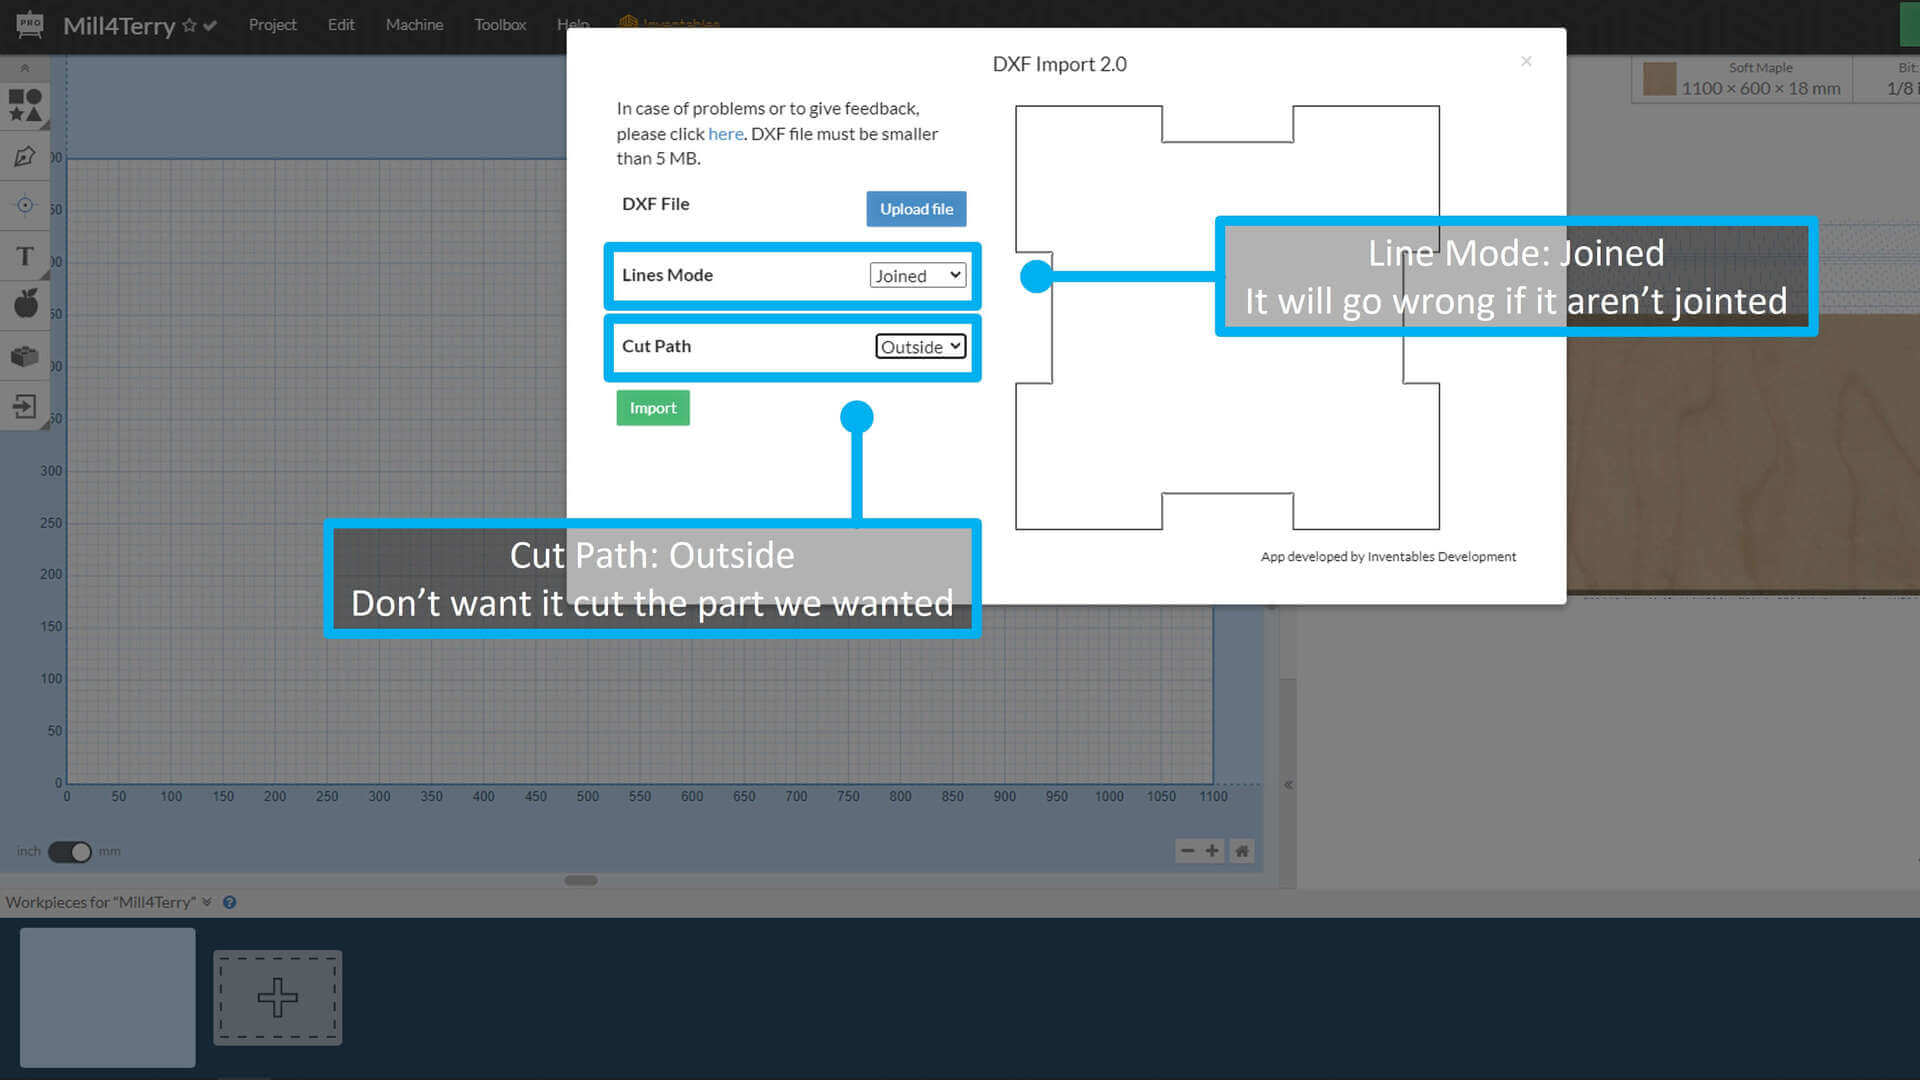
Then, I’ve import the DXF file into the Easel

In the confirm box, I’ve set the cut path to outside because I don’t want it cut the part I need. And set joined for the line mode, otherwise it will go wrong.
After the DXF imported, I’ve moved it for left some space between the cut path and border.
Then on the left side list, I added 1mm depth to make sure the part are totally cut off.
And check again is the cut path was set to outside.
Last few step before milling, I’ve download the software to unlock ‘PRO’, some necessary features like machine controlling.
After that, I’ve tried to operate the machine manually on the ‘Jog Machine’ Panel.
I’ve confirmed the communication works and no items were put on the working area. So let’s move to the milling part.

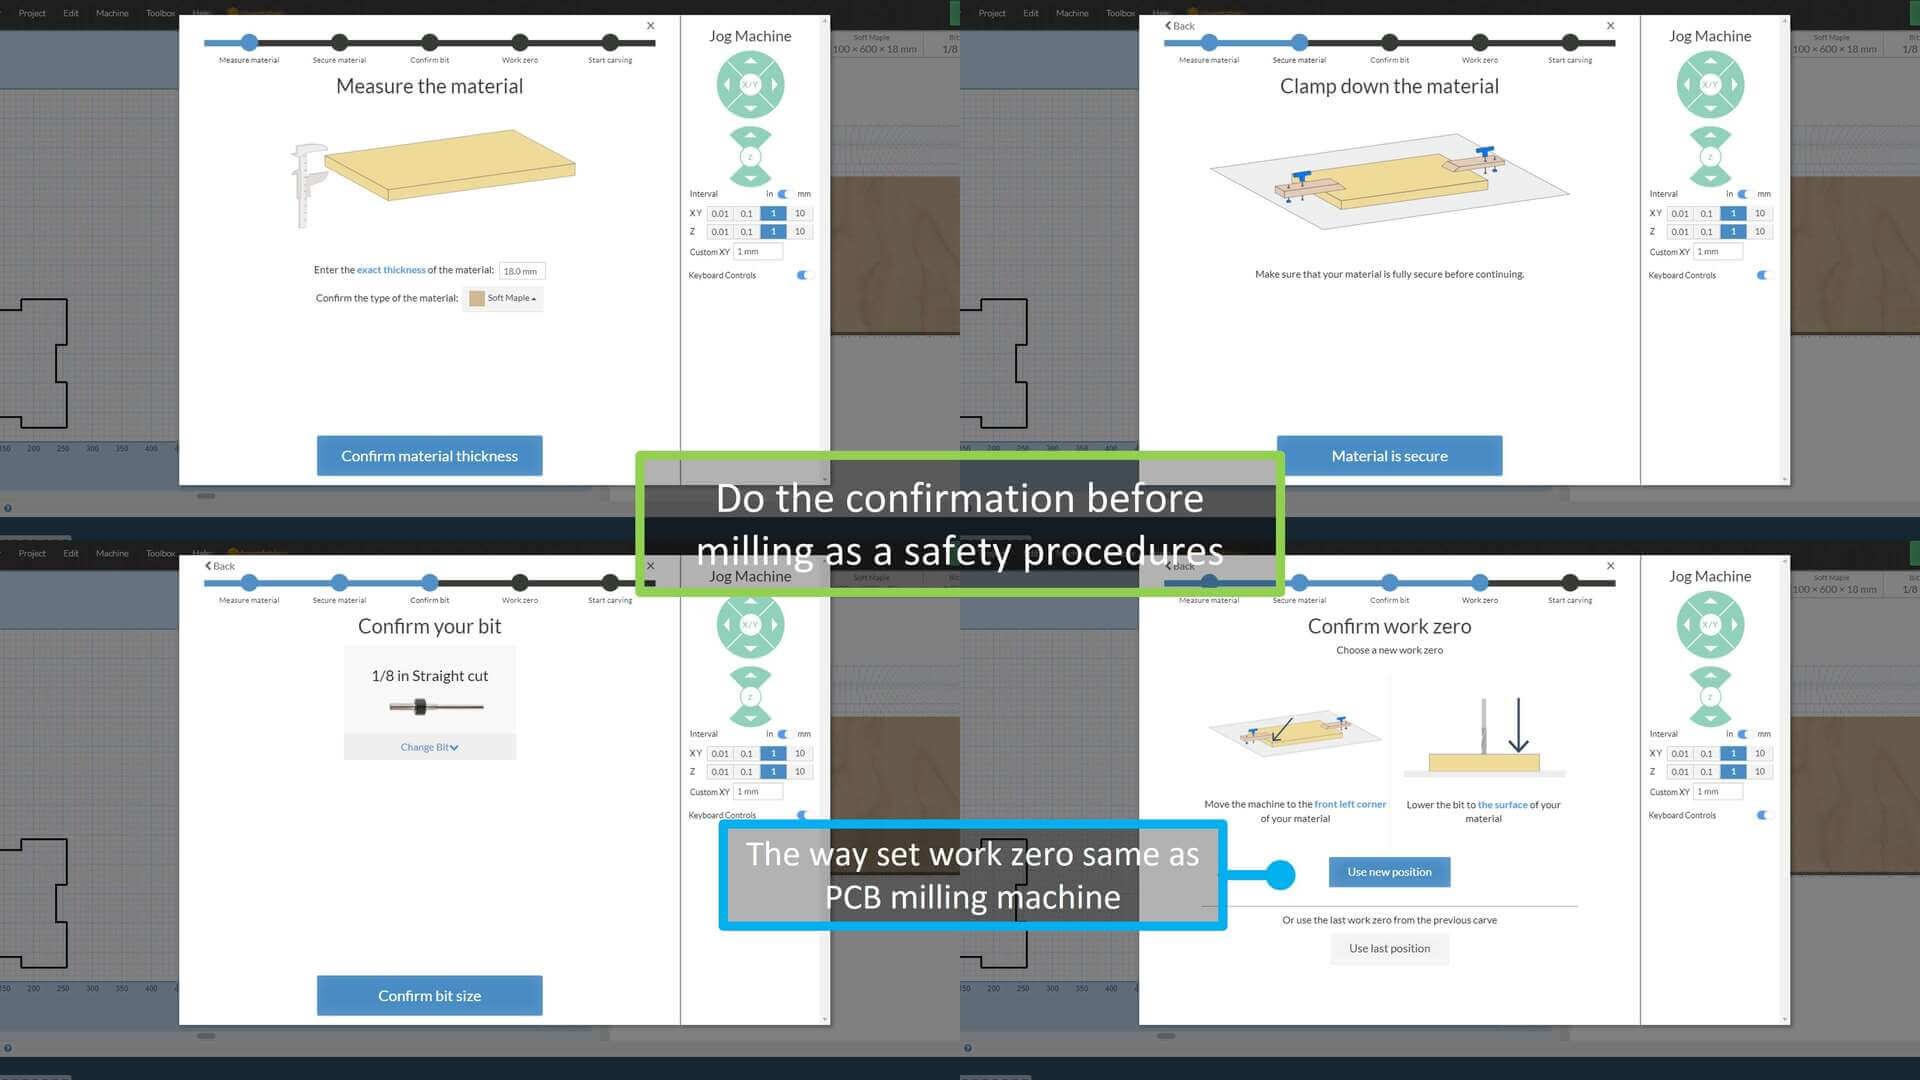
For safety procedures, finish the confirmations before milling.
For confirm the work zero, it’s the same way of setting the PCB milling machine.
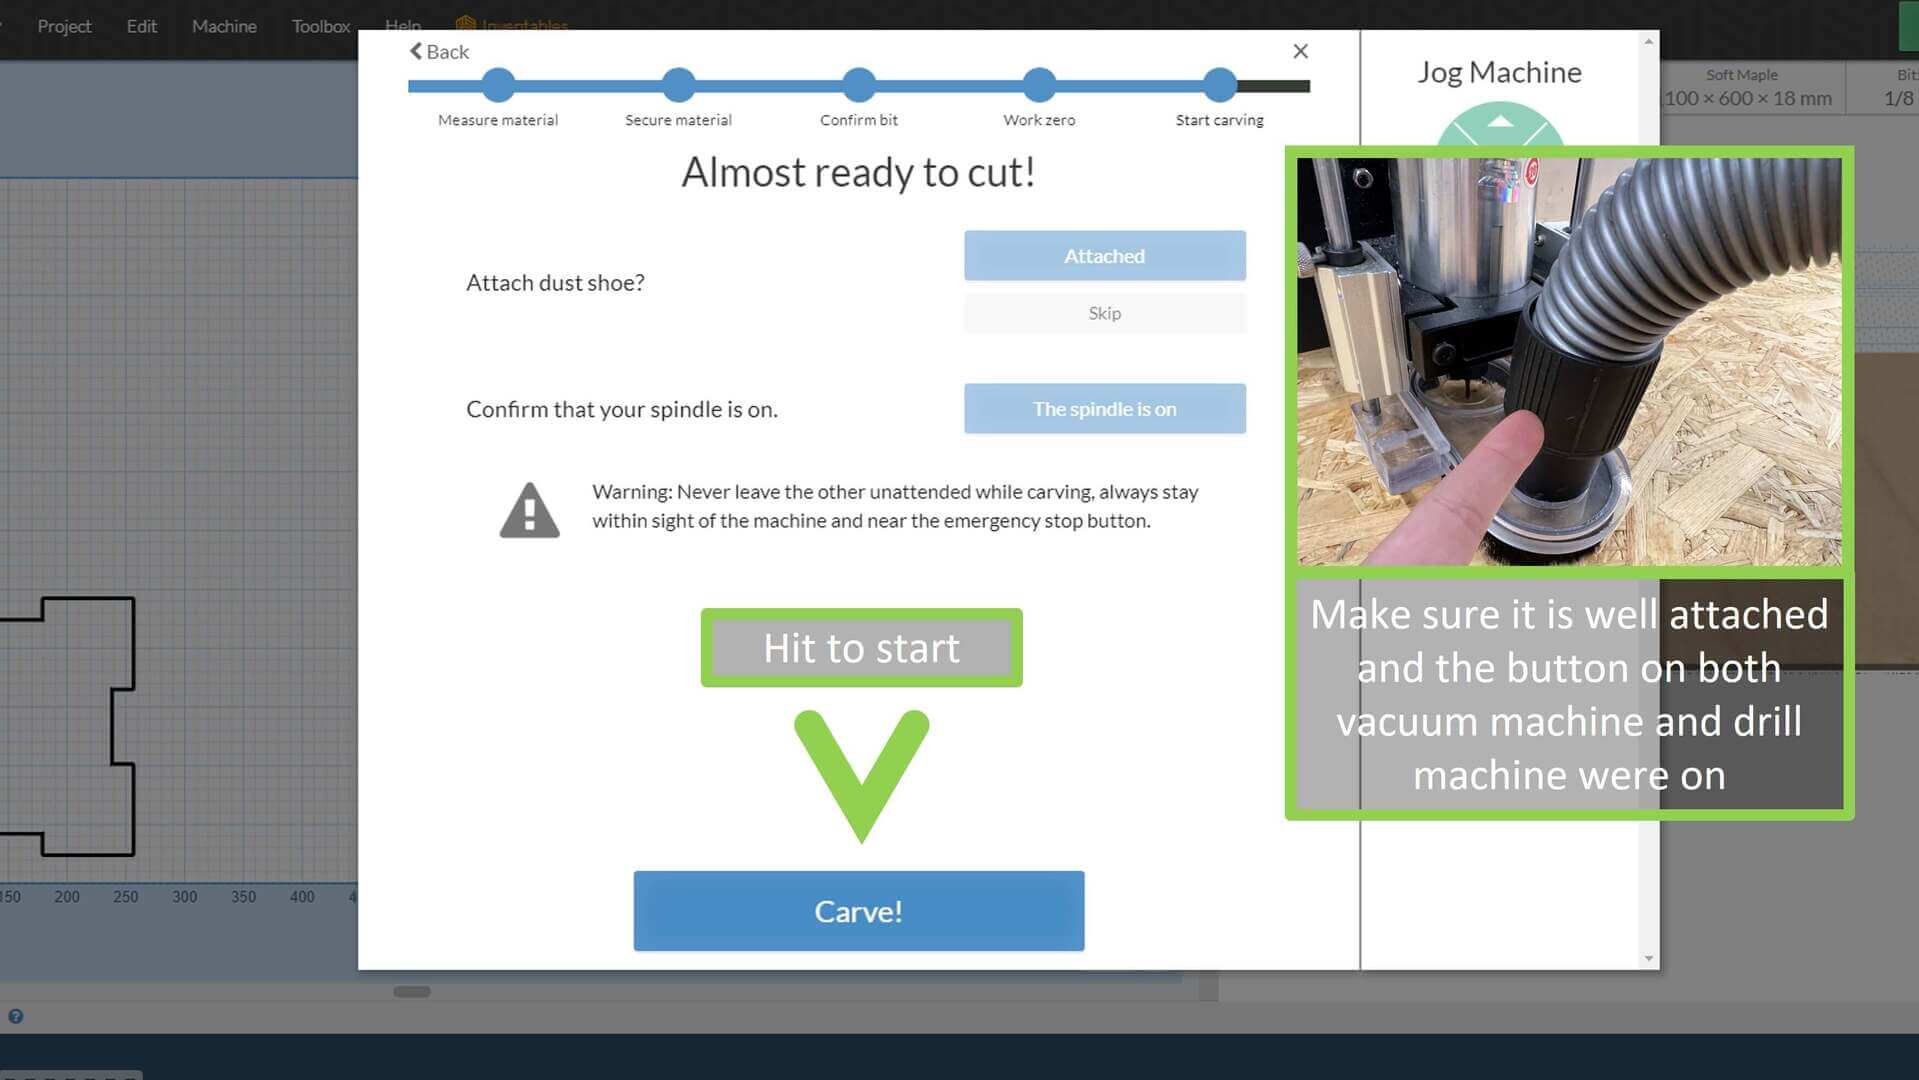
After all confirmations, including of making sure the vacuum nozzle is well attached and the button on both vacuum machine and drill were switched on. Then click the ‘Carve!’ to start.
And make sure my safety glasses was wore on and no accessories were wore on.

Making Sure of the milling bit, board were secured.


I used:
| Type | Value |
|---|---|
| Feed Rate | 254 mm/min |
| Plunage Rate | 228.6 mm/min |
| Depth Per Pass | 0.4 mm |
But then, after 30 min. I think that is too slow, it seems to took almost 1.5 hr for cutting a ~20 x 20 cm part, so I speed it up to:
| Type | Value |
|---|---|
| Feed Rate | 711.2 mm/min |
| Plunage Rate | 228.6 mm/min |
| Depth Per Pass | 2 mm |
And it took 15 min to cut the rest.
As you can see in the video, the slow settings cut perfect than the fast settings. There are not much excess left on the edge because it is running in slow settings.
Then, I’ve remove the excess using file, and make it little round.

I’ve measure the size of it and it seems not exactly the size I wanted but it’s close.

I’ve made a info photo for it using PowerPoint.

Oops… The board isn’t secured enough, and it moved. Don’t secure the board like me, it’s wrong! Otherwise, you will end up as I do.

Beta
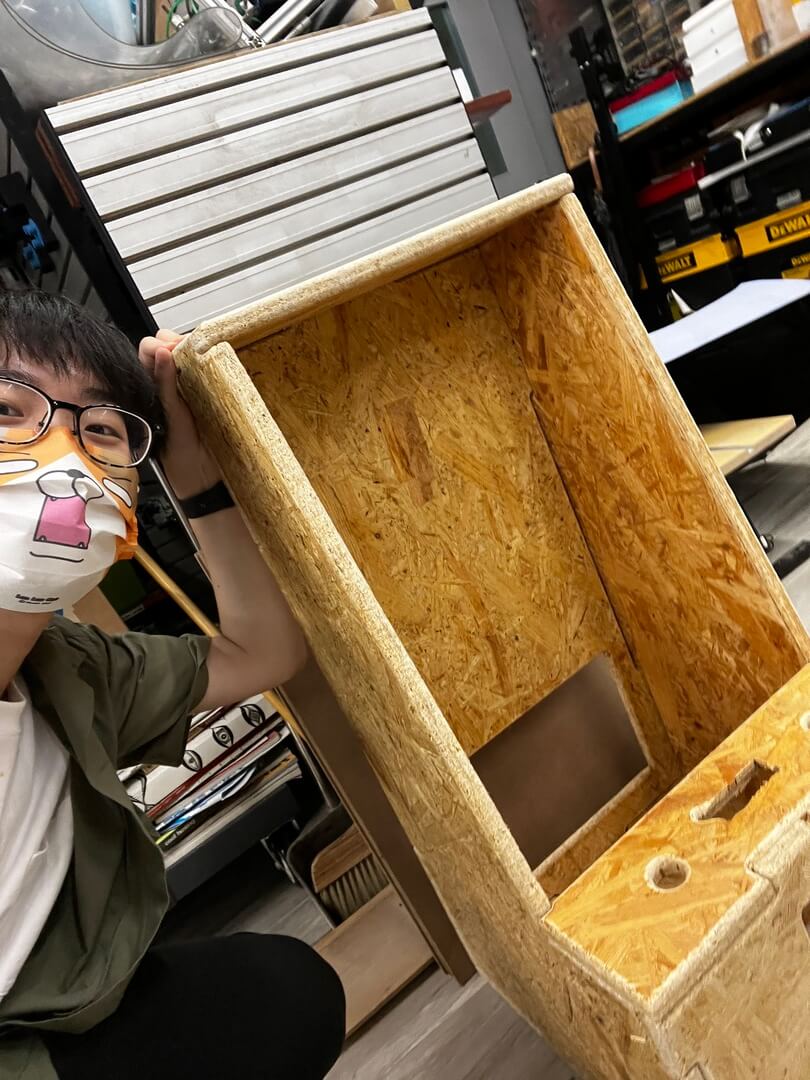
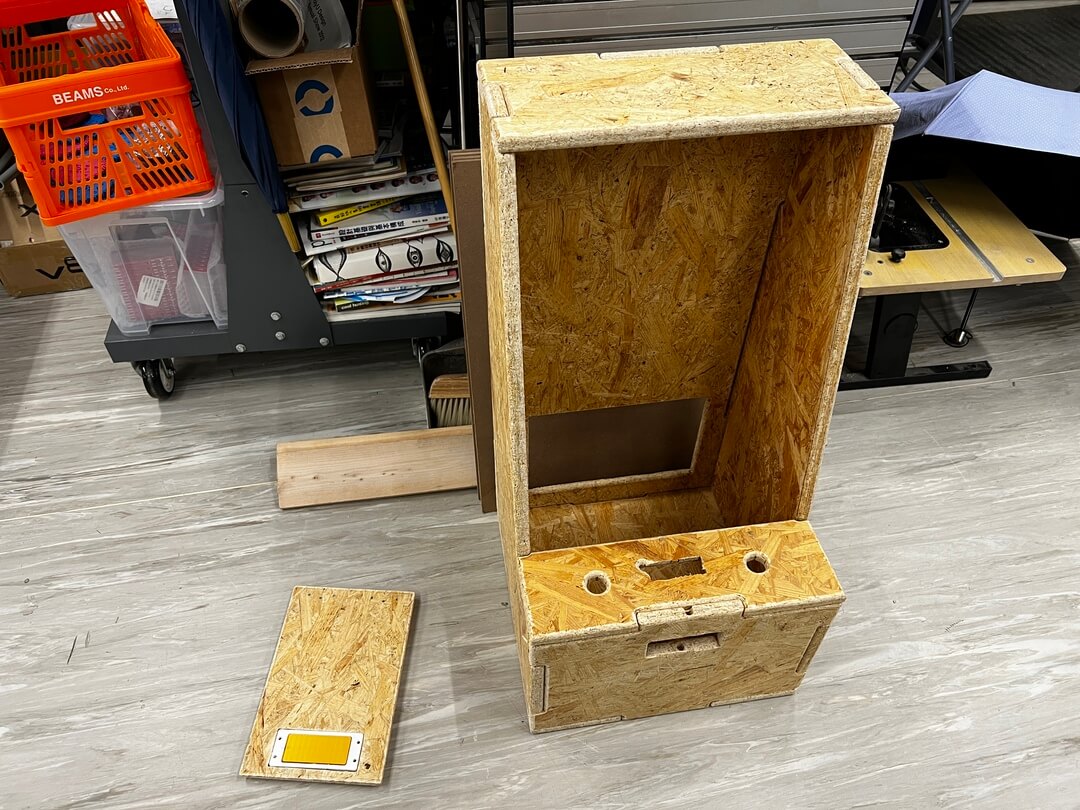
After understanding the control of the CNC and the features of the material. I go further on making my 1:1 BALL-IN game machine enclosure.
CAD design
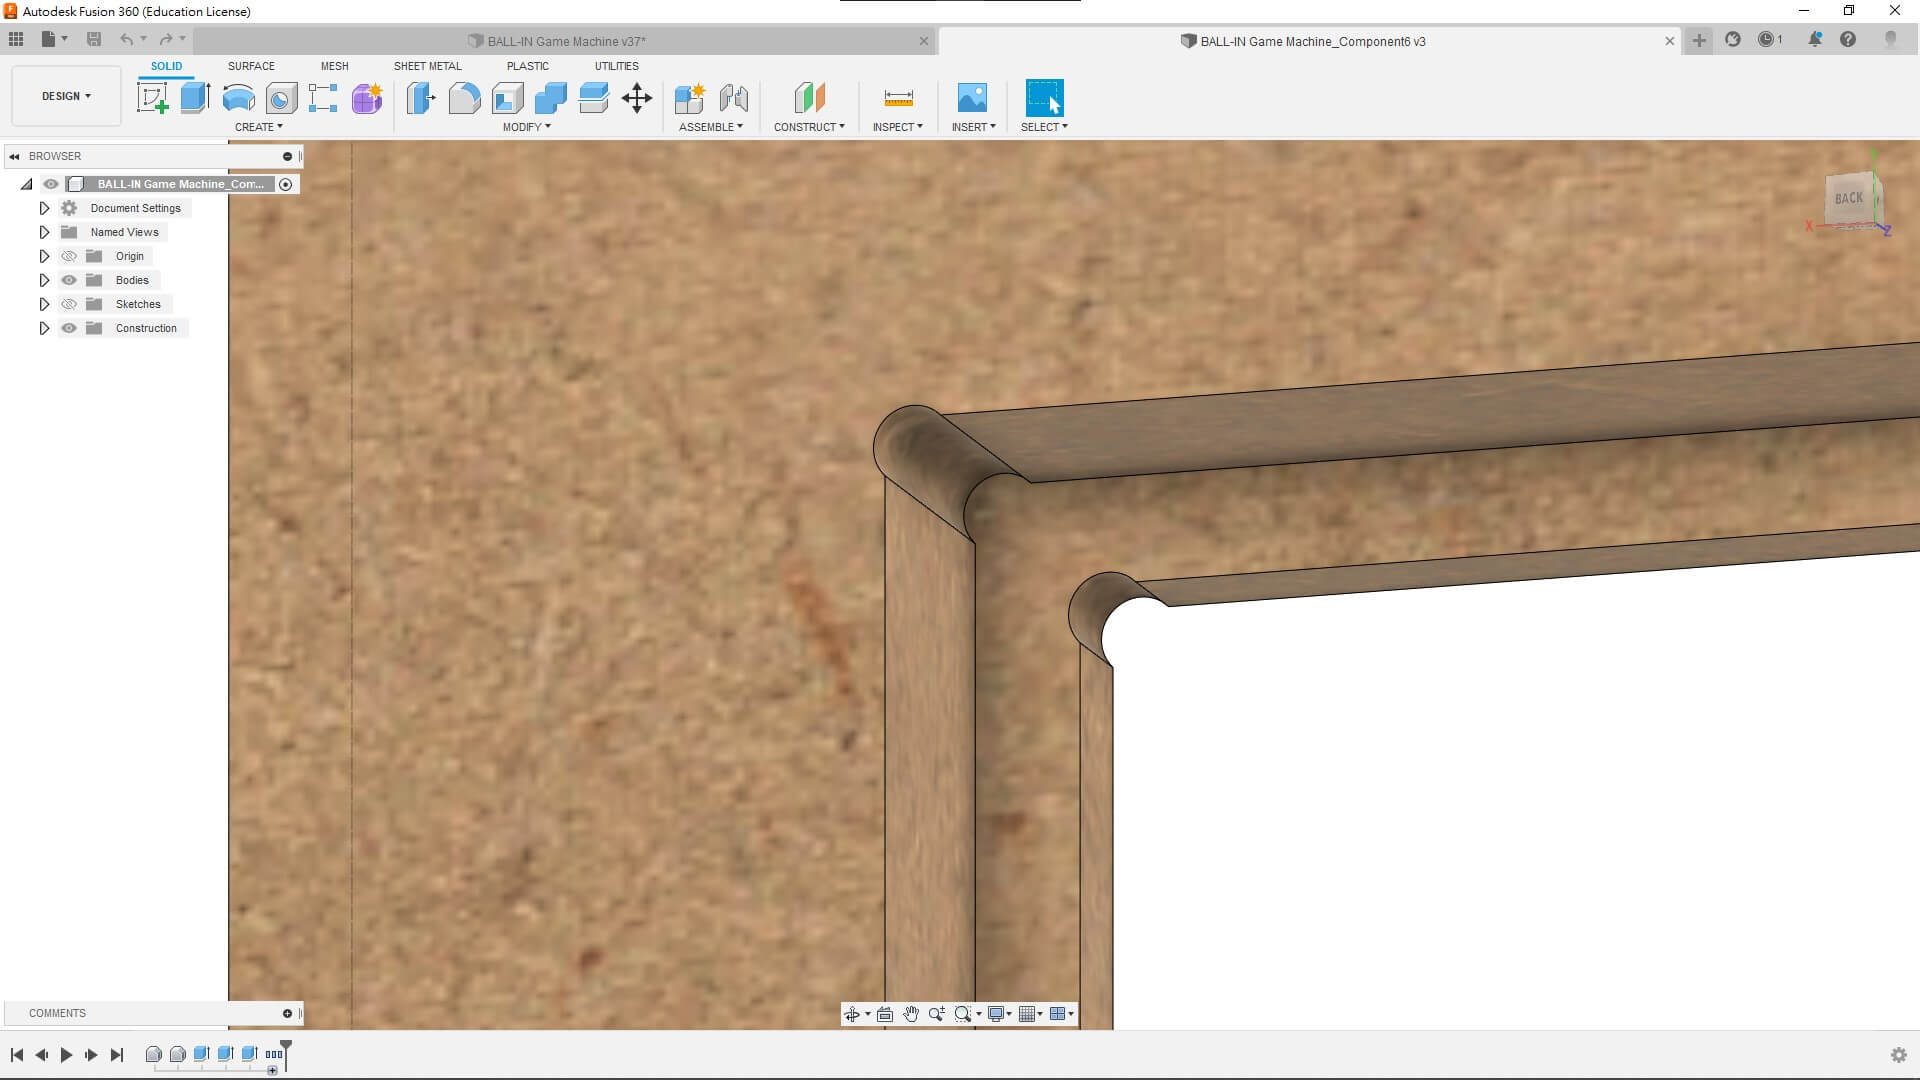
I’ve do some changes on the model.
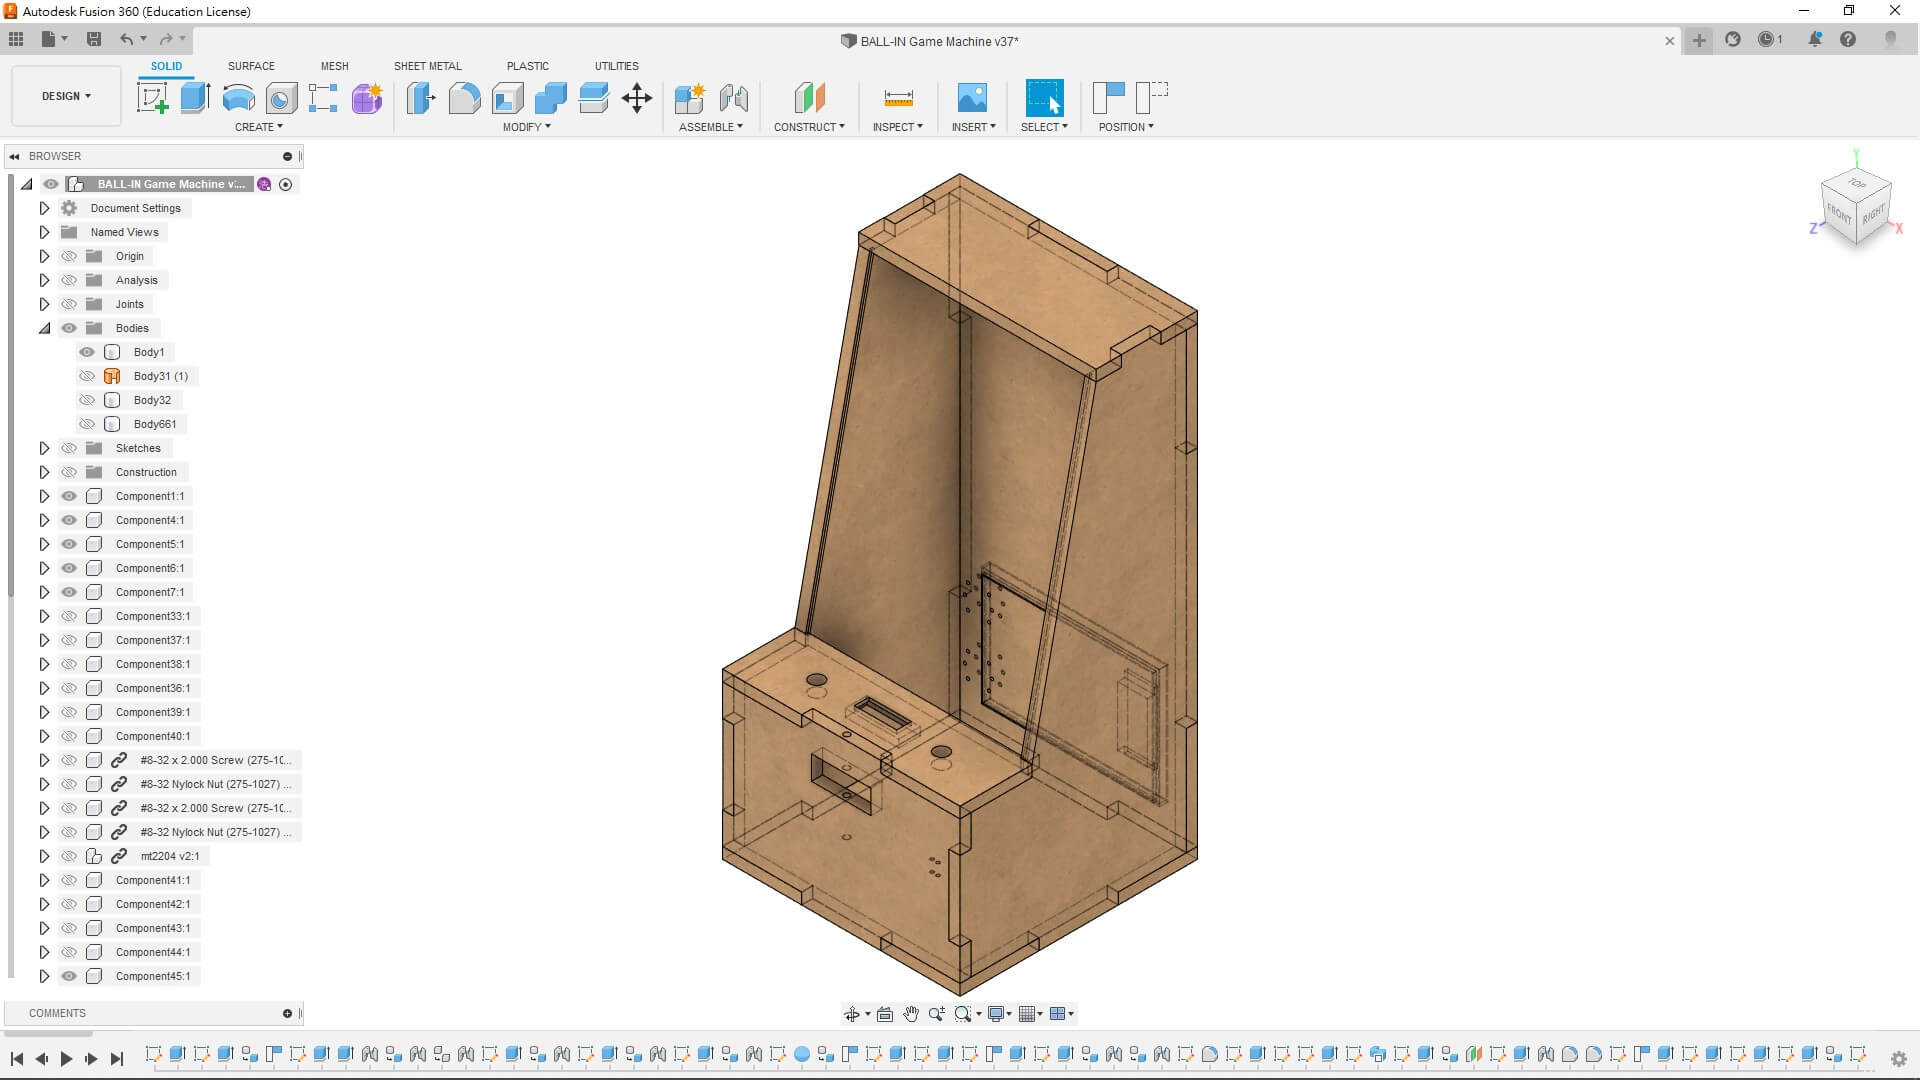
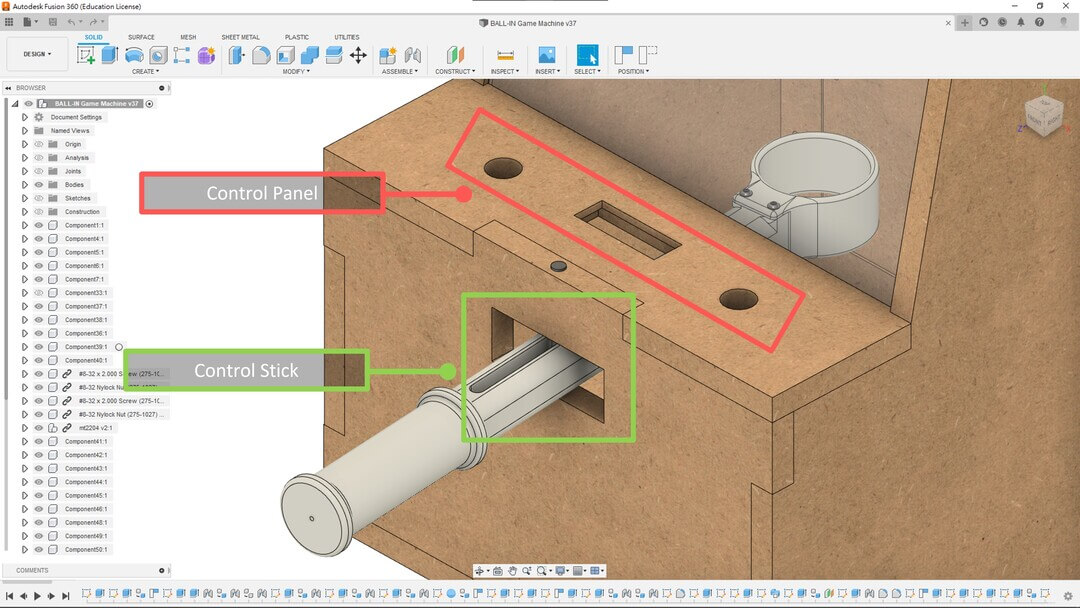
I’ve made the holes for the buttons and the LCD.
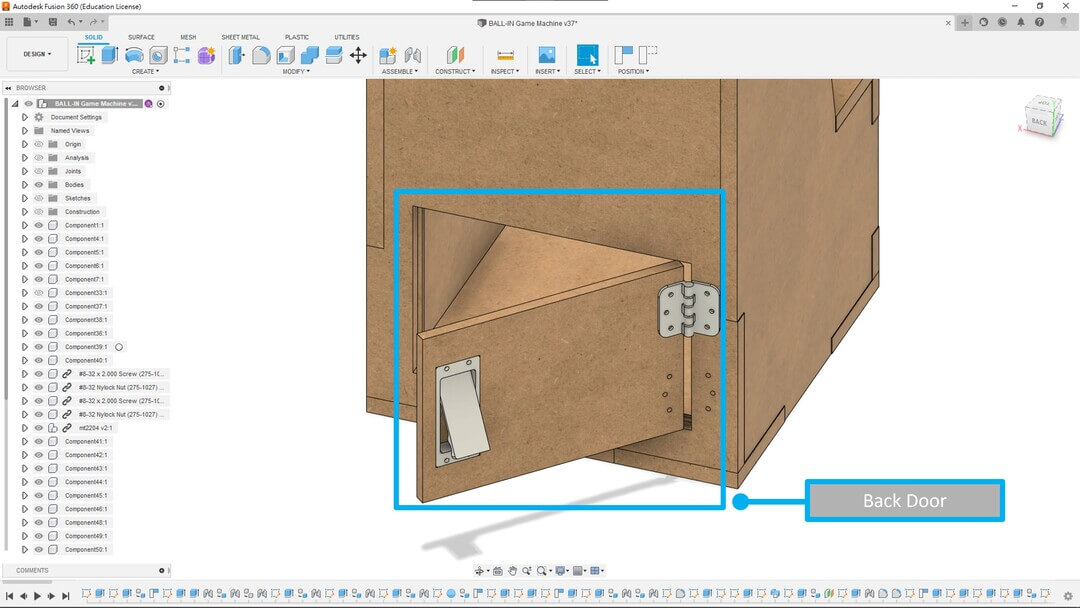
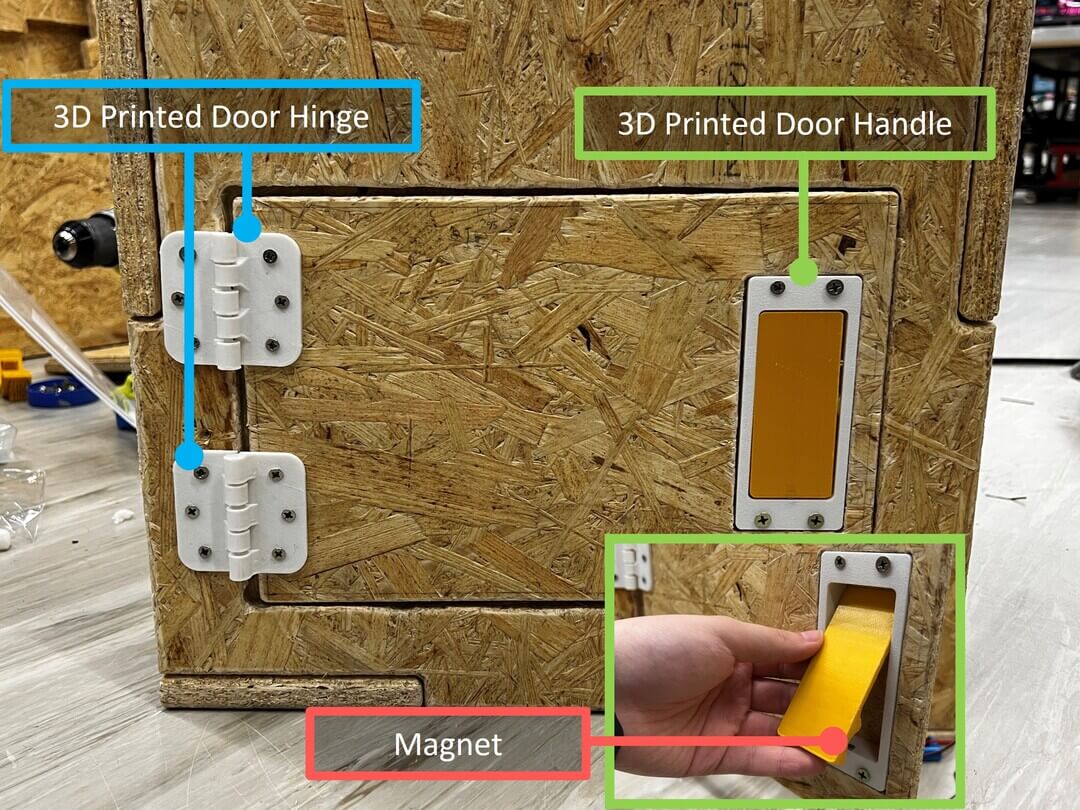
I’ve made the back door for the maintenance and there will be 3D printed door hinges and door handle.
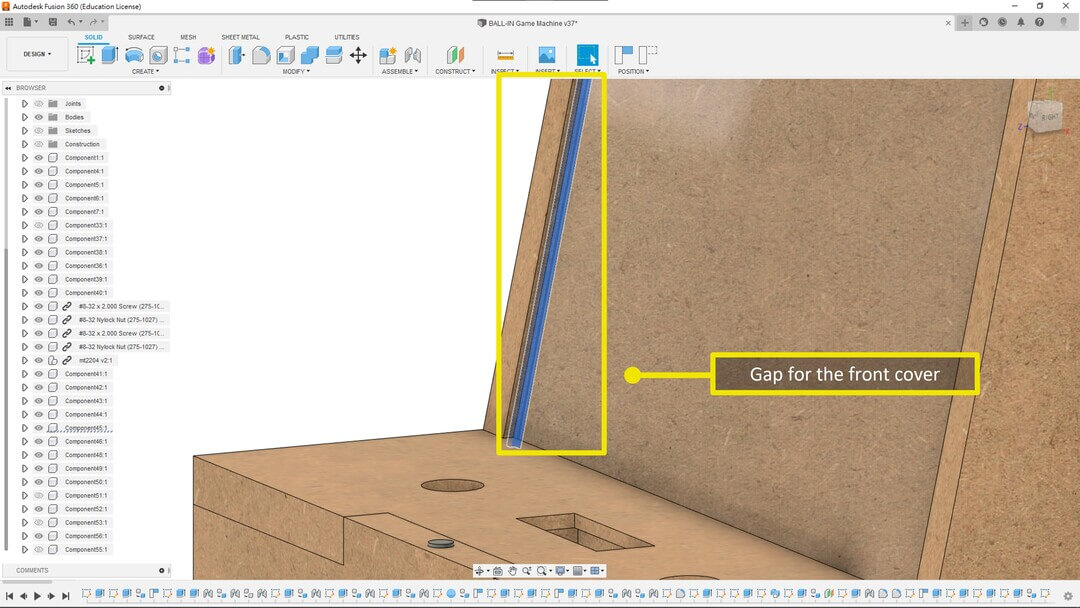
And I’ve also made a gap for putting the front cover.
Before exporting the files, dogbones are needed.
Export the DXF file without kerf.
Then import the DXF into the Easel.
Milling
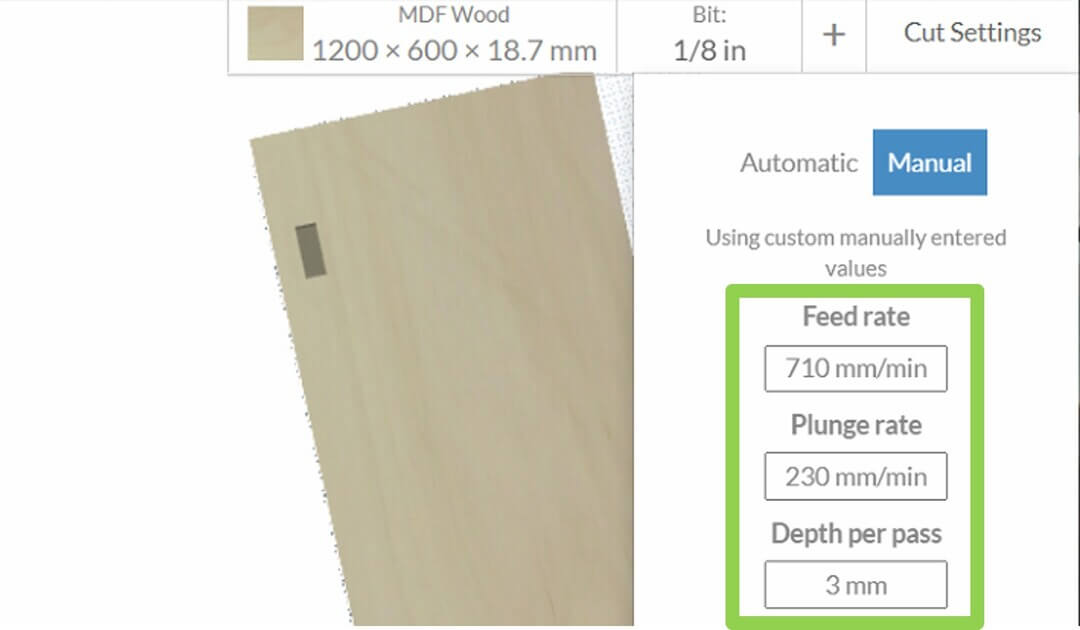
This time, I’ve used:
| Type | Value |
|---|---|
| Feed Rate | 710 mm/min |
| Plunage Rate | 230 mm/min |
| Depth Per Pass | 3 mm |
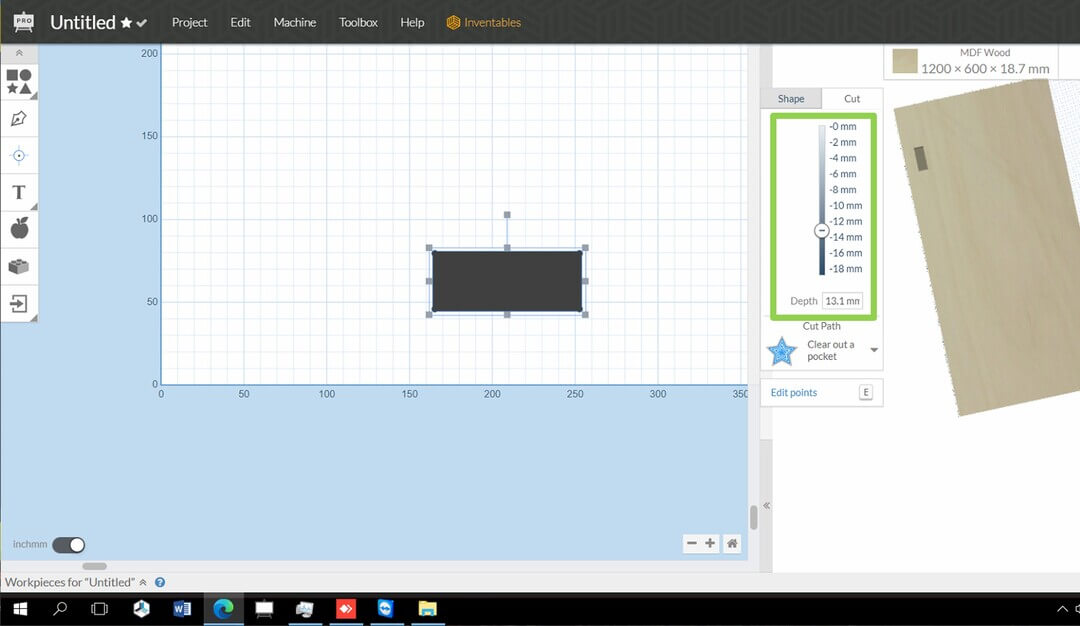
And I’ve some parts that I don’t want it to cut all the way down. So I need to set the cut depth on the object panel.
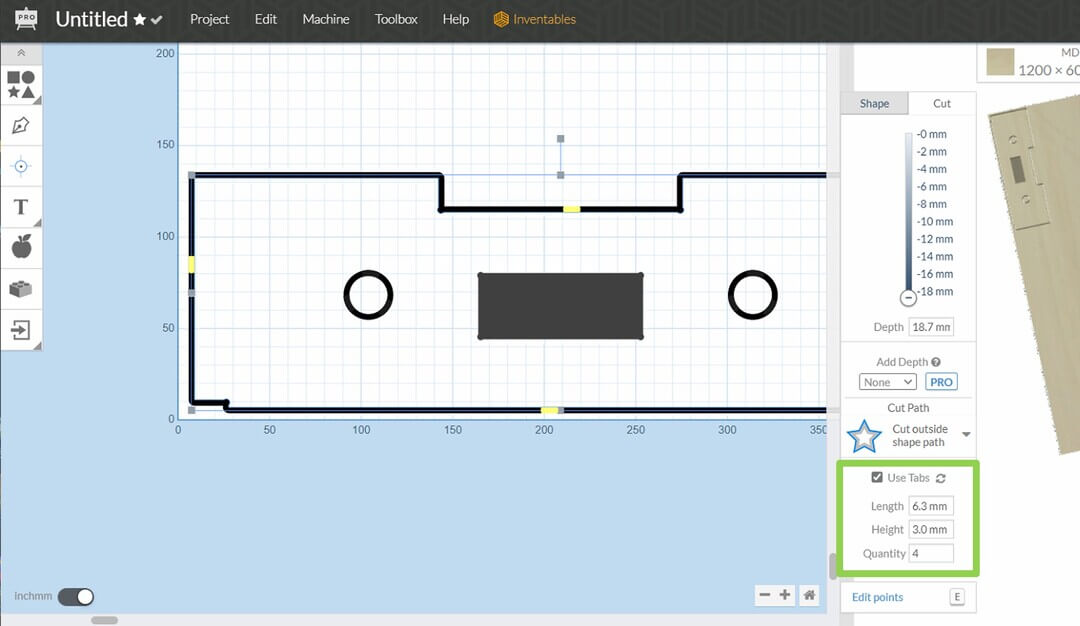
To avoid the parts moved when it almost done, I’ve used taps. Here’s my settings of the taps:
| Type | Value |
|---|---|
| Length | 6.3 mm |
| Height | 3 mm |
| Quantity | 4-6 |
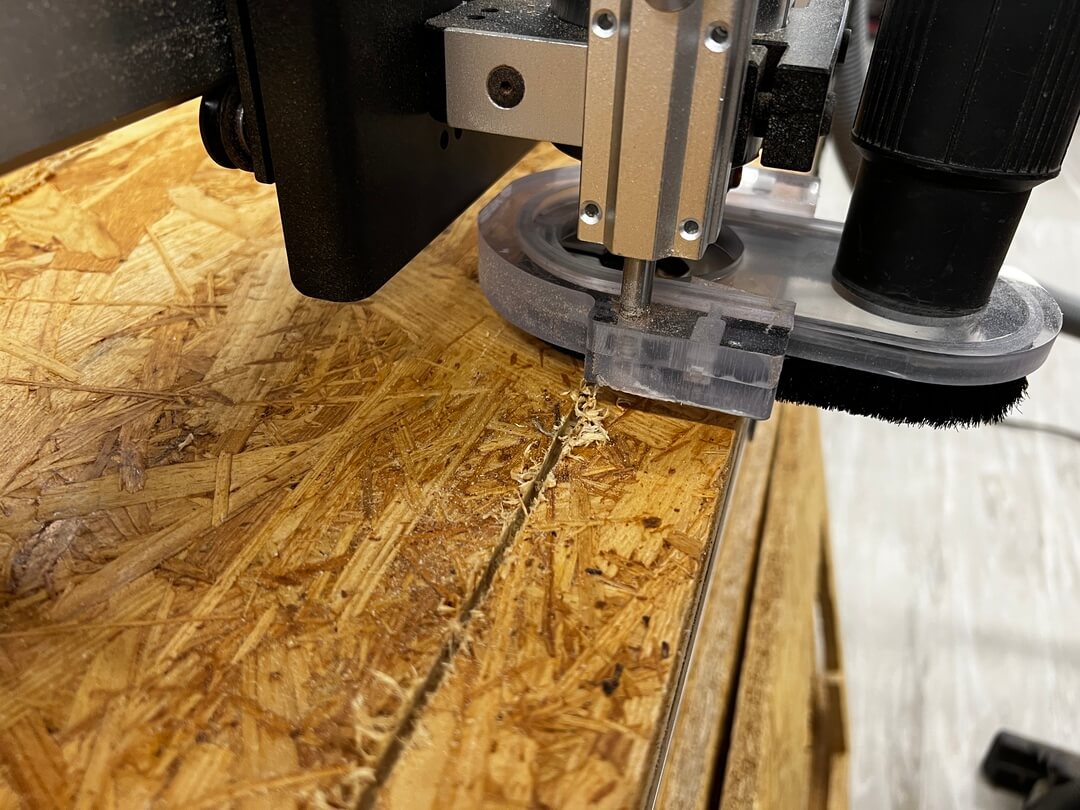
Then start to mill~~ For the biggest part, 800 x 400mm, it took around 40 min. And I used 3 days and it took around 200 min to finish all the parts.
Then I’ve used handheld sander to remove the excess and round it.

Assembling
It can be joint together perfectly.
(^^)
In this new design, I made a backdoor for the maintenance. Then, I used 3D printed to make the door hinges and door handle with magnet.
Opps!…
This time isn’t secured problem. I’ve speed it up and I set the depth per pass to 6mm, and I think it’s too heavy to the drill. Although it saves times but it will go wrong easily.

Downloads
Game Machine Model f3d file - Google Drive
Alpha Game Machine component dxf file - .zip
Beta Game Machine component dxf file - .zip