Final Project
1. SLIDE

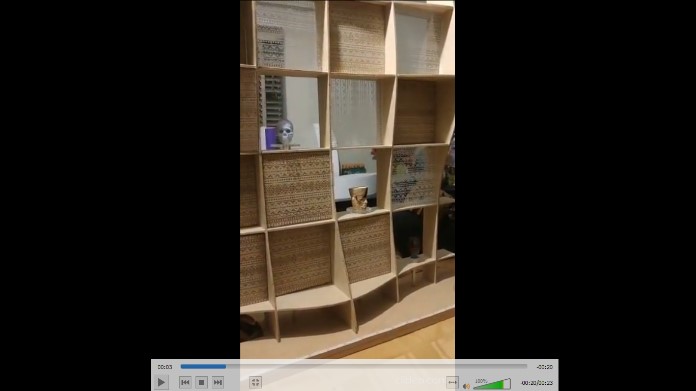
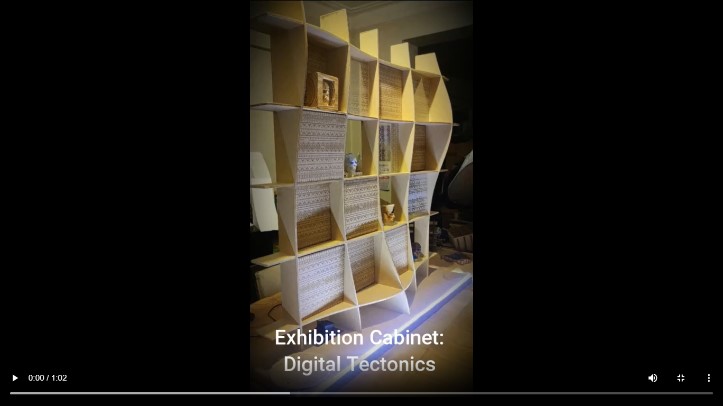
2. VIDEO
3. DESIGN
The proposal consists of making an exhibition piece of furniture for a museum. Furniture design expresses the technical and constructive skills of digital manufacturing. The structure of the furniture is made of waffle-type MDF to express the plastic movement and the complexity of digital manufacturing through assemblies. This structure, which is an analogy of bones, will be covered with MDF and acrylic panels with Andean motifs, which is an analogy of skin. The constructive potential of digitally manufactured materials will also be expressed in this skin. Within this structure, cubicle-type spaces are generated in which sculptural objects are found for the exhibition with pre-Hispanic motifs. The theme is the pre-Hispanic cultures of Peru. The intention is that each sculptural object expresses the constructive potential of each machine in the laboratory. Therefore, the expression in the details and finishes of the final object will be very important to observe its complexity. This exhibition module will have axes of rotation so that the exhibition object can be seen in all its angles. When the observer approaches the display module, it will start to rotate and background music will also turn on.
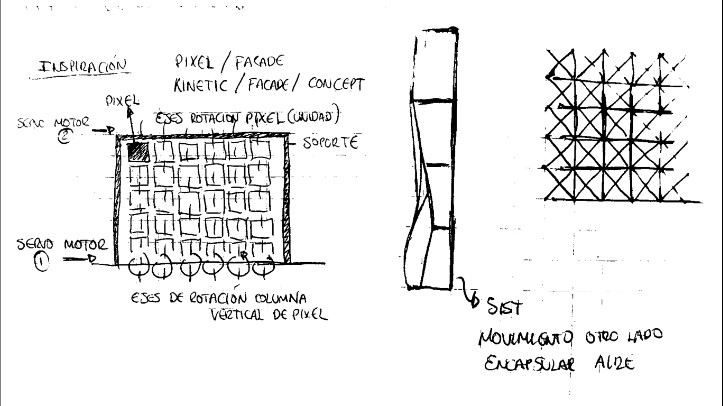
There are many modules or display furniture, but most are designed to use light to focus on the objects on display. There are few works that integrate movement and sound. The mechanical system will be inspired by group work Mechanical and machine design kinetic window
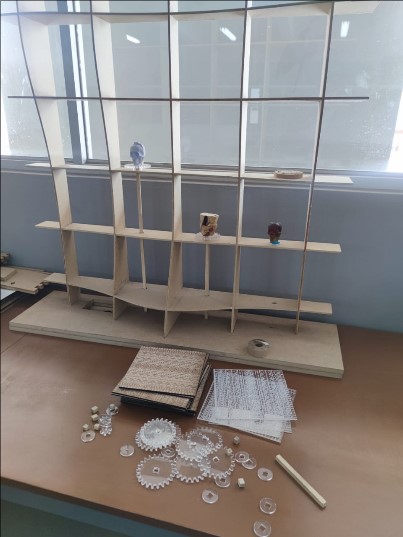
The following sketch expresses the first idea about axes of rotation and the undulations of the structural support:
3.1 DESIGN AND MANUFACTURE OF SCULPTURES AND BASE AND SUPPORT (CNC)
I designed the support module. I did this in Computer Controlled Machining
I had to remanufacture the entire process because I wanted a larger scale and custom to my final project.
The entire design and manufacturing process is documented in Computer Controlled Machining
The design of the base was made in autocad. Use the large format CNC router. For the elaboration of the Gcode, JsCut was extracted. First, the vector design had to be exported to Inkscape to edit its colors and saved in .SVG format. The information was configured on the JsCut online platform. Outside with the 1/8” tool. 6mm depth of cut as the MDF board was 5.75mm.
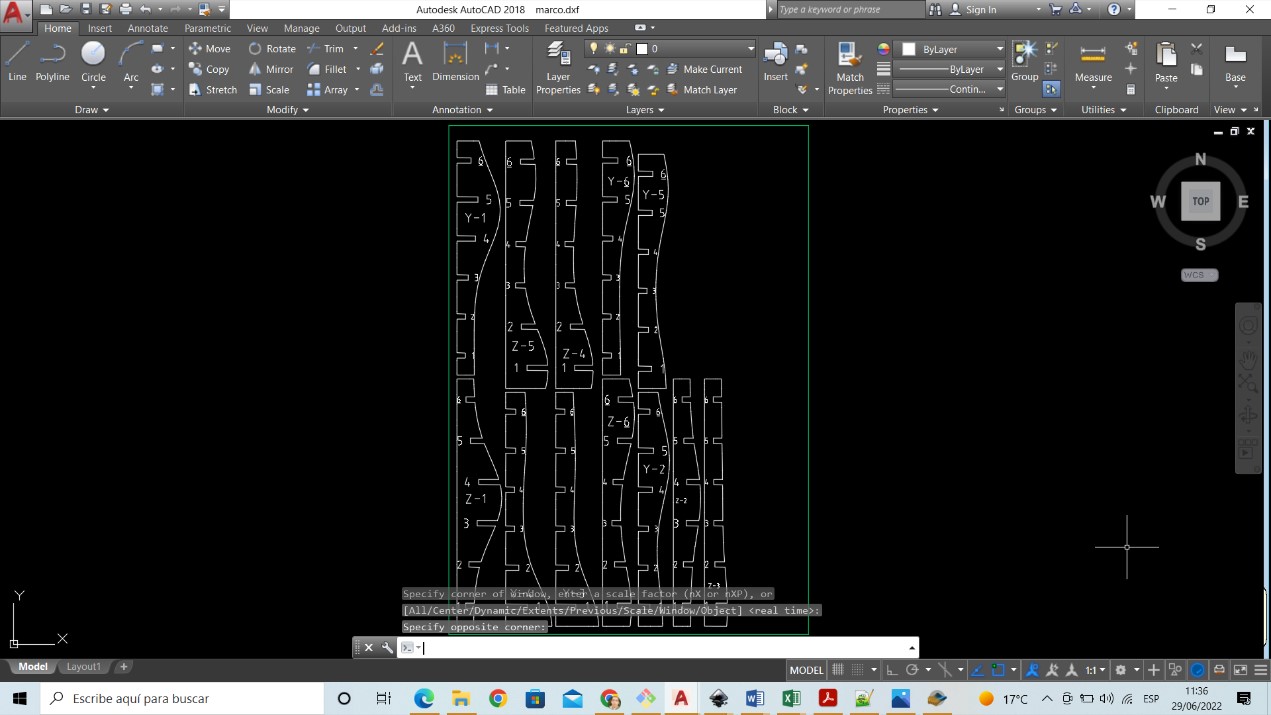
Example import in SVG:

Example of Gcode generation in JsCut

The result of the support manufacturing is the following:

For the sculptures, the small-format CNC milling machine is used. The procedure of Molding and casting was followed. The object was downloaded from Sketchfab. Then the mold was designed in rhino 7. The union of both faces and a hole to make the material was considered. Once the 3d model was obtained in .stl format, the gcode was made in the Vcarve software. The 3D roughing toolpath was used with the 1/8” end mill and the 3D finishing toolpath with the 1/8” ball nose.
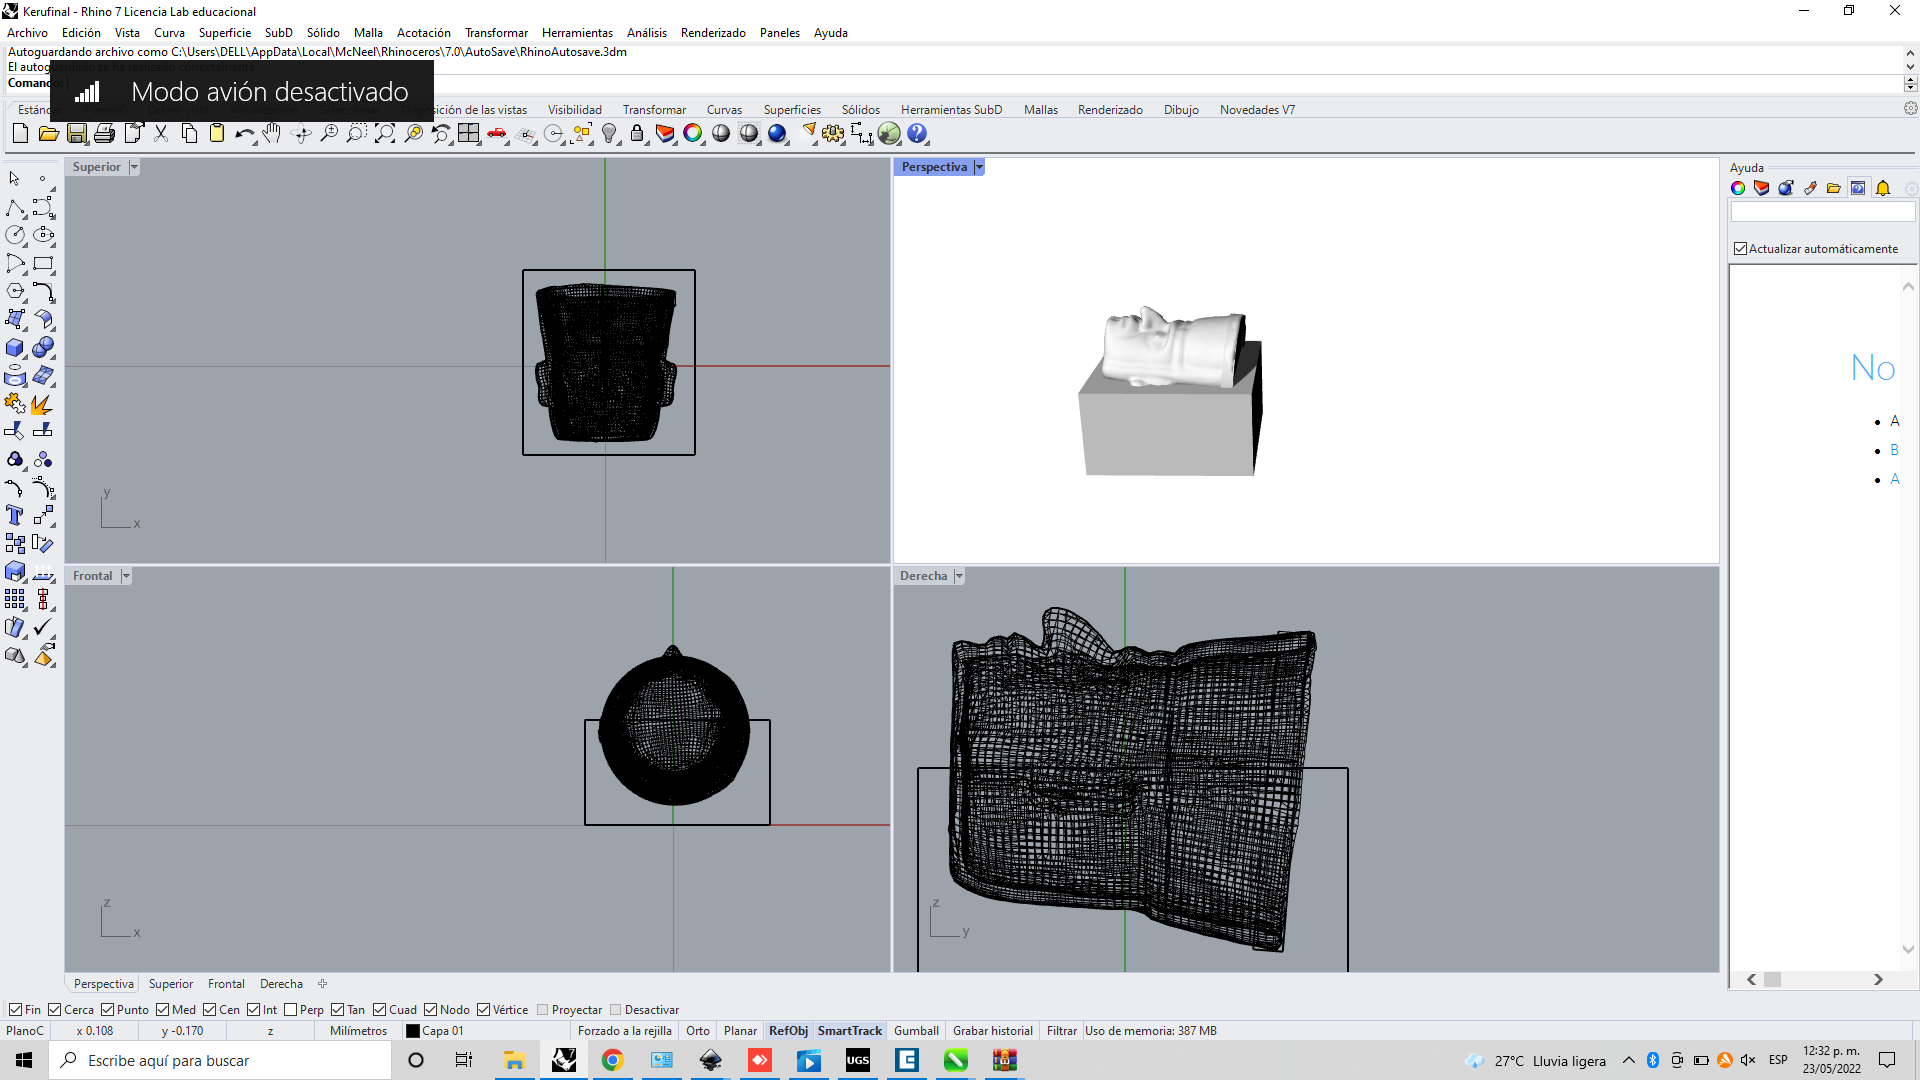
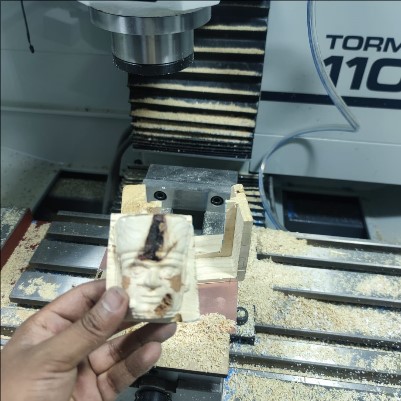
Here you can see the pre-Inca sculpture “kero” made of wood

I was also able to make a sculpture of the “stone of the sun” from the pre-Hispanic culture.

I had problems with the milling of the exhibits. Some strawberries broke despite having studied and simulated the trajectories. Later I realized that I put the wrong machine when exporting the gcode.
3.2 DESIGN AND MANUFACTURE OF PANELS AND GEARS (LASER CUT)
I designed the MDF panels with textures inspired by the Andean culture. I put into practice what I learned from Assignments controlled cutting
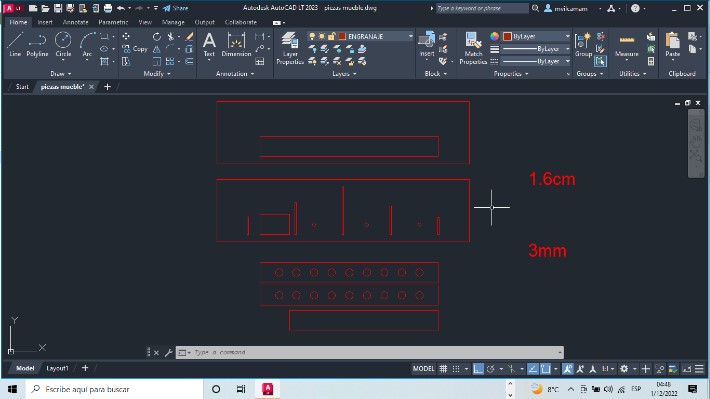
First I designed the gears for the mechanical system of my final project. I drew it in autocad and then exported it in PDF. To print the 2D vector file was edited in CorelDraw. The “very fine” lines and the color “RGB 255” The cutting parameters for the 4mm thick cardboard was. Speed 24%, Power 98%, and frequency 10%. For engraving, import the default machine properties.
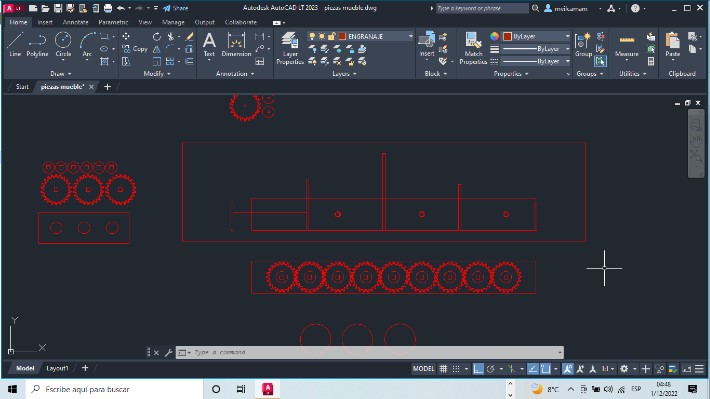
Example of exported PDF

Example of Edition in corel Draw of the pattern of the pre-Hispanic culture.

Laser machine cutting and engraving the pieces:

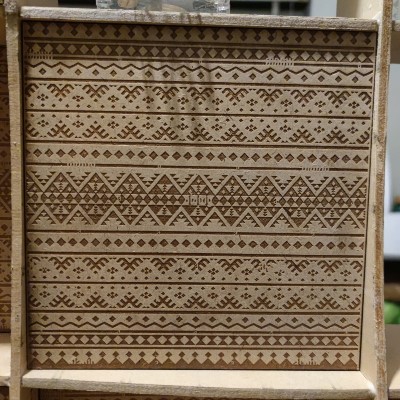
Result of the acrylic panel with pre-Hispanic patterns. Imported the default properties of the machine for the 3mm acrylic material

Result of the 3mm MDF panel with pre-Hispanic patterns
Result of acrylic gear parts. The default properties of the machine for 6mm acrylic were imported

4. MOUNTING
In the following image you can see all the manufactured parts.
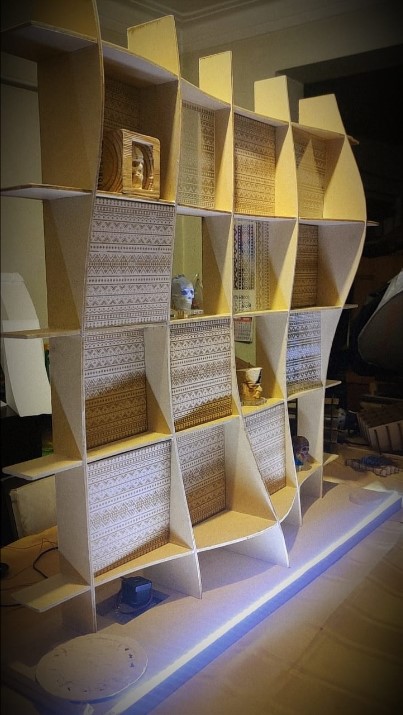
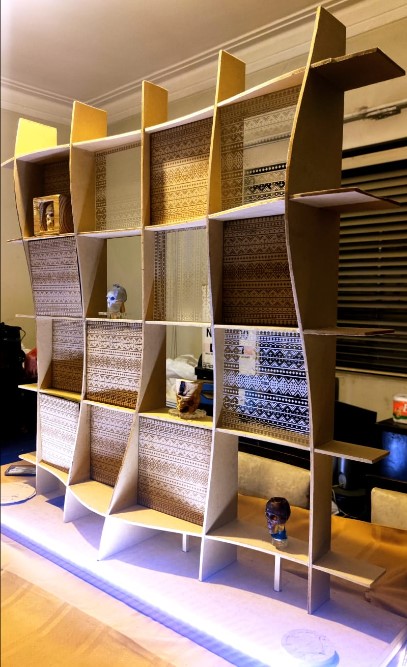
In the following images you can see the union of all the pieces together
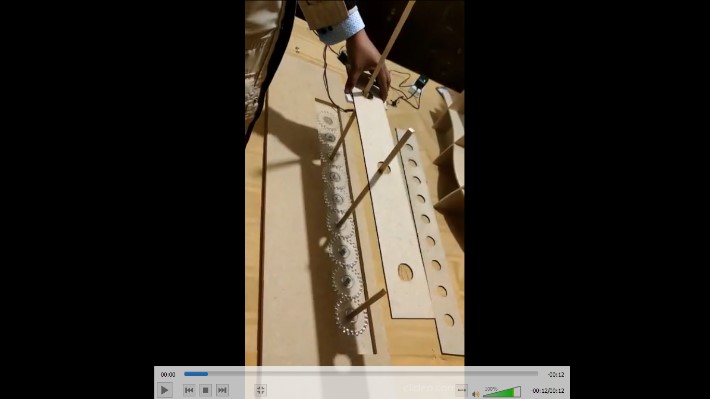
Rotation axis test manually before assembling the parts:

Hiding the gear parts so that it is not easily noticeable when it works.
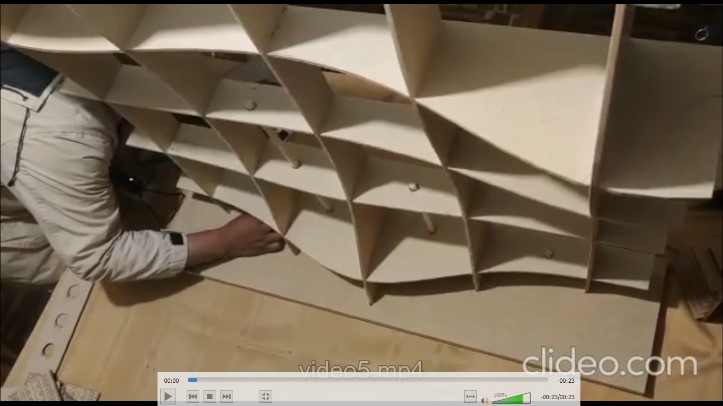
Back of the cabinet:
Detail of the textures and sculptures:

5. ELECTRONIC DESIGN AND MANUFACTURING
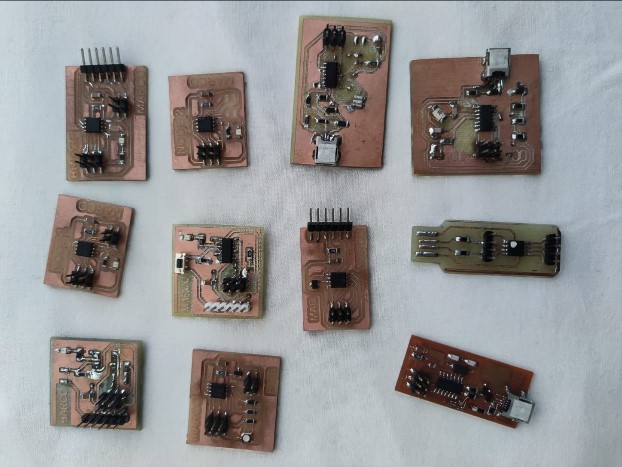
Thanks to the large number of electronic boards that were manufactured in the Assignments of the course, I was able to use each one of them to carry out my final project work: You can review the following Assignments for more details:
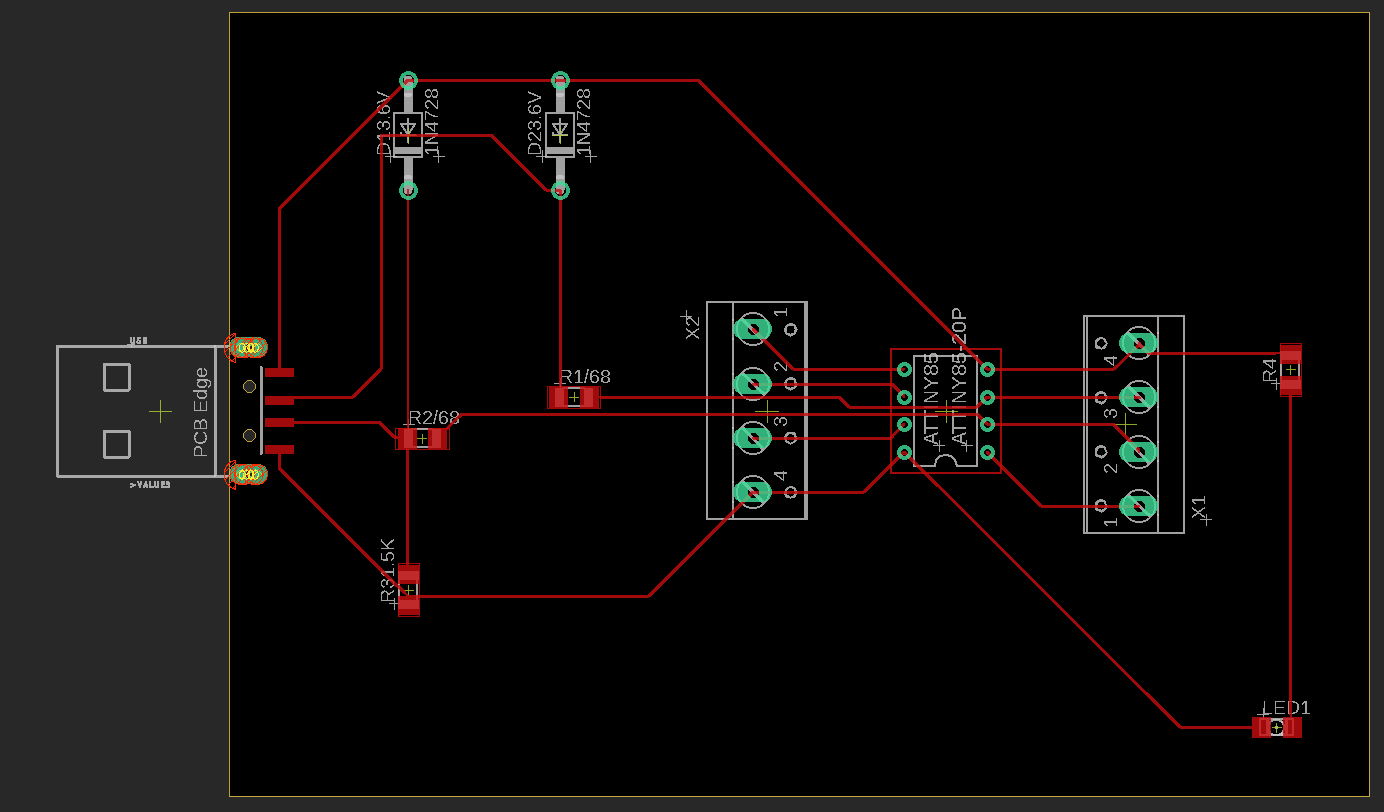
For the electronics I decided to design a board to receive the signal from the motion sensor and control the servo motors. Since I had an Attiny 85, the design was adapted to this microcontroller. In Eagle I designed the plate as shown in the image.
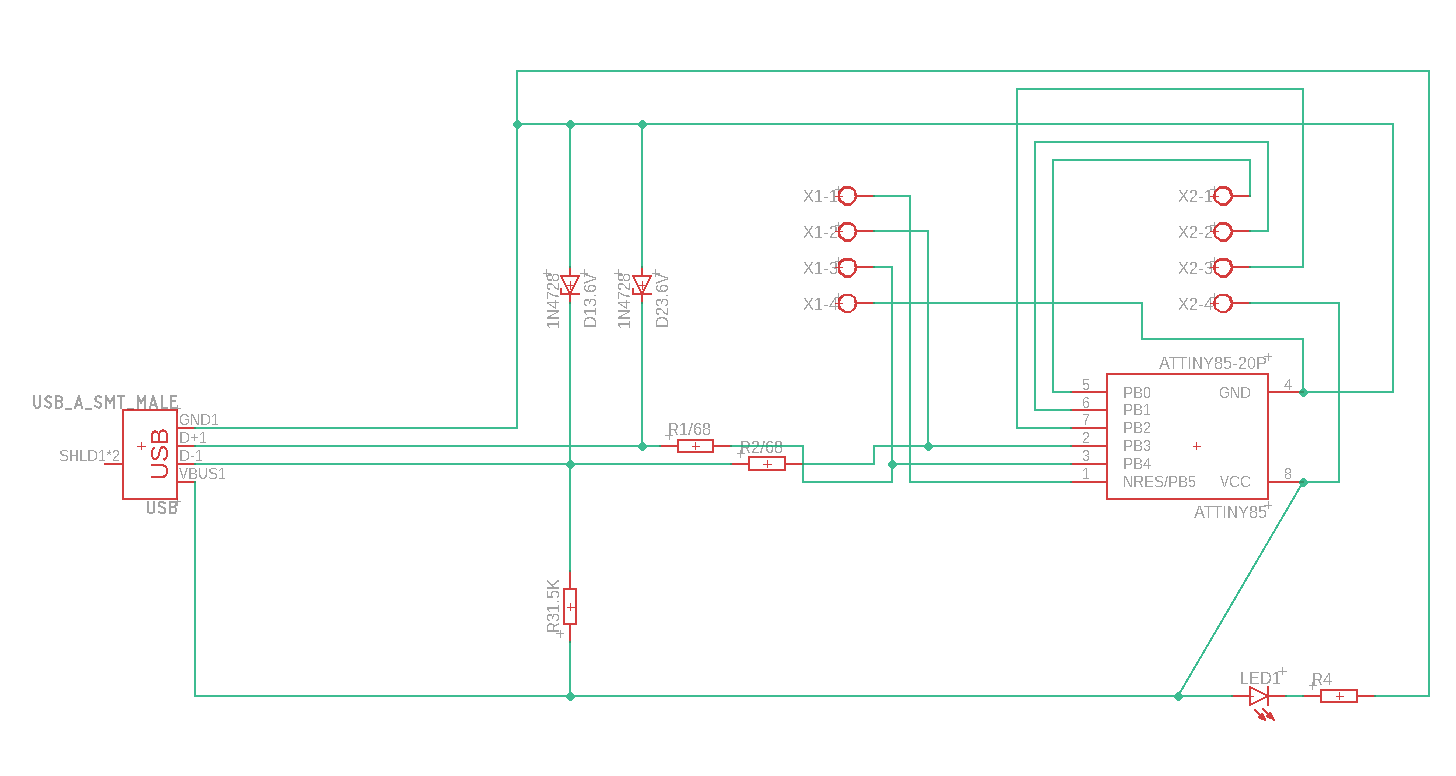
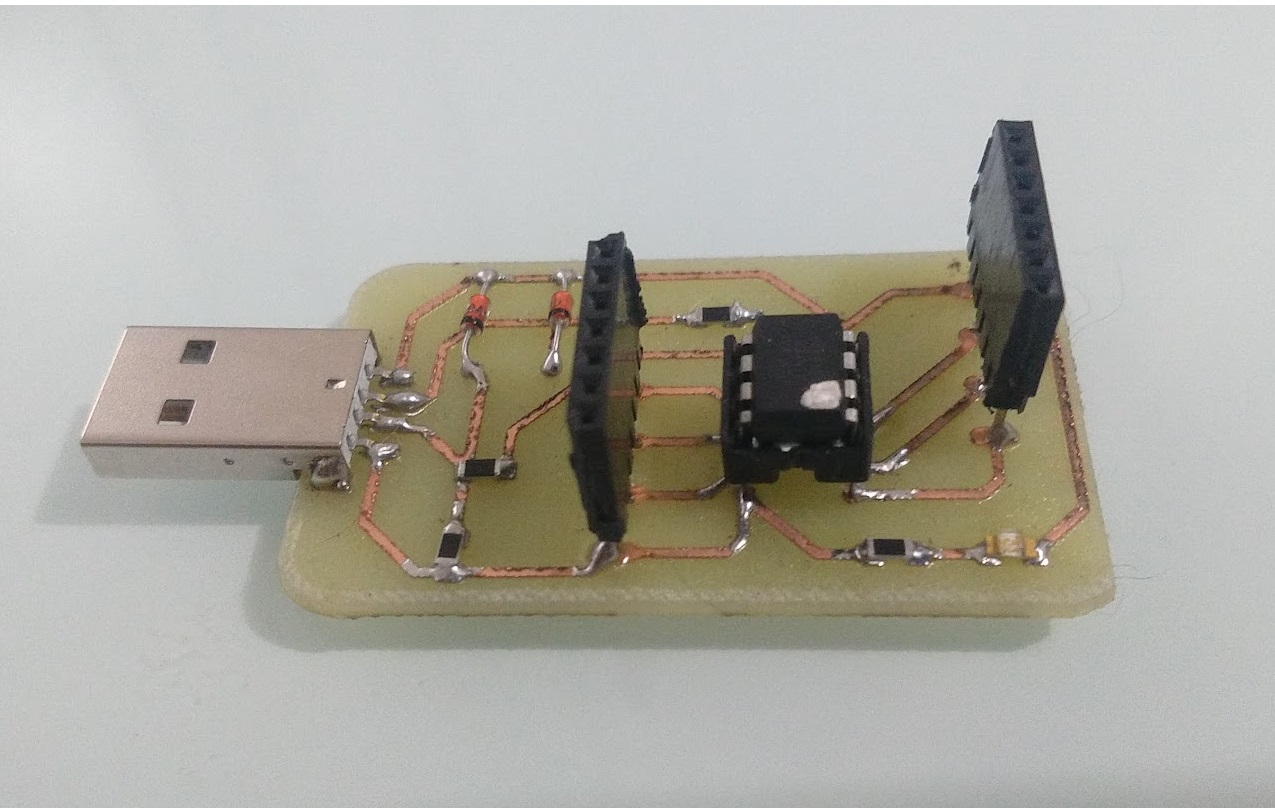
The circuit that receives the motion sensor and controls the servomotors was made. With the help of the Tormach CNC milled the plate on a copper sheet. The components were soldered to have the board ready:
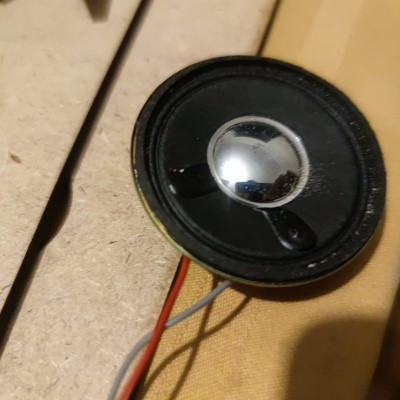
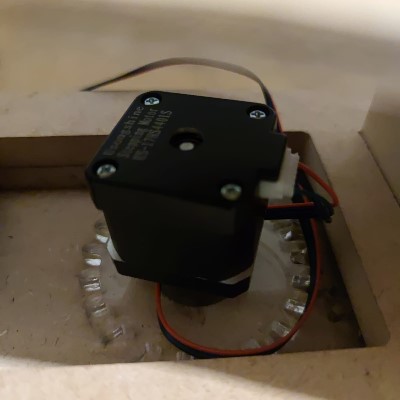
Below are the PIR sensor for motion detection, the speaker and the servo motor used.

6. PROGRAMMING AND TESTING
I designed the program to control the motor. For the programming I used the Arduino software in which I programmed the reading of the signals from the motion sensor and the rotation of the servomotor
To detect the motion sensor we use the following code:
const int LEDPin = 13; // pin for the LED const int PIRPin = 2; // input pin (for PIR sensor)
int pirState = LOW; // start no movement int val = 0; // state of the pin
void setup() { pinMode(LEDPin, OUTPUT); pinMode(PIRPin, INPUT); Serial.begin(9600); }
void loop() { val = digitalRead(PIRPin); if (val == HIGH) // if it is activated { digitalWrite(LEDPin, HIGH); //LED ON if (pirState == LOW) //if it was previously off { Serial.println(“Sensor activated”); pirState = HIGH; } } else //if disabled { digitalWrite(LEDPin, LOW); //LED OFF if (pirState == HIGH) //if it was previously on { Serial.println(“Sensor stopped”); pirState = LOW; } } }
To activate the music we use the following code:
int tonePin = 8; int MUSIC_BUTTON = 9; void setup() { pinMode(MUSIC_BUTTON, INPUT_PULLUP); pinMode(tonePin, OUTPUT); } void loop() { if(digitalRead(MUSIC_BUTTON) == LOW) { PlayMusic(); } noTone(tonePin); } void PlayMusic() { // here goes your code }
For the programming of the stepper servo motor we use:
//LIBRARIES:
include 
Servo my servo; // create a servo object int angle;
void setup(){ myservo.attach(3); // we assign pin 3 to the servo. Serial.begin(9600); // start the serial port }
void loop() {
angle= 0; myservo.write(angle); Serial.print(“angle: “); Serial.println(angle); delay(2000);
angle= 90; myservo.write(angle); Serial.print(“angle: “); Serial.println(angle); delay(2000);
angle= 180; myservo.write(angle); Serial.print(“angle: “); Serial.println(angle); delay(2000);
angle= 90; myservo.write(angle); Serial.print(“angle: “); Serial.println(angle); delay(2000); }
Rotation test with the servomotor: with the gears and axes of rotation:
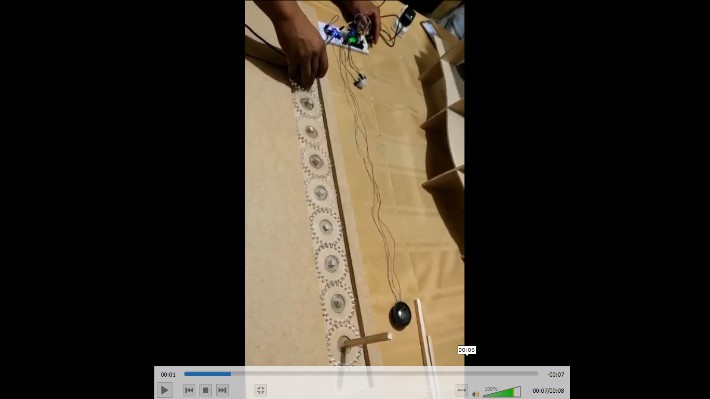
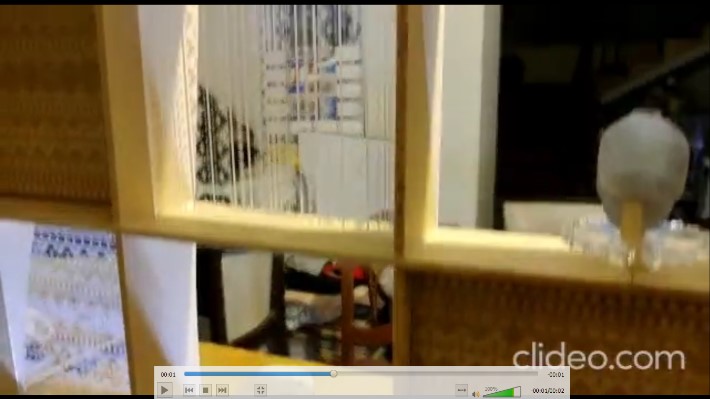
Testing the rotation of the vertical axes with the cap on
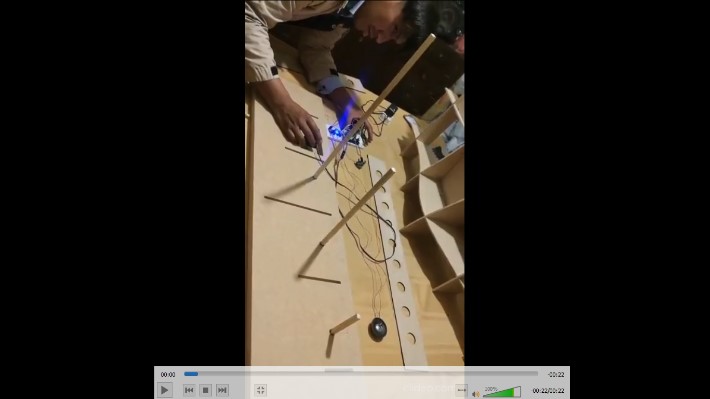
Testing the rotation of the vertical axes with the structure on. Movement through servo motor force activated by motion sensor.
The motor and drive mechanism with the motion sensor will work properly.
7. LICENSE
MARCO VILCA FURNITURE AND EXHIBITION LICENSE
8. MATERIAL’S LIST
- A 120x120x6mm MDF panel costs 30 USD
- A 120x120x6 mm MDF panel costs 20 USD
- A 100x100x3mm acrylic panel costs 30 USD
- Motion sensors and servo motors cost 20 USD.
- Attiny 44 costs 2 USD
- The total approximate cost for the manufacture of the final product will be 102 USD.
9. CONCLUSIONS
The most complicated part for me was the electronic part since I was not used to working with programming. If something fails even though the test was done many times and everything went well before, maybe a cable is broken or some connection is wrong because that could lead to the error, always check all the connections. There are many things that can be improved in the design, the gear system works better if the motor is in the middle since the forces are distributed evenly. Exploring the curves as an envelope is a challenge that I would have liked to achieve. For the time I could not do it. I am motivated to do it in future work. I am very happy to have been part of Fab Academy, it has helped me develop different skills and learn to work from the simplest to the most complex.