10. Molding and casting
Group assignment
- Review the safety data sheets for each of your molding and casting materials
- Make and compare test casts with each of them
From the following link you can access the Group Assignment: Group Assignment
Individual assignment
- Design a 3D mould around the stock and tooling that you’ll be using, mill it (rough cut + (at least) three-axis finish cut), and use it to cast parts.
3D mould
A skull was chosen for this modeling. The object was downloaded from Sketchfab. Then the mold was designed in rhino 7. The union of both faces and a hole to make the material were considered.

Once the 3d model was obtained in .stl format, the gcode was made in the Vcarve software. The 3D roughing toolpath was used with the 1/8” universal milling cutter and the 3D finishing toolpath with the 1/8” ball nose.

Mould and cast the parts
The first exploration for the manufacture of the molds was made in wood. In this first exploration, the 1/8” rounded bur broke. This was due to the high speed of the milling. With this learning, the test was carried out in the blue wax mold.

The first step was to cut the mold so that it can be placed on the Tormach CNC Mill machine.

The 16x10cm cut block was placed on the CNC mill machine

The machine was cleaned so that the chips of the block can be recycled.
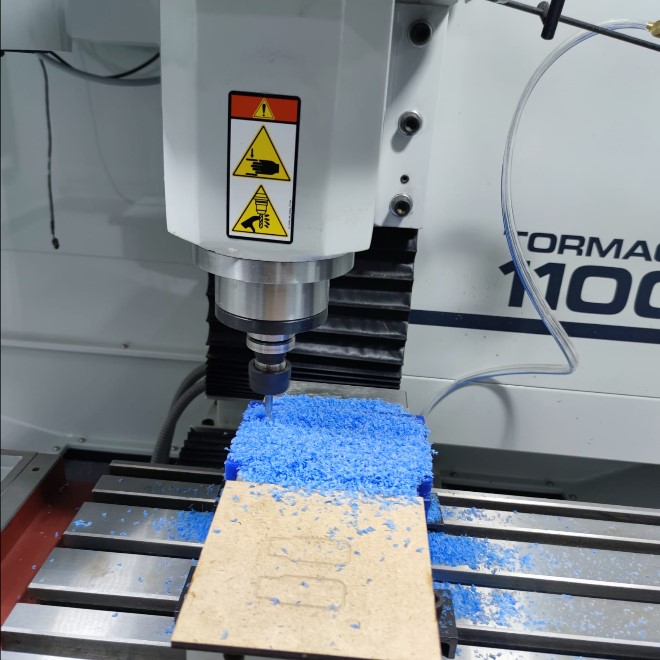
The point of origin was placed according to the design at the bottom left of the blue wax block. On the screen you can see the execution process: RPM 7500

The final mold of the blue wax was made with the 1/4” rounded bur since the 1/8” bur was broken.

We proceed to mix 200 gr. silicone F-10 Plus and 5 gr of catalyst in a container. The mixing process must be rigorous. One disadvantage of the catalyst being colorless is that it was not possible to visually recognize how well it was mixed. Hand mixing time was approximately 2 minutes.

Approximately 2 hours were left for the silicone to dry.

The next day the silicone was removed from the mold.

Type III gypsum stone is for dental use. I used it because it dries quite quickly. Use the proportion 60 ml/200gr according to the technical specifications. When mixed it is a very solid paste. I decided to add 20 ml more water to be able to fill the mold. This way I was able to work better. After 5 minutes it was already hard. Remove the mold after 10 minutes. It was pretty fast. Let the mold dry for a day before handling it.

For the use of Glycerin use 250gr. This allowed me to fill the mold. This process was complicated since the mold did not seal completely. By heating the glycerin for approximately 5 minutes and turning liquid and hot caused me various problems. Finally, with the help of rubber bands, I was able to seal the mold well and the glycerin dried in approximately 10 minutes. Glycerin was used to fill the mold. Waste material by not sealing the mold well.
The fine result was with good finishes despite using the 1/4” rounded endmill.

Problems
-
The materials in my locality were difficult to obtain. It took some time to be able to buy them from another city.
-
It was my first approach to the Vcarve Pro software. It wasn’t difficult but it did take me a while to be able to use it efficiently. That is why the milling and testing was first done on a block of wood.
-
It was also my first exploration with this type of material (silicone, glycerin, cement plaster). Which caused a bit of uncertainty but we finally got to know the procedure.
Design Files
About this week
The most difficult process for me was making the code in Vcarve. The code I used was in .mmg format
The exploration with Glycerin was also complicated as it is liquid and when hot it can escape through the joints of the silicone molds. These unions must be well sealed with rubber bands and tightened very tightly until they solidify.
The final result is satisfactory since you can see how your 3D model materializes in different materials.