16. Interface and application programming
GROUP ASSIGNMENT
- compare as many tool options as possible
We chose to test creating interfaces with Python following the examples in the book: Create Graphical User Interfaces with Python. It can be downloaded for free from the following link: magpi.raspberrypi
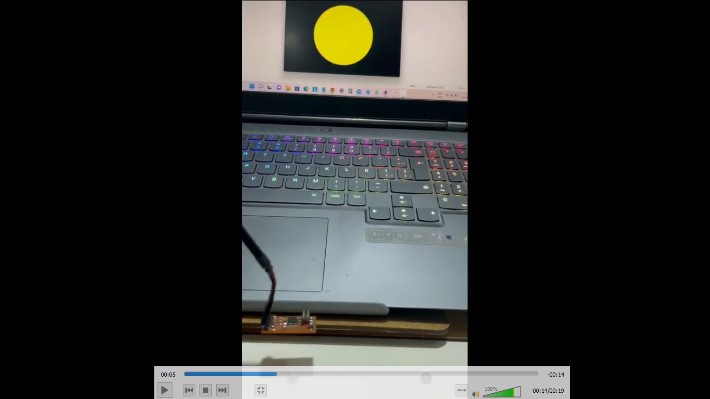
We tested the example that allows us to create a window with a button that randomly generates names for a spy.
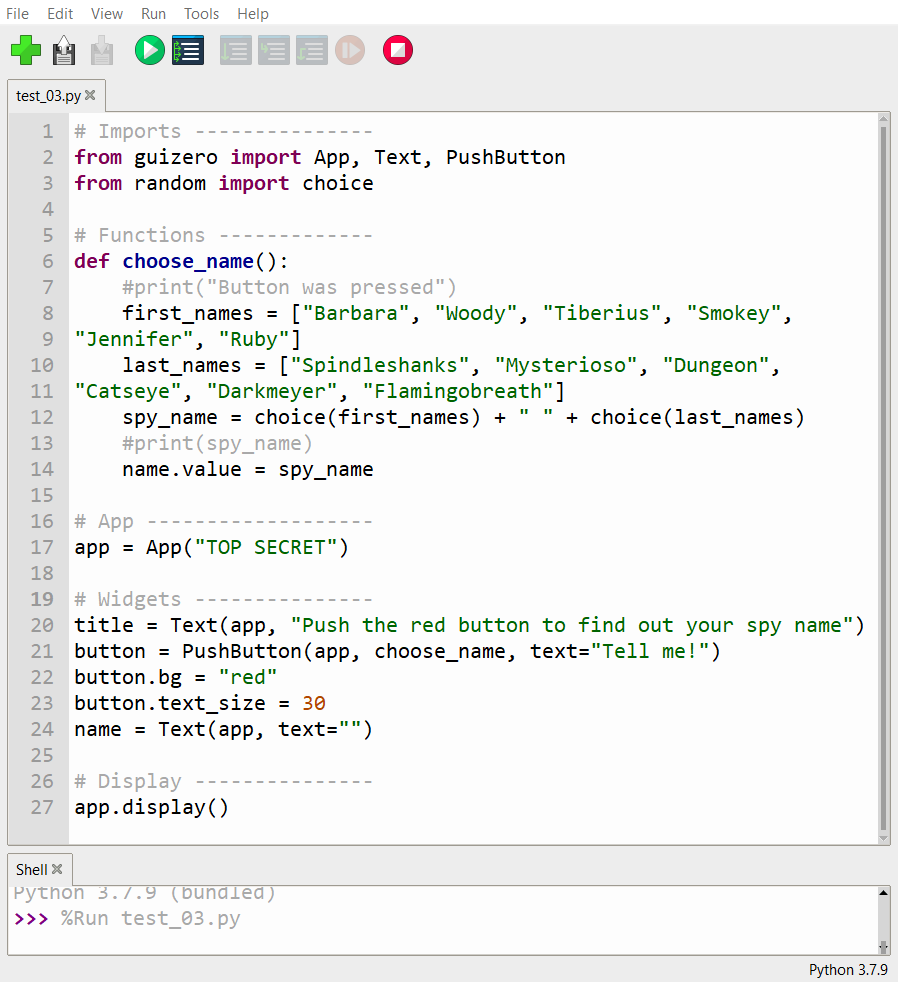
the code is the following:
Imports ---------------
from guizero import App, Text, PushButton from random import choice
Functions -------------
def choose_name(): #print(“Button was pressed”) first_names = [“Barbara”, “Woody”, “Tiberius”, “Smokey”, “Jennifer”, “Ruby”] last_names = [“Spindleshanks”, “Mysterioso”, “Dungeon”, “Catseye”, “Darkmeyer”, “Flamingobreath”] spy_name = choice(first_names) + ” ” + choice(last_names) #print(spy_name) name.value = spy_name
App -------------------
app = App(“TOP SECRET”)
Widgets ---------------
title = Text(app, “Push the red button to find out your spy name”) button = PushButton(app, choose_name, text=”Tell me!”) button.bg = “red” button.text_size = 30 name = Text(app, text=”“)
Display ---------------
app.display()
We type this code in the Thony software
we run and test

Analysis
app = App(“TOP SECRET”) Generates a window with the name “TOP SECRET” title = Text(app, “Push the red button to find out your spy name”) Allows you to add a title
button = PushButton(app, choose_name, text=”Tell me!”) Allows you to create a button with the text “Tell me!”
spy_name = choice(first_names) + ” ” + choice(last_names) Allows to generate the random name
File test
INDIVIDUAL ASSIGNMENT
- Write an application that interfaces a user with an input &/or output device that you made.
For the individual assignment I chose to work with the Processing software that can be downloaded from the following link: processing
In the following link I found a good tutorial for beginners that helped me to test interfaces with my Inputs card. arduino-and-processing
For the interface I will use my INPUTS card with magnetic sensor magnetic-sensor
First I had to reprogram my PCB so that I could read the signals through the serial port. The code I used is the following:
include 
define rxPin 1
define txPin 2
define sensor 2
SoftwareSerial mySerial(rxPin, txPin);
void setup() { // put your setup code here, to run once: mySerial.begin(9600); }
void loop() { // put your main code here, to run repeatedly: int value = analogRead(sensor); mySerial. println(value); }
While in Software Processing I tried the code that allows to change the size of an ellipse depending on the reading value of the sensor.
import processing.serial.*;
Serial myPort; // Create object from Serial class static String val; // Data received from the serial port int sensorVal = 0;
void setup() { size(720, 480); noStroke(); noFill(); String portName = “COM5”;// Change the number (in this case ) to match the corresponding port number connected to your Arduino.
myPort = new Serial(this, portName, 1200); }
void draw() { if ( myPort.available() > 0) { // If data is available, val = myPort.readStringUntil(‘\n’); try { sensorVal = Integer.valueOf(val.trim()); } catch(Exception e) { ; } println(sensorVal); // read it and store it in waltz! } background(0); // Scale the mouseX value from 0 to 640 to a range between 0 and 175 float c = map(sensorVal, 0, width, 0, 400); // Scale the mouseX value from 0 to 640 to a range between 40 and 300 float d = map(sensorVal, 0, width, 40,500); fill(255, c, 0); ellipse(width/2, height/2, d, d);
}
It should be noted that the code in Arduino the transmission speed is 9600 bauds but when testing the communication for some reason I only receive data at the speed of 1200 bauds. Therefore, in the Processing code I modify the data of the communication speed by 1200.

I proceed to test the code in Processing and this is the result:
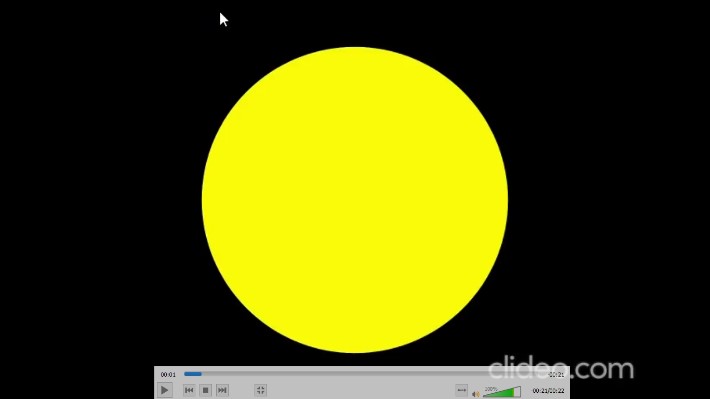
float c = map(sensorVal, 0, width, 0, 400); float d = map(sensorVal, 0, width, 40,500); fill(255, c, 0); ellipse(width/2, height/2, d, d);
This last part of the code allows you to rescale the size of the ellipse based on the sensor values.