3. Computer Aided design
Task
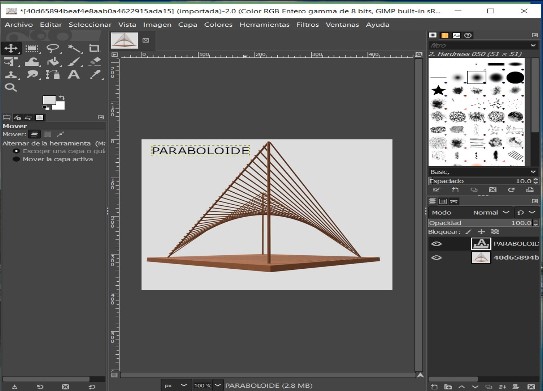
Model (raster, vector, 2D, 3D, render, animate, simulate, …) a possible final project, compress your images and videos, and post it on your class page
GIMP
-
Download the program from the official pageGimp
-
i saw a youtube channel tutorial LINK
-
Start exploring the program and make some edits. I noticed that it is very similar to the photoshop program.
INKSCAPE (convert image to vector)
-
Download the program from the official page Inkscape
-
The tools I learned to use are:
Open the image you want to vectorize
Use the vectorize bitmap tool
Choose the best option according to the image:
   - brightness cut
   - edge detection
   - autotrace
Edit preferences:
   - Uniform stroke color
   - Unfilled
Dynamic path / deviation
Edit path nodes
- In the following images you can see some procedures:
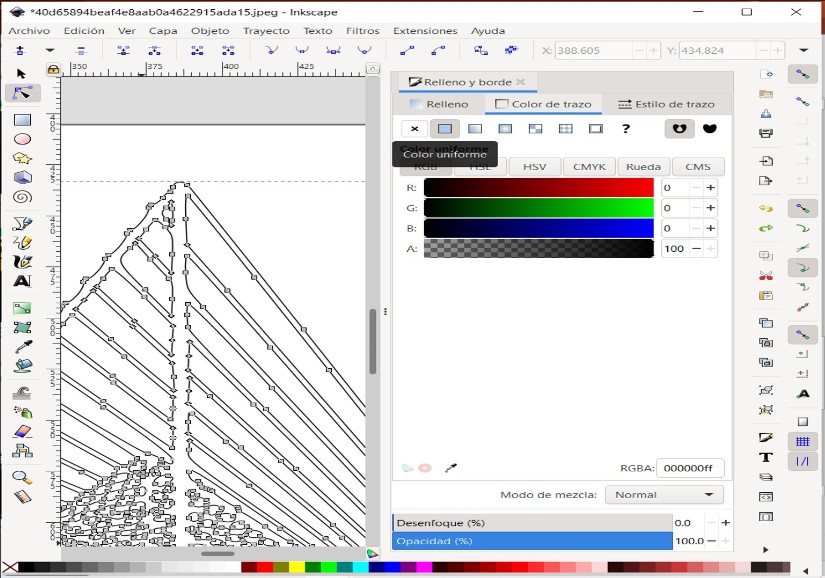

- This image is ready to be printed in laser cutting.
COREL DRAW (convert text to vectors)
-
Download the program from the official page CorelDRAW
-
The tools I learned to use are:
Text tool: IMPACT font
wrote: "FAB ACADEMY 2022"
Convert to curves tool
Properties: remove fill, black border and very fine line
- In the following images you can see some procedures:

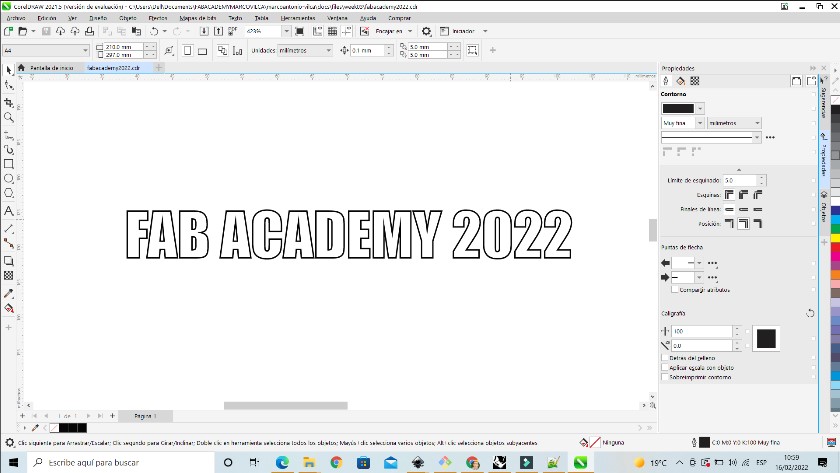
- This text is ready to be printed in laser cutting.
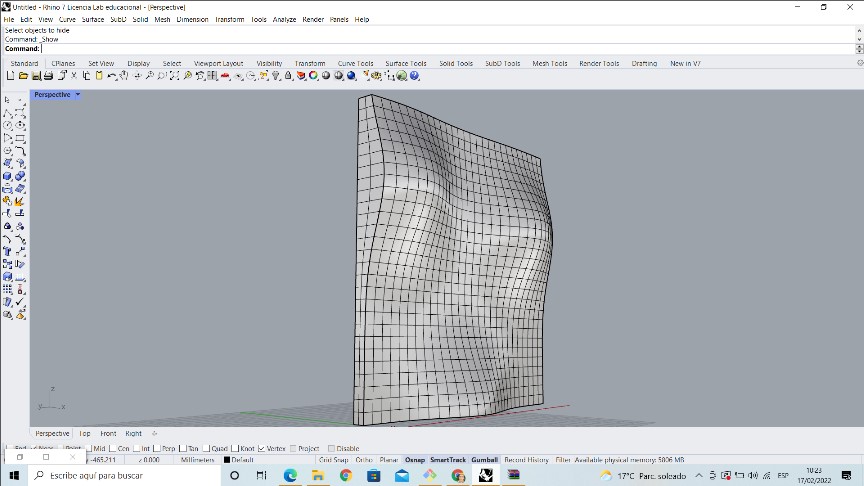
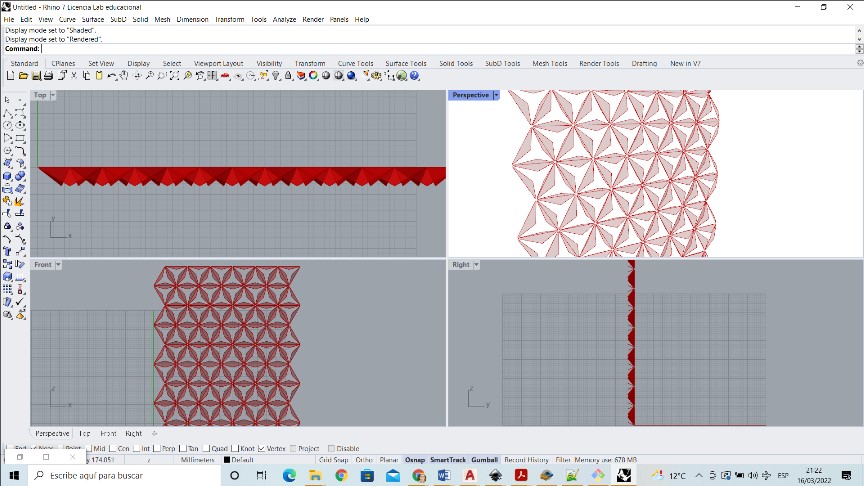
RINHO7 AND GRASSHOPPER “PARAMETRIC KINETIC FACADE”
To create this 3D model I used the Waffle Structure tutorial.
The procedure was as follows:
With the surface 3P tool, two parallel rectangular surfaces were created.
With the rebuild Surface tool, the dividing nodes are edited to one of the surfaces
With the SoftEditSrf tool, the undulations were created on one of the surfaces.
With the Dopborder tool, the edge of the two surfaces was selected
With the Loft tool both surfaces were joined into a single object
The following image shows the result of this procedure:
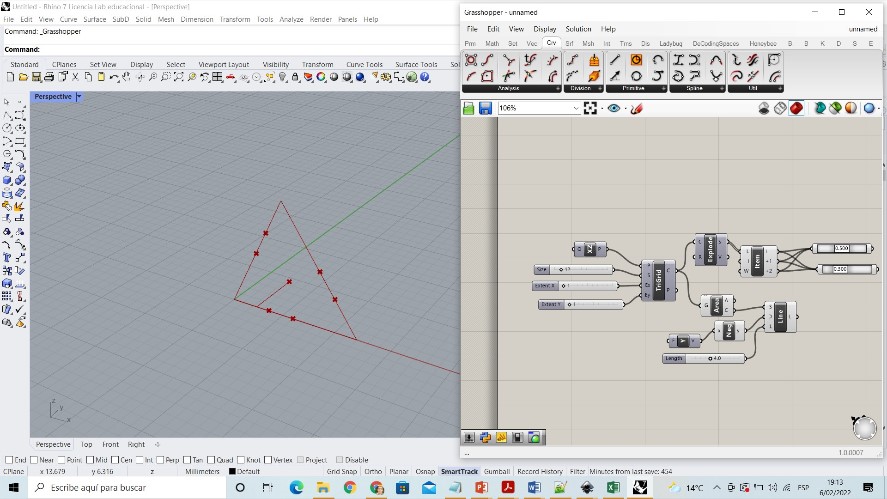
For the use of this tool, the tutorial kineticfacade was applied, based on this procedure the 3D model was made.
The commands used were the following:
- Grasshopper/vector/gri/triangular

/xz plane
size (0.12)
extent X (1)
extent y (1)
- grasshopper/curve/util/explode
/sets/list/listitem (+1/+2)
/curve/analysis/point one curve
área
/curve/primitive/line SDL
unit Y (Y)
slider 4.0
/curve/analysis/end point
- In the following images you can see some procedures:
Video grasshopper
For a better understanding of the work done in grasshopper, I attach a link to my personal YouTube channel. I haven’t been able to insert my .mp4 video yet due to compatibility issues. The video shows the movement dynamics of the triangular components of the designed wall.
Rinho7
Rinho 7 presenta una versión Educacional en cual permite explorar el software.
Evaluate and select 2D and 3D software
For me the best software for 2D design is Inkscape since it is free and easy to use. I have used it to vectorize images and it is compatible with JsCut which is used to create Gcode. In addition, the interface to create objects is easy to use.
Due to my profession as an architect I master software such as Autocad, Archicad, Sketchup and rinho7. In this course I personally think that the Grasshopper plugin of Rinho 7 is more useful. Digital fabrication is consonant with parametric design. Grasshopper is a potential resource for parametric design.