2. Project management
To begin the assignment, I followed the tutorials on GitLab and Fabcloud.io. I understood the instructions provided and could follow them step by step, but I still didn’t really understand how it all worked together. So, I sat down and began searching YouTube videos to help me understand! Some videos were a little overwhelming, as they assumed you knew the basics, and since that wasn’t my situation I searched a little longer. After several hours of reviewing, I came across two videos that really helped the light bulb trigger! The videos explained each part of the process (Git vs. GitHub/GitLab) and how to use them independently as well as together. Armed with this information, I restarted the process of putting my account together.
Learning to use Git and GitLab
The process begins with generating your SSH key. The SSH key is your computer’s authentication code so your computer can communicate through encryption with the hosted site, in our case GitLab. My first attempt to generate my key either failed or I missed a step when confirming it. I all of a sudden had this fear that I would somehow delete or ruin my GitLab account, so for practice, I created a GitHub account to walk through the process.
I finally was able to generate my key using these steps from GitLab:
After following these steps outlined above, I was finally able to generate my key! Once that was completed, I needed to enter my key into my account. After generating my key, I felt a little more confident, so I added my key to my GitLab account directly through the user settings. Next I needed to install mkdocs to practice using my terminal and Git Bash.
I knew we could directly use the GitLab interface to work on our websites, so to familiarize myself with it, I changed my .yml file and updated my Student Agreement and About Me sections through this markdown method. In order to push myself a little further out of my comfort zone, I tried some of the next steps using the terminal and Git Bash processes.
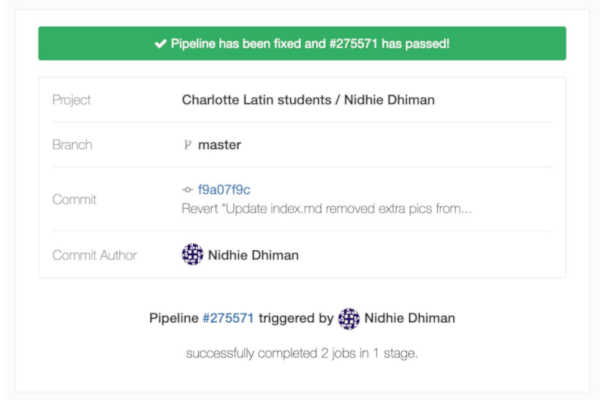
It worked!
My pipeline “broke” at the end of January, meaning in could not push or pull or make any further changes. I am still uncertain how I managed to get to this point. I tried everything I could think of through research, aside from doing a hard reset on my GitLab account. It took me a few days to get to the point where I came to terms with having to start over. Although I knew I wouldn’t actually be starting over. So I made a copy of my repository locally as a backup (and then 2 other backups just in case!). Once that was complete, I did a little more research before having to do an actual hard reset and discovered I could simply revert certain commits through the GitLab IDE. Since I was going to reset anyway, I took a chance and tried this method. And wouldn’t you know it worked! My guess is that when I pushed my last two commits through Visual Studio, I must have not pulled correctly and caused a jam in the pipeline.
Now that I have mended my pipeline, I did a little more research on Visual Studio. I spoke to one of my colleages, Barbara Morrow, and learned that it was better to use Visual Studio Code to correctly work with Markdown. She showed me how I could quickly use the basic commands directly in the interface to sync with my GitLab account.
XnConvert
My colleague, Scott Moulton, turned me on to XnConvert to resize and compress pictures in bulk. He gave me a quick tutorial on how to set everything up in the software, as it is not very intuitive. You can set the output parameters for the entire folder of pictures, and it does so in just a few seconds. One thing I especially loved about the program is it will convert .HEIC pictures from my iPhone directly without having to convert them to .jpgs first.
I began by clicking on the “Actions” tab. This is where you decide what you want to do to the picture. I selected resize from this menu.

The next step was to set my “Output” settings. I clicked on this tab, and first located the folder I wanted my processed pics to post in. Scott let me know to set up some holding folders for the process. So, I have folders on my computer labeled “Pics to Resize”, “XNC Resized Pics” and “Backup Pics”. In the output settings, I used the folder for XNC Resized Pics. For the output filename, I changed it to reflect that I had resized the pictures, so I wouldn’t accidentally upload a large image if it mistakingly was moved to the upload folder. The final step was to change my compression rate. I played around with a few options to look at quality, and eneded up liking 50% in the end. The file sizes are slightly higher, but well below any threshhold that would affect the overall size of my repository.

Once my settings were updated, it was time to try this out! I previously spent a lot of time saving each file as a jpg, resizing it in Gimp and then compressing it on tinyjpg.com. I was really hoping to save some time with this method. I clicked on the “Input” tab and then selected the “+Add files” button. I navigated to the folder I had set up earlier labled “Pics to resize” and added all the pictures in it. For this test run, I only had 2 pictures in there. Once added, it was as simple as hitting the “Convert” button in the bottom right.

The software then spits out a quick little status report to tell you how everything worked…in a matter of seconds! It displays how many files you added, how many it converted and how many it output.

Just to see how well it did on the conversion size, I viewed the files in my Viewer and was impressed with the results.

I am loving this new method! Makes the entire documentation process a little bit easier!