9. Embedded programming
This week I worked on defining my final project idea and started to getting used to the documentation process.
All final files used can be found here
Arduino IDE Baremetal Programming
I looked at the attiny412 datasheet and on page 134, I found the PORTA.OUT register that could be used to adjust the states of the pins, so I replaced the digitalWrite statements with statements using that register and ended up with the following code:
void setup() {
  // put your setup code here, to run once:
  pinMode(1, OUTPUT);
}

void loop() {
  // put your main code here, to run repeatedly:
  PORTA.OUT |= 1 << 7; //sets to high
  delay(1000);
  PORTA.OUT &= ~(1 << 7); //sets to low
  delay(1000);
}
Referencing Sofia Vona’s fab academy site, I found the PORTA.DIRSET register to store the pin modes. I double checked this by finding it on the datasheet, and I found it on page 137 so I replaced arduino’s pinMode function with it, and I reduced the delay to be able to tell the difference in blinking.
void setup() {
  // put your setup code here, to run once:
  PORTA.DIRSET |= 1 << 7;
}

void loop() {
  // put your main code here, to run repeatedly:
  PORTA.OUT |= 1 << 7; //sets to high
  delay(100);
  PORTA.OUT &= ~(1 << 7); //sets to low
  delay(100);
}
I then tried to pair this with button input to control the blinking, but my first few attempts did not work.
Attempt 1:
I checked the datasheet to see how to enable the pullup resistor and found it on page 137.
void setup() {
  // put your setup code here, to run once:
  PORTA.DIRSET |= 1 << 7; //sets led pin as output
  PORTA.DIRSET &= ~(1 << 6); //sets button pin as input
  PORTA.PIN6CTRL |= 1 << 3; //enables pullup on button
  PORTA.OUT |= 1 << 7; //turns off
}

void loop() {
  // put your main code here, to run repeatedly:
  if (!(PORTA.IN && (1 << 6))) { //checks if button is pressed
    blink();
  }
}

void blink() {
  PORTA.OUT |= 1 << 7; //turns off
  delay(500);
  PORTA.OUT &= ~(1 << 7); //turns on
  delay(500);
  PORTA.OUT |= 1 << 7; //turns off
}
Attempt 2:
I then looked more closely at the pin configuration section on page 137 and found that it was possible input was disabled, so I made sure it was enabled by adding PORTA.PIN6CTRL = 0x1; //makes sure button pin has input enabled before enabling pullup on the button, but it still did not work.
Final:
I then checked Drew Griggs’s fab academy site, and when I saw his code, I realized that when I was dealing with the bit string from PORTA.IN, I was using the boolean variable operators instead of the bitwise operators, and when I fixed that, it worked.
void setup() {
  // put your setup code here, to run once:
  PORTA.DIRSET |= 1 << 7; //sets led pin as output
  PORTA.DIRSET &= ~(1 << 6); //sets button pin as input
  PORTA.PIN6CTRL = 0x1; //makes sure button pin has input enabled
  PORTA.PIN6CTRL |= 1 << 3; //enables pullup on button
  PORTA.OUT |= 1 << 7; //turns off
}

void loop() {
  // put your main code here, to run repeatedly:
  if (~PORTA.IN & (1 << 6)) { //checks if button is pressed
    blink();
  }
}

void blink() {
  PORTA.OUT |= 1 << 7; //turns off
  delay(500);
  PORTA.OUT &= ~(1 << 7); //turns on
  delay(500);
  PORTA.OUT |= 1 << 7; //turns off
}
Platform IO
I installed platform io by going to the extensions section of VS code and installing platform io. I then created a new project configuring it with the attiny412 board.
For the programmer, I had heard from some of my classmates that platform io wiped the programmer we made and that only the arduino would work after being made into a jtagupdi programmer, so I did that and uploaded the following code:
#include <Arduino.h>

void blink() {
  PORTA.OUT |= 1 << 7; //turns off
  delay(1000);
  PORTA.OUT &= ~(1 << 7); //turns on
  delay(1000);
  PORTA.OUT |= 1 << 7; //turns off
}

void setup() {
  // put your setup code here, to run once:
  PORTA.DIRSET |= 1 << 7; //sets led pin as output
}

void loop() {
  // put your main code here, to run repeatedly:
  blink();
}
For some reason, the code that I used for the previous section with the button wasn’t working, so I just used the blinking code without the button.
Group Work
Our group work for this week can be found here
I worked as part of our group A2 and did the setup work for testing the jetson nano which involved wiping and flashing an sd card.
Failed/Incomplete Language Attempts
Rust
I installed rust from their site.
To install the necessary dependencies for avr-device, I ran cargo install atdf2svd --version 0.3.1, but I got the following errors:
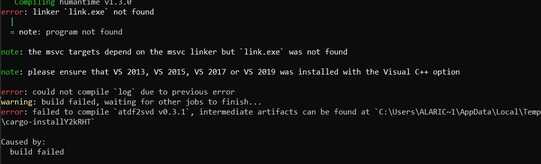
To fix this, I found this stack overflow answer and ran the following commands:
rustup toolchain install stable-x86_64-pc-windows-gnu
rustup default stable-x86_64-pc-windows-gnu
I then ran the following commands running the command line as an administrator to finish installing the dependencies following the build instructions on the avr-device repo:
cargo install atdf2svd --version 0.3.1
cargo install svd2rust --version 0.19.0
cargo install form
rustup default nightly
rustup component add --toolchain nightly rustfmt
pip3 install --user svdtools
I then added the attiny412 chip to the crate.
I first downloaded the attiny412 atdf from this repo and added it to the vendors directory in avr-device. I then added the following line to the cargo.toml file under features:
attiny412 = ["device-selected"]
In the makefile I added the attiny412 onto the list of chips to end up with CHIPS := at90usb1286 atmega1280 atmega1284p atmega128rfa1 atmega168 atmega2560 atmega8 atmega8u2 atmega328p atmega328pb atmega32u4 atmega4809 atmega48p atmega64 atmega644 attiny202 attiny2313 attiny2313a attiny84 attiny85 attiny88 attiny816 attiny841 attiny861 attiny167 attiny1614 attiny412. I also added the attiny412 to the list of devices on the readme. I then made an attiny.yaml file and added the following code:
_include:
  - "common/ac.yaml"
  - "common/spi.yaml"
  - "common/usart.yaml"
I then added the following code to src/devices/mod.rs:
#[cfg(feature = "attiny412")]
pub mod attiny412;

#[cfg(feature = "attiny412")]
impl attiny412::Peripherals {
    /// Returns all the peripherals *once*
    #[inline]
    pub fn take() -> Option<Self> {
        crate::interrupt::free(|_| {
            if unsafe { DEVICE_PERIPHERALS } {
                None
            } else {
                Some(unsafe { attiny412::Peripherals::steal() })
            }
        })
    }
}
I then added the attiny in the list of compile error options as well as the following code in the corresponding sections of the code:
#[cfg(feature = "attiny412")]
pub use crate::devices::atmtiny412;
#![cfg_attr(feature = "attiny412", doc = "**attiny412**,")]
I then opened powershell and ran make attiny412, but it had errors and did not work. I tried also making the chips that it already had prebuilt into the crate, but even those did not work, so I concluded that there is probably something wrong with the crate.
Avr-gcc
Installing the Software
Prior to fab academy, I already had gcc installed through MSYS2, a package manager, following this site. After downloading MSYS2, I opened it and entered the following command:
pacman -Syu
To install gcc, I entered the following command:
pacman -S mingw-w64-x86_64-toolchain
I wanted also to use MSYS2 to install avrdude to keep all my packages organized, so I entered the following command to search for it:
pacman -Ss avr
Below shows the results for mingw64:
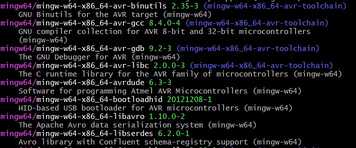
I then ran the following command to install avrdude:
pacman -S mingw-w64-x86_64-avrdude
It, however returned the following errors:

I then searched around for ways to fix this problem, and I found this site, and I used the following commands:
curl -O https://repo.msys2.org/msys/x86_64/msys2-keyring-r21.b39fb11-1-any.pkg.tar.xz
curl -O https://repo.msys2.org/msys/x86_64/msys2-keyring-r21.b39fb11-1-any.pkg.tar.xz.sig
pacman-key --verify msys2-keyring-r21.b39fb11-1-any.pkg.tar.xz.sig
pacman -U msys2-keyring-r21.b39fb11-1-any.pkg.tar.xz
pacman -Syu
Then I repeated the command above to install avrdude. It still had errors, but this time there were less.

I then tried running the following commands, but they still did not work
rm -r /etc/pacman.d/gnupg/
pacman-key --init
pacman-key --populate msys2
I then ran pacman -Syu again, and tried installing avrdude, and it worked.
I also installed avr-gcc with pacman -S mingw64/mingw-w64-x86_64-avr-gcc