6. 3D Scanning and printing
This week I learned how 3d printing can be useful despite its long times since it can make objects impossible for subtractive processes. I also learned how to use scanning, specifically photogrammetry, to quickly replicate real world objects.
All files used can be found here
3D Printing
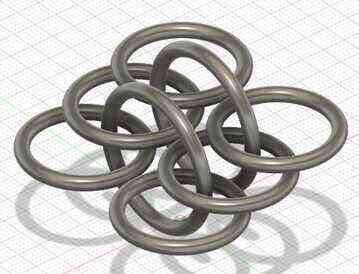
I decided to print a few links of chainmail, and I looked at this site to see what the traditional pattern was. It cannot be made subtractively since the links would be printed already connected.
Design
I used the following parameters:

I started with a sketch of 2 circles to form a ring.
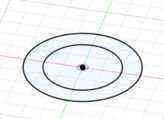
I then extruded the ring and added a fillet of half the thickness to produce a torus.


To create links, I used the move copy tool.


I thought the distance between the links with the verticle torus were a bit too close together, so I changed it to a larger torus so that it would pass through the widest part of the gaps to link.

I then made another move copy to make another link, and since I thought the verticle torus still looked a bit too close to the horizontal ones, I lowered the thickness parameter.
Slicing and Printing
I used prusa slicer for slicing, and in the configuration wizard, I selected the ender 3.
To get the design into prusa slicer, I exported it from fusion as an stl and imported it into prusa. I sliced it with supports enabled and exported the g-code.
I then started the print, but it failed. There were bits of plastic sticking up and some strings between places the nozzel traveled.
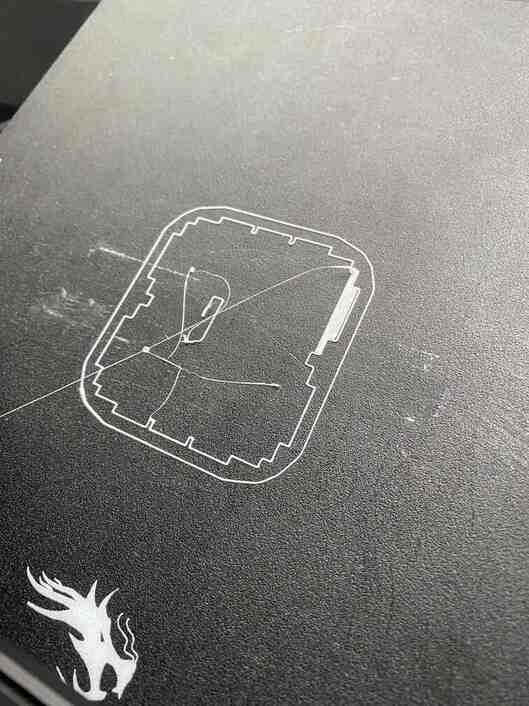
I tried a couple more times, but it kept failing in the same way, so I went back to the design and changed the detail from optimal to detail, and that worked.

I then removed the supports

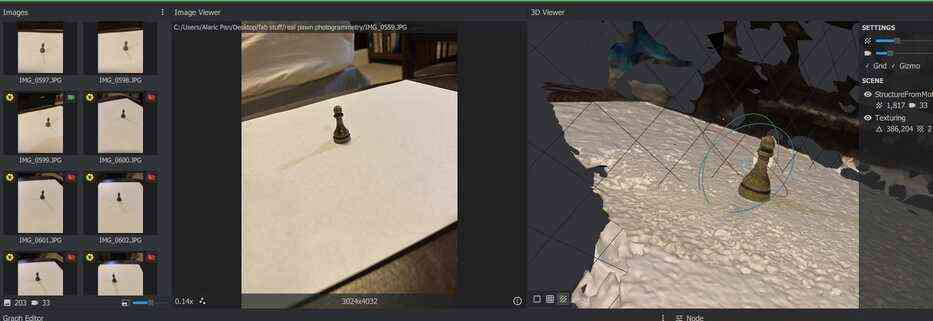
Scanning
I used meshroom for photogrammetry, and I referenced the fab documentation of Teddy Warner, a fab graduate.
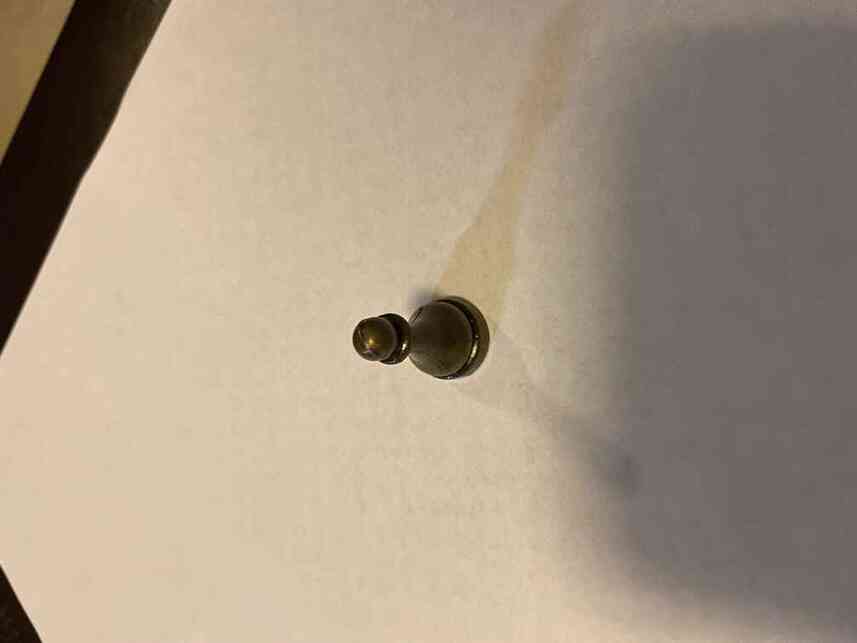
I took 100 pictures of a pawn with a white sheet of paper underneath to provide better contrast.

I then downloaded meshroom and extracted the zip file. To open meshroom, I opened the application file in the folder, and that opened a terminal, and to open the application, I just hit enter.
I then dragged a folder containing the pictures into a panel on meshroom and started the processing.

After a while it finished.

When I opened the obj file in fusion however, it was not very detailed and a section was missing.

I then redid the process with 203 pictures taken with the night mode of my phone which would help with lighting differences.
It finished and looked a lot better.
I then pulled it into fusion and used the plane cut tool to remove unnecessary portions of the mesh.
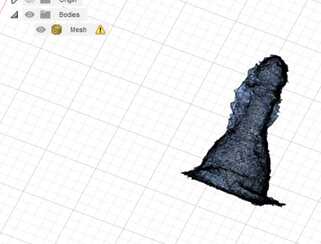
To close the mesh, I hit the warning sign and had it repair the mesh.
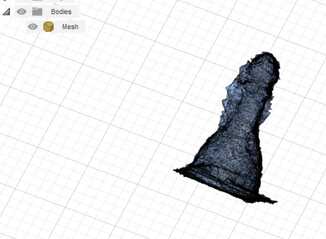
I then exported it as an stl and opened it in prusa to see how it would print.

Group Site
Our group work for this week can be found here
I characterized the 3d printers available to us for clearance using the file provided by Dr. Gershenfeld. I did this with the ender 3 and contributed with the resin printer.