16. Wildcard Week
This week I learned to use the laser cutter in more unique ways with origami.
The design files can be downloaded here (test for paper settings) and here (cut file).
Inspiration
I used to do origami, and so when I saw it as an option for this week, I was excited to use the skills I’ve learned for it.
For reference in terms of the folds, I looked at this video for an origami spikeball.
Testing Paper Settings
To start, I tested the cut and score settings for papper for our laser cutter. I did this by making some lines and color mapping in rgb with each of the 3 color values representing a setting of the laser cutter, r for speed, g for power, and b for frequency.

All had 100 speed and 10 frequency, but for the power from bottom to top were 2, 5, 10, 40, and 50.
Because these tests were not entirely satisfactory for scoring since even with just 2 power, the back looked like it was dangerously close to cutting through, and it did cut through on the ends, I decided to do a few more tests using the same file just with different settings and having the laser not cut some of the colors depending on how many I wanted. I then wrote the power used on each cut next to it.

Below shows the back of the paper:

Most of the scoring test cuts still went through to the back on the ends, and the highest one that didn’t marked the paper but did not go deep enough to fold easily, so I chose to use 1.5 power since it still scored properly and was lower and made minimal marks through to the back.
For cutting, the lowest power that went through was 5, so I decided to use that.
Design
The design would require 12 identical modules, so I folded one to better see where the folds need to be and marked some of the folds.
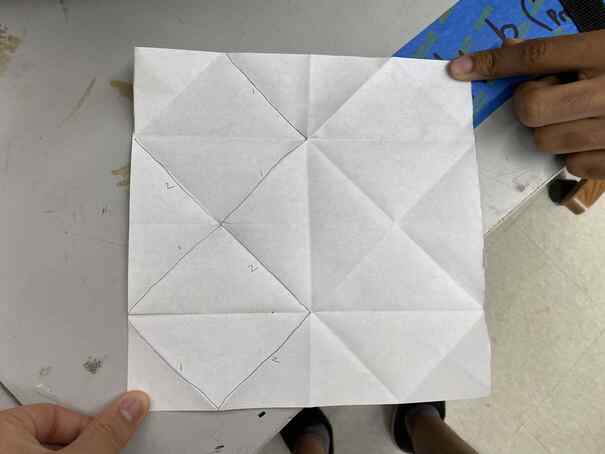
The lines are labeled 1 and 2 since a later fold produces those folds with a single fold.
I also found that the first fold in half does not actually contribute to the final assembly folds but only acted as setup as a marker for the quarter folds, so I omitted it in the design.

Cutting and Assembly
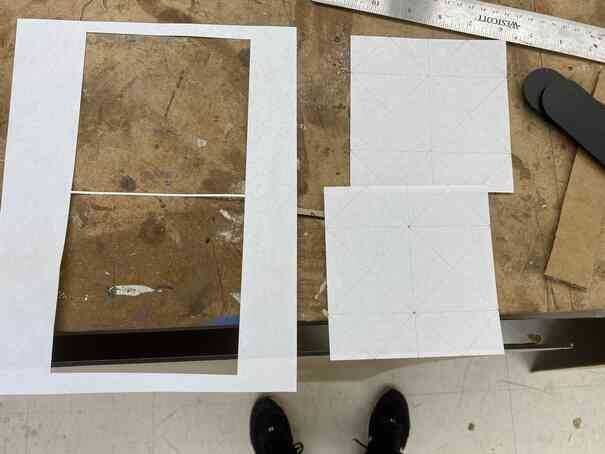
I sized the modules so that 2 would fit on a single sheet of paper, and when doing the first sheet, I noticed that while the cutting with 5 power cut all the way through for most parts, it was not doing so consistently, so after that, I turned the power up a little to 8. Other than that, everything went as planned.
I then folded all 12 modules.

The folding went quite smoothly and of course was much better than doing it purely by hand. The folds were more accurate because the laser cutter is much more accurate than a human, and some folds required folding multiple layers of paper, which increased inaccuracy since it would be more difficult to do by hand and thus would prompt usage of greater strength over accuract as well as the tendency for the paper to fold along easier but inaccurate lines, but the laser had already scored all the folds beforehand allowing these to be done easily.
I then put them all together to form the spikeball.
