12. Mechanical Design
This week is about making a machine and funny thing is all my group mates came positive for covid and that gave us time to work together since we had to isolate ourself. And with us was Fran and Sibu. It was a great experience to work in group giving and taking inputs for a common goal.
Week Assignments
-
group project for Mechanical design:
-
design a machine that includes mechanism, actuation, automation, application.
- Build the mechanical parts and operate it manually
-
document the group project and your individual contribution
-
group assignment for Machine design:
-
actuate and automate your machine
- document the group project and your individual contribution.
Group Assignment.
The group assignment can be found here.
The link to the video is here.
Machine.
So, the first and for most thing is to decide what machine we are going to make. It was a good brainstroming among ourselves and finally we decided to make a machine which can convert pet bottle to 3D printing filaments. The waste bottle has become a kind of use and throw purpose and waste is a big problem in all part of the world.
The machine concept is almost done then we divided the work to each where for some work we were supposed to work individual and few in pairs. We elected Zina Choden as our team leader and she managed to divide the work very carefully and she did a great job leading the team.
Team Members Responsibilies.
-
Zina Choden Yonten
-
Team Lead
- 3D design
-
Documentation
-
Sonam Paldon Dorji
-
Programming
- Hall Effect sensor team
-
Documentation
-
Anith Ghalley
-
Hall Effect Sensor team (mechanism)
-
Programming
-
Kencho wangdi
-
Extruder modification
- Assemble components
- Prototyping
- Wood works
Working in group.
The picture below was taken when we were finally able to come back to lab after being covid positive. Initially it was tough working with the sickness but with a good company, any tough journey is worth it.
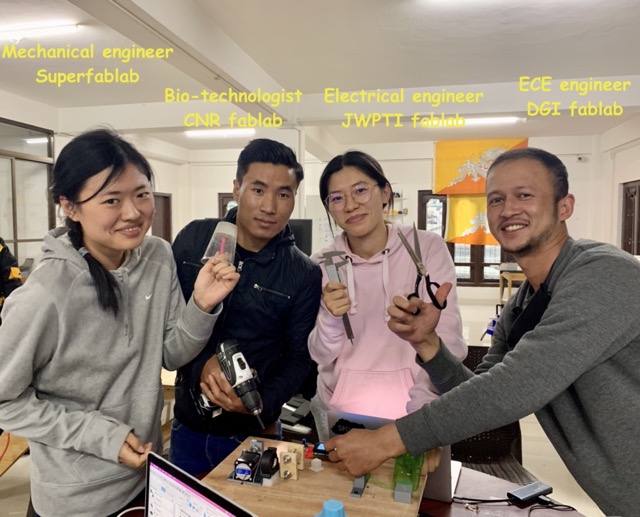
The picture above is the team member of group B-positive. It felt great working with this people, our team members comes from a diverse background such as Mechanical engineer (Zina Choden), Bio-technologist (Kencho Wangdi), Electrical Engineer (Sonam Paldon Dorji) and I am an electronic and communication engineer.
It was a great experience because our team with different background helped us analyse a problem from all different approaches and prepectives.
My Work.
I was assigned to work with Sonam Paldon to:
- Design an amplifying mechanism.
- Programming the machine.
Mechanism.
With our approach to convert the pet bottle to 3D filament has the high possibility of creating an uneven diameter of the filament. Therefore it is necessary to control the extrusion of the filament as per the diameter of the filament from the extruder.
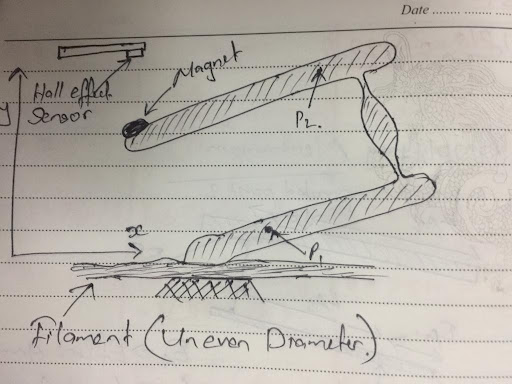
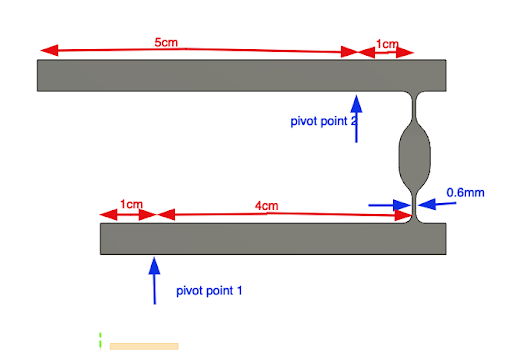
Our mechanism must be able to detect the variation of about 0.5 mm in the diameter of the filament. Therefore our Aim is to create an amplifying mechanism which would have an amplification factor of x20. SInce we want to use the Hall effect Sensor to detect the variation.
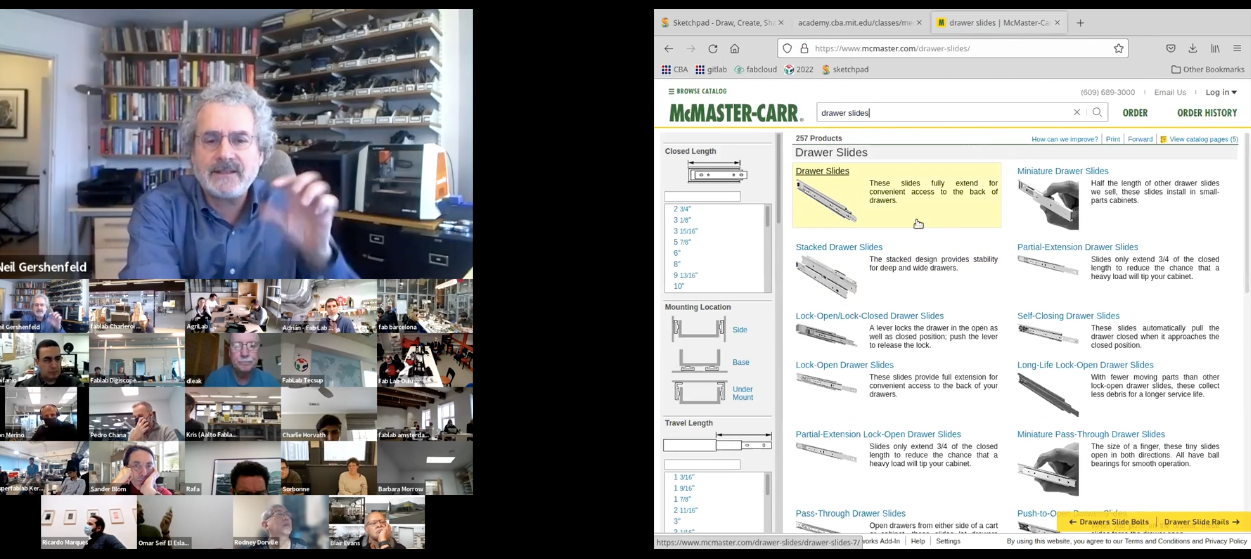
As per the video in the Input week design of the hall effect sensor. We have observed that a considerable variation of 2 cm is required for the hall effect to detect a measurable variation between the sensor and the magnet.
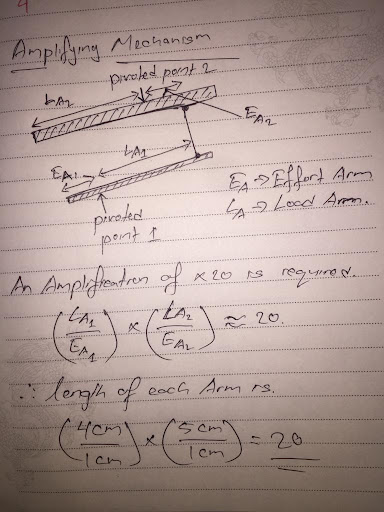
Therefore, after a quite a long time of brainstorming and exploration we decided to use the concept of first class lever.
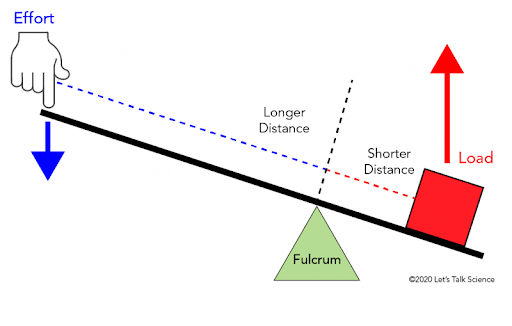
The Ratio between the Load Arm to the effort Arm will give us the scale with which the movement of the effort arm will make a huge variation at the end of the load Arm.
With this concept, we have designed a combination of two first class levers. Where the load arm of the first lever will create a huge variation to the load arm of the second lever.
The First iteration of the mechanism was a to basically create the combination of the levers.
The we understood that the pivoted point would need some joints, which should provide the freedom for rotational movement but should restrict translational movement.
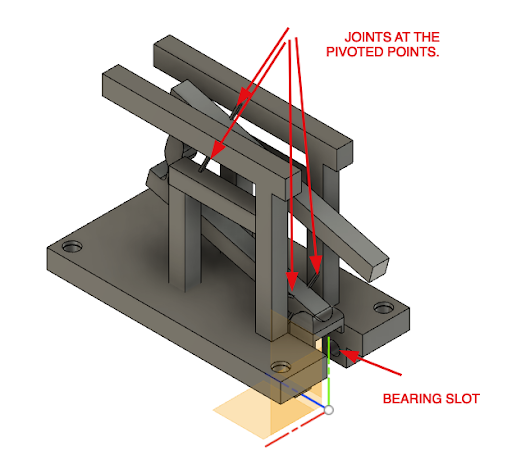
But all these joints broke while removing the support after printing. Therefore we are now looking forward to making more reliable joints in the future iterations of the design. For now we manually created the pivoted points at the support and at the lever to test the amplification of the mechanism.
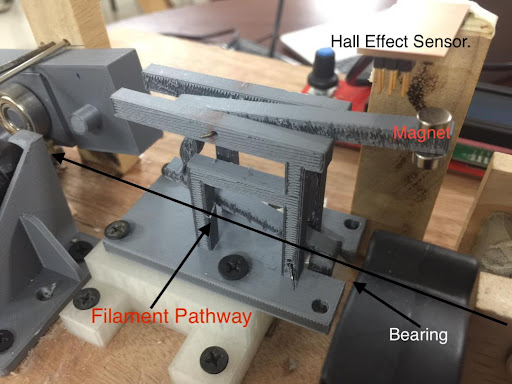
Finally the mechanism was installed on the machine. Then we tried to check variation on the output from the hall effect sensor. When the filament passed through the pathway, the variation on the hall effect output was observed. Therefore, we plan to take this output from the hall effect board and control the speed of the motor.
Programming.
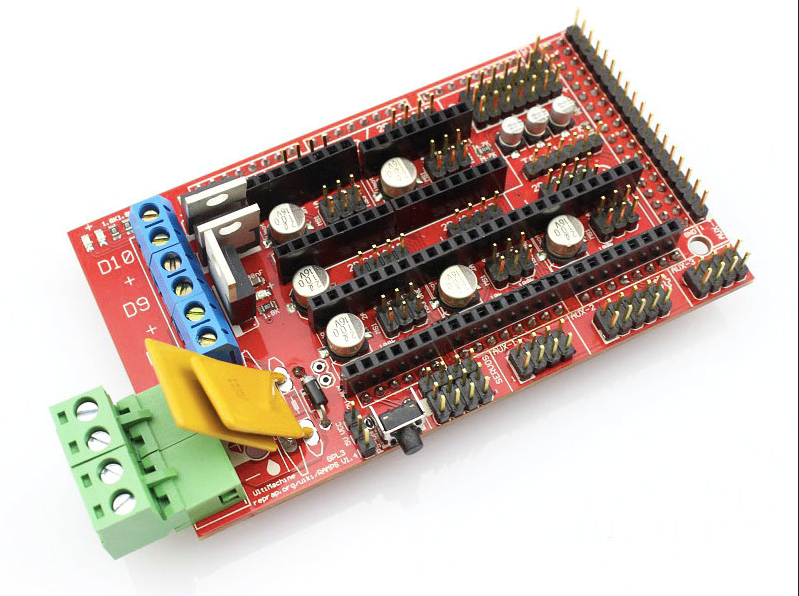
For this machine development, we will be using the Arduino Mega and on it we will be using ramps to controll the components in our machine.
The components or modules required for our machine is shown below.
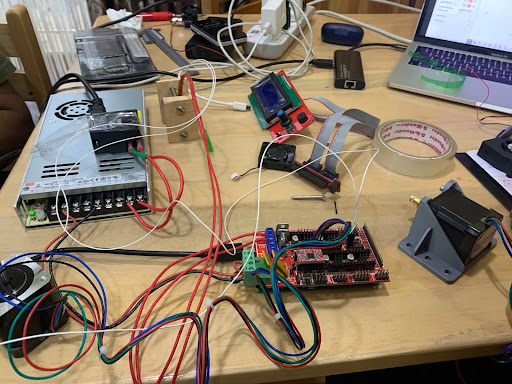
The components are:
- Power supply (230 AC to 12 V DC).
- Arduino Mega.
- 3D printer Extruder.
- Stepper Motor.
- Motor Driver.
- 12 V fan.
- 4x16 LCD.
Basically the connection of these components to the ramps is listed below.
- The power supply converts the 230 V AC Supply to 12 V DC.
- The 12 V supply is connected to the ramps.
- The stepper motor is connected to the E0 with a motor driver.
- The Extruder goes to D10 for power supply and is connected to T0 to sense the change of temperature.
- Fan to the 12 aux.
- LCD to the AUX-4 Pins.
To programm to machine we used the marlin firmware, since this firmware will allow us to configure the program based on our requirments of using different components.
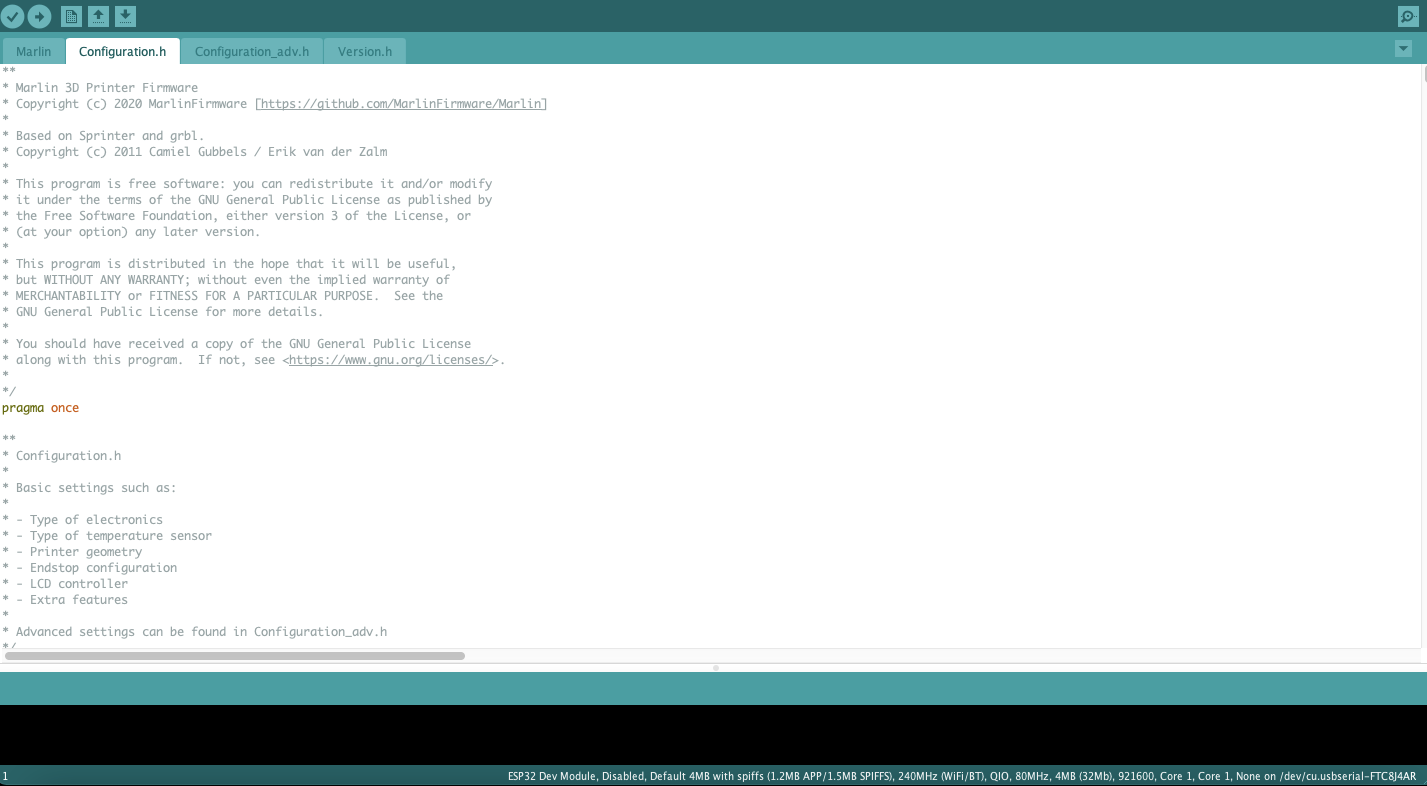
And to tune the extruder, controlling the motor and temperature of the extruder we will be using the cncjs.
Motor :
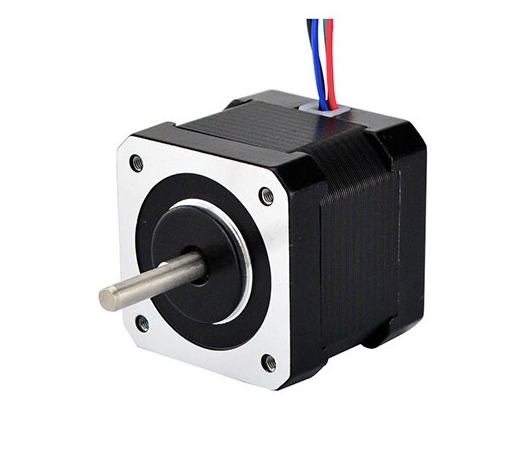
As mentioned above the stepper motor is connected to E0 and the motor will be controlled using the motor driver like shown below.
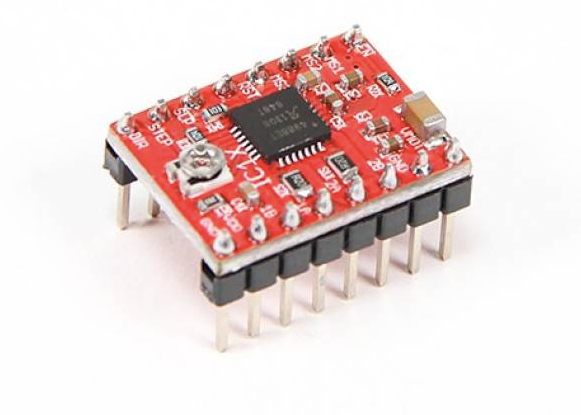
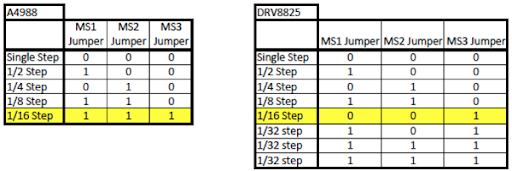
To change the resolution of the motor from 200 steps to 1600 steps we shorted the MS1 and MS2 jumper as indicated below.

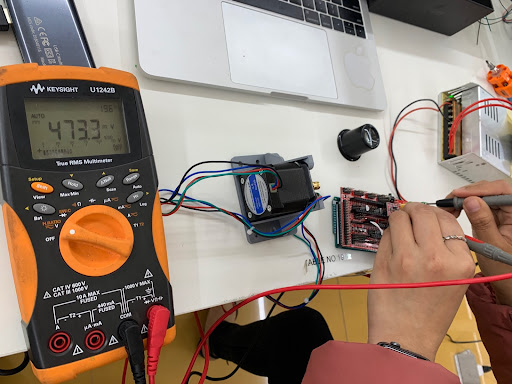
Next Sonam and I tried to limit the current for the motor driver to 0.047 V.
Extruder :
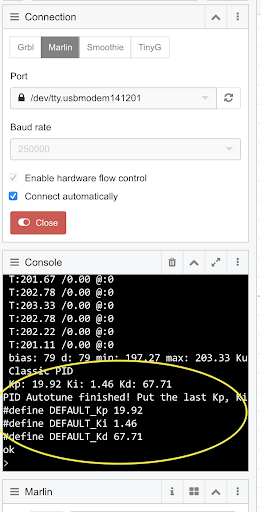
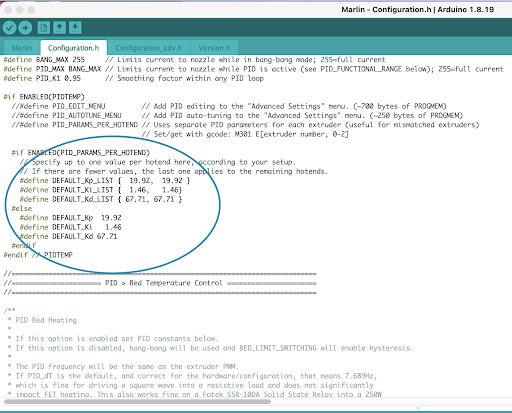
I heard few bits about PID but never worked on it. So here we learned to auto-tune the PID for the extruder on the cncjs software.
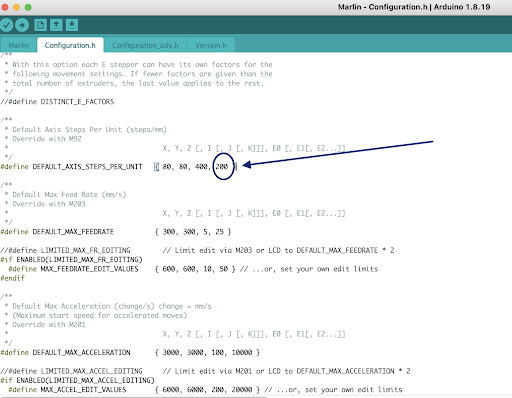
So the final task was to make the necessary changes on the marlin firmware to meet our requirments for the machine.
Set the value for the motor which is connected to E0.
And now take the tuned value of PID and add it to the PID value on the firmware.
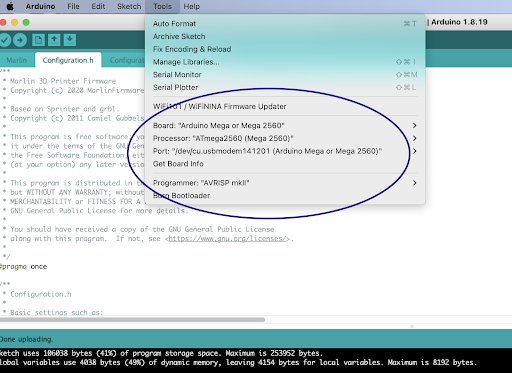
Uploading the program to the arduino Mega.
Problem Faced.
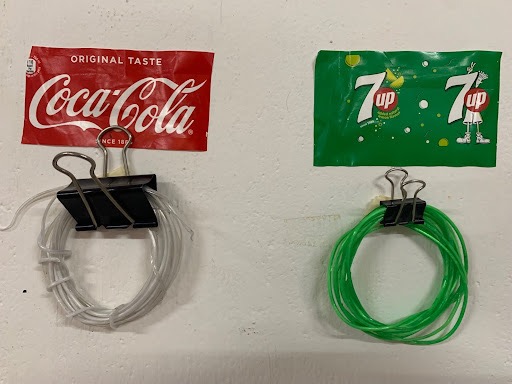
The filament produced form the coke bottles were having air bubbles in side and it was quite tough and strong, It was with uneven diameter. But the filament form miniral water bottle was thin and melts faster. We were able to print using miniral water bottle.
Outputs.
- Filament Produced.
- Printing with the filament.
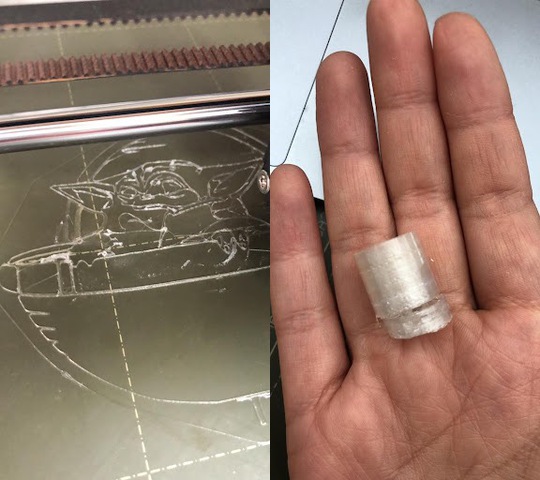
- Using one coca cola bottle we were able to produce 500 cm long filament.

Future Works.
- Designing a mechanism whith higher amplifying factor.
- Make better holder for the extruder.
- Make the machine even more user-friendly while operating.
- Reduce the size of the machine, so it is portable.
- Incorporate spool holder so that filament produced can be automatically stored.
- Incorporate the output from the hall effect board to control the speed of the motor.
- Improve the overall aesthetic of the machine.