10. Molding and casting
This week was all about molding and casting. I learned alot with the process. In the begining, when Takesan taought us about the process I thought it was a really complicated process but when we started with the practical process It was not that diffcult process.
Group Assignment.
Group assignment can be found here
- While molding and casting work, it is very important to take up precautions while doing the process.
- Cover your mouth.
- Avoid eye contact with the chemical.
- Use gloves.
-
keep it away from children.
-
And also, never throw the left over mixture in the basin since it can block the outlet.
SOftware used.
- Modela Player.
- Vpanel.
- Fusion360.
3D Design.
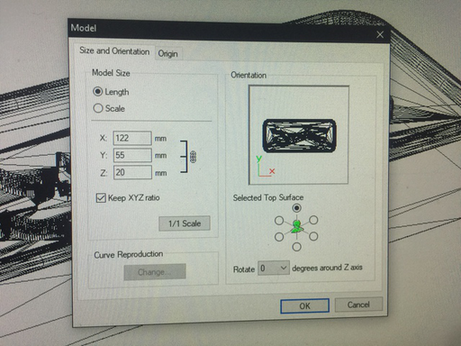
For the design, I used the fusion 360 to design my model. The image below is shows the 3D design model.
First I took the measurement of the wax block so that there is enought space for my design and wall to hold on the wax.
The screenshot below shows the parameters defined for the design.

Taking this dimensions, I made a rectangle. The reason I took the initial dimension as same as the dimension of the wax so that my final model made based on the dimension of the wax.

Fter extruding the rectangle. Two different offset are made to considered.
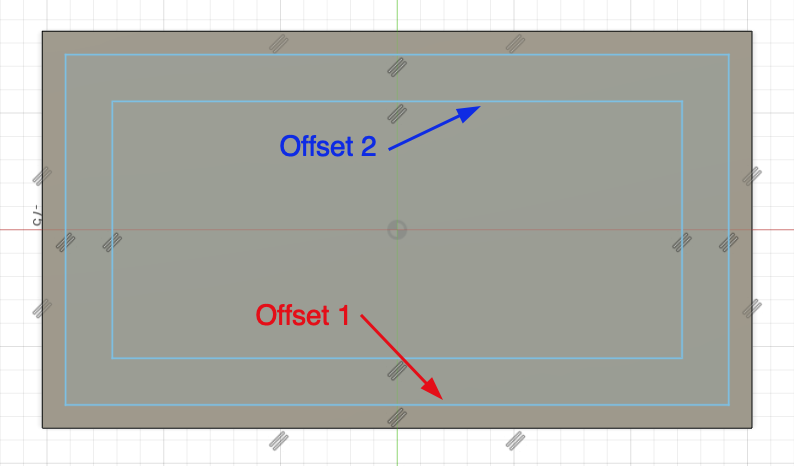
- Offset 1: Outer edge for the mold wall.
- Offset 2: Inner edge for the mold wall.
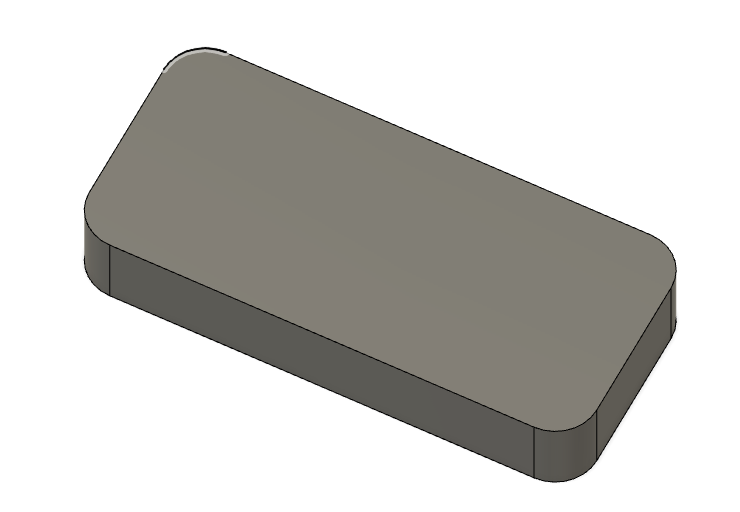
And after extruding and smoothing the sharp edges, my expected output should would be like this.
Since I planned to present and dzongkha on my design and the word is
- ༼འགྱར་མེད༽ (meaning ༼Jurmi༽). Its a name. It is important to maintain the font style to as Jomolhari as shown below.
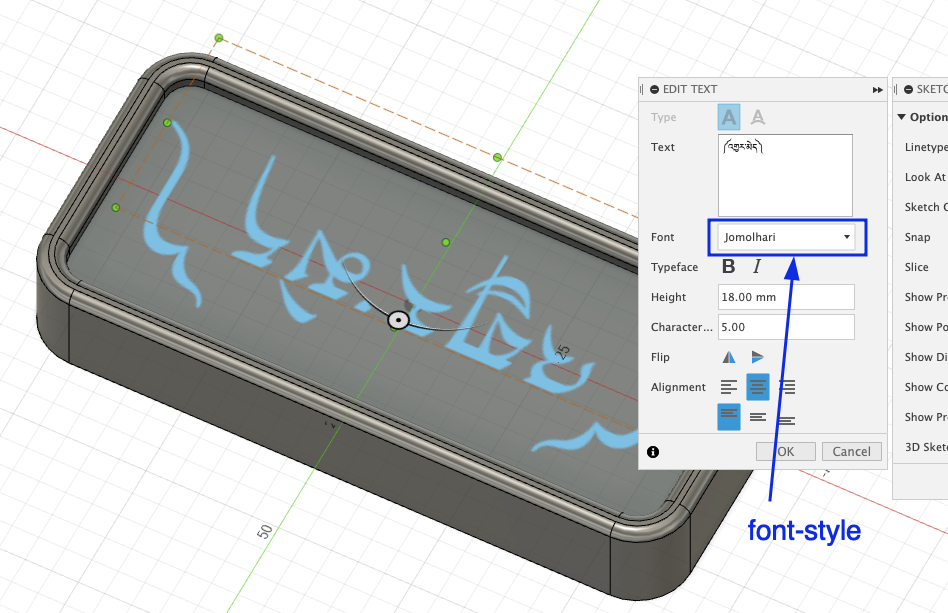
Hence after extruding the alphabets. My design is ready fpor molding and casting.
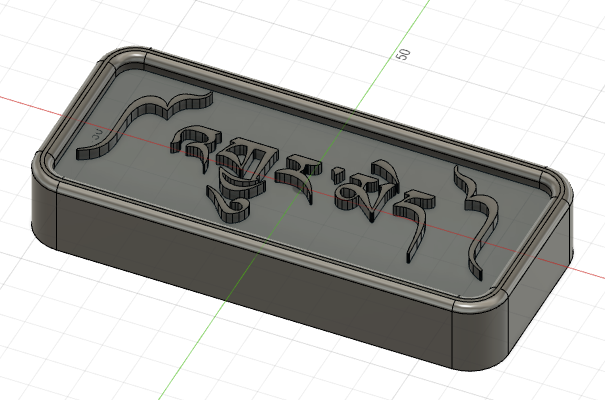
The model is an extrude of dzongkha work. The word is Jurmey and its a gift to one of my friend who has been helping me in school during the fabacademy course.

Model
Necessary setup and learning.
Before we go on with engraving using the SRM20. First Takesan demonstrated with his design and he went through all the processes. From generating a g-code file to creating mold and cast.

We were introduced to the modela player and the process of creating the roughing and finishing file.
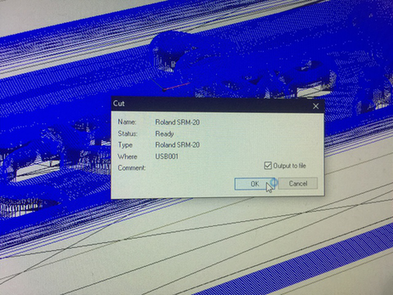
And finally the file is exported in stl format to generate the g-code (.prn file) for the machine.
Modela Player.
Similar to the mit mods, we can use the modela player software to generate g-code for the SRM-20 machine.
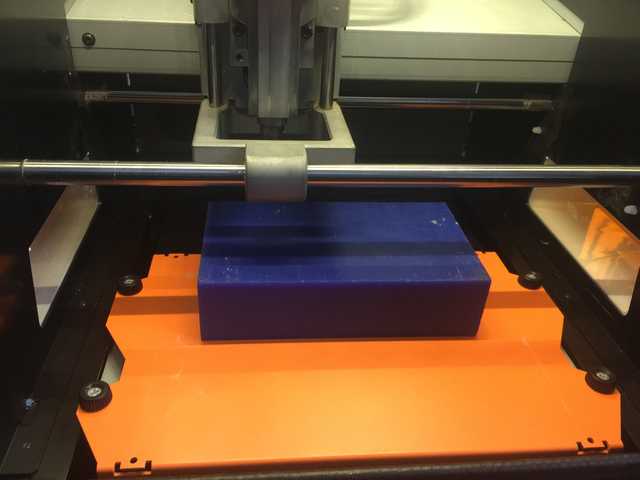
The first step is to open the stl file in the make orientation of the model as per the orientaion of the wax in the SRM-20.
The image above shows the orientation in the g-code and the image below show the wax orientation inside the SRM-20.
The next step is to generate the .prn file by creating the two processes i.e finishing and roughing file from the modela player.
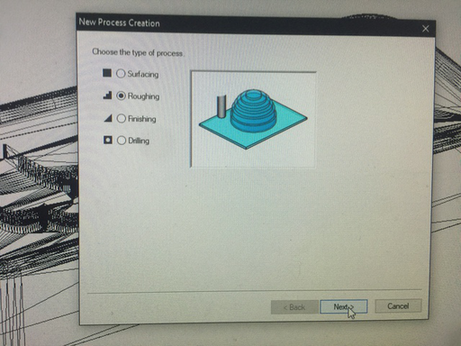
Creating the Roughing file.

the 10 mm indicates the width for the silicon walls of the mold. This will help in creating a mold that would hold the casting material.
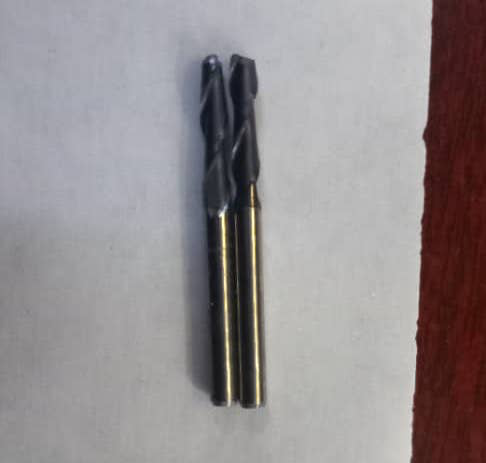
For the roughing process we will be using the 3.145 square end mill to create the roughing profile.
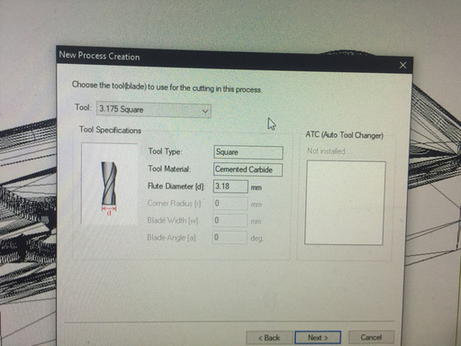
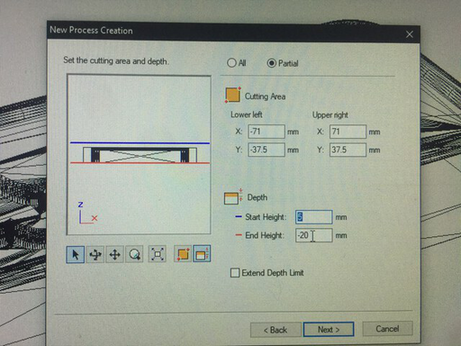
We had the cutting area and depth area. And set the start height to 5mm, so that there we a some thinkness in the negative mold to hold the cast later.
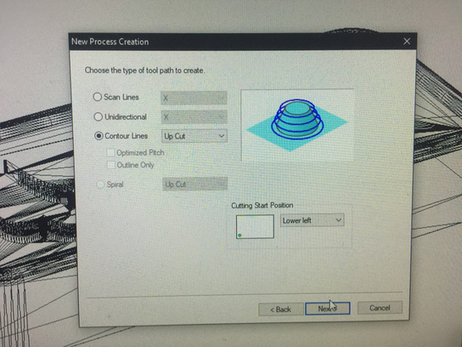
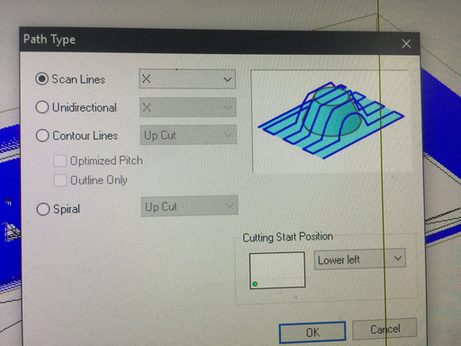
The tool path for the roughing process will be contour lines (Upcut).
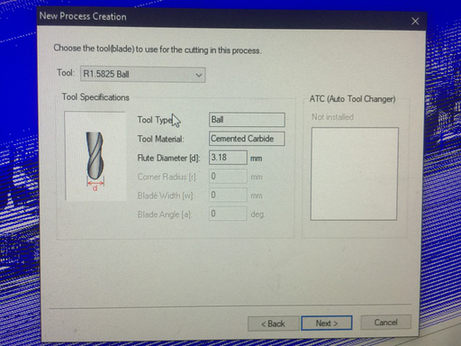
Creating the finishing file.
Now the next step is the creat g-code for the finishing file. Not much of a difference, we have to change the tool to R1.5825 Ball.
And the next step is to set the tool path to scan lines.
Now make sure that we have saved the g-code file to a proper location.
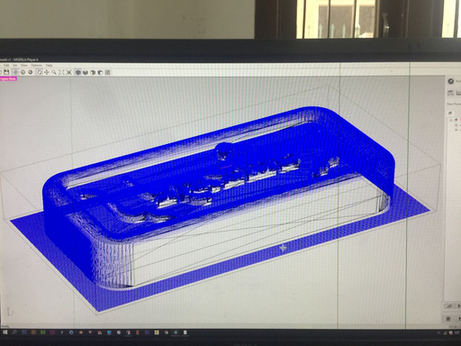
Also from the modela player we can open the virtual model ad view the 3d model from the virtual modela as shown below.
SRM-20
Since we had experiencing working with SRM-20 machine so it was not a big deal wo work with this machine.
The main important thing is using a differnt enmill for this work.
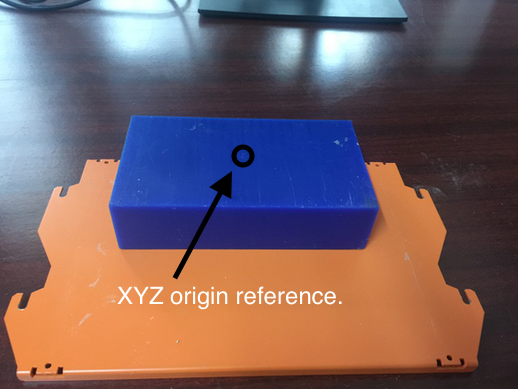
The process is very similar to the PCB production. While adjusting origin, I took note of these two points.
- Set the origin for X and Y coordinate to the center of the wax surface.
- And set the origin for Z coordinate on the surface of the wax block.
The image below shows the point where I took the reference to set the origin. To match the reference origin in the toolpath for roughing and finishing file.
Roughing.
To carry out the roughing process we will be using the 3.175 square endmill. So to start with, add the roughing file as output on Vpanel.
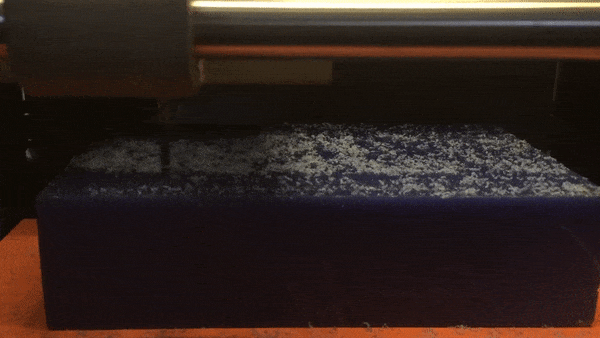
The tool will follow the contour path as set on the modela player. It took 2 and half hours to complete the roughing process
The roughing work will create a contour lines, so that the finishing file will smoothen the surfaces. And the next step is to excute the finishing process.
Finishing.
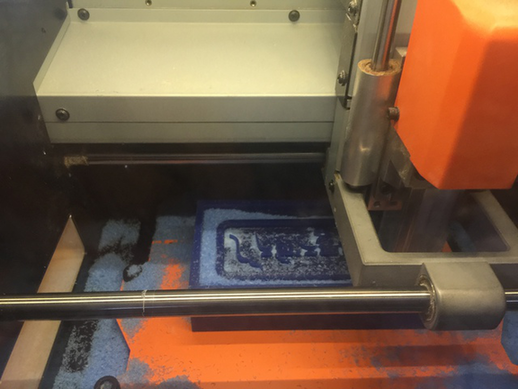
Now we will change the endmill to 1.5825 Ball endmill, maintain the Z origin from the edge of the wax and add the finishing file as output.
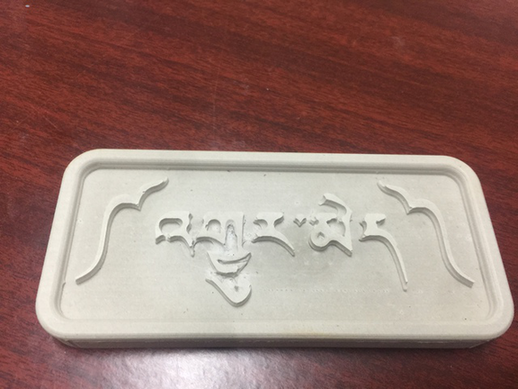
With simalar work approach to milling the pcb all the works were completed and the final out is shown below.
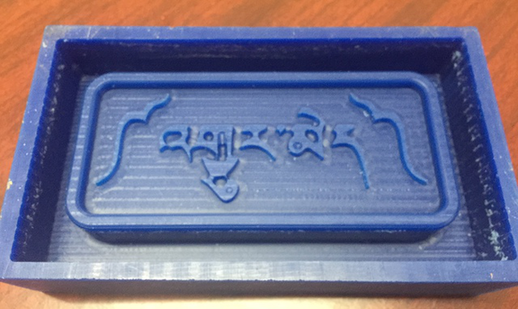
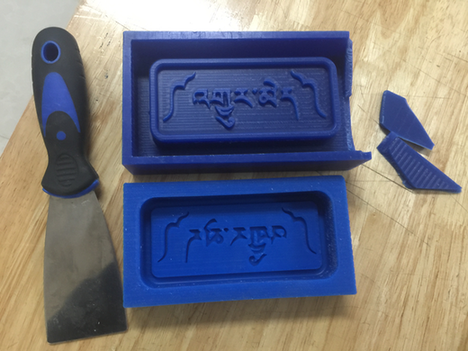
Problem : after the finishing work was done, I notices that some of the engraving parts were smaller than the size of the endmill and hence it was not able to engrave well.
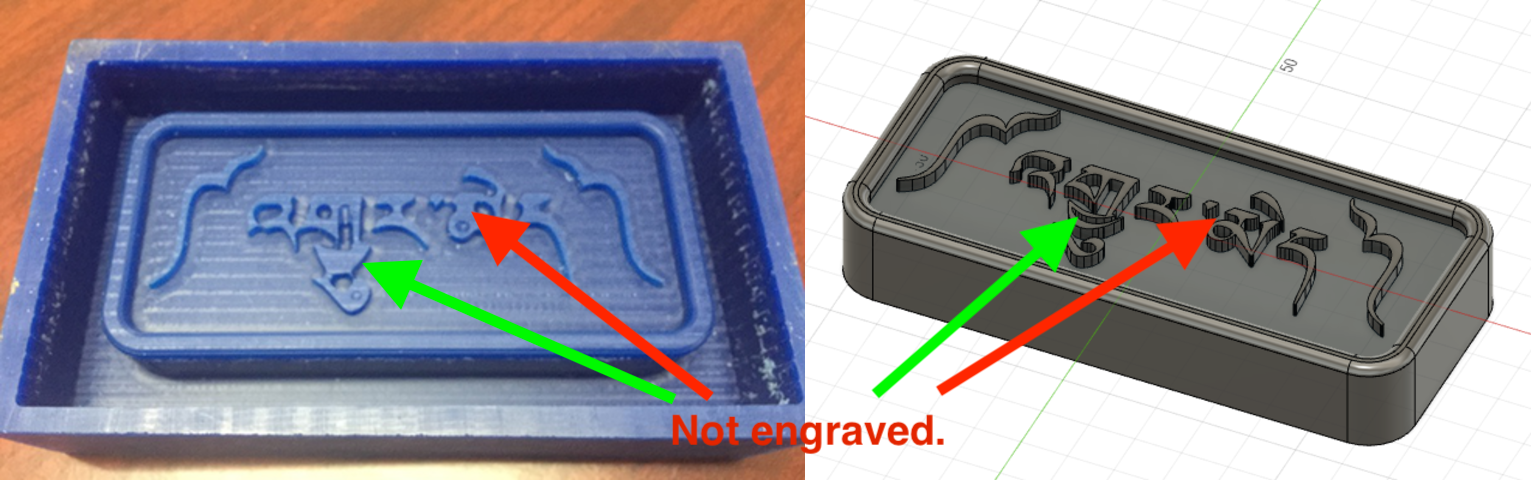
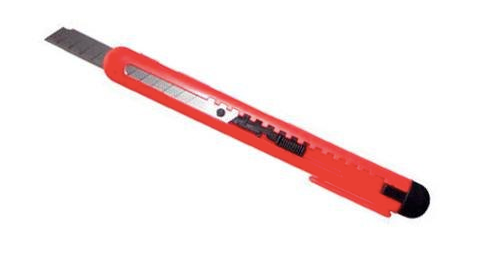
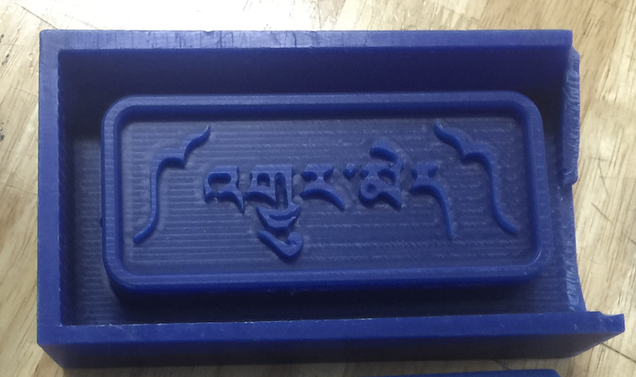
Therefore to solved this, I improvised the mold with the help of a blade to manually engrave.
After that the mold would like this.
Creating a Negative mold
For creat a silicon negative the material as shown below is mixed with equal quantity of both the material.
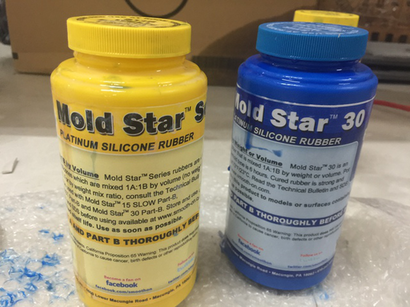
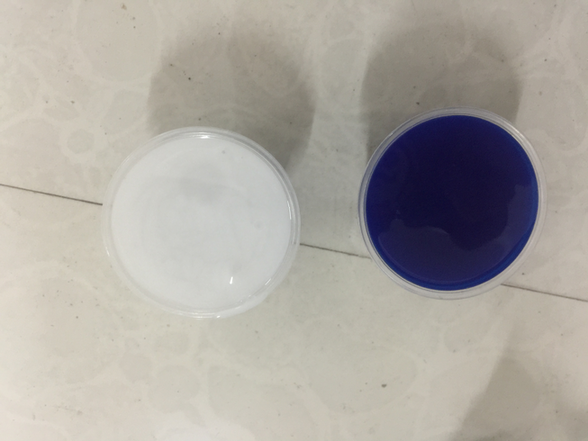
The amount or the weight of the two material must be of equal quantity and mixed well.
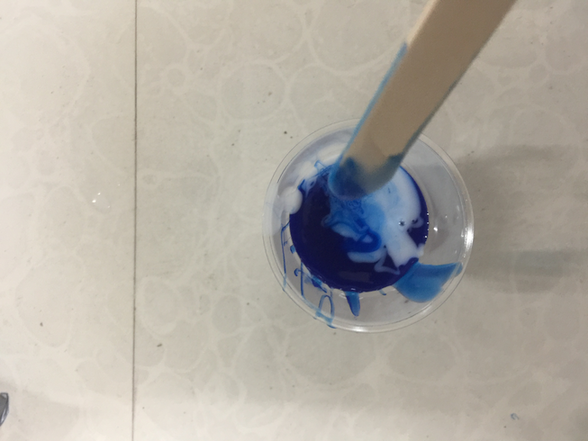
The video below shows a glips of work during this process.
The vidoe over here is in fast motion but to pour the silicon, we need to pour it slowly over a height to avoid air bubble in the silicon mold later.
The mold was left overnight, so that the material will set well. The next day I seperated the two mold.
Casting.
So the final process is to add the casting material to the negative mold to get the final model of the design.
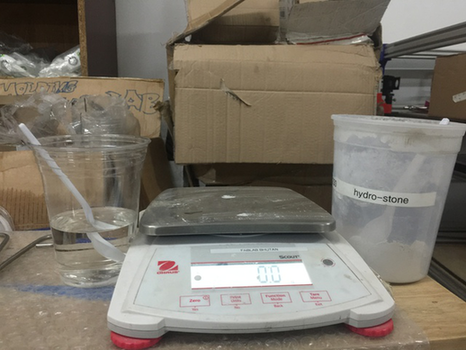
The ratio between water and Hydrostone is for 100 gram of hydrostone it will be mixed with 30 gram of water. So we the same measurement of hydrostone and water I made the casting material.
The casting was kept to dry up and take the shape of the mold. So quite excited to see the final output.
Final output.
The video below is a short Vlog for the molding and casting week.