18. Wildcard week
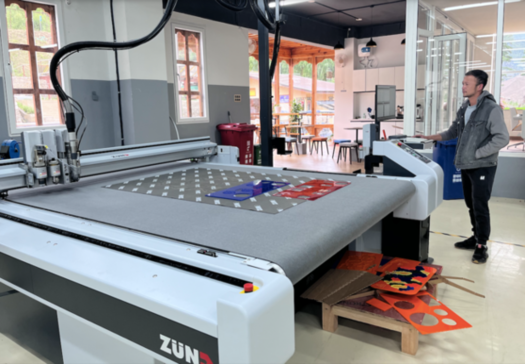
This week is all about trying out new machine where we can design and manufacture somethng using a machine. I was a wonderful experience working with the machine I tried. And the machine that I unsed is called Znud.
-
Task: Wildcard Week
-
Design and produce something with a digital fabrication process (incorporating computer-aided design and manufacturing) not covered in another assignment, documenting the requirements that your assignment meets, and including everything necessary to reproduce it.
What is a ZUND Cutter?
- The ZUND is modular cutting system that can be adapted and used to cut, route and draw on a range of materials. With interchangeable modules, tools and blades, the ZUND can be configured to cut vinyl, fabric, leather, cardboard, foam core, rubber and many more! link
Because of the force exerted by the blade moving during cutting (unlike the laser cutter), smaller features may not come out as cleanly or detailed as they would on the laser cutter. In general, the Zund is suited to larger features.
File Types required.
File types:
- Illustrator files (.ai)
- .DXF files
- .DWG files
- .PDF files.
Module, Tool and Blade.
The module is used to hold the different tools.
The tool sits inside the module and its function is to hold the blade or pen or wheel.
And the blade held inside the tool will cut the material.
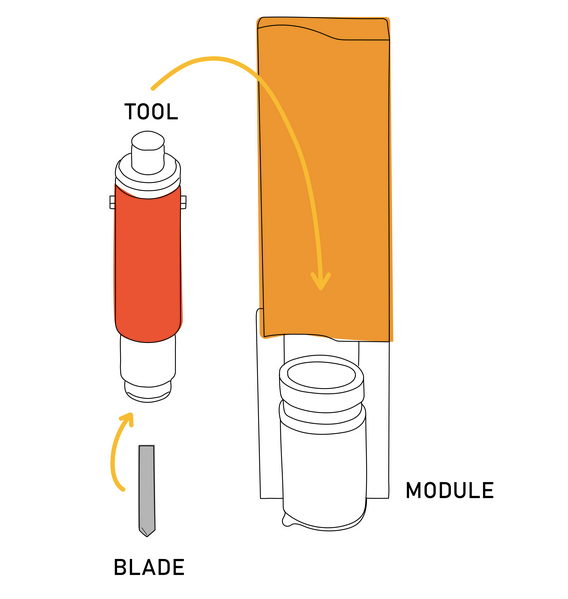
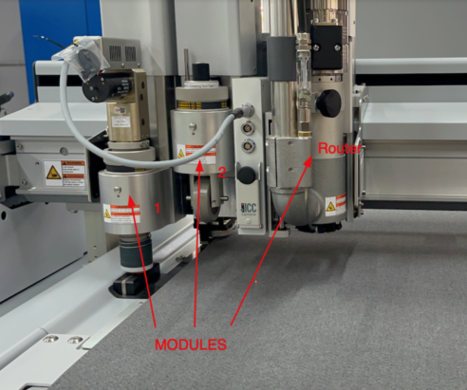
For my work I will be using the router to cut out my design.
Design.
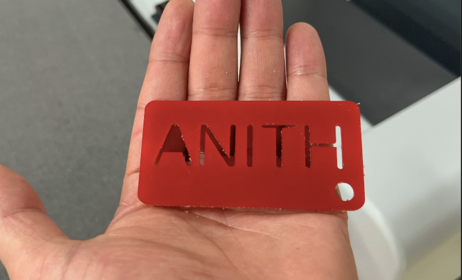
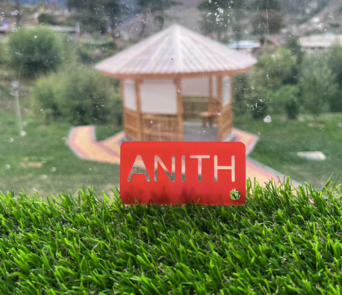
I used the fusion360 software to design a key chain.
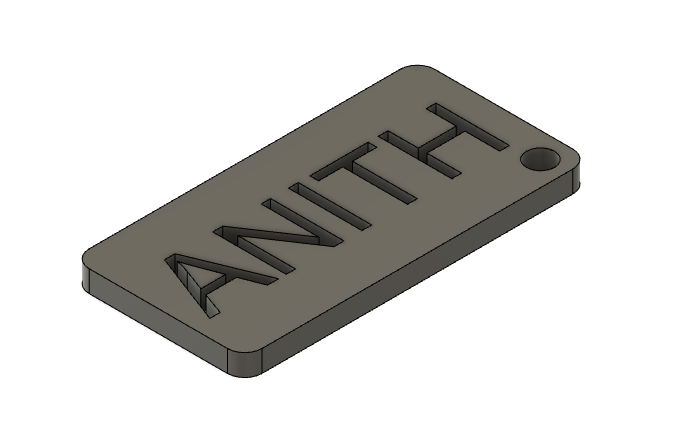
I kept the parameter of the keychian to hold my name on it. The dimensions are shown below.

You can view my model here.
And then the file was exported as a DXF file so that we can cut the keychain out.
The Process.
Before we any work we have to initiate the three modules of the machine. We have to select the module alternativly and let the module auto initialize.

To operate the machine, the machine is operated using four Zund apps.
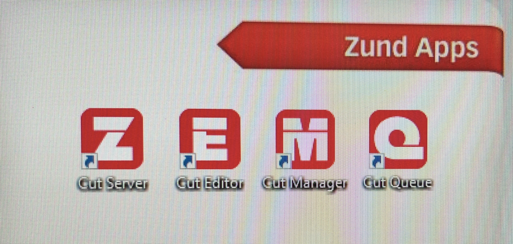
The cut Server is kept on and we can view it running it on the task bar
Firdt we will working on the cut editor.
Next the machine will start for magazine scan. The machine will check and link it will auto tune itself.
The compressor are kept in their respective pressure.
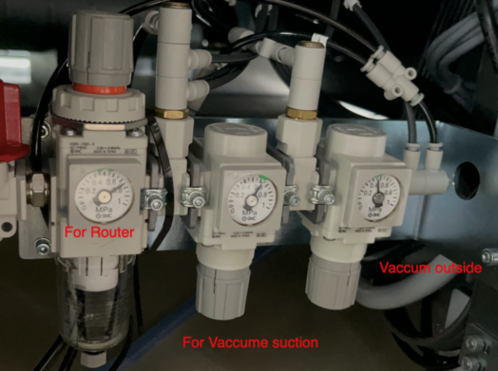
- For vaccumn suction: 6 bar.
- For outside vaccumn: must be above 4 bar.
- For Router: above 7.5 bar.
Next we will select the tools. We will be using the 2mm tool and the machine will change the tool by itself and maintaining all its tuning.
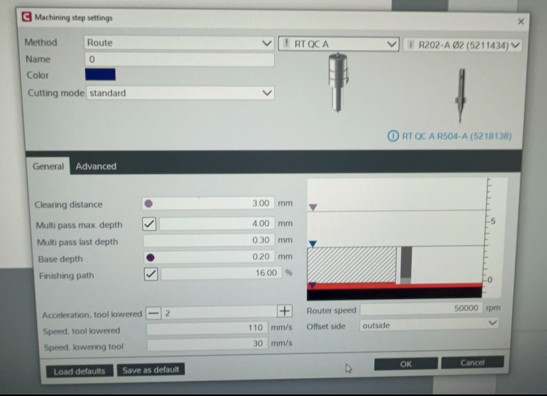
Cut editor.
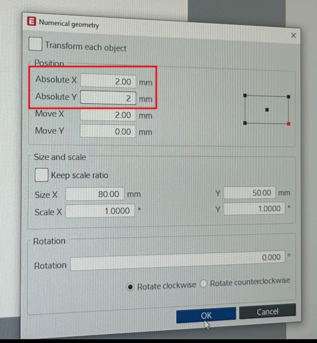
In the cut editor, import the DXF file. Select the out lines and maintain an absoluate zero to about 2 or 3 mm.
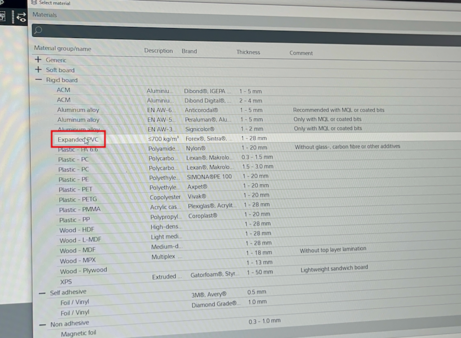
Next we will chose the material type, i will be using the extended PVC and and write the thickness of 3 mm.
The next step is select the method of work to he machine. In my case is the route option. Alnd also specify the bit Diameter.

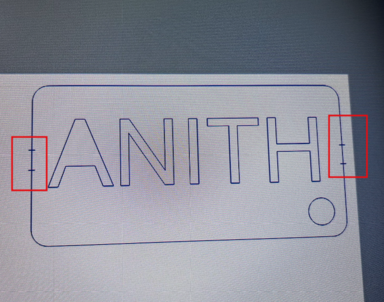
Sometimes when the cutting is completed the cut out might fly away. Therefore we can insert bridge at certain edges.
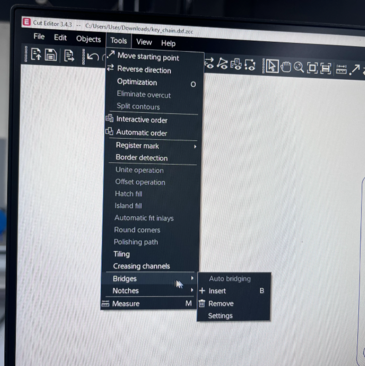
The image below indicates the bridges added to the edges.
Then click on send to server and minimize the cut editor. save and exit.
Cut Queue.
The file from the cut editor will be found here. double click the file and it will open the Zund cut center.
- Select the seal grid.
- Then select the bit.
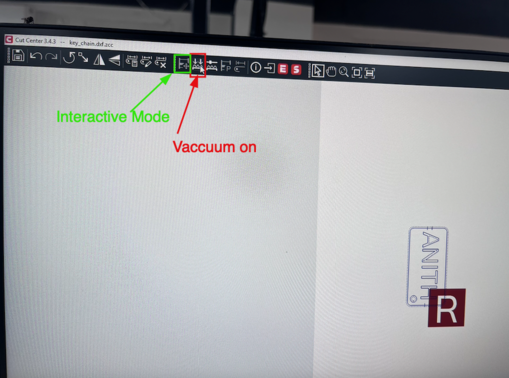
After this we will turn on the vaccuum by clicking the option as shown below.
In the interactive mode we can control the router and set the origin for any module or the laser. Once the origin is set we can set the origin by clicking Ctrl-R to keep the reference.. And then turn on the vaccuum.
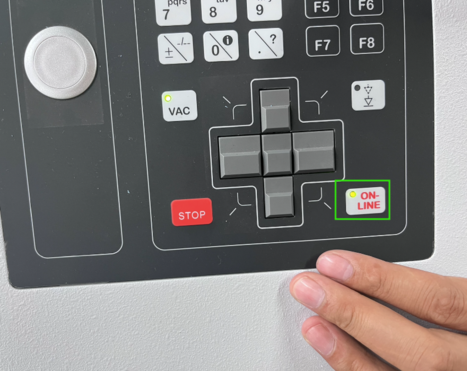
Make sure that you have press the online button.
Setting the origin in the interactive mode. the origin can be set based on the modules and laser.
Finally, Turn on the router module and start the job for the machine.
Video
Output.
Problem.
Initially I was having small cut out below my name but I earsed it since my bit diameter is 2 mm, the cut out should be more then 2mm. Hence changing the design was the solution.