Wildcard Week
This week I intend to learn about composites. This will include:
Unit Description
Group assignment:
- I found the following in the Assessment Guide: Do I have to do the group assignment if I choose to do composites? Answer: Yes, you have to make test coupons.
- Document your work on the group work page and reflect on your individual page what you learned.
Individual assignment:
- Design and produce something with a digital fabrication process (incorporating computer-aided design and manufacturing) not covered in another assignment, documenting the requirements that your assignment meets, and including everything necessary to reproduce it. Possibilities include but are not limited to wildcard week examples.
Learning outcomes
- Demonstrate workflows used in the chosen process
- Select and apply suitable materials and processes to do your assignment.
Checklist
Linked to the group assignment page
-
Linked to the group assignment page:
-
There are two types of assignments, one group about composites and one individual, since I am alone in my personal Fab Lab I will do both. All of my work will be documented here, so there won’t be a group assignment page.
To complete my Final Project, I will need to make a stand to set my Smart Buoy in while it is not in use for display as well as a convenient place to put it while I program it :) I will be relying on the example given by Adrian Torres with composites.
Safety First!
Read the safety data sheet (SDS) and technical data sheet (TDS) for the resins that you’re using
- Read the safety data sheet (SDS) and technical data sheet (TDS) for the resins that you’re using:
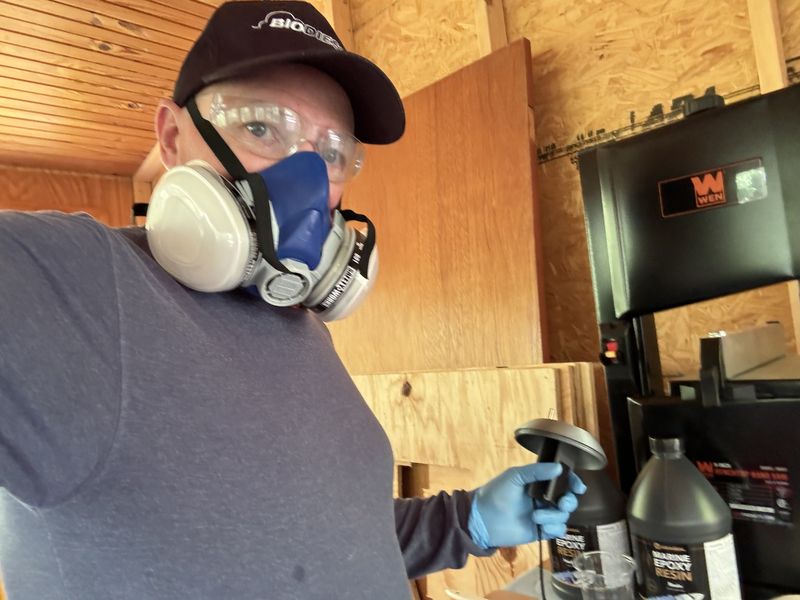
For this assignment I will be using Marine Epoxy Resin made by AquaSeal as the “matrix”. This is a two part epoxy with equal portions of epoxy and hardener in the batch to be used.
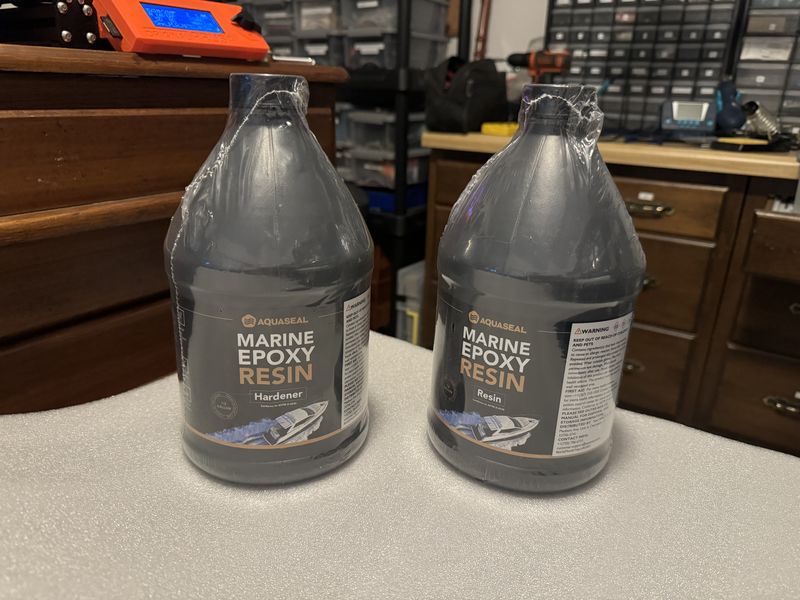
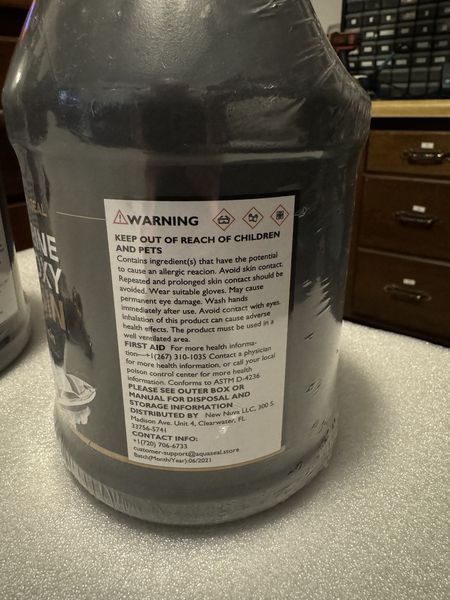
The warning label is brief, but informative.
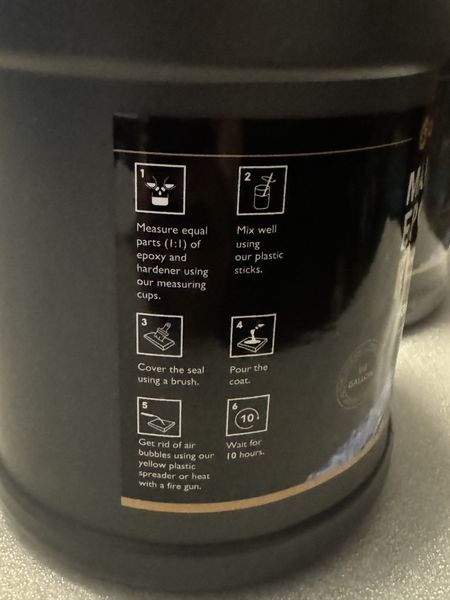
Brief instructions are also provided on the containers.
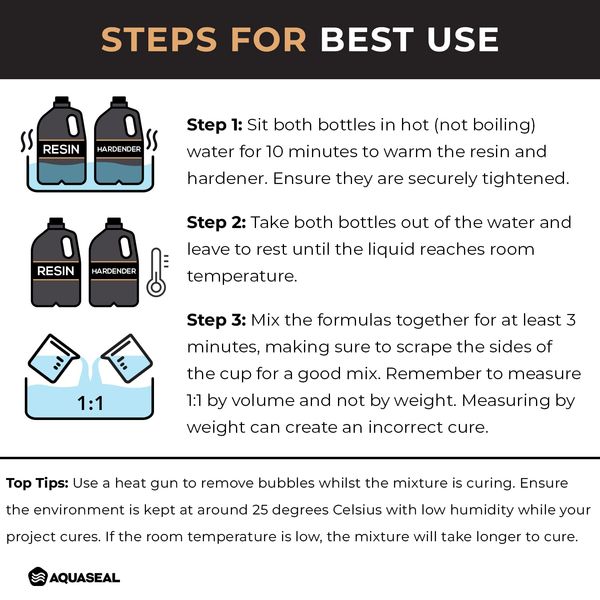
I found more detailed instructions by searching the internet since I could not find the manufacturer directly. This is the Aquaseal User Guide.
Most importantly, I found “For your safety, please wear protective clothes and equipment (rubber gloves, safety glasses, respirator etc.) at all times while working with Aquaseal Marine Epoxy Resin to prevent injuries such as skin irritation, eye irritation or lung damage.”
This is important as well:
- For larger projects, please do not mix more than 3kg of epoxy resin with more than 3kg of hardener.
- To achieve desired result, limit your working time to 20 minutes.
- Do not pour more than 3cm (1.1 inch) in one layer.
- Please note that preliminary curing takes from 1.5 to 3 hours. (Thicker layer cures slightly faster).
- Do not pour another layer until the previous layer has completed it’s preliminary curing time (1.5 to 3 hours).
- Complete curing time estimate: 10 hours. Make sure to keep the temperature stable at 25°C (77°F) for best results.
Also when beginning to use: - Mix thoroughly for 3 minutes, scraping the sides and bottom of the mixing cup during the mixing process. Improperly mixed epoxy resin won’t be able to catalyze and therefore won’t be able to cure properly. - After mixing, Aquaseal Marine Epoxy Resin is good to work with for 20 minutes. During that time, please pour and spread the mixture on the desired surface.
And there was a small tips guide too.
I will follow these tips and guides as well as the safety warnings. I will need to work quickly! I found some negative reports online, so I will see how my experience turns out :)
This is my Personal Protective Equipment for the duration.
To complete the Group Assignment, I will make some coupons as well as test the use of the resin on covering the Sensor Buoy Prototype that I made for the Final Project. With these tests completed I will be more confident about using the material to complete the assignment.
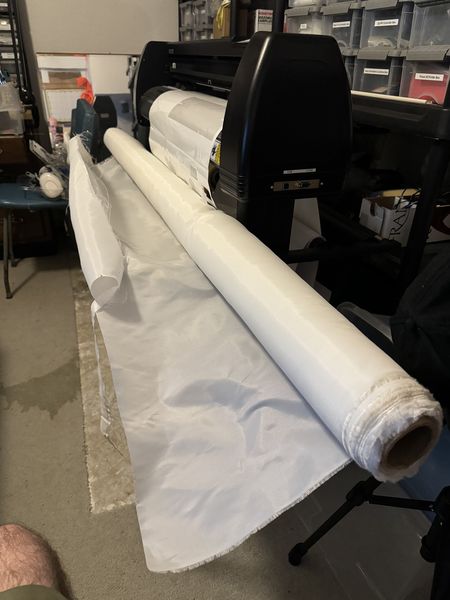
For the “fiber” I will be using Dacron Fabric. This is material typically used for aircraft covering (the older ones :) I ordered a roll to skin my cardboard kayak (and I will someday ;) but for now, I will use it to complete this assignment.
As for safety, the SDS is more comforting than the epoxy resin. You can read all about it here I will summarize here, but please read the SDS if you intend to use this material. Dacron is a registered trademark of DuPont, but the company license the formula to other companies to make. The DuPont company doesn’t even make it themselves! (At least that is what I found.) A company near me uses this material and gives a good demonstration. In this video the Superflite name is mentioned, but it’s the same material.
Bottom line, from the SDS: OSHA HAZARD CLASSIFICATION: Non-hazardous. Staple fiber presents low hazards for usual industrial or commercial handling. And: HAZARDS NOT OTHERWISE CLASSIFIED: Eye contact with airborne polyester fibers/staple may cause mechanical irritation with discomfort, tearing, or blurring of vision.
In other words, it’s fairly safe, but stay away from the dust, it can irritate you, but it probably won’t kill you like other options.
I have a whole roll of this stuff, so that’s a good thing ;)
Design and fabricate a 3D mold (~ft2)
- Design and fabricate a 3D mold (~ft2):
Design a 3D Mold
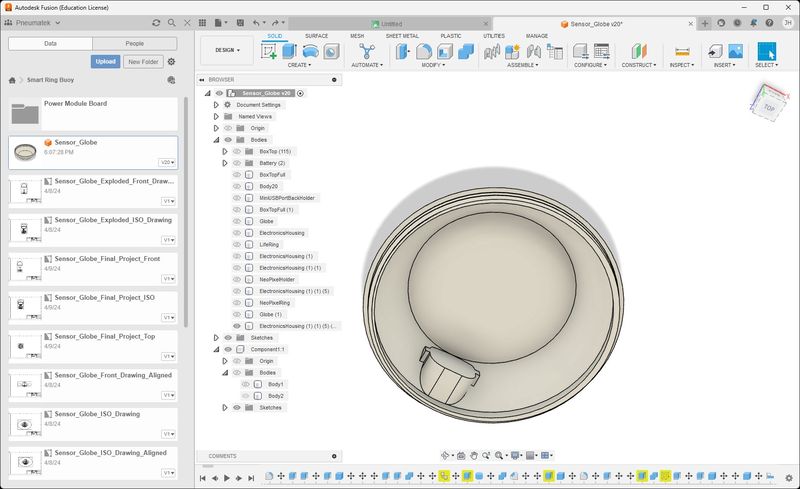
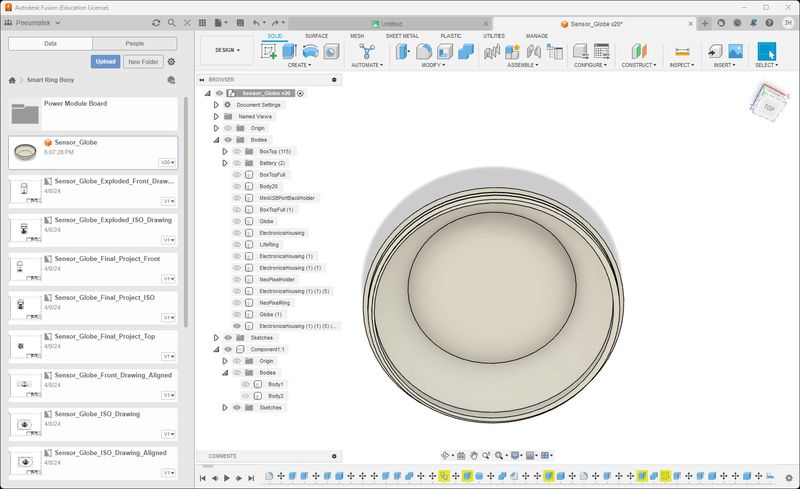
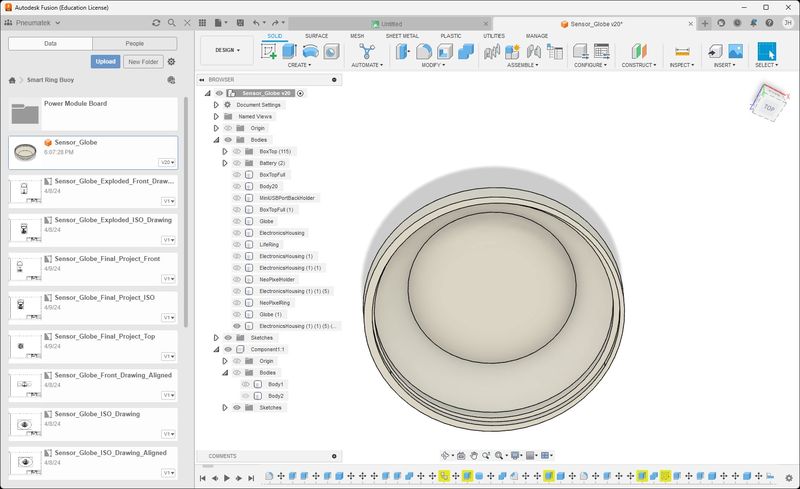
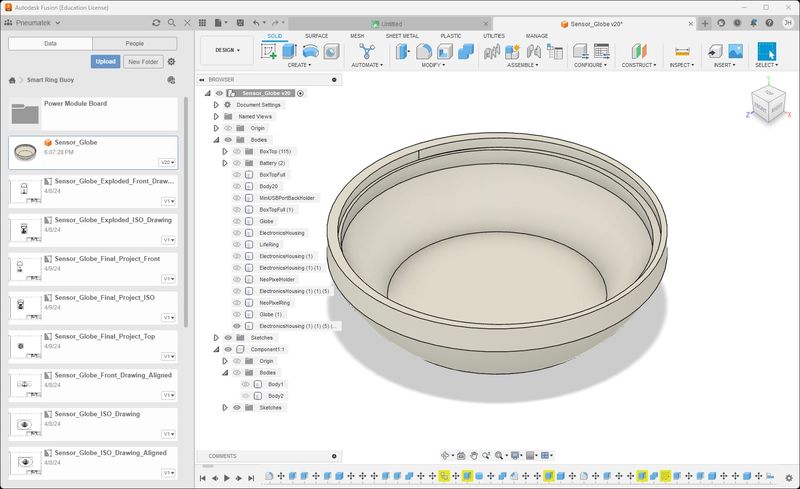
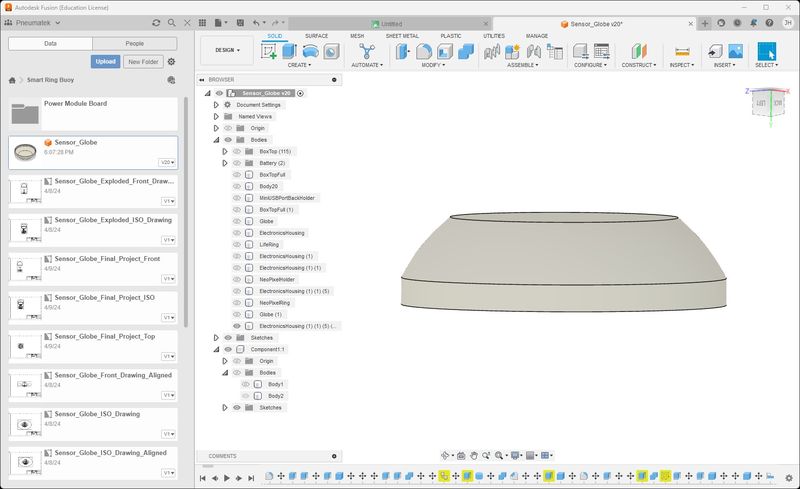
As I mentioned, I will use this assignment to make a make a stand to set my Smart Buoy in while it is not in use for display as well as a convenient place to put it while I program it. To do this I will model a simple stand that it can sit in by using the model of the Electronics Housing as the mold to make the mold digitally.
Using the skills I gained in Molding and Casting Week I will make a mold/form that I will cover with a fiber and epoxy matrix to give it strength.
This is a video of the process of making the mold/frame in Fusion 360.
This is a video of the process of converting the model into G-Code to send to the 3D printer.
I must admit this was a little easier; using the lessons learned so far and leaning on the strength of the 3D printer. I wanted to cover the part with Dacron and be done with it. Just sayin’… Turns out it is a little more complicated than that.
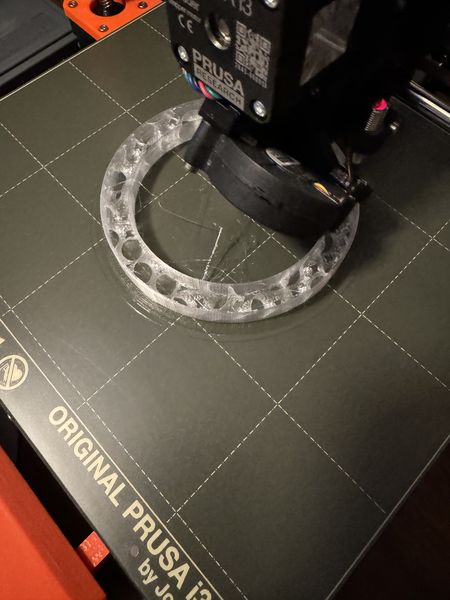
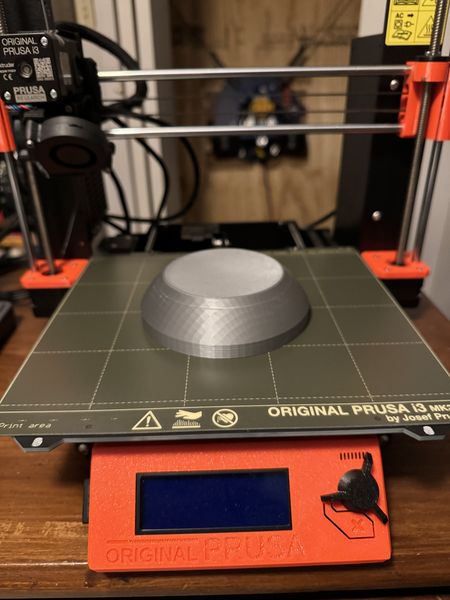
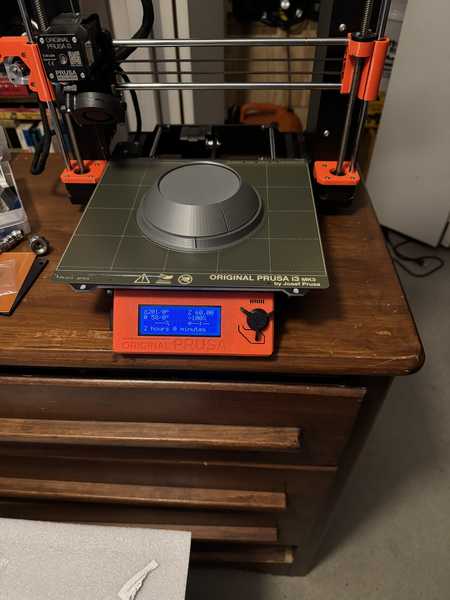
I printed the form I intended to leave in the part. This is the beginning of the print.
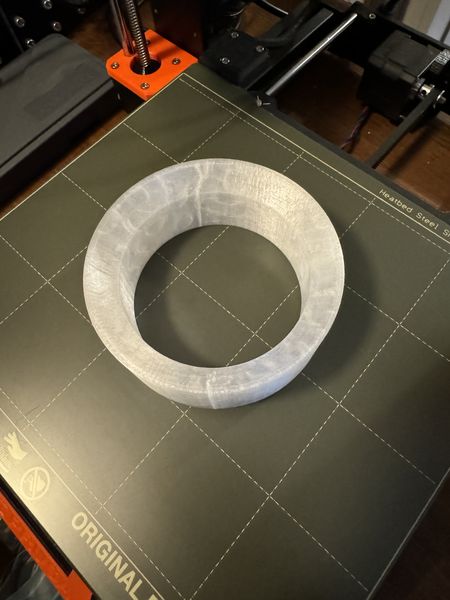
This is the end of the print.

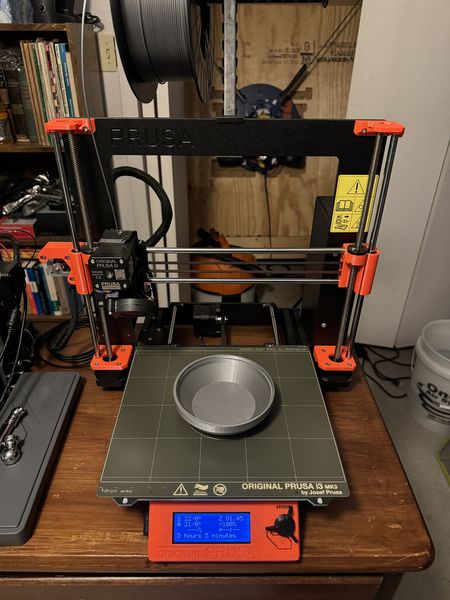
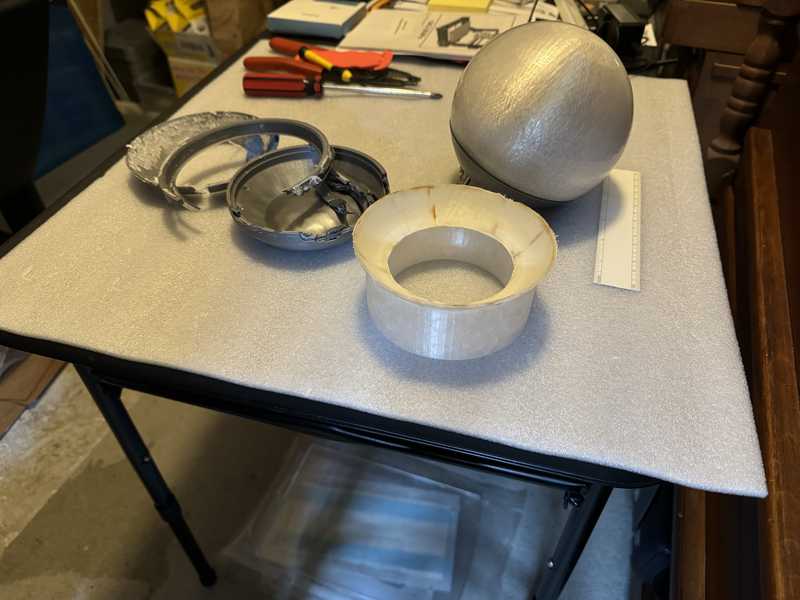
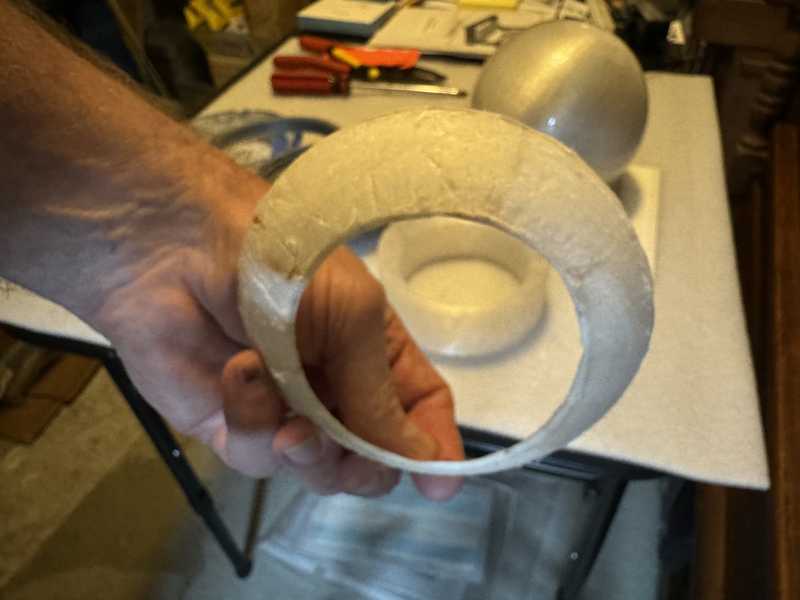
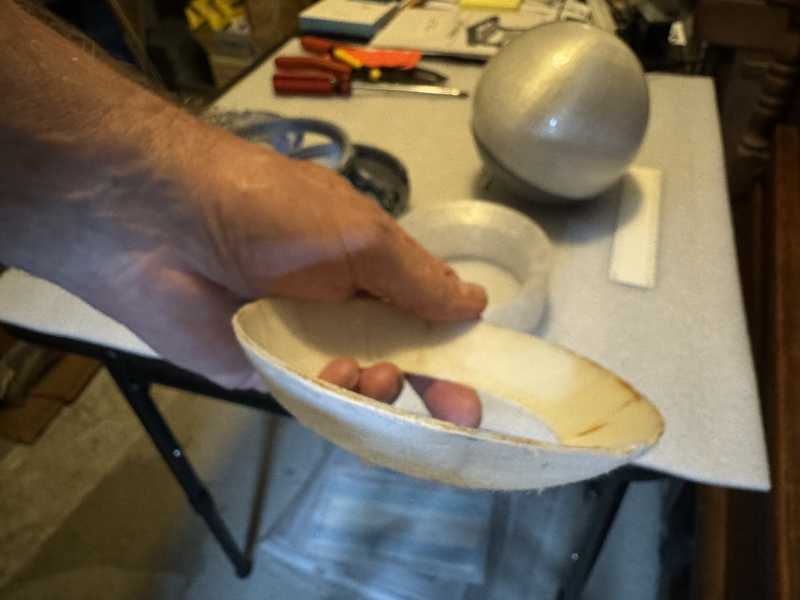
This is the post-processed part.
And this is the result I envisioned.

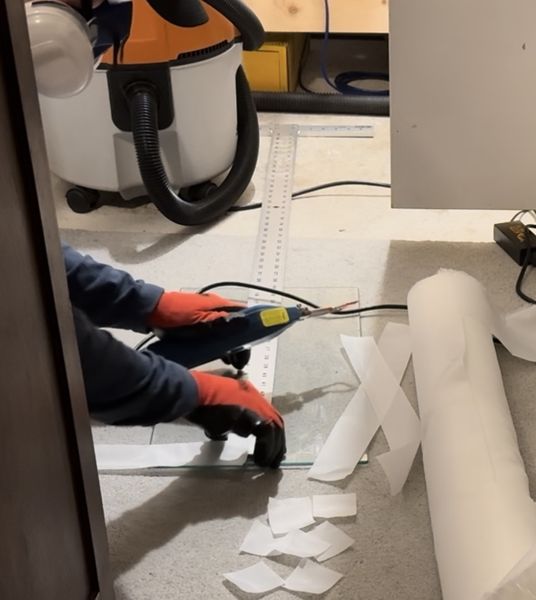
However, things didn’t work out as I had hoped. Here’s a little teaser to keep you in the game. I cut some material just to test out a hot tool I have…Hot Cutter! Right!? I would love to automate this tool!

Here’s the specs.

And yeah, it gets hot! Cuts Dacron like butter ;)
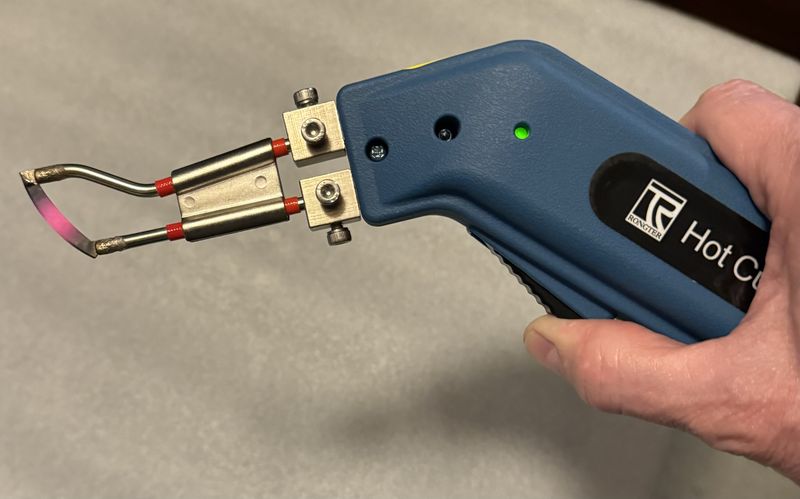
So I played a little to get a feel for it and cut on tempered glass. I had never used it for what I got for, so your right there with me. If you go slow, it will vaporize the material. You have to move as if you were cutting with a razor; it’s that fast. I cut the edges off as a trial and then cut a trial strip using a metal ruler as a guide. It was so awesome! I can’ believe I haven’t used it till now. Oh well, that’s what I got for :) I will document the process soon, but I just wanted to share the excitement right now. More to come.
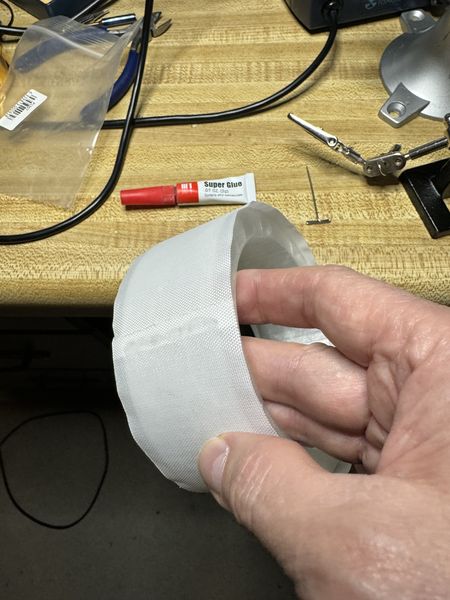
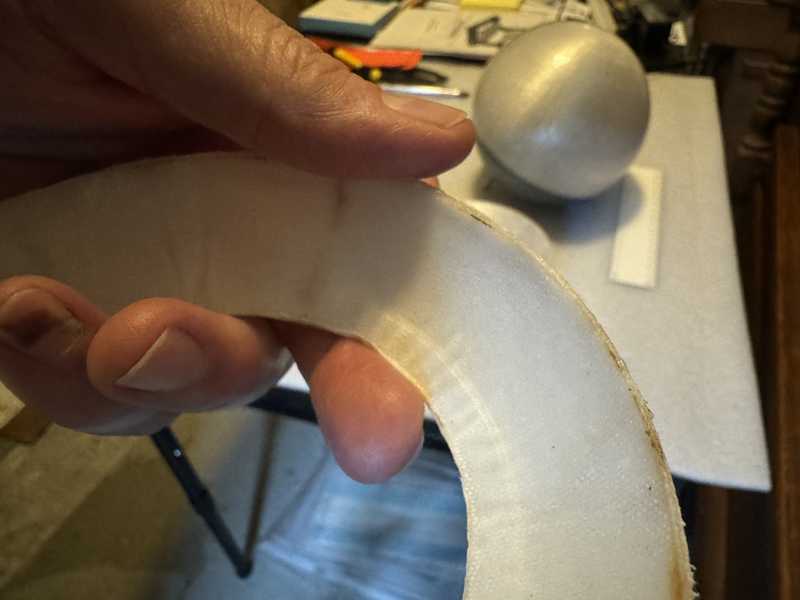
The strip I cut was the width of the steel ruler (50 mm). Just a little wider than my printed part. I superglued the an edge to the part with it centered, wrapped it around and completed the circle.
I let it cure over night and then I wanted to experiment with the heat shrinking capability of the Dacron.
This iron was purchased long ago when I explored RC model building. It is a Hobbico Custom Sealing Iron, rated at 115V and 170W.
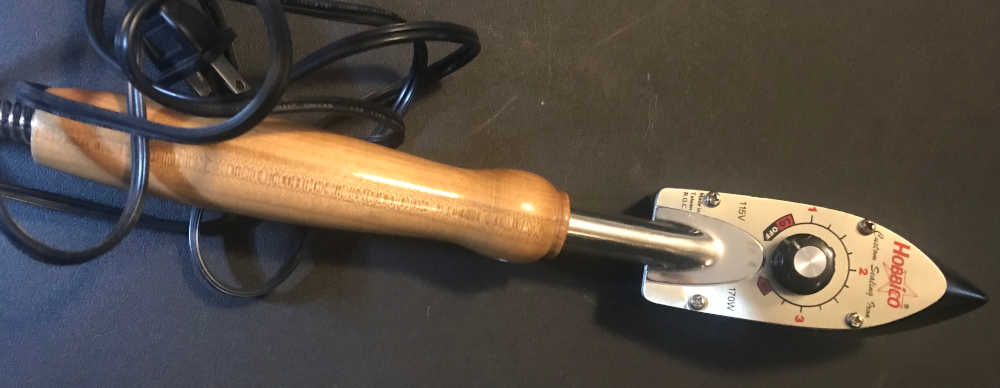
I watched a video on Applying Ultracote If you watch it, the first minute is blank, so be patient or do a little scrubbing forward. My first test was to find out what temperature the iron would have at various settings. The instructions call for 220F for sealing edges and 300F to shrink and eliminate wrinkles. Using a non-contact IR thermometer, I found that the “2” setting fluctuates between 200F and 225F; the “3” setting fluctuates between 300F and 360F. Makes it easy to follow instructions ;)
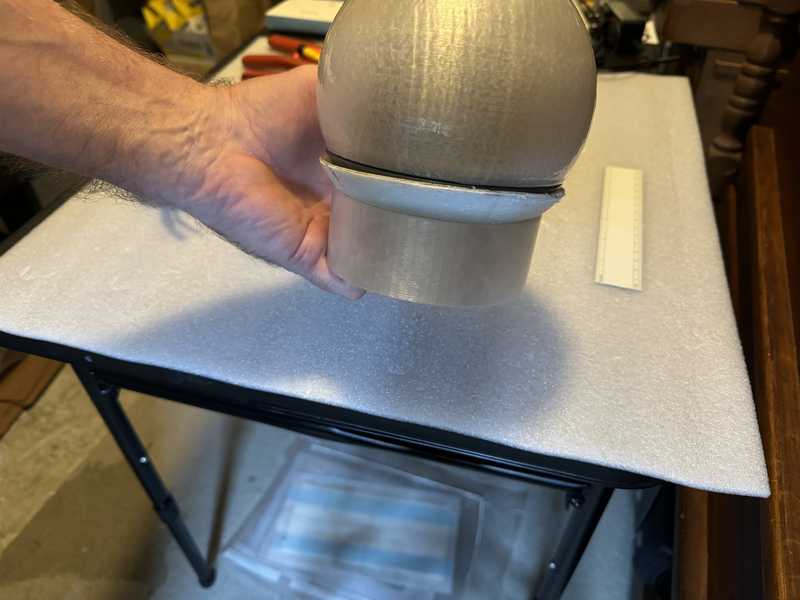
I tried setting 2 on the Dacron, but it was a little slow, so I tried setting 3. That was the ticket! I had a cotton tee-shirt wrapped around it like you would for Ultracote, so that may have made a difference, but it worked well. It did shrink and tighten up.
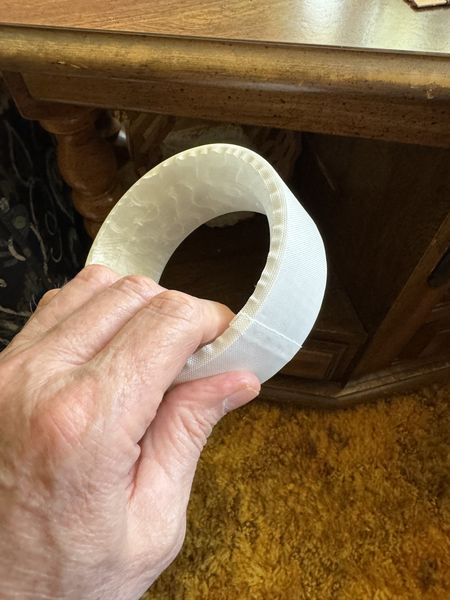
Here’s the other side.

I’m not pleased with the result; though I could make it work with poor results. My Instructors recommended that I make a mold that could make more than one part. The wisdom of experience! So glad to have my Instructors; they’re the best!
I spent the day fussing around in my lab, watching videos on different things for composites and nothing was clicking, but I was intrigued by a volcano made by Akash Badshah. So I cleaned up my Fab Lab after the last Final Project sprint, reorganized and labeled some things that needed labeling. After I put it off long enough, I opened Fusion and went back to basics. I am making a stand to hold my Final Project and I want to make as many as I need with the material at hand. So here it is: Use the pretty clear PLA to hold it, but make an adapter (or interface if you will) that can be of different colors.
Just a quote from Akash that made my day, “So far this class has been a defining experience in my MIT career and I would highly recommend that anyone who can should take the class. Hopefully, the skills and problem solving I learn in this class will stay with me for years.” I will echo what Akash said, this class is the defining moment of my life. I am so into this, that I live and breath it everyday. Don’t take this course lightly, it is the heaviest class you will ever take. When you finish, you will be able to fly.
Back to basics, keep it simple.
This is where I began again.
I needed to remove the inner connector housing.
Then I added a ring for a base.
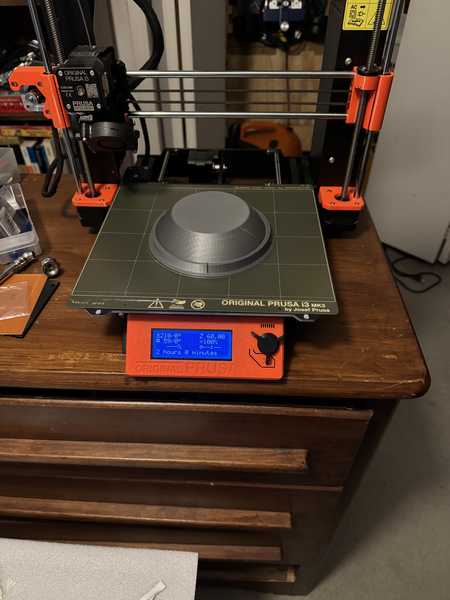
This is the inverted result.
This is the orientation for use.
I began 3D printing the form:
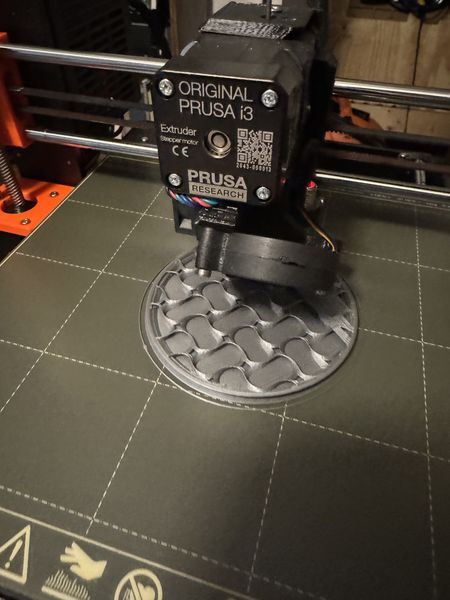
Pretty cool looking, eh!?
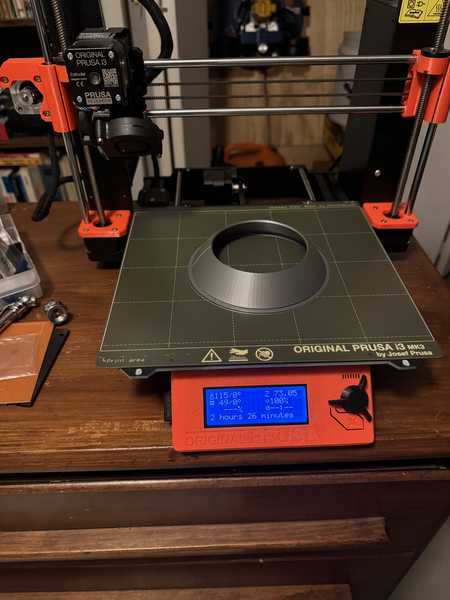
Here’s a progress shot.
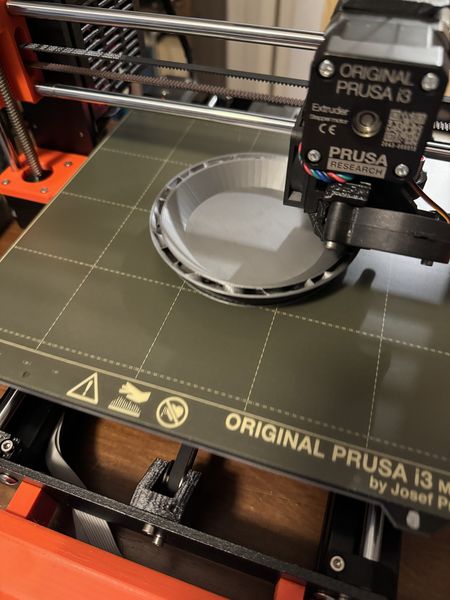
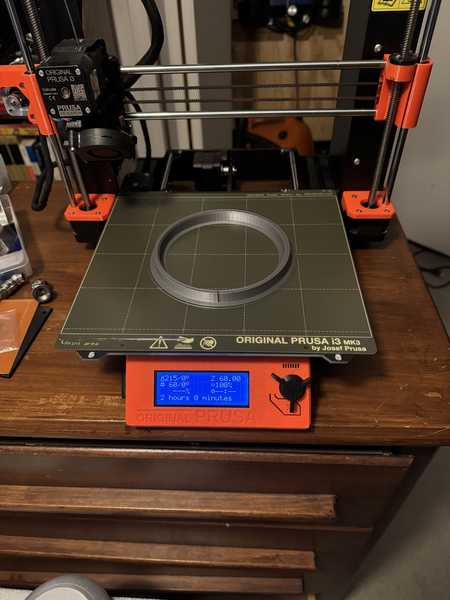
This is the finished print of the form/mold.
This is the inside form/mold in the position of use.
Additionally, I modeled an outside mold/form to contain the composite inside of a volume during compaction in the vacuum bag. This model was actually a “happy accident”. My goal was to cut the fabric in the shape that would wrap around the inside mold/form. I got this idea from my Instructor Pablo who told me to make the inverted part to make a mold. So I did and that is how I came up with the outer mold/form.
I also designed and printed an outer ring to prevent slipage.
This shows the inner mold/form in the retaining ring.
This shows the complete assembly.
And produce a fiber composite part in it, with resin infusion and compaction:
- And produce a fiber composite part in it, with resin infusion and compaction:
This is the results after removal.
This shows how the wax paper adhered to the composite.
This is a side view showing good results where there wasn’t any wax paper. Beeswax applied to the mold/form was the trick.
This is a closeup to see the fiber with resin infusion and good compaction.
Included ‘hero shot’ of the result:
- Included ‘hero shot’ of the result:
Documented the workflow(s) and process(es) you used:
- Documented the workflow(s) and process(es) you used:
Produce test coupons for your composite fabrication process(es):
- Produce test coupons for your composite fabrication process(es):
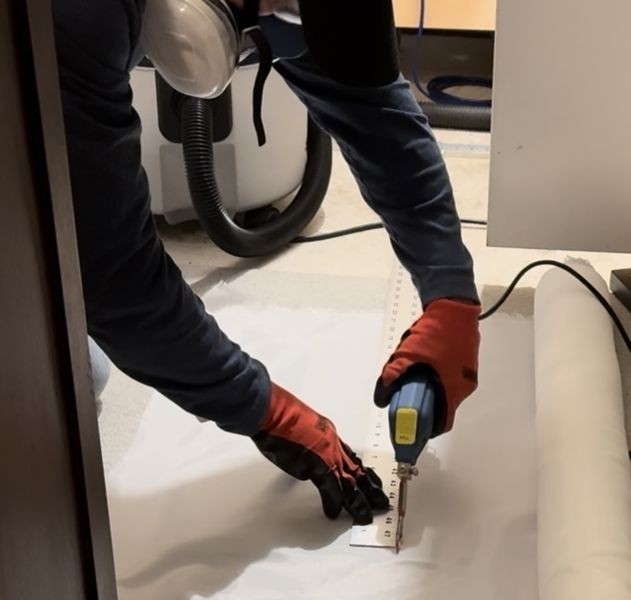
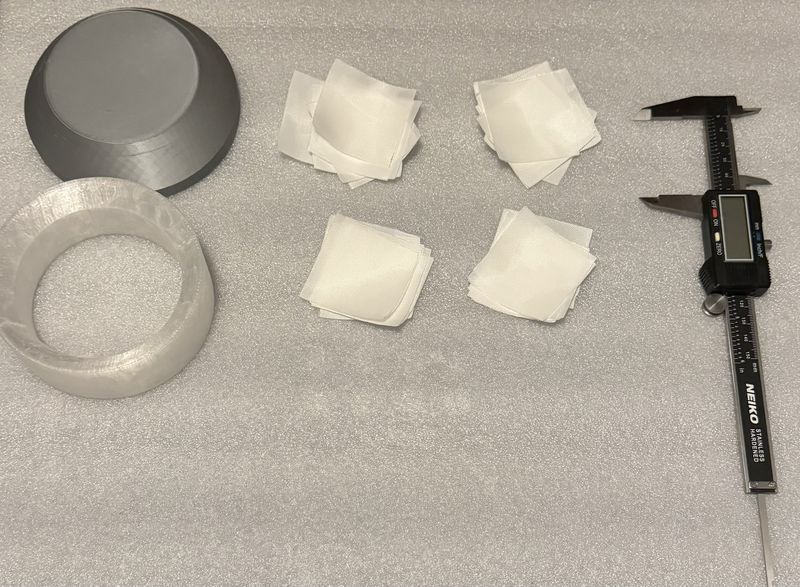
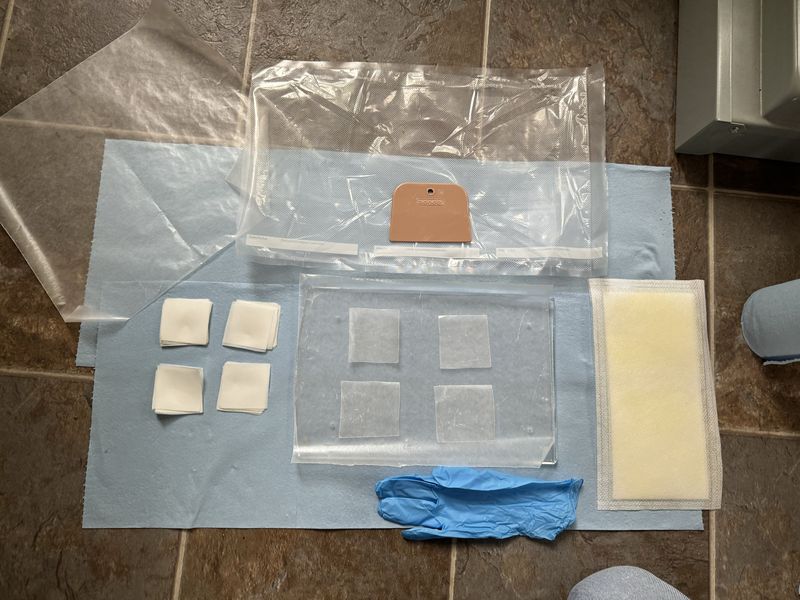
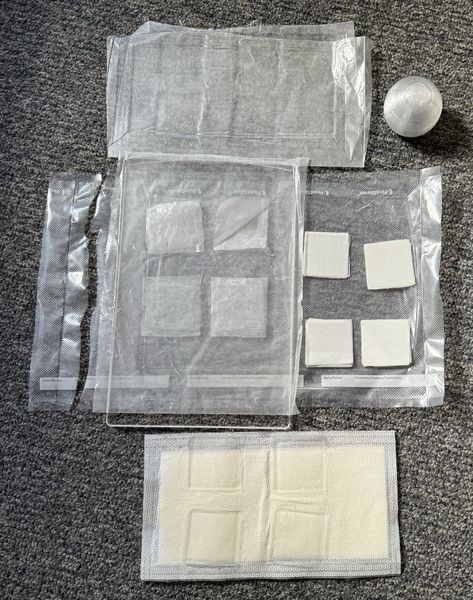
The test coupons are made of the Dacron fabric and Marine Epoxy resin. First I made the fabric parts. This is the start of the process with appropriate PPE on.

Starting to cut strips.
Strips sliced.
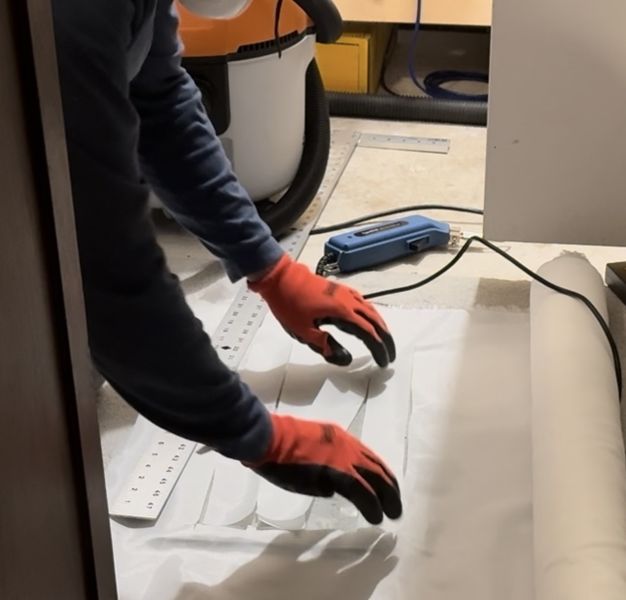
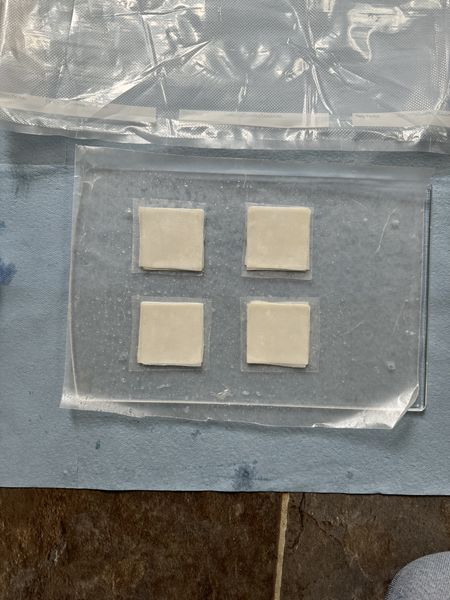
Coupons sliced.
All 32 slices - 8 slices per coupon. Gives the total coupon thickness of 1 mm.
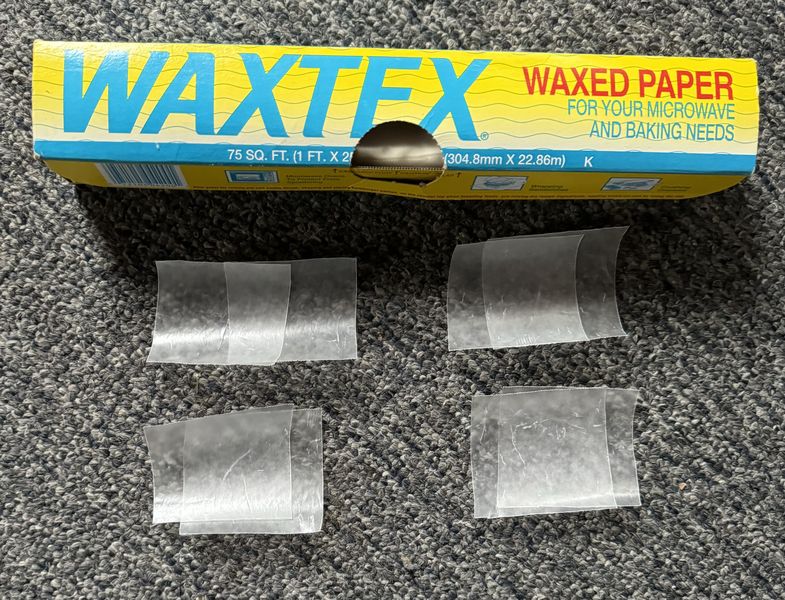
Prepared the wax paper release material.
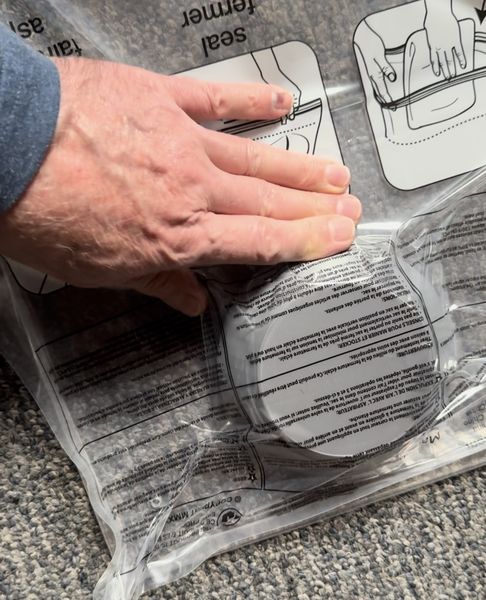
Next, I tested the vacuum bag systems. My first system test was with the MagicBag system. I knew about this product, but I have never tried it. You can use a regular vacuum cleaner, but I tried the vacuum that was on the shelf near the bags. It’s pretty small.
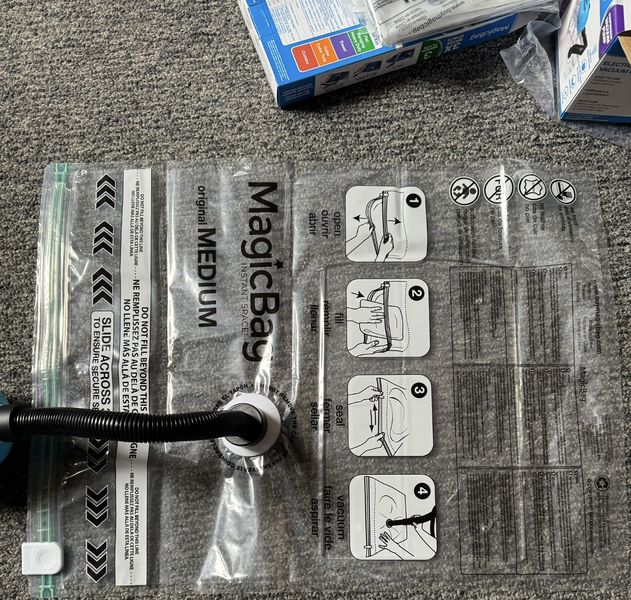
The system did pull out most of the air.
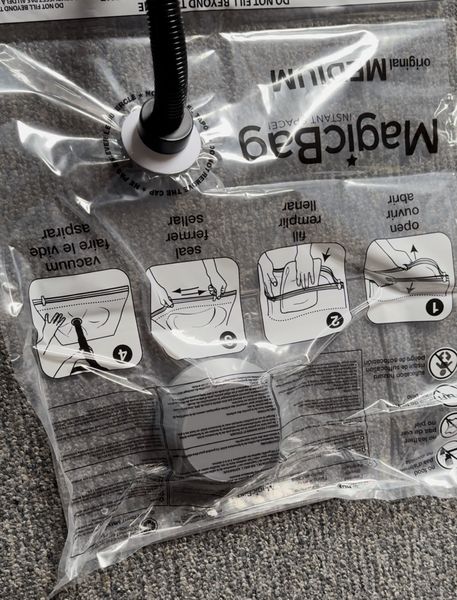
But the part could be moved by hand, so I knew that would not be sufficient.
Now I tested the FoodSaver system. This is what I wanted to use to begin with, but I saw the MagicBag system and thought I would give it a try. This is the FoodSaver system.
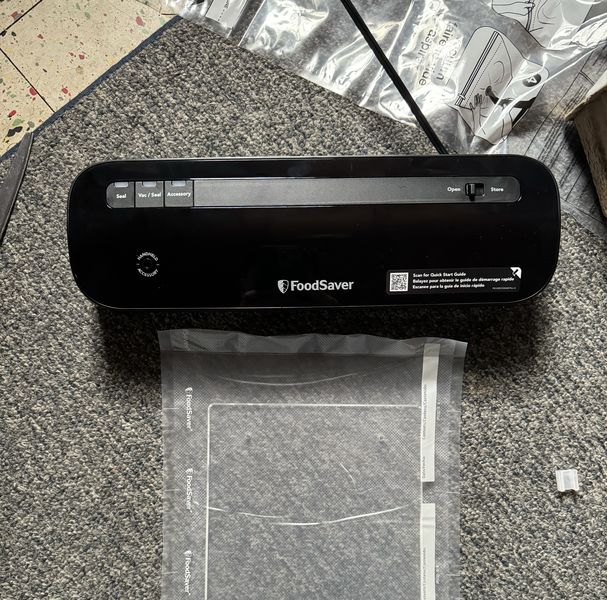
This shows the finished vacuum packed bag. The system seals the end after pulling a deep vacuum.
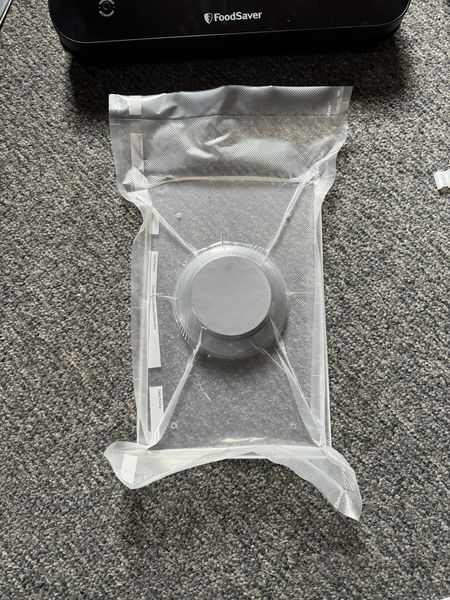
You can see how deep the vacuum is since the part won’t move.
With the vacuum system tested and ready, I setup the coupons to be infused. I also sprayed the bleeder/breather (Mop Pad) with Pam spray as a release agent. I was a little concerned about the yellow coloring.
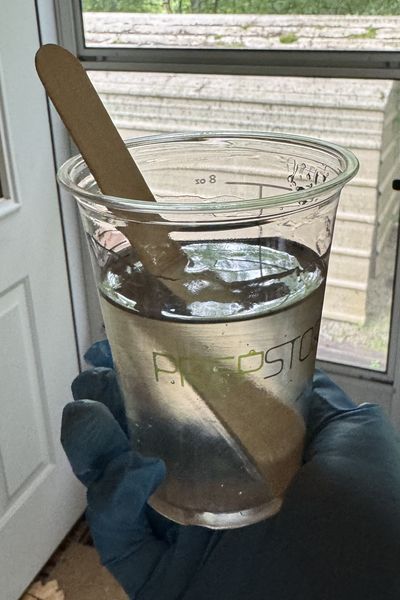
I mixed two equal parts of the marine epoxy.
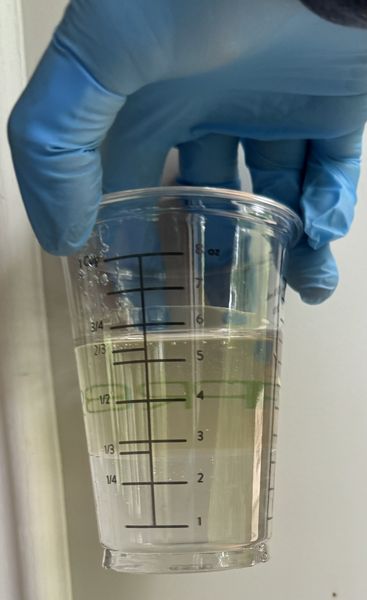
I was supposed to mix the batch for 3 minutes; I probably mixed for 2 minutes. I got nervous since I had 20 minutes to finish the application and I confused this epoxy with another brand I had read about. I will be sure to mix 3 minutes next time :)
Coupons are infused with marine epoxy by drizzling epoxy from spatula and using the spreader to push through the fabric after adding each layer for a total of 8 layers each. There is a layer of wax paper to protect the acrylic base, then a square of wax paper for each coupon.
I placed the bleeder/breather on the coupons and placed them in the vacuum bag.
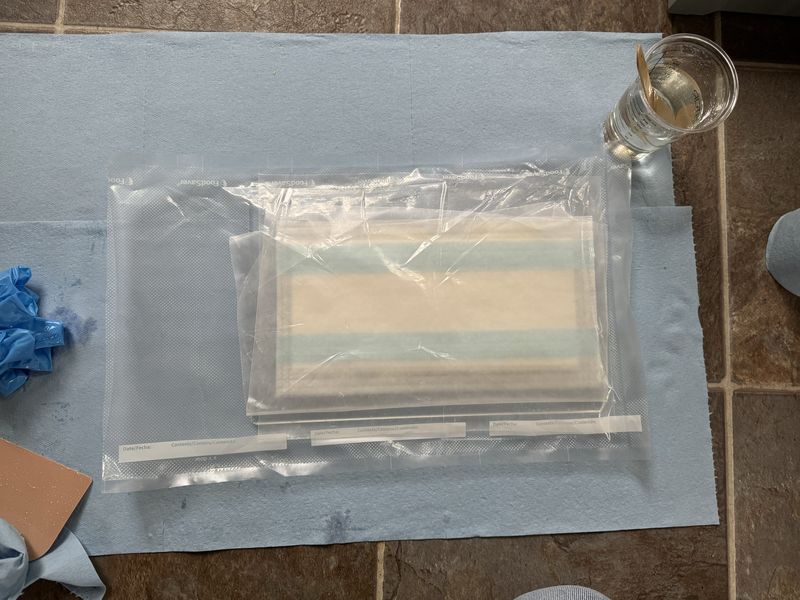
I took the vacuum batch out side and completed compaction.
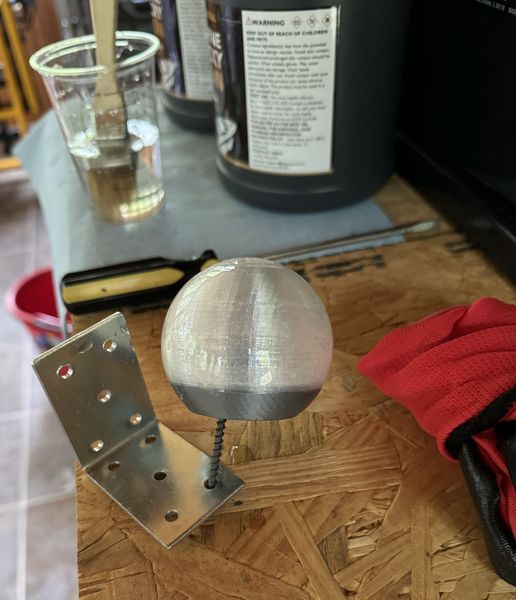
I also coated the Smart Buoy Prototype with marine epoxy to test the viability of using this epoxy to make the Smart Buoy waterproof. It look s great! We’ll see how it turns out.
Included ‘hero shot’ of the result:
- Included ‘hero shot’ of the result:
The curing time is 10 hours and I let it cure over night. It was 18 hours total curing time. This is the result. The coupon thickness is uniformly 1.3 mm on all coupons. They are not super rigid, but definitely stronger with epoxy matrix. When I stack them together, they are noticeably more rigid.
Described problems encountered (if any) and how you fixed them:
- Described problems encountered (if any) and how you fixed them:
Lessons Learned
-
The Marine Epoxy Kit was purchased for Fab Academy 2023 and I never used it. The shelf life was supposed to be 6 months. I also had a quart of Gelcoat Epoxy that I planned to use if the Marine Epoxy failed; the Gelcoat package had leaked during shipping, but I sealed it as soon as it arrived. Because of these risks, I purchased Gorilla Waterproof Patch & Seal Spray as well as Bondo Fiberglass Resin and Hardener. To make a long story short: I read the the SDS and TDS for all materials and the PPE was the same as the Marine Epoxy. I tried the spray first, thinking it would be easiest and would work; it was not guaranteed to work on all plastics and it didn’t work on PLA. The Bondo Fiberglass Resin had a brownish color, so that wouldn’t work for my purpose since I needed clear. The Gelcoat was yellowish, cloudy, and mostly jelled.
-
The Marine Epoxy was perfect as you have seen. It was crystal clear and poured wonderfully. I just expected that it was going to fail due to the expired shelf life. I was so relieved and happy that it all worked out. At the end of this assignment, I was exhausted, but I really enjoy looking back on the lessons learned.
-
I coated the Smart Buoy Prototype with Marine Epoxy. It was perfectly glassy and will work wonderfully on the Final Project. I did not separate the globe from the electronics holder while coating it since I held it with a screw in the bottom; it cured like that. I am not able to open it due to the epoxy seeping into the threads. I will definitely be keeping the actual Smart Buoy separated during coating. It is curing as I type :)
-
The coupon thickness is uniformly 1.3 mm on all coupons from the added matrix. They are not super rigid, but definitely stronger with epoxy matrix. When I stack them together, they are noticeably more rigid. Adding more layers would probably improve rigidity.
-
The preparations for the Wildcard Week are complete, but I still need to design the strips that will be used for the interface between the Smart Buoy and the stand. I need to learn how to use the Sheet Metal tools to do this. I will finish the assignment when I have figured that out.
Included original design files and source code:
-
Included original design files and source code:
-
This is a list of my original design files and source code discussed on this page:
-
Fusion 360
-
Smart Buoy Stand sensor_globe_v18.zip 17 Kb
-
PrusaSlicer
-
Smart Buoy Stand sensor_globe_v18_0dot15mm_pla_mk3s_4h34m.zip 1.9 Mb