Molding and Casting
This week I will learn about molding and casting. This will include:
Unit Description
Group assignment:
- Review the safety data sheets for each of your molding and casting materials
- Make and compare test casts with each of them
Individual assignment:
- Design a mold around the stock and tooling that you’ll be using, mill it (rough cut + (at least) three-axis finish cut), and use it to cast parts.
Learning outcomes
- Design appropriate objects within the limitations of at least 3-axis machining
- Demonstrate workflows used in mold design, construction and casting
Checklist
Linked to the group assignment page and reflected on your individual page what you have learned:
-
Linked to the group assignment page and reflected on your individual page what you have learned:
-
There are two types of assignments, one group and one individual, since I am alone in my personal Fab Lab I will do both. All of my work will be documented here, so there won’t be a group assignment page.
Reviewed the safety data sheets for each of your molding and casting materials, then made and compared test casts with each of them:
- Reviewed the safety data sheets for each of your molding and casting materials, then made and compared test casts with each of them:
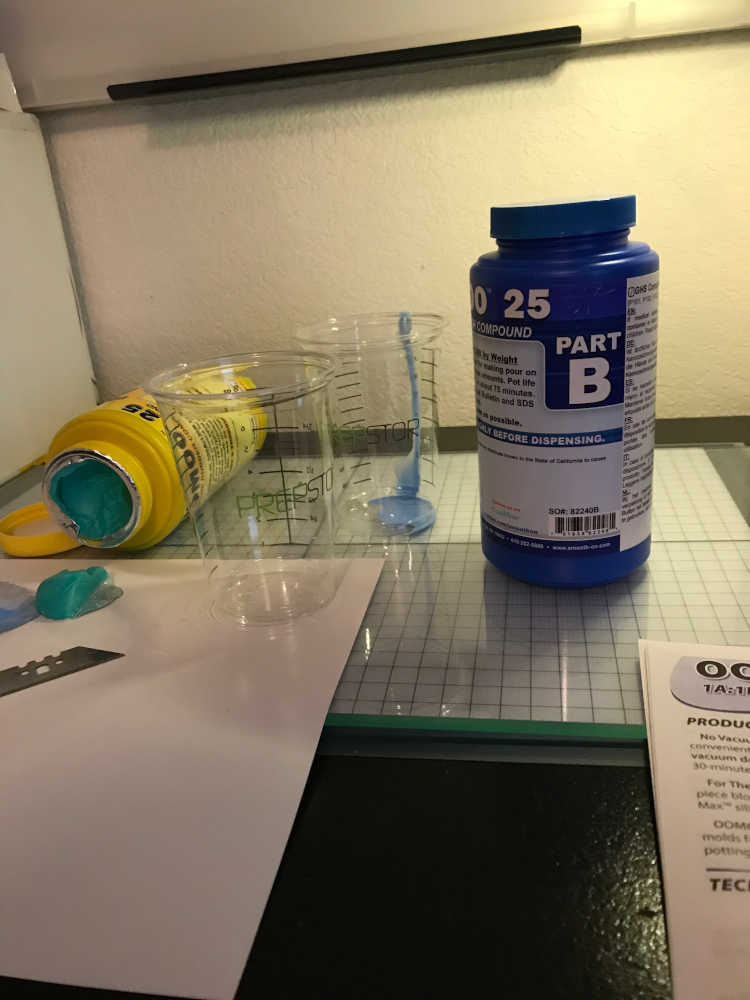
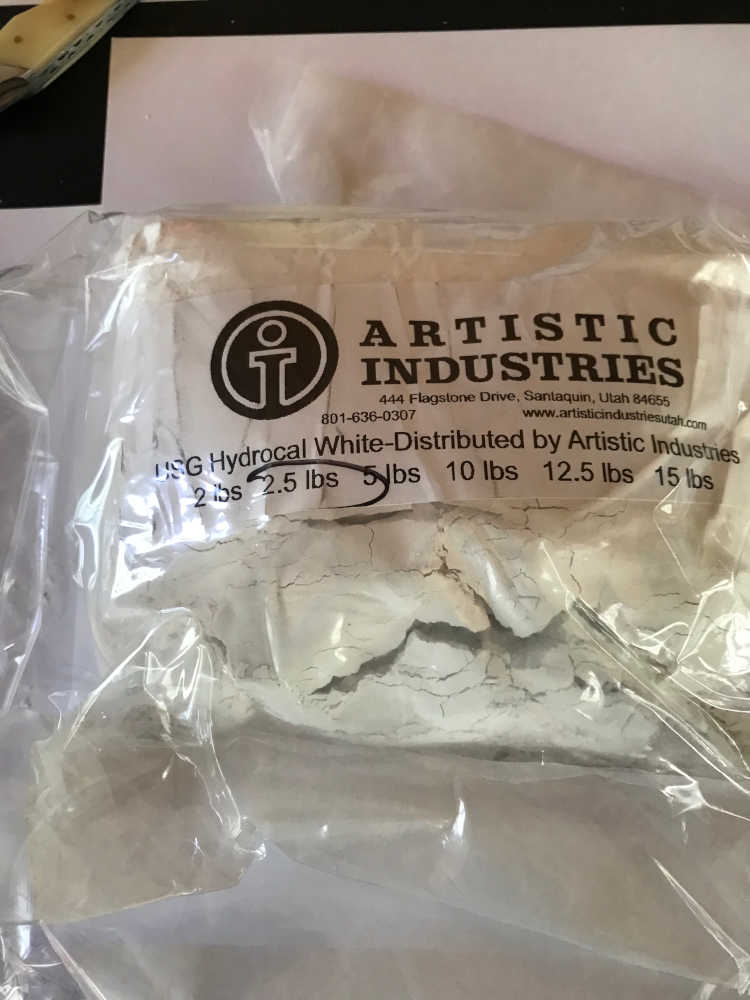
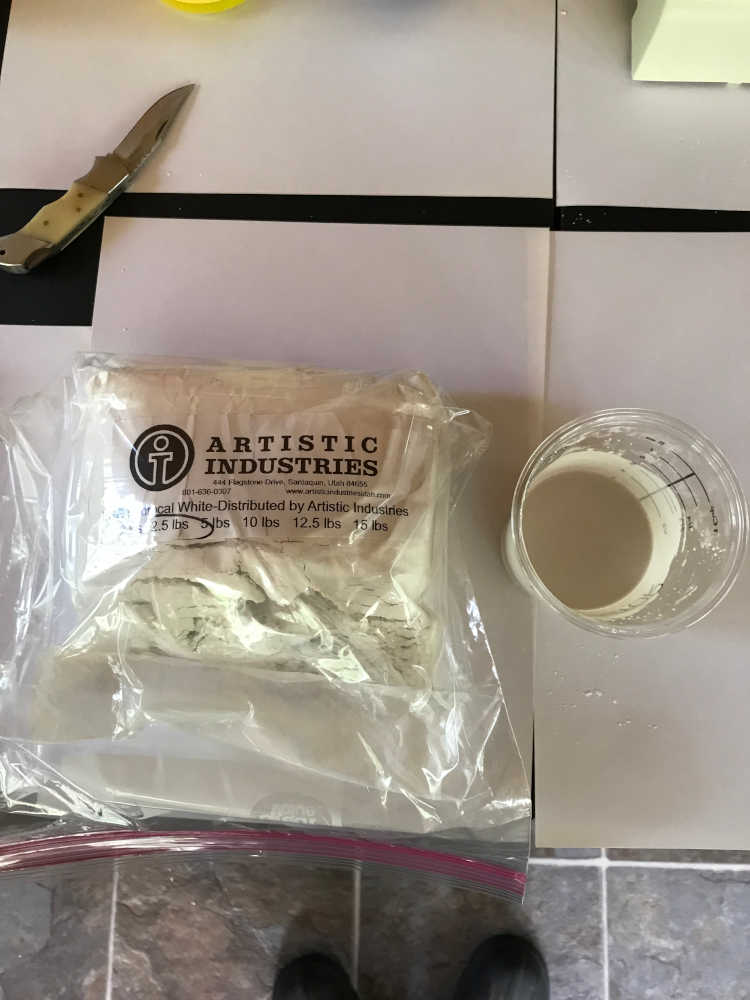
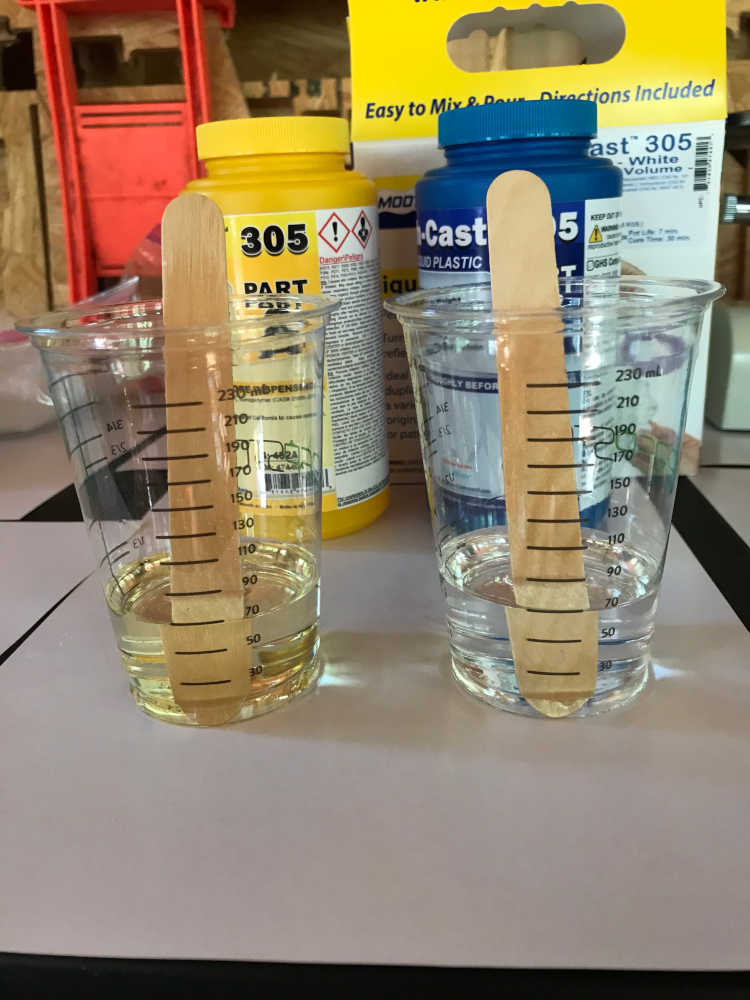
My molding materials will consist of BLUE Machinable Wax from machinablewax.com and OOMOO 25 from smooth-on.com. My casting material will be Smooth-Cast 305 Medium Setting - White Liquid Plastic from smooth-on.com as well as USG Hydro-stone and USG Hydrocal White Gypsum Cement from artisticindustriesutah.com.
After reviewing the safety data sheets (SDS) for the 5 materials, I have a greater respect for the SDS system as well as the materials I will be using. I had no idea about the dangers involved in using these materials for something so innocent as “making art”. Although I have a lot of experience with very hazadous materials, I am humbled by my ignorance of the hazards involved in molding and casting. The order of the materials will be in the order I intend to use them.
I will include a thumbnail of the first page as well as a link to each SDS for your convenience.
- Machinable Wax (Blue, F-14 Green/White, F-99, & Orange+ formulas) SDS
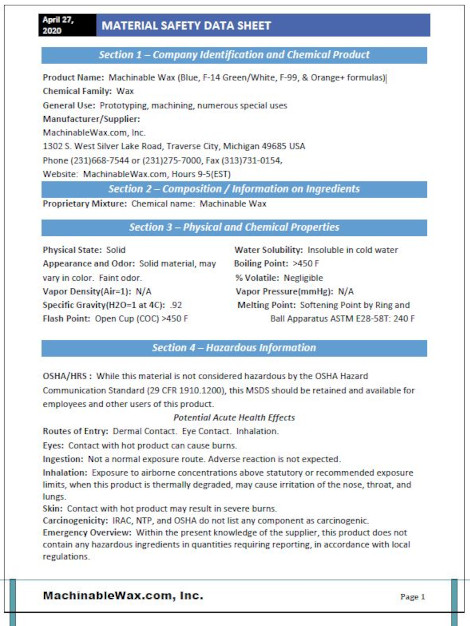
At room temperature, I would rank this material as the least hazardous; however, at high temperatures it can cause injuries as well as fires. I will use this material to make a positive mold into which I will pour OOMOO™ 25 to make a negative mold.
This is the result of using this Machinable Wax material:
- OOMOO™ 25 SDS

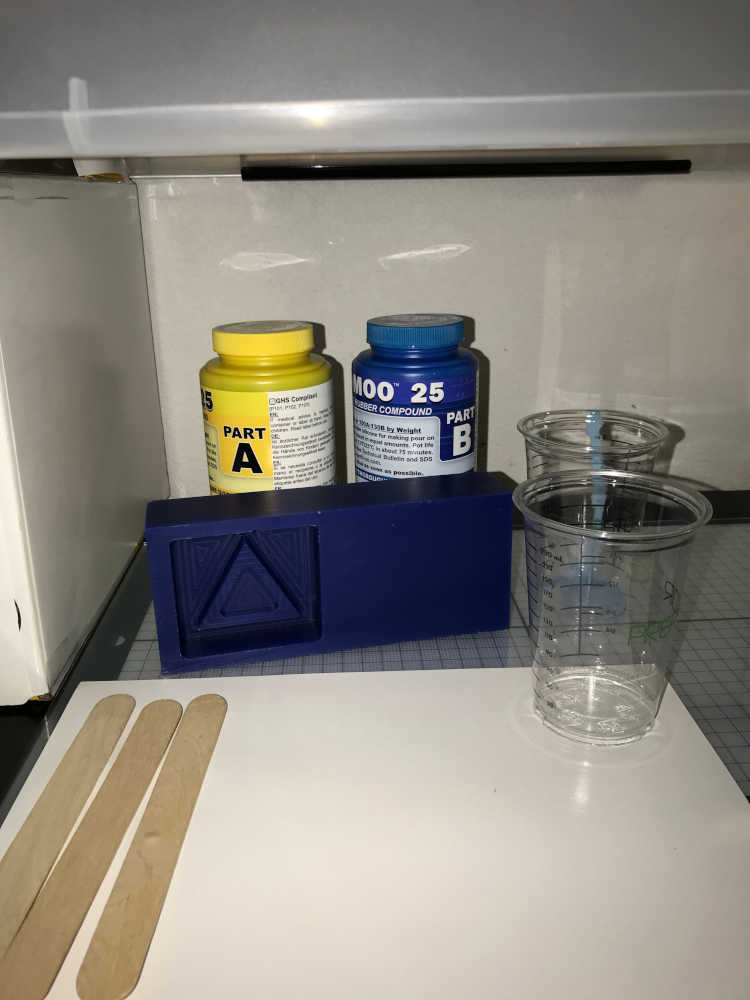
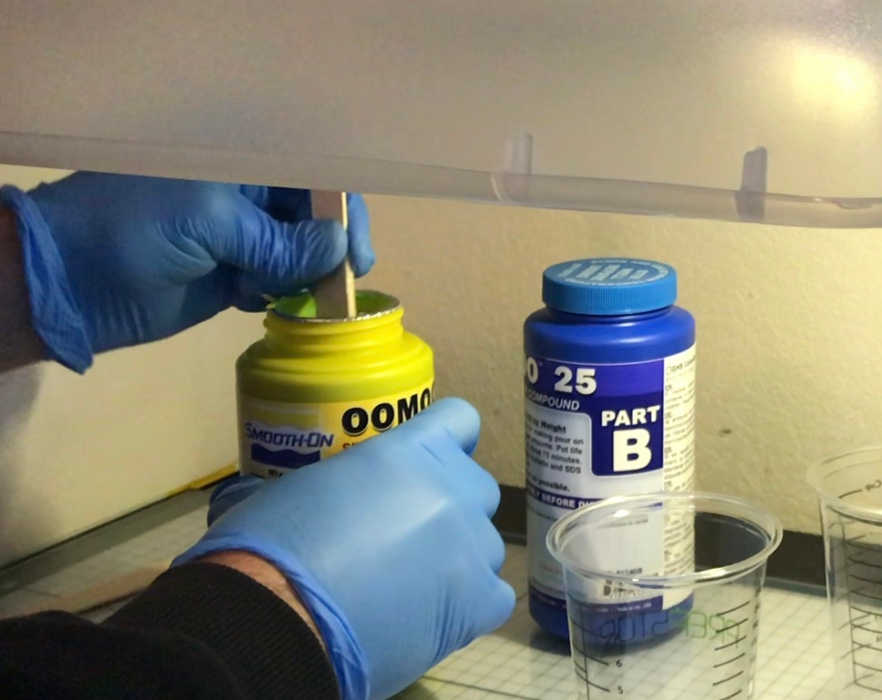
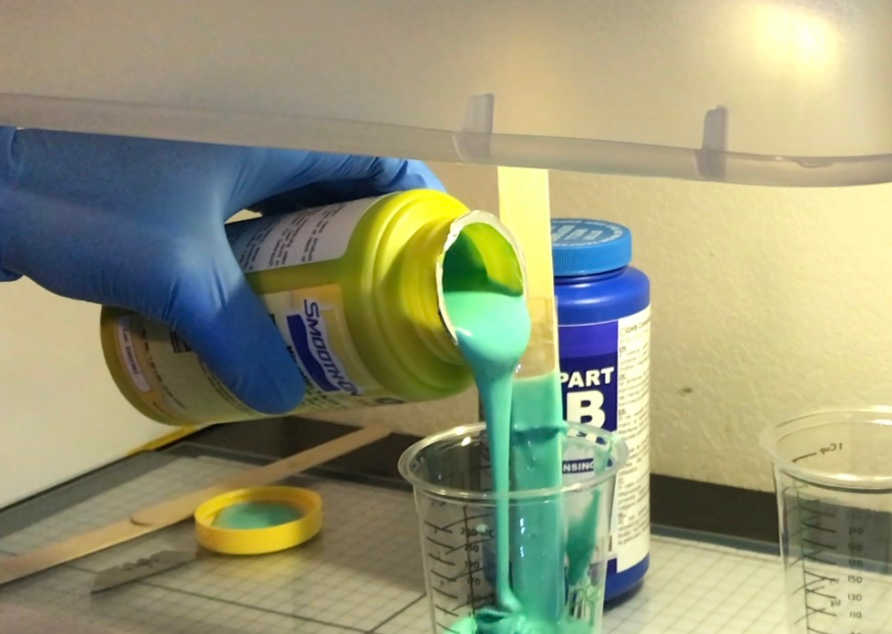
At room temperature, I would rank this material next as not very hazardous; however, during decomposition, in fire conditions, “can produce carbon oxides, gasses/vapors, and traces of incompletely burned carbon compounds.” Additionally, Precautions for safe handling: Use good general housekeeping procedures. Wash hands after use. Do not get in eyes, on skin or on clothing. Do not breathe vapors or mists. Use good personal hygiene practices.” This is a statement in most SDSs and common sense should be exercised. OOMOO™ 25 is a Part A and Part B (each part has its section in the SDS, A then B) easy to use tin cure silicone rubber compound that features a convenient one-to-one by volume mix ratio (no scale necessary). I will use this material as a negative mold to produce the final positive product.
Mix Ratio By Volume 1A:1B Mix Ratio By Weight 100A:130B Pot Life 15 minutes Cure Time 75 minutes
Safety – Use in a properly ventilated area (“room size” ventilation). Wear safety glasses, long sleeves and rubber gloves to minimize contamination risk. Wear vinyl gloves only. Latex gloves will inhibit the cure of the rubber.
Pouring – For best results, pour your mixture in a single spot at the lowest point of the containment field. Let the rubber seek its level up and over the model. A uniform flow will help minimize entrapped air. The liquid rubber should level off at least 1/2” (1.3 cm) over the highest point of the model surface.
Curing – Allow to cure for 75 minutes at room temperature (73°F/23°C) before demolding. Post curing the mold an additional 4 hours at 150°F (65°C) will eliminate any residual moisture and alcohol which is a by product of the condensation process and may inhibit some resins. Allow mold to cool to room temperature before using. Do not cure rubber where temperature is less than 65°F/18°C.
This is the result of a OOMOO™25 test cast using this material:
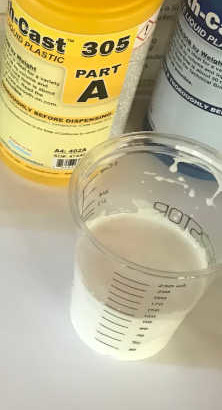
- Smooth-Cast™ 305 SDS
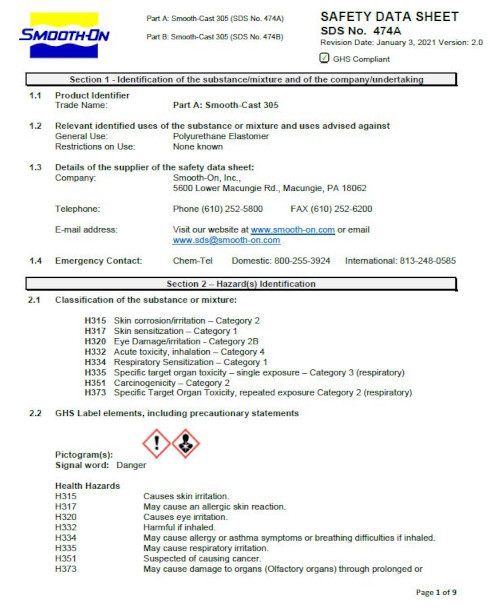
At room temperature, I would rank this material as hazardous; in fact, it is dangerous! Like OOMOO™ 25, during decomposition, in fire conditions, “can produce carbon oxides, gasses/vapors, and traces of incompletely burned carbon compounds.” Even worse, you can see the dangers involved in handling on the first page of the SDS. Like OOMOO™ 25, “Precautions for safe handling: Use good general housekeeping procedures. Wash hands after use. Do not get in eyes, on skin or on clothing. Do not breathe vapors or mists. Use good personal hygiene practices.” The vendor emphasizes, “Mixing should be done in a well-ventilated area. Wear safety glasses, long sleeves and rubber gloves to minimize contamination risk.” Another caution, “Curing - Important: Use this product with at least room size ventilation or in proximity to a forced outlet air vent and do not inhale/breath fumes. Fumes, which may be visible with a significant mass concentration, will quickly dissipate with adequate ventilation. Castings with significant mass may be hot to the touch and irritate skin immediately following cure. Let casting cool to room temperature before handling.” Smooth-Cast™ 305 is a Part A and Part B (each part has its section in the SDS, A then B) liquid plastics are ultra-low viscosity casting resins that yield castings that are bright white and virtually bubble free. Vacuum degassing is not necessary. They offer the convenience of a 1A:1B by volume or 100A:90B by weight mix ratio. I will use this material to produce the final positive product.
Mix Ratio By Volume 1A:1B Mix Ratio By Weight 100A:90B Pot Life 7 minutes Cure Time 30 minutes
Safety - Materials should be stored and used in a warm environment (73° F / 23° C). These products have a limited shelf life and should be used as soon as possible. All liquid urethanes are moisture sensitive and will absorb atmospheric moisture.Mixing tools and containers should be clean and made of metal, glass or plastic. Mixing should be done in a well-ventilated area. Wear safety glasses, long sleeves and rubber gloves to minimize contamination risk.
Measuring and Mixing - Liquid urethanes are moisture sensitive and will absorb atmospheric moisture. Mixing tools and containers should be clean and made of metal, glass or plastic. Materials should be stored and used in a warm environment (73°F/23°C). Stir or shake both Part A & Part B thoroughly before dispensing. After dispensing equal amounts of Parts A and B into mixing container (100A:90B by weight) and mix thoroughly. Stir deliberately making sure that you scrape the sides and bottom of the mixing container several times. Be careful not to splash low viscosity material out of the container.
Pouring - Pour your mixture in a single spot at the lowest point of the containment field and let the mixture seek its level. This will help minimize air entrapment.
This is the result of a Smooth-Cast™ 305 test cast using this material:
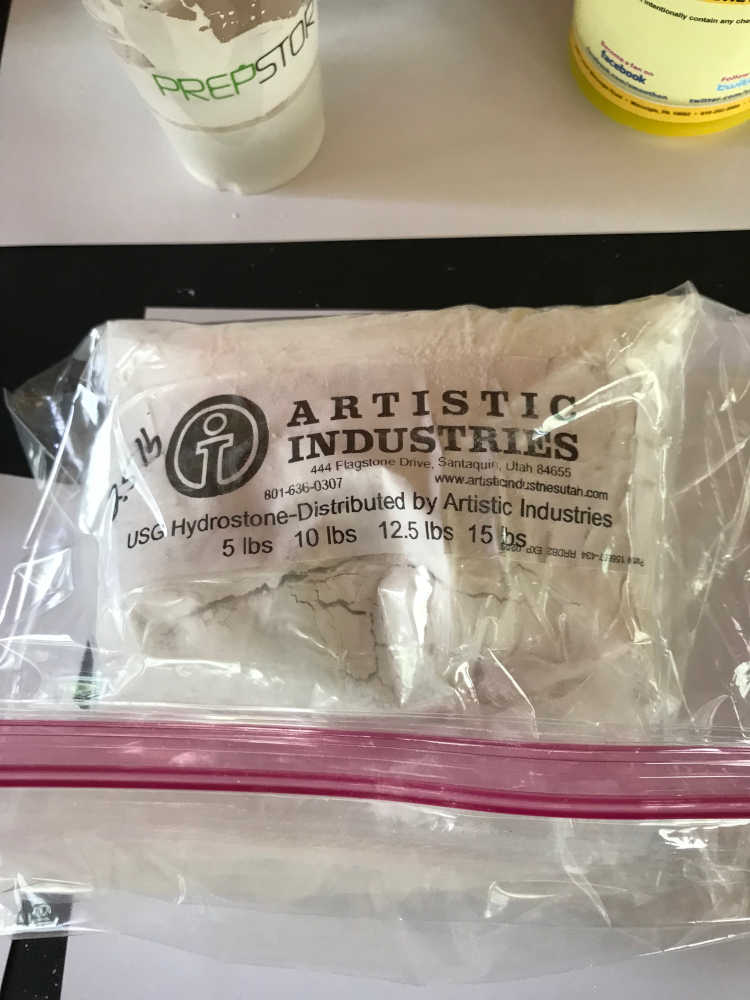
- Hydro-Stone® Gypsum Cement SDS
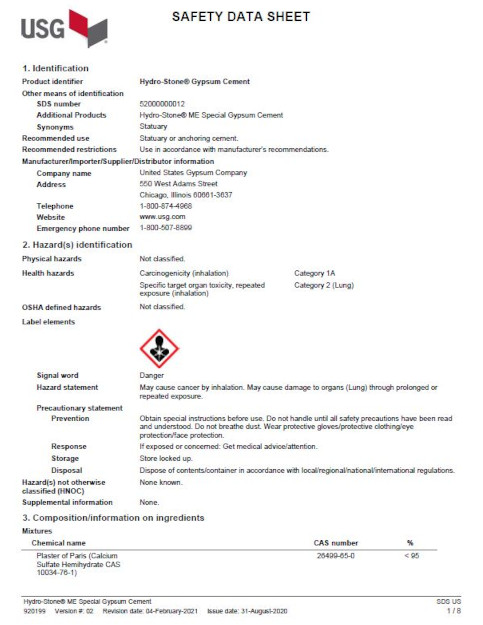
This material is different in that it is a powder and easily inhaled. I would rank this material as hazardous; in fact, it is dangerous! It may cause cancer by inhalation. Please use with caution and proper PPE. Additionally, there is an exothermic reaction when mixed with water and produces considerable heat. Please read the SDS! I will use this material to produce the final positive product.
Precautions for safe handling - Minimize dust production when mixing, or opening and closing bags. Avoid inhalation of dust. Use with adequate dust control and local ventilation. Wear appropnate personal protective equipment (See Section 8). Wear appropriate NIOSH respirator when ventilation is inadequate and occupational exposure limits are exceeded. Wash hands thoroughly after handling. Use a non-alkaline soap such as Neutralite Safety Solution or Mason’s Hand Rinse.
Safety – Do not breathe dust. Wear protective gloves/protective clothing/eye protection/face protection. Wear approved safety goggles. Normal work clothing (long sleeves and long pants) is recommended. Use a NIOSH/MSHA approved respirator if there is risk of exposure to dust/fume at levels exceeding the exposure limits. When mixed with water this product can become very hot. Encasing or making molds of any body part can cause serious burns.
- Sets in 17-20 minutes, after machine mixing
- Requires 32 parts water by weight per 100 parts plaster.
This is the result of a Hydro-Stone® test cast using this material:

- Hydrocal® White Gypsum Cement SDS
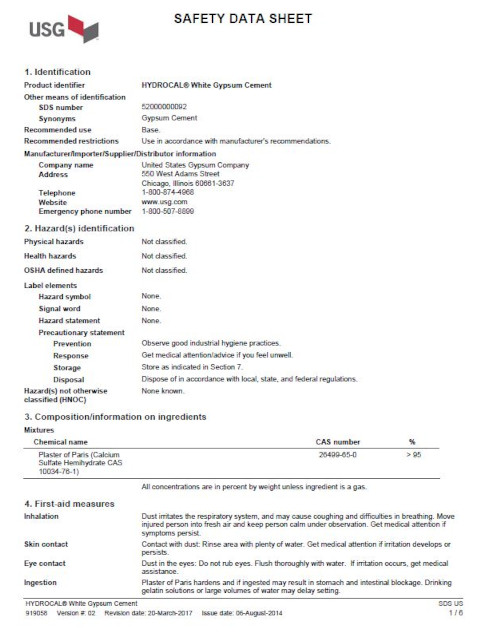
This material is also a powder and easily inhaled. I would rank this material as not as hazardous. Dust irritates the respiratory system, and may cause coughing and difficulty breathing. Please use with caution and proper PPE. Additionally, there is an exothermic reaction when mixed with water and produces considerable heat. Please read the SDS! I will use this material to produce the final positive product.
Precautions for safe handling - Minimize dust production when mixing, or opening and closing bags. Avoid inhalation of dust. Wear appropriate personal protective equipment Wash hands after handing. Observe good industrial hygiene practices and use appropriate lifting techniques.
Safety – Do not breathe dust. Wear protective gloves/protective clothing/eye protection/face protection. Wear approved safety goggles. Normal work clothing (long sleeves and long pants) is recommended. Use a NIOSH/MSHA approved respirator if there is risk of exposure to dust/fume at levels exceeding the exposure limits. When mixed with water this product can become very hot. Encasing or making molds of any body part can cause serious burns.
- Sets 25-35 minutes after machine mixing
- Requires 45 parts water by weight per 100 parts plaster.
This is the result of a Hydrocal® test cast using this material:
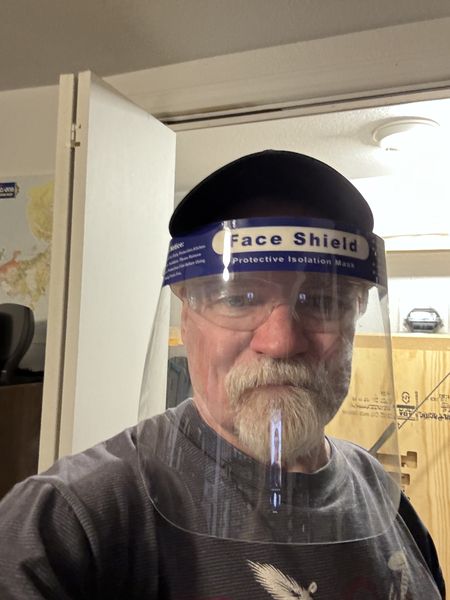
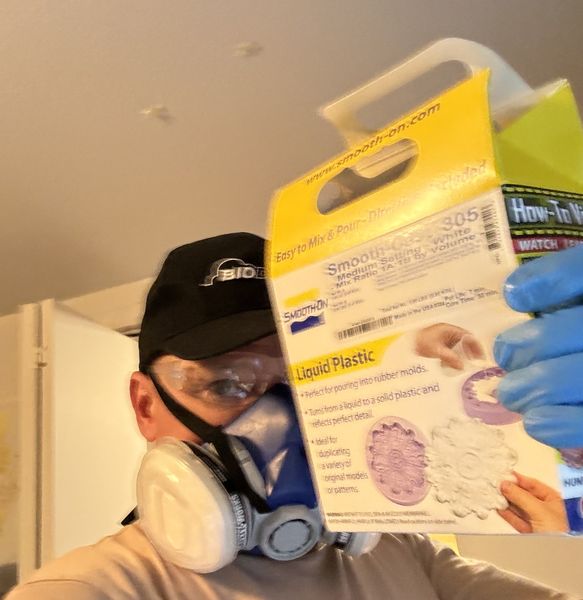
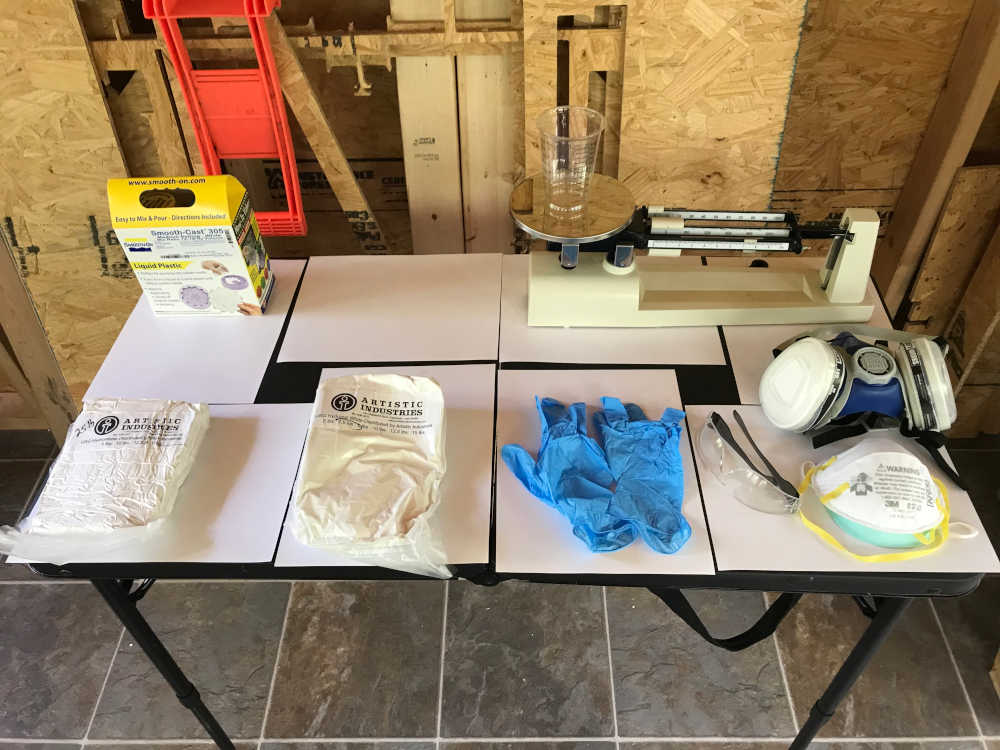
Personal Protective Equipment (PPE)
The Safety Data Sheets give direction in Precautionary Statements for Prevention of harm. I stated the requirements and hazards above. In any case, the PPE to wear should be at or above the required equipment. All require protective clothing, safety glasses and gloves, but some require face masks, respirators, and/or face protection.
This is a picture with safety glasses, face mask, and protective gloves.

This is a picture with safety glasses and face protection.
And this is a picture with safety glasses, respirator, and protective gloves.
Documented how you designed your 3D mold and created your rough and finish toolpaths for machining, including machine settings:
- Documented how you designed your 3D mold and created your rough and finish toolpaths for machining, including machine settings:
Since this is the first time I fully “immersed” in learning about molding and casting, this is new territory for me :) My first thought was to mold and cast a rudder for my final project. I began by researching various designs and even 3D printed a 25% scale of an actual rudder for a kayak. It was fun and exciting, but I quickly realized that I was out of my league when I began trying to design one and realized that I needed to design a mold not a rudder…back to safe waters! I decided to look for a tutorial that would teach me the basics of mold design, so I went to the Fab Academy Tutorials to see what was there. There are currently 3 to explore; I looked at each of them, but the best for me was done by Kris titled 3D Modelling for Molding and Casting using FreeCAD. Although I was considering the software to be Fusion 360, I had a little experience in FreeCAD, so I jumped in. So glad I did! The familiar waters were calming and Kris did a great job of leading me through the process of making a mold from a basic part. Just what I needed.
I followed the YouTube video step-by-step and learned not only how to design a mold, but learned some tips and tricks in FreeCAD. Thanks Kris! As he mentions on the webpage, “We follow a 3-step process here where we create the final model first (1), then the negative mold (2), and then the wax positive (3). To reproduce the actual model in real life you would then work in the opposite direction:. Mill the wax positive (3), cast a silicone negative with it (2) and use it to cast the final piece with liquid plastic (1).”
Kris was very clear and guided every step of the way. It was not easy for me! I probably spent hours going through the video multiple times and stepping through the steps to get the final mold. Be forewarned! It will require an investment of time, but it wil be rewarding throughout the learning process.
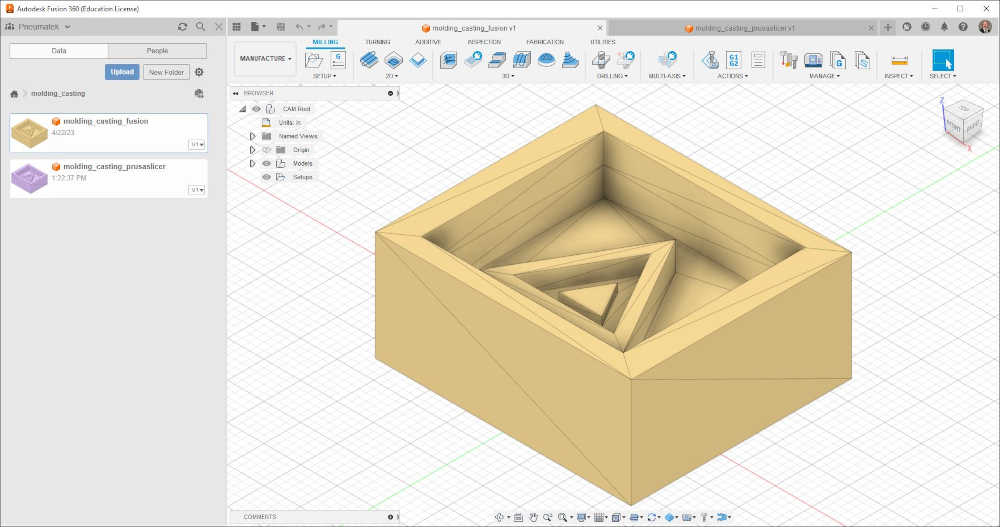
First we designed the Model Base:
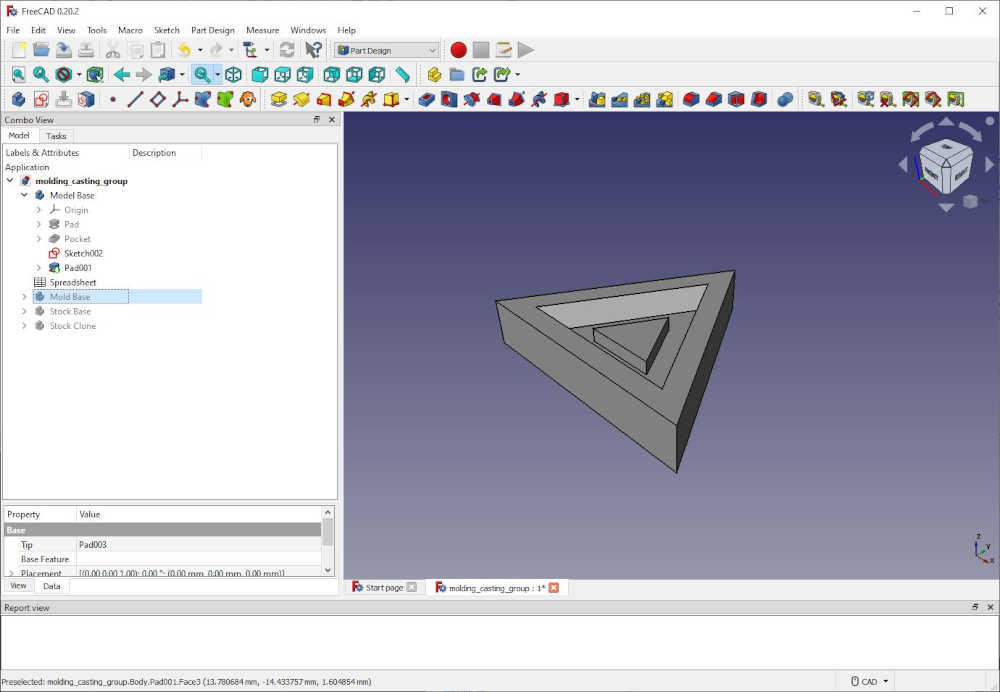
Then we designed the Mold Base:
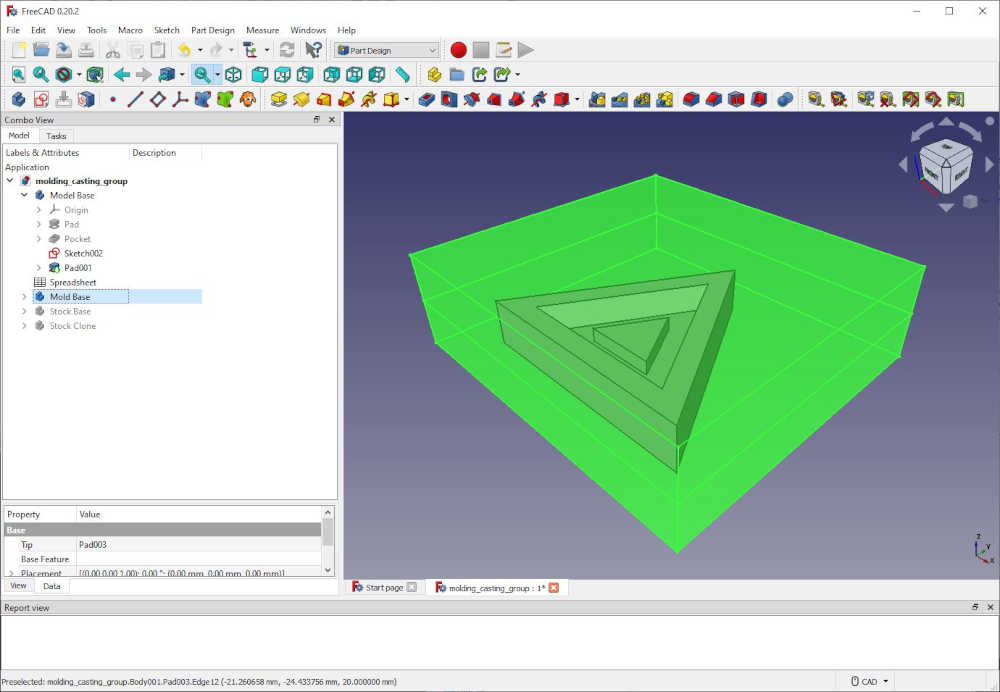
Then we designed the Stock Base:
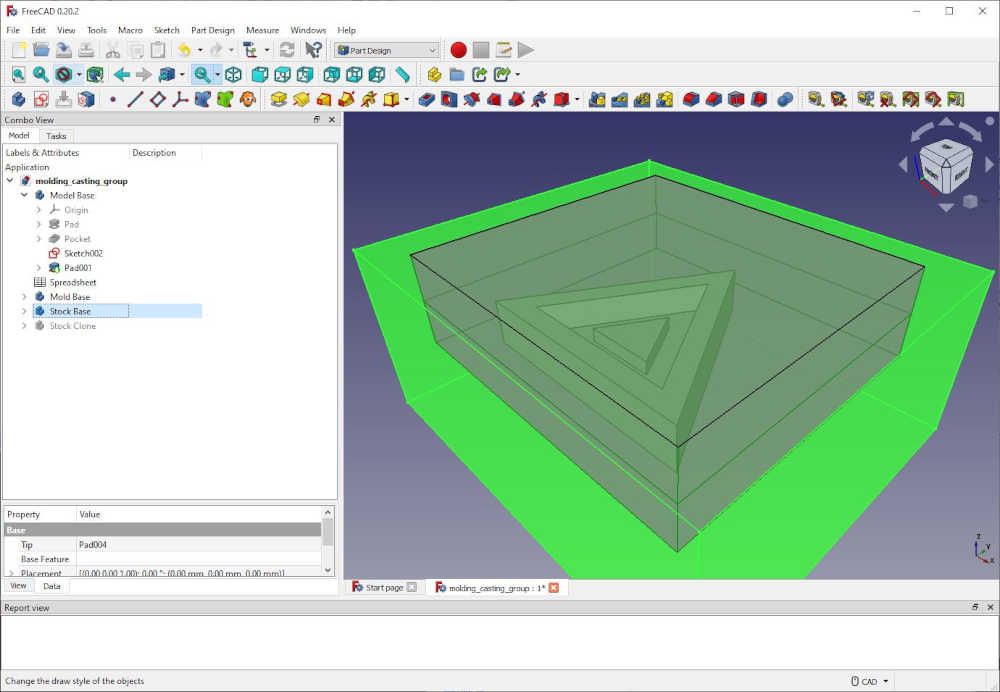
Lastly, we designed the Stock Clone:
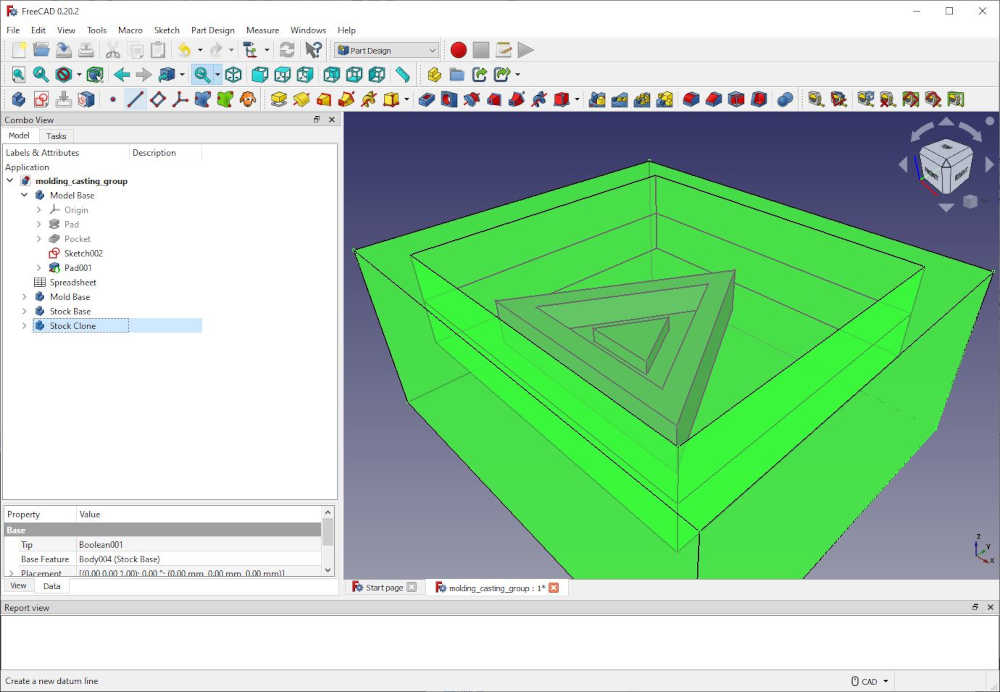
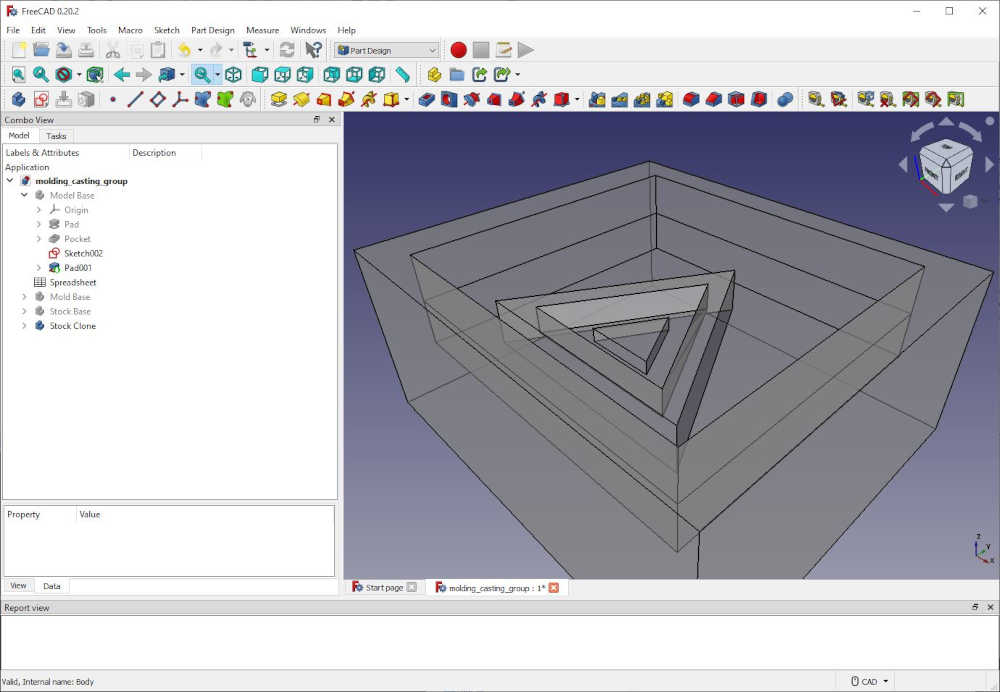
This is the Stock clone with the other objects hidden:
This is a video so you can see what the wax will look like after it is milled:
Described problems and how you fixed them:
- Described problems and how you fixed them:
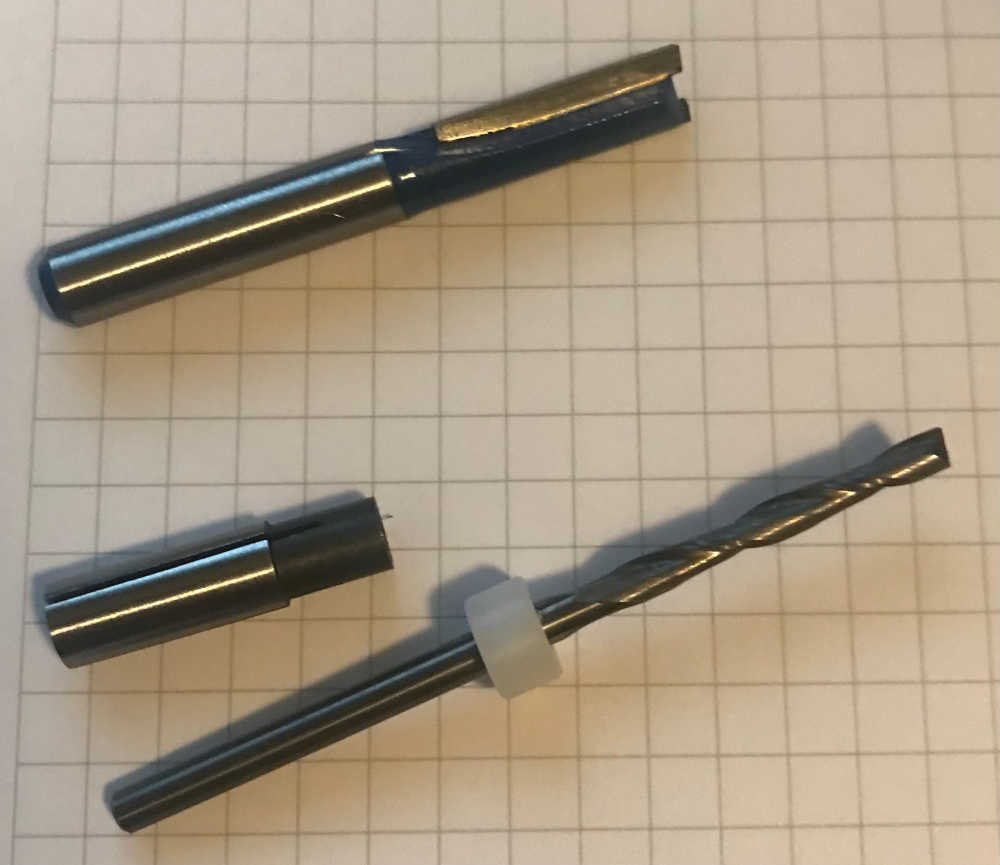
Now for creating my rough and finish toolpaths for machining, including machine settings. Again, I’m in new territory! With the Internet available, it is time to research. Starting with the things I know: machines and tools I have, software I have used, and the experiences of milling so far. My hope was to use the mini-mill I have, Sweety, my CNC 3018 Pro, but the endmills I have are a bit too long; that’s a problem to be solved. The endmills I have been using were 1/8” shank diameters and the 1/64” plus the 1/32” diameter for fabricating PCBs. I need something bigger to mill the wax. To create the rough toolpath, the 1/4” size seemed more reasonable and I have one for the MakerMade M2 (Maslow) large format CNC mill. Still leaning toward the smaller mill, I found the right collet for the 1/4” shank diameter; it’s the ER11 Collet Size 6.5mm. I tried it in the Sweety and it fit perfectly. The endmill is 50mm overall length (OAL) with a 20mm length of cut (LOC). This would work for the depth of cut in my wax stock to make the mold. However, to make the finish toolpath, I will need a smaller endmill, preferrably 1/8” or 3mm. Thankfully, I found another endmill that came with the MakerMade M2 in the Starter Set MM-18SS3; it is a 3pk of 1/8in router bits (up cut, down cut, straight) with collet reducer (1/4” to 1/8”). I will use the up cut endmill.
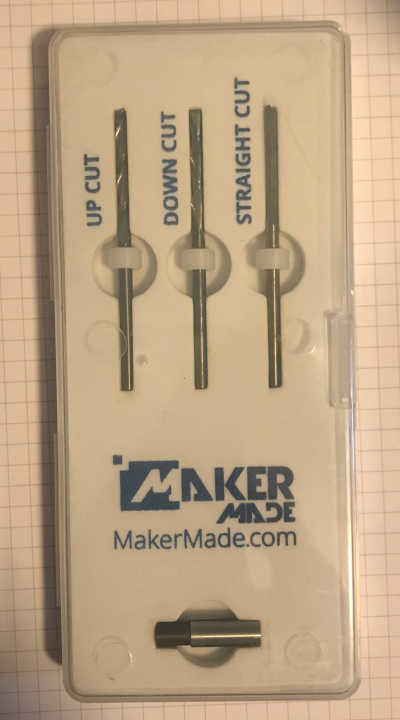
This is a picture of the tools I plan to use:
Now I must make a decision. The tools fit in both machines. The fixture for the M2 is going to be more difficult that double-sided tape in the Sweety. We will see which way I go. Now to make the toolpath. In order to make the toolpath, I am leaning toward using mods since it works so well when I make a PCB; I exported the STL file for the Stock Clone and loaded it into mods; the toolpath only had a few paths, so I knew something was wrong.
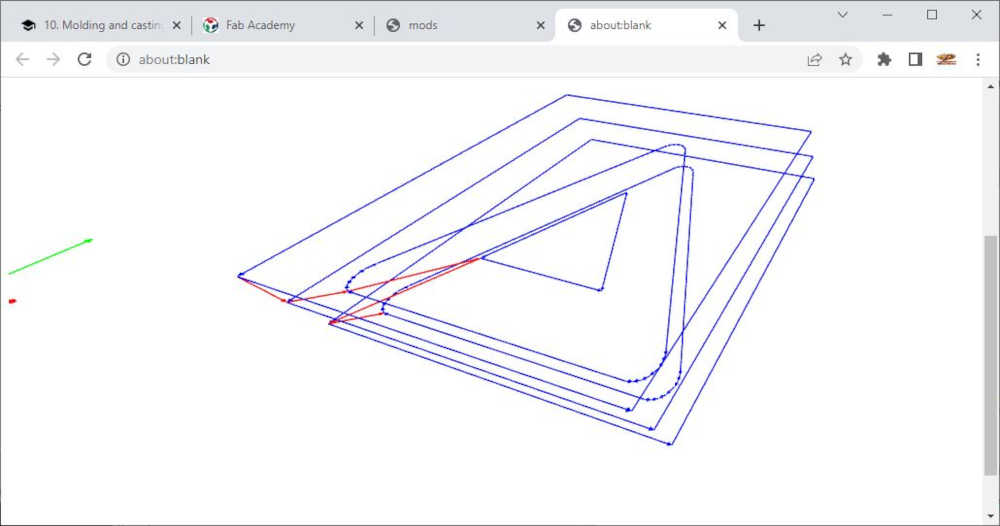
As the “lonely student”, I felt alone, but not willing to give up, I thought I would make the gcode to send to the 3D printer; I did that and was happy to see exactly what I designed. I like being alone :)
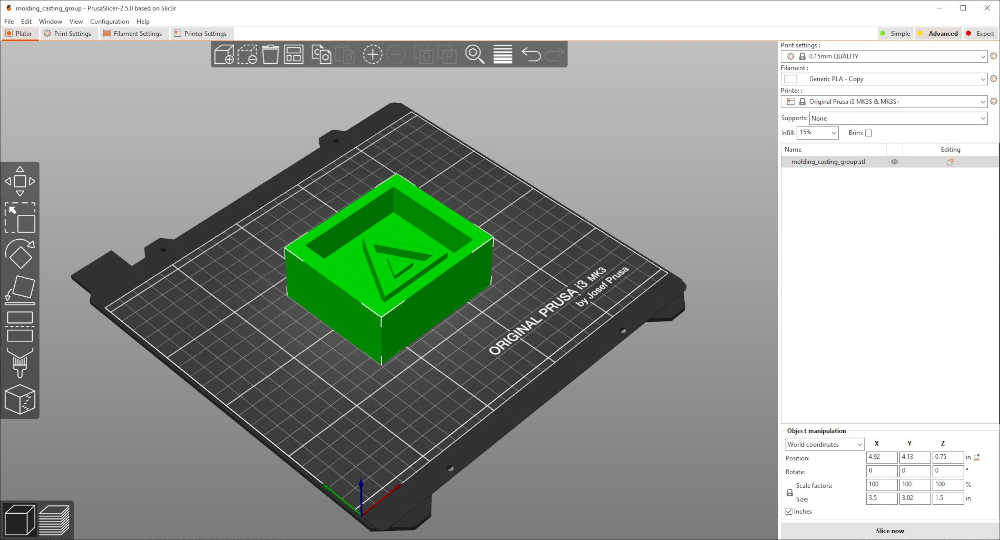
I decided to use another path. Knowing that Fusion 360 can import/insert 3D models in the form of DXF files, I decided to explore importing/inserting STL files to see what my design would look like and use some familiar tools. Not only was I able to insert a STL file, but I was able to insert the 3MF file I just made in the PrusaSlicer software. I opened Fusion 360, made a project called molding_casting and made a New Design. I changed the Document Settings > Units to mm since I used those units to design the mold. The Insert > Insert Mesh and select the file I saved in PrusaSlicer. What a wonder sight! There sat the mold waiting to be measured. I measured the dimensions with the Inspect tool and all is well.

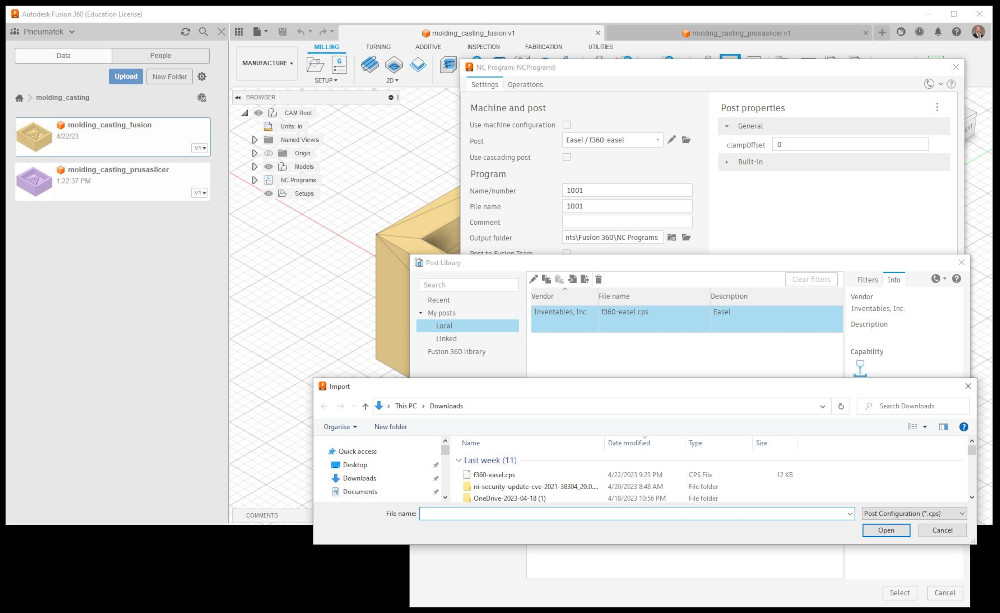
To be fair, I did spend a lot of time trying to figure all of this out. My goal was to create a toolpath with multitudes of pass since that is what I expected; Fusion 360 did not disappoint. However, the path to get there was much more involved; now I bring in Easel Pro by Inventables. I have used this software to produce the table I made in “make something big” week and I used the MakerMade M2 to do that. It was a long path, but I got there. Processing 3 > Fusion 360 > Shaper Origin Export > Easel Pro > g-code > Makerverse > MakerMade M2 > Cutting Wood (Molecules/Atoms). This time I have to take a path through “post processor”. I have read about this and heard others talking about it, but I never had to go through it myself…Caught Me! It happened in the most subtle way :) I wanted to import the the STL file into Easel Pro to take a look at it, so I had to dredge up the things I previously learned. At first, I directly imported the STL. It was HUGE!
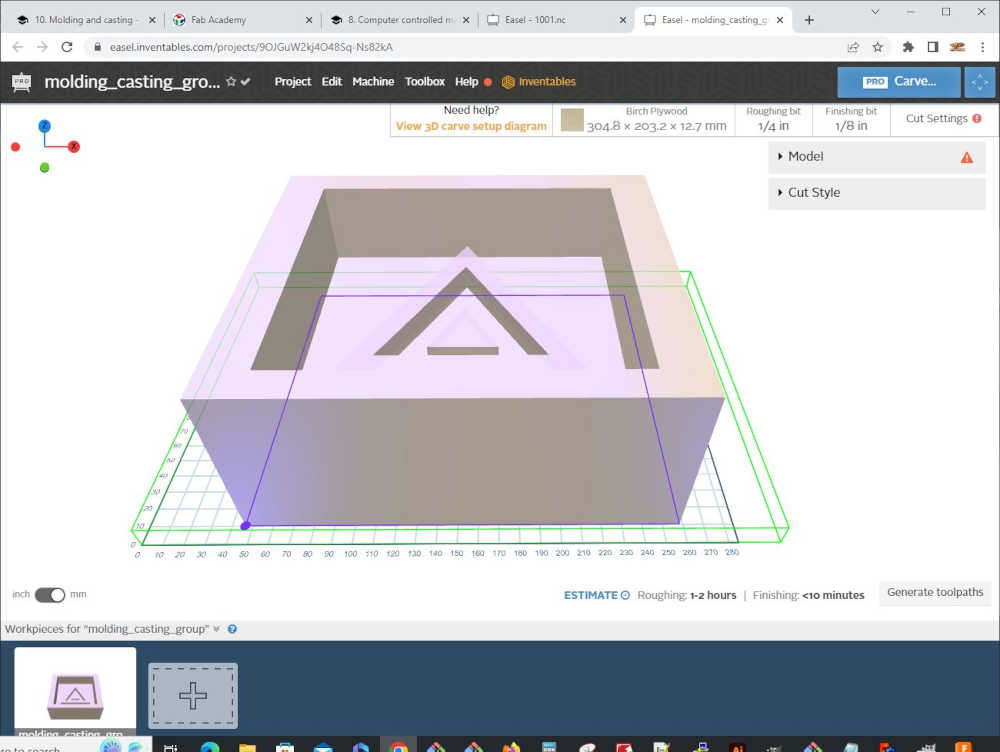
Knowing this was not going to work, I tried going through the g-code route. This is where I was face-to-face with the Easel post-processor for Fusion 360. My first impression was, “You finally caught me!” :) To make a long story shorter, I downloaded the post-processor and used it in Fusion 360. I was frustrating, but I figured it out. Understand that this is not the way I wanted to go. Fixturing a chunk of wax on an inclined plane is not my idea of fun, but it was an option.
We are now entering uncharted territory for me…Enter the Manufacture Workspace in Fusion 360
To use the post-processor, you have to point to it. I downloaded it, so it was in Downloads, I just had to navigate to it.
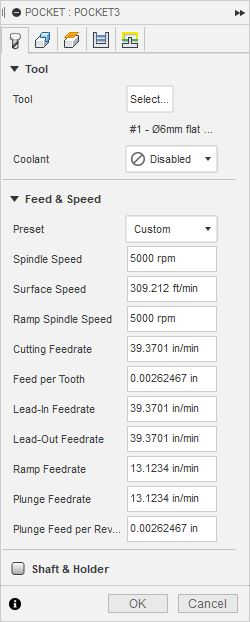
Now that was non-trivial. We need to use it! To do so, we use 3D > Pocket Clearing > Setup the Tool (Endmill) and all of the machine settings necessary to remove the unnecessary material as efficiently as possible. The first session will be with the 1/4” (6mm) Flat Endmill, so we will select that tool:
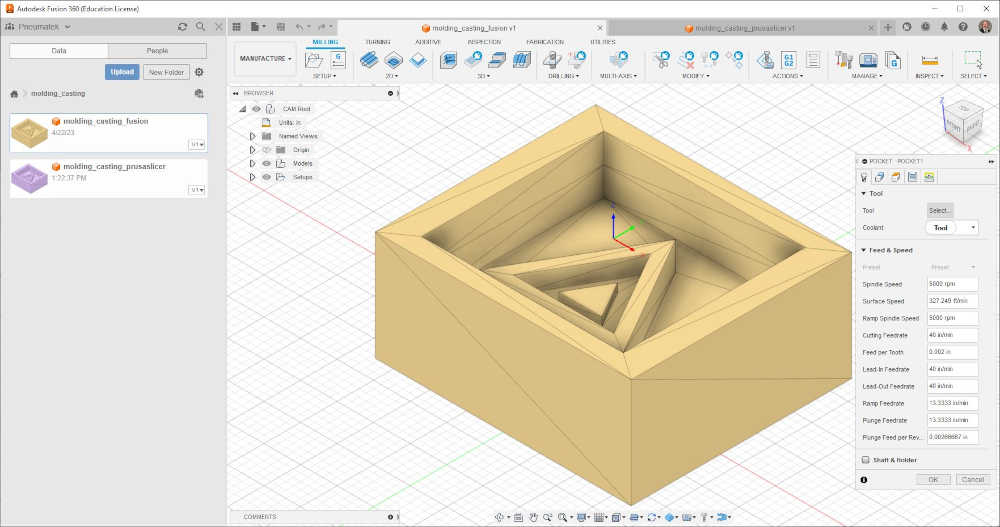
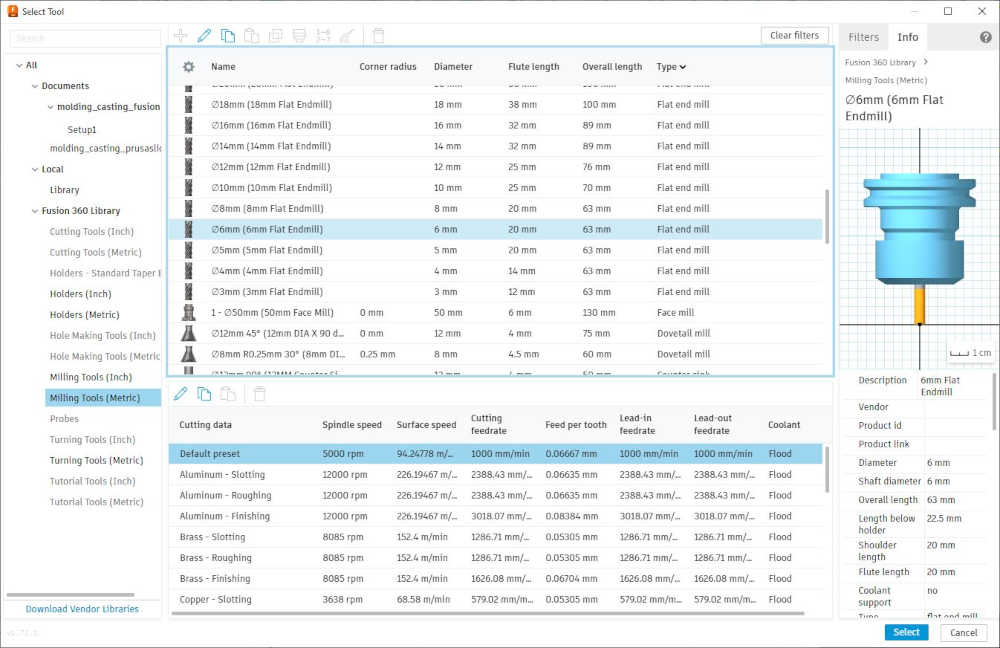
I don’t have coolant, so I disable that. For now, I will go with the default settings to demonstrate the simulation and output of g-code. Although I am accepting the defaults, I still need to go through each of the windows for machine settings and Click OK.
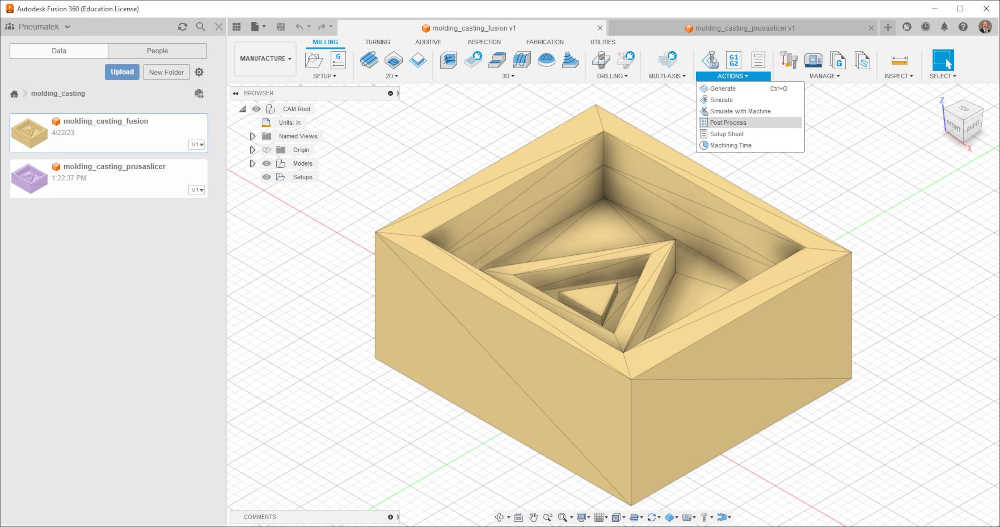
At this point the toolpath is generated with the selected tool and settings:
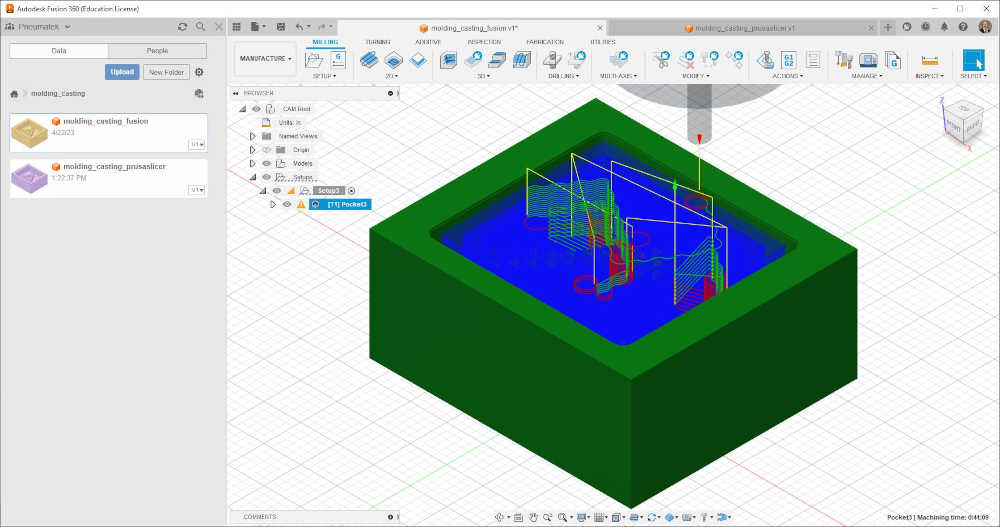
Now for the exciting part…so far. Actions > Simulate > Push Play :)
Okay, so that was a cool video, right? It was also a test of making a video for my final project :) However, that was the post-processor for the MakerMade M2; that is not my preference. I really want to use the MySweety CNC 3018Pro-M to mill my small jobs. I did some more research and found out there are other people trying to solve the same problem. Setting up the post-processor is very similar to the Easel PRO, but there is already a grbl post-processor in the library. First, you have to copy a similar machine. A YouTube video from ollysworkshop explains how to “Create fusion360 profile for grbl CNC machines (Sainsmart Genmitsu 4030)”. I figured this machine was close enough to what I have, so I gave it a try. The author does a great job guiding through the process, but some of the features selected were not available to me as I followed along. It may be a version issue.
I made 3 different machines by copying what was in the Fusion 360 Library listed under Autodesk. The one that made most sense and was the one the author used is the Autodesk Generic 3-axis Router.
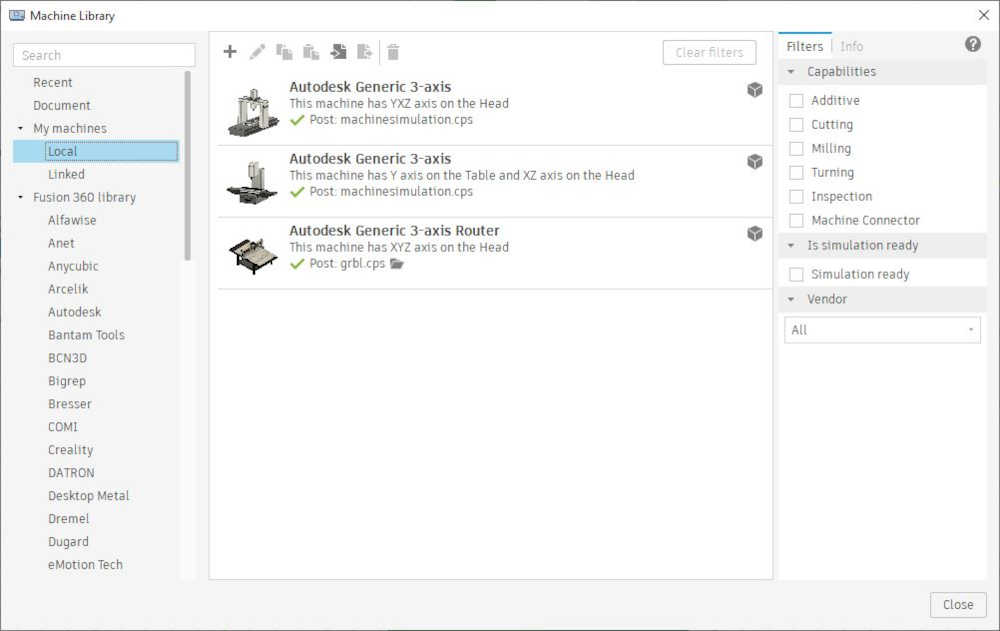
To get to that screen in the Manufacture Workspace > Manage > Machine Library. Then you Click the arrow next to Fusion 360 Library > Click on Autodesk > Select a machine that makes sense > Right-Click on the machine > Click Copy > Click Local under My machines > Click Paste at the top of the window to the right. Now you can edit the machine and choose grbl as the post processor.
The ironic part of all this…I never used those machines when I setup the milling job :) It was purely by accident or inattention to detail :) While in the model to be milled, I selected Manufacture Workspace > Clicked 3D > Clicked Pocket Clearing > Selected Tool: 3mm flat endmill > Disabled Coolant > Browsed all the panels > Clicked OK > Clicked Actions > Clicked Post Process. At this point you get a dialog box to setup for making the g-code.
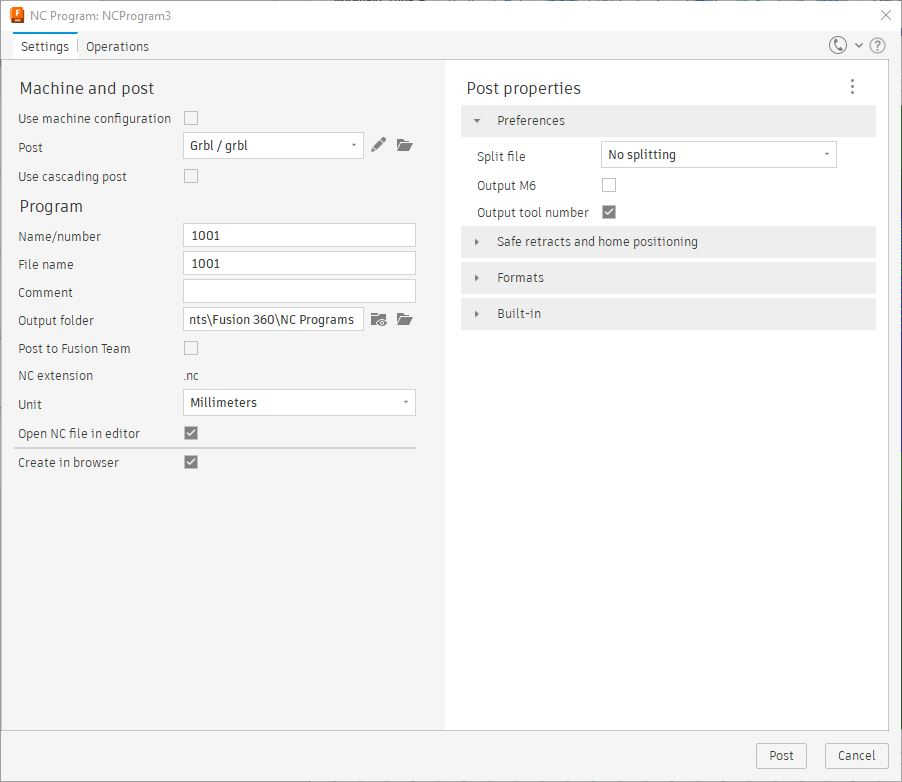
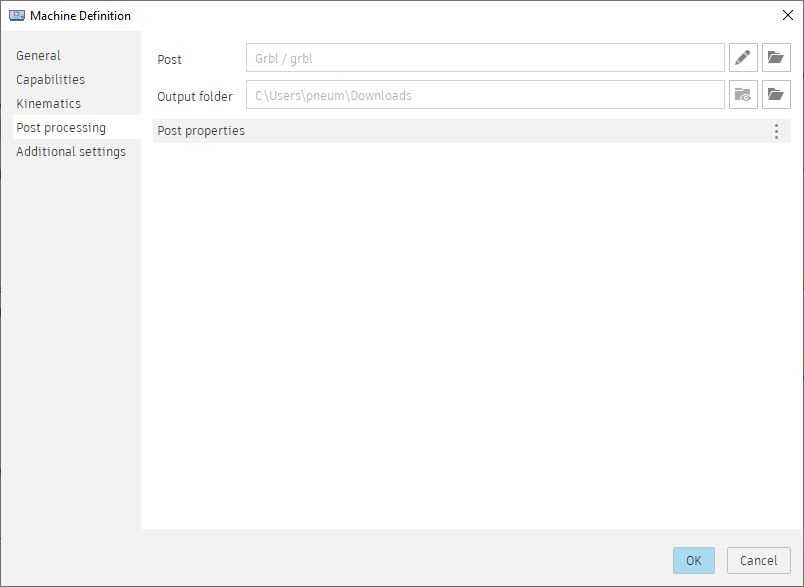
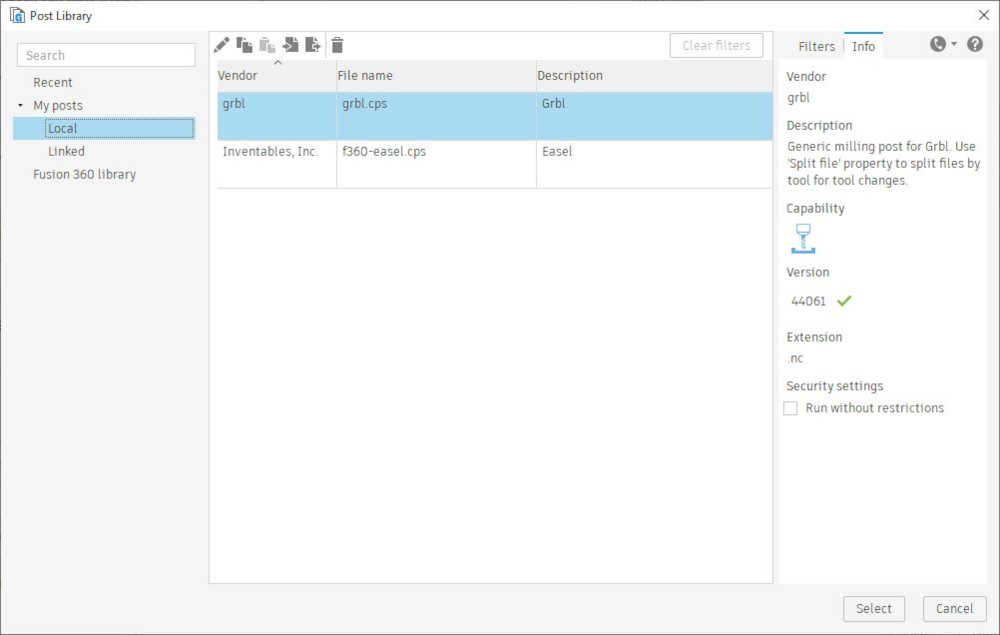
Notice in the Settings Tab, at the top, under “Machine and post”, you can check “Use machine configuration”; well I never did that, I just clicked the folder below and to the right and selected Grbl/grbl from the Post Library window that opened. It was already listed in Local under My posts because I associated it with the machines that I copied. I never selected a machine.
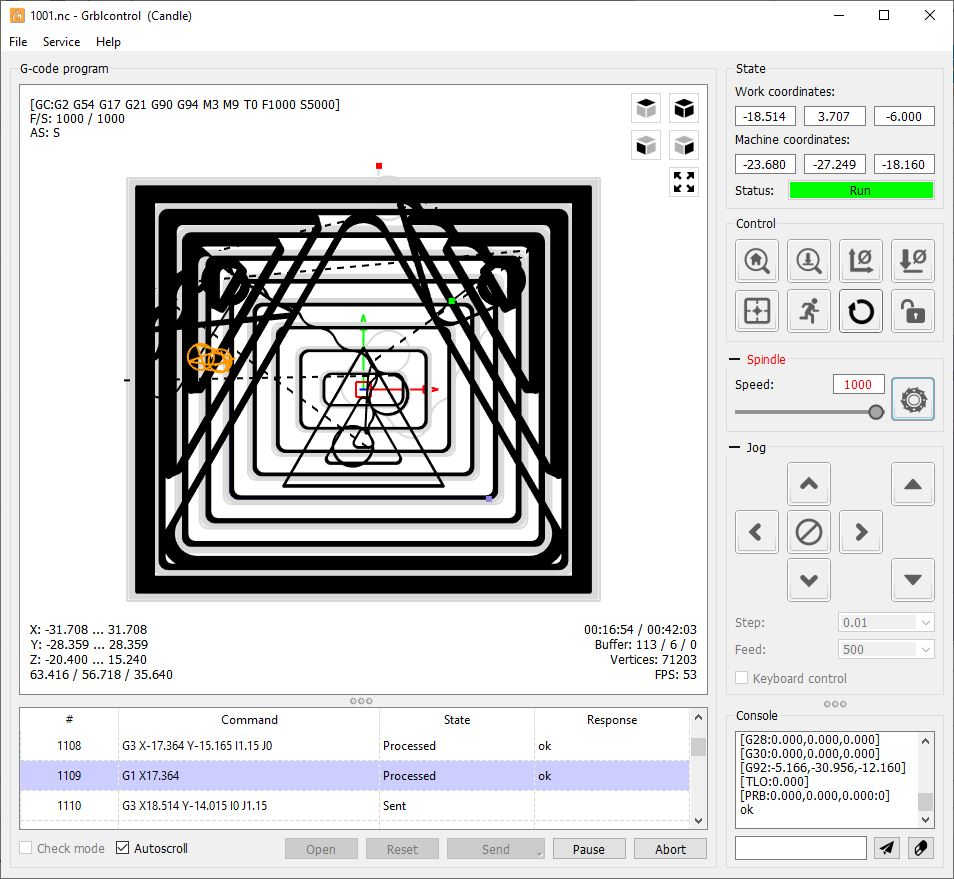
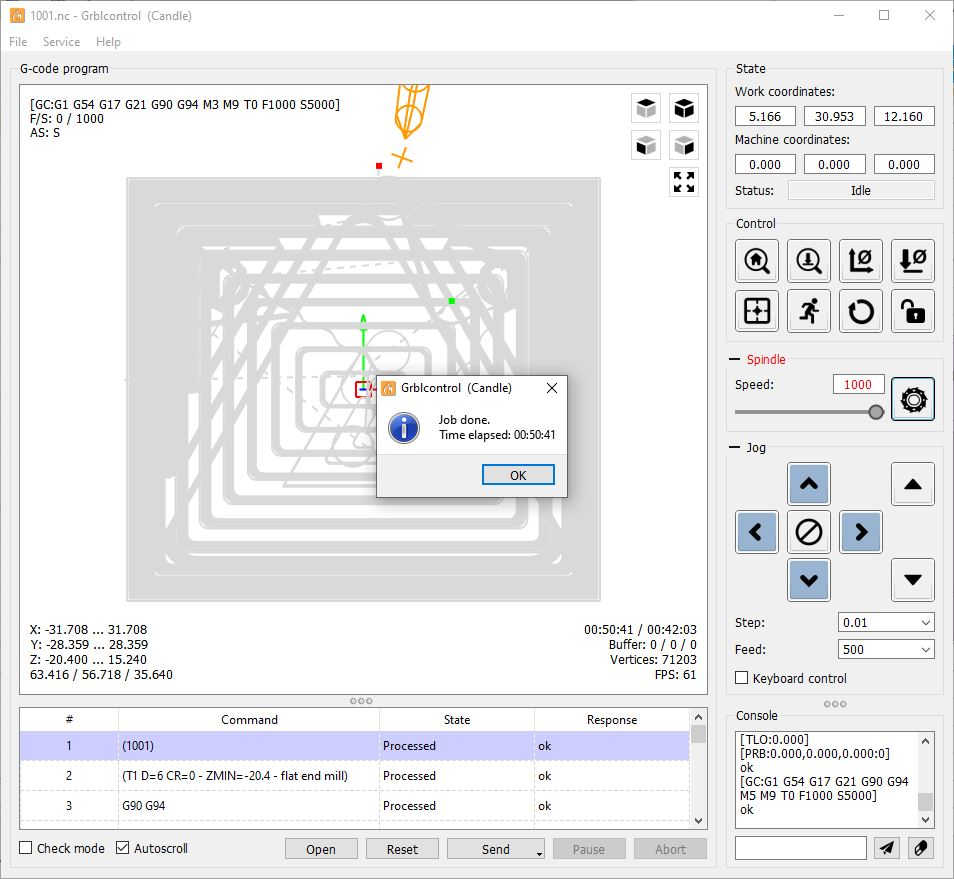
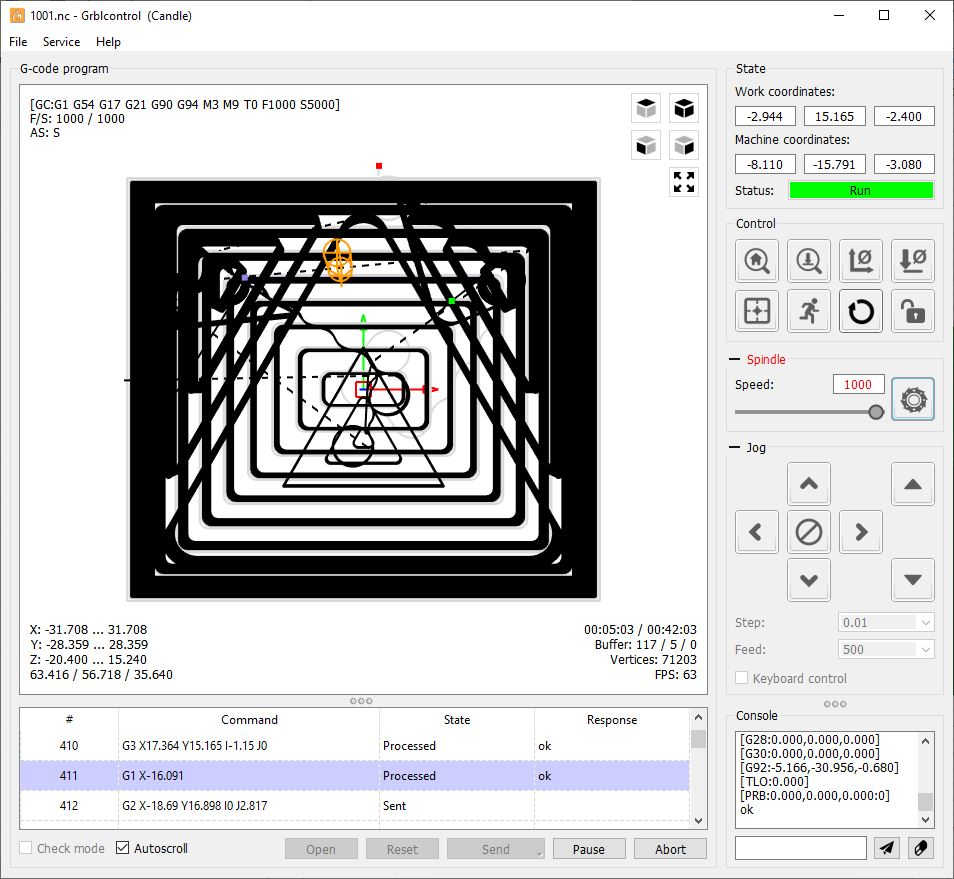
The g-code worked without an error. The only problem I had what the Z-axis motor went too high and ratched for a second right at the beginning. I figured that would throw off the actual height of the endmill, so I found the g-code that made it do that. It was line 14 Z15.24. I adjusted that to Z12.24 and that fixed the problem. By the way, I was cutting air through the debugging process until I figured it out. The whole pocket job went without a problem until the end. You will discover later that the endmill nicked the side of the mold right at the end of the job…the same line is at the end of the g-code too and I just discovered that while I was documenting “after the fact” :) Document as you go, but go back and document what you missed; you’ll find treasures.
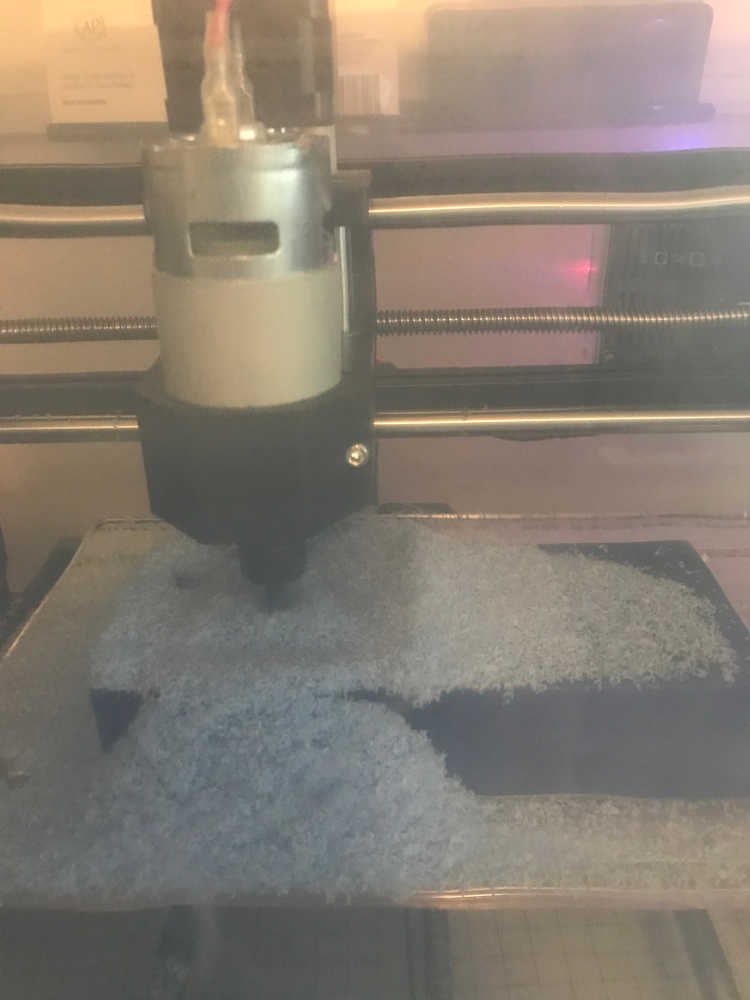
Now for the rest of the story! As I type, the machine is busy working on the finish of the mold. The roughing of the mold went well and was very exciting; it was my first you know?! At first, I vacuumed the chips as they were made, but then I decided to let them build up to keep them from flying everywhere. I think that was a good idea, but I could no longer see the progress. As long as it was moving and making more chips, I was happy.
So you are probably wanting some pictures, videos, etc. How shall I start? To begin with, I thought this was a flop. The 1/4” flat end mill was the only tool that would work, so I decided to go for it. As I was making tweaks to the height of the tool, I realized that I could raise the spindle motor a little higher. I used the caliper, and sure enough, I could raise it another 0.5 inch; just enough to fit the long endmill in with the collet. Oh, you should know, I stressed over dinner thinking the 3mm endmill was too long. Note to self: when you have troubles and perplexities, have dinner; you’ll figure it out! :)
My computer started flaking out with GIMP, so I stepped away. Didn’t want to ruin the progress :) It is amazing to watch the endmill whip around and barely miss the triangle in the center. It’s like watching Tron and the light cycles :)
Roughing job in progress:
Wax chips building up:
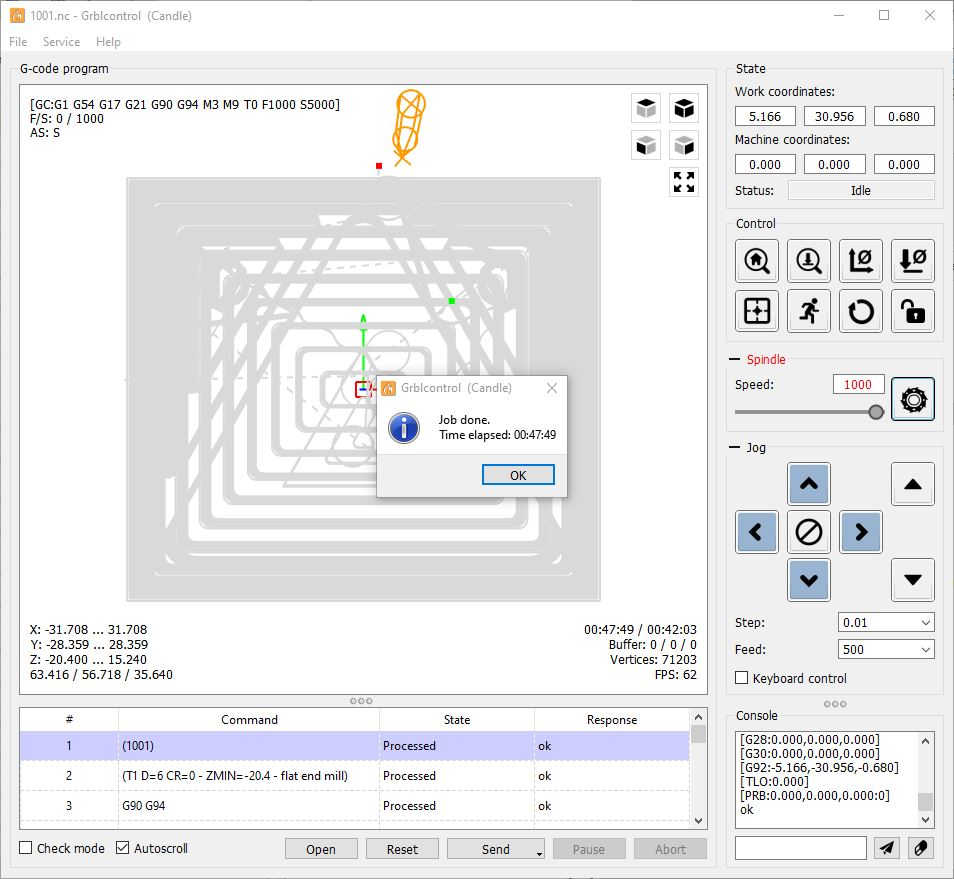
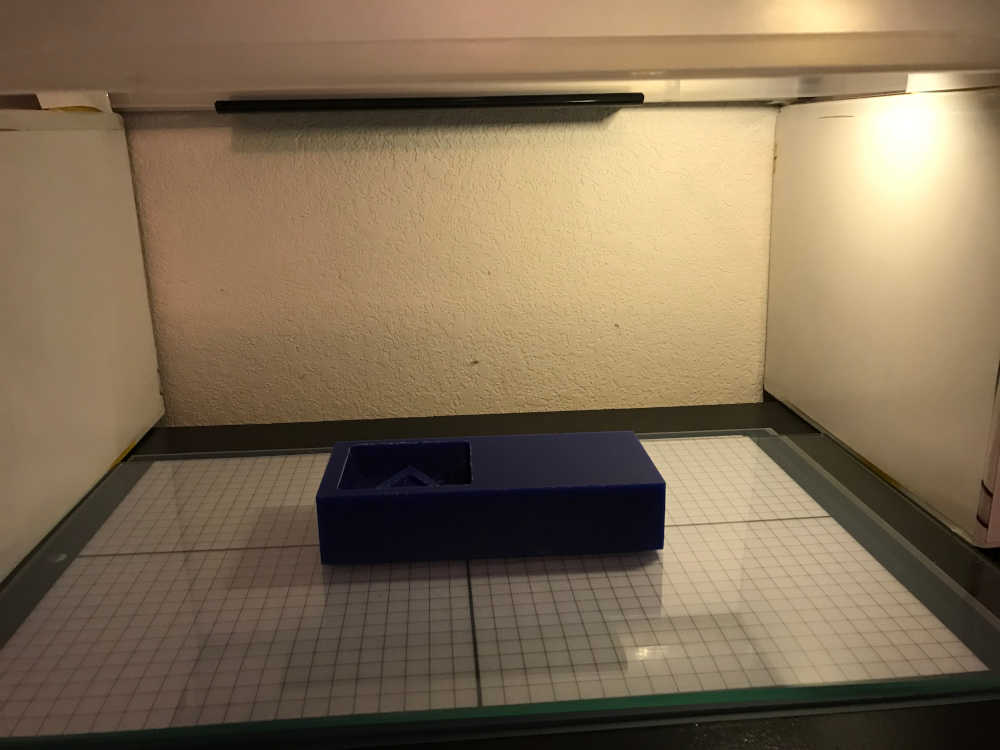
This is the roughing job finished:
The pile of wax chips:
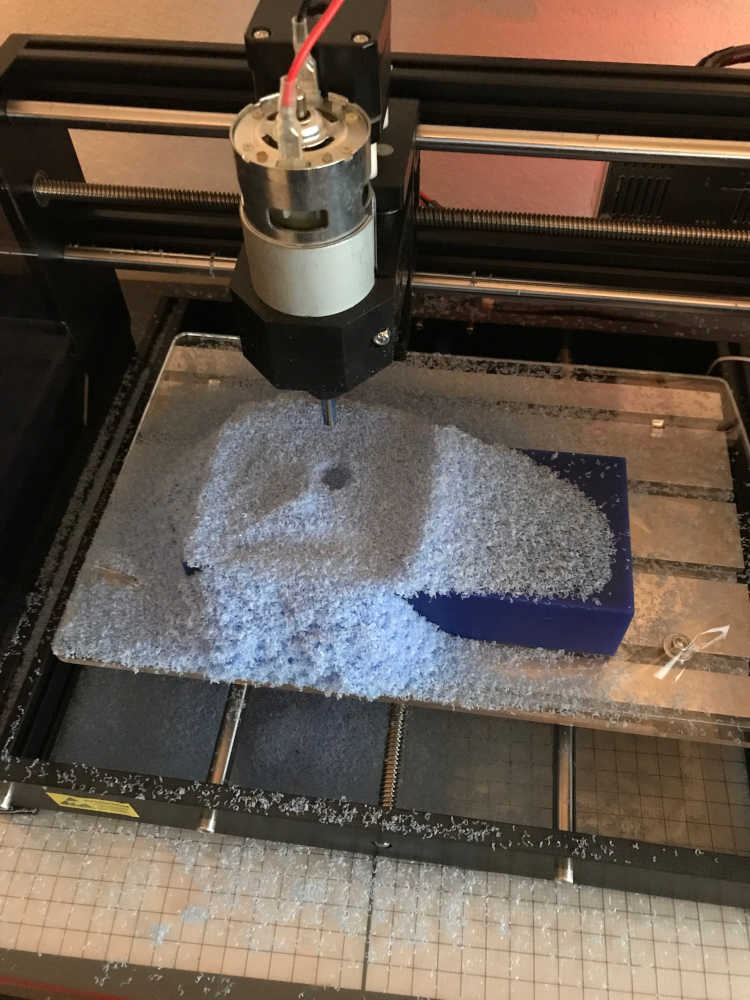
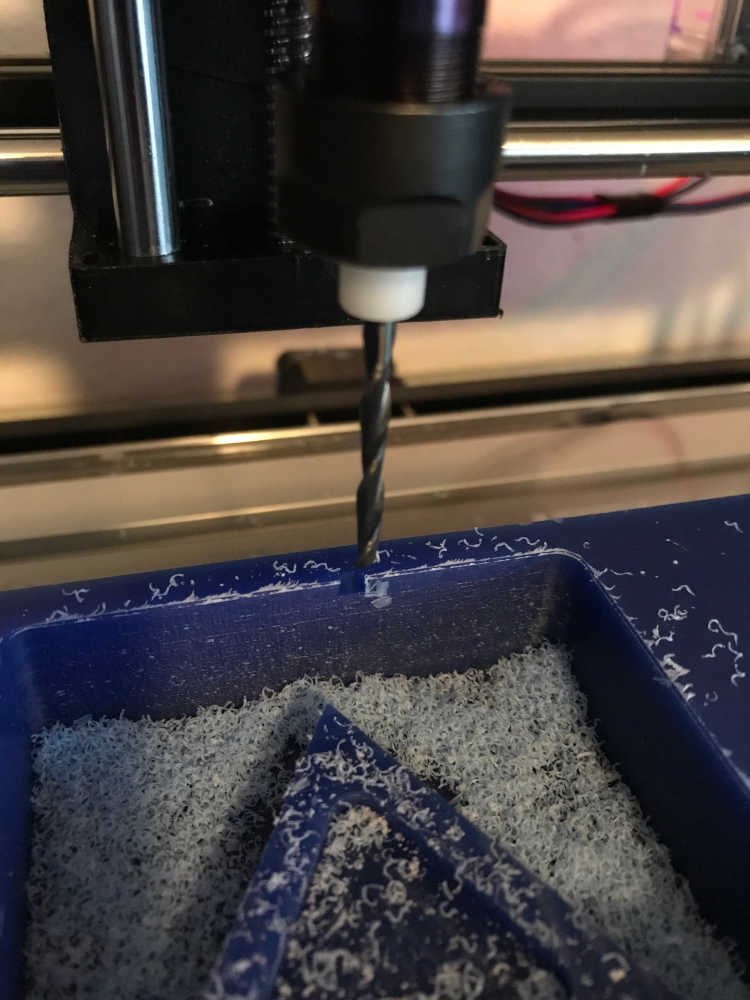
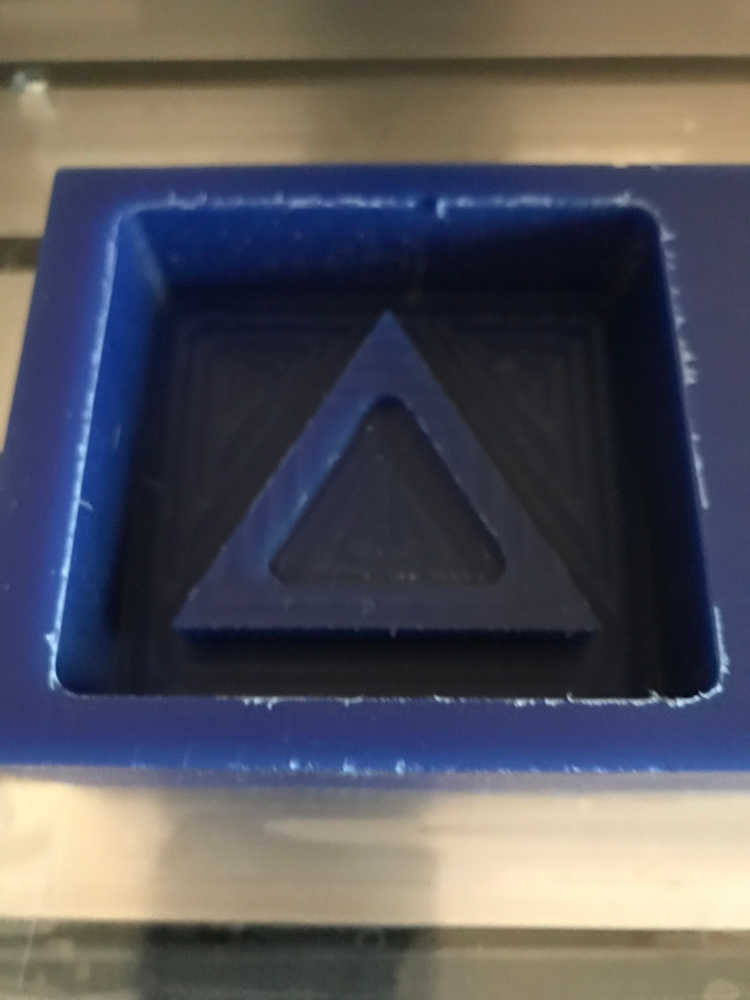
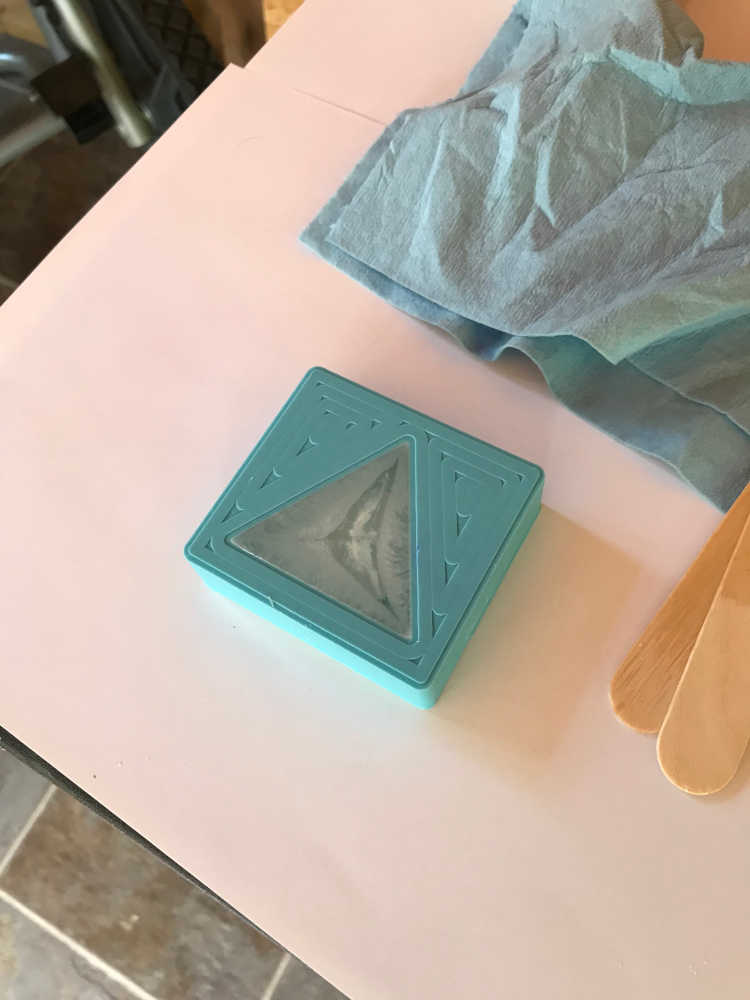
I cannot express the joy I had as I removed the wax chips from the job site :) Especially when I saw the triangles on the base. Whoa!
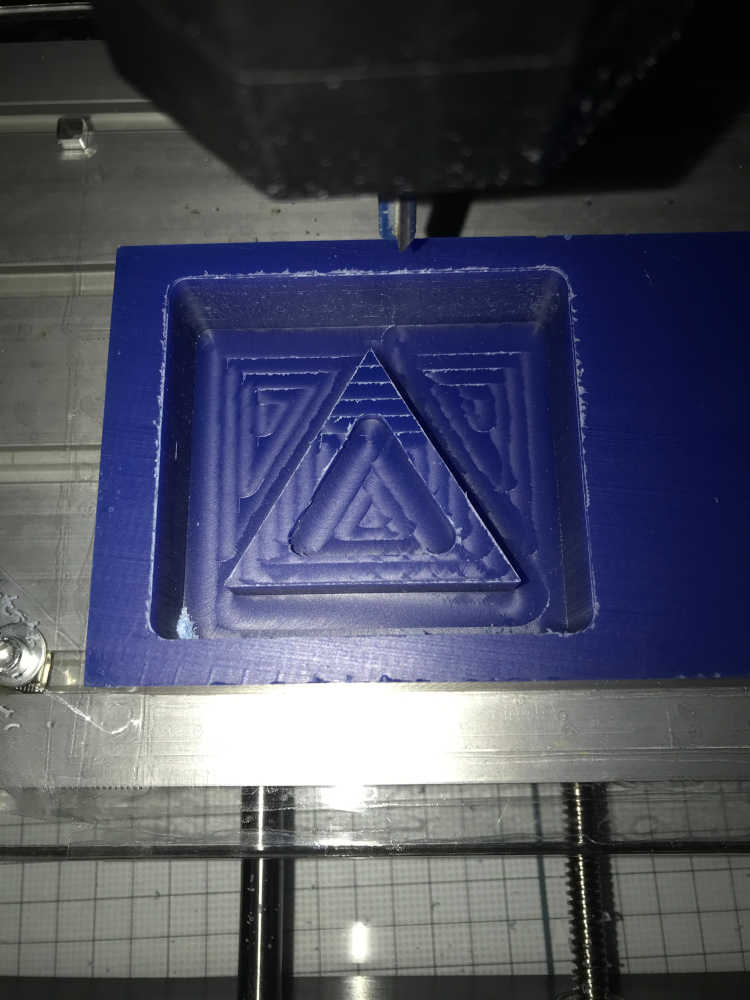
Okay, so right now, the 3mm endmill is knocking off the pieces the 6mm endmill left…smooooothing!!!! The finish has begun! This is so awesome! If you haven’t done this, you need to :) The inner triangle is getting a wax job…hehe. I can’t wait to see the center triangle emerge from the wax! Well… the bigger endmill wiped out the center triangle and the smaller endmill did not make one as I thought it would. With a smaller tool, I am looking forward to seeing the outcome in the next spiral.
Finishing job in progress:
Finishing job finished:
Wax from the finishing process:

The tool nicked the edge of the mold right as it was done. Not sure what caused that.
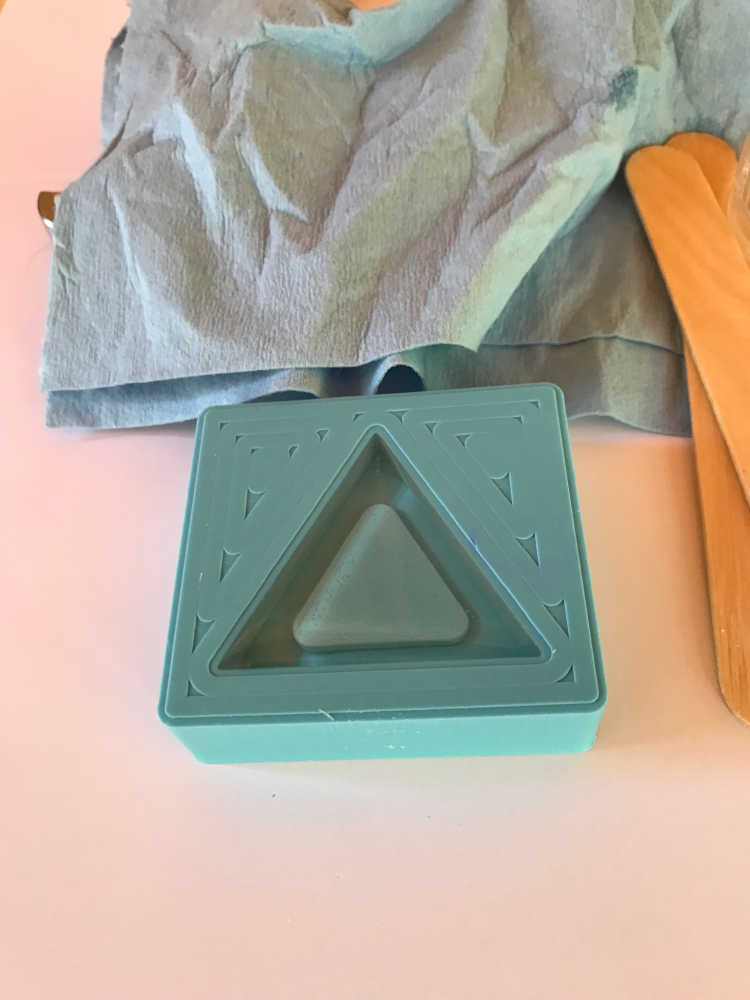
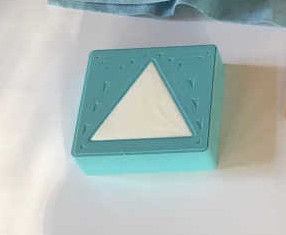
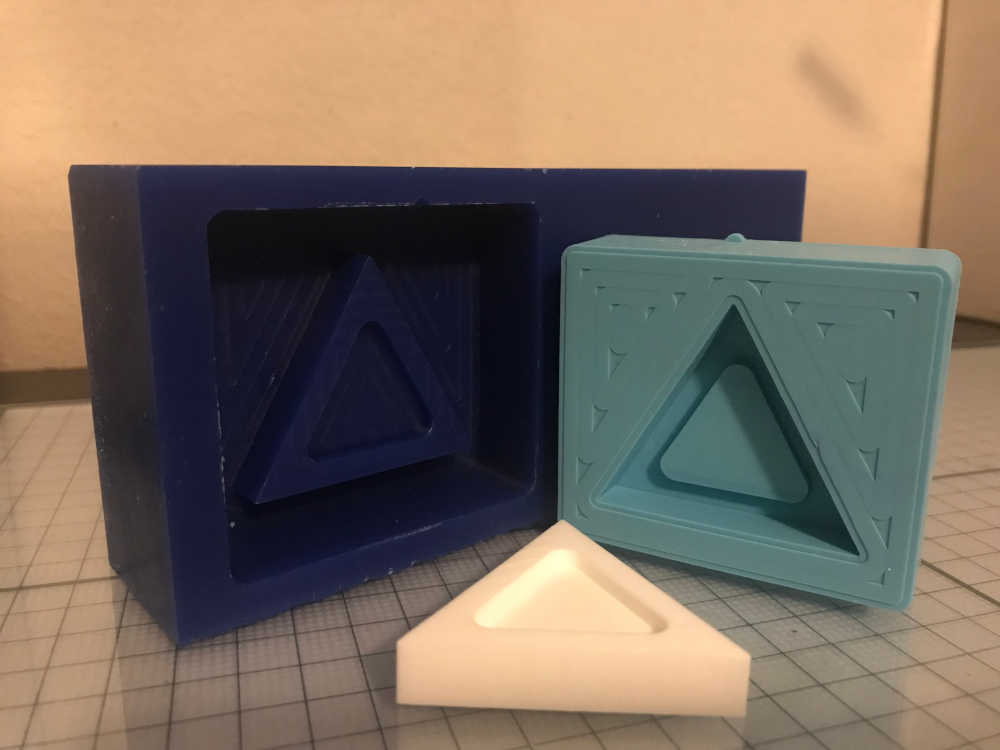
It turned out great! Time to make a mold!
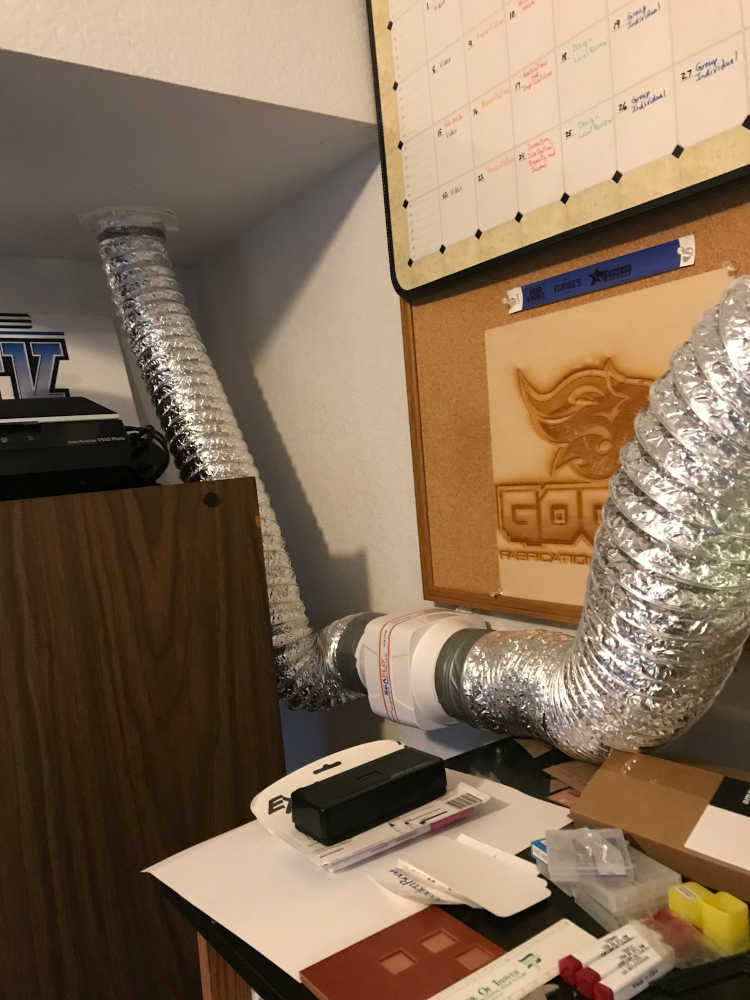
I turned my mini-mill station into a ventilated hood for a casting compartment:
Casting compartment exhaust port:

Exhaust System:
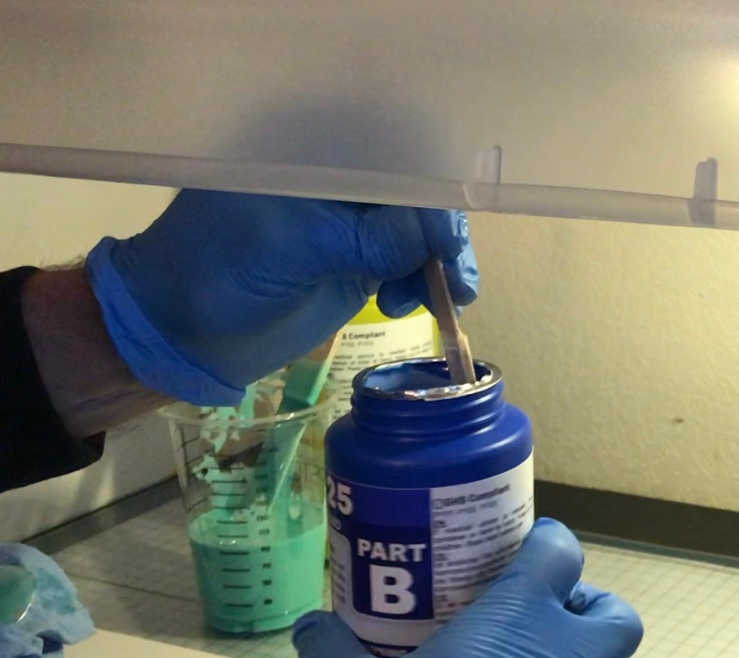
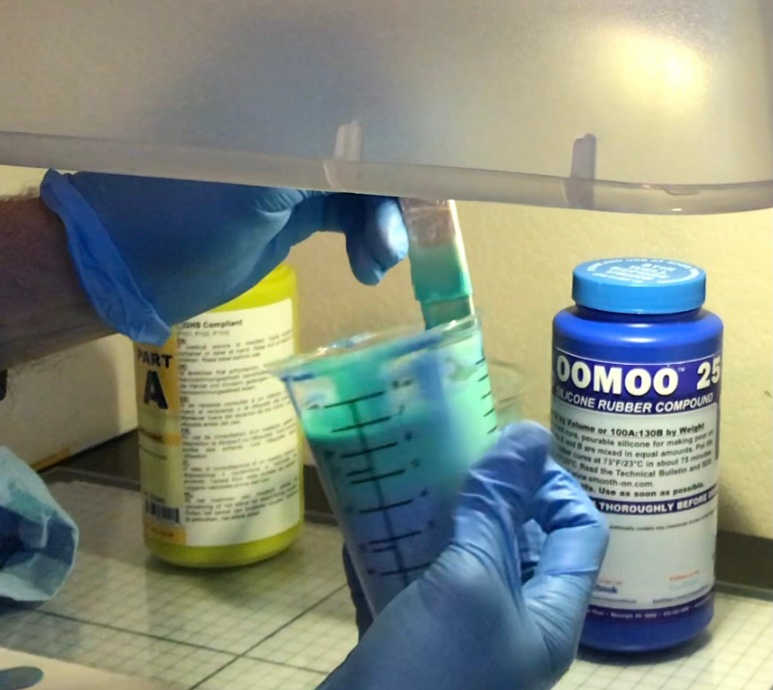
Getting ready to mix the OOMOO™ 25!
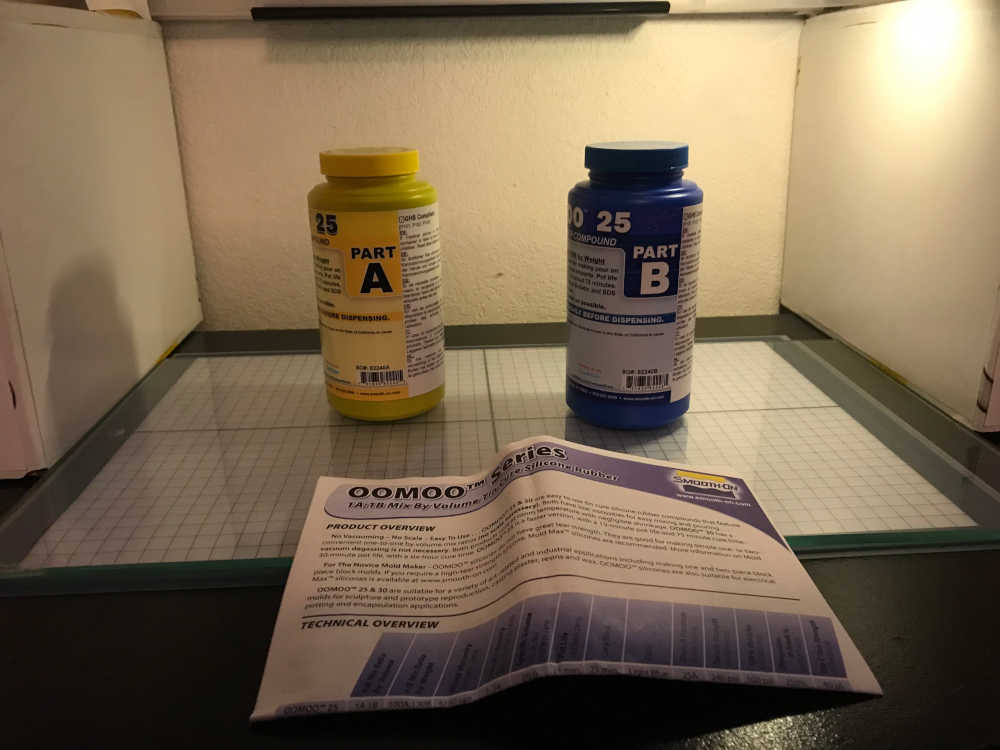
Part B was fine; Part A…not so fine :( Solid rubber! What a bummer! I ordered some directly from Smooth-On right away. Next spiral…
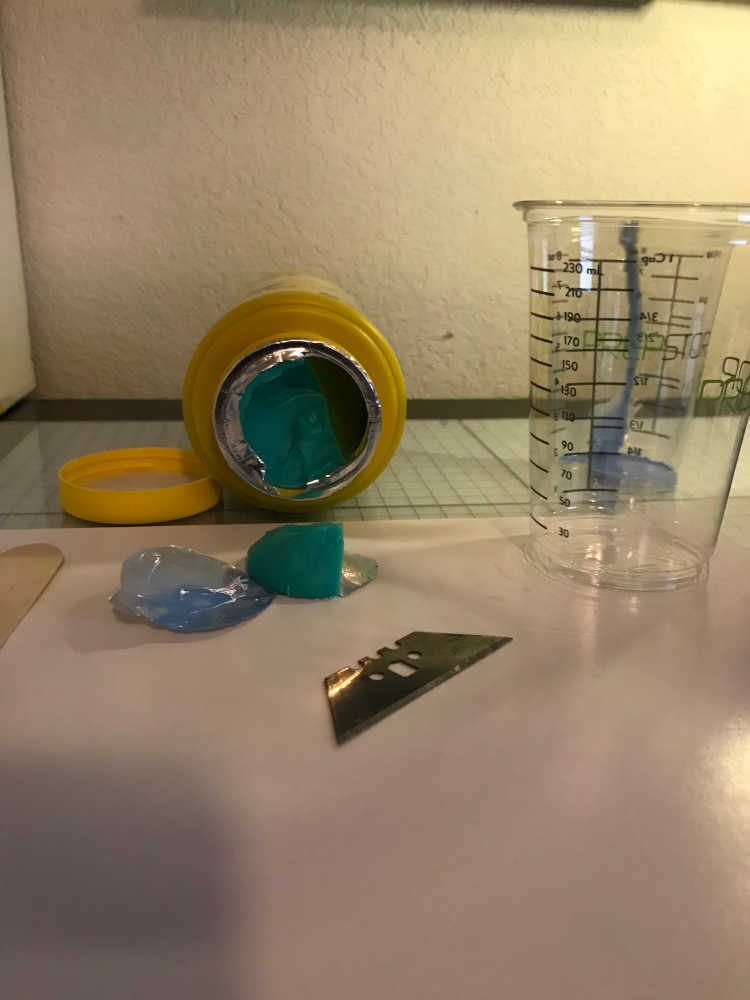
Another view of the crime scene:
Well that’s it for now! When the materials arrive, I will setup the casting compartment again. Lessons learned and dry run of the casting compartment complete :)
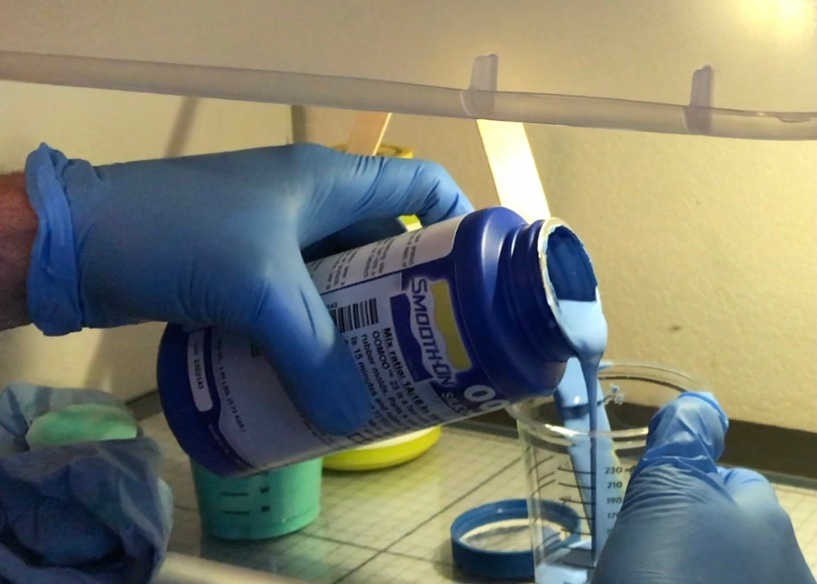
Continuing the spiral…I received my fresh batch of OOMOO™ and Smooth-Cast™ 305. Immediately I noticed that it has an expiration date on it; I didn’t notice that before (because the dates were covered with a sticker). The expired materials OOMOO™ 10/22 and Smooth-Cast™ 305 03/21. Now I know to purchase directly from Smooth-On.
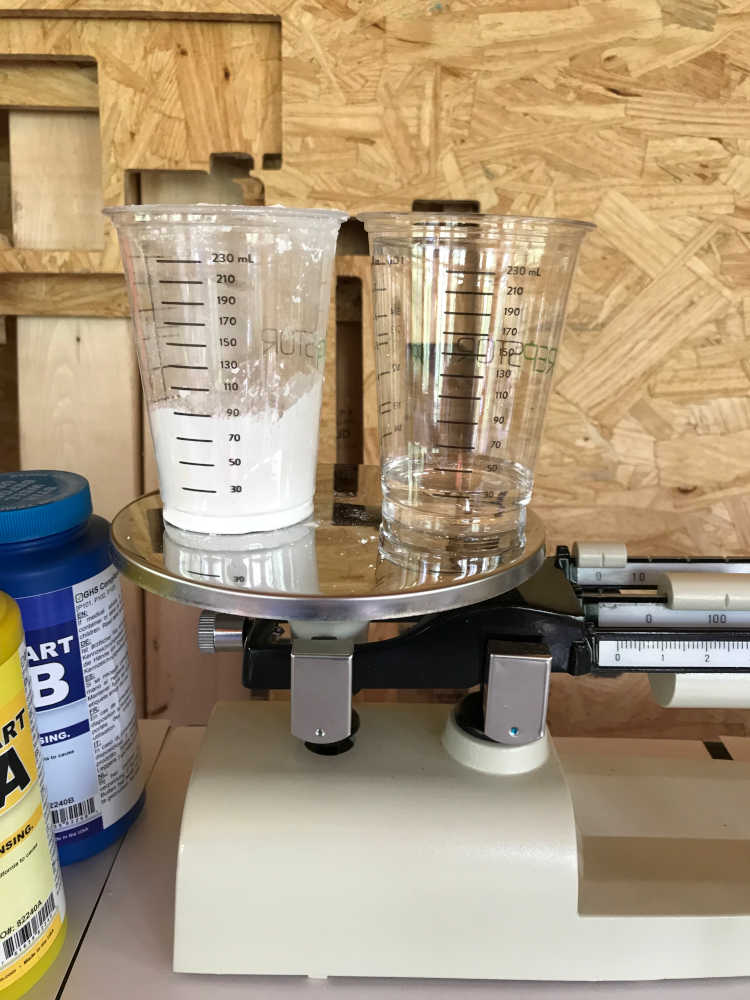
I worked with the OOMOO™ first since it has the lower potential for harm. I did this indoors in the casting compartment. I stirred Part A:
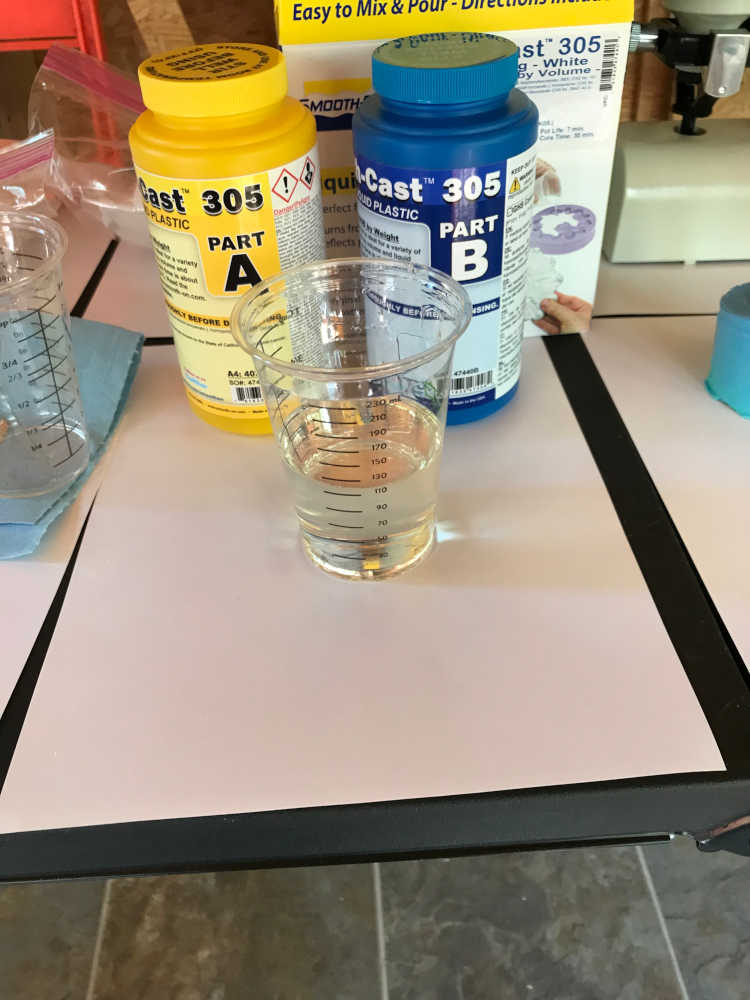
and poured 90 ml into a cup:
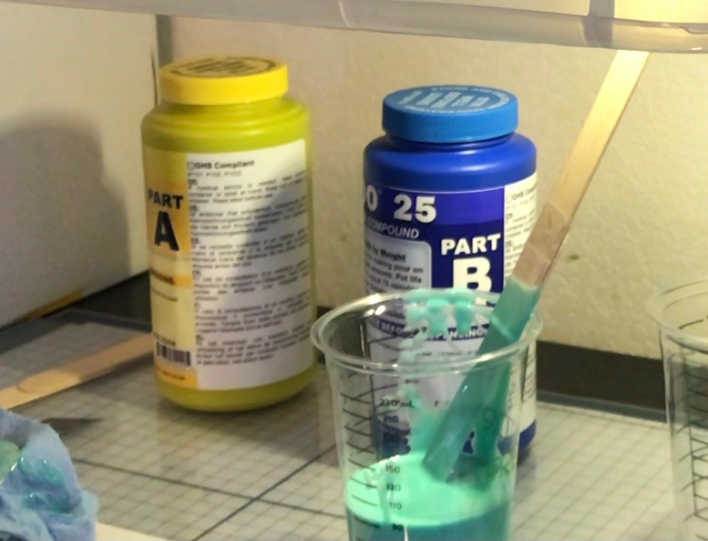
Then I stirred Part B:
and poured 90 ml into a cup:
Just so you know, I previously poured water in the wax mold to measure the amount needed to fill it; it was 90 ml, so I made a double sized batch to monitor what remained.
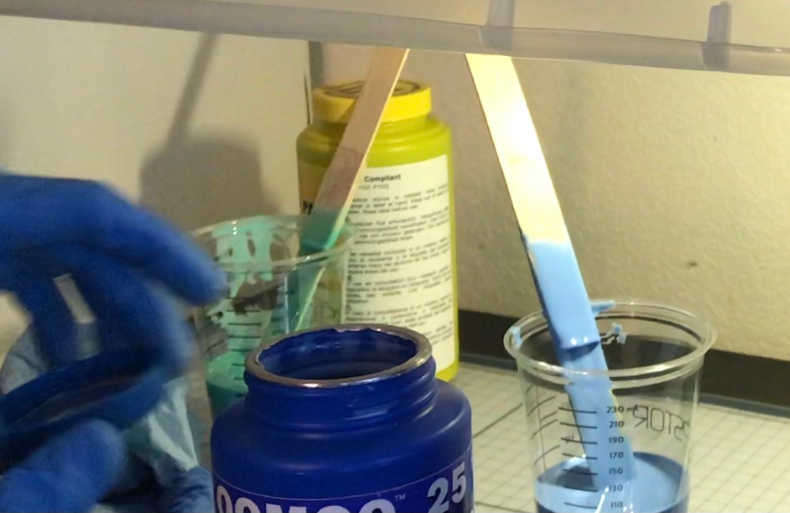
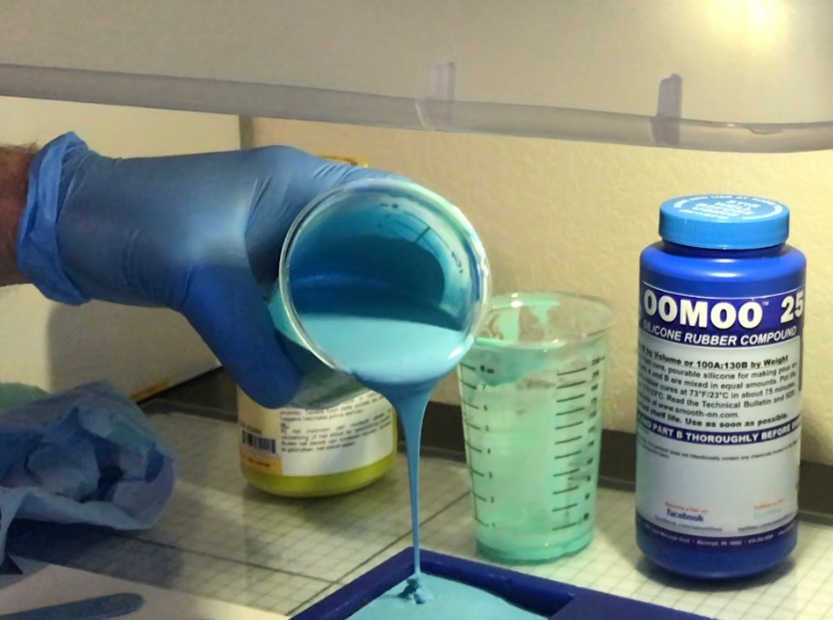
I poured Part A into Part B:
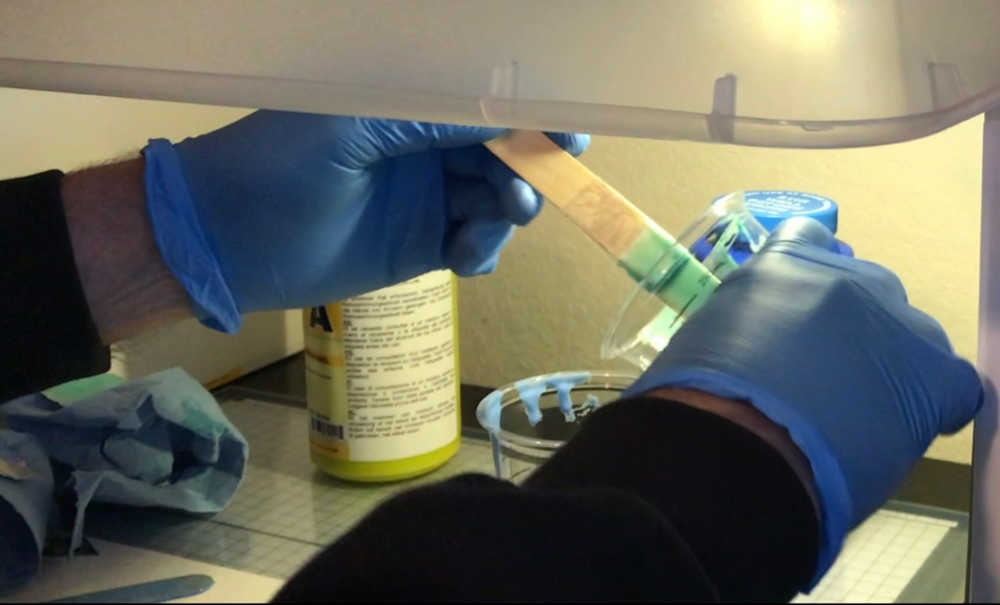
I stirred it for at least 3 minutes:
When I thought the color was right with few or no lines, it was time:

Poured it into the mold…very slowly, at the deepest spot, with a thin line:
This is the result of the tedious work. Notice the bumps…I was running out of time!:
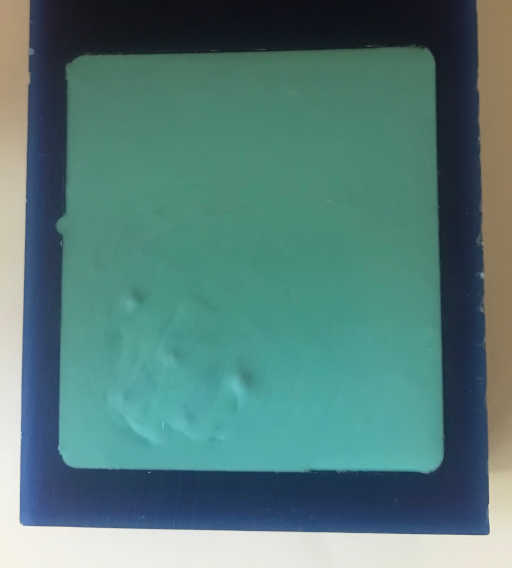
Per Smooth-On’s instructions, I should let it cure for 1.25 hours. I let it cure for 3.5 hours. This is the test sample result:
First, I am so glad I made a test sample to check the cure time! Second, I probably didn’t have the optimum conditions for making a batch of OOMOO™25. I made it in my basement and per the Prusa i3 MK3 3D printer temperature sensor, it was 66°F. Per Smooth-On, the environment should have been 73°F or higher. Thankfully, I moved it to a warmer room for curing, but it did take longer to cure. I let it sit over night in the warmth.
Demolding was exciting and nerve racking. I didn’t know what to expect. I will share the moment with you:
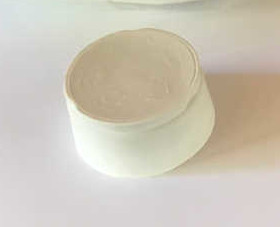
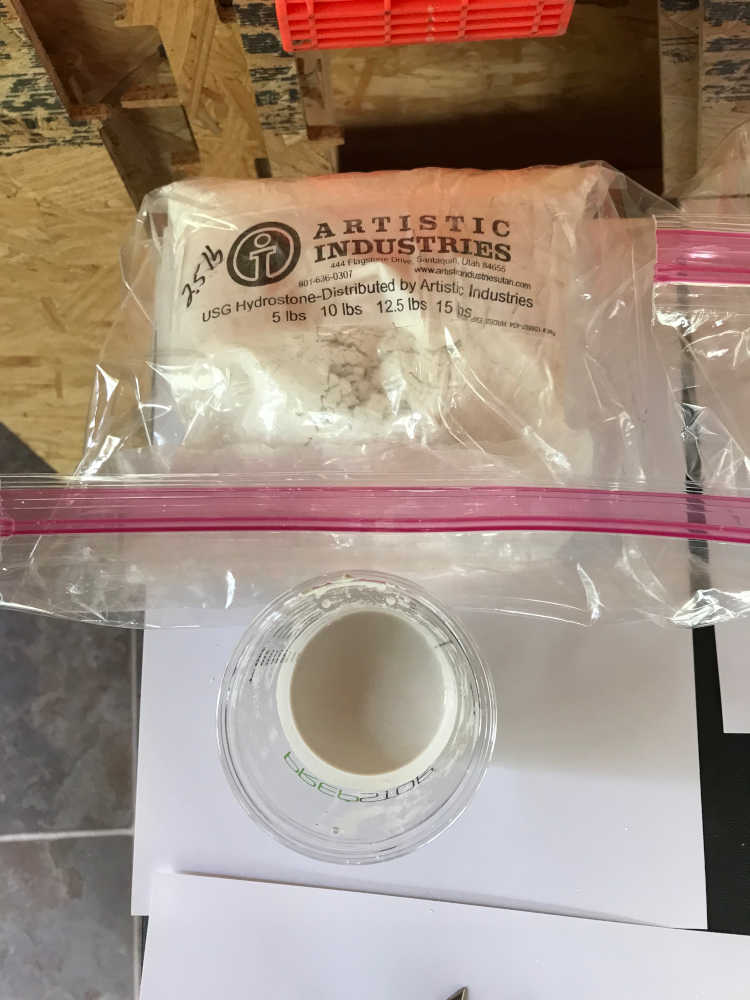
Had to do a few other things :) As I mentioned there are some rock solid castings…so here’s the setting:
Material:
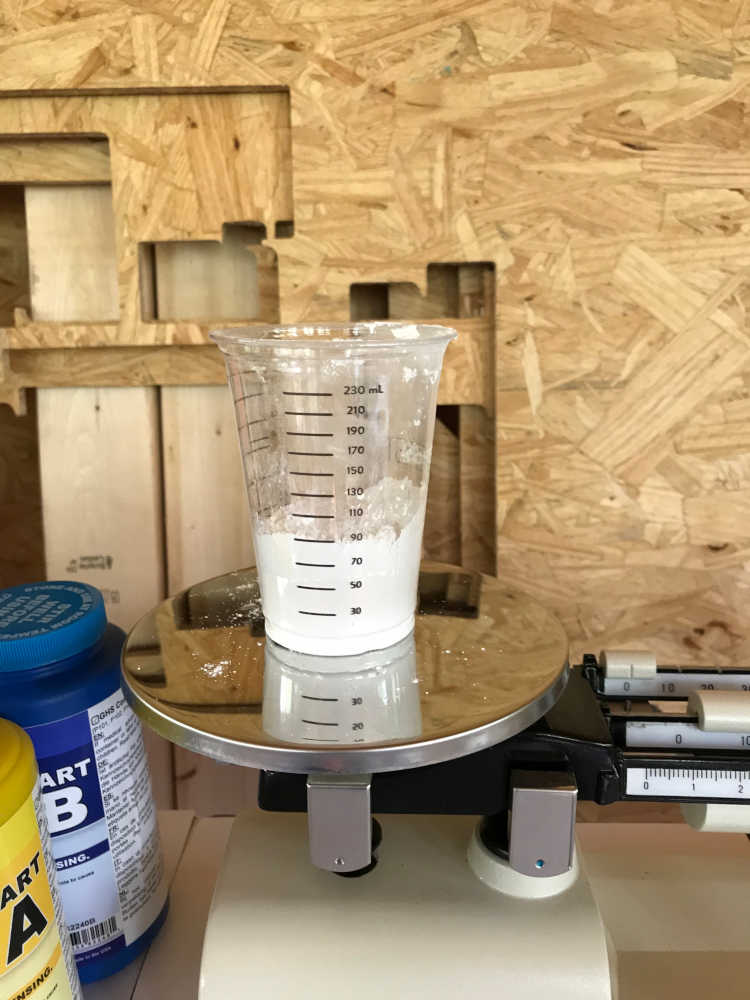
Measure it:

Just add water:

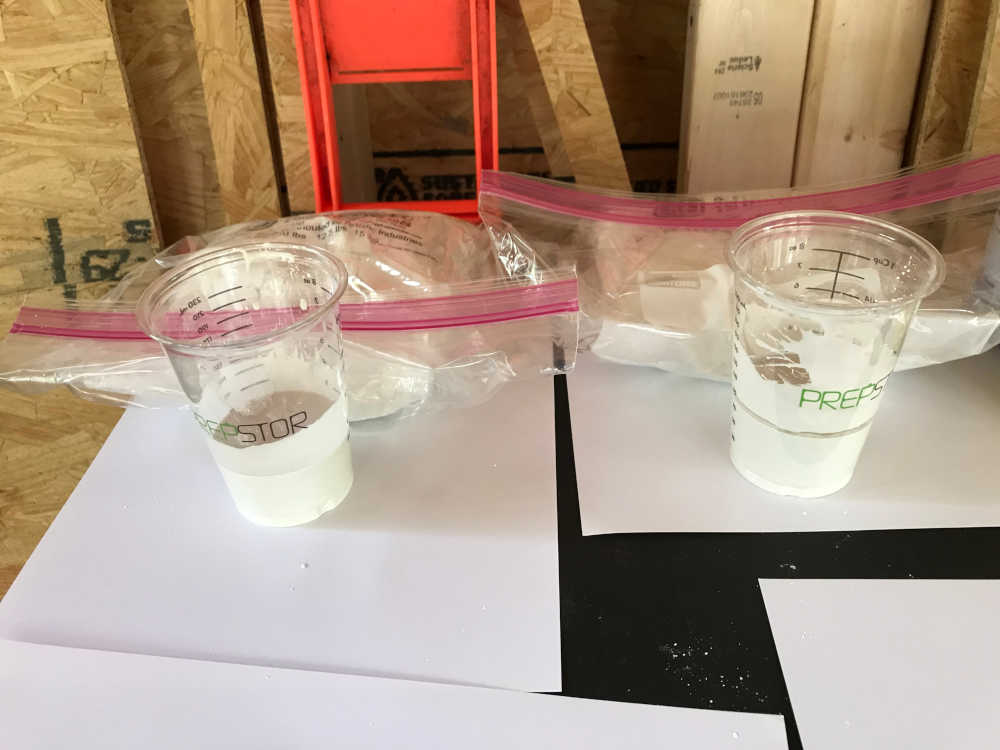
Here’s the mix:
I stirred it up a bit and left it in the cup… we’ll see what happens. We have another rock to make.
Material:
Measure it:
Just add water:
Here’s the mix:
I stirred it up a bit and left it in the cup… we’ll see what happens. The HydroCal was not as thick as the HydroStone…makes sense less water in the HydroStone.
Well let’s see:
Rock Solid!
Finally, I had to make hard plastic (urethane) to make an ornament for my Final Project. So here’s the setting:
Material:
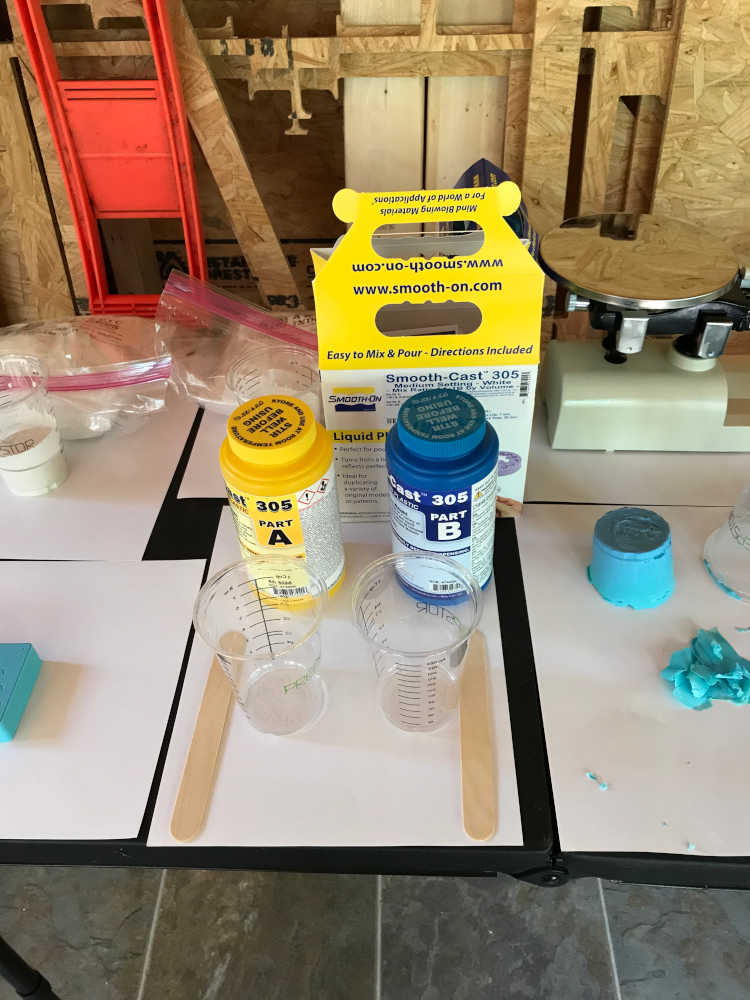
Measure it:
Here’s the mix:
Pour it in the mold:
Partially cured:
Completely cured:
Demolding the Smooth-Cast™ 305 part:
Included your design files and ‘hero shot’ of the mold and the final object:
- Included your design files and ‘hero shot’ of the mold and the final object:
What a Ride!
Comments About the Learning Experience
As you can see in the Hero Shot, the very bottom of the silicone rubber mold had rough spots. Thankfully the final part did not have any rough spots except for the machining pattern and it was very smooth to the touch.
The other learning opportunity was in the software. I did not fully understand the roughing and finishing process since I had difficulties with Mods. It seemed to hang and not complete the calculating, so I abandoned that software and used Fusion 360 and verified with the other applications as you read above. In the next spiral, I will do better with Mods since Professor Neil demonstrates it so well.
All in all, I learned a lot from this learning experience and I was able to make a mold and cast from it. Additionally, I obtained experience with different types of molding and casting materials.
This is a continuation of the Molding and Casting week in Fab Academy 2024
Documented how you designed your 3D mold and created your rough and finish toolpaths for machining, including machine settings:
- Documented how you designed your 3D mold and created your rough and finish toolpaths for machining, including machine settings:
I want to design a compass-like device similar to the previous mold, but with a spherical shape and a chamfer.
Captain Jack Sparrow’s compass has intrigued me and I found one to 3D print.

This is how it looks on Thingiverse.

I knew the top dome would not look nearly as good as a dome cast in a mold. I printed the top dome just to obtain the parameters, but also to see what it would look like.


As you can see it looks 3D printed and would take a lot to make it look glassy and shiny. So I will take this opportunity to learn from my mistakes and make this better.
So here is the plan:
-
I will 3D print most of the components from the 3D model I found on Thingiverse.
-
I will 3D model the mold necessary to cast the mold necessary to cast the semisphere for the compass top.
-
Dimensions: (measured) diameter 47.6 mm; height 17.5 mm (calculated sphere) diameter 50.875 mm; height 16.95 mm
-
Up to this point I have modelled an estimated semisphere in Fusion 360 with the following steps coming soon.
Before you read through the steps, here is a model you can look at to see what the results are:
The first step was to model the actual part that I wanted to make; the semisphere or dome that goes on top of the compass. This was a real exploratory experience since I have never done this and never learned how. So common sense was to make a solid sphere and then another one 3mm in diameter smaller. I chose 40mm and 43mm and then did a combine operation to cut out the center. Well…that didn’t work, so I searched for help and found some from Justin Geis @FusionTutorials. This Fusion 360 Shell Tool Tutorial - Creating Hollow Objects with the Shell Tool! was just what I needed.
So I made a sphere and used the Shell tool. So much easier than I imagined.

The next step was to cut away what I didn’t need, so I made a sketch of a rectangle at the origin and made it 50mm square.

Then I did an extrude cut to remove the upper portion of the sphere.

Now I have a hemisphere, but I need an even smaller section. So I selected the sketch again and extruded/cut the rest of the unwanted hemisphere making my semisphere. By the way, I got made that term up after inspiration from the Off-Topic Mattermost Channel by @Nicolas.Decoster and the study of Semi-Primes :)

And this is my semisphere.

I was pretty excited at this point because I just made something in a modelling environment that I had in my mind and in my hand. So Cool! Now the fun begins…new territory, so I will need a guide. I did a search for mold making with Fusion 360 and found some great help from Lars Christensen on his YouTube Channel. This How To Make a Casting Mold — Fusion 360 Tutorial #LarsLive 105 was just what I needed.
It took me several iterations, but I learned more each time. I will spare you the details, but I will show you a video of my process.
Basically, you Insert Into a Current Design which is a freshly made design. Make sure the units are correct. I was using millimeters. This allows the linked object to be changed and reflected into the new design. From there, a sketch is made and a Push/Pull followed by a Combine/Cut. This is first done to the desired part; my semisphere. Then the same process is done to the subsequent parts until there is a mold that make a mold that makes the part.
Now I did this with the estimated semisphere that I showed above, but this was not exact; this led to another iteration that was pretty cool. I Inserted the STL provided from the Thingiverse site and obtained the exact parameters.

I made a rectangular sketch that was tangent to the bottom of the semisphere to set the bottom, then I made a circular sketch on the vertical plane to approximate the diameter of the sphere that the semisphere was made from.

This not only allowed me to find the diameter of the original sphere, but enabled me to measure the height of the semisphere. With this information, I was able to design the (almost) exact semisphere for Captain Jack Sparrow’s compass. Then I went on to make the molds you saw in the video above. If you would like more detail, just let me know :)
Design Files and Source Code: Eagle, GIMP, Arduino, G-Code