17. Applications and Implications
Assignment
Propose a final project masterpiece that integrates the range of units covered, answering:
- What will it do?
- Who’s done what beforehand?
- What will you design?
- What materials and components will be used?
- Where will come from?
- How much will they cost?
- What parts and systems will be made?
- What processes will be used?
- What questions need to be answered?
- How will it be evaluated?
Your project should incorporate:
- 2D and 3D design
- additive and subtractive fabrication processes
- electronics design and production
- embedded microcontroller interfacing and programming
- system integration and packaging
Where possible, you should make rather than buy the parts of your project
Projects can be separate or joint, but need to show individual mastery of the skills, and be independently operable
What will it do?
The idea for my final project is to develop a cart for smart harvesting, it will incorporate a scale at the base and allow me to keep track of the total weight of harvested products, it will have an LCD screen that will show that information and also buttons on the handle to carry a count of the harvested points and also other options such as tare the scale according to the container that we decide to use, this information will also be sent via bluetooth to a cellphone to view the information, according to Neil’s advice this project will be a canvas that more later will be possible to work in a more advanced way (changing the bluetooth communication for something with a higher range and uploading the data to the cloud).
Who’s done what beforehand?
Well at the beginning I thought that my idea was innovative and nobody had implemented it, but doing a deep search I found this Carry robot and also with a fabacademy project that is being developed this year, it is necessary to specify that both robots stand out for reducing the effort that the person performs when harvesting, in my case I did not consider implementing a displacement system because the product that I plan to harvest will be of reduced weight and size, but I still find very interesting options that could easily be integrated into my project.


What will you design?
I plan to design the cart frame, button handle, PCB board and covers for all the electronics and also for the LCD screen, that would be all hardware related. For the software part I will develop a code to execute all the functions that I plan and I will also elaborate a cellphone app to visualize a GUI.
What materials and components will be used?
For the frame I will use 18mm thick wooden plates, pieces such as the handle and the covers will be printed in ABS plastic (to guarantee certain resistance to weathering), the covers will be cut in acrylic to visualize the contents of the interior and also protect the LCD screen from water splash or rain, for the elaboration of the PCB I will use the milling machine and most of the electronic components available in the fablab.
Where will come from?
All the components come from the local market, this due to the situation we are going through due to COVID-19 and other political factors.
How much will they cost?
| Material | Cost (USD) |
|---|---|
| Atmega328au | 3.5$ |
| Smd components (resistors, capacitors, oscillator, etc) | 4$ |
| Bluetooth HC-05 | 5$ |
| LCD display | 5$ |
| Momentary 16mm Push Button Switch DS-212 | 5$ |
| 20kg Load cell | 8$ |
| PCB board | 1$ |
| Wood sheet 18mm | 47$ |
| Wheels | 27$ |
| 1kg of ABS | 18$ |
| Clear acrylic sheet 5mm | 12$ |
| Aluminum rod | 8$ |
| Wood screws | 1$ |
| Bolts and nuts | 1$ |
| Wood glue | 4$ |
| Zip ties | 3$ |
| Wires | 2$ |
| 18650 cell | 8$ |
| 18650 charger | 5$ |
| TOTAL BALANCE | 167.50$ |
What parts and systems will be made?
In theory, everything will be made using the machines, tools and components of the laboratory except for the tires and electronic components such as the LCD screen and the load cell. In the next point I will detail it more.
What processes will be used?
| Process | Task |
|---|---|
| COMPUTER CONTROLLED CUTTING | cut acrylic covers |
| 3D SCANNING AND PRINTING | make a handle with buttons and covers for the electronics and LCD screen |
| ELECTRONICS DESIGN | develop the pcb that will be in charge of controlling our entire project |
| COMPUTER CONTROLLED MACHINING | cut the entire frame for the chart |
| EMBEDDED PROGRAMMING | program the pcb to work properly and run everything planned |
| INPUT DEVICES | interpret load cell values |
| OUTPUT DEVICES | display all necessary information on the LCD screen |
| NETWORKING AND COMMUNICATIONS | establish correctly the bluetooth communication between the chart and the cell phone |
| INTERFACE AND APPLICATION PROGRAMMING | develop the graphical user interface that we will use on the cell phone |
What questions need to be answered?
I believe that this project has a lot of potential, I am just laying the foundations so that later on you can work in a more professional way, it is necessary to bear in mind that this is a prototype that will be implemented with the help of digital manufacturing technology. First we must identify the main function of my chart, which is to help us when harvesting by obtaining an exact value of the amount of products harvested according to weight thus obtaining the total yield.
Since Neil stressed the difficulty of the project, said that for the moment we should work with a simple wireless communication means (bluetooth) and not complicate ourselves with the use of a GPS, that is why the main part of the project is to establish the correct weight sensing and also implement a tally counter that will be evidence of the amount of harvested points and by performing a simple mathematical operation we will be able to calculate the yield of that harvested area.
So the 2 questions that should be answered are:
- How to calculate crop productivity?
- How to correctly weight a product? What is the maximum weight?
How will it be evaluated?
What is crop productivity estimation?
Various methods have been developed for quantifying production and productivity of agricultural systems at research plot level and also for agricultural statistics at regional and national level. However, as agricultural production systems are changing to address new challenges, for example, climate smart agricultural practices, the yield estimation methods developed and tested for a particular production system may not adequately reflect the yield for new production systems. For example, the standard crop cut method using sampling frames may create significant bias and error if applied to crops planted in raised beds in row geometry.
Whole plot harvest metod (idea that I plan to apply)
Harvesting the entire field to determine crop yield is normally done in trial plots, excluding one or more boundary lines that may not reflect the tested treatment due to boundary effects. This method can be employed in experimental or demonstration plots. It can also be used to estimate yield from small-scale farmers’ field if farmers are willing to cooperate but is too costly for larger samples of farmers. The complete harvest method is considered the most accurate and often used as a standard for comparing effectiveness and accuracy of other methods. Crops that have a defined maturity date, such as cereals or legumes with a determinate growth habit, can be harvested in a single operation whereas crops with staggered maturity such as banana, cassava and legumes or with an indeterminate growth habit like common bean, cowpea and mungbean require multiple harvests per plot. In many cases, a farmer gathers all his/her produces from his/her land in one place, thresh there and take home after weighing. In such cases, it is easy to estimate the yield by dividing the total yield by the total area that farmers own.
How to correctly weight a product
The working principle of this project is easy, before going into details, first, we have to calibrate this system for measuring the correct weight. When the user will power it up the system will automatically start calibrating (depending on the weight of the wooden plank). And if the user wants to calibrate it manually they can press a push button on the handle.
For calibration, wait for LCD indication for putting a plastic tray over the load cell(located at the base of the chart) and wait. After some seconds the calibration process will be finished. After calibration user may put any weight under 20kg (due to the use we estimate for berries) over the load cell and can get the value over LCD in kilograms.
My implementation plan
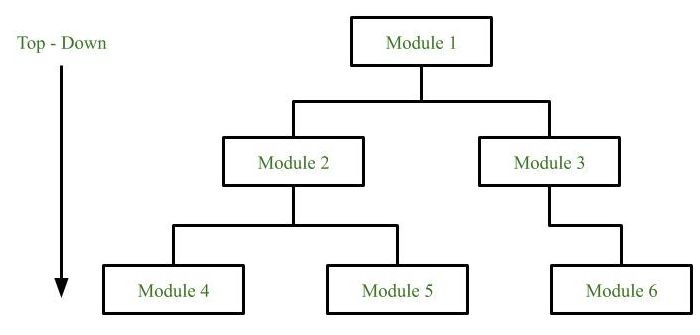
Top-down approach
Each system is divided into several subsystems and components. Each of the subsystem is further divided into set of subsystems and components. This process of division facilitates in forming a system hierarchy structure. The complete software system is considered as a single entity and in relation to the characteristics, the system is split into sub-system and component. The same is done with each of the sub-system. This process is continued until the lowest level of the system is reached. The design is started initially by defining the system as a whole and then keeps on adding definitions of the subsystems and components. When all the definitions are combined together, it turns out to be a complete system.
The main advantage of top down approach is that its strong focus on requirements helps to make a design responsive according to its requirements. You can check out my Final project page for more information.