2. Project management
Tasks
- Build a personal site describing you and your final project.
- Upload it to the class archive.
- Work through a git tutorial.
Understanding GIT
SVN uses a single centralized repository to function as a communications hub for developers; In addition, when collaborating, change sets are passed between the developer’s working copies and the central repository. Git’s distributed collaboration model is completely different, providing each developer with their own copy of the repository, with their own local history and branch structure. Users generally need to share a series of commits, rather than a single set of changes. Instead of committing a changeset from a working copy to the central repository, Git allows you to share entire branches between repositories.
The git remote command is a part of a larger system that takes care of synchronizing changes. The records inscribed using the git remote command are used in conjunction with the git fetch, git push, and git pull commands. All of these commands have their own synchronization responsibilities, which can be found at the corresponding links.
Thanks to Learn Git with Bitbucket Cloud I was able to understand the basic commands and how they work:
Git remote
The git remote command allows you to create, view, and delete connections to other repositories. Remote connections are more like bookmarks than direct links to other repositories. Instead of providing real-time access to another repository, they function as handy names that can be used to refer to a not-so-simple URL.

-v
Shows URLs of remote repositories when listing your current remote connections. By default, listing remote repositories only shows you their shortnames (e.g. “origin”). Using the “-v” option, you will also see the remote’s URLs in listings.
add <shortname> <url>
Creates a new connection to a remote repository. The “shortname” you provide can later be used instead of the URL when referencing the remote. A typical default shortname is “origin”: this is used for the remote which your local repository was cloned from.
remove <name>
Disconnects the remote from the local repository. Note that this will have no effect on the actual remote repository (i.e. the repository itself is not removed / deleted / etc.).
rename <old-name> <new-name>
Renames the remote connection.
Git fetch
To download content from a remote repository, the git pull and git fetch commands are available to perform this task. You can think of git fetch as the safe version of the two commands. This command downloads the remote content, but does not update the local repository job status, so your current job will not be affected. git pull is a more aggressive alternative, as it downloads the remote content to the active local branch and immediately runs git merge to create a merged commit with the new remote content. If you have pending changes in progress, this action will cause conflicts and start the merge conflict resolution flow.

git fetch <remote>
Retrieves all branches of the repository. It also downloads all the required commits and files from the other repository.
git fetch <remote> <branch>
Performs the same action as the previous command, but only retrieves the specified branch.
git fetch --all
A powerful function that retrieves all registered remote repositories and their branches:
git fetch --dry-run
The –dry-run option will run a demo of the command. Generates examples of actions to take during recovery, but does not apply them.
Git push
The git push command is used to upload content from the local repository to a remote repository. Submitting is the way to transfer commits from your local repository to a remote repository. It’s the equivalent of git fetch, but instead of downloading commit imports to local branches, it sends commit exports to remote branches. Remote branches are configured using the git remote command. Submissions have the ability to overwrite changes, so care must be taken when making them. These problems are described below.

git checkout develop
git push origin develop
Before using “git push”, make sure the correct local branch is checked out. Then, to perform the push, simply specify which remote branch you want to push to:
git push -u origin develop
If you are publishing a local branch for the first time on a remote, the “-u” option is helpful. It makes sure that a tracking connection between the local and the newly created remote branch is established:
git push
After having set up such a tracking connection, you can perform future pushes without providing additional options - since the tracking connection provides default values for the push command:
git push origin --delete feature/login
To delete a remote branch, simply use the “–delete” option and specify which branch (on which remote) you want to delete:
Git pull
The git pull command is used to pull and download content from a remote repository and instantly update the local repository to reflect that content. Merging remote top-level changes to your local repository is a common task in Git-based collaboration workflows. The git pull command is actually a combination of two commands, git fetch followed by git merge. In the first stage of the git pull operation you will run a git fetch on the local branch pointed to by HEAD. After the content is downloaded, git pull will enter a merge workflow. A new merge commit will be created and HEAD will be updated to point to the new commit.

git pull <remote>
Fetch the specified remote’s copy of the current branch and immediately merge it into the local copy. This is the same as git fetch <remote> followed by git merge origin / <current-branch>.
git pull --no-commit <remote>
Similar to the default invocation, it pulls the remote content, but does not create a new merge commit.
git pull --rebase <remote>
As in the previous incorporation, instead of using git merge to integrate the remote branch into the local one, use git rebase.
git pull --verbose
Provides detailed output during a push that shows downloaded content and merge details.
How FabAcademy git is organized:
| header | header |
|---|---|
| Academany | Academany |
| Subgroups and proyect | Fab Academy |
| Year | 2021 |
| FABLAB | ESAN |
| Student | César Valdivia |
| So arrive to | index.md |
| Docs | |
| Images | |
| Assignments | |
| Projects |
Applying what I learned
The day began with Neil Gershenfeld remote class, to explain to the participants the importance of the documentation system for the Academy. Then we began the job in the local environment to practice the creation of GIT , MkDocs and the organization of documentation in the respective repository. The practice session started singing in the Gitlab while the user received from academany IT. Then we began the job in the local environment to practice the creation of GIT , MkDocs and the organization of documentation in the repository of respect.

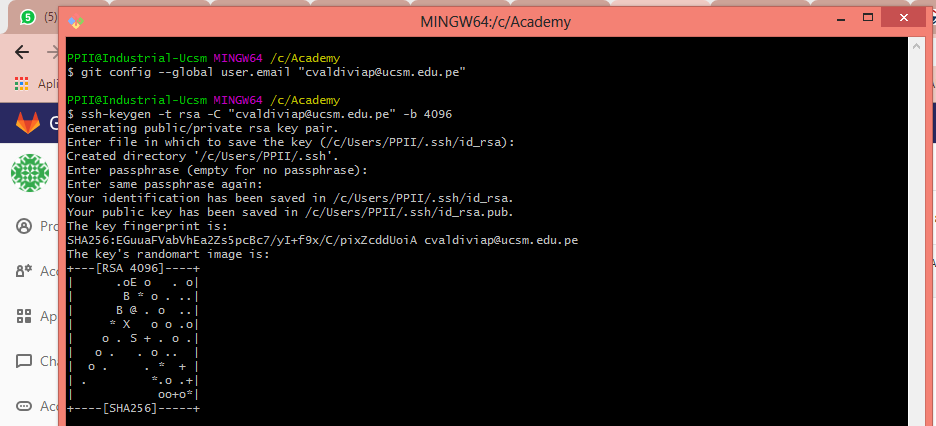
Then download the git from internet I did use the Git Bash to configure my repository in the cloud, after install the software I was ready to configure it, an the first step was introducing the credentials.

It command allow me obtain a key to access to gitlab, and used to access safely in synchronization between git bash and gitlab.

Is time to create a copy of the master repository from the cloud to local desktop. Git allow work in local way while make the changes and update the master on the cloud when it´s ok, make it I used the clone command.


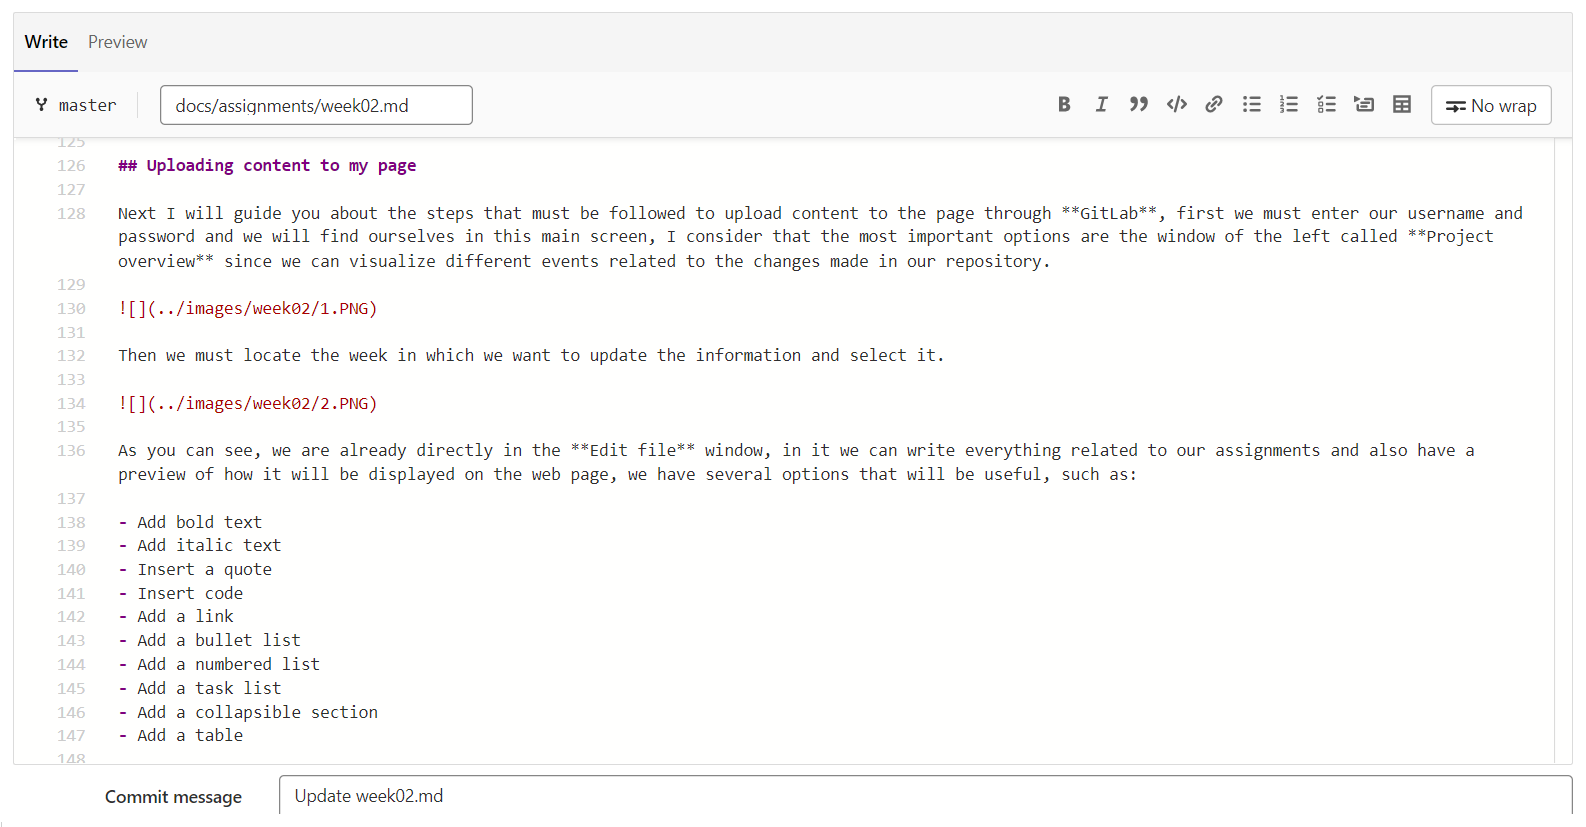
Uploading content to my page
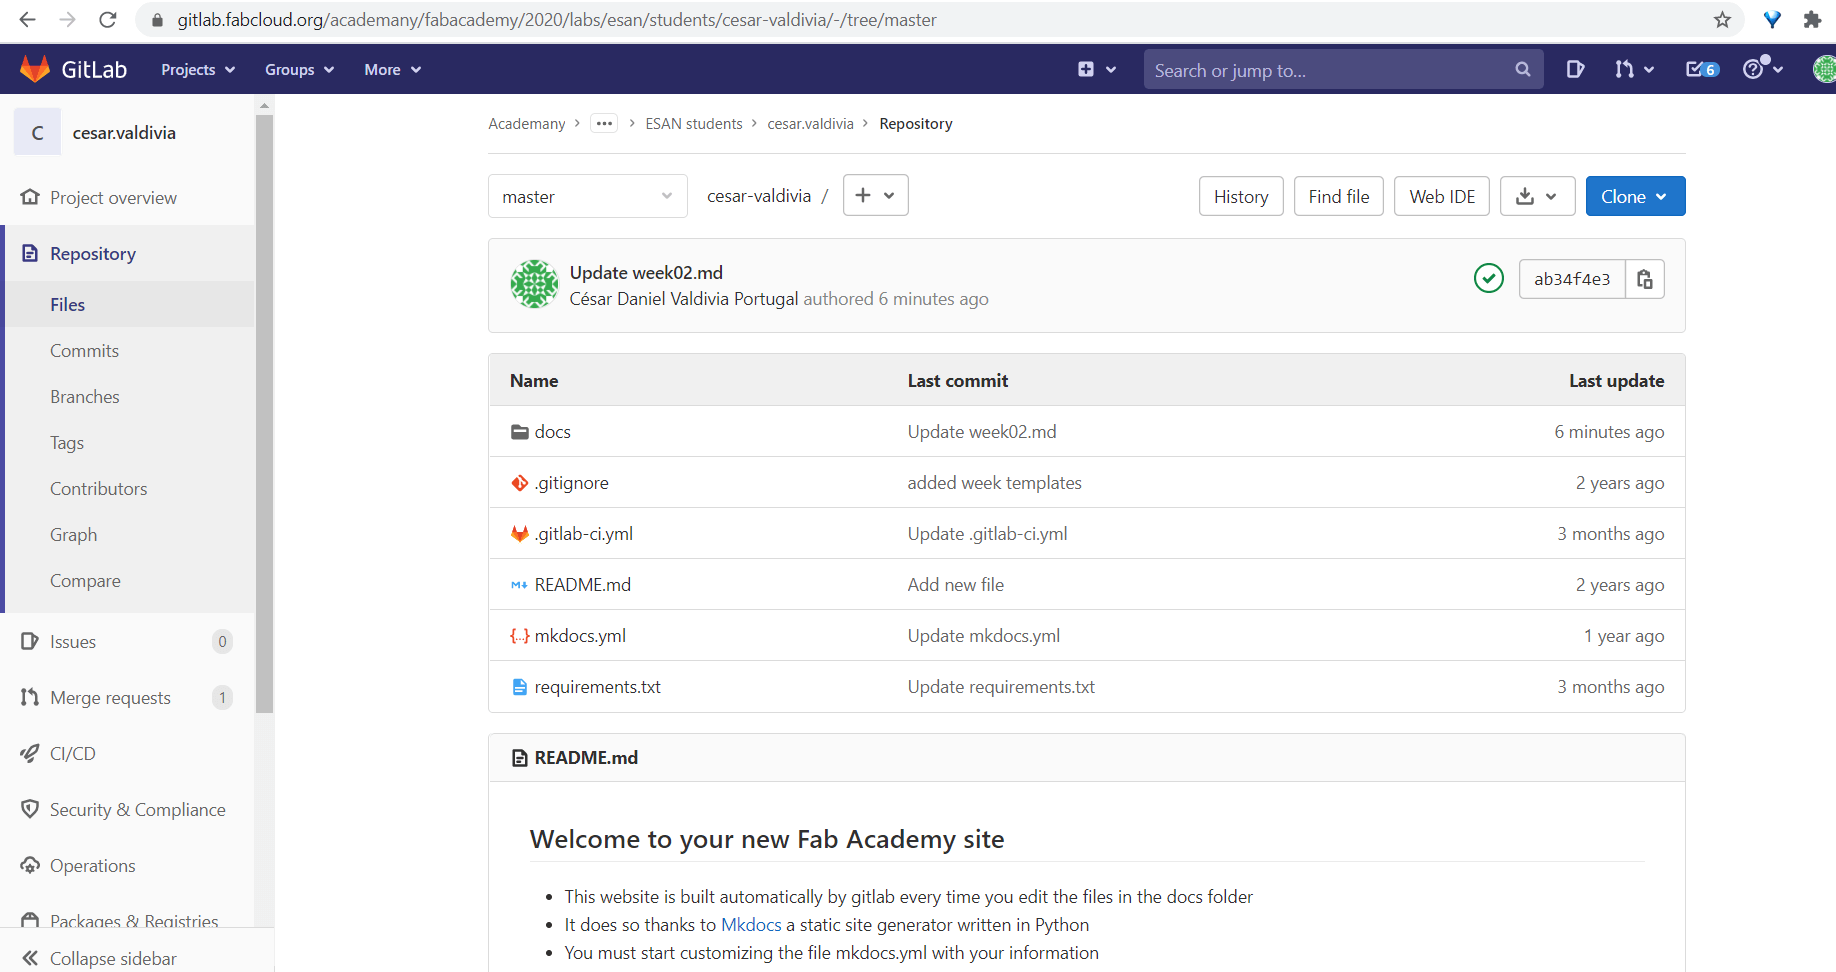
Next I will guide you about the steps that must be followed to upload content to the page through GitLab, first we must enter our username and password and we will find ourselves in this main screen, I consider that the most important options are the window of the left called Project overview since we can visualize different events related to the changes made in our repository.
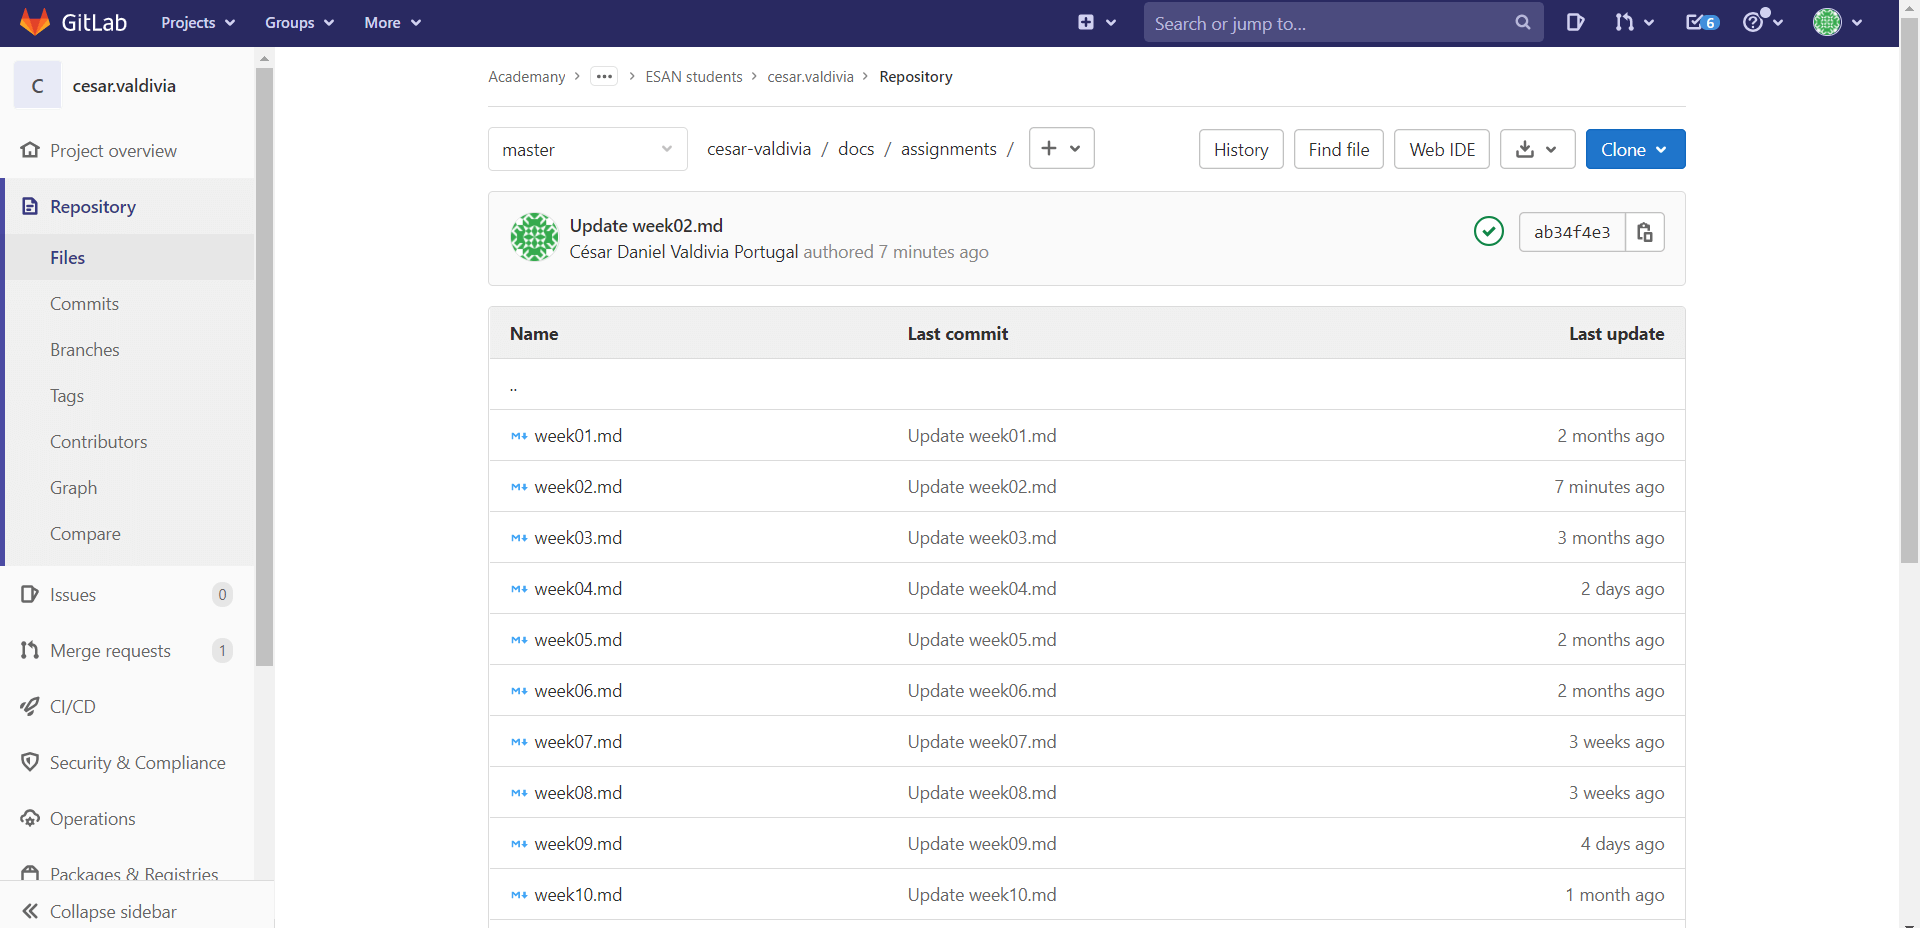
Then we must locate the week in which we want to update the information and select it.
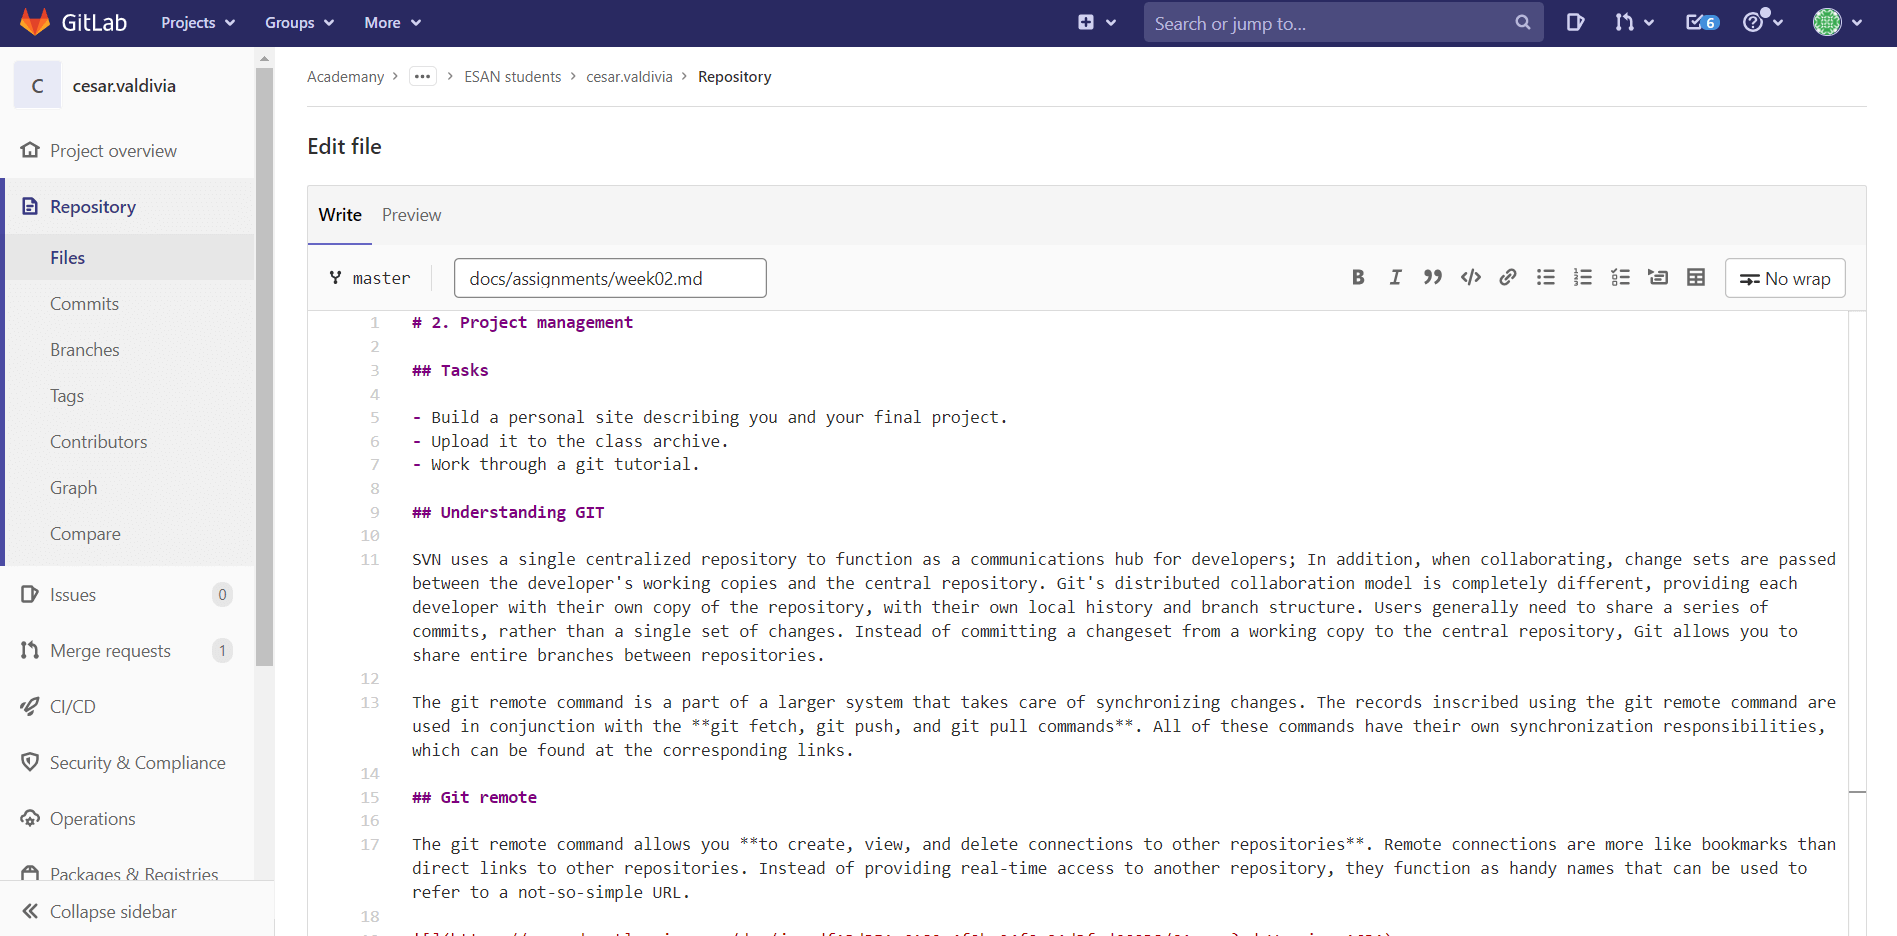
As you can see, we are already directly in the Edit file window, in it we can write everything related to our assignments and also have a preview of how it will be displayed on the web page, we have several options that will be useful, such as:
- Add bold text
- Add italic text
- Insert a quote
- Insert code
- Add a link
- Add a bullet list
- Add a numbered list
- Add a task list
- Add a collapsible section
- Add a table
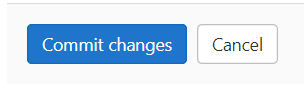
And the most important button is located in the lower left part of the blue color Commit changes, this button will be in charge of saving all the changes that we make in the document, particularly I use it every time I finish with an assignment point to avoid losing the content due to some mishap.
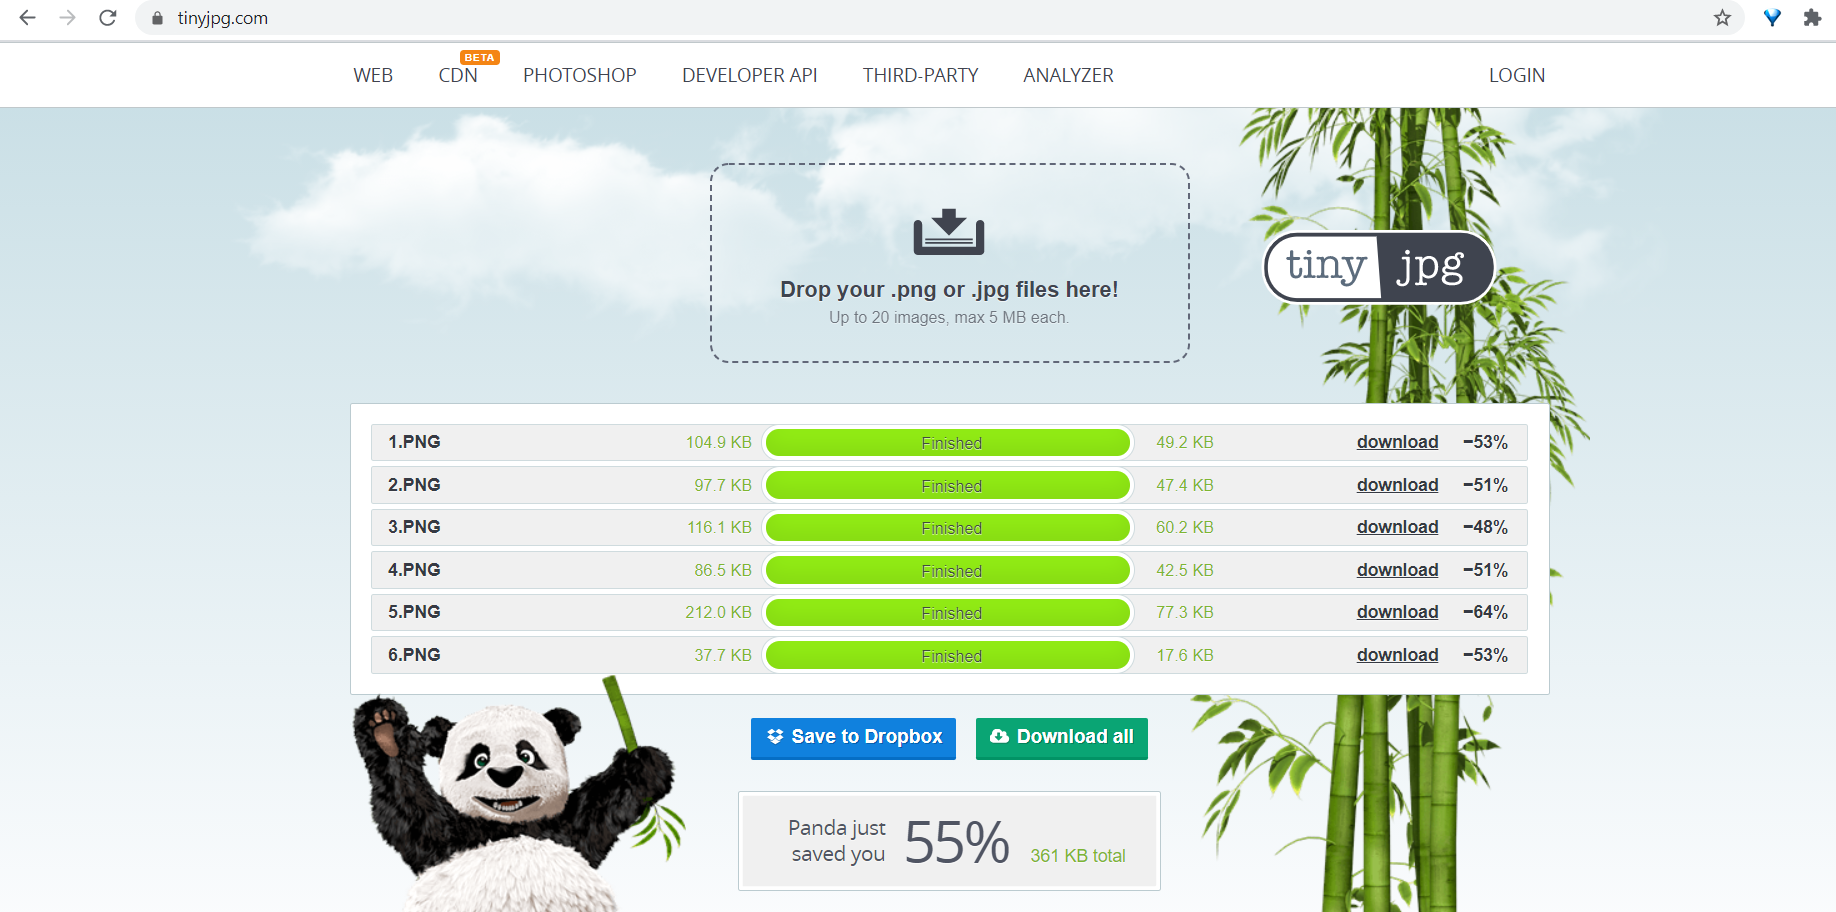
Once everything necessary to add text to our page has been defined, we can proceed to add multimedia content, in this case images, but these steps can be replicated for any type of file accepted by GitLab, we must remember that memory space is very valuable, That is why it is recommended that each assignment does not exceed 10mB, to achieve that we must use programs that compress the size of our image and video files, in this case I use TinyJPG to compress my images.
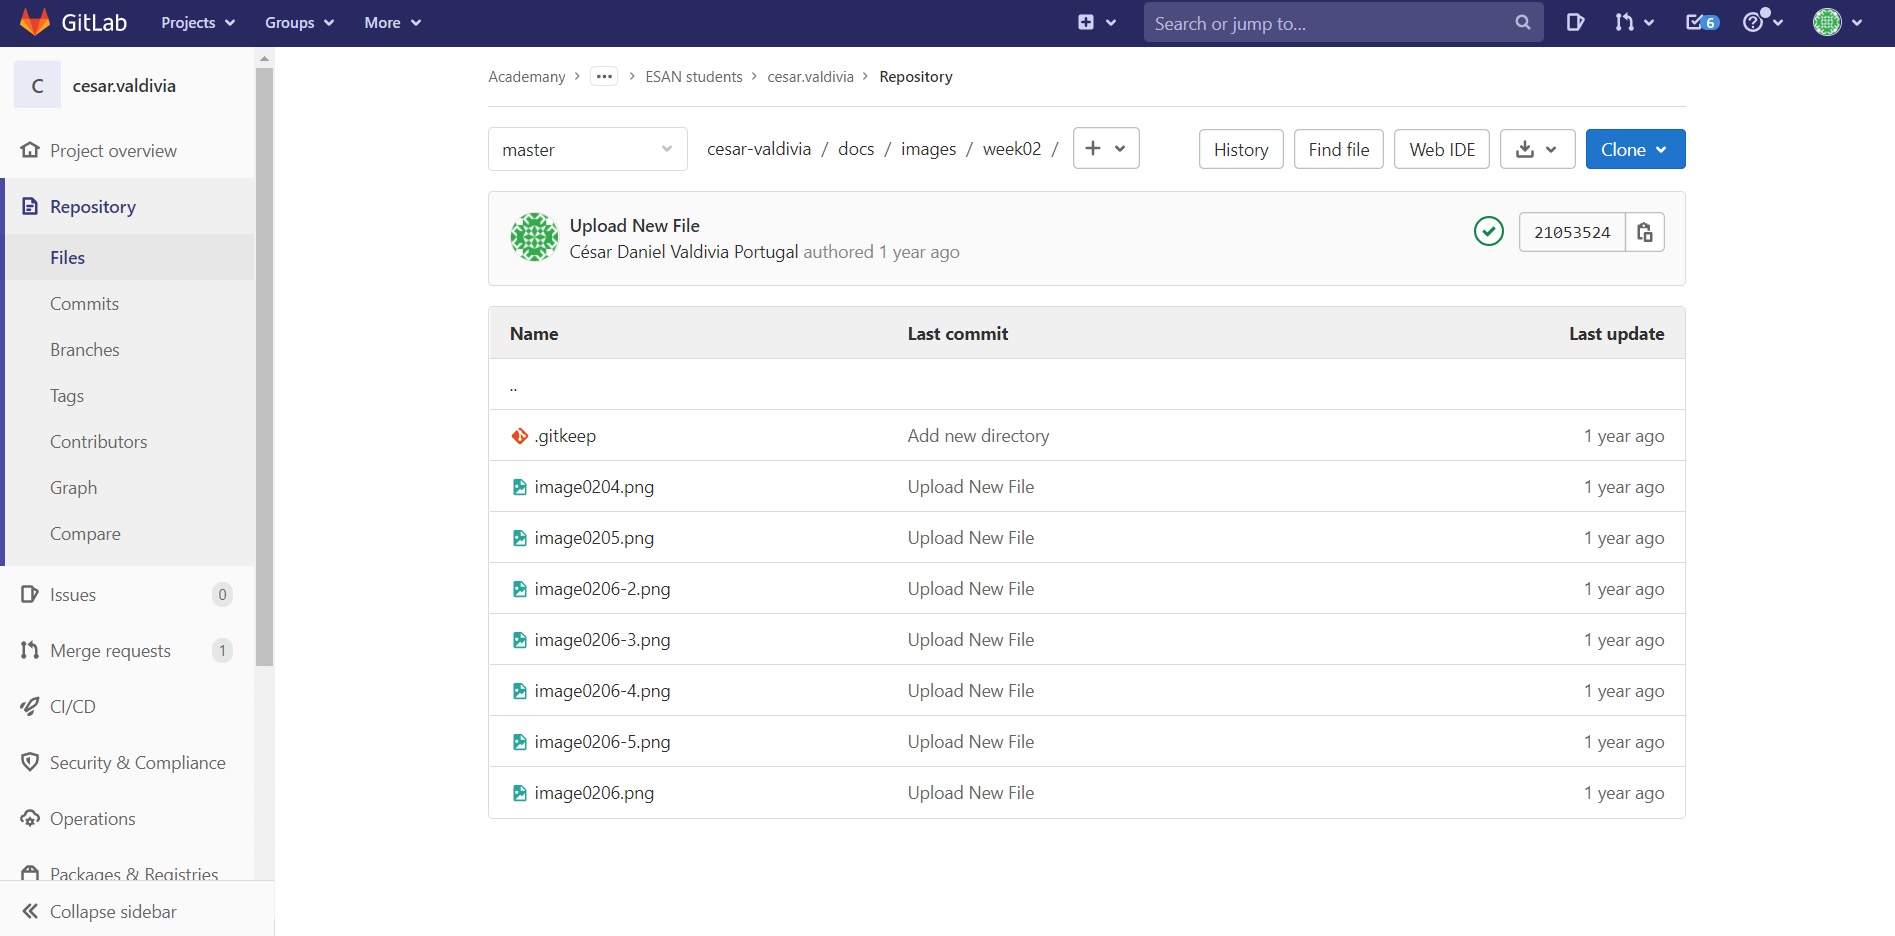
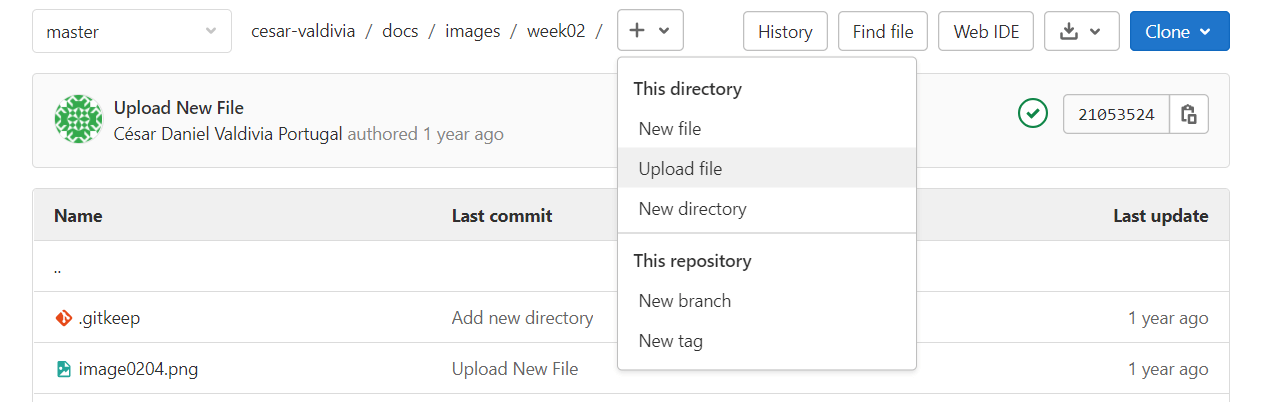
To add images we must go to our container folder designated for images (a good practice to keep everything in order) and press on the + button and select the Upload file option
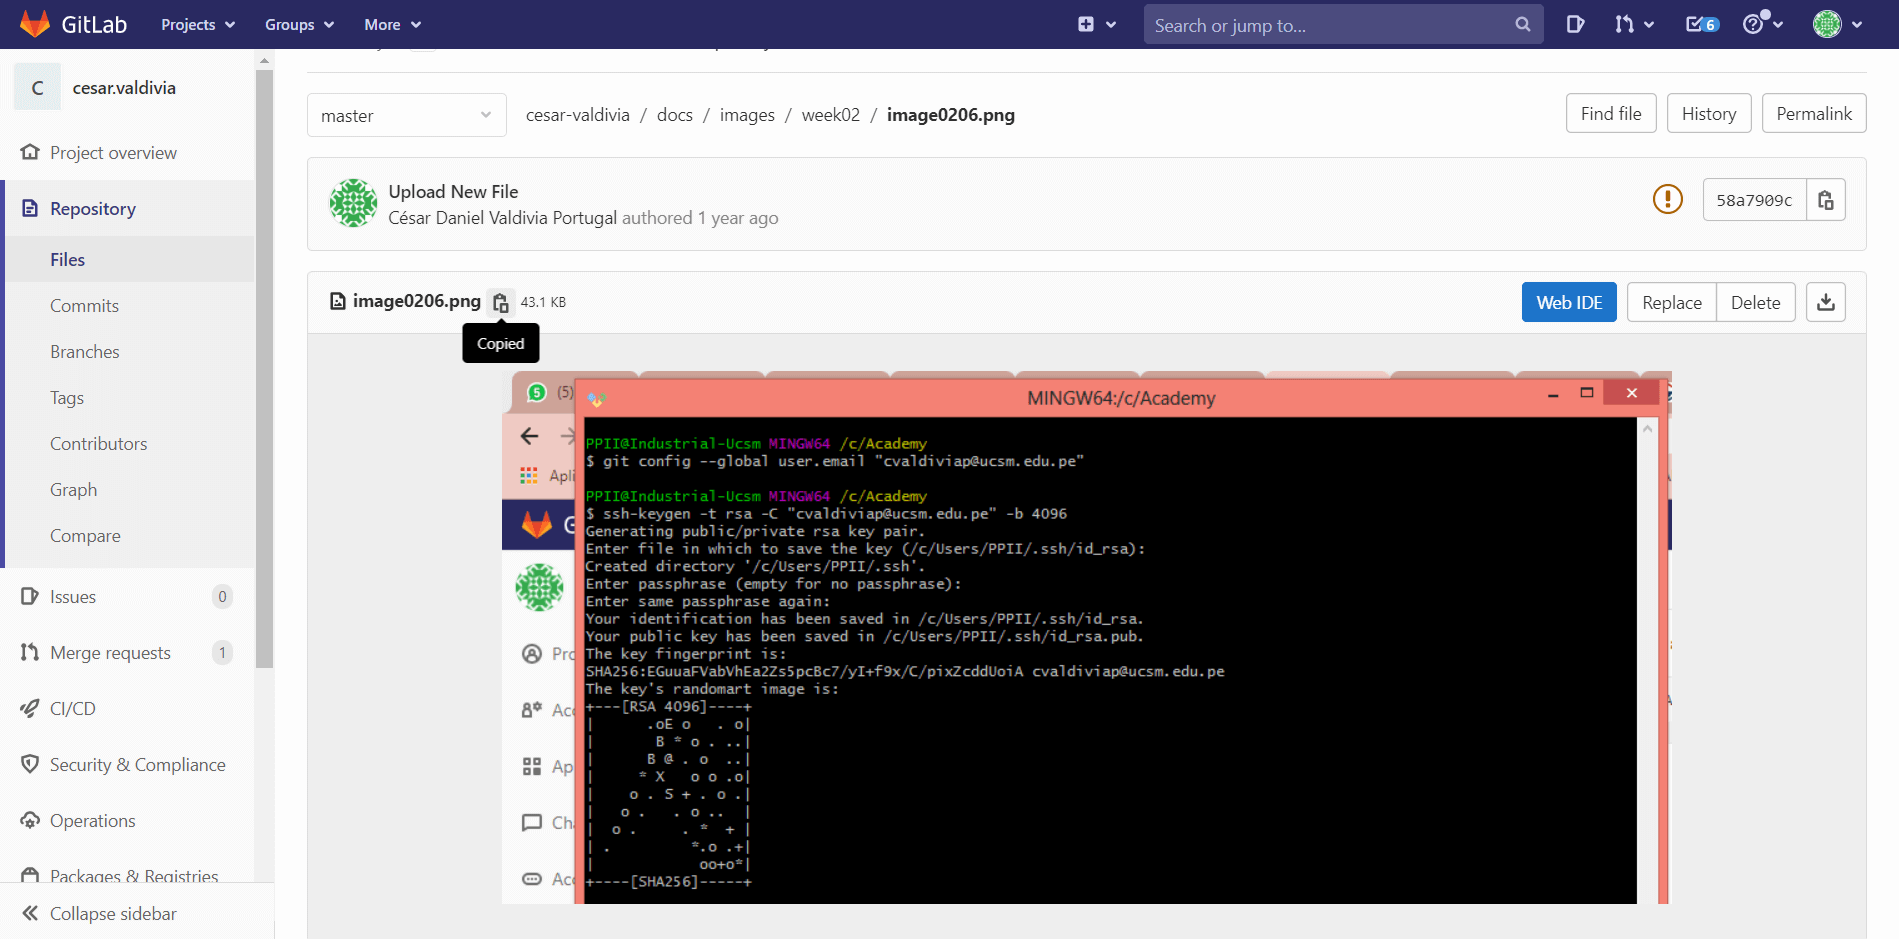
Finally with our image already uploaded, we can see a preview to confirm that it was uploaded correctly, so as not to be suffering with the exact path where it is stored, I recommend using the Copy file path button to later paste it into our document and add the correct syntax to view images, as indicated below.

Use of the syntax on my page
As you can see, the # is in charge of defining the level of the title and marks it in purple as a reference, when an image is entered correctly the entire path turns red, also the texts enclosed by become bold and we can appreciate the use of a bullet list**.
Finally, remember again that we must press that blue magic button so that all our progress is stored
Useful links
Fab Academy Student Agreement
The Fab Academy is responsible for:
- Teaching principles and practices of digital fabrication
- Arranging lectures, recitations, meetings, and events for the class
- Evaluating and providing feedback on student work
- Offering clear standards for completing assignments
- Certifying and archiving student progress
- Supervising class preparation
- Reviewing prospective students, instructors, and labs
- Providing central staff and infrastructure for students, instructors, and labs
- Fund-raising for costs not covered by student tuition
- Managing and reporting on the program’s finances, results, and impacts
- Publicizing the program
- Promoting a respectful environment free of harassment and discrimination
I am a Fab Academy student, responsible for:
- Attending class lectures and participating in reviews
- Developing and documenting projects assigned to introduce and demonstrate skills
- Honestly reporting on my work, and appropriately attributing the work of others
- Working safely
- Leaving workspaces in the same (or better) condition than I found them
- Participating in the upkeep of my lab
- Ensuring that my tuition to cover local and central class costs is covered
- Following locally applicable health and safety guidance
- Promoting a respectful environment free of harassment and discrimination
Signed by committing this file in my repository,
Cesar Valdivia