Electronics Production
Week 4
FabISP
Review
This week’s assignment consists to make our own version of the FAB ISP in circuit programmer. But… I never heard about it! There are a few questions to be solved before begin to make it.
What is a FAB ISP? What is the reason to make it? The FAB ISP is the FAB LAB version of the AVR ISP programmer. This programmer usb port, original by ATMEL allows us to program “in circuit” any of the AVR microcontrollers (AVR XMEGA, megaAVR, tinyAVR, Automotive AVR). The reason to make it is because we are going to need it to program our microcontrollers to do something in the next weeks.
The genealogy of the FAB ISP goes something like this; there are three kinds of FAB ISP’s: David, Andy and Valentin. Valentin’s FabISP is based on Andy’s FabISP wich is based on Neil's FabISP wich is based on David Mellis's FabISP which is based on Limor's USBTinyISP which is based on Dick Streefland's USBTiny. Little tricky to understand at the first bite uh? It gets less difficult when you check all of them and try to understand the differences between them. Andy integrates in circuit the USB connector on Neil's FabISP and Valentin improved Andy's version in order to avoid desoldering the jumpers.
We’re going to make the Andy’s Version. Get all the documentation in the author’s web page.
PNG to BMP
We proceeded by downloading the .PNG files of Andy’s web page. In the time we try to import them into Dr. Engrave (the Roland Modela software) we find out that the only supported files were .BMP and .DXF. In this way, we changed the extension of the .PNG files to .BMP files, but the "problems" didn't stop. We imported the .BMP files but the software crashed every time. We solve the problem by deleting the white background of the images in Photoshop and save them again as .BMP.
First Time Millig Process
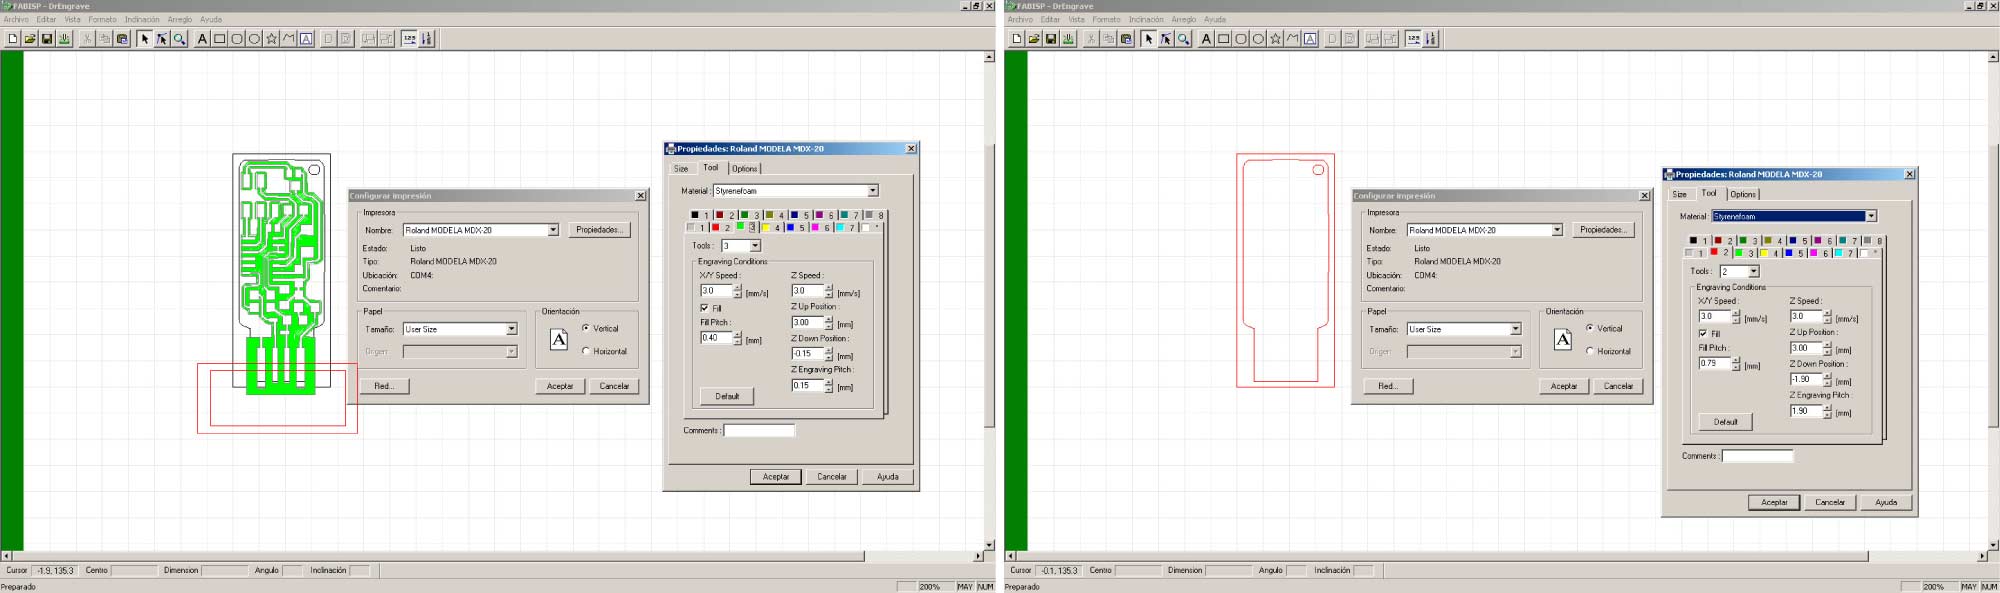
As I mentioned before we worked with the machine software, which are among others Dr.Engrave and 3dEngrave because we couldn’t install the Fab Modules on Ubuntu... but we’re on it. We proceeded by importing the .bmp files and with help from this tutorial, the web version of the fab modules and some preview experience, we base our decisions to make the process with the next parameters.
Millig Process
- >Fill Intensity: 0.12 - Green
- >X/Y Speed: 3.0 mm/S
- >Z Speed: 3.0 mm/s
- >Fill Pitch: 0.40 mm
- >Z Up Position: 3.0 mm
- >Z Down Position: -0.15 mm
- >Z Engraving Pitch: 0.15 mm
Cutting Process
- >Fill Intensity: 2 - Red
- >X/Y Speed: 3.0 mm/S
- >Z Speed: 3.0 mm/s
- >Fill Pitch: 0.79 mm
- >Z Up Position: 3.0 mm
- >Z Down Position: -1.90 mm
- >Z Engraving Pitch: 1.90 mm
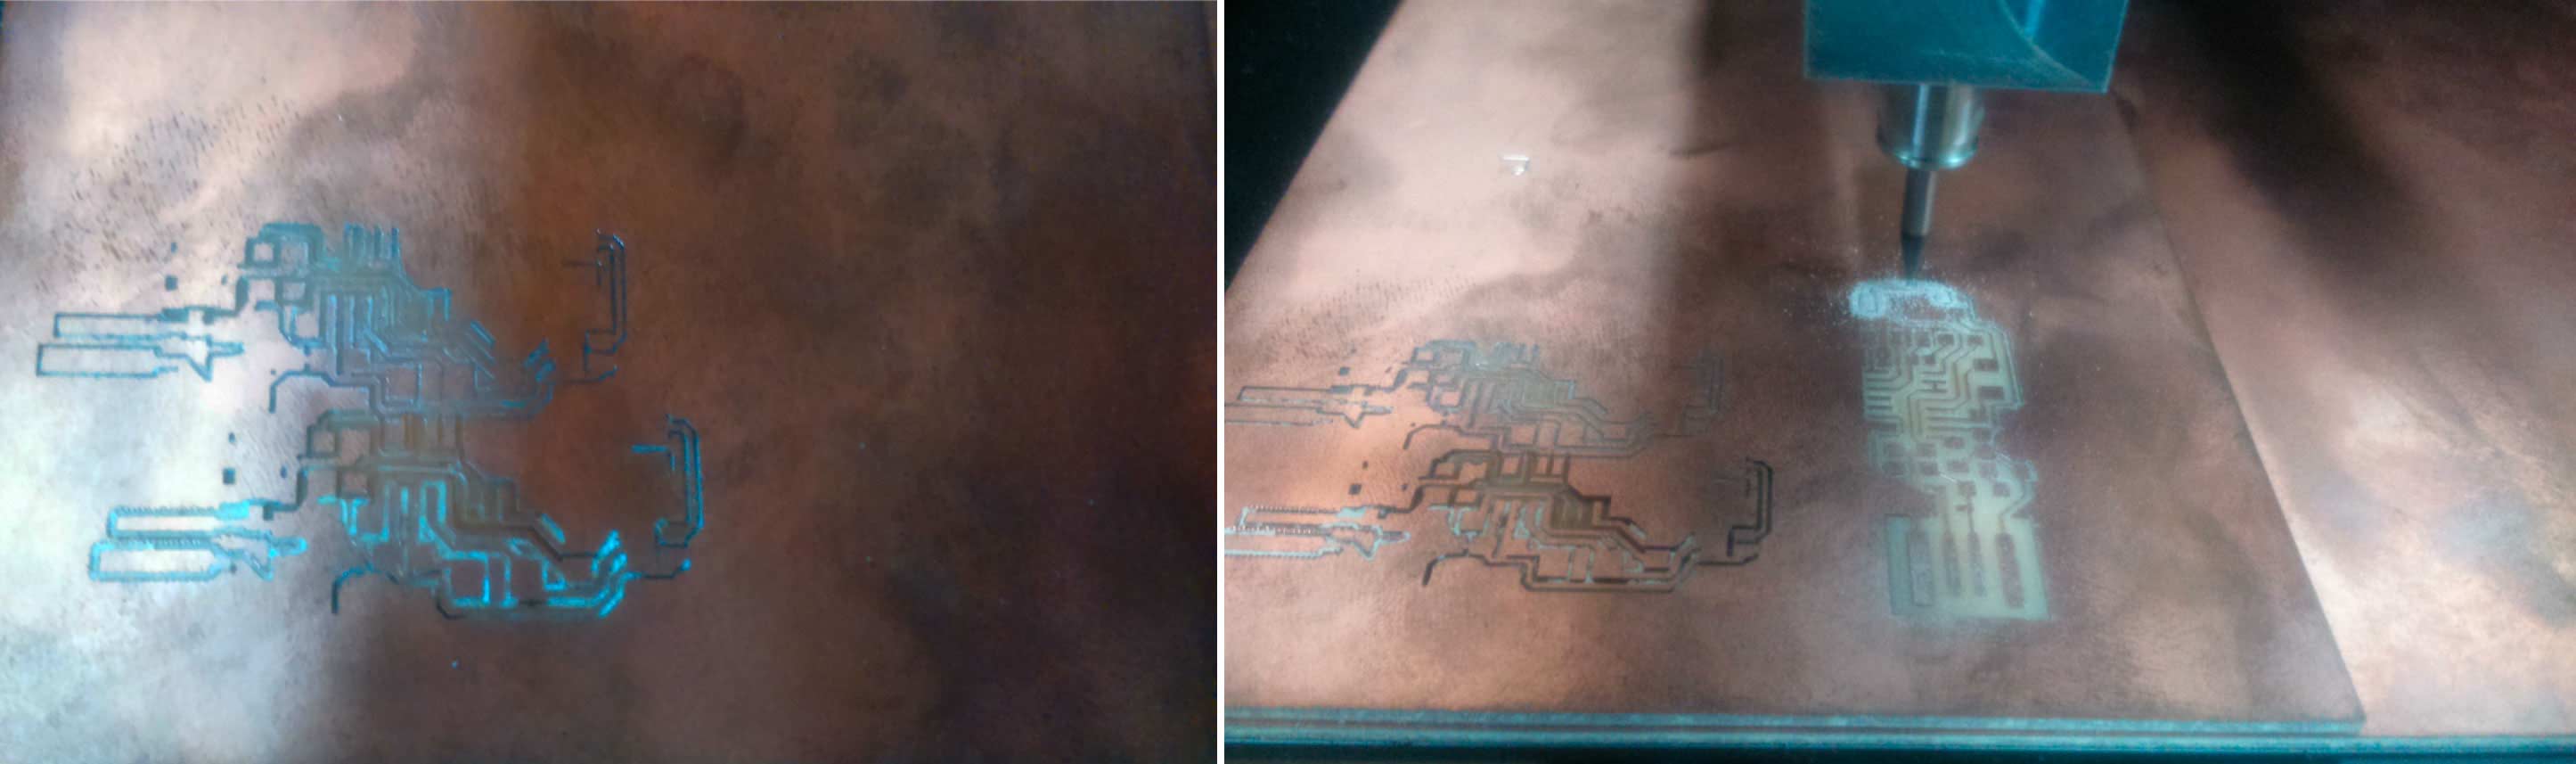
The first tests didn’t ended the way we expected but they were essential to adjust the final parameters. We also had errors in the correct dimensions of the .bmp files; one of the images was bigger than it supposed to be.
FabISP final fabrication Process
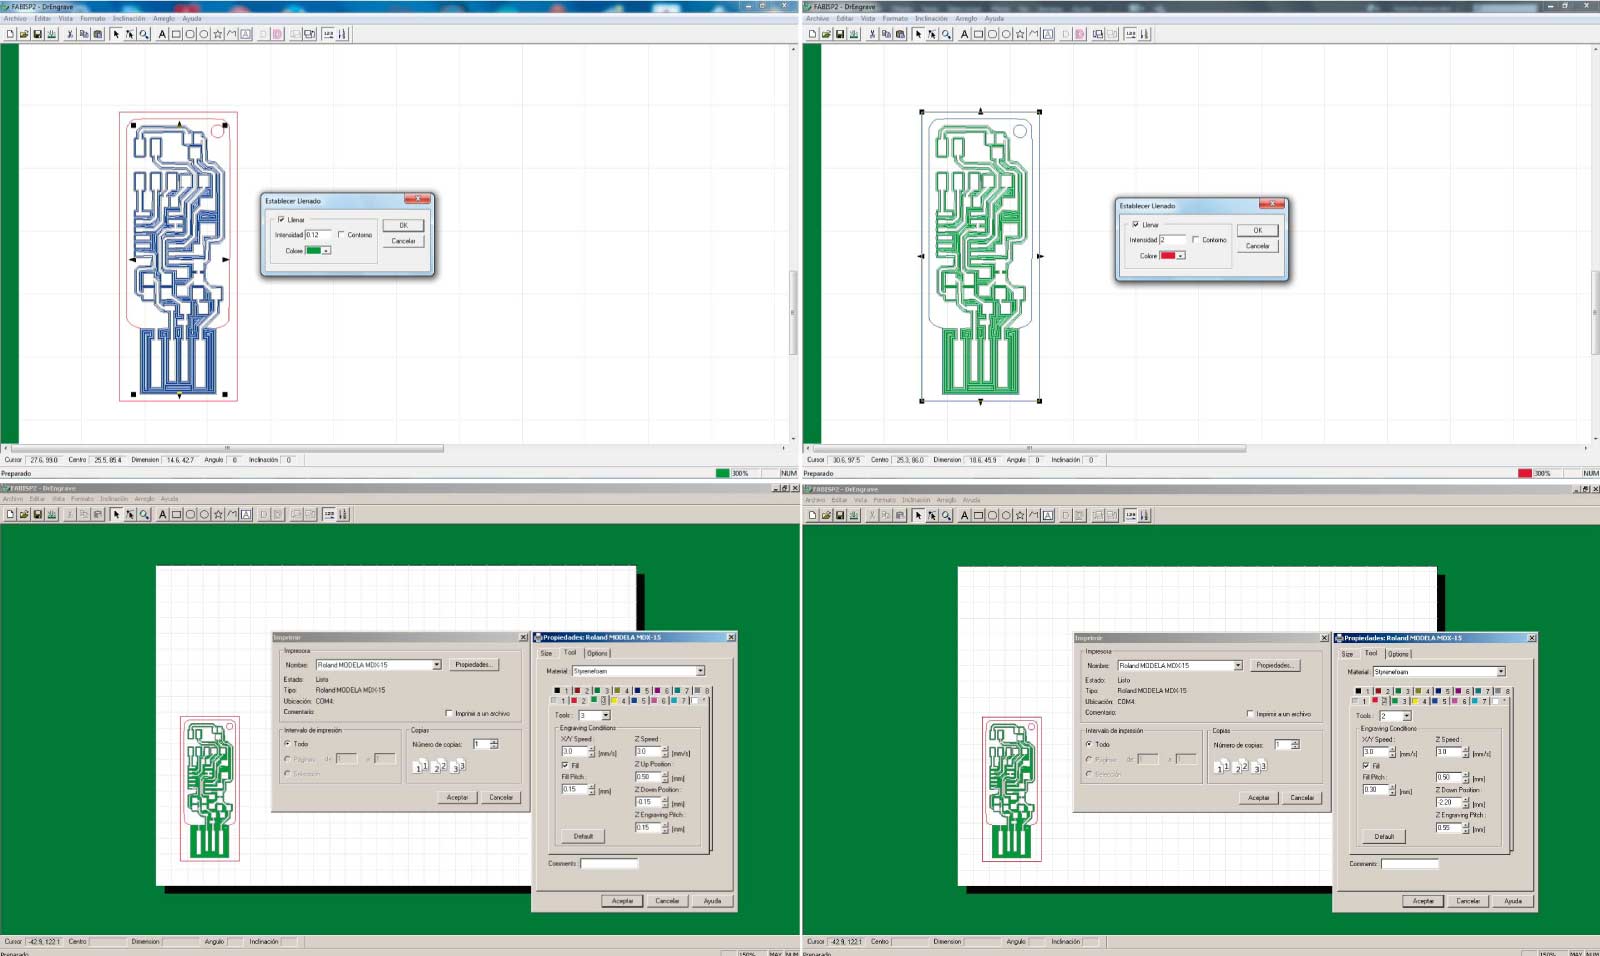
With some parameters adjustments and also in the dimension of the images we were able to mill and cut correctly the FabISP whit the next parameters:
Millig Process
- >Fill Intensity: 0.12 - Green
- >X/Y Speed: 3.0 mm/S
- >Z Speed: 3.0 mm/s
- >Fill Pitch: 0.15 mm
- >Z Up Position: 0.5 mm
- >Z Down Position: -0.15 mm
- >Z Engraving Pitch: 0.15 mm
Cutting Process
- >Fill Intensity: 2 - Red
- >X/Y Speed: 3.0 mm/S
- >Z Speed: 3.0 mm/s
- >Fill Pitch: 0.30 mm
- >Z Up Position: 0.5 mm
- >Z Down Position: -2.20 mm
- >Z Engraving Pitch: 0.55 mm
In the image bellow can be appreciated the first and the final fabISP with the errors mentioned before.

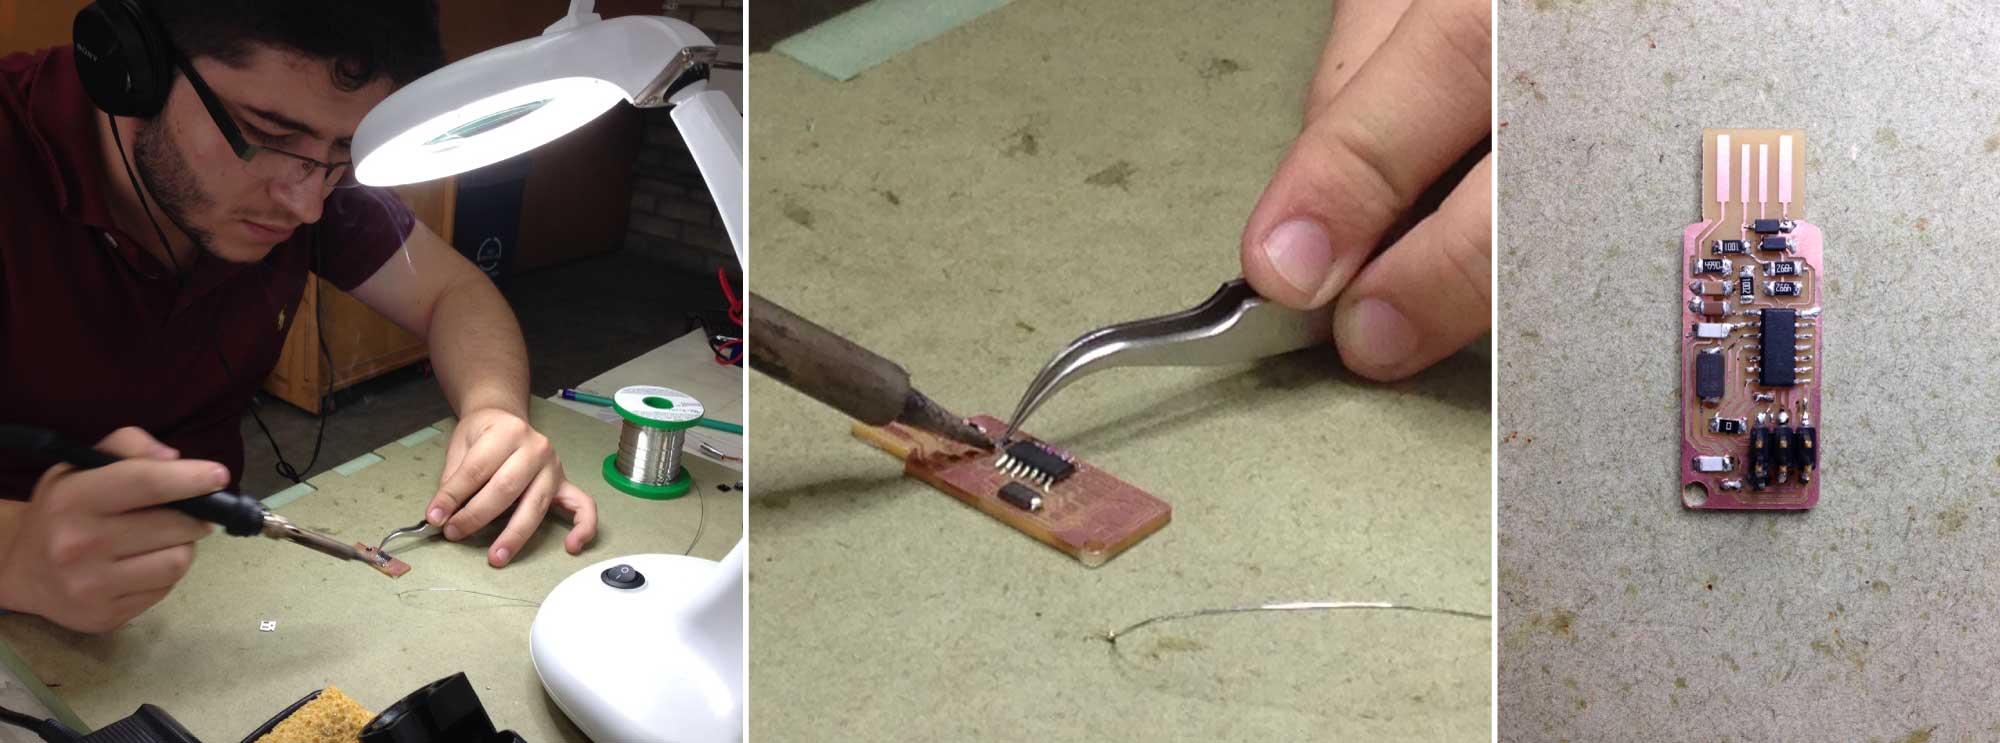
Soldering
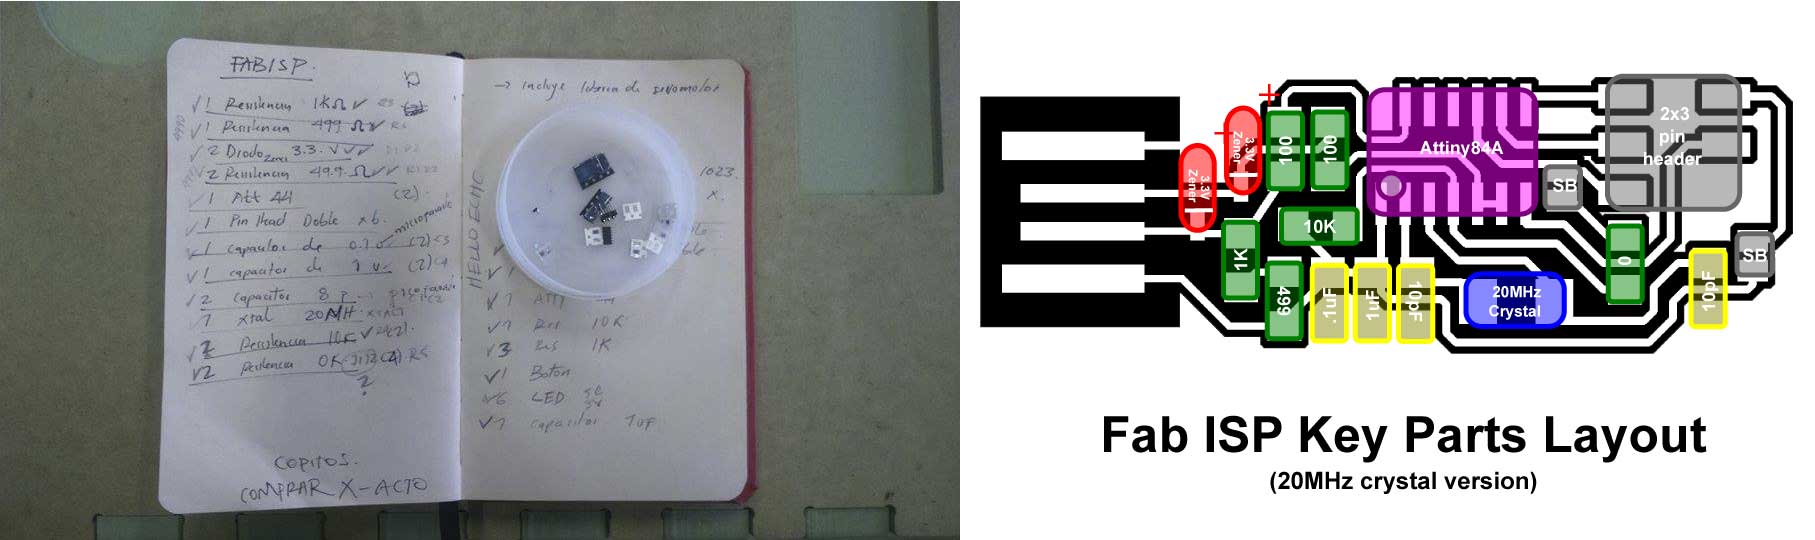
I have no experience in soldering, as an architect I have never been close to the Electronic. I’m ready to open myself to new knowledge and process. There's a new whole world to explore and in a near future i expect to be able to integrate it with my profession. With the FabISP milled the next step is to make our "bill of materials" in order to soldering the components with the proper values. A series of tutorials about the FabISP as well as the Parts Lay Out from below can be found here.
FabISP Programing
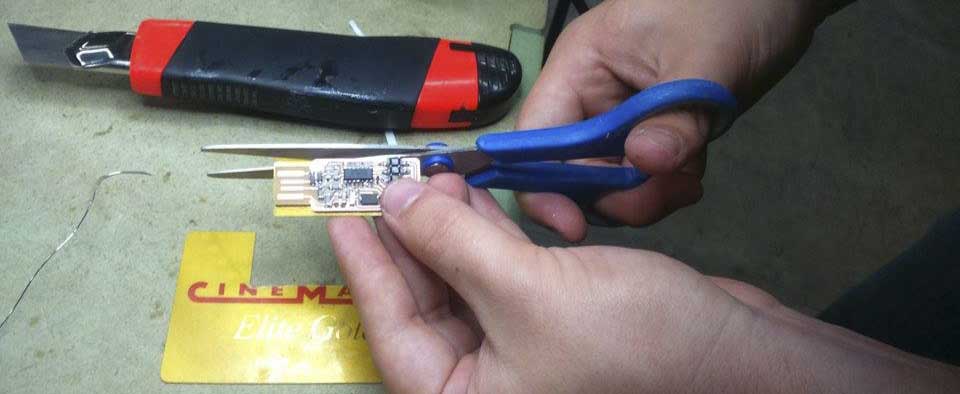
Before start the FabISP programming we follow our tutor’s recommendation about adding a plastic recycled card to make the FabISP thicker to make good contact with the pc. Cut the card following the shape of you programmer, paste both with help from the double side tape.
Once all the preview steps are ready it’s time to program the FabISP. Follow the next link to get detailed documentation about programming the FabISP on Ubuntu, Mac OS or Windows. We made the whole process in our tutor’s pc with Mac OS. We tried to download the necessary software both on Ubuntu and also on Windows, but It didn`t work.
First of all download and install Crosspack AVR from here, then the FabISP Firmware for MacOS from here; Unzip all the firmware files.
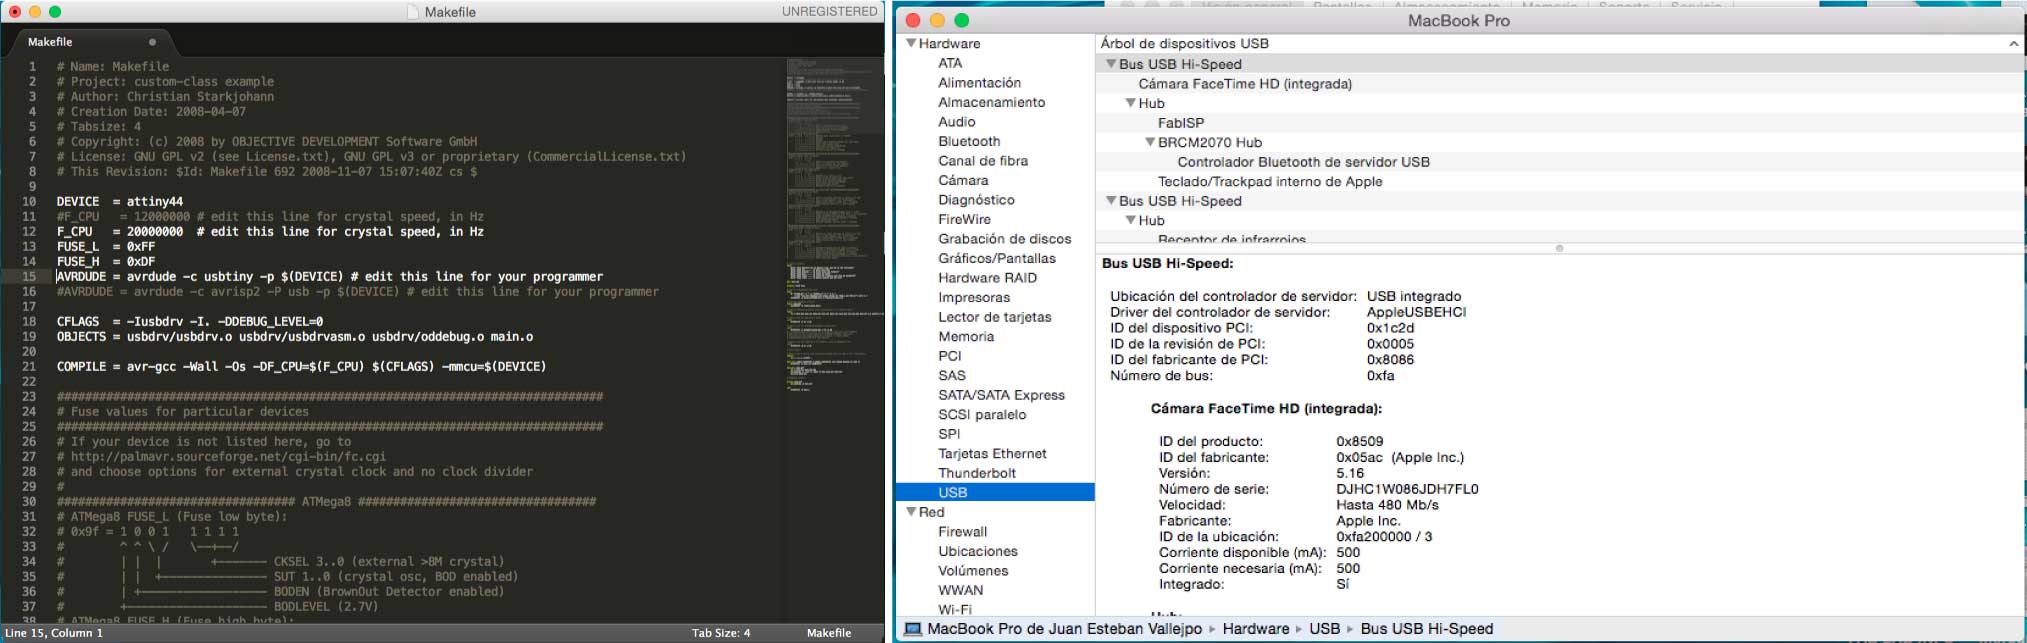
Editing the MakeFile
When you are trying to program a new FabISP with another FabISP it’s necessary to edit the MakeFile (file on the firmware directory previously downloaded) because it is set up by default to work with the AVRISP. Open the Make File with a text editor and go the next lines:
- #AVRDUDE = avrdude -c usbtiny -p $(DEVICE) # edit this line for your programmer
- AVRDUDE = avrdude -c avrisp2 -P usb -p $(DEVICE) # edit this line for your programmer
Uncomment the first line and comment (#) the second one. It should look like this.
- AVRDUDE = avrdude -c usbtiny -p $(DEVICE) # edit this line for your programmer
- #AVRDUDE = avrdude -c avrisp2 -P usb -p $(DEVICE) # edit this line for your programmer
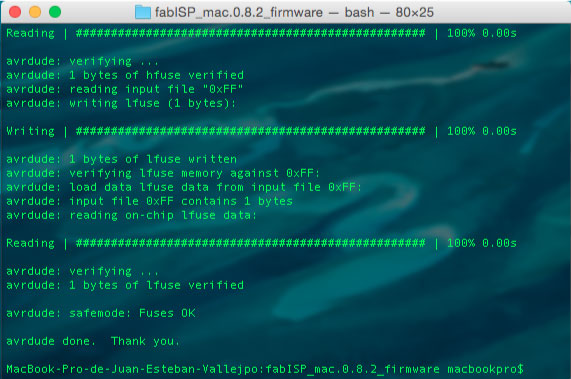
Then open the terminal and type the next instructions:
- cd Desktop/fabISP_mac.0.8.2_firmware
- make clean
- make hex
- make fuse
- make program
If everything goes well your FabISP is programmed! You can verify that your FabISP is working correctly by plugged in and search for it on your pc. The fabISP should be listed in one of the USB ports.