Molding and Casting
Week 9
Review
This week's assignment consists to mold and cast a 3d object and understand this manufacturing process. The basic process consists in pouring a liquid material into a mold with a specific shape, and get solid parts from it. We are going to use machining wax as a countainer mold. The machining wax is usually used in jewelry because of Its high resistance and hardness. Molding and casting is very useful when we need to make many equal pieces.
Design
For the 3d model I used a logo that I designed before with "Illustrator" and made some modifications in the thickness of the lines because of the recommendation of my local instructor, and then I exported it as a .dxf file. After that I opened it in "Rhinoceros" and modeled the 3d element playing with different heights. Once your element is ready, turn the polysurfaces into meshes and export it like .stl and we are ready to fabricate. Before you start drawing and modeling you should take into account the next recommendations.
- >Consider the diameter of the tool you are going to use for machining the wax.
- >Leave at least 5mm “walls” for the 3d mold. It’s better to have slightly tilted walls.
- >Check the “Flute” dimension; this will be the optimal machining distance in your element.

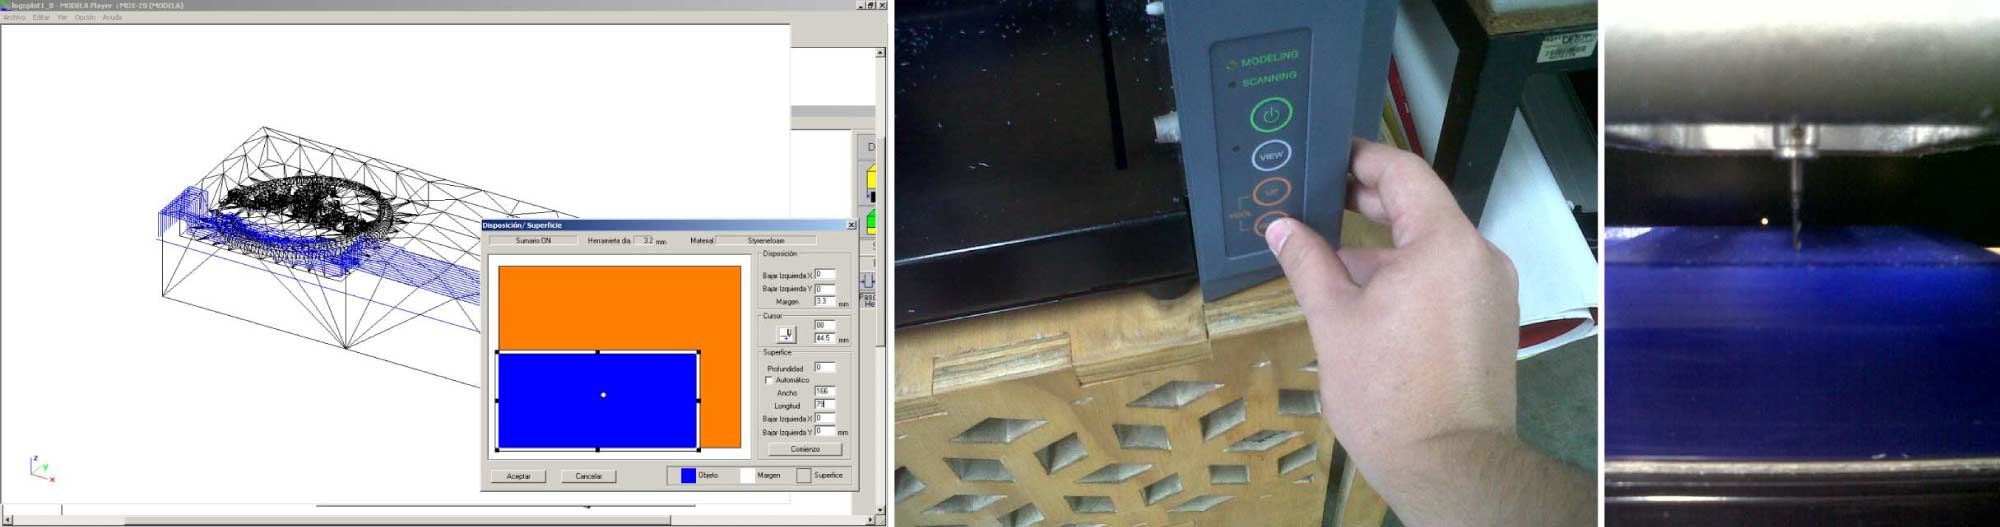
Previews Settings in the Roland MDX-20 Machine
We are going to work this week with the Roland Modela MDX-20 Machine, the machining wax is 166mm x 79mm x 37.5mm but, we’ll use half of it. The element is a one face mold. Follow the next previews steps. You can also check this NASA User Training Manual with the Roland Modela MDX-20 Milling Machine.
- 1. Tape the bottom of the molding wax with double sided tape to the "bed" of the machine.
- 2. Turn ON the machine in the control Panel.
- 3. Open the Modela Player Machine software.
- 4. Click on Options > Disposition/surface.
- 5. Move the tool to the desired position
- 6. Manually move the tool with the “DOWN” button closer to the work surface.
- 7. Manually unscrew the tool and make "Z" with the surface.
1/8 Bit Mill
There is a lot of material to be removed before we see our element, that’s why we use the 1/8 end mill. The 1/8 end mill has 3.2mm diameter approximately and had the sufficient hardness to “quickly” remove the excess of material. In the Modela Player Software click on import, select your stl file and click on open. The software is very intuitive and take us through a series of steps, detailed coming up next.
- 1. Select the diameter of the tool you are going to use, in our case 3.2mm for a 1/8 end mill. Set the material and the finished.
- 2. Set the cut direction in the work surface.
- 3. Set the object dimensions. Mine is 166mm x 79mm x 37.5mm
- 4. Set the maximum cut depth. In our element is 11.2mm
- 5. Configure the printer, set the tool with a 15mm/s X/Y speed and 10mm/s Z speed.
- 6. Make a preview of the cutting pattern and click on begin.
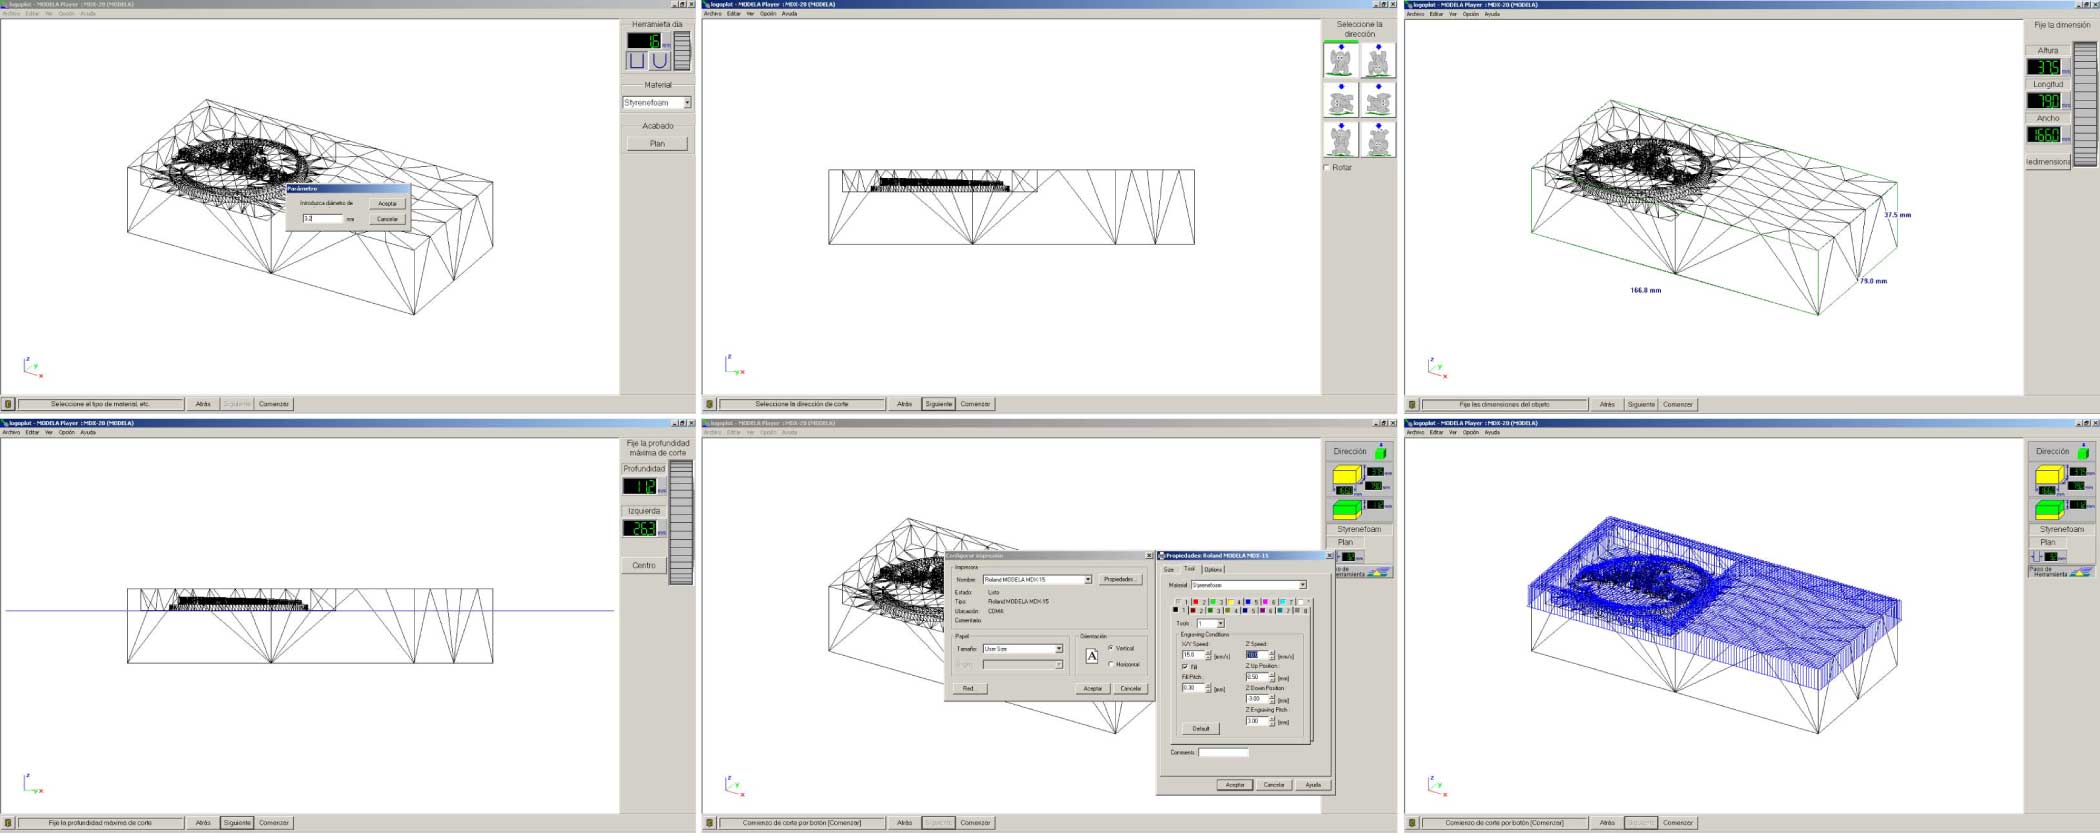
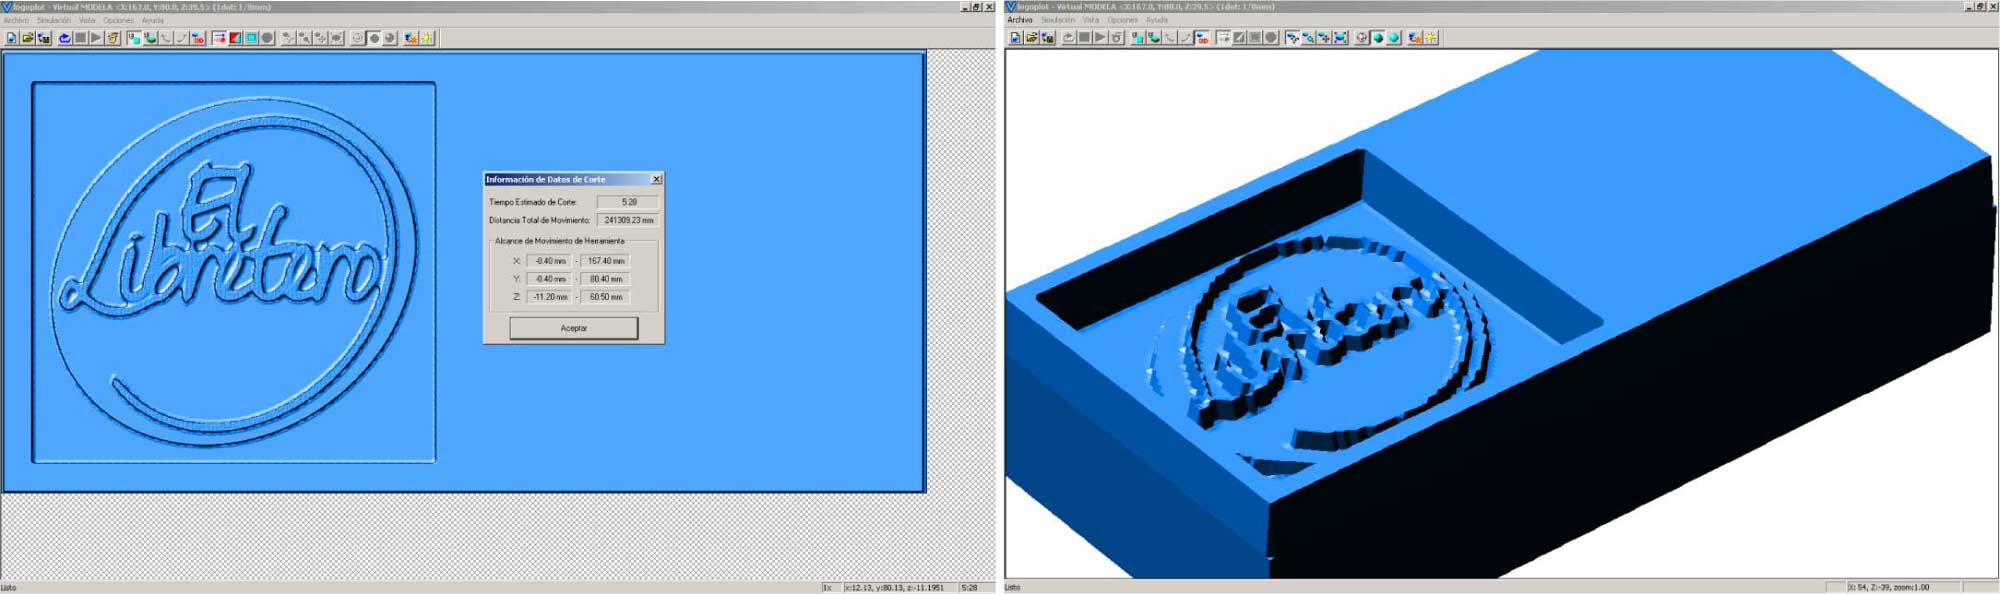
We can see a render of our model going to File> Output Preview. Go to Simulation> Estimate Cutting Time to see the minimum time needed to mill the model. My model took 2:49 hours to complete the process with the 1/8 tool.

Fabrication Process
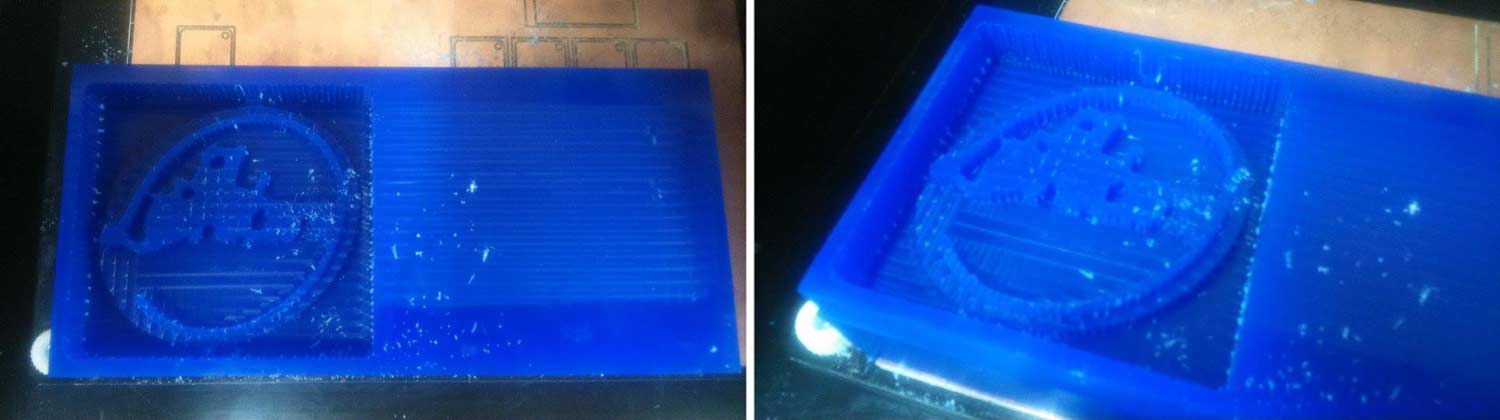
The result as I expected had low resolution because of the tool diameter as I explained before. We are ready to continue with the 1/16 end mill.
1/16 Bit Mill
The next step is to change the tool for a 1/16 end mill bit for the finishing. The 1/16 end mill has 1.6 mm diameter approximately and it’s the proper to make the details of my countainer mold. Follow the same preview steps by changing the tool diameter for 1.6mm.
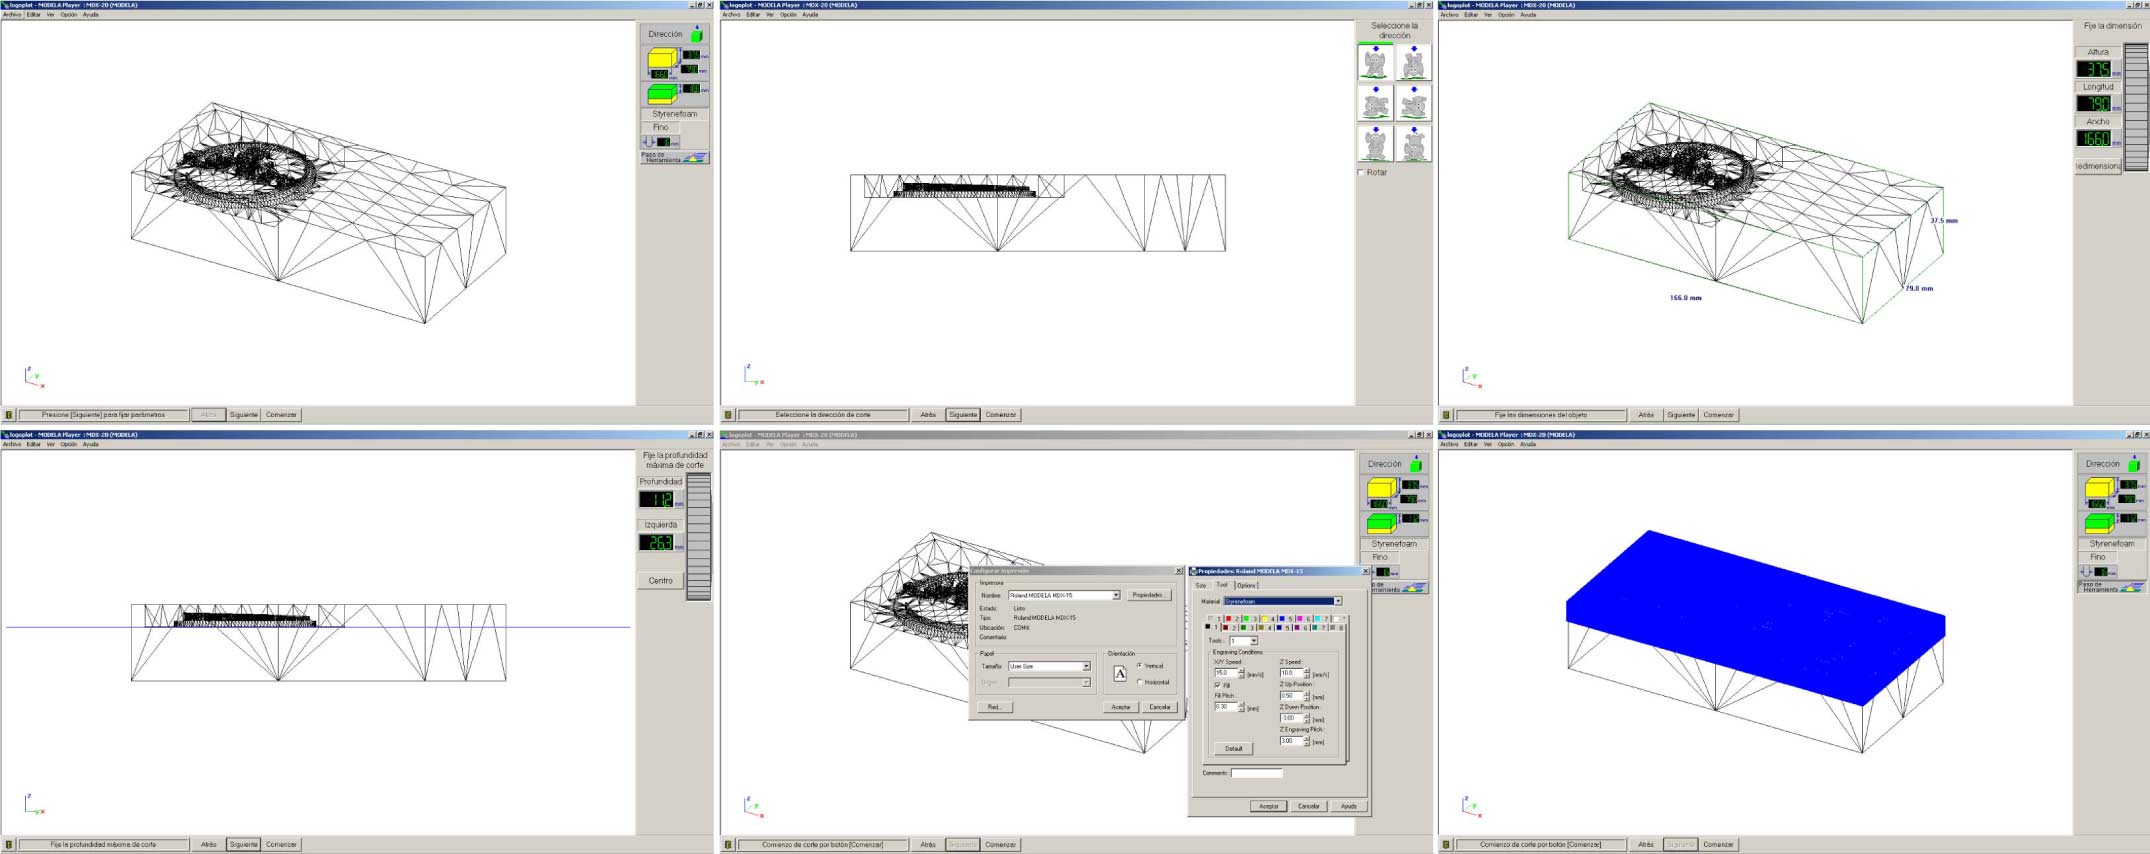
The estimated cutting time was 5:28 hours to complete the process and as we can see the element looks fine keeping good resolution.
Fabrication Process
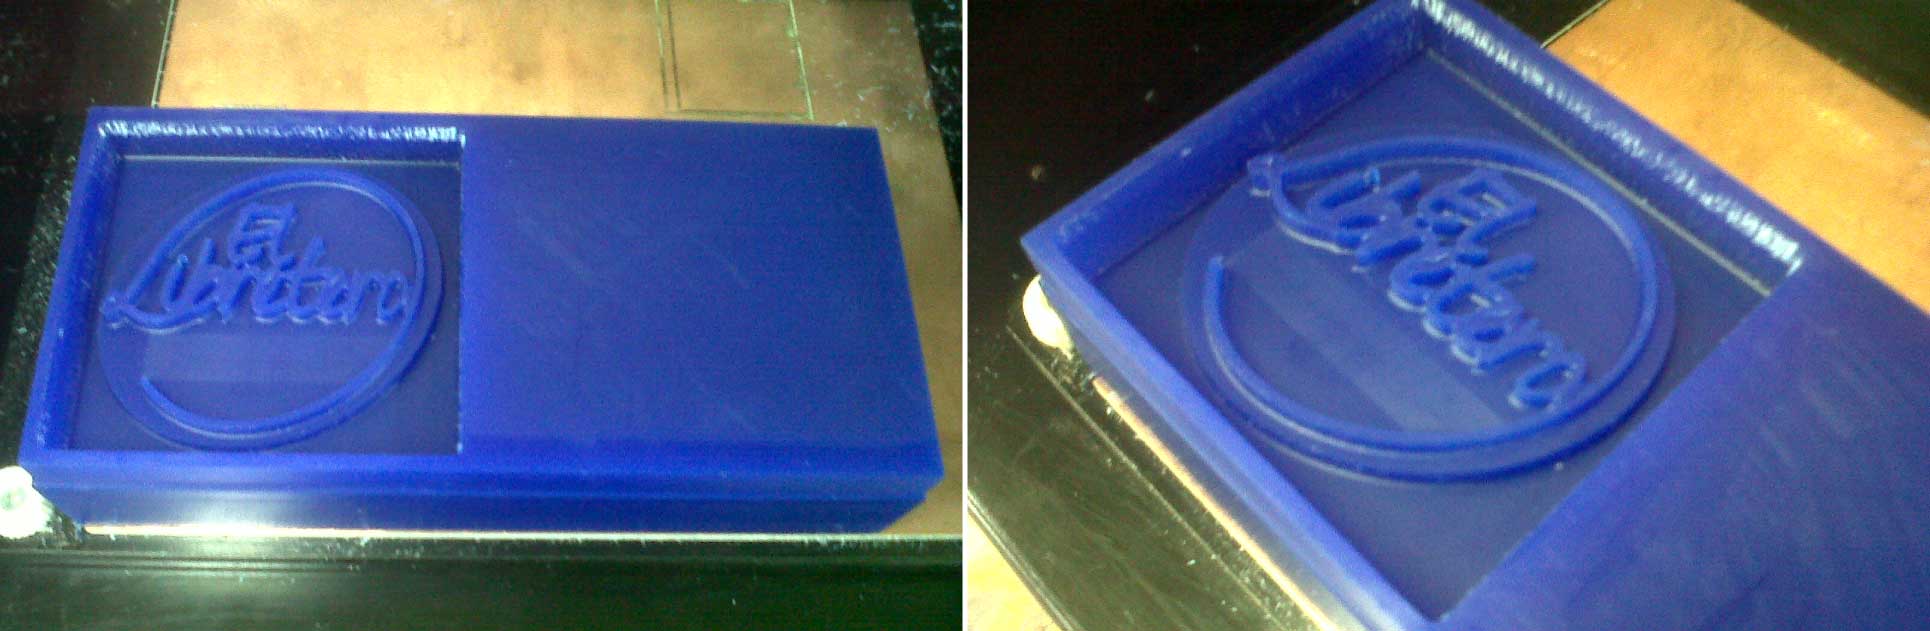
I’m happy with the final result; the logo looks very clear. The countainer mold is ready for the silicone. The “flute” of the bit causes a little bit of roughness in the mold walls, but nothing to worry about.
Silicone Mold
With our countainer mold ready, were going to make the negative silicone mold. The silicone we’re going to use has two products: the base and the catalyzer. The seller instruction was for 1000g of the base product 50g of catalyzer. We made a simple rule of three. For 250g of the base product we use 12.5g of catalyzer.
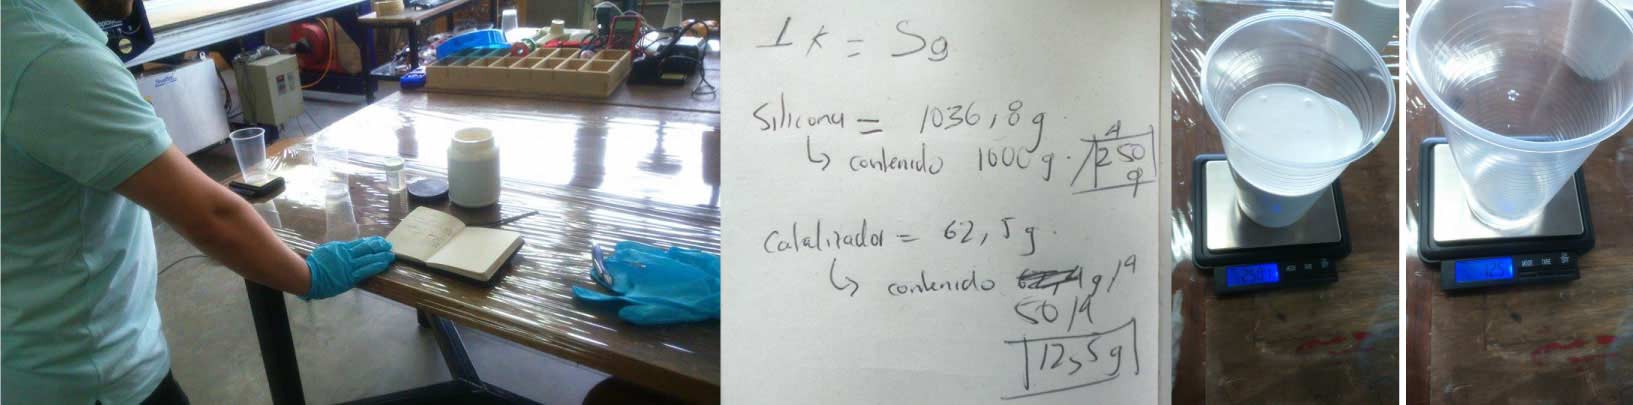
ALWAYS follow the safety instructions. Mix the base product and the catalyzer with a stick, not too fast to avoid air bubbles. Pour the mix into the countainer mold slowly in every corner. Vibrate the mix to reach every part of your mold and remove the bubbles.
Vacuum bags are the last step; protect your object with a generic perforated container and vacuum all the air excess. Repeat this operation every two hours at least. I let it dry from a day to another.

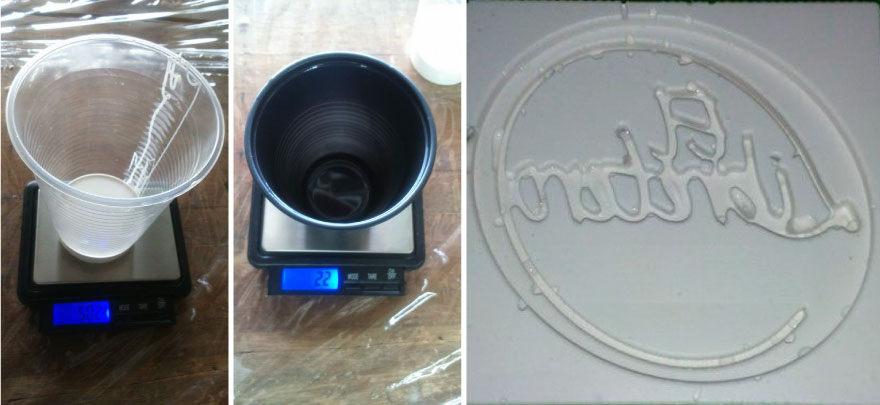
The first mold didn’t look as I expected, the mix didn’t reach every part of the mold and some air bubbles didn’t allow to get a better result. Let’s make another.
Second Try
There was a lot of leftover silicone mix in the preview model, in this I made a 50g base for a 2.5g of catalyzer. I followed the previous steps more carefully and as we can see, I got a much better result.
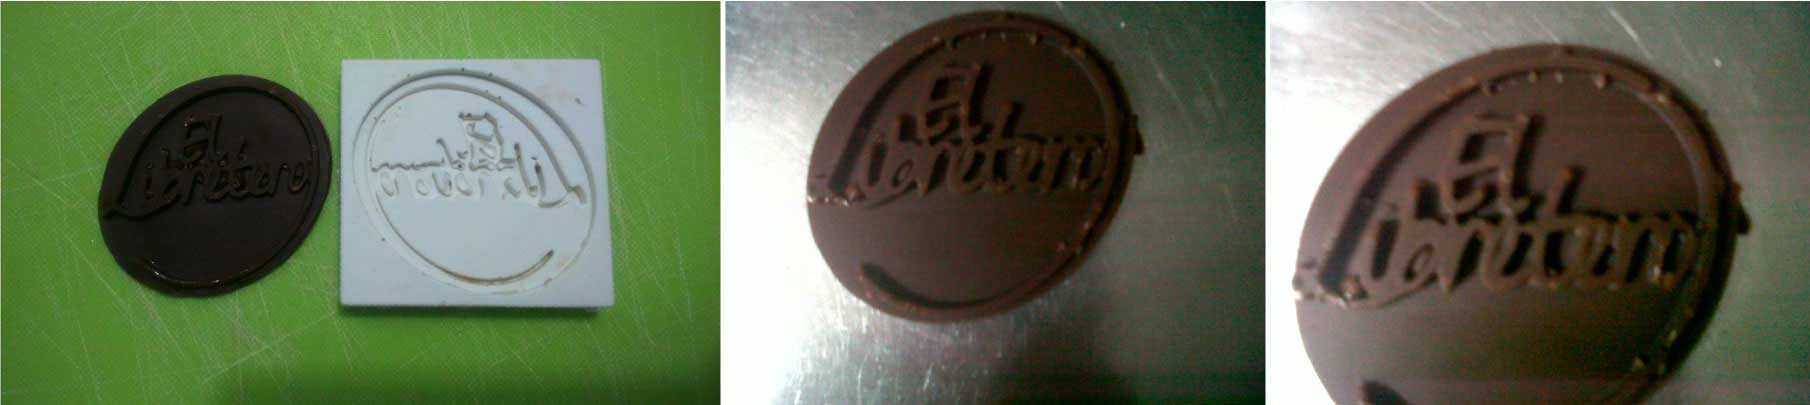
Chocolate Casting
Finally we can cast some chocolate logos. Melt the chocolate in a double boiler, and when it`s totally melted pour it in the silicone mold, also, do it slowly reaching every part of the mold.

Final Result
Let the chocolate rest for a proper time and unmold it. I think it looks fine, some air bubbles but good enough. Repeat the times you want.
This week assignment was cool but, slightly delayed; do not spent a lot of time in the 3d design, because you have to wait for hours milling the mold, preparing the silicone mold and casting some parts before you can see a result. Molding and casting is a very interesting technique to explore and make series of equal pieces.