Interface and Application Programming
Week 15
Review
This week assignment consist to write an application that interfaces with an input &/or output device. I will use “Processing” to write the programs that will interact with the potentiometer trough the Fabduino and the board that I use for Networking and Communications.
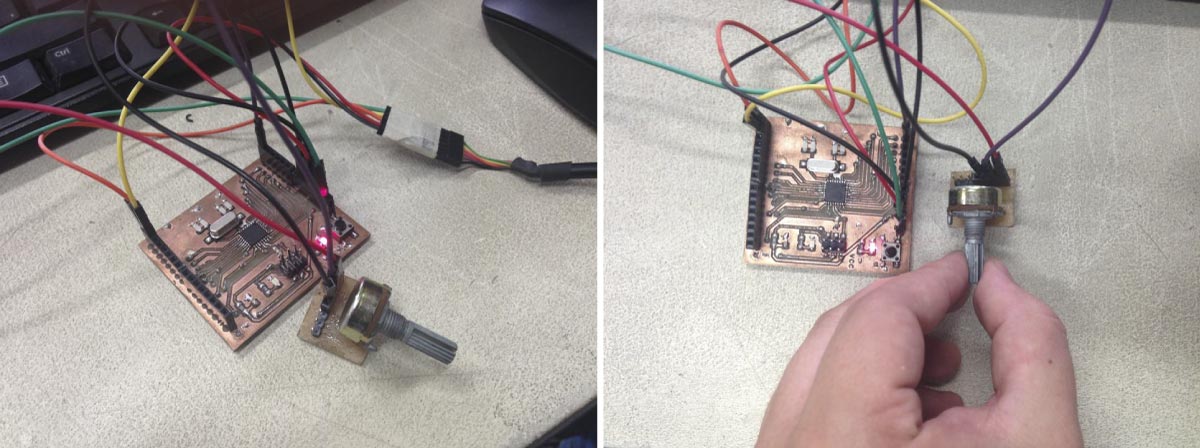
Potentiometer Board + Fabduino
As I said above I use the Fabduino and the potentiometer board of a previous assignment. Through the Serial Communication (process of sending data one bit at a time, sequentially, over a communication channel or computer bus) I was able to interact with the data from the analog sensor.
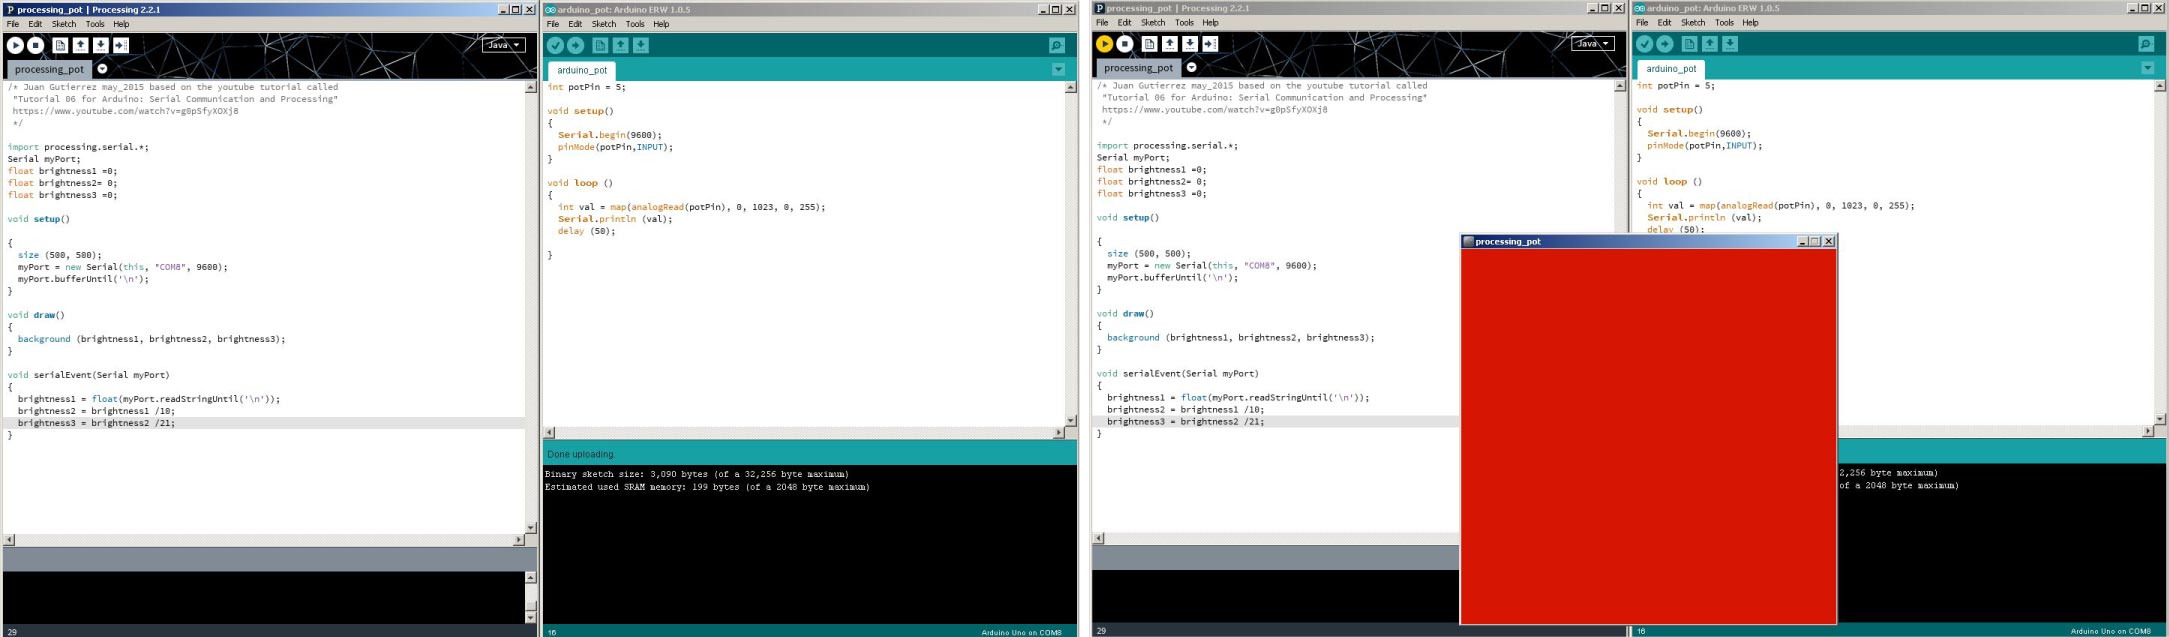
Potentiometer Color Brightness
My first program is based on this tutorial of serial communication between the Arduino IDE and Processing. In the time that I move the potentiometer, the serial communication between the board and the software changes, creating a variation of color brightness in processing.
Arduino Code
/* Juan Gutierrez Jun_2015 based on the youtube tutorial called
 "Tutorial 06 for Arduino: Serial Communication and Processing"
 https://www.youtube.com/watch?v=g0pSfyXOXj8
 */
int potPin = 5;

void setup()
{
  Serial.begin(9600);
  pinMode(potPin,INPUT);
}

void loop ()
{
  int val = map(analogRead(potPin), 0, 1023, 0, 255);
  Serial.println (val);
  delay (50);
}
Processing Code
/* Juan Gutierrez Jun_2015 based on the youtube tutorial called
 "Tutorial 06 for Arduino: Serial Communication and Processing"
 https://www.youtube.com/watch?v=g0pSfyXOXj8
 */

import processing.serial.*;
Serial myPort;
float brightness1 =0;
float brightness2= 0;
float brightness3 =0;

void setup()

{
  size (500, 500);
  myPort = new Serial(this, "COM8", 9600);
  myPort.bufferUntil('\n');
}

void draw()
{
  background (brightness1, brightness2, brightness3);
}

void serialEvent(Serial myPort)
{
  brightness1 = float(myPort.readStringUntil('\n'));
  brightness2 = brightness1 /10;
  brightness3 = brightness2 /21;
}
The Result
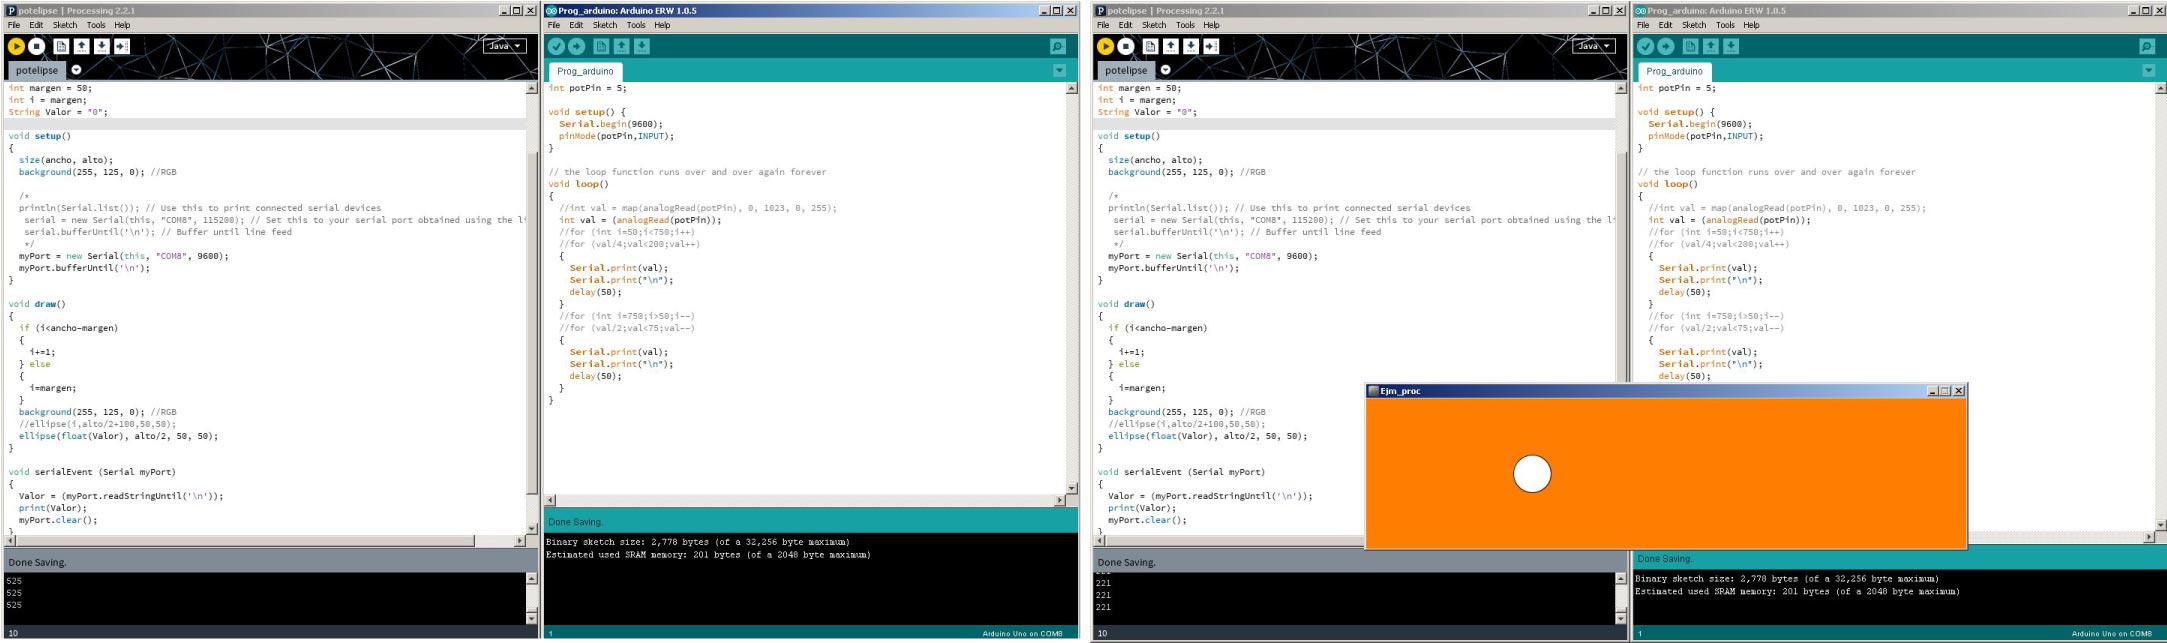
Potentiometer Moving Elipse
For my second program I used the potentiometer to move an ellipse in processing. Also in this case the analog sensor is connected to the analog input 5 (A5) of the Fabduino.
Arduino Code
/* Juan Gutierrez Jun_2015 */

int potPin = 5;

void setup() {
  Serial.begin(9600);
  pinMode(potPin,INPUT);
}

// the loop function runs over and over again forever
void loop()
{
  int val = (analogRead(potPin));
  {
    Serial.print(val);
    Serial.print("\n");
    delay(50);
  }
  {
    Serial.print(val);
    Serial.print("\n");
    delay(50);
  }
}
Processing Code
/* Juan Gutierrez Jun_2015 */

import processing.serial.*;

Serial myPort;

int ancho = 800;
int alto = 200;
int margen = 50;
int i = margen;
String Valor = "0";

void setup()
{
  size(ancho, alto);
  background(255, 125, 0); //RGB


  myPort = new Serial(this, "COM8", 9600);
  myPort.bufferUntil('\n');
}

void draw()
{
 if (i<()ancho-margen)
  {
    i+=1;
  } else
  {
    i=margen;
  }
  background(255, 125, 0); //RGB

  ellipse(float(Valor), alto/2, 50, 50);
}

void serialEvent (Serial myPort)
{
  Valor = (myPort.readStringUntil('\n'));
  print(Valor);
  myPort.clear();
}
The Result
This week let me a lot of things to learn. Processing is a great programming language to continue learning, very powerful to program in a visual context. The possibilities of interact with the hardware and software opens a new whole world of potentials.