Composites
Week 12
Review
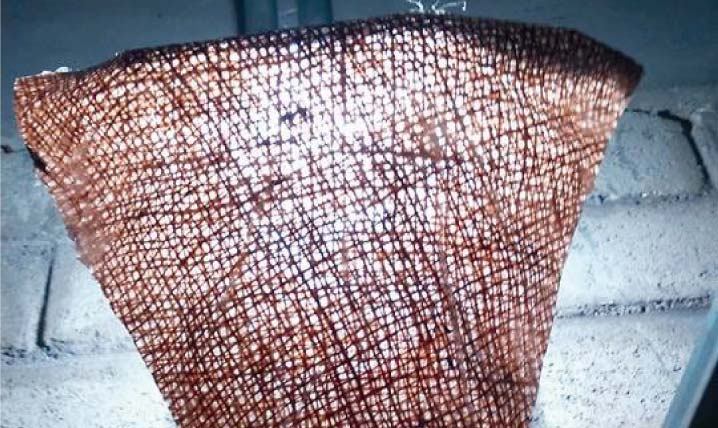
This week we’re going to make a 3d mold to produce a composite fiber from it. With some help from epoxy resins, the fiber will be hard enough to be removed from the mold keeping the form of it. Composites are a good way to make shells; I will make some kind of lamp shade with “Yute” fiber. The superposition of these fibers in different directions produces a nice light effect. Yute it`s a fibrous herb cultivated in tropical regions for its fibers. It is mainly used to make packing bags.
Design
I used the “Rhinoceros” plugin “Grasshopper” to make the model. The form is produced by a simple series of circles with different diameters, sectioned longitudinally. Also I used the add-on “Paneling Tools” for “Grasshopper” to make the triangular panels in my design. Turn all the polysurfaces into a solid mesh and export it like a .stl file.

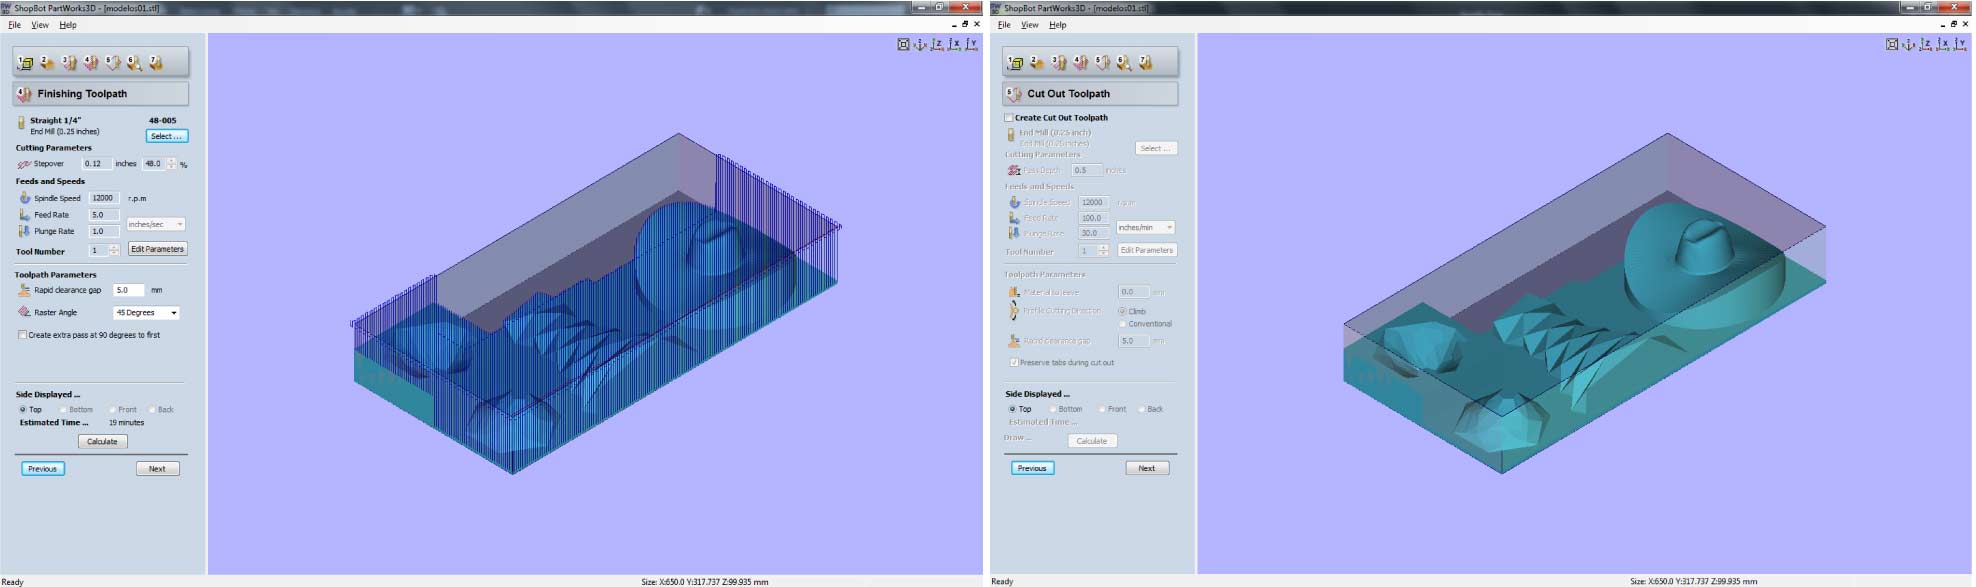
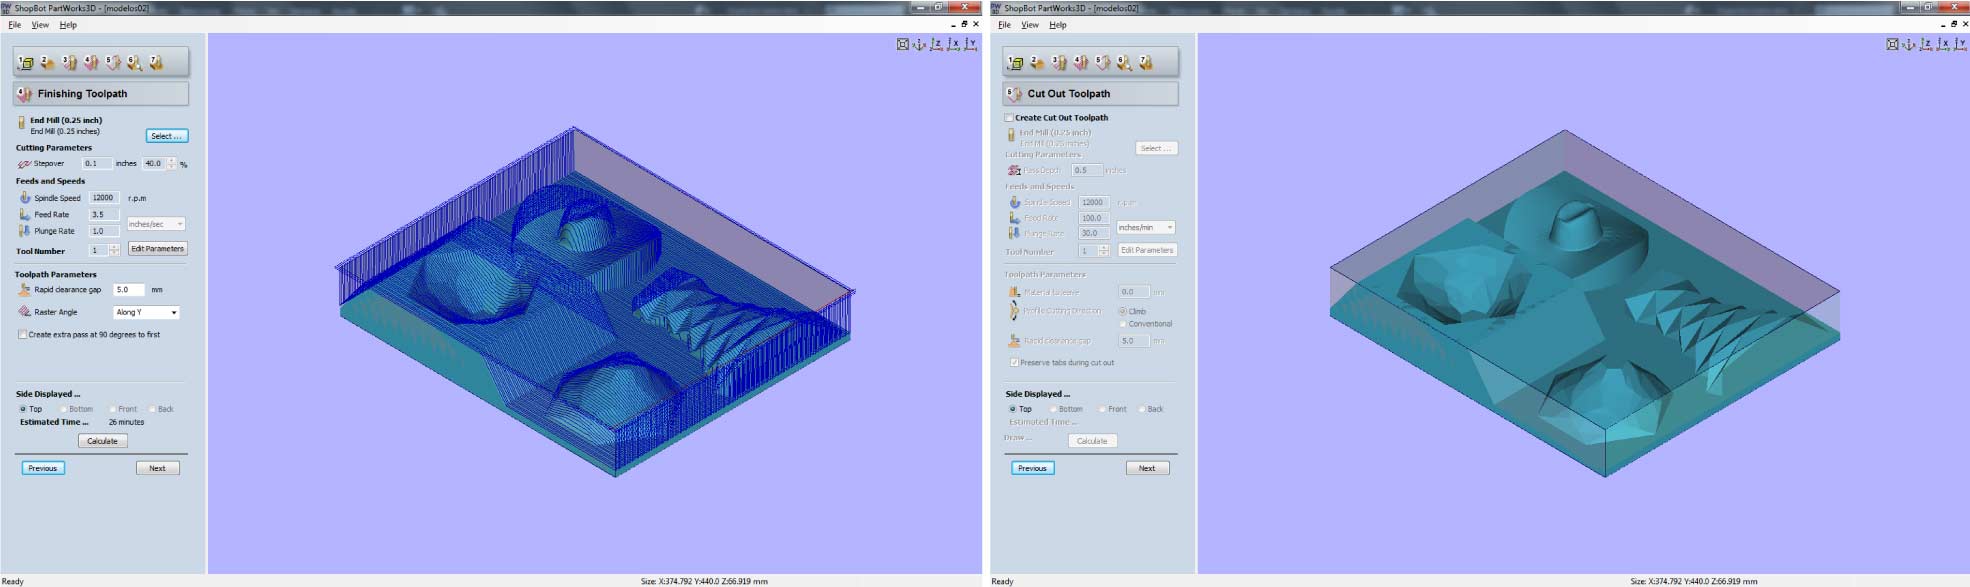
Foam Settings in the Shopbot
We used the Shopbot CNC to mill the “high density” Foam. The Shopbot spindle can reach about 14000 RPM to mill the foam like “butter”. The software used to mill was Partworks 3D (Shopbot Software). This is very intuitive software that takes us through a series of easy steps to fabricate our 3d model. The steps are detailed next.
- 1. Orientate and Size Model. (Set the units in mm)
- 2. Material Size and Margins. (leave at least 10mm in the X and the Y axis to fix the material)
- 3. Roughing Toolpath (1/4 end Mill, 12000 Rpm, Feed Rate 5.0)

- 4. Finishing Toolpath. (Final surface)
- 5. Cut Out Toolpath. (Used to cut the model, i didn't use this)
- 6. Make the preview of Machinig. (With the toolpaths)
- 7. Save the Toolpaths as different processes.

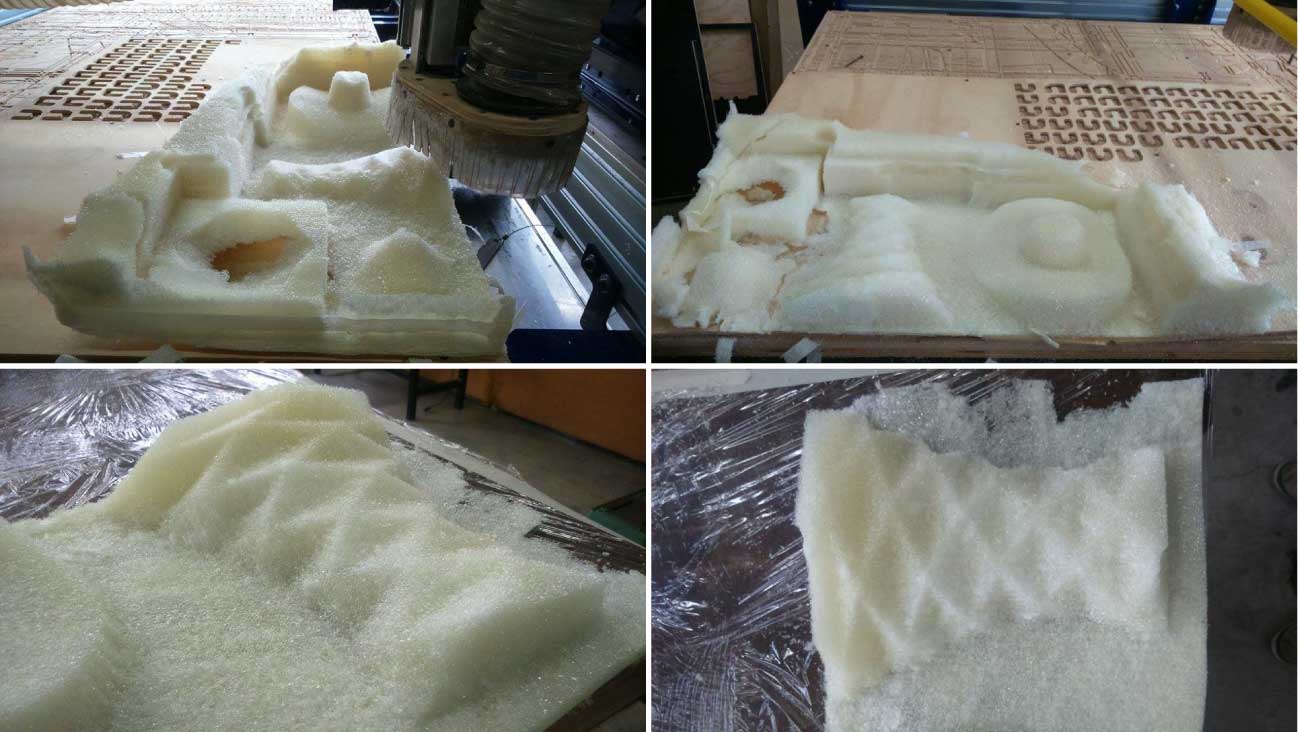
“High Density” Foam Milling
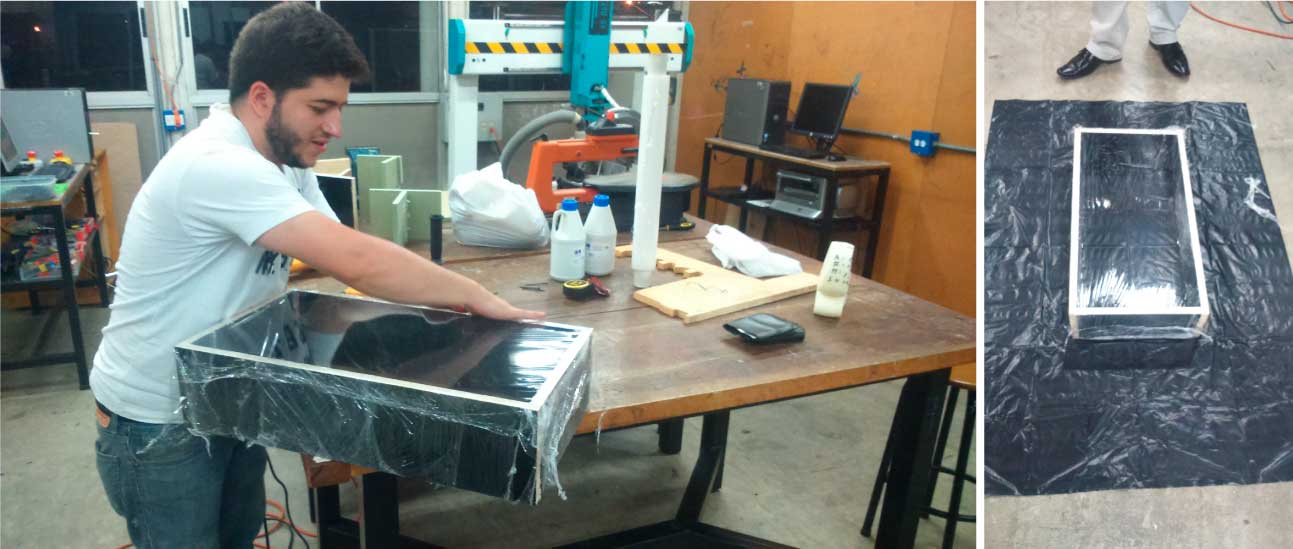
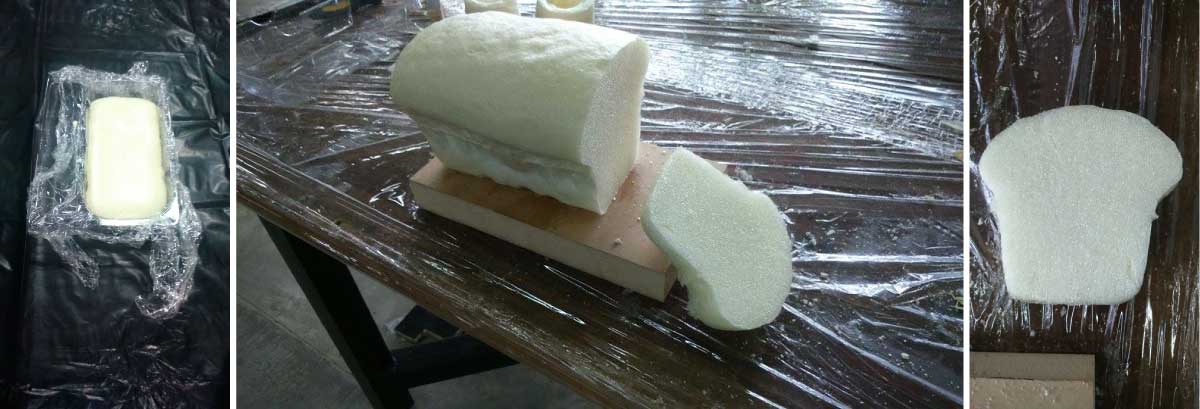
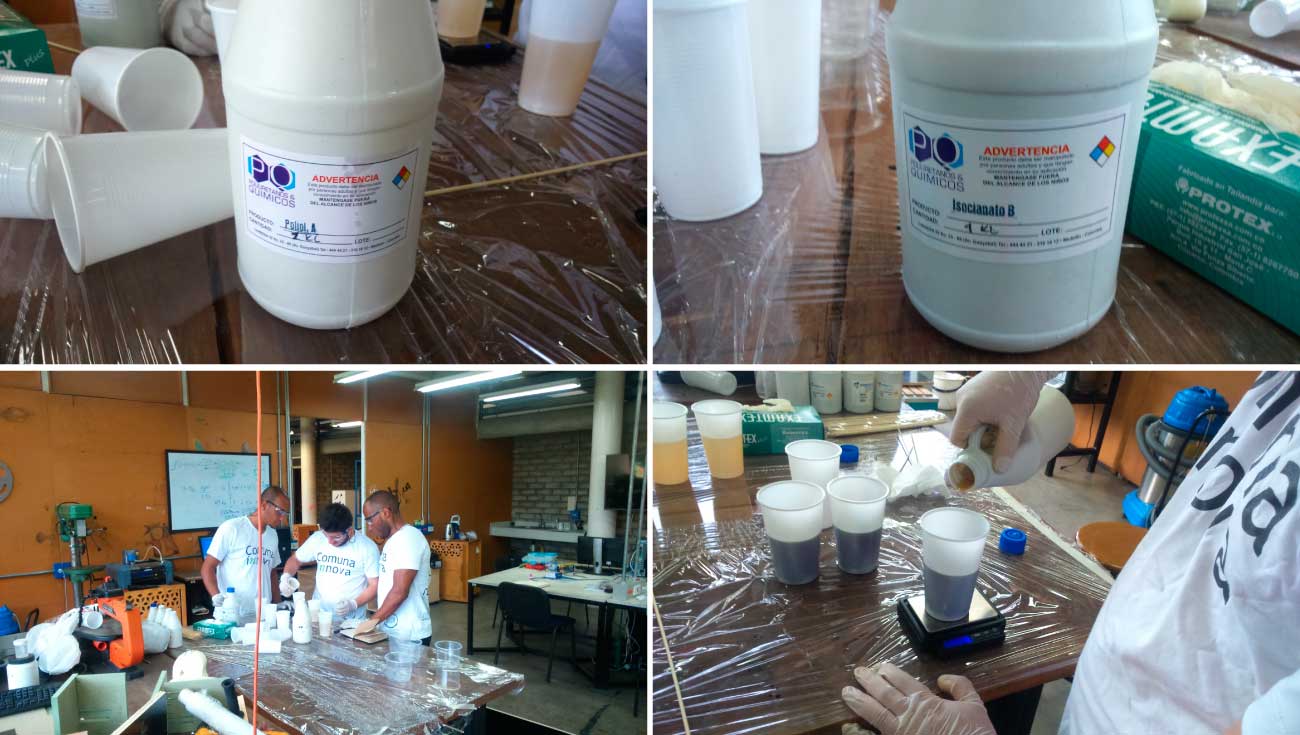
We continued by making the high density foam to mill our designs. To start we begin by making the container mold for the foam, but we were not secure about the volume of mix we had to prepare. That’s why we decide to mix 33g of each component to see how it goes. As can be seen in the image bellow the container mold MUST (we made a huge mistake with the second container mold) be covered with cling film and some oil. It’s also important to prepare the room for the mixing. Keep everything cover with plastic bags.
The foam mix test gone well, we were able to cut it with a handsaw and machining it with a MotorTool. Our expectatives were high at this point.
Preparing the Foam
With the “experience” of the test, we design a new container mold according to our needs. The necessary mix to fill the 80cm (L) x 40cm (W) x 15cm (H) was about 970g of each component in a 1:1 proportion.
As I said before we made a HUGE mistake with this container mold. As can be seen bellow we didn’t use cling film neither the oil to protect the foam from the mold. We follow the advice from someone who said that it wasn't necessary...(It won't happen again). We mix the components in four different proportional parts for each corner of the container mold (I think this was the only thing that gone well in the process). We reach every spot.

The foam grew to the size we planned. Six people stood above the container mold to ensure that we have compacted foam.

At the time to unmold the foam the container mold was totally fixed to it. As result it was a head ache try to do it without damage the foam. We clearly didn’t make it. We had to break some parts of the container mold. The foam broke and we lost huge pieces of it.
Milling Process
We had to rescale our models to the foam we had available. Even we tried to compact the mix to get high density foam, the final result didn’t end the way we expected (At this time I don’t kwon what could be go wrong with the mix or the process). Some parts of the foam were really “weak”. As can be seen bellow we didn’t get high quality pieces. Actually the 3d mold of one of my classmates, was damaged in the milling process.
Wood Milling Process
We were not enough happy with our molds, that’s why we use some wood to make the whole process again. For second time we rescale our 3d models with the idea to optimize the process and the available material. The parameters to mill the foam are detailed next.
- Roughing Toolpath (0.3125" End Mill, 12000 Rpm, Feed Rate 2.5)
- Finishing Toolpath (0.25" End Mill, 12000 Rpm, Feed Rate 3.5)


Milling Process
Milling the wood took about one hour and a half more than the foam. Certainly the wood is denser than the foam, that’s why it’s necessary to reduce the Feed rate (speed) in the milling parameters.

I think that the final result was good; the surface didn’t end as a smooth surface, but the triangles of the paneling have better resolution than the foam triangles.

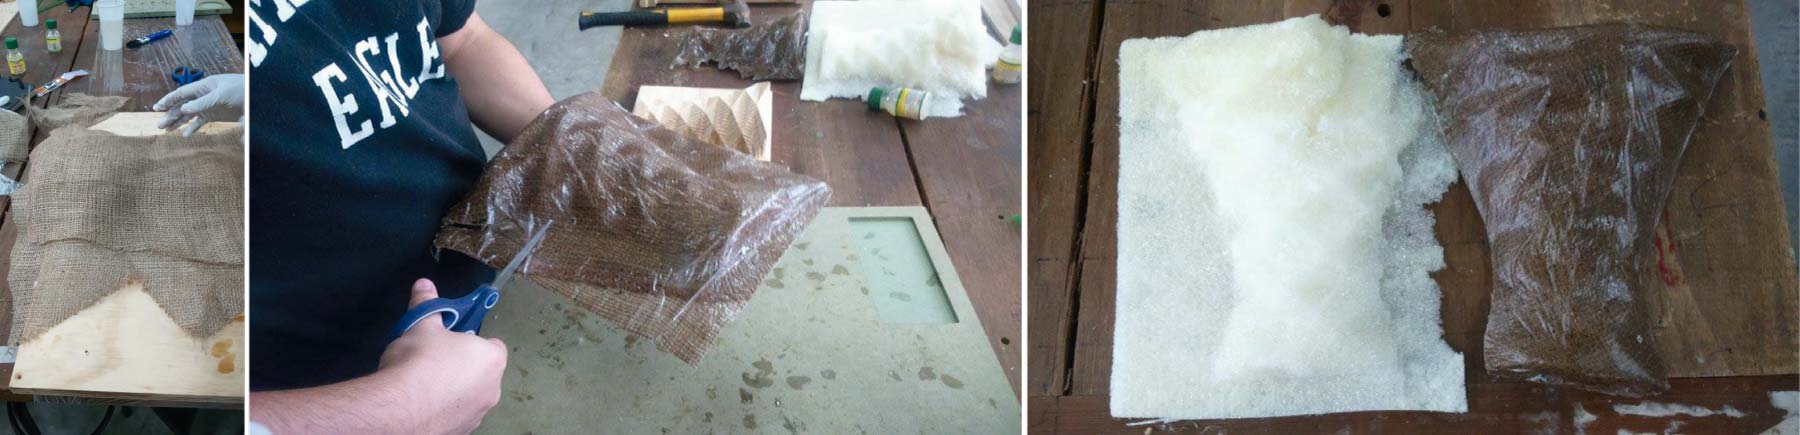
Cutting the Fabric
With our molds ready to make the composite, the next step was to use the laser cutter to cut properly the fabric according to the dimensions and the form of the object. In “Rhino” we can use a few commands to turn 3d meshes into 2d flat surfaces. The commands “Squish” or “Smash” should help in that task.
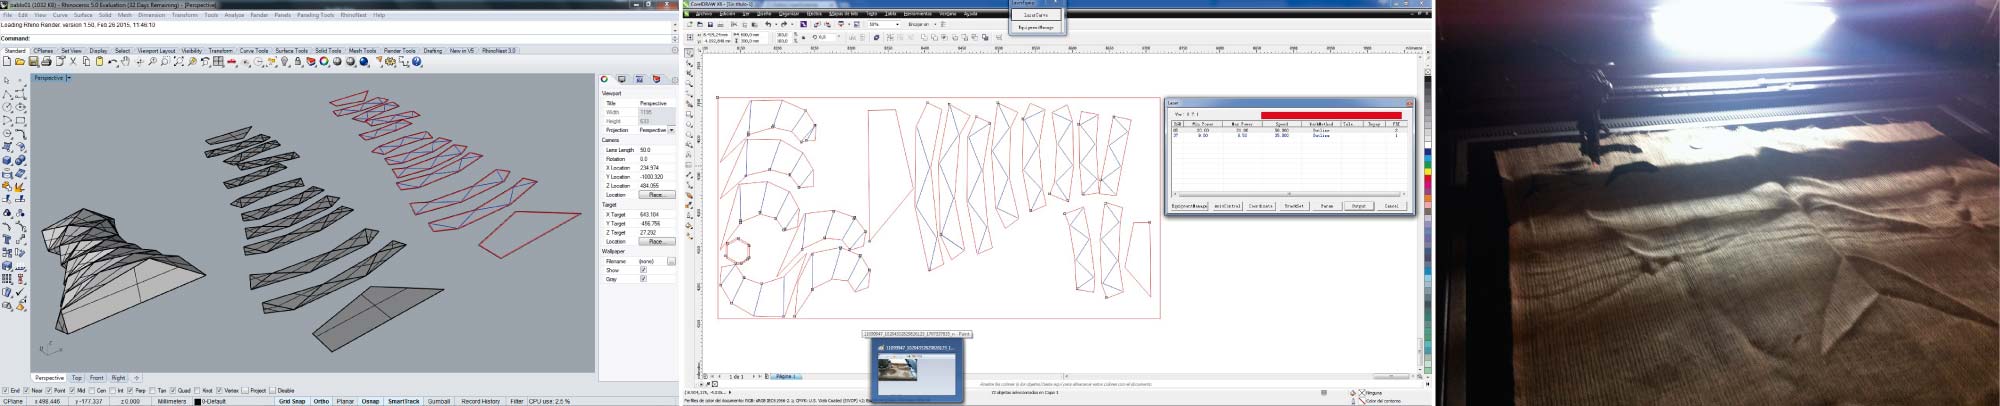
For me these commands didn’t work really well because of my surface form. I had to divide the surface into several independent surfaces. This played a trick on me because it’s harder to make the composite in this way. It’s easier and better to have a single piece of fabric. The parameters for cutting were Speed: 50% and Power: 20%
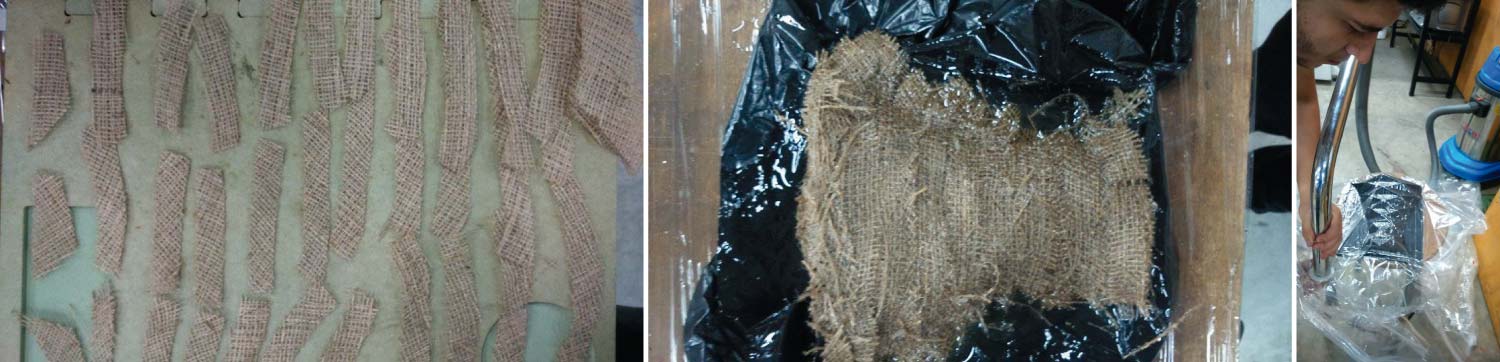
Epoxy Resin
With all the pieces cut was the time to mix the components for the epoxy resin, and also prepare the mold and the work surface. First of all use plastic gloves all the time. The mix of the epoxy resin is composed by the resin and the hardener mixed in a 1:1 proportion. I mixed about 150g of each component and it was enough. Have on hand: plastic glasses, bascule, stick(to mix), brush and everything you think you will need.
With help from our local instructor we follow the next steps to make the composite:
- >Use plastic bags to cover the work surface. The resin can cause a mess even if you try to keep it clean.
- >Cover the 3d mold with Cling Film to avoid the fabric get stick to it.
- >Give a first hand of resin in the surface (covered with cling film) and then place the first piece of fabric.
- >Repeat 2 or 3 times the same process until you have a couple layers of fabric.
- >Cover the object with a plastic bag and put it in the vacuum bag.
- >Vacuum the air excess every hour for the first 3 hours.
- >Let it dry 24 hours at least. At the time to unmold it you will see it is still getting hard.
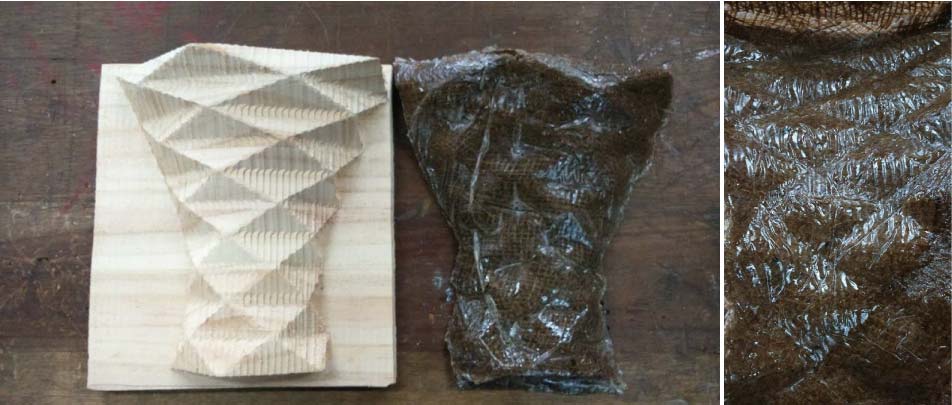
The composite should come out very easy because the cling film doesn’t stick to it. Use scissors or cutter to cut the excess of material.
I also done another composite with the foam. I cut a couple pieces of fabric with scissors (the analog way hehe) and repeated the same process detailed above. In this, the composite came out better because as I said before a single piece of fabric is better than multiple pieces. I have to say that the triangles in this one weren’t as good as the others made with the wood mold.
I felt I learned tons this week, we made some serious mistakes… but at the end we go forward with this assignment. Really cool technique to explore.