3D Scanning and Printing
Week 5
3D Scaning
Review
This week’s assignment we will learn different 3d scanning techniques and 3d print an own design. There’re many 3d scanning techniques as many 3d printing process. You can learn more about this in these tutorials. In 3d scanning we´ll explore the 123D CATCH APP and Kinect Scanning. For 3d printing we’ll use fused deposition modeling as 3d printing process.
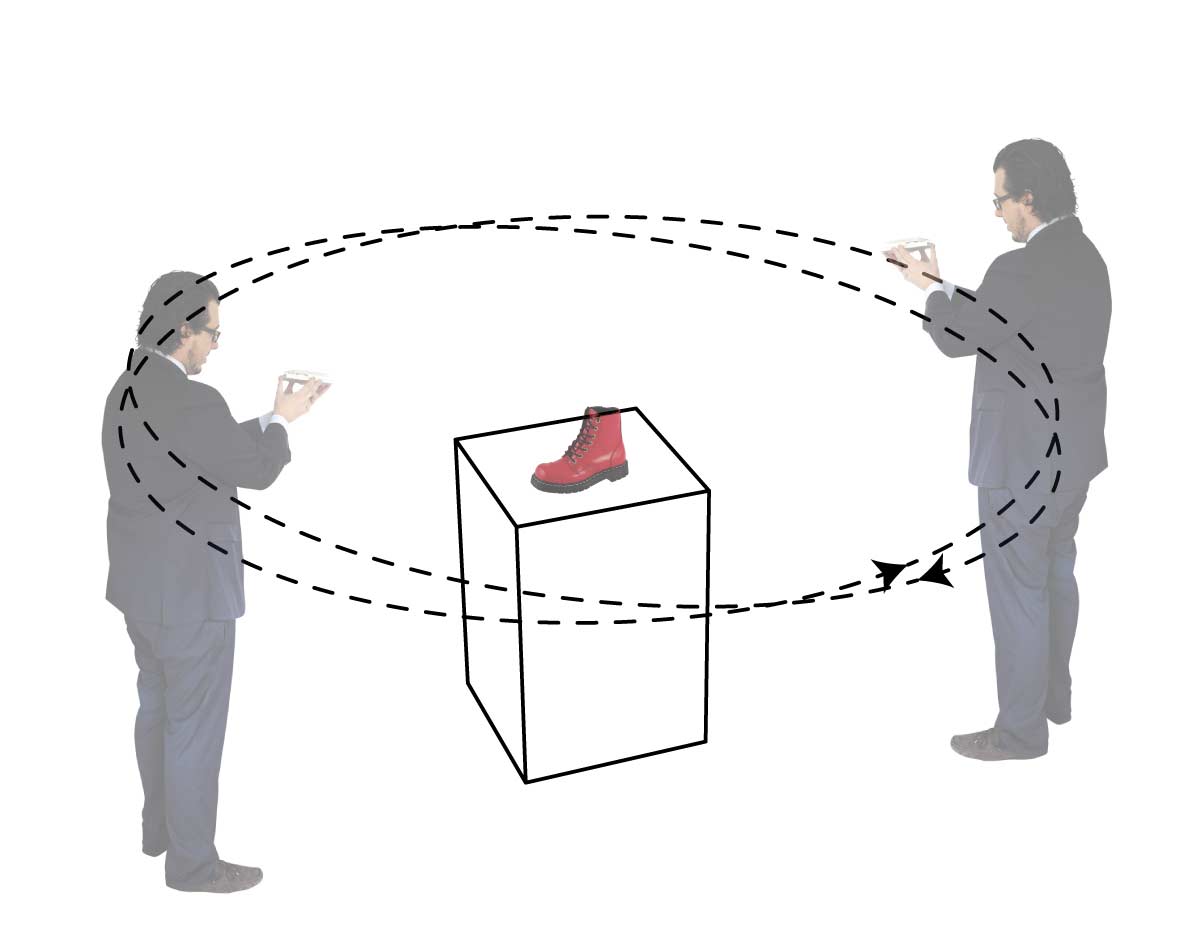
In both (123d Catch and Kinect Scanning) we will follow some similar recommendations, even if the Kinect is based on Laser Scanning and the 123Catch is based on photogrammetric techniques. For scanning a solid object turn around the element as in the image above keeping the scanner in the same position. We also can change the scan position but try to scan the object in a continuous line.
123D Catch

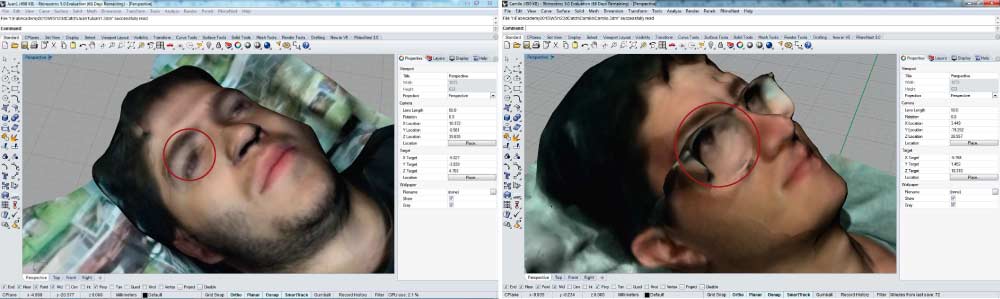
In the first attempt to scan an object we made a mess around the object, trying to understand the basics of the 3d scanning. With the instruction of our local architect friend Andres Hincapie we learned to keep the scanning surface “clean” having only a few strong color reference objects as we’ll see below.
Besides, avoid reflective surfaces like glasses because it can cause deformations in the object. Blinking is also a “problem”. Try to stay quiet like a statue as long as you are being scanned.
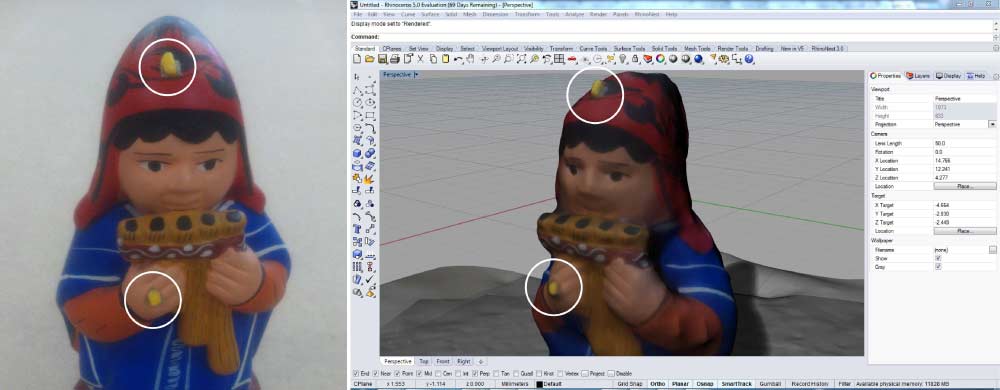
Some of the optimal conditions for a 3d photogrammetric scanning are:
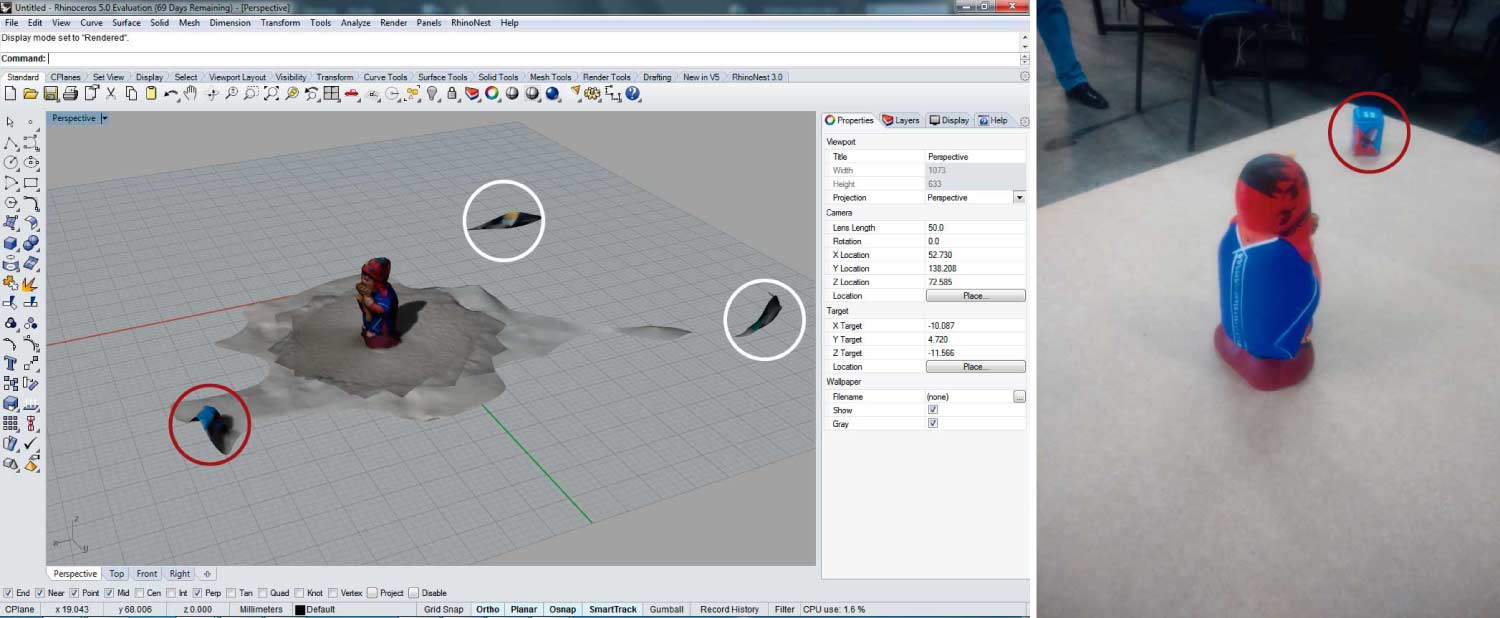
- >Scan solid pieces with strong colors. This will help to track the shape, the depths and the shadows more efficiently.
- >Scanning guides as the yellow dots below.
- >Reference objects help as reference points at the time of join the pictures.
I made some explorations with the 123Catch before. Newspapers are also an excellent tracking guide for the 3d scannings. I scan myself and some of my friends with good results. Follow this tutorial for more recommendations about 3d scanning with this app.
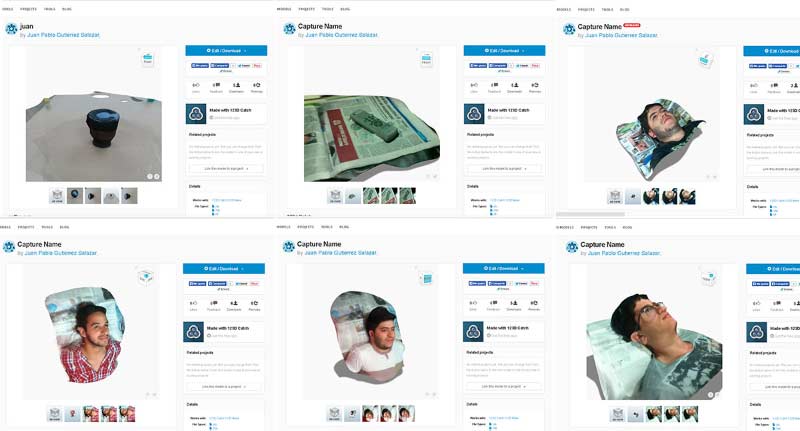
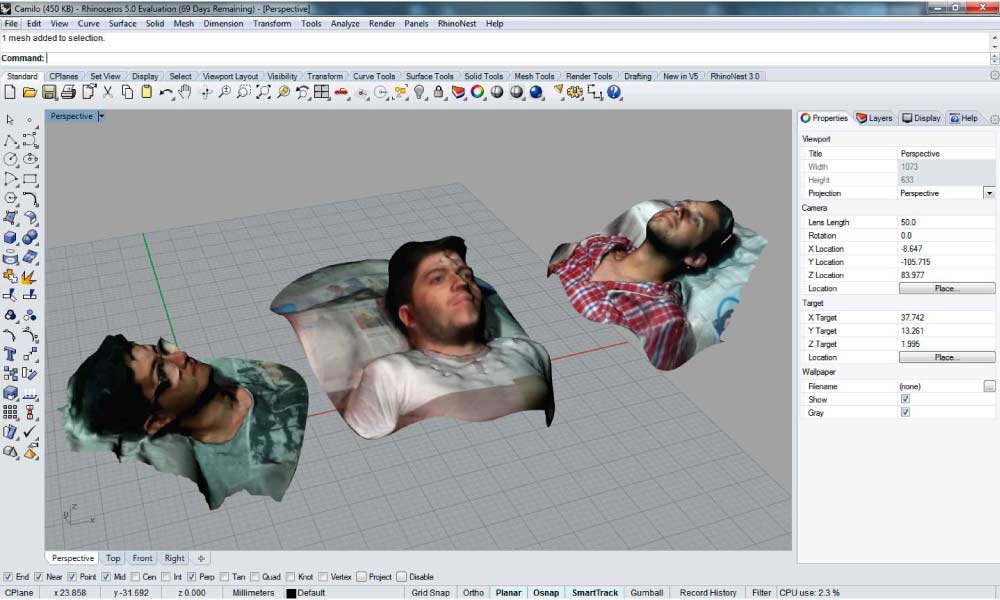
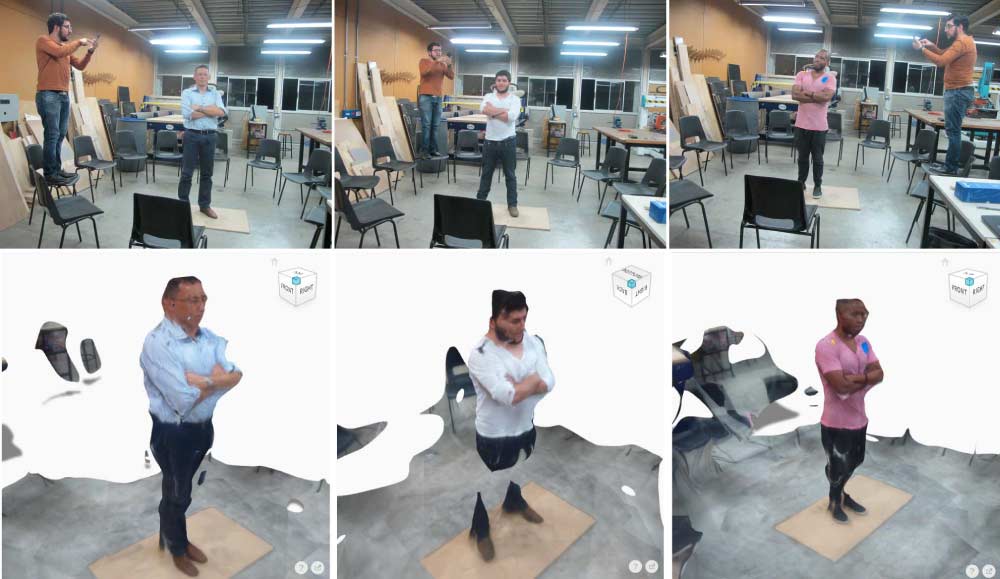
We made a group scanning exercise with some help from Andres. The result wasn't the expected, taking in account there was a lot of elements around us that difficulties a good scanning result. Daniel Asprilla had the best result, with some mesh repair he was ready to be printed.
Kinect
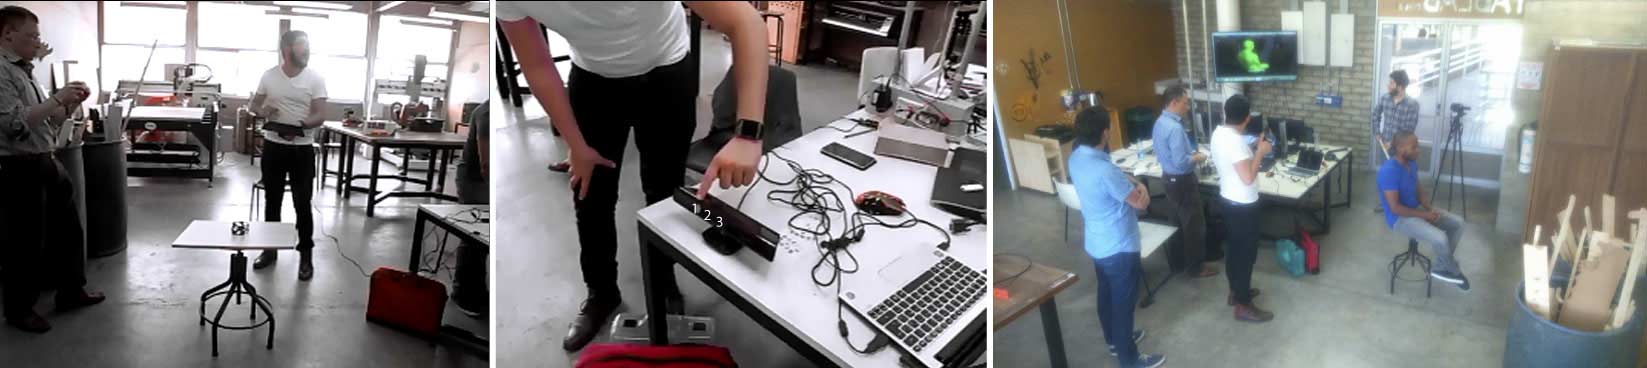
Kinect scanning was a little bit more difficult, at the beginning we couldn't install the drivers, they were too updated for our “old” kinect. Remember to install the old drivers for a first version kinect. Before begin scanning we need to install: Kinect for Windows SDK v1.8, Kinect for Windows Runtime v1.8 and Kinect development Kit.
Next step is installing Skanect software and we are ready to start. The optimal distance to scan an object with the kinect running on skanect is 1m. The kinect scan approximately 1m3; if you want to scan something bigger it will need more RAM memory and the pc will crash. The kinect has 1 infrared camera and one vga cam. As in the scan with the 123d catch is important to scan a solid and coloured shapes.
3D Printing
Preview
Our lab 3d Printer is a 3D Touch by "Bits from Bytes". This 3d printer allows us to print in ABS and PLA plastics. According with this NASA tutorial for 3d printing with the 3D TOUCH, ABS is an excellent material to print small designs because of its toughness, but in large pieces, it tends to warp on the bottom because it has relatively high shrinkage on cooling. For big pieces it’s recommended to print in PLA, a hard plastic with low environmental impact.
3D Touch Printer Specifications.
- Material: ABS_PLA. Multiple Colors
- Extruder Heads: 2 with options for a 3.
- Max Build Size: 18.5cm x 27.5cm x 20.1cm
- Z axis Resolution: 0.125mm
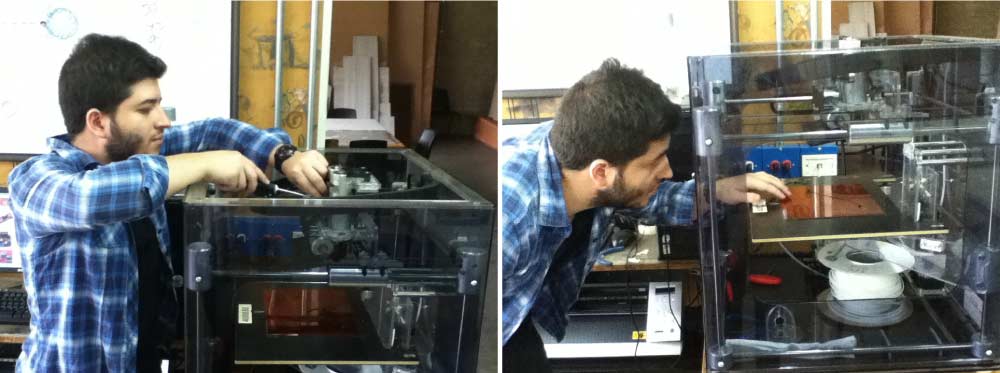
We follow some advices from our “Supernode” and used a piece of acrylic to fix properly the elements to the bed. It works better than the original bed surface from the machine, but still we had to add some tape to fix really well the element as we’ll see in the images bellow.
Object Desing
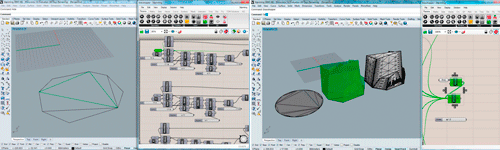
The challenge was to design an element that couldn’t be done subtractively. That’s why I designed a “Pencil Case” in "Rhinoceros" and its plugin "Grasshopper" with space for a little plant. A decorative and functional gift composed by triangles with different heights, inclinations and double curved surfaces.
At the time to export it from “rhino” like .stl file and import it in the BFB Axon Software, it turned in an endless procedure to process the file and have it ready for the 3d printing. Then I decided to make the element smaller, and erase a few of the triangles. It works this time. I printed it in white ABS with the next parameters: ABS extruder temperature 260º, PLA extruder temperature 195º.

3dPrint Object Desing
As I said before the acrylic worked well but in some places because of the bottom wrap, the material lifted from the bed and I had to stop the 3d printing process to add some tape around the element. After that i continued the printing.

The result wasn’t as I expect, there were holes in the final object that they weren’t in the 3d model. I’m not happy with the result and I’m waiting to print my element in another 3d printer.

3dPrint Object Scan
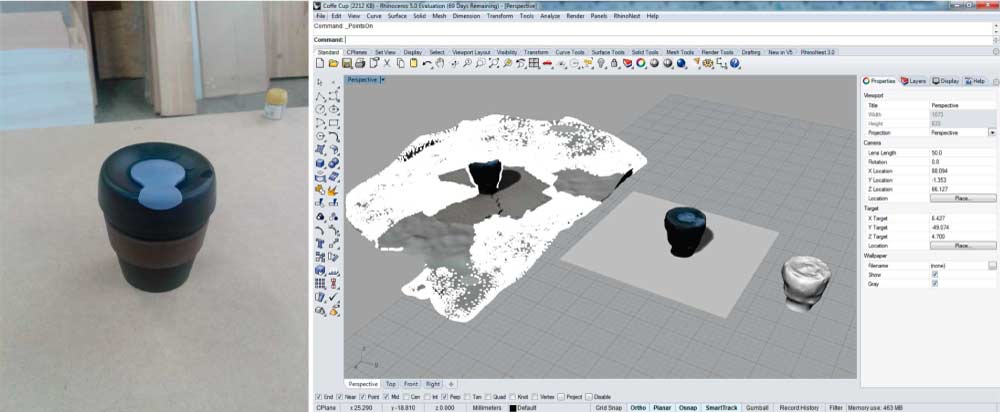
I quickly scan my tutor’s coffee cup, a simple object considering our printer limitations. The coffee cup was an object that could be easily printed without spending much of time on it. I downloaded the model from the 123dCatch web, and opened the .obj file in “Rhinoceros” to clean the meshes, cap some holes and let it ready for the 3d printing process.
3Doodler
Manual 3d printing it`s more difficult that it seems. Basically it’s fundamental to have a steady hand to make a simple shape, the PLA plastic doesn’t harden fast enough. As result the object isn’t as precise as we wanted (off course it depends also of the user experience). But, in other way it’s a really cool machine with tons of potential in a near future to quickly sketch a 3d idea.

Augmented Reality
We had the opportunity to learn about augmented reality. We made a class exercise whit Unity3D with and android app developed by Andres. To learn the basics of the augmented reality I downloaded the android app Augment. I uploaded a model in the web page of the app, and also a tracker. It works really well. As I already said, this week let us many tools to continue exploring and learning
