13. Molding and Casting
During this week we have to design a 3D mold, machine it with the monofab (milling machine), and use the mold to cast the parts
Group Assignment
Our group assignment can be found the link
3D design
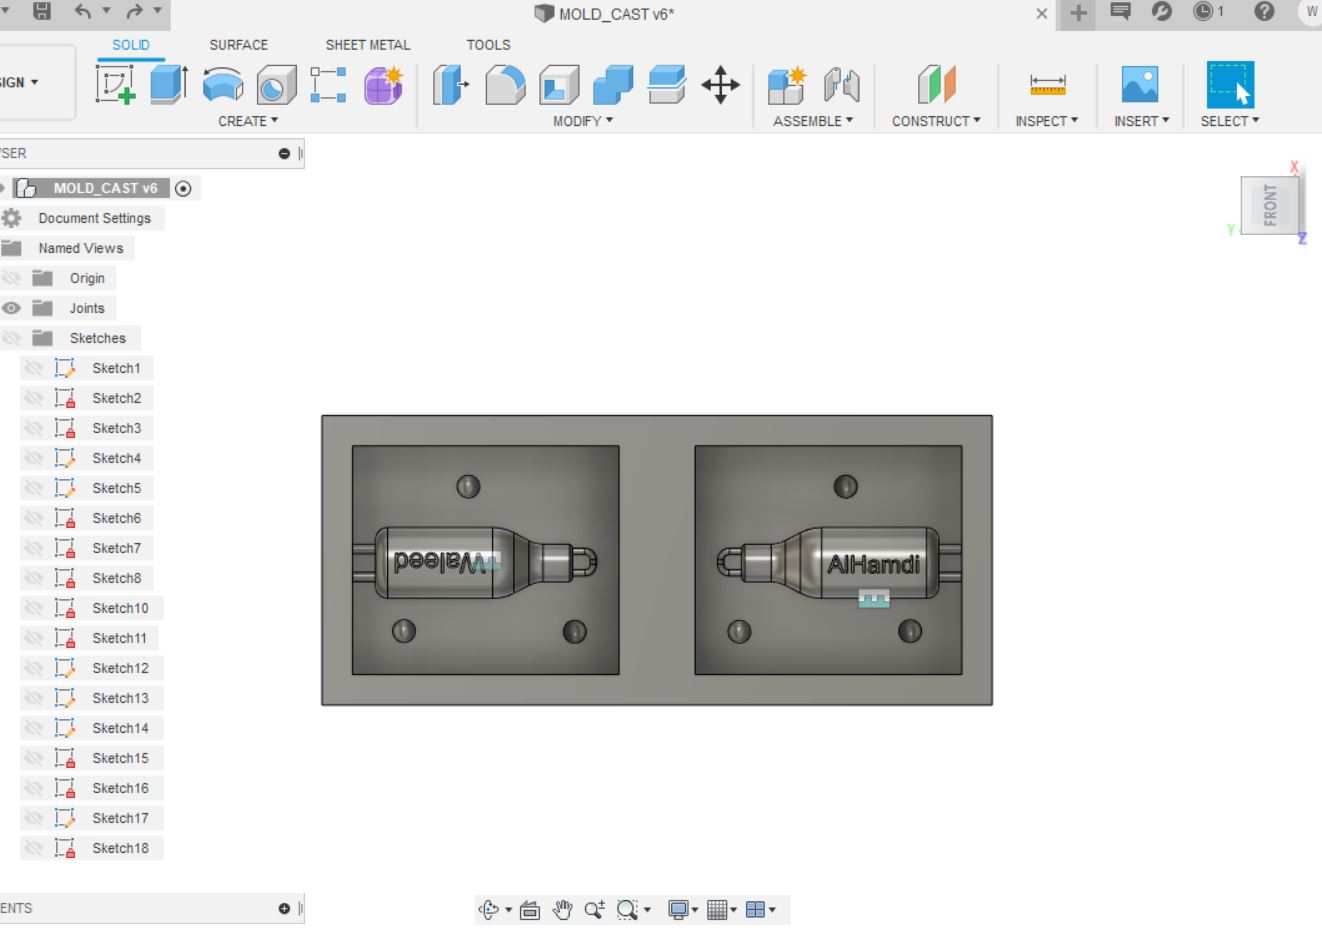
For this week I decided to make something easy and simple to design, so I decided to make a keychain with my name written on it.
I used fusion 3d to design and create the toolpath for the mold (both CAD and CAM)
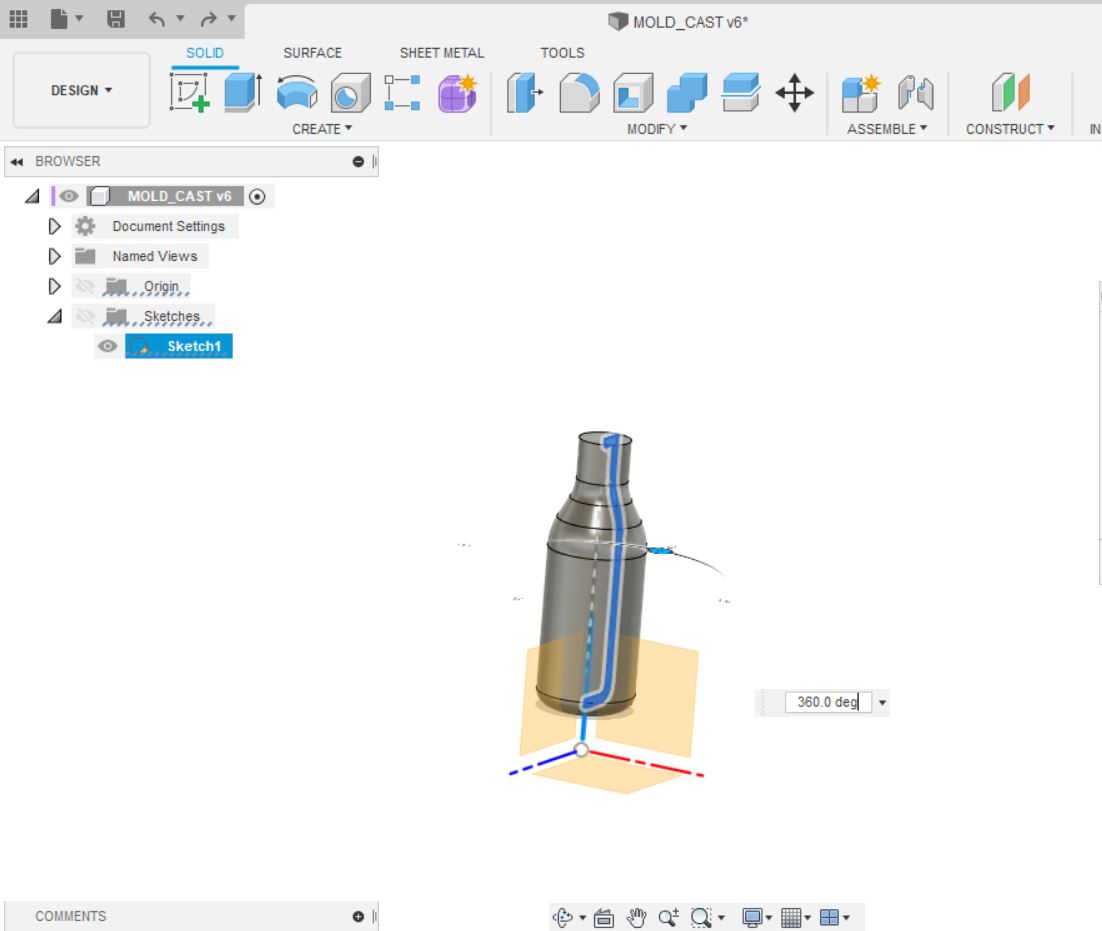
I started by drawing the 2d sketch of the main body ,
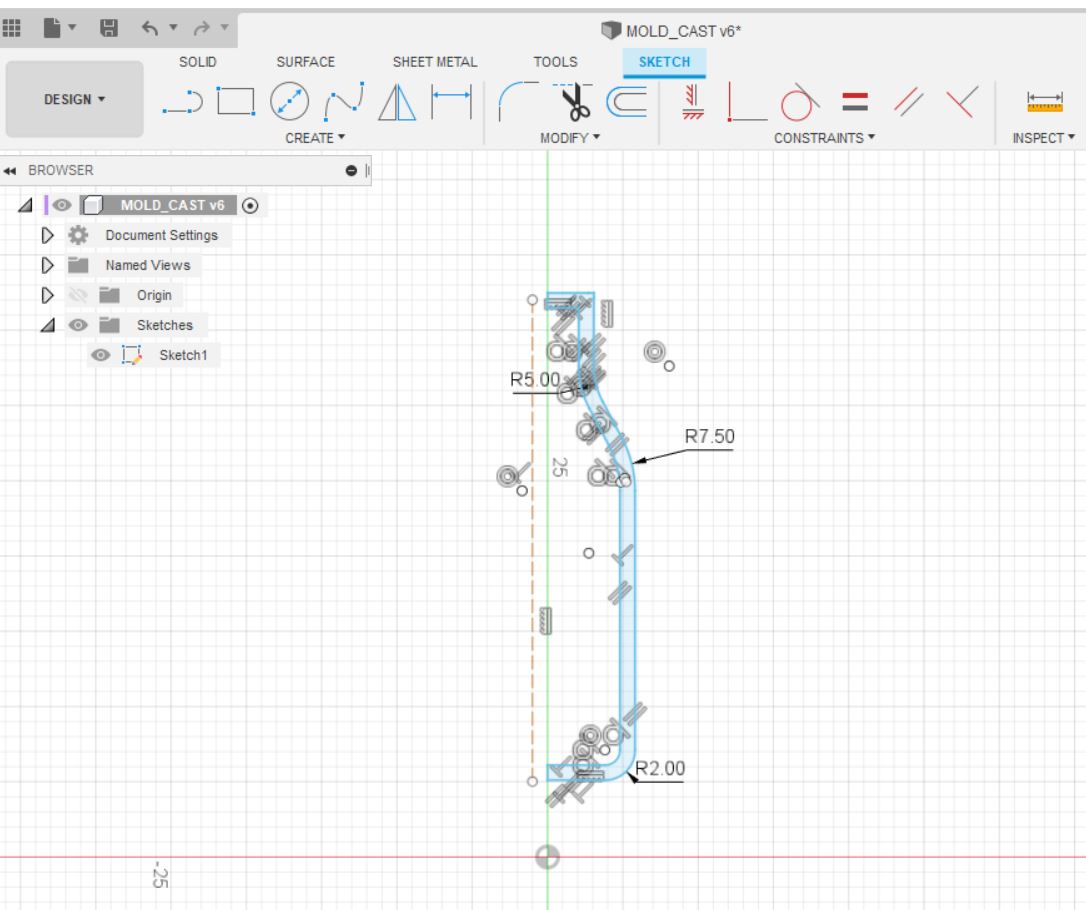
Then I revolved the 2d sketch to have the 3d shapes and I added the remaining details
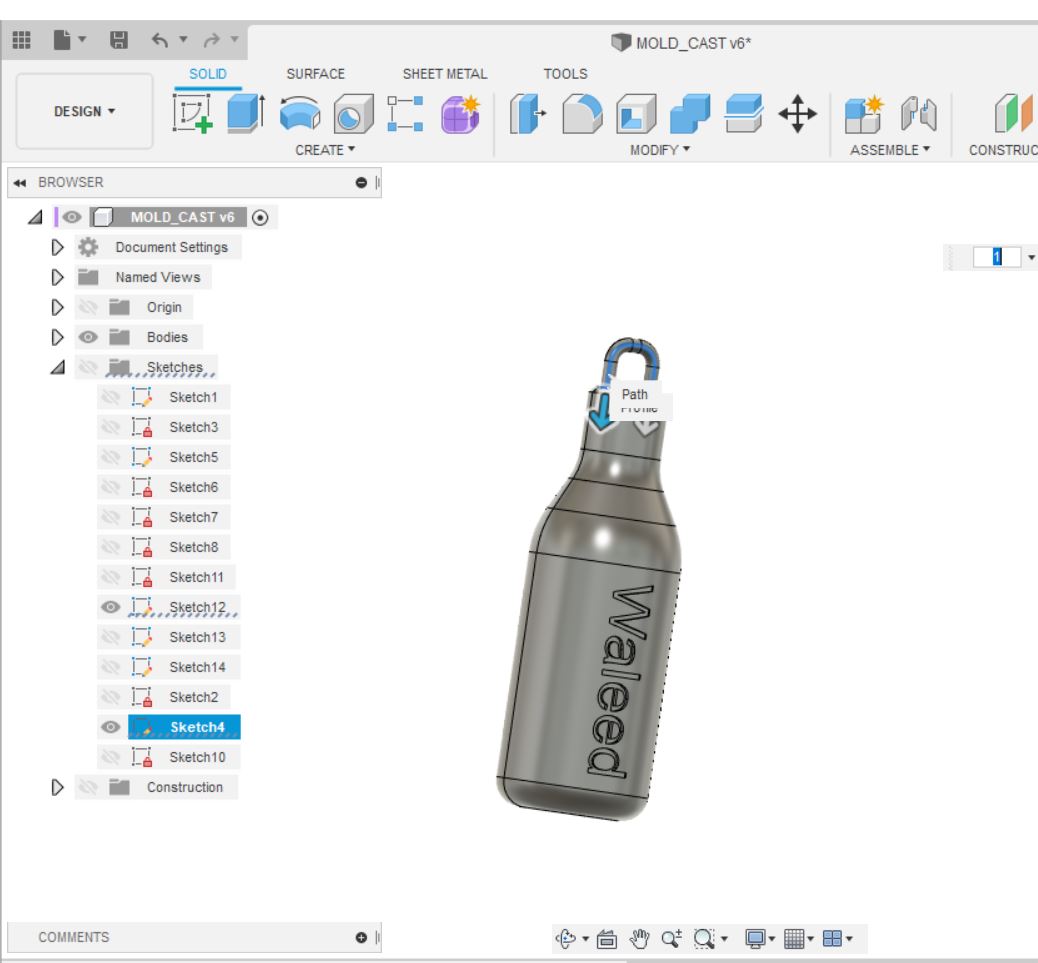
then I simply divided the body in two parts using the split body tool
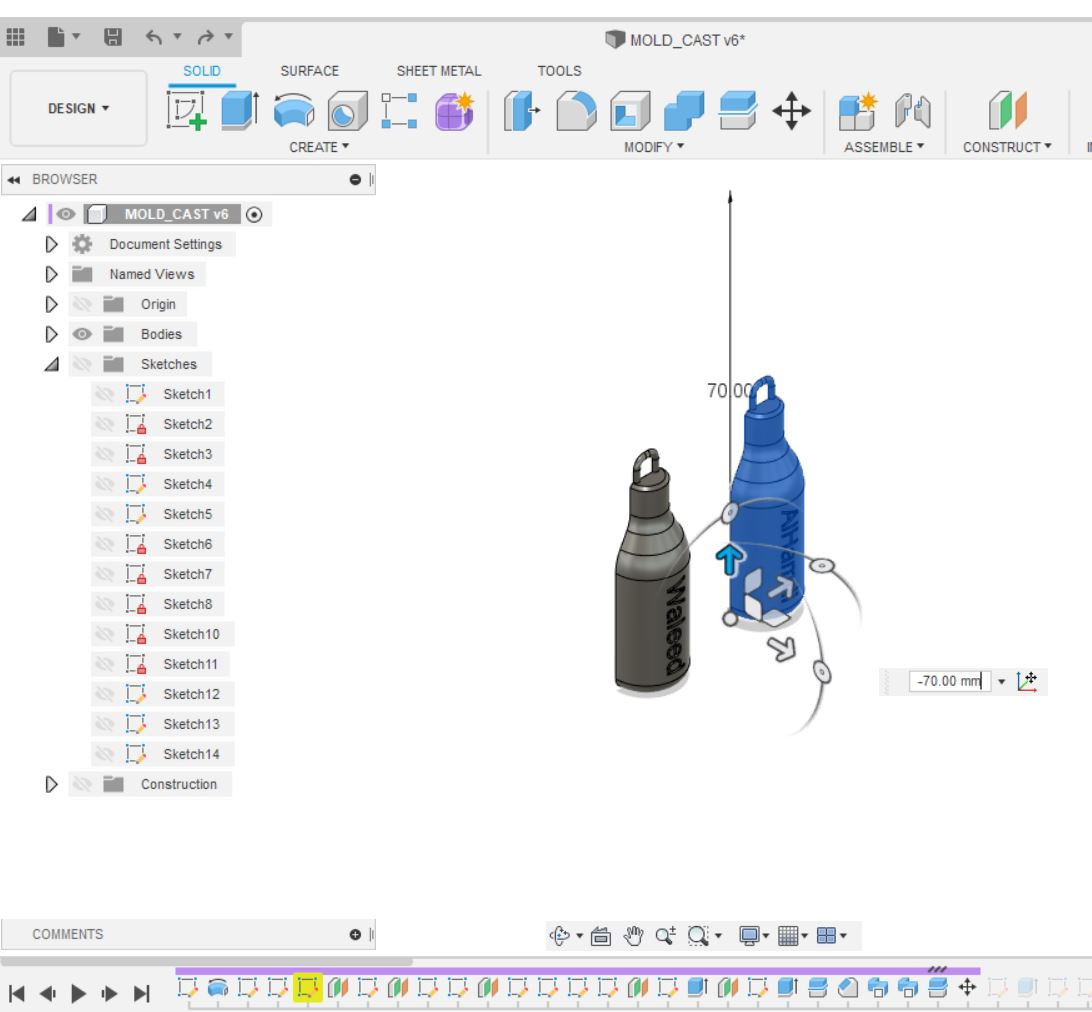
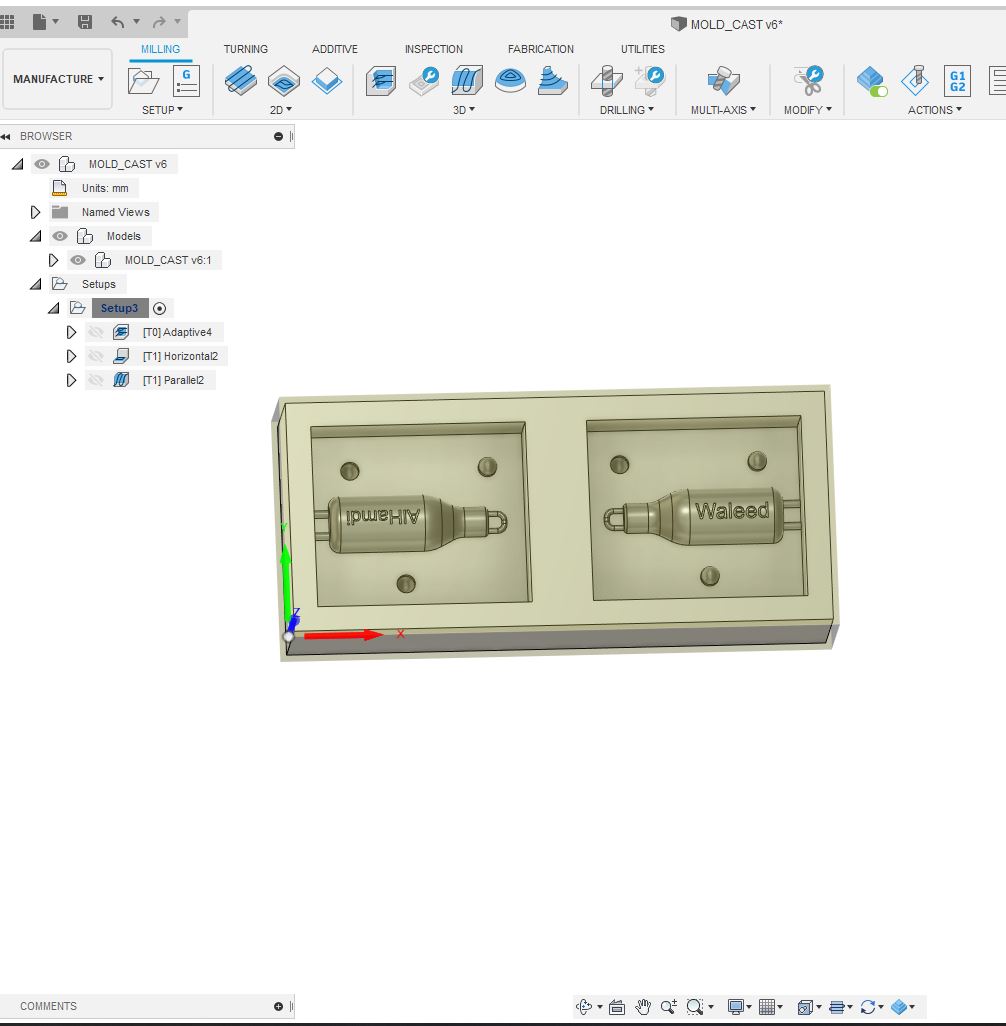
Then I started creating the mold from a box size 176mm * 76mm * 39mm and joined the two parts of the body
Fabricating the mold
In this step I worked with Fusion 360 CAM,
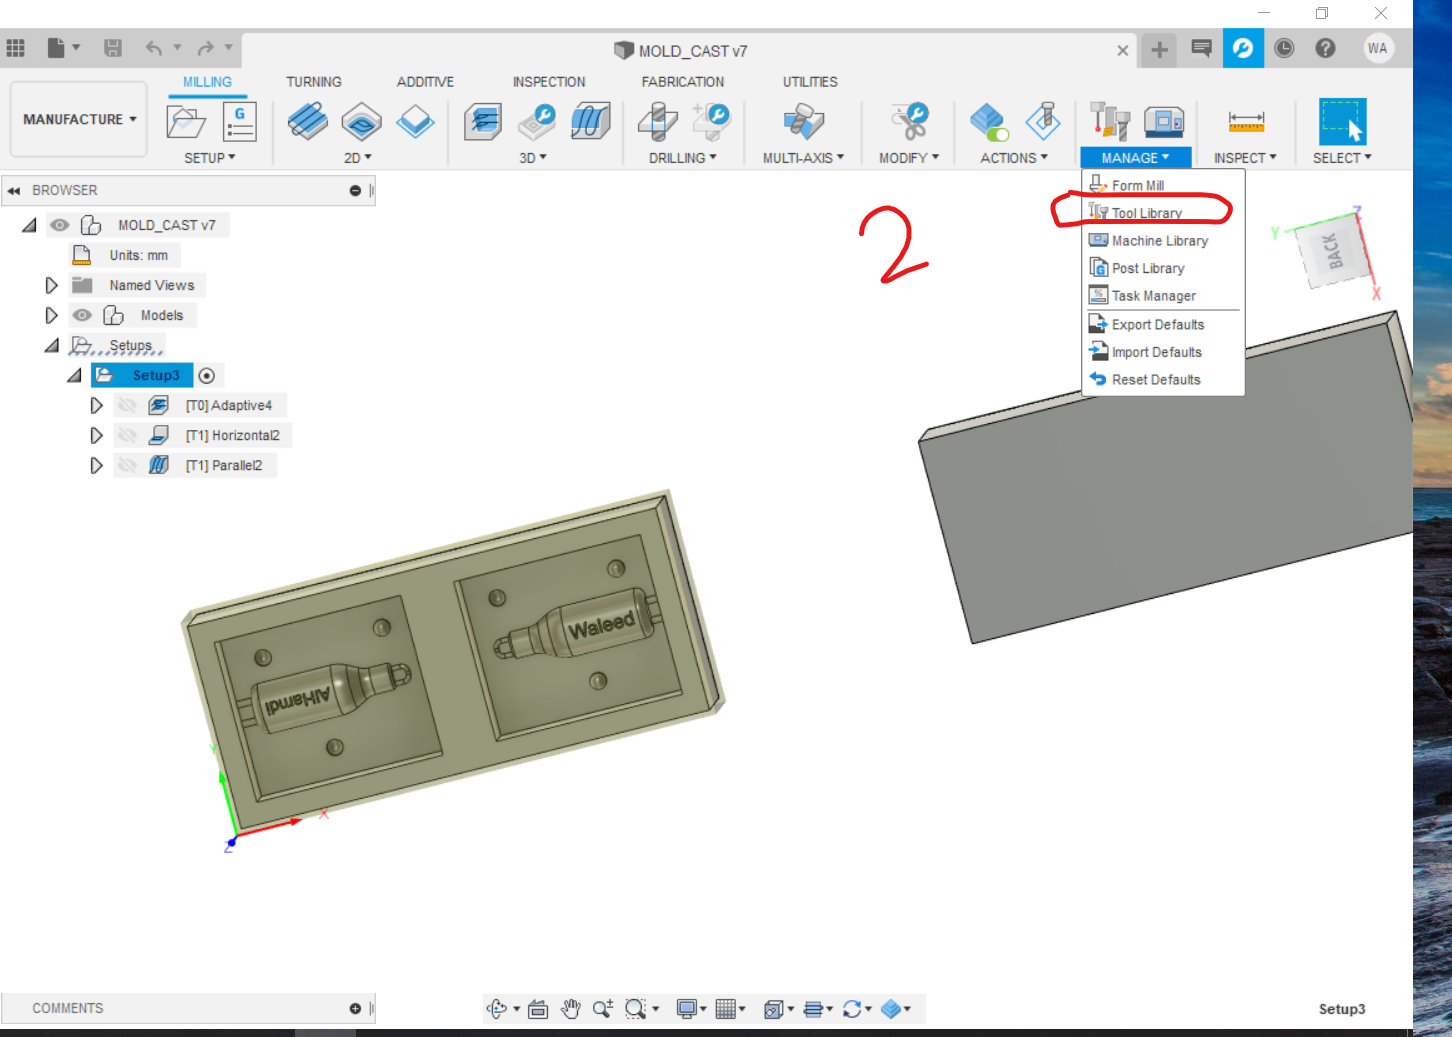
Adding the tools
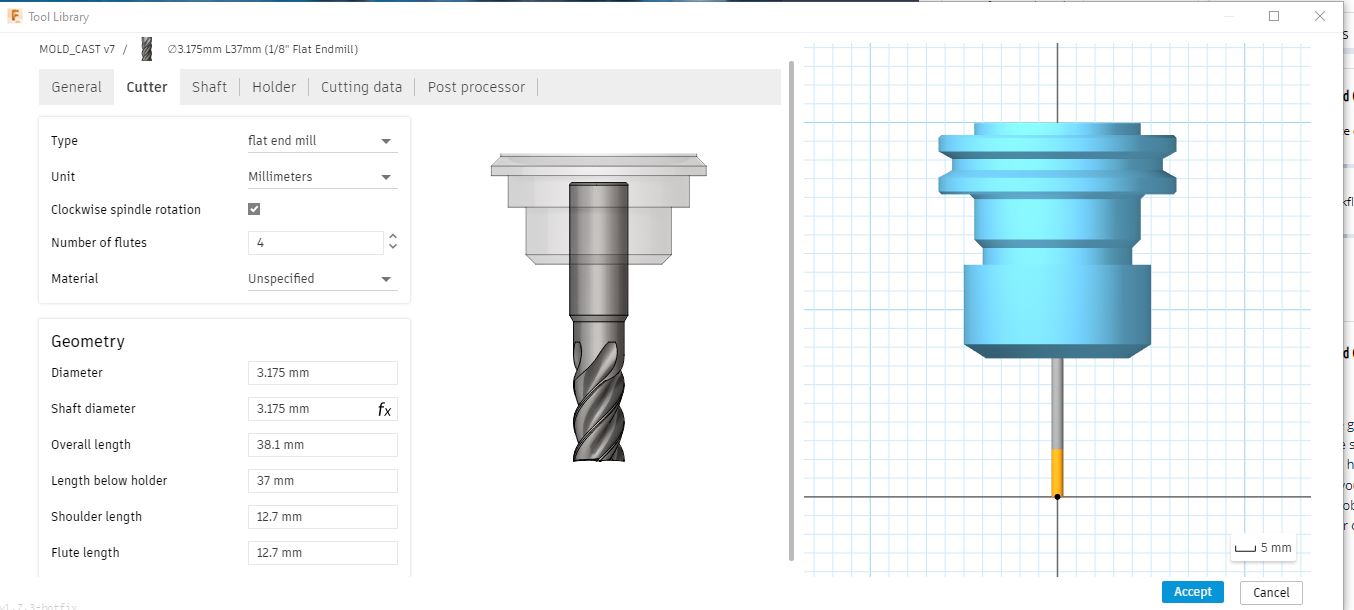
The first step was to add the tools that I will use during the milling process, which are 1/8 flat end mill, 1/8 ball end mill. to do this you have to go to manage > tool library > add new tool.
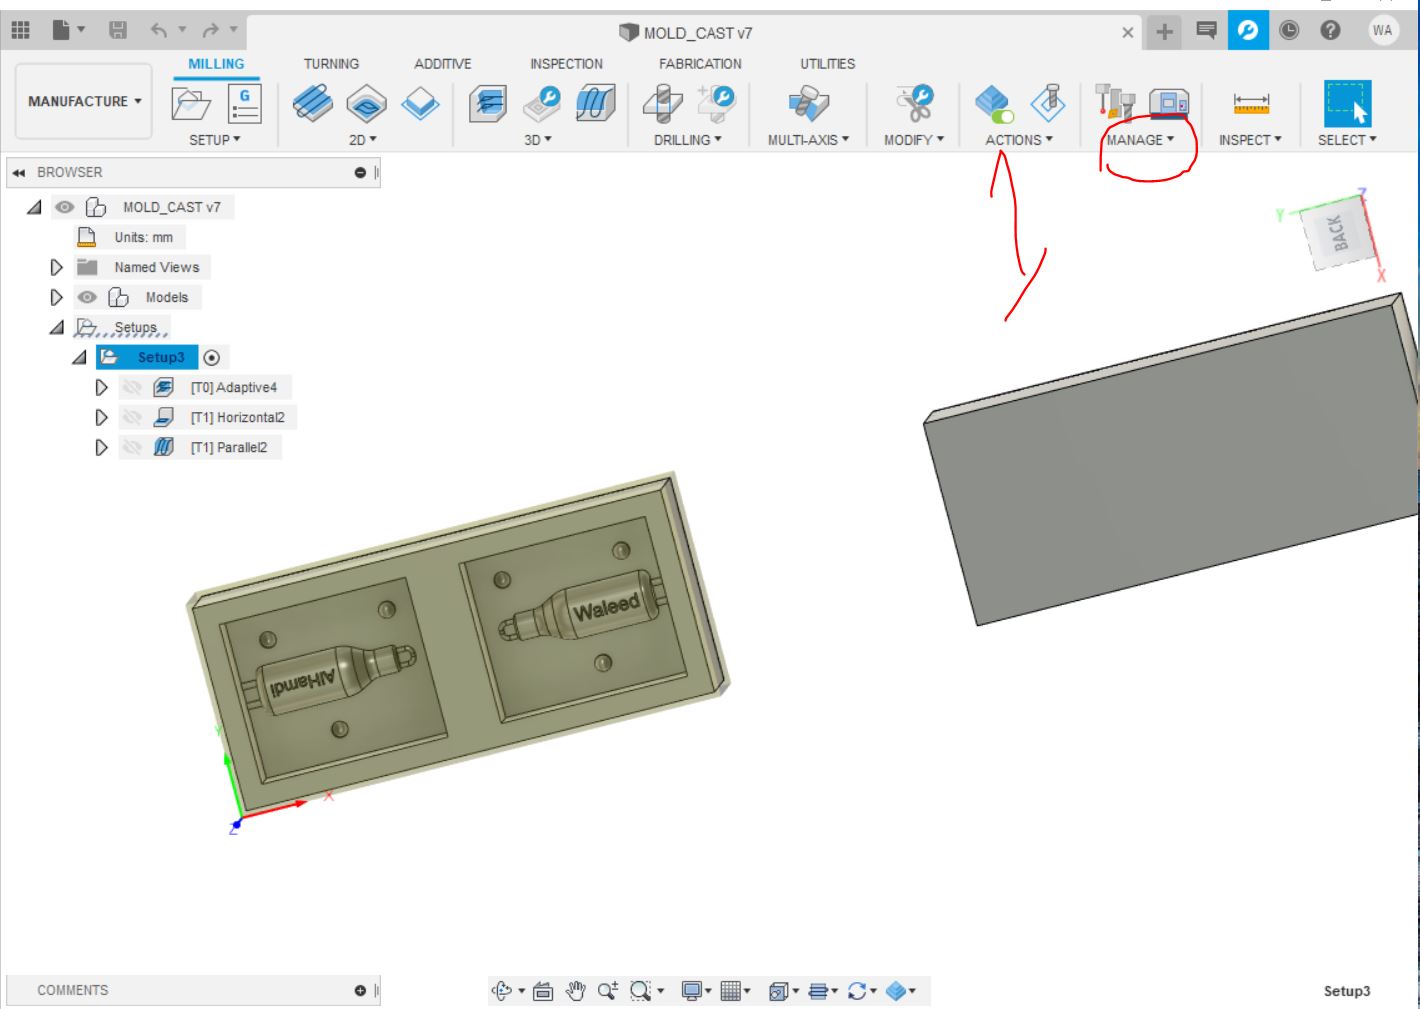
The setup
In this stage I started creating the setup simply by clicking on setup tab then new setup. During this stage all what you have to do is to allocate the origin which is the upper left corner in my case, also to choose the stock mode as Fixed size box and select the model itself.
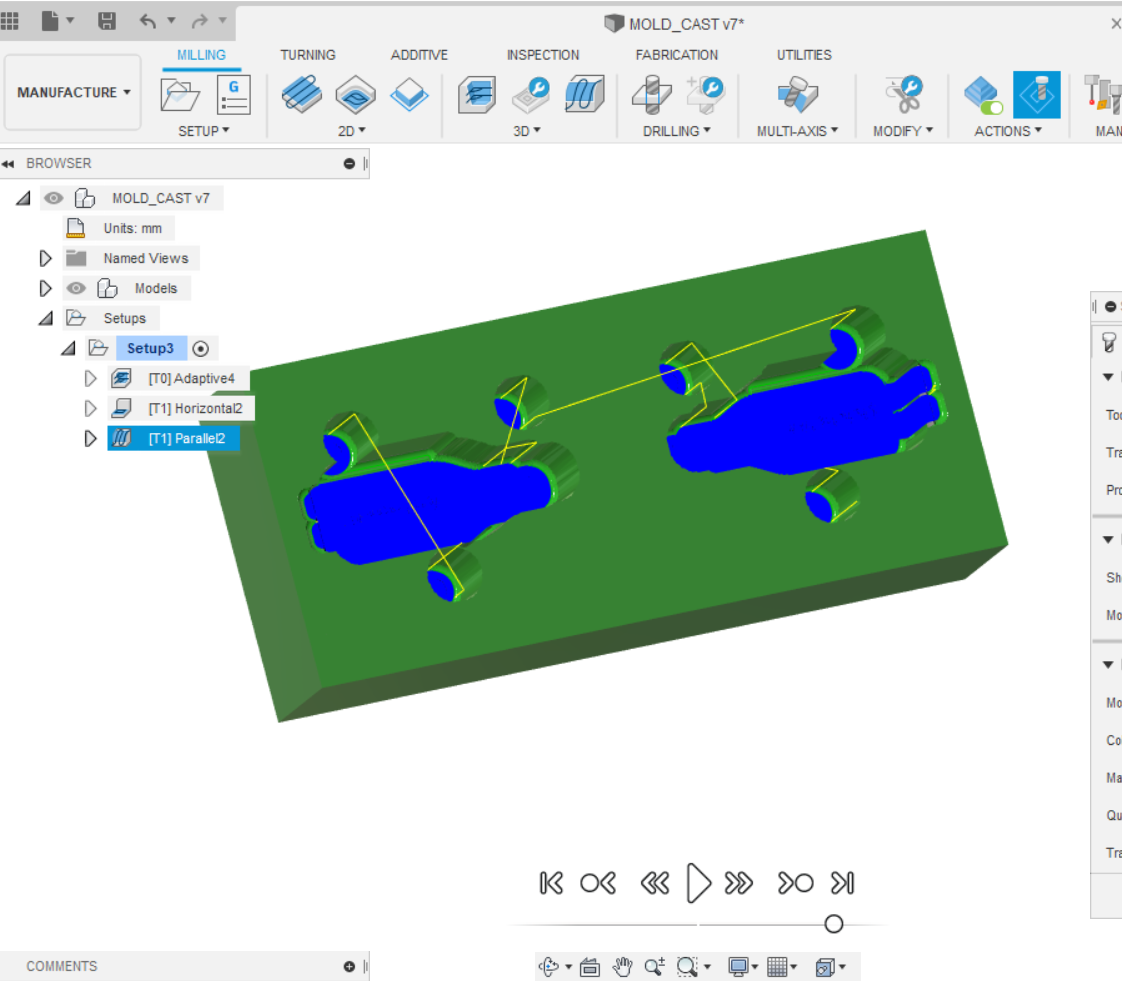
Toolpath
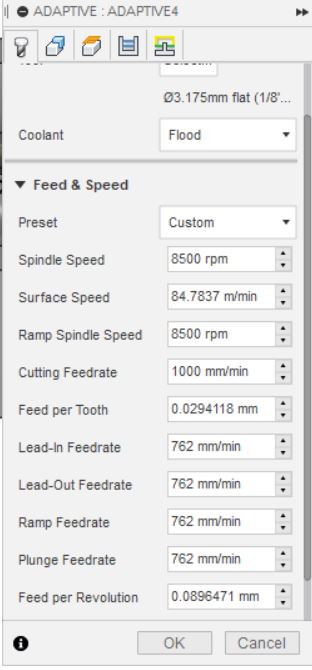
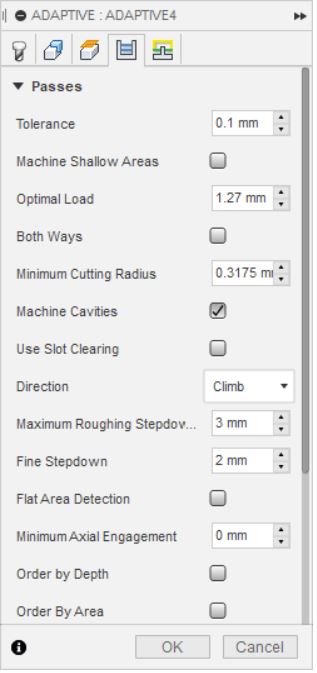
I started with the rough cut where the majority of the material will be removed in this process, this by selecting the 3d tab then adaptive clearing, for this operation I will be using the 1/8” flat end mill, with the following settings
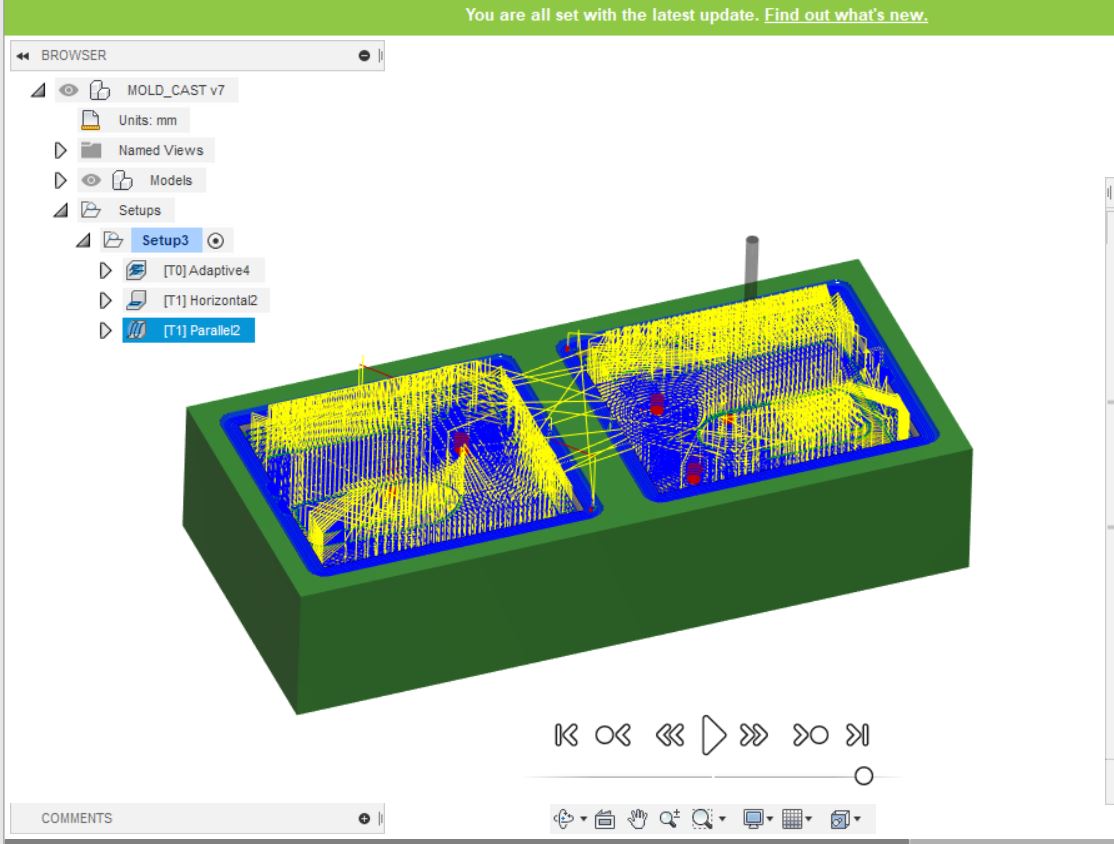
one of the amazing tools fusion 360 provides is the simulation tool where you can simulate the process itself and you can double check if there is any problem with the cut,
once I was happy with the simulation, I prepared the mobofab milling machine and mounted the 1/8” flat mill bit, once I was done with that I started the milling process, and this is was the result.

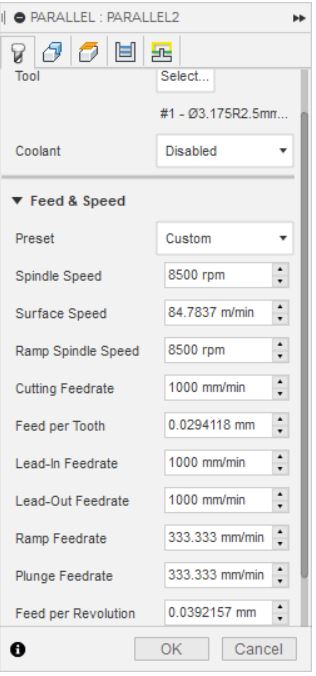
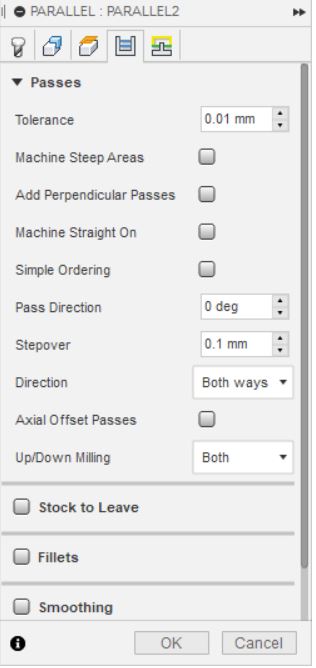
Once I was done with the rough milling now it is time for the finishing mill to show the details of the model, to do so, on fusion 360 under 3d tab click on parallel, for this process I used the 1/8 bull nose end mill, and setting were as the following:
after I ran the simulation I exported the toolpath and started the milling operation but this time I mounted the 1/8” bull nose milling machine and the result was as follow,

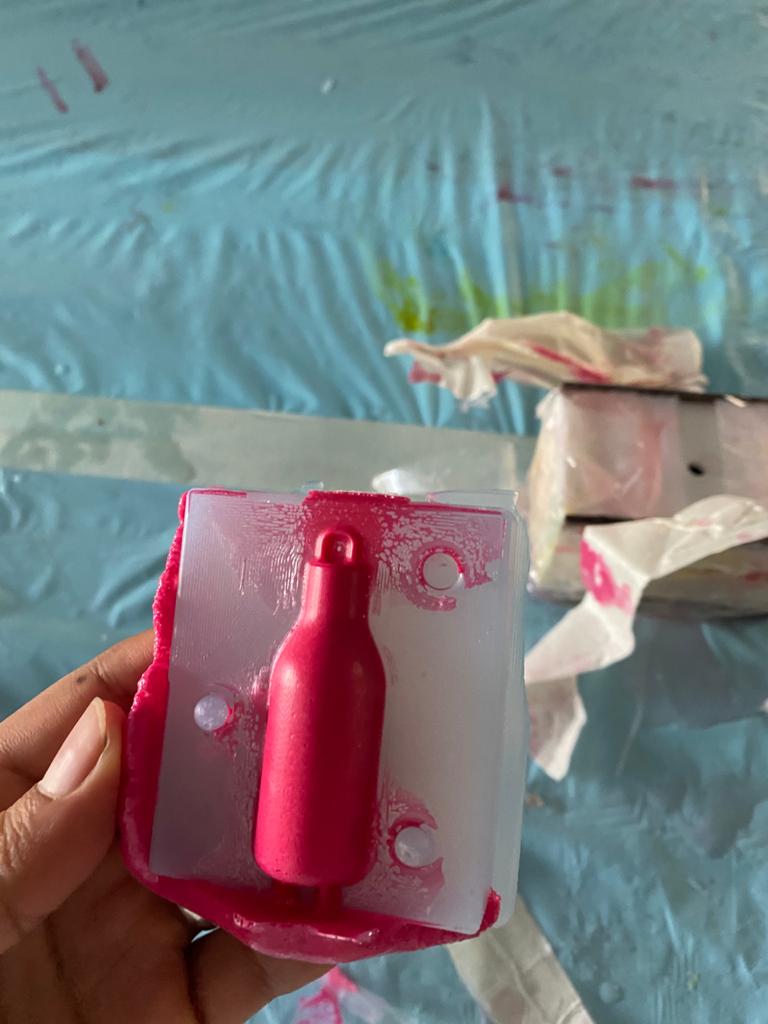
Making the mold
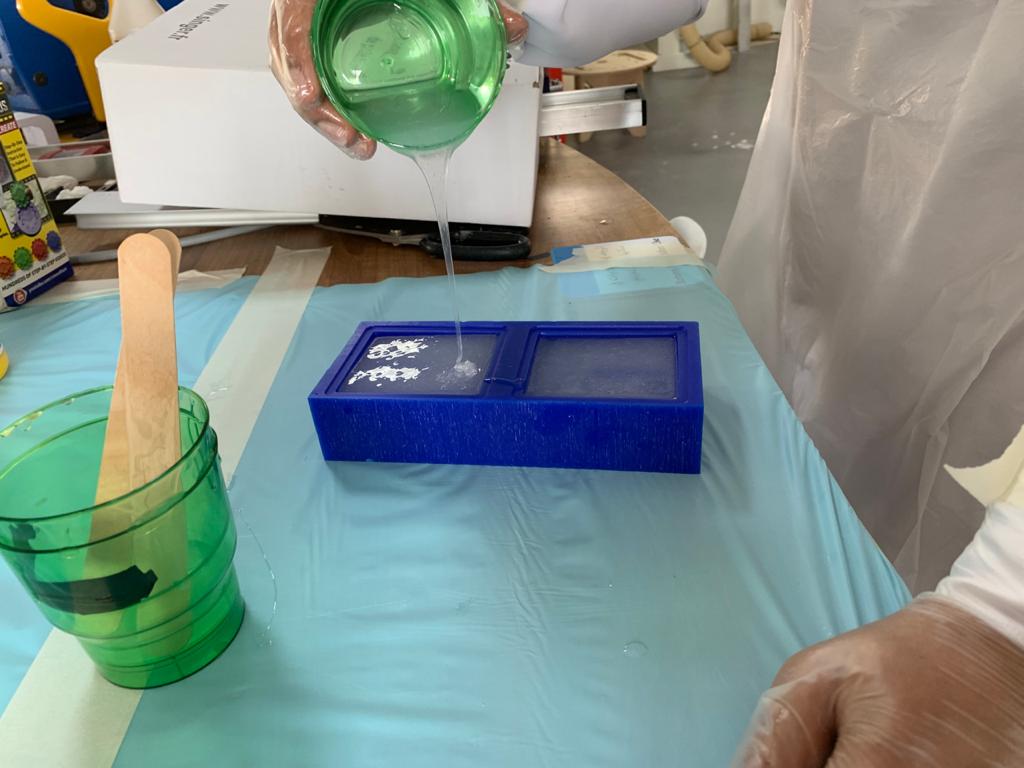
To make the mold I used the Dragon Skin 30 from Smooth-ON, which consist of two parts A & B,

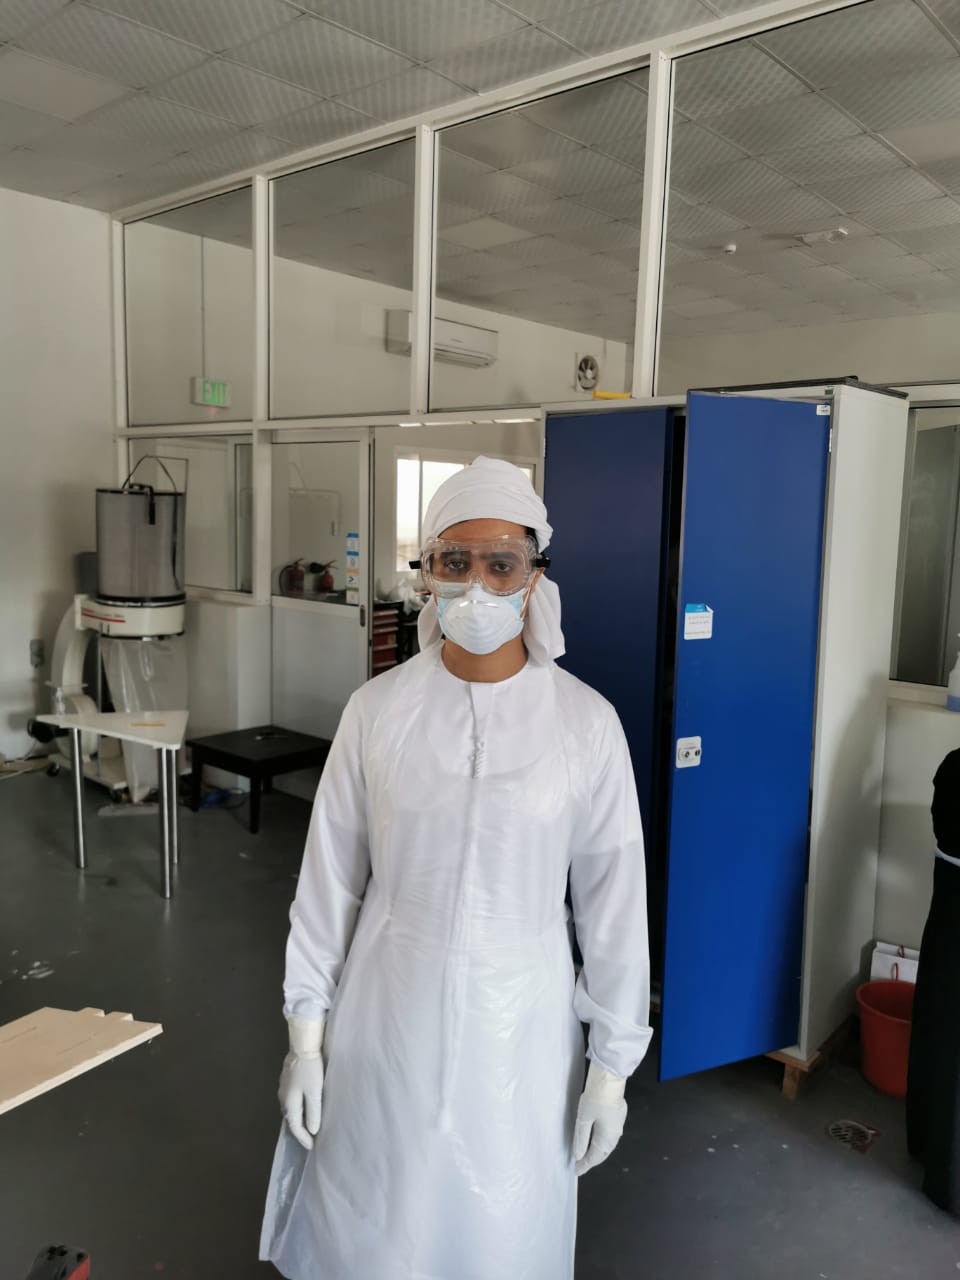
before starting with the process I went through the safety measures written in the datasheet attached with the product also making sure to follow the steps to make the mold.
Due to the fact the silicon rubber we are using is a dangerous material, I followed the safety protocol, wearing a mask and gloves
to make the mold I have to mix both parts A and B with same ratio 50% each, to do so I have to use digital scale to measure the weight for each part and make sure they are equal,
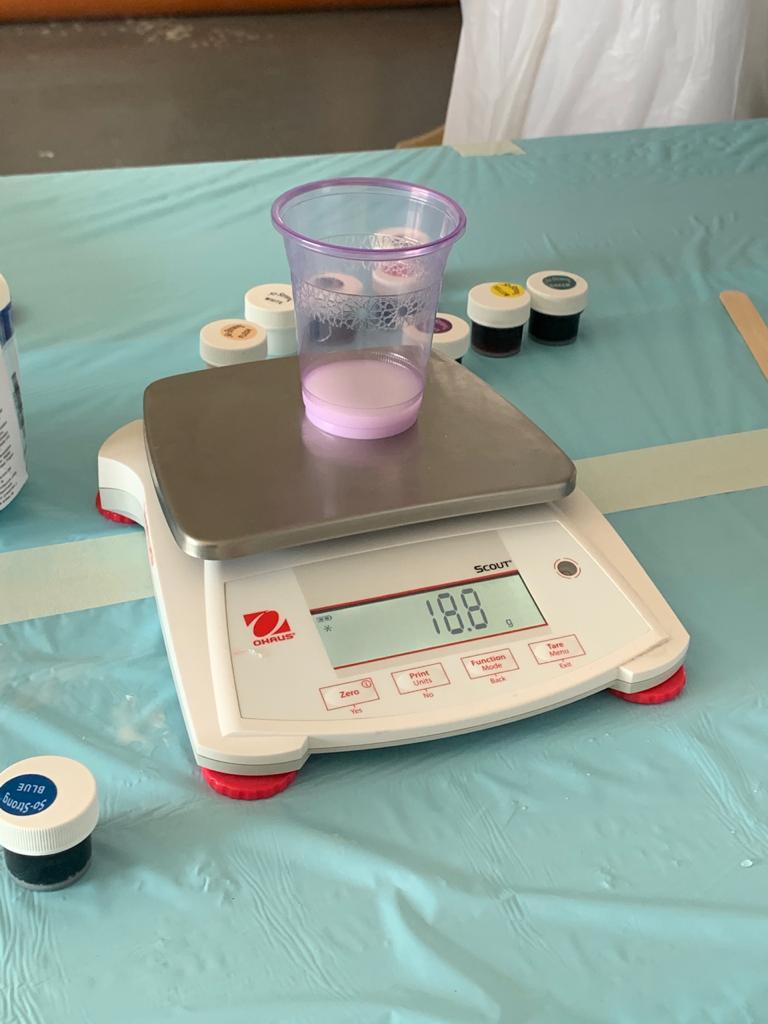
then dipense the required amount of part A and B into mixing container and mix them for 3 minutes then pouring the mixed liquid to cure for at least 16 hours.
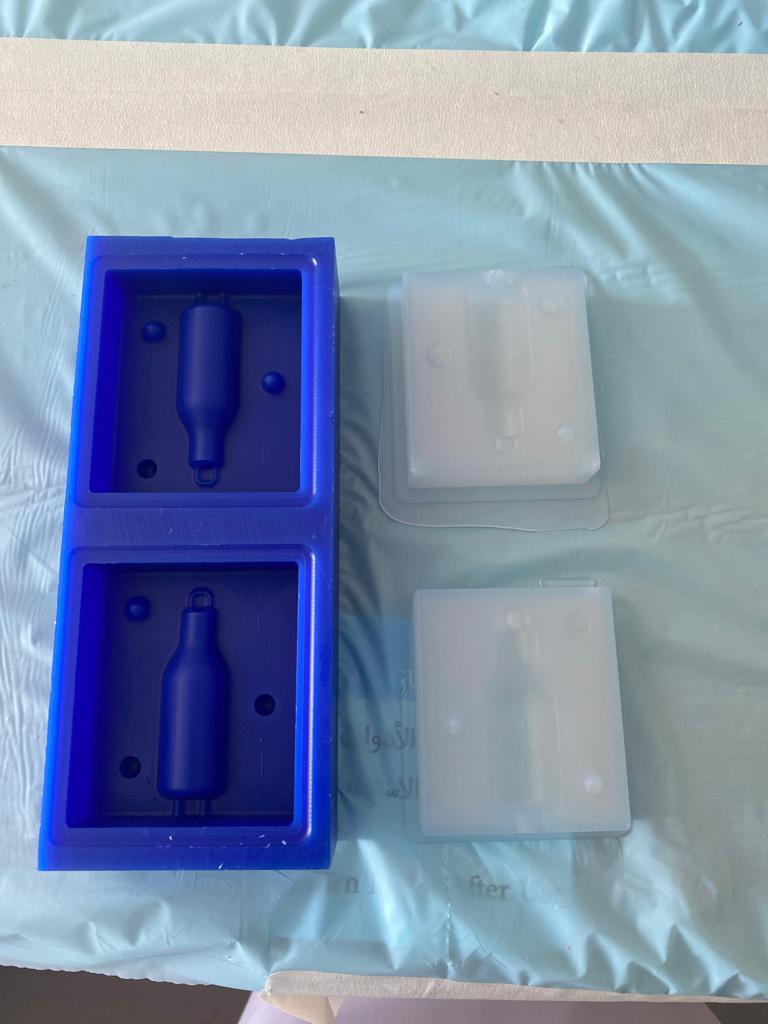
The next day once the mold was dry I removed it and the result was really good:
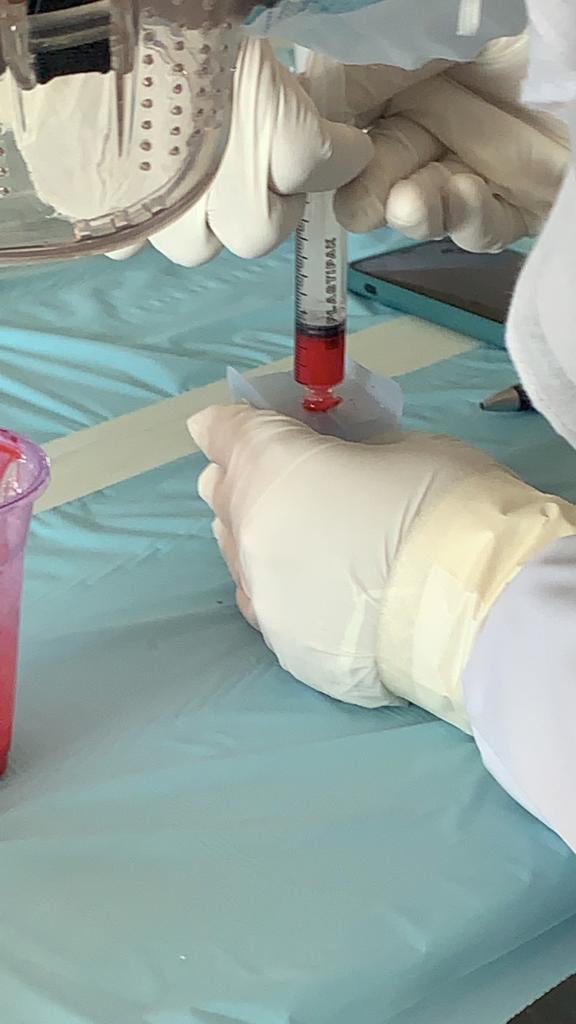
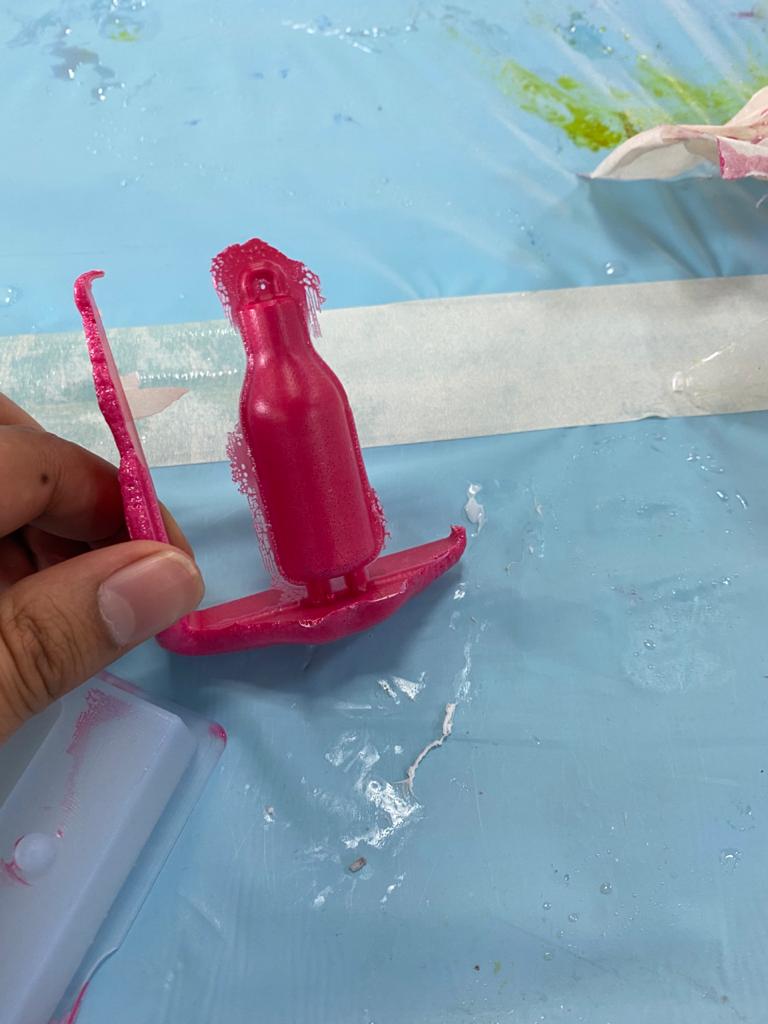
Then I used Task 04 which also consist of two parts A & B, Task 04 is considered as a dangerous material all safety measures should be taken into consideration wearing a mask and gloves and making sure not to smell or touch the material as mentioned in the safety datasheet , then I followed the same procedures mixing 50% of each part A and part B as the mold to make the cast, mixing both parts and using the used a needle to pure it inside my mold and I wait the next day.
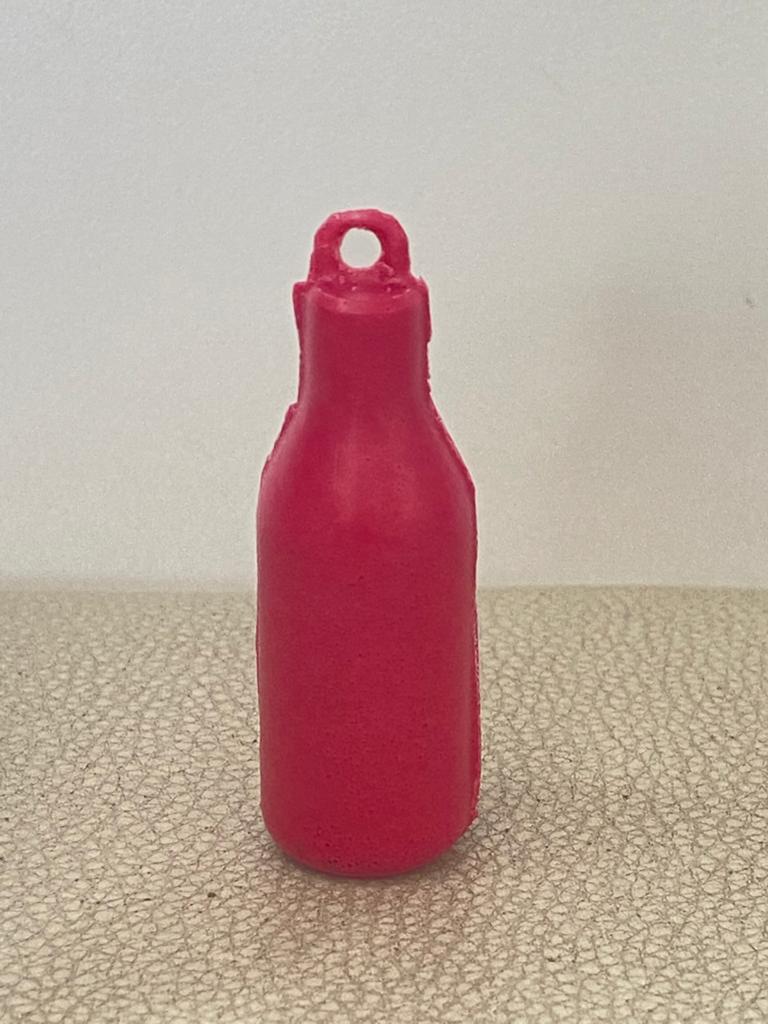
the result was as follow:
Download Files