8. Computer controlled machining
The objective of this week is to build something big using the shopbot
Group Assignment
Our group work can be found here
Designing
I started by designing my model using fusion 360 software, at the beginning I did not have any idea what design I should come with and cut, but then I decided to build a piece of a furniture.
with a bit of digging in YouTube I came across a tutorial which teaches you the fundamental on designing and constructing a chair.
First Attempt
I started creating my own design, by implementing what I have learned in the design week, making sure to design a parametric table so that it be easily resized based on the sheet and material thickness and size, the parameters were as follow:

and this is was the result:

Laser cutting
I started laser cutting the model just to double check and test the design I was not fully happy with the design this is where I decided to try another one.
Second Attempt
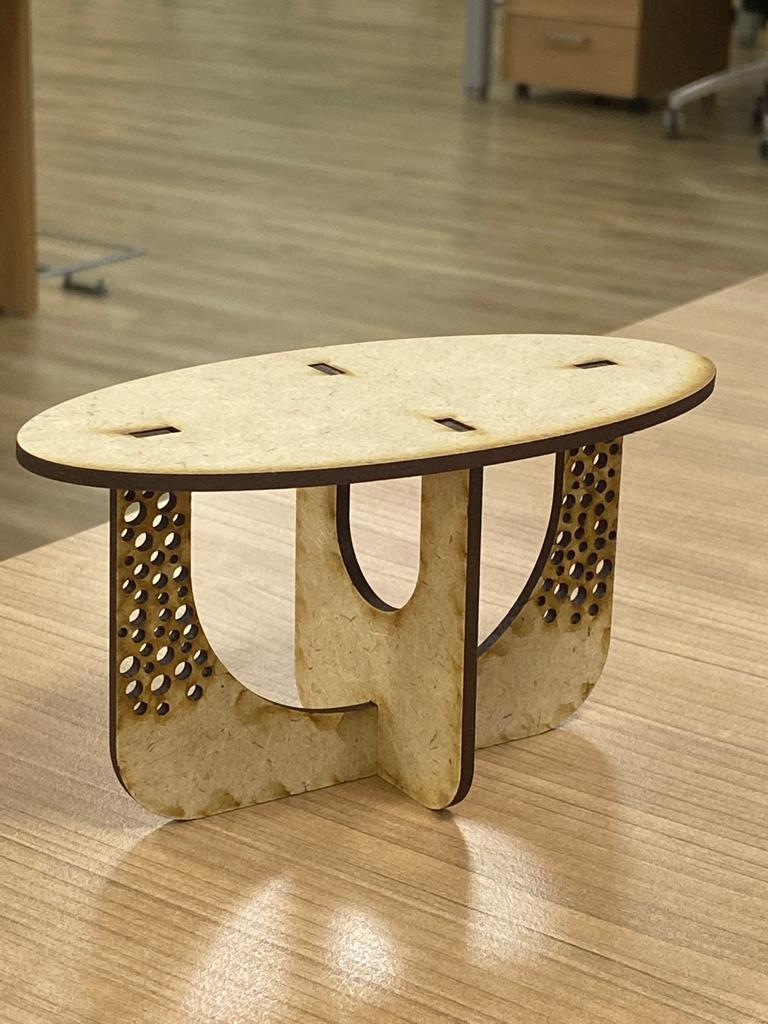
I redesigned the furniture this time making sure the table has shorter legs which will make much stable, and the following parameters were used in the design:

and this is was the result:

laser cutting
I was quite happy with the design which led me to set up the machine to start the fabrication.

Shopbot Milling
Safety first
Now it is time to cut the design with real machine which is the shopbot, but before that we had to take the safety measures in to consideration, making sure of wearing the Safety glasses, masks and the safety headphone, also to keep a safe distance from the machine while it is operating.
Joints test
Before cutting the design, I needed to make sure that the joints sizes are right, so I designed and cut the joints first with 2mm difference between them.

Vcarve for toolpath
Once the design is ready now it is time to create the toolpath what I did is exporting the dxf files and upload them in the VCarve software in order to create the toolpath.
Firstly, I needed to secure the sheet to the bed using a drill, I suffered currying the sheet alone, it was quite heavy, and I would recommend to ask for a hand to place the sheet.

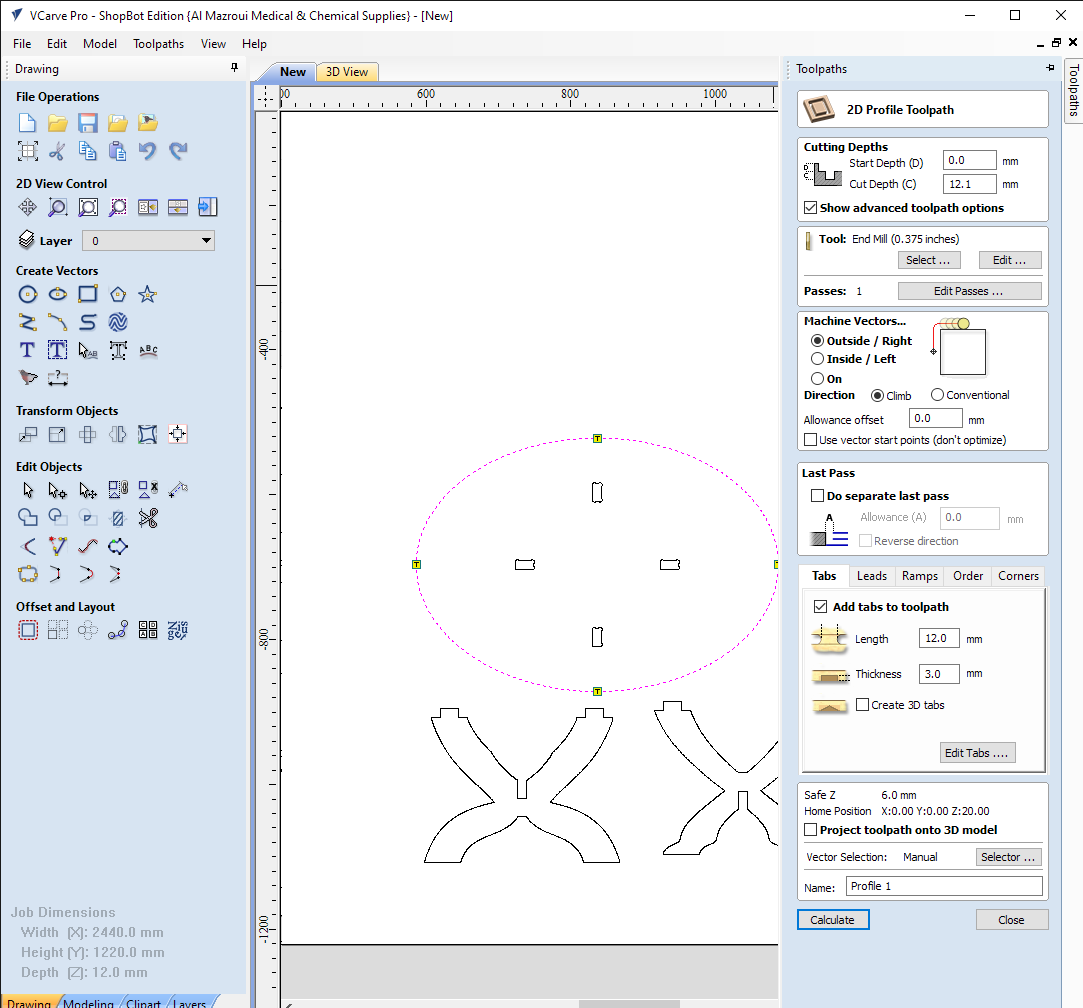
To create the toolpath I needed to import the dxf files in V Carve, then in the job Setup I have to set the sheet size and the origin of the machine as shown the picture below


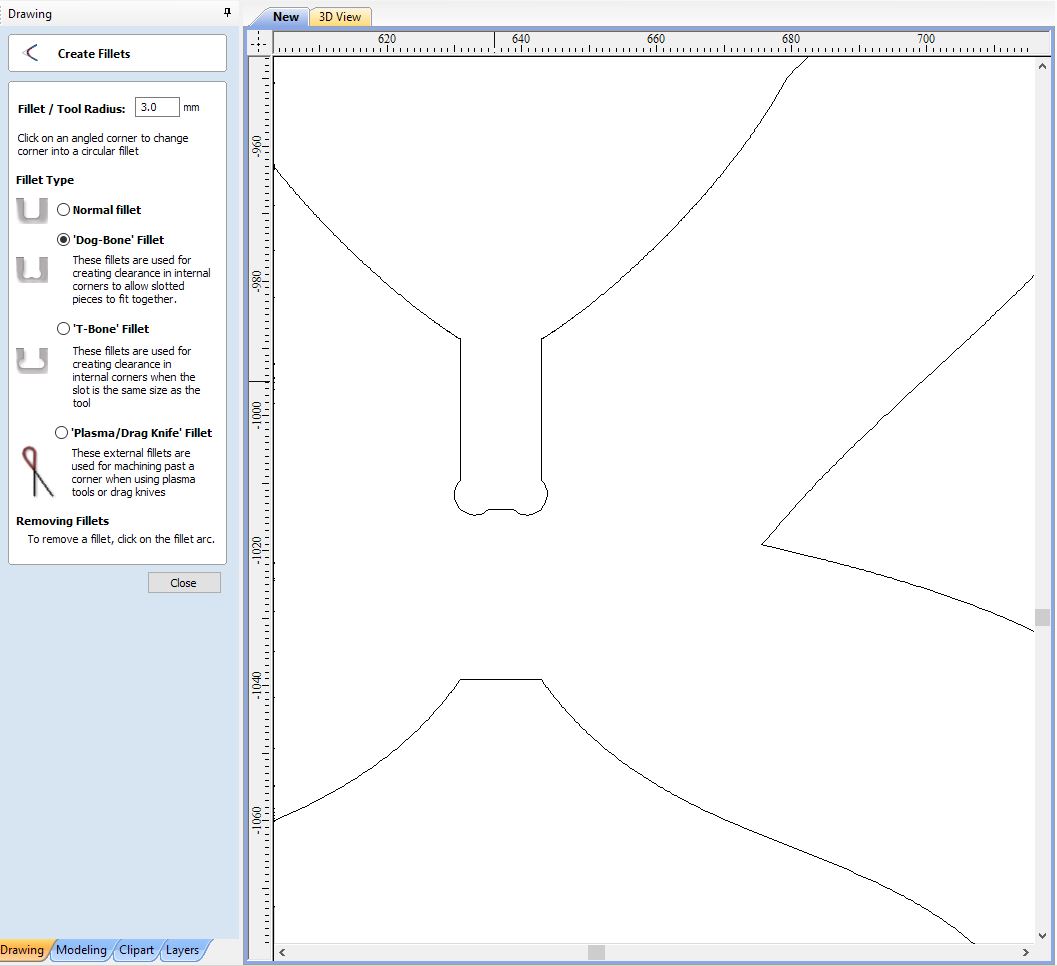
Once I was done with that I had to create the dog bones for the joints so that it give a space and clearance in the internal corners this is done by clicking in create fillets tab with 3mm tool radius
then I started creating the toolpath, this is done by clicking on profile toolpath which is under toolpath tab with the following settings:
Cutting depth: 12.1mm, to make sure the tool passes all the way down through the sheet
Tool: 6mm End mill tool with the following speed and feed rate:

Machine vectors: Outside for outer shapes, Inside for inner shapes
Tabs: 4 tabs with 12mm length and 3mm thickness
once all the toolpaths were ready, I converted them as sbp file.
Milling with shopbot
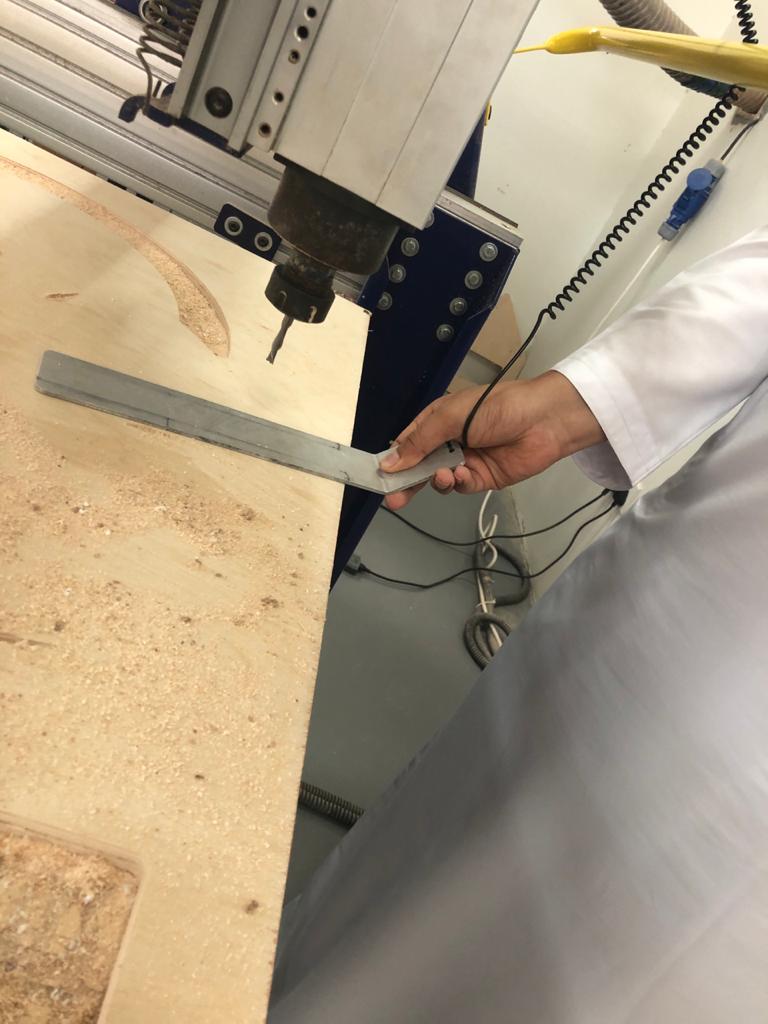
Now it is time to set up the shopbot this is first by placing and moving the shopbot head to the origin X,y axis by using the keypad to control the movement of the shopbot manually, then I used the calibration metal card to Zero the z axis.
Then we can simply run the job by clicking on cut part icon in the keypad, then carefully following the instruction to start the milling.

Since the ventilation of the shopbot is broken I had to clean the sheet with a vacuum machine, as you can see that the cut run was good. Then I simply started sanding the parts once I removed them from the shopbot, then I started assembling my tiny cute coffee table.

Download Files