11. Interface and application programming
This week assignment is to build an application that interfaces with the output or input which is attached to the microcontroller. To do so I chose processing to build the application.
Group assignment
Our group assignment can be found here
Processing
Processing is a flexible software sketchbook and a language for learning how to code within the context of the visual arts link
Due to the fact that it is my first time using processing I started by learning the language by using this tutorial which is written by Andreas Schlegel for the programming environment processing to add Controllers to build a graphical user interface on top of your processing sketch include Sliders, Buttons, Toggles, Knobs, Textfields, RadioButtons, Checkboxes amongst others and can be easily added to a processing sketch.
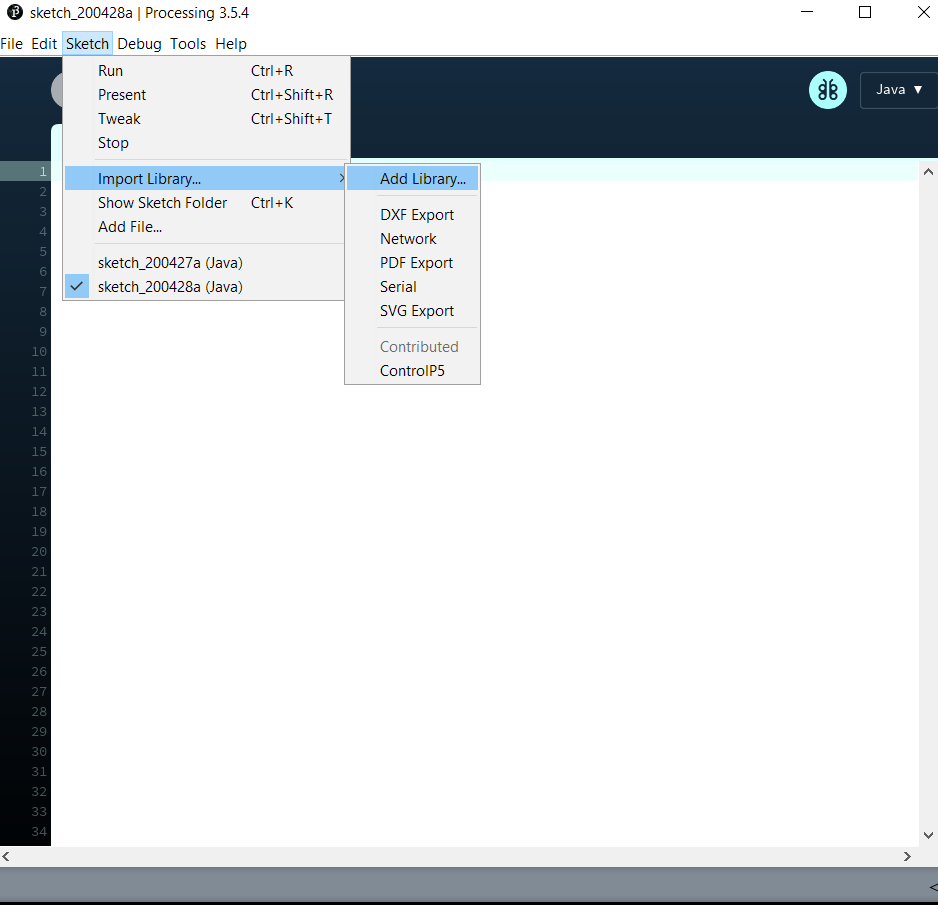
First, I have to add ControlP5 library
to add the library I have to go to the tool bar
Processing coding
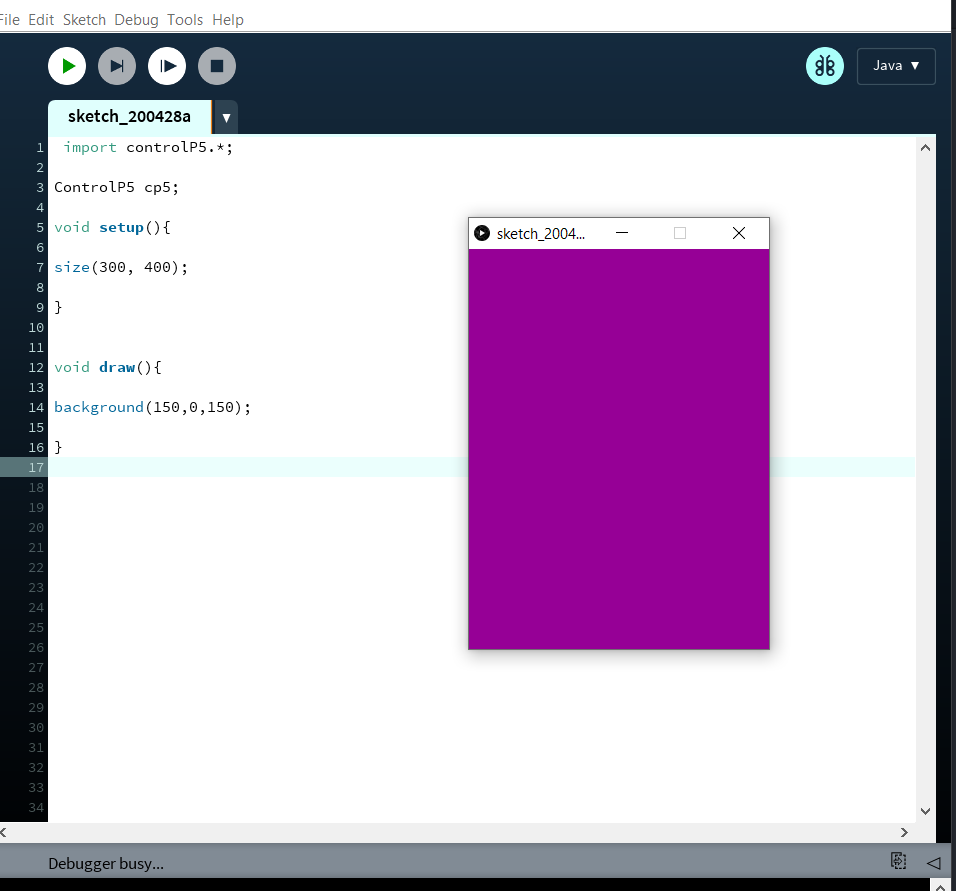
I started by creating the background by calling both the size and background function,
import controlP5.*;
ControlP5 cp5;
void setup(){

size(300, 400);}

void draw(){
background(150,0,150);
}
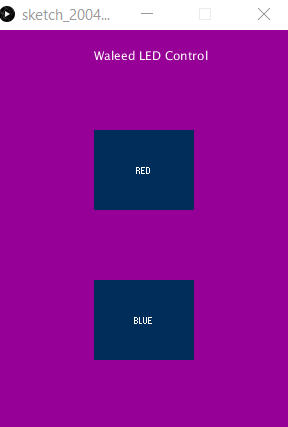
Then adding a title to my application window calling text function:
text("Waleed LED Control",100,30);

Adding the buttons
I will be using two button to control the lighting of the rgb, hence I have to use the following command,
 cp5 = new ControlP5(this);
 cp5.addButton("red").setPosition(100,100).setSize(100,80);
 cp5.addButton("blue").setPosition(100,250).setSize(100,80);
Once I was happy with it, now I have to build the communication between the application and Atmega328p this is done when any button is pressed a specified character will be sent through the serial to the Atmega328p then the atmega328p will perform a certain task,
to do so I have to add two additional lines where a character will be sent once a button is pressed
void red(){
port.write('r');
}

void blue(){
port.write('b');
}
Combine all the code as the following:
 import controlP5.*;
 import processing.serial.*;

 Serial port;
 ControlP5 cp5;

 void setup(){

   size(300,400);

   printArray(Serial.list());

   port= new Serial(this,"com23",9600);

   cp5 = new ControlP5(this);

   cp5.addButton("red").setPosition(100,100).setSize(100,80);
   cp5.addButton("blue").setPosition(100,250).setSize(100,80);
 }
 void draw(){

 background(150,0,150);

 text("Waleed LED Control",100,30);
 }
 void red(){
 port.write('r');
 }
 void blue(){
 port.write('b');
 }
Arduino code
Now I have to write the Arduino code when the character is detected the led will light up and it was as the following:
void setup (){


  pinMode(3,OUTPUT);
  pinMode(5,OUTPUT);

  Serial.begin(9600);
  }

void loop(){

  if(Serial.available()){
     char val = Serial.read();

     if(val =='r'){
      digitalWrite(5,HIGH);
       digitalWrite(3,LOW);
         }
      if(val =='b'){
      digitalWrite(3,HIGH);
             digitalWrite(5,LOW);


      }
   }
 }
The result
Using processing made it easy for me to control my microcontroller, there are a lot of application I could use the processing and Arduino with such as controlling the home garage with my mobile phone.
Download Files