3. Computer Aided design
Assignments for week 2
-
model a possible final project.
-
compress images and videos and post it on my class page.
The goal for this week is to explore and note the similarity or dissimilarity between various 2D, 3D, Animation (Motion Render), Audio & Video tools and softwares also the ability to understand what actually happens by testing and doing lots of examples made me aware of choosing the suitable software to approach the design i wanted, all of that was to insure the best software i can use to model a possible final project.
Choosing the suitable CAD software :
In order to choose a suitable software you have to
- Imagine the tool or whatever you want to design.
- Sketch the design you came up with on a piece of paper.
- If you are welling for easy going software i recommend “Onshape”, but if you had good experience and enough skills you can use “Fusion 360” and you can use “AutoCad”.
- The more you try and exercise the more you get close to your goal.
Files to download :
I have included all the files that you can download down below and here you can find them directly :
Links to download the softwares:
I have found these tutorials very useful :
Designs for my final project :
- Cat food dispenser.
- Cat food holder.
- Plate.
My experience with 2D , 3D softwares :
Onshape :
The steps i have went throw while using Onshape for the first time to create a design just for testing :
-
While Starting the project you have to create an account first then you have to go to create and type your project name.
-
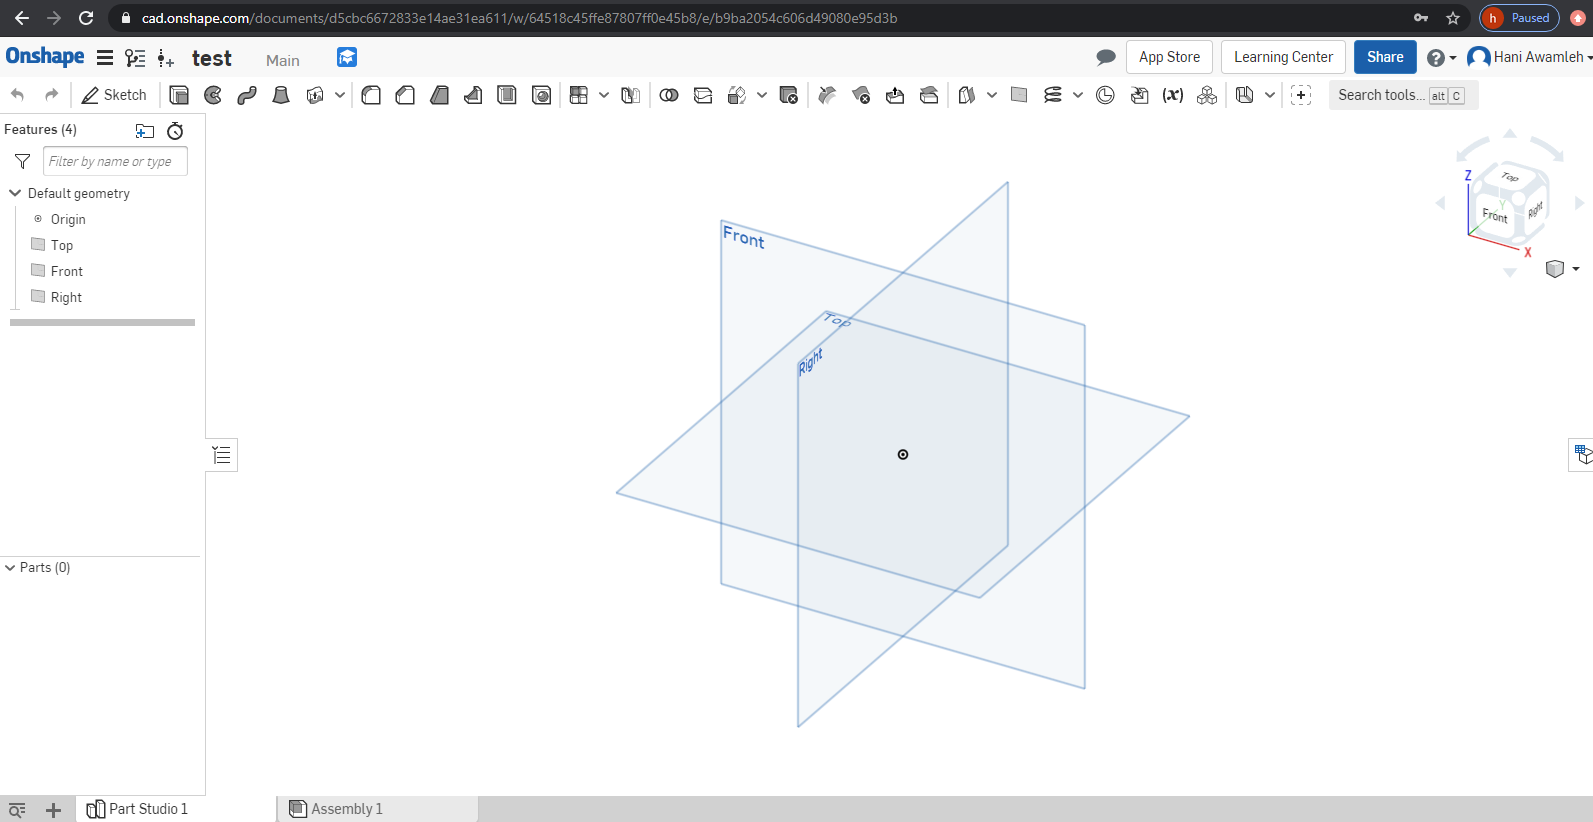
On the screen you will notice 3 planes which are : top, right and front plane “these planes are perpendicular to each other” which look like this.
-
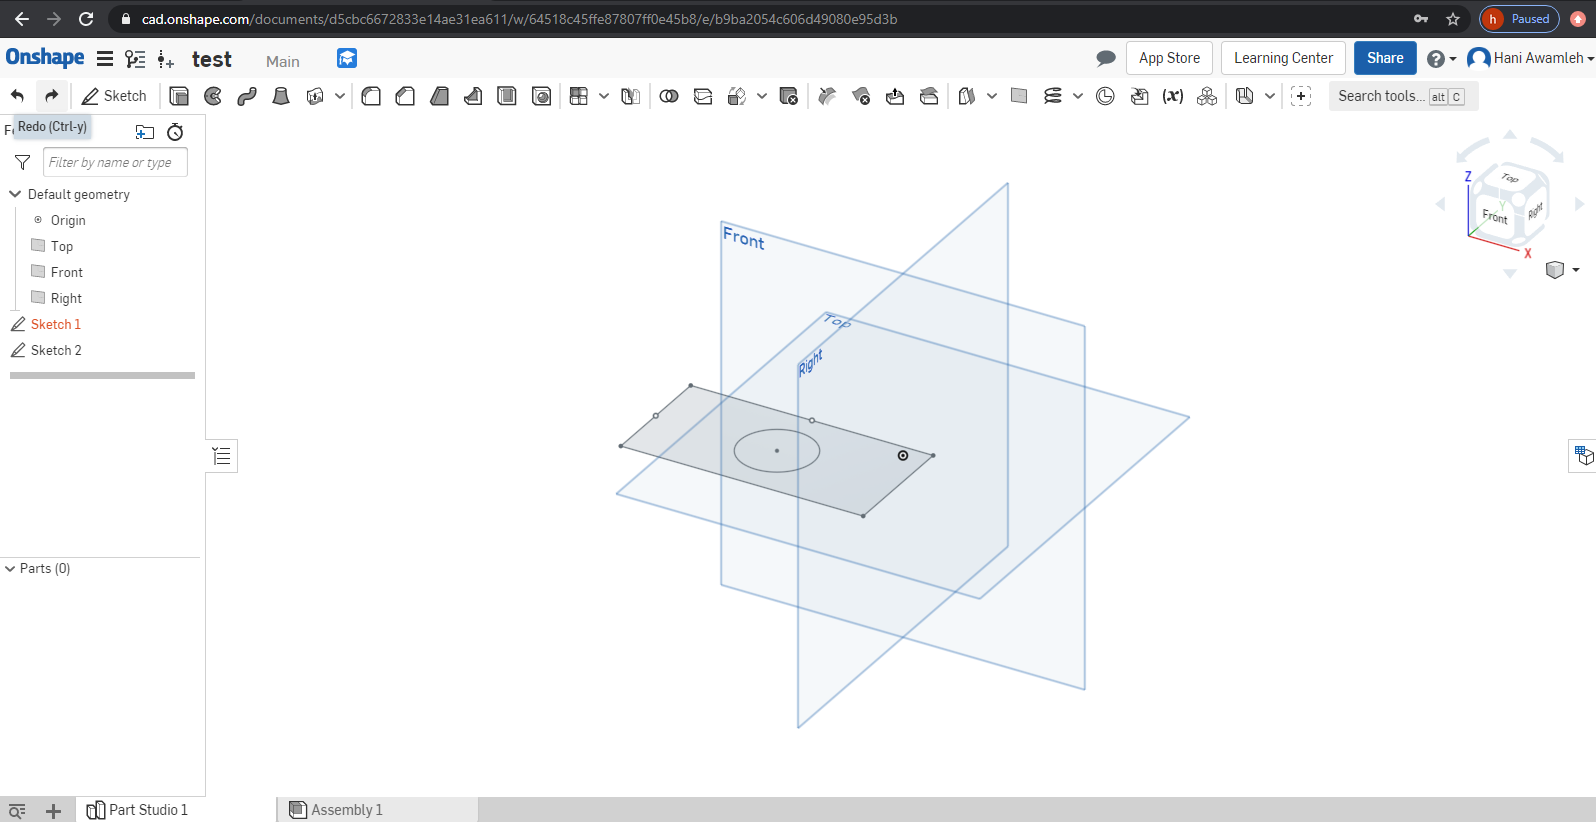
In order to start i recommend to do a 2D sketch like this.
-
Extrude that sketch “You are free to define the height of the object”.
My test design on Onshape :
So basically to decide whether something is good or not you must try it and for me i have found that “Onshape” is a really good software and i have made this test design : 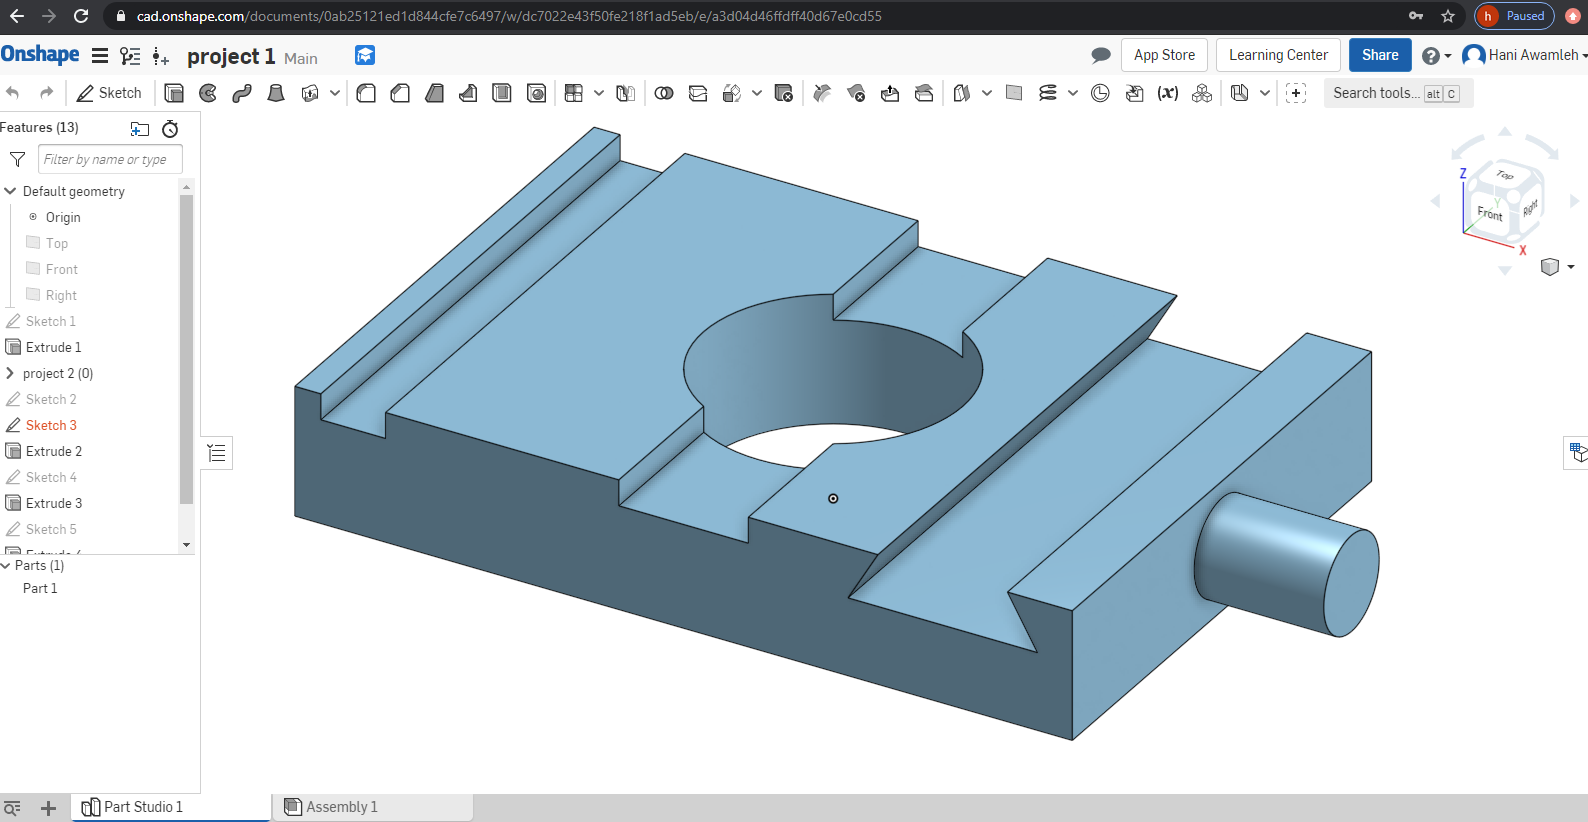
first of all i have tested this software by designing something simple so to that i have drawn a 2D sketch which is a rectangle and then a circle “to make it as a hole later ” then, i extruded the 2D sketch to make it 3D object “i did not extrude the circle” and i ended up with this shape : 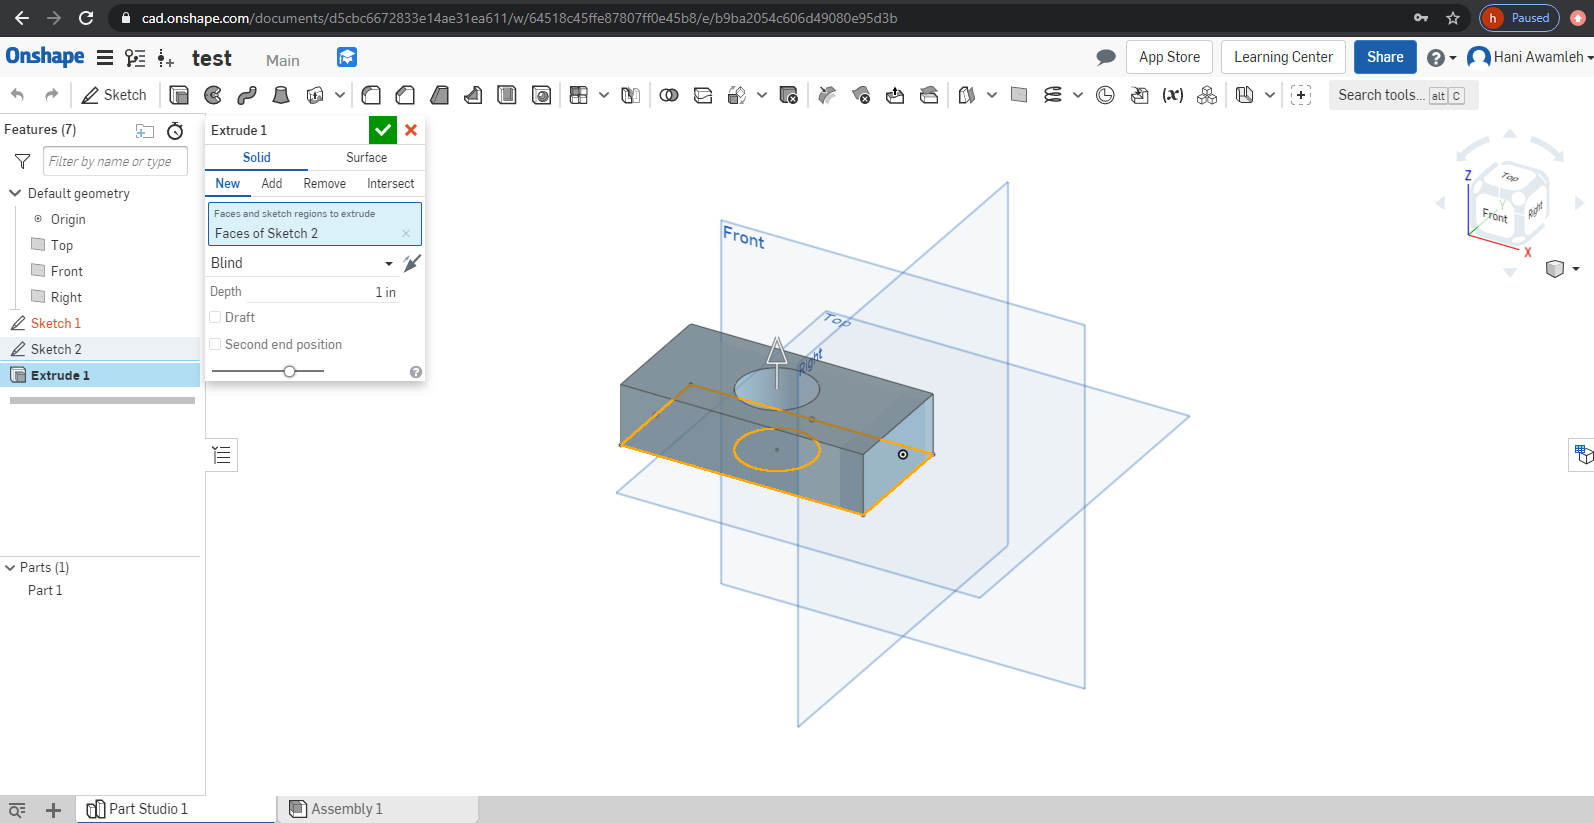
Also you can make a corner rectangle that would be contained to the edges of selected shapes if you choose dimension and choose the space between the rectangles lines, you will be able to constrain that as well. you can select 2 objects, or 2 lines and press on coincident and then press choose coincident again to constrain that and to draw mid point line for a rectangle, choose construction line and then choose a line, move along the rectangle edges and you ll notice a a red square once you get to the center of the square then drag the construction line to the other end of the rectangle and press on it once the same red square center point appear.
Here are some useful commands :
-
Revolve command: is ideal for creating cylindrical and revolve against the axis.
-
Sweep command: cross section or any closed contour and you want to write it on defined path make a sketch then make a sketch profile and sweep the path along the profile.
-
Loft command: create a smooth transition between two or more profiles for example between a circle and a triangle, To create a loft you have to insert planes and sketch profile then sketch the guide curves.
And thats all for Onshape.
Fusion 360 (parametric) :
The steps i have went throw while using Fusion 360 to create a design just for testing :
-
To start using fusion 360 you have to create an account just like Onshape.
-
Fusion has lots of options like “Design, Render, Animation, Simulation, Manufacture and drawing” so you choose what suits your design.
-
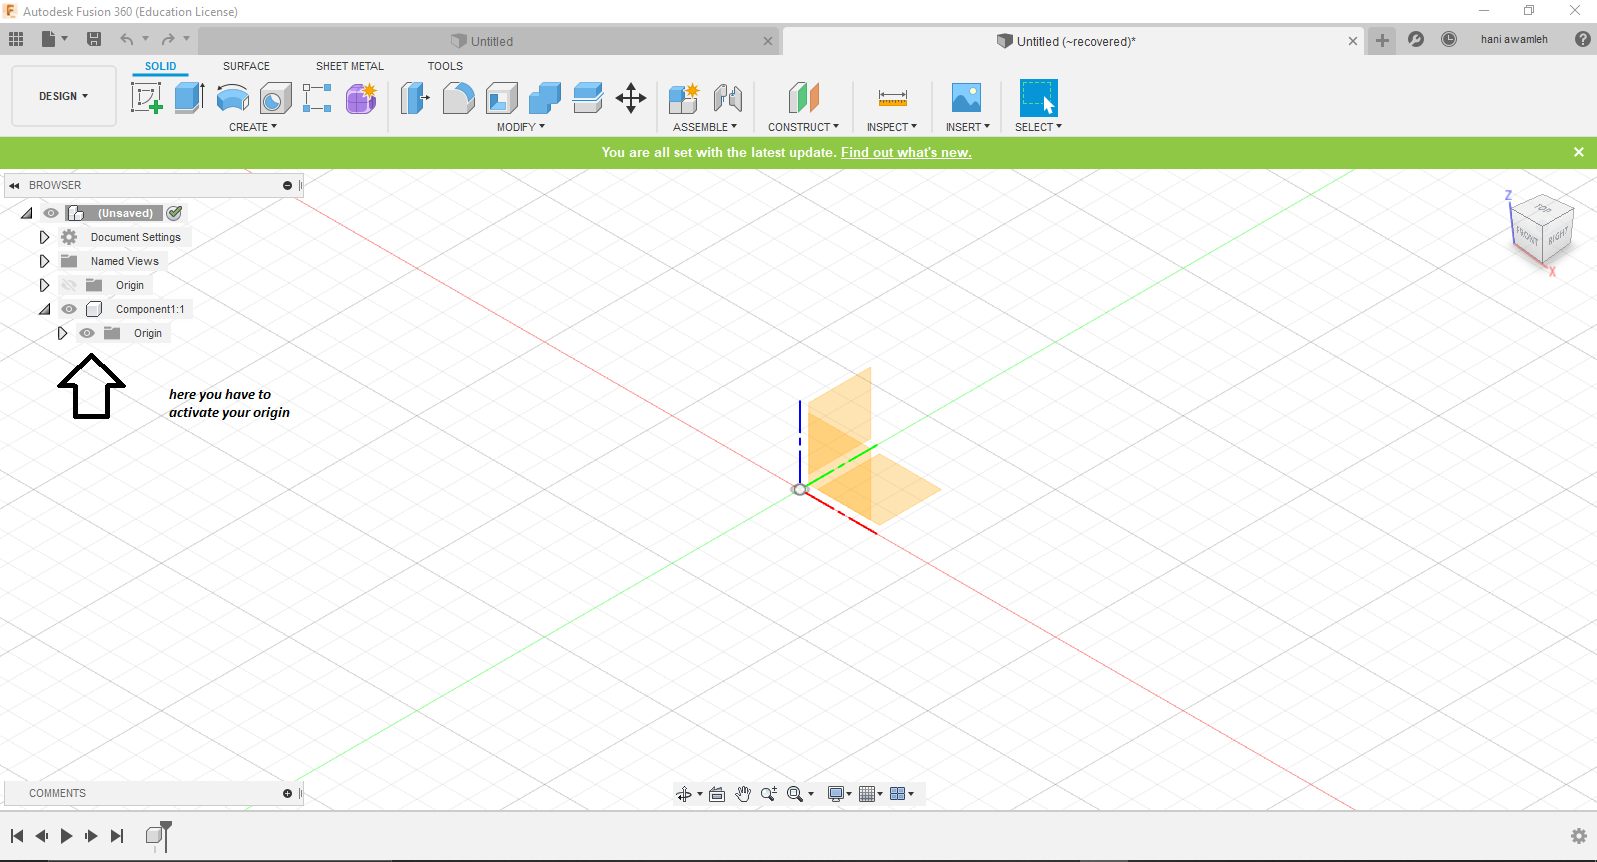
In order to start designing you have to activate your component like this.
-
Now do a 2D sketch then Extrude the sketch to start a 3D design.
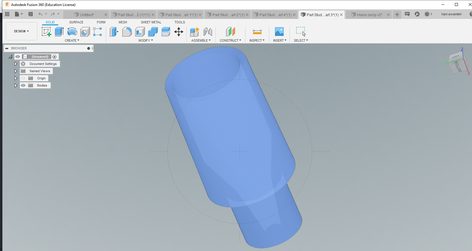
My test design on fusion 360 :
Fusion is one of the most friendly CAD softwares and its really good for designing at first i thought its hard to deal with but after i did some exercises it started to get easier to deal with and i made this test design :
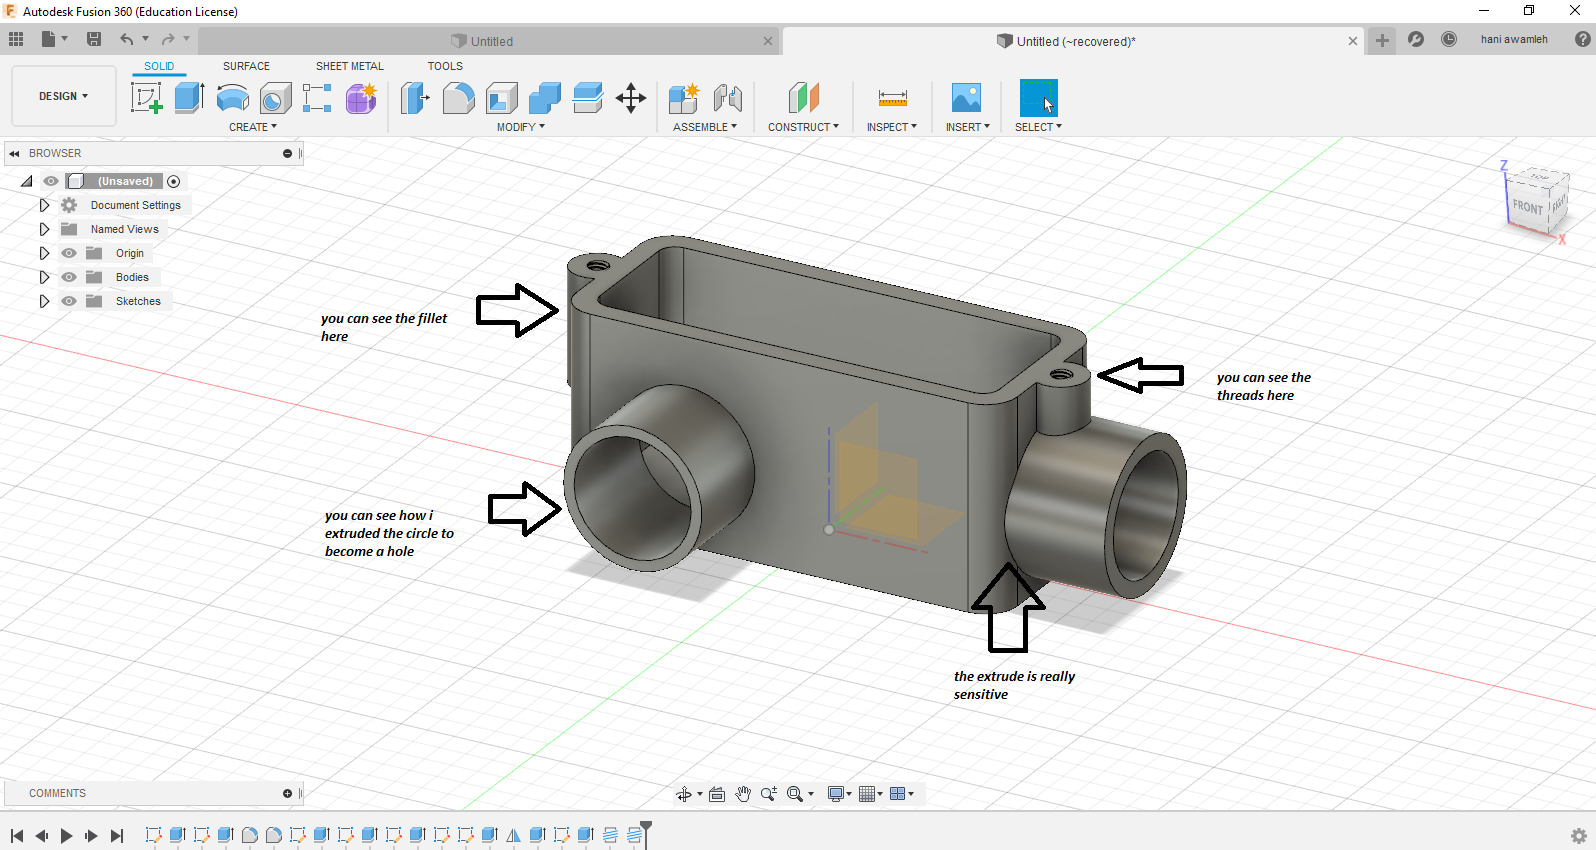
As i said i statred with a 2D sketch then i extruded that sketch to become a 3D object then i added a circle and extruded that circle to become a cylinder after that i have drawn another circle inside the cylinder and extruded it to become a hole then i did the same thing on the right side after that faced a problem with sides they were so sharp so i had to Fillet the edges then i added one circle on the top left of the object and extruded that circle to become a cylinder then i added a smaller circle to become a hole for a screw and i mirrored that on the other side and finally added some threads for the screw.
Here are some useful shortcuts that i used while designing on fusion :
- S=Model Toolbox
- Q=Push/Pull
- C=Circle
- D=Dimension
- L=Line
- X=Construction
- P=Project
- Ctrl+Z=Undo
- J=Joint
And thats all for Fusion 360 .
Autocad (2D):
In order to start using AutoCad you should have some patience because this software is easy to deal with if you are calm and it just need a little bit of experience, in my opinion AutoCad is a software just for 2D designs its really hard to use it for 3D designs.
The steps i have went throw while using AutoCad to create a test for design :
-
to start using AutoCad you have to install it and use the education license if you are a student.
-
AutoCad has a limit for design unlike Fusion 360 which is limitless.
-
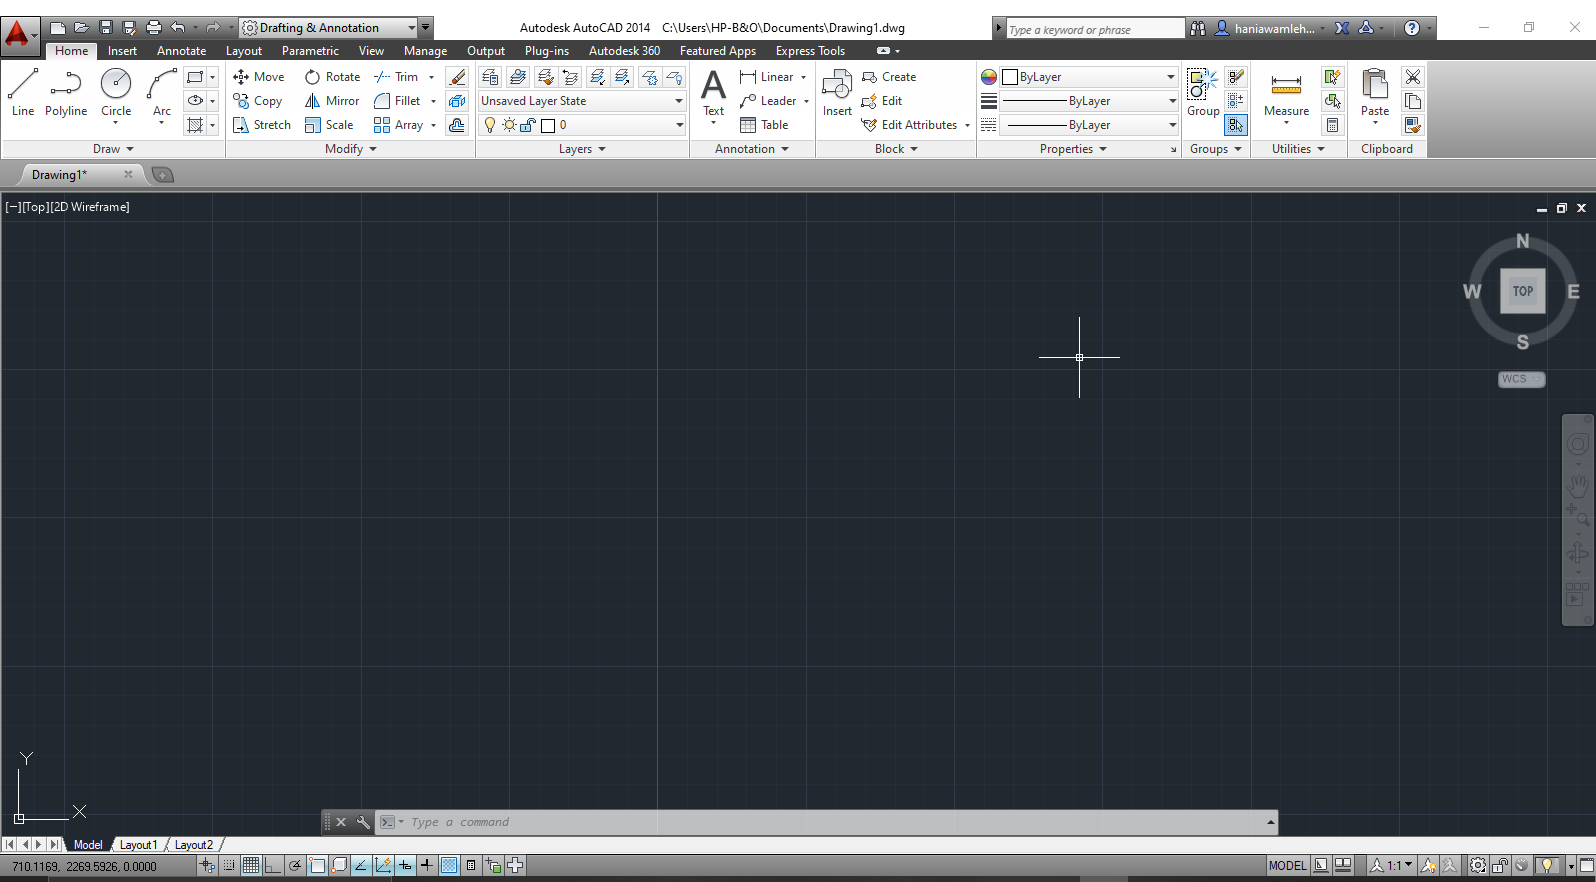
When you open the software you will notice there is a lot of buttons and features but its easy to get to know them and to achieve that you must practice and do lots of exercises and thats what the Home page looks like :
-
Now you can start sketching and designing.
My test design on AutoCad :
AutoCad is a tough software and it has some limits and that means you cant design everything on it it can be used to design 3D objects but its hard to deal with but as i said you can do everything if you practice and do a lot of exercises and here is my 2D test design :

Here i started with drawing some reference lines then i did two tangent lines and connected them with 3 circles and just designed it as if the design is just half and after the sketch started to get its shape as i wanted i mirrored the half and completed the design.
Here are some useful shortcuts for AutoCad :
these shortcuts will help a lot and save time.
click here to see the shortcuts
And thats all for AutoCad .
Inkscape (vector) :
Inkscape is a free and open-source vector graphics editor. This software can be used to create or edit vector graphics
the steps i have went throw while using Inkscape :
-
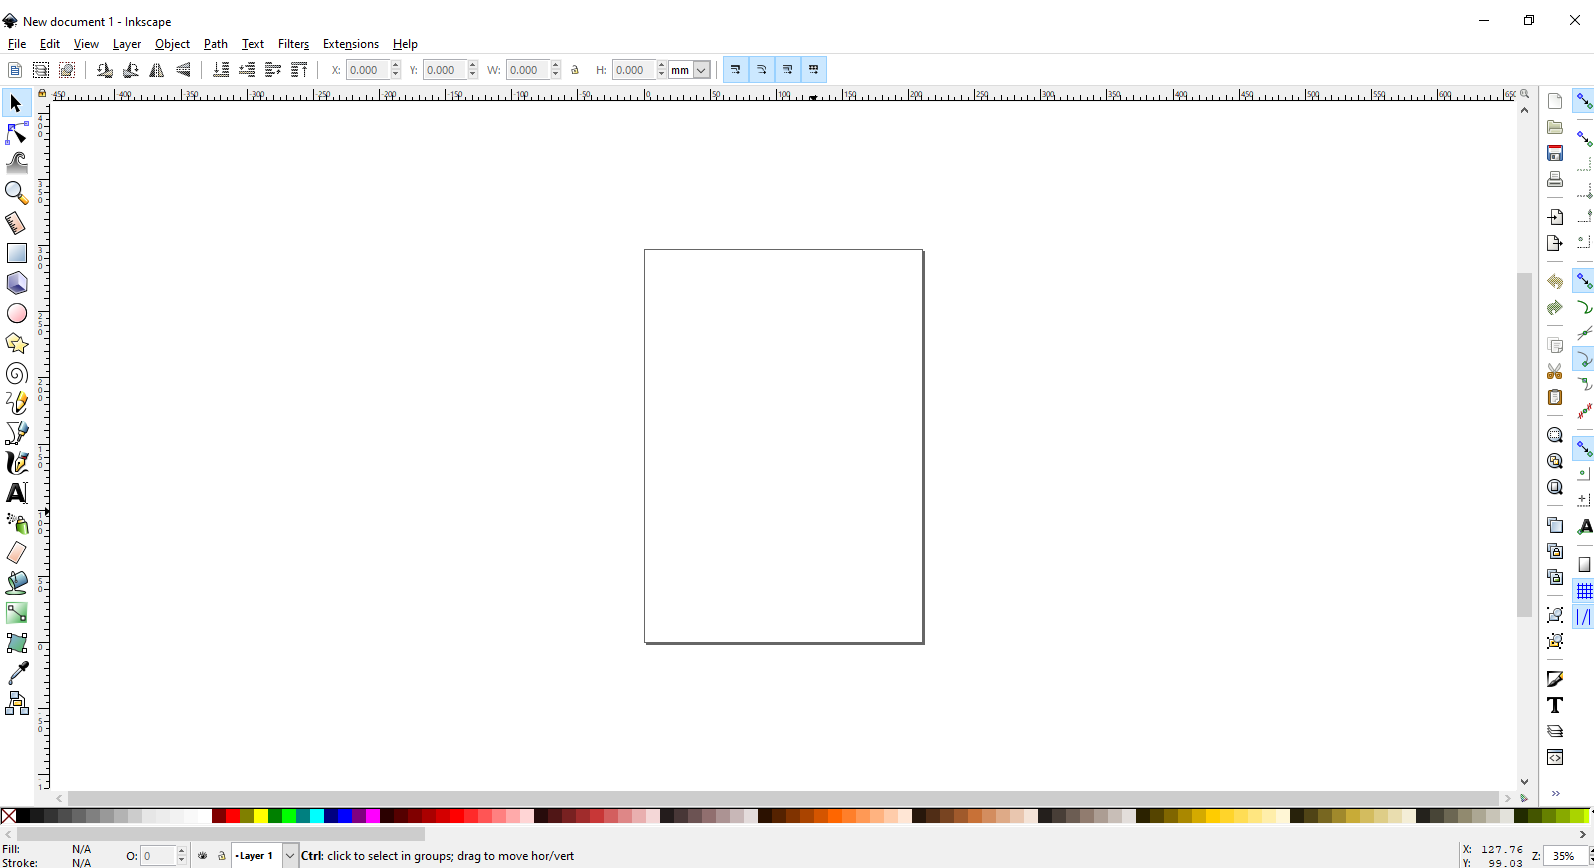
After downloading the software you can start drawing and the first thing you will notice is the home page which look like this :
-
You will notice that there are a lot of tools on the left hand side, anything you click on can be selected and you can change its properties, also resizing your design by using arrows or by changing the numbers on the top screen you can also create Barcodes and QR codes like this :
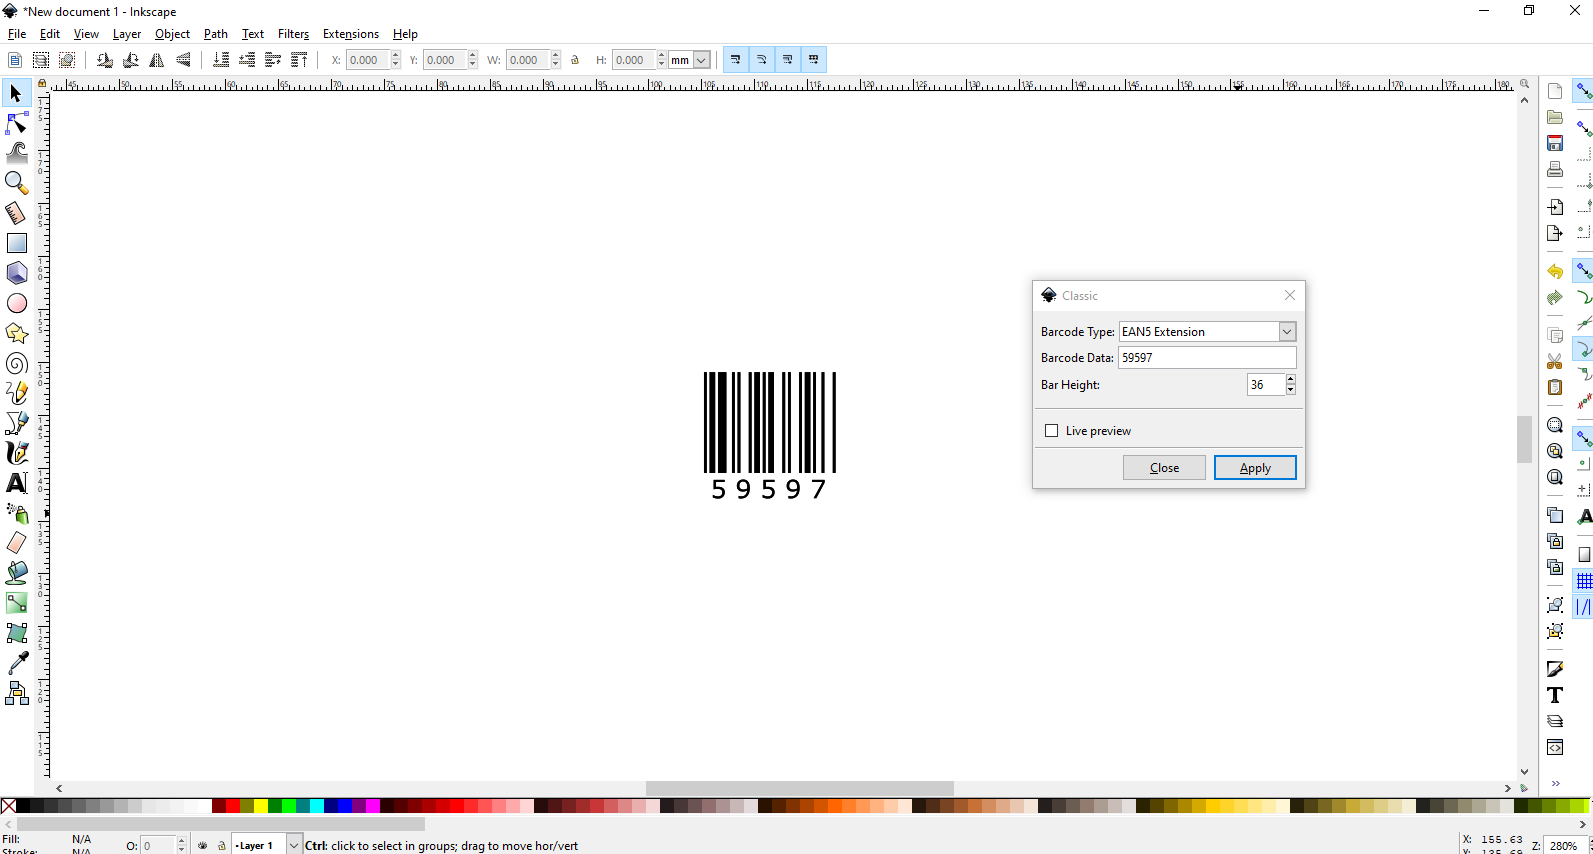 QR code :

Inkscape is a great software which has lots of potentials so i recommend to use it for designing logos and simple business cards .
Here are some useful shortcuts for Inkscape :
click here to see the shortcuts
and thats all for Inkscape .
Final project designs :
Design File : Click here to see the design
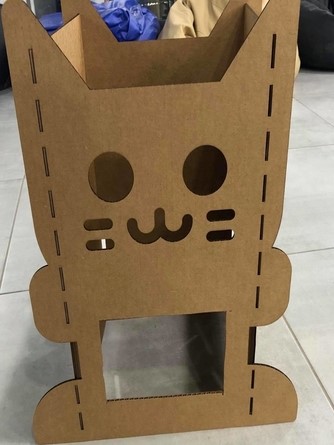
This is the first idea for the case :
- In this photo you can see my first idea for the final project case, i wanted to 3D print this case design but i realized that it will be a waste of materials to 3D print such a big case, so i decided to think and design another case in which i can cut by the laser cutter .
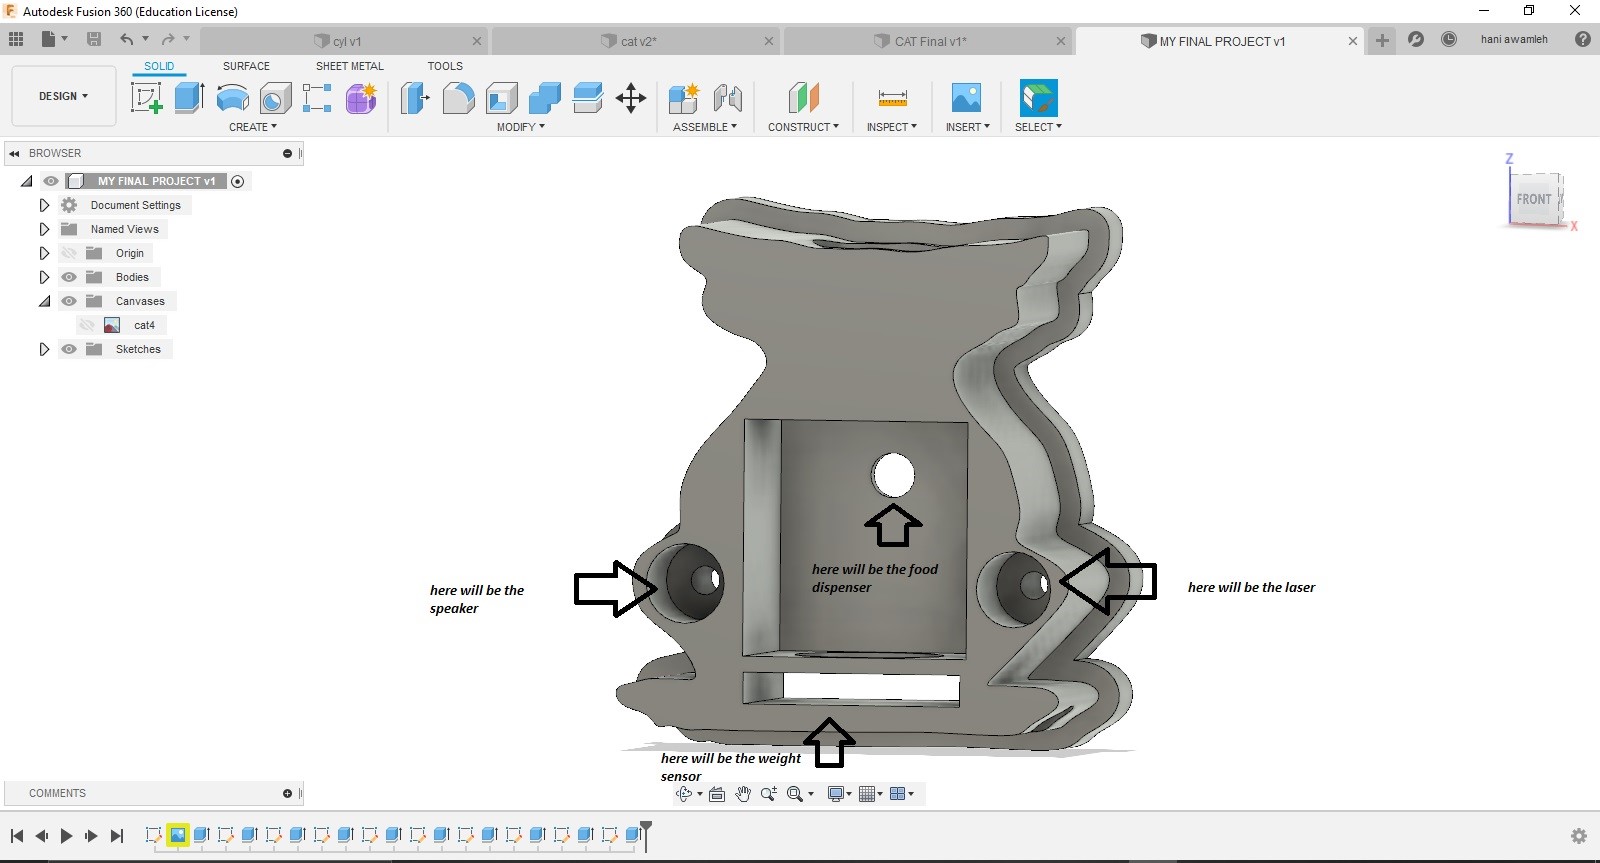
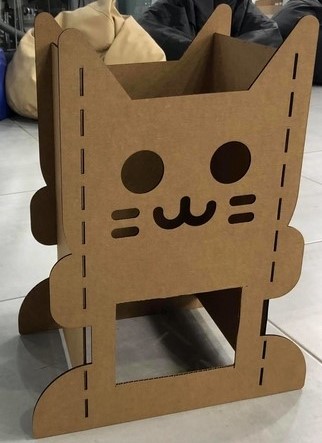
The final idea for the final project case design :
So basically ideas are like a building once you have the first floor ready you start building and building and for that i have realized that the first design was not good as a final product it was just to demonstrate the idea for my final project and i started designing new cases for the final project, finally i have ended up with this design which it took me so long to finish but if you want something to look in a good way you have to put a lot of effort on it, here is what i have come up with as a case for my final project :
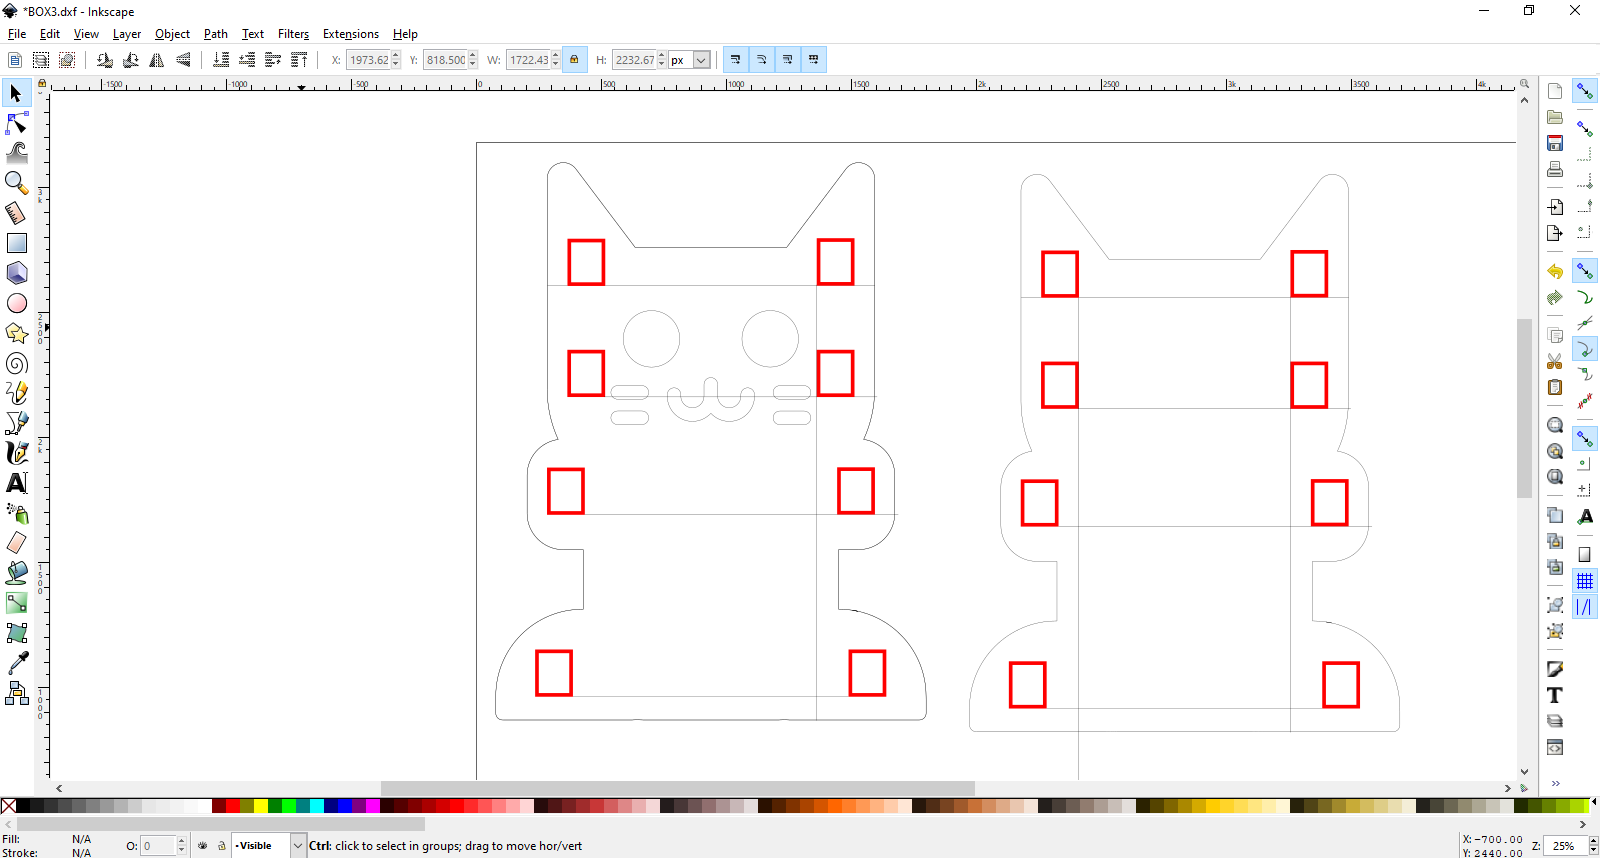
So first i designed the case using “Fusion 360” and then i saved it as a drawing in order to edit it on “Inkscape” and here is the file and a look for the design :
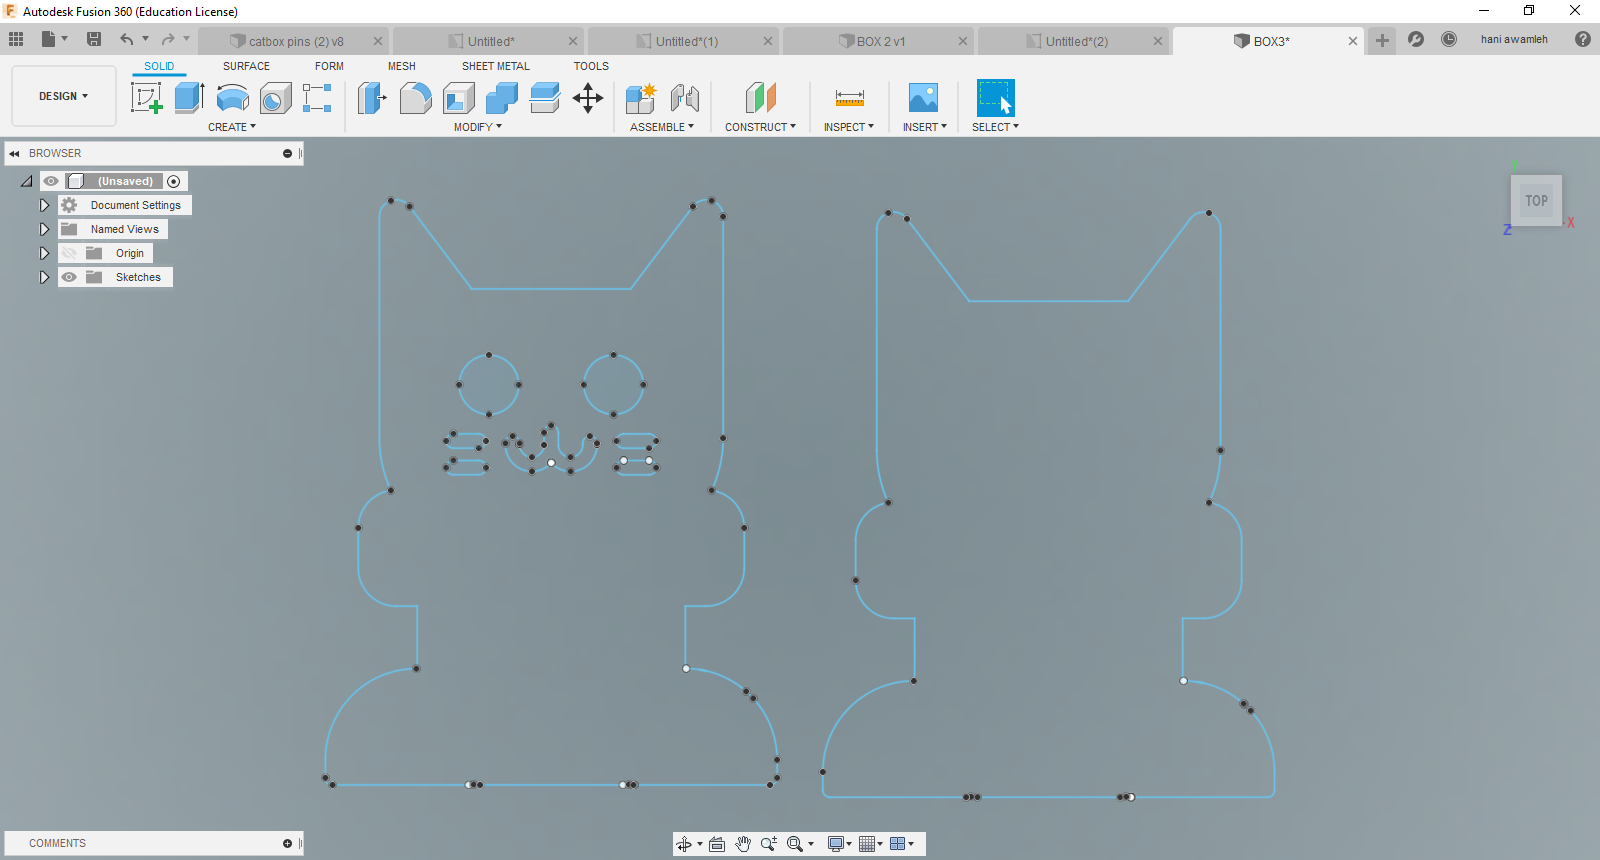
Then i saved the file as DXF in order to open it on “Inkscape” and started editing and started with this :
then after editing more and more in order to come up with an accurate design i ended up with this :
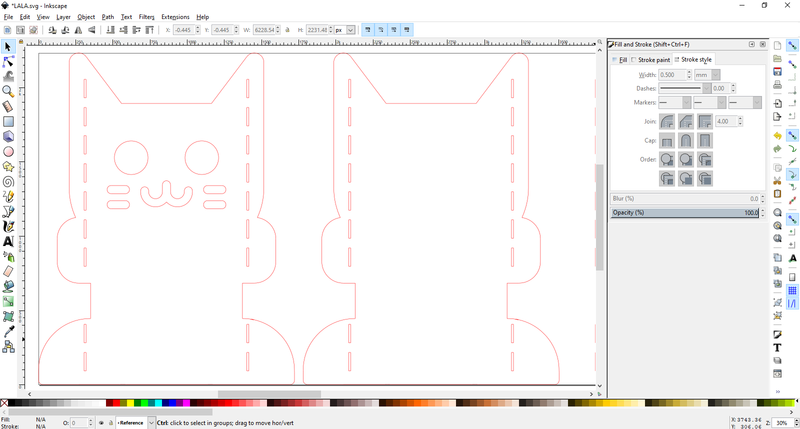
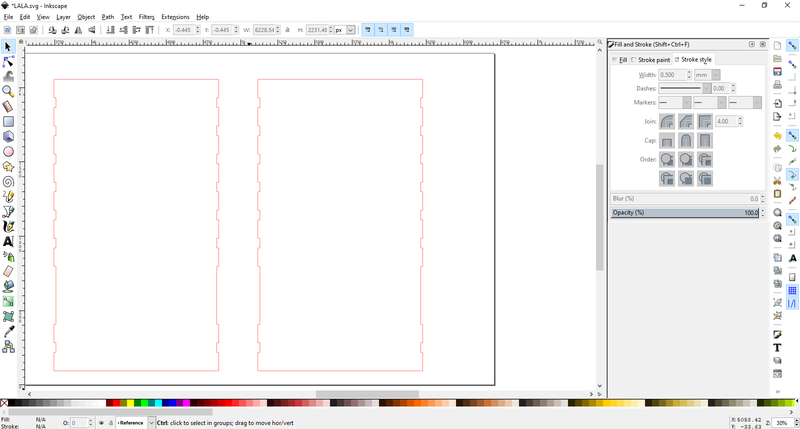
And here is a look for the design when it is finished :
The Final project design file on Inkscape
And that will be the final look for the final design case .
The food portion dispenser :
- First i designed the portion wheel using fusion 360 and here is the process :
to design the portion wheel i started by drawing a circle then i divided the circle into nine sides then i extruded only 3 sides in order to make as much space for the food:
- Then i designed the food holder :
and here are the files of the 3D designs:
Click here to see the design file
Click here to see the design file
Click here to see the design file
Big thanks to Murad saadeh for the inspiration of the food portion dispenser .