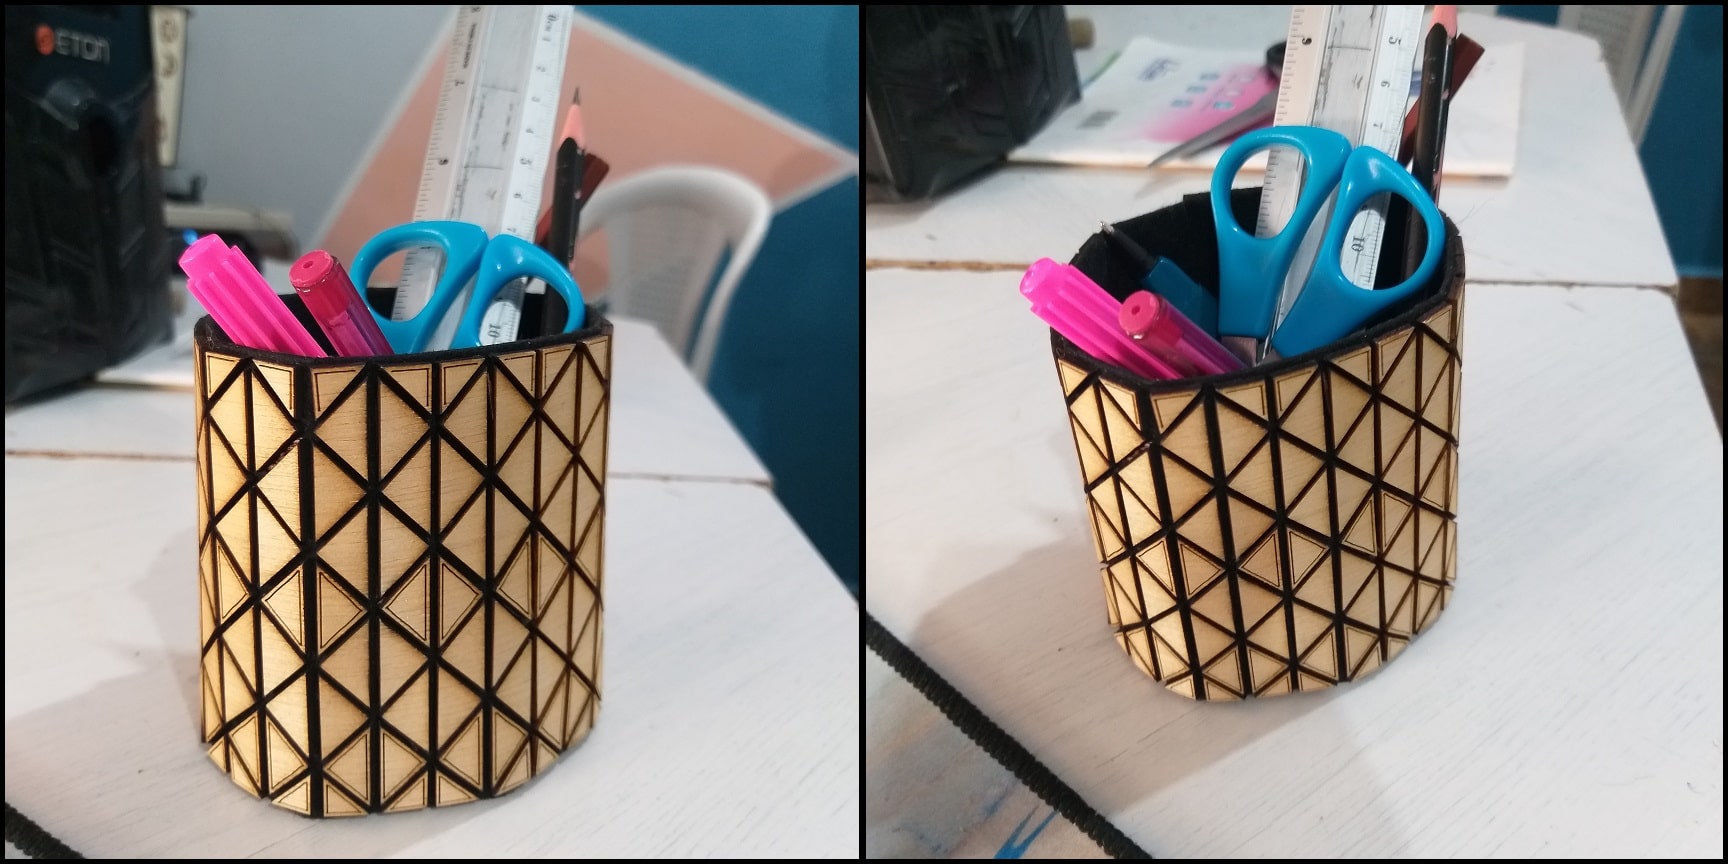
17. Wildcard Week
File Download
Base pattern Solidworks file
Wood-textile SVG file
Wood-textile dxf file
In this part I will work on wood-textile to make a pen holder. I looked into previous work in Montserrat Ciges personal page and in Fabricademy 2019-2020.
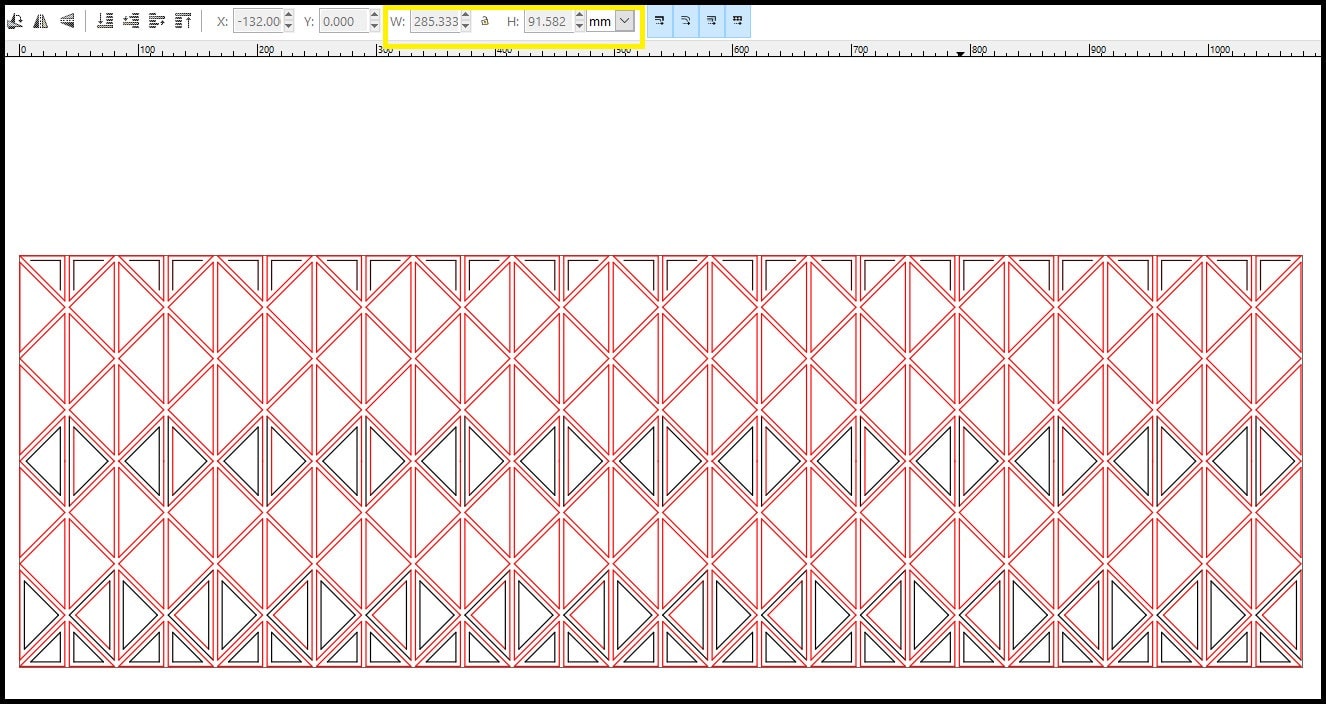
The Design
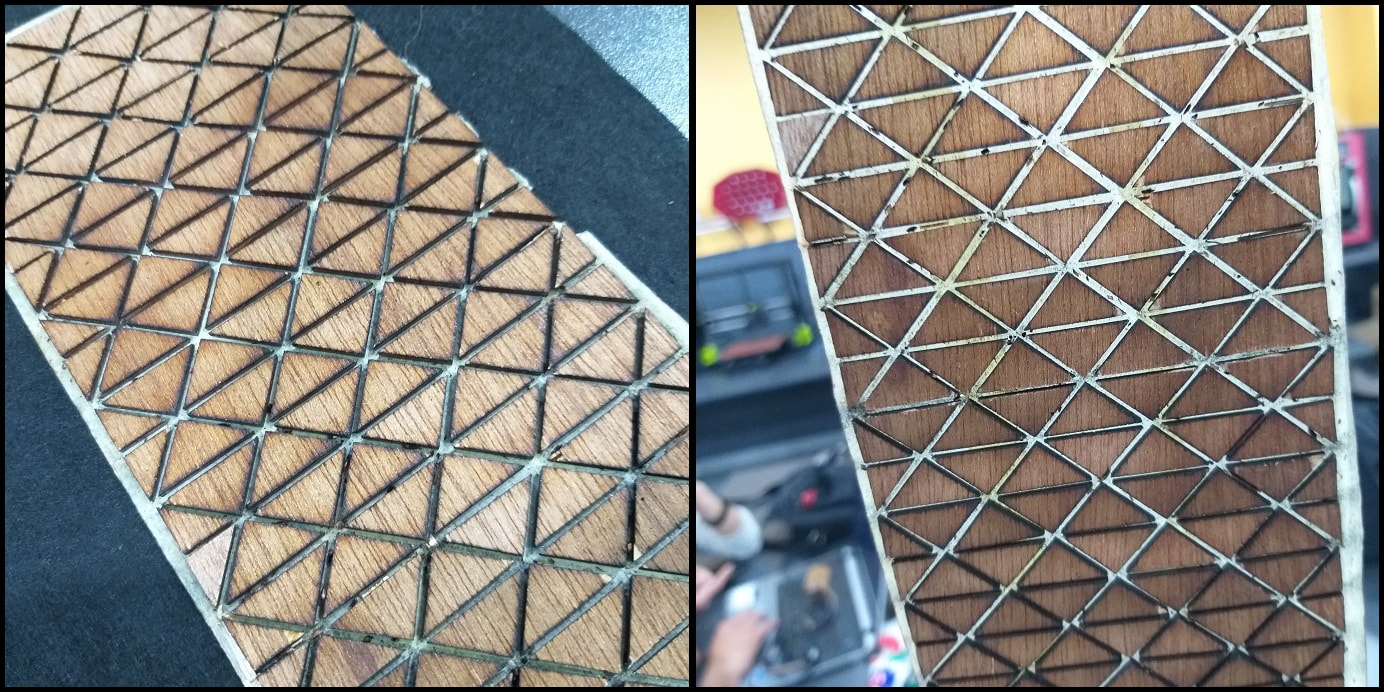
I designed a base pattern using Solidworks. Then imported the dxf file to Inkscape to clone and export to the Laser cutter. The base pattern is 21 mm x 91 mm and cloned horizontally to form 285 mm x 91 mm wood pattern that will be glued into textile or leather. The clearance between wood pieces is 1 mm, which will provide the flexibility of wood-textile.

The wood-textile will be formed into a cylinder to make a cup holder. The result cylinder is Dia x H = 91 mm x 91 mm.
After forming the wood-textile to a cylinder, an extra textile or leather piece will be glued to close one side of the pen holder.
Laser Cutting
I used 2.7 mm plywood. Note that cut lines are colored in red and engrave lines are colored in black. To know more about using Inkscape and laser cutting check Computer Aided Design and Computer Controlled Cutting weeks.
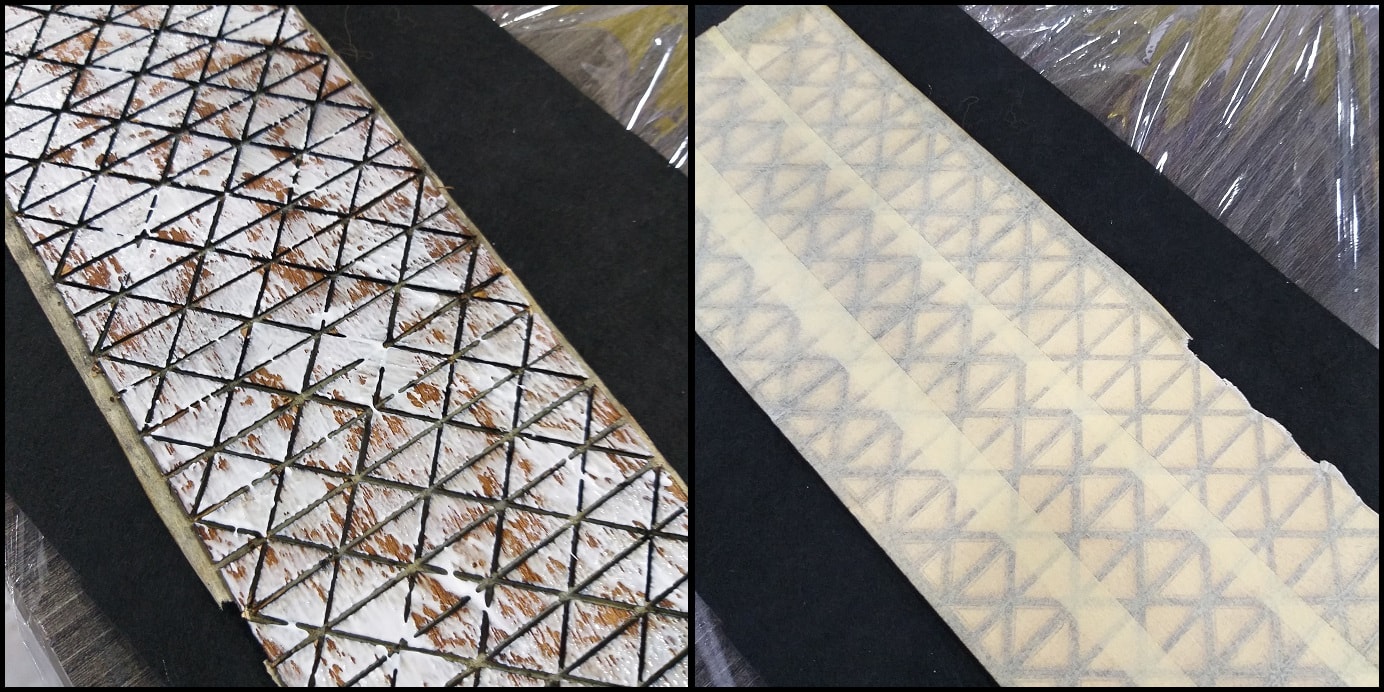
To keep cut pieces in place and prevent from falling through laser machine grid, I put an acrylic board (the white part in image) below the playwood. I got the acrylic from waste so no extra material was sacrificed.
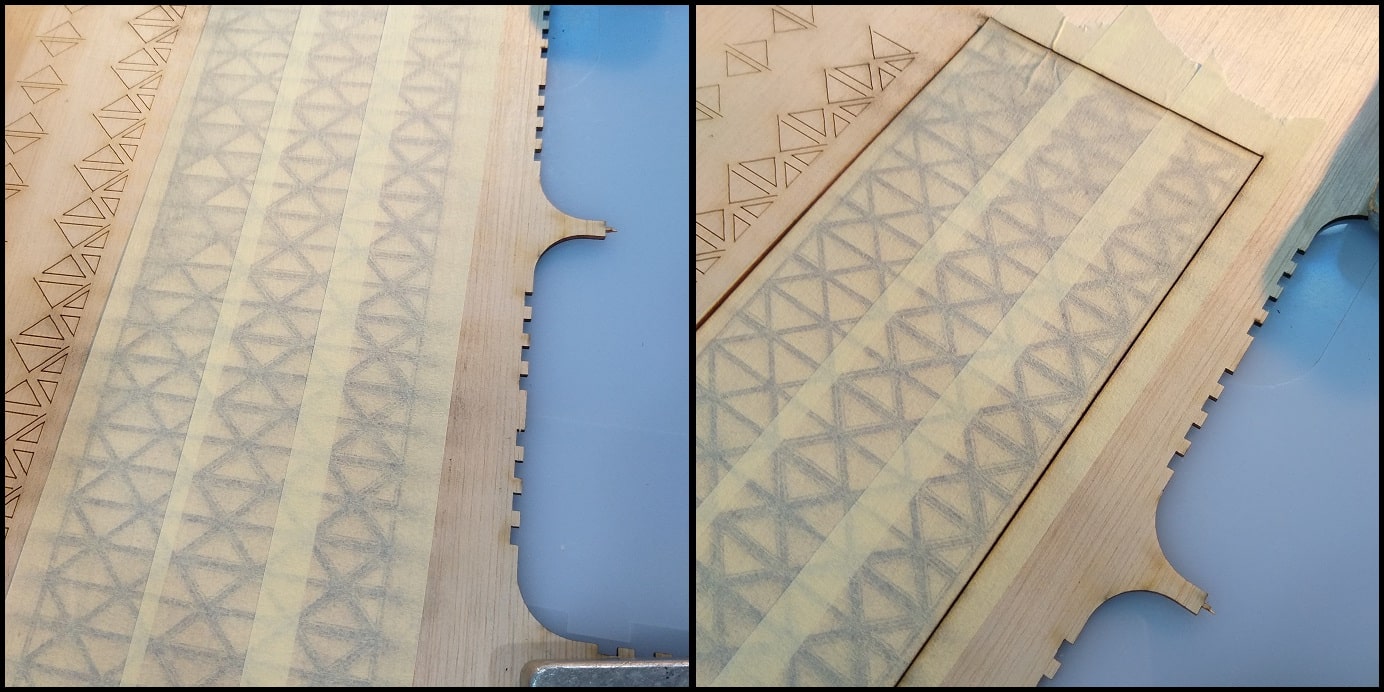
After completing the engraving part and cutting wood pieces, I put paper tape on top to hold all parts in place and cut around.
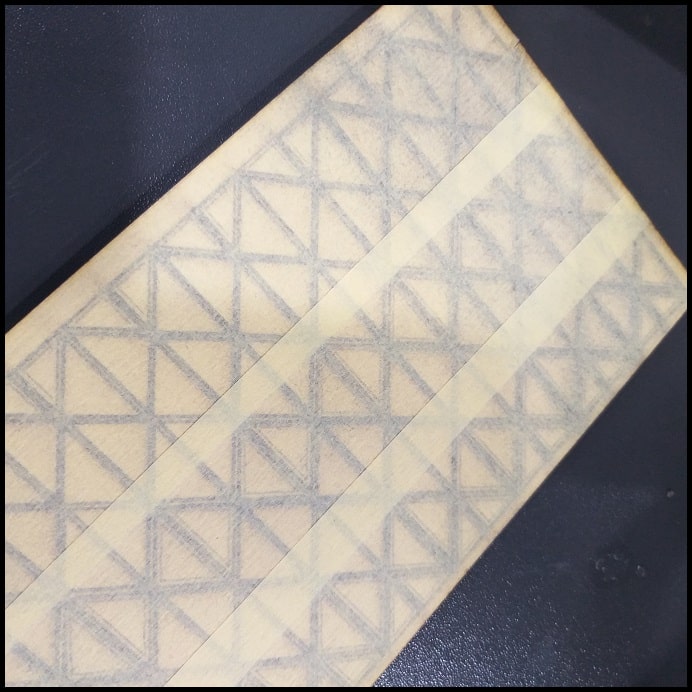
Then I removed the frame between pieces, leaving all wood tiles attached to paper tape and held in place. This process took some time, because the clearance between pieces in tight (1 mm), and pieces themselves are small.
Fixing to Textile
I fixed the wood pieces to black textile. I applied wood white glue to tiles and put on textile and left for enough time with some weight over to dry.
When glue dried, I removed paper tape. The tiles are fixed on textile in place.

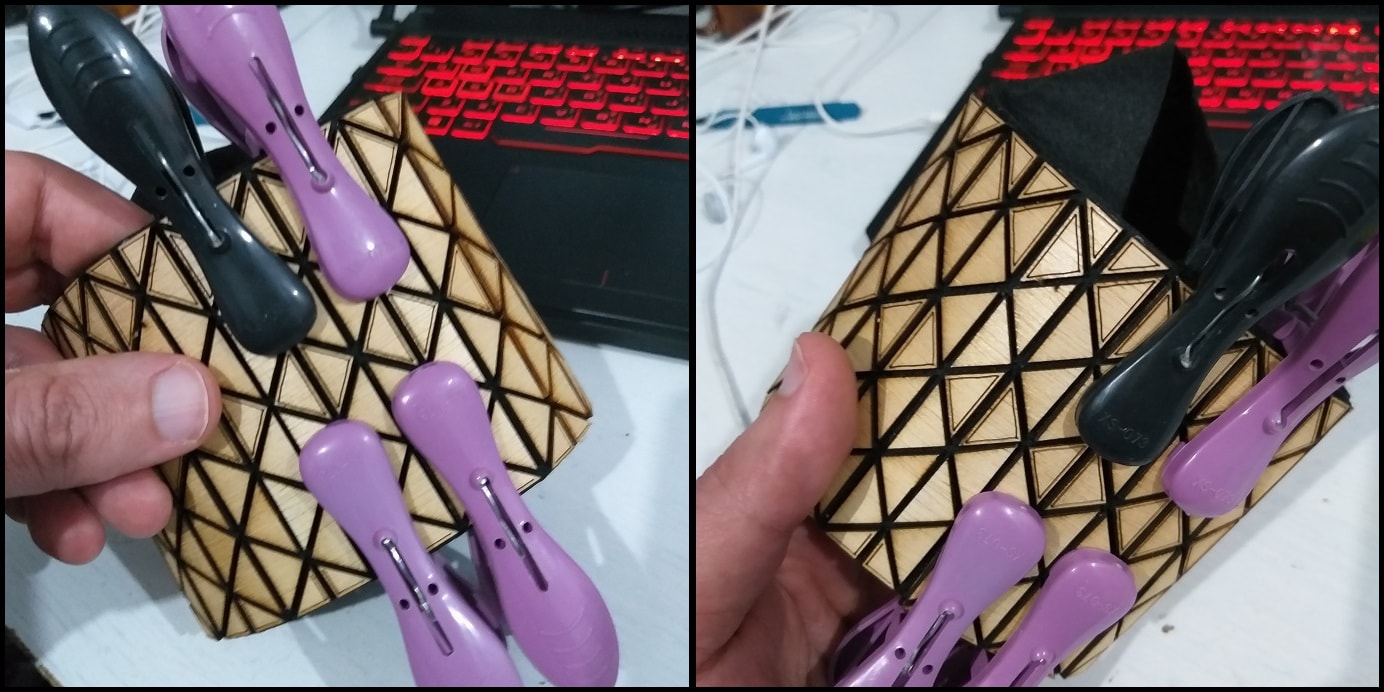
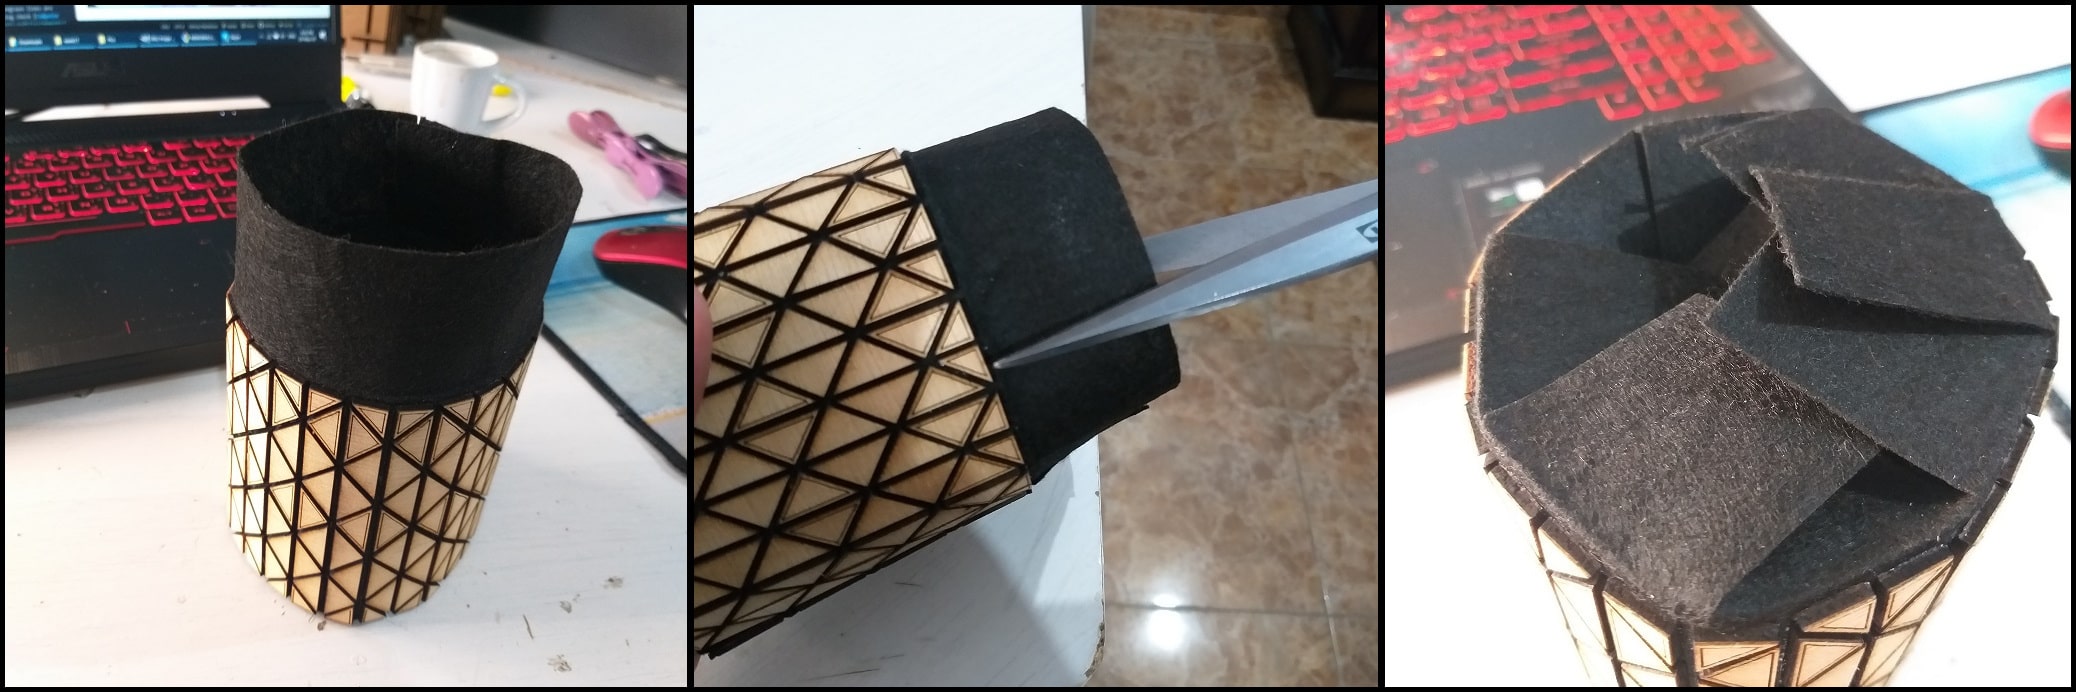
Making the Pen Holder
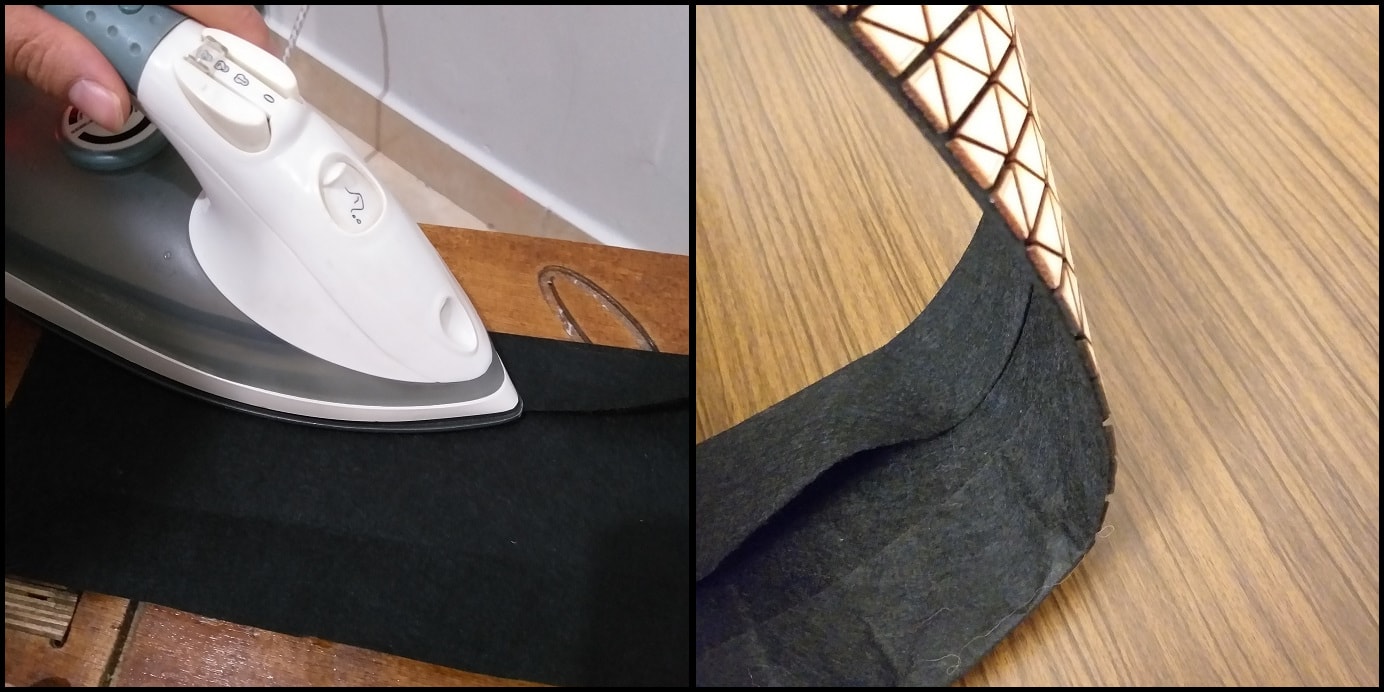
I folded textile top and bottom and used cloth iron to have nice bends. I applied glue to textile on the top bend to keep in place after forming the wood-textile into cylindrical shape.
The extra textile from one side (left or right) was cut to length and glue was applied to the opposite side. The uncut side textile was fixed inside and edges aligned to form a cylinder.
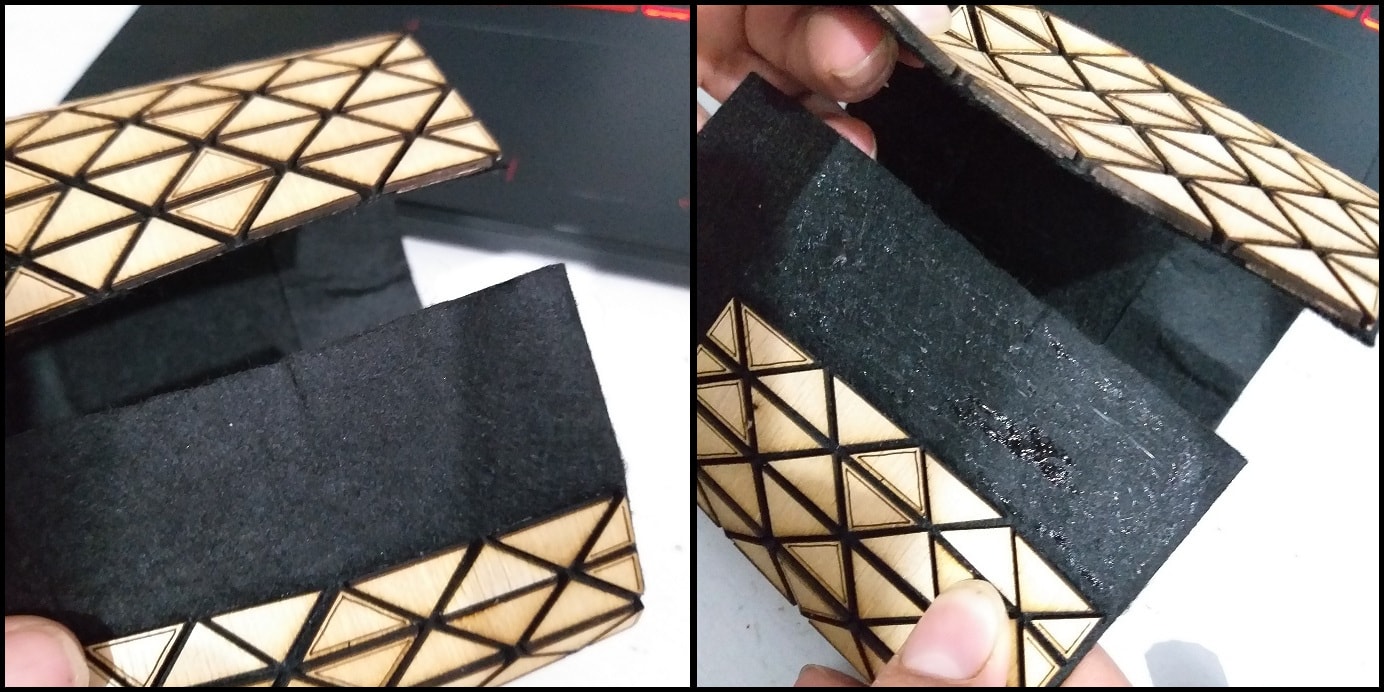
Force applied to glued overlapping textile and left over to dry. Note that the extra textile at the bottom of shape will be used to close the bottom and make a pen holder.
Using a scissor, I made cuts into the extra textile at the bottom then folded them to make a closed end. Then I used glue to join them together.
Problems and Fixes
The wood tiles were small and clearance between them was 1 mm. I would suggest to make larger tiles and wider clearance which makes it easier to remove the frame and the result wood-textile will be more flexible.
Hero Shoot!