16. Molding and Casting
Group Assignment
In this part we read and reviewed the technical and safety datasheet of casting and molding material we have in the lab.
Molding and Casting Material
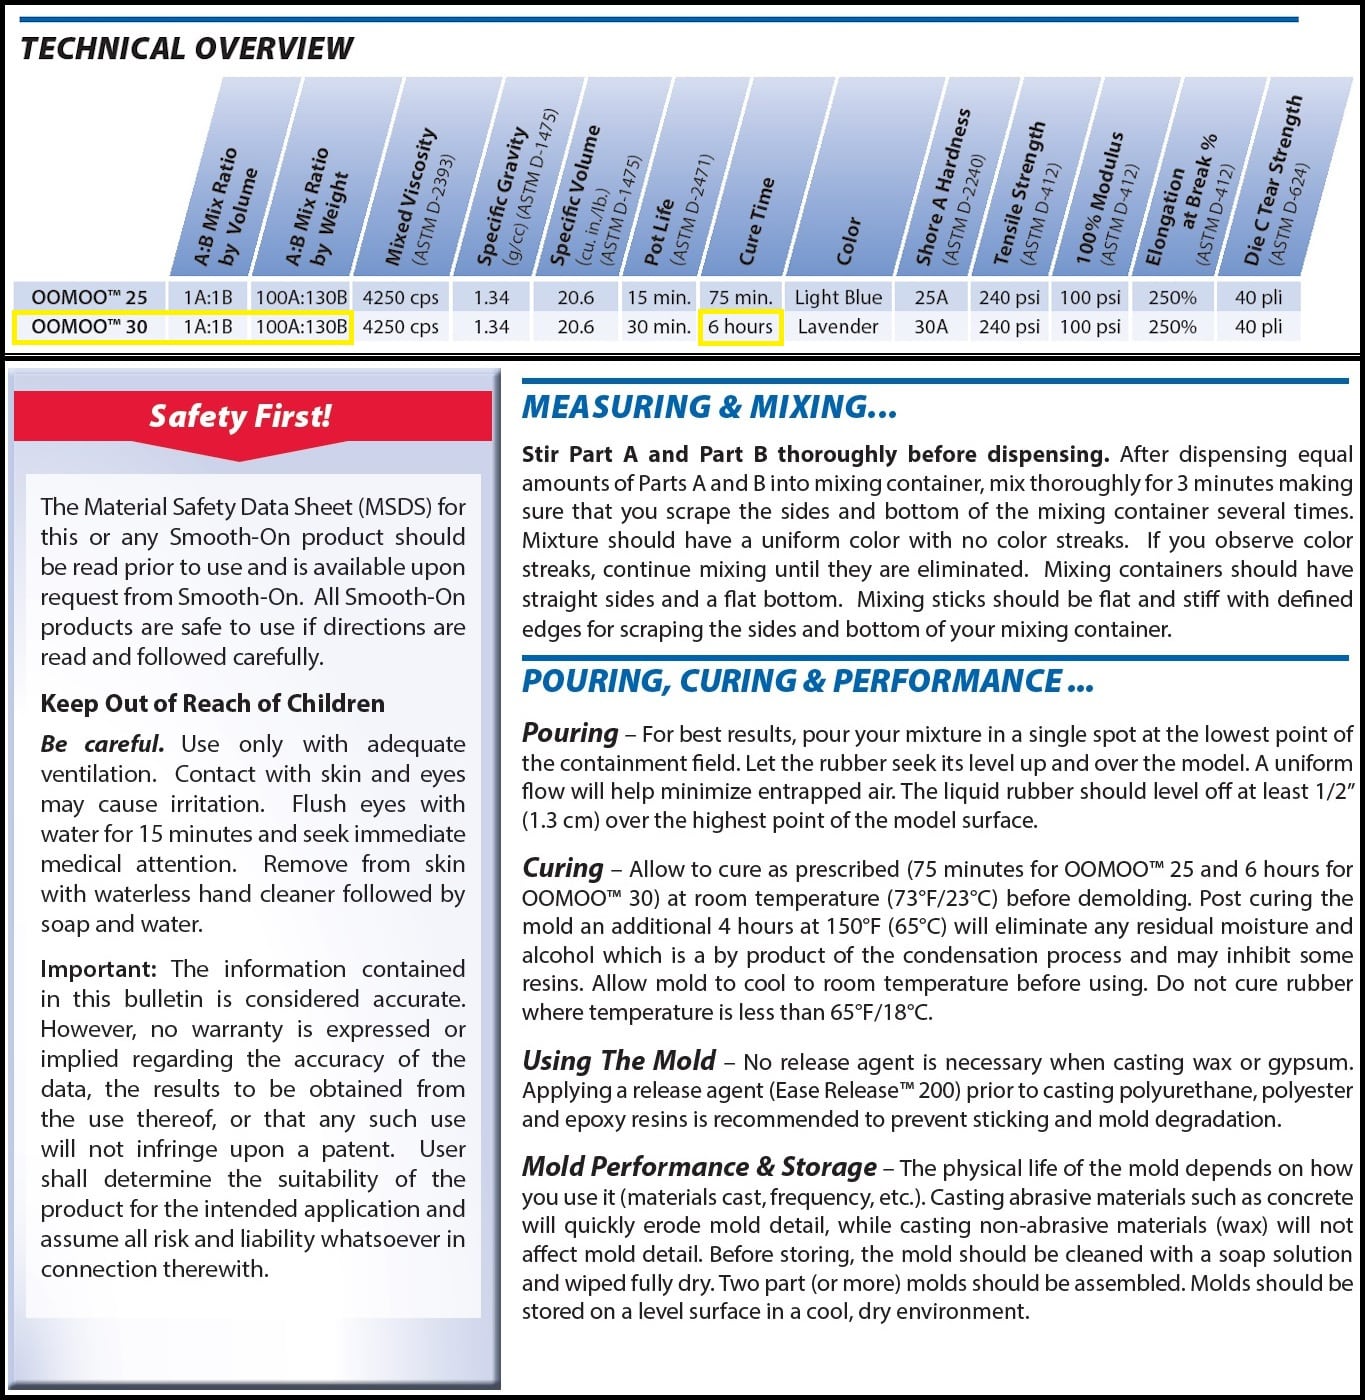
The image and table blow show the material we have in the labs.
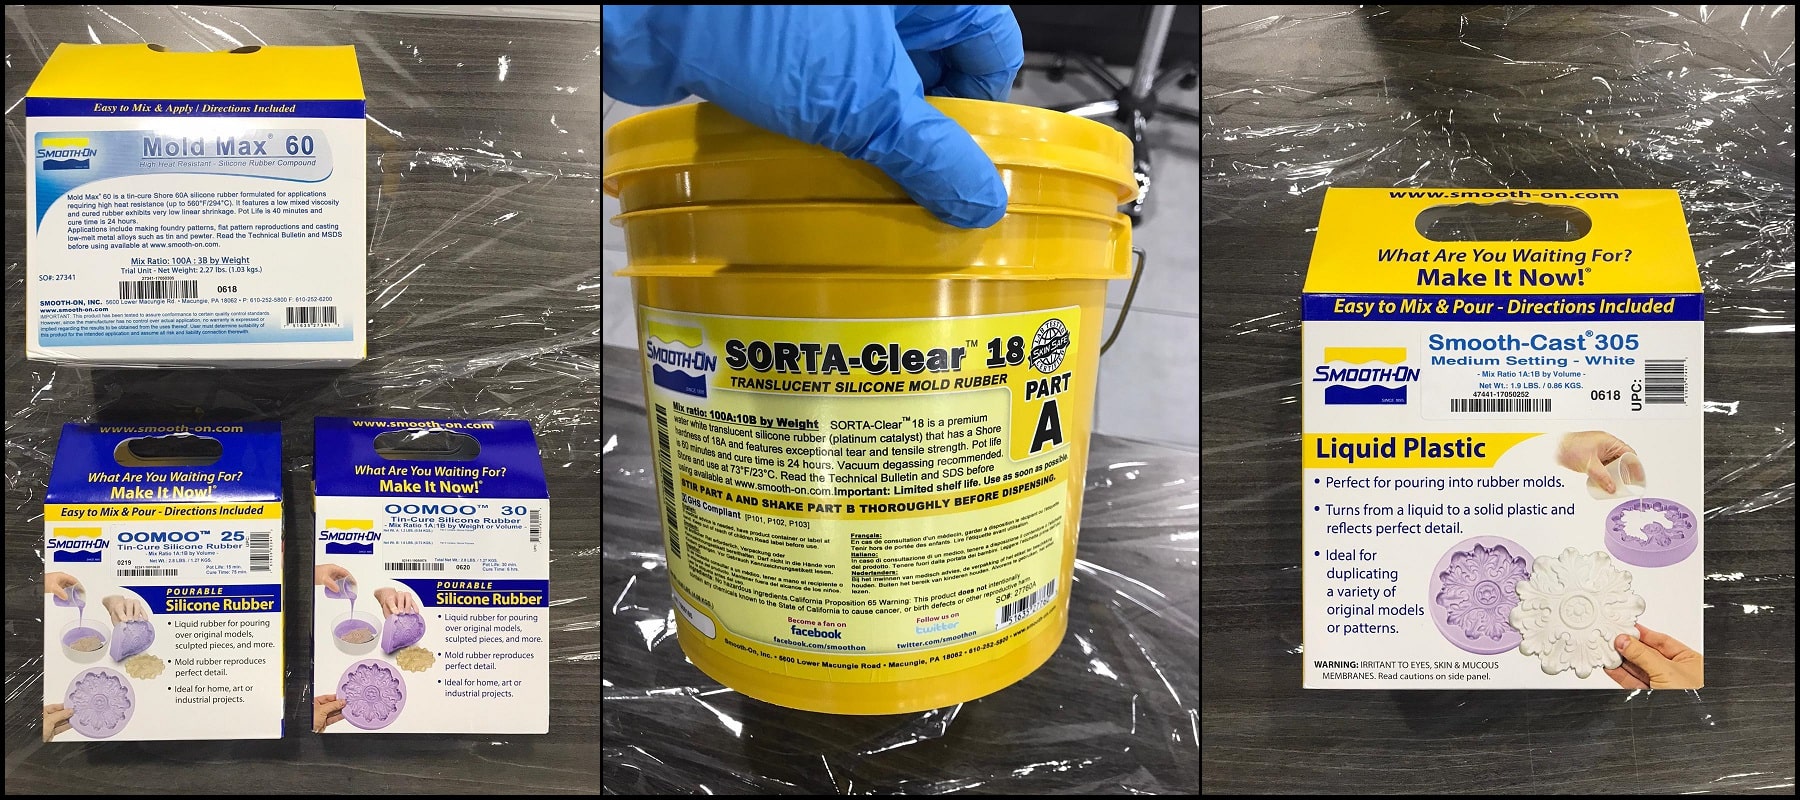
| Material | Category | Series | Supplier |
|---|---|---|---|
| OOMOO™ 30 | Silicone Rubber-Tin Cure | OOMOO™ | Smooth-on |
| OOMOO™ 25 | Silicone Rubber-Tin Cure | OOMOO™ | Smooth-on |
| Mold Max™ 60 | Silicone Rubber-Tin Cure | Mold Max™ | Smooth-on |
| SORTA-Clear™ 18 | Silicone Rubber-Platinum Cure | SORTA-Clear™ | Smooth-on |
| Smooth-Cast® 305 | Urethane Resins | Smooth-Cast® | Smooth-on |
The first 4 material are liquid silicone rubber and the last one is liquid plastic. We compared the liquid silicone rubber material (the first 4)

The image lists the key differences between the 4 liquid rubber materials. For example, there are operational differences like pot life and cure time, and there are finish differences like end product color.
Safety and Technical Datasheet
Technical and safety datasheets are linked for each material. The technical datasheet provides operational data like technical specs and processing recommendations. The safety datasheet describes different hazards associated to the material and risk levels. Note that SORTA-Clear™ 18 is the only safe food material.
OOMOO™ 30
Technical datasheet
Safety datasheet
OOMOO™ 25
Technical datasheet
Safety datasheet
Mold Max™ 60
Technical datasheet
Safety datasheet
SORTA-Clear™ 18
Technical datasheet
Safety datasheet
Food safety technical datasheet
Smooth-Cast® 305
Technical datasheet
Safety datasheet
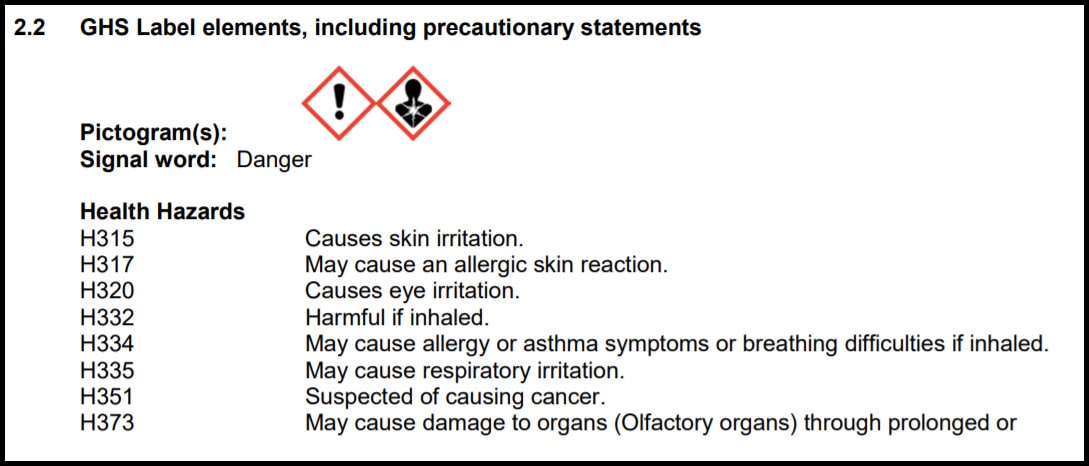
For example, the following risks are listed in the safety datasheet of Smooth-Cast® 305.
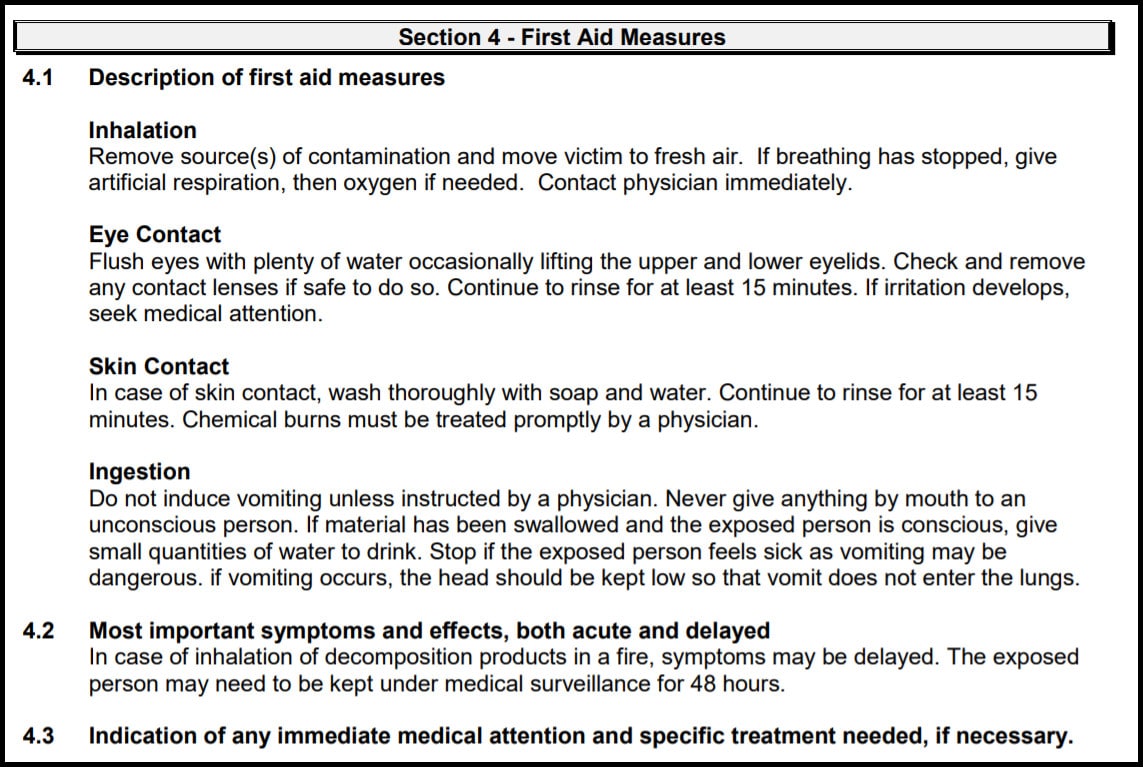
And also, the following first aid measures are listed in the safety datasheet for the same material.
In the technical datasheet information about working on the material could be found. For example, for OOMOO™ 25 the following guidelines are listed (in addition to safety ticket!).
Machinable Wax
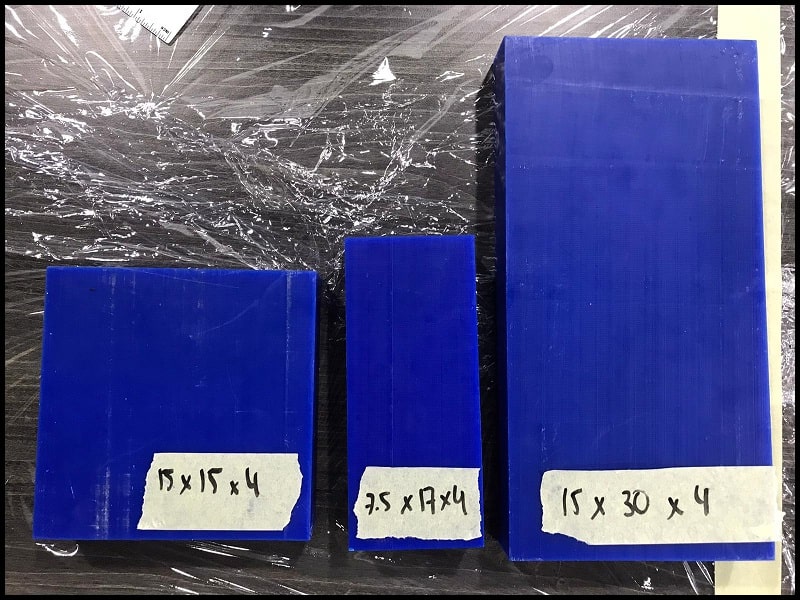
In the lab we have 3 sizes of machinable wax (dimensions in cm). This will be used to mill the positive mold of the final product.
Material Test Casts
We made test casts using OOMOO™ 30 and SORTA-Clear™ 18 silicone rubbers. We followed the mixing guides in technical datasheets for both materials.

Week Assignment
File Download
Mold Fusion 360 file
Mold STL file
3D roughing and finishing toolpaths
The 3D Model
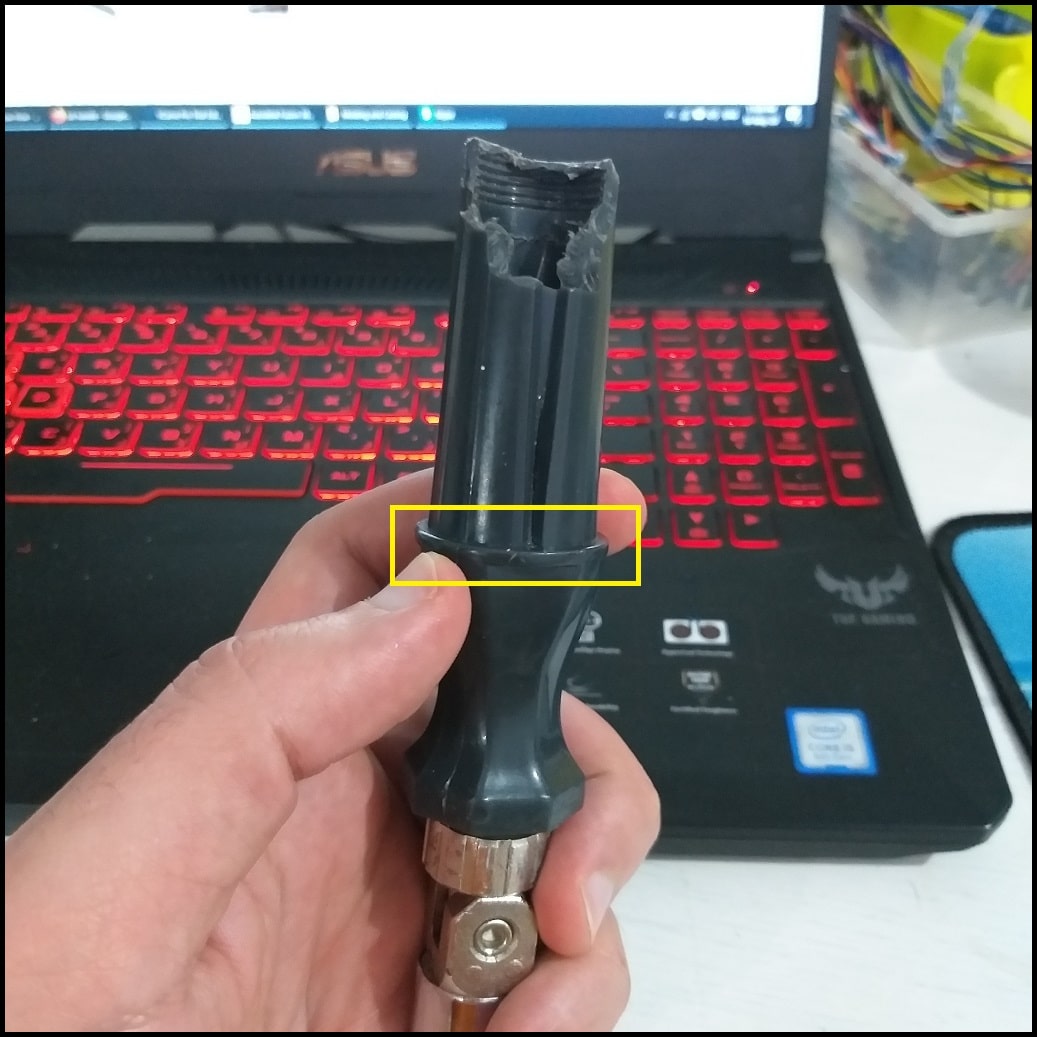
I this part I will make a new grip to replace the broken one in my bit handle screwdriver. The new grip will wrap the part above the edge in the yellow box.
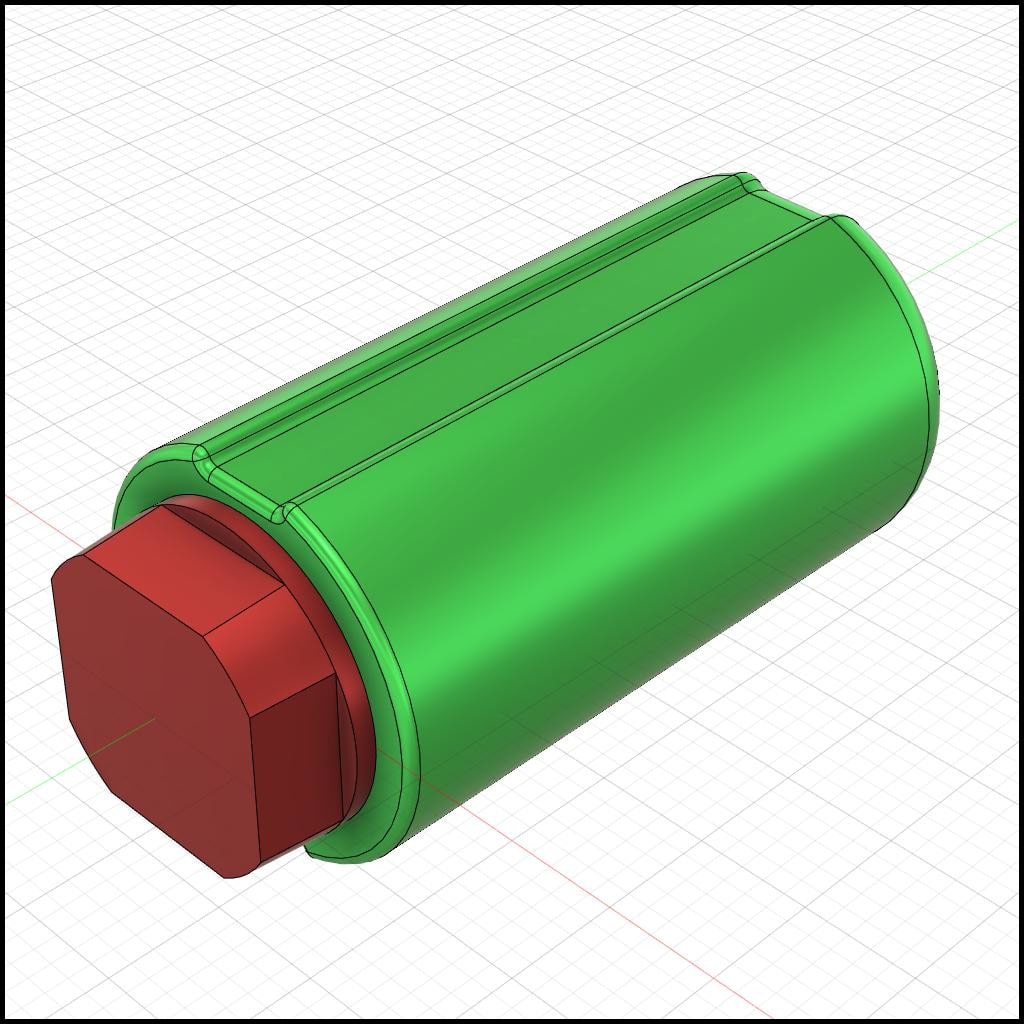
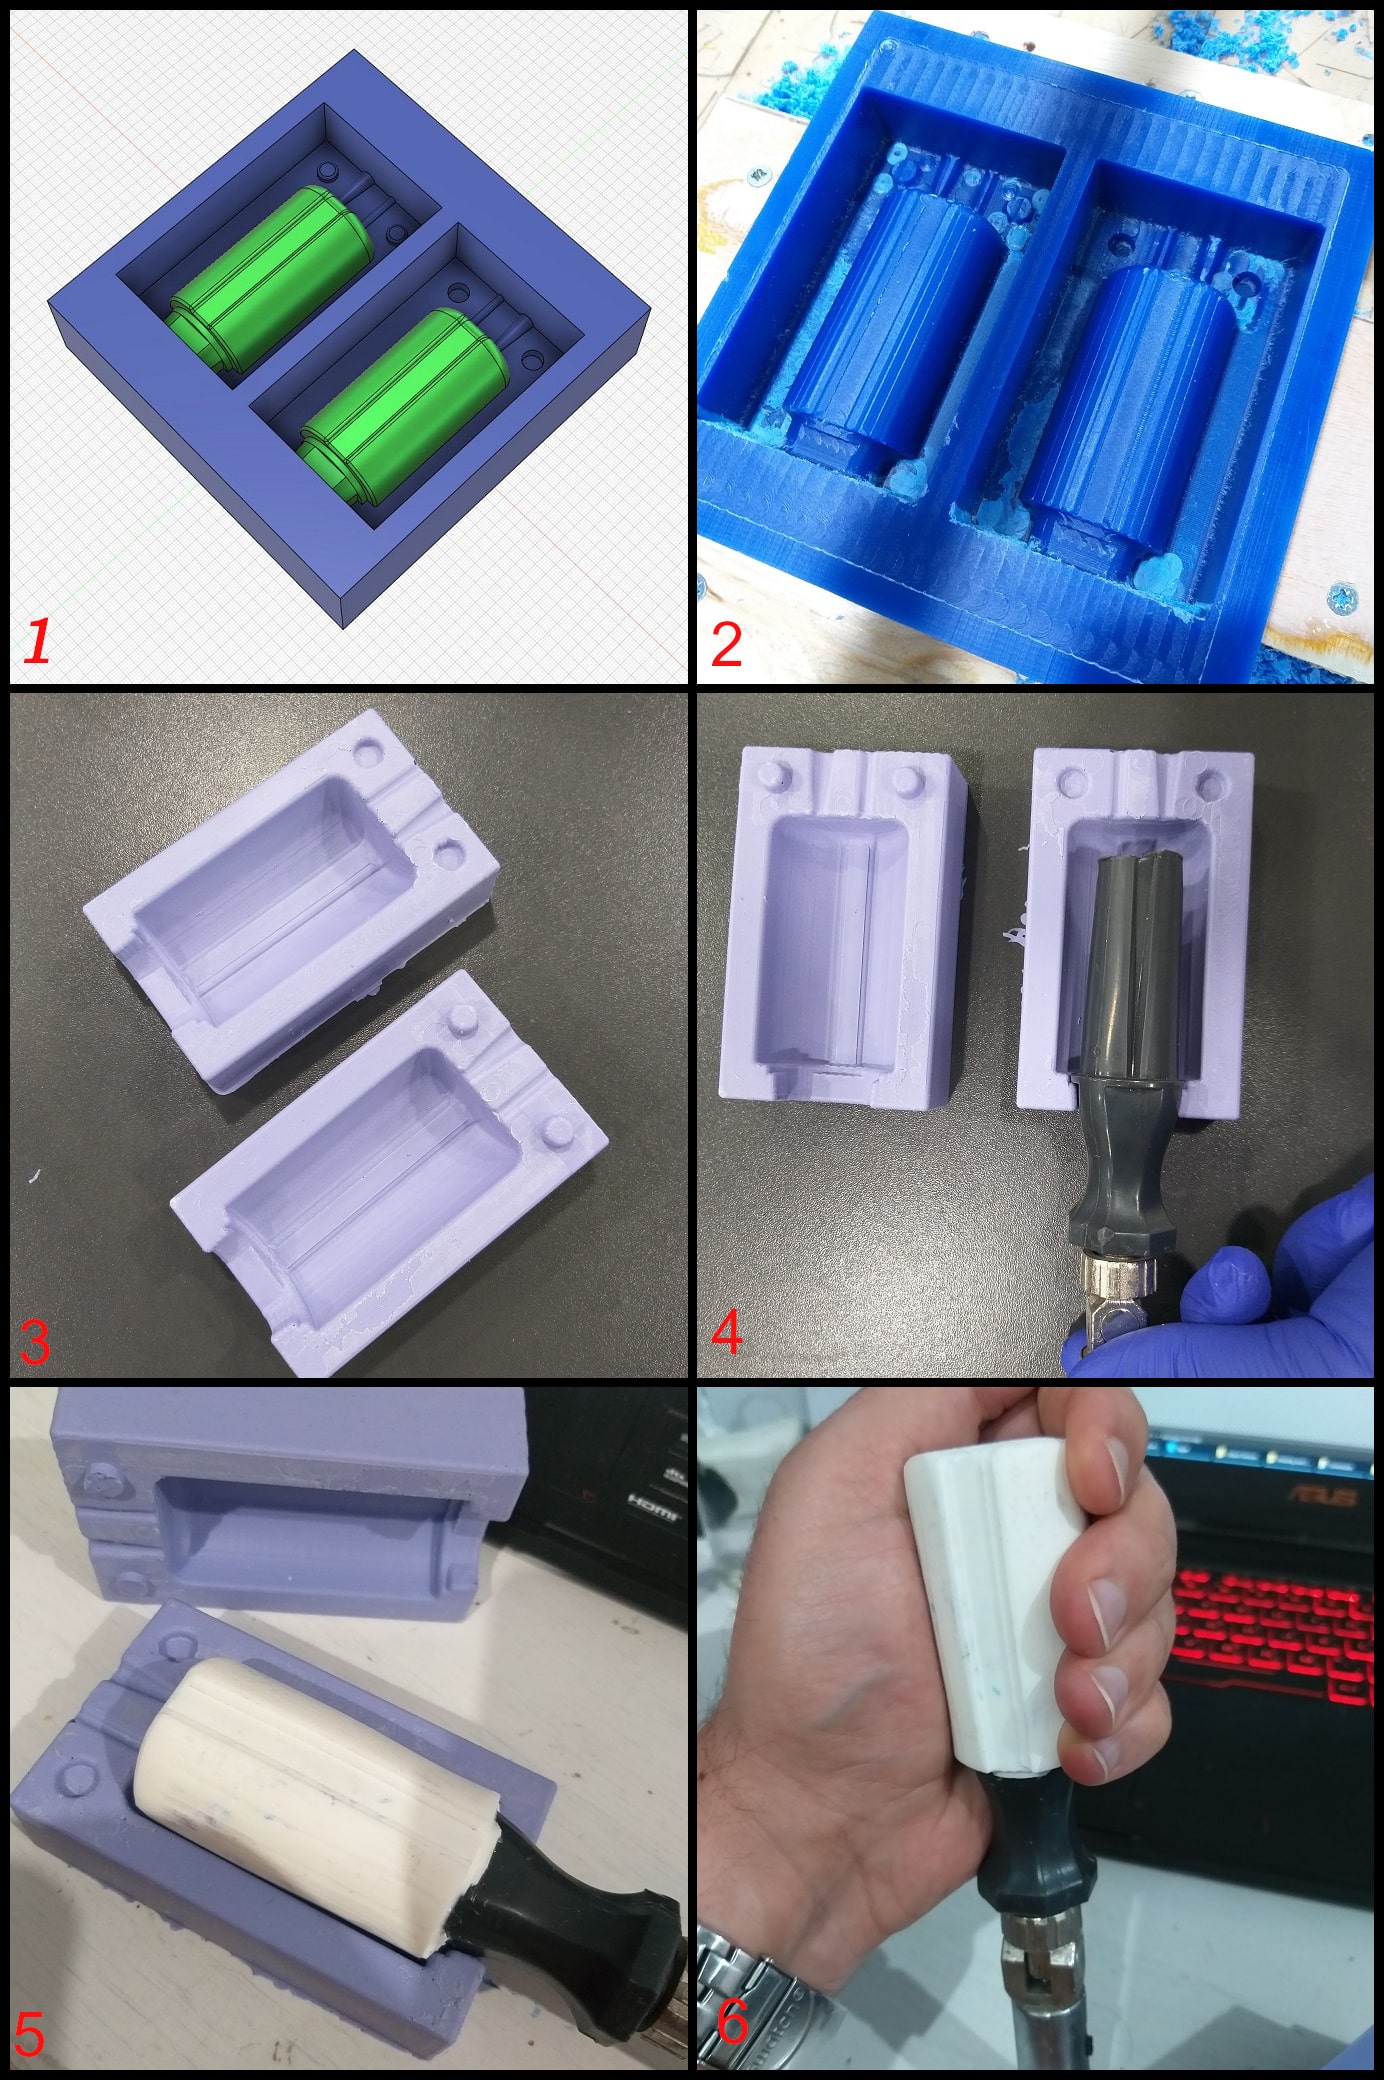
I created a model for the new grip, including the edge and part of the original body below the edge (shown in red). This will not be molded in the final product, it will be used to register the mold parts in the right position. This part fits to the size in the handle. So, the handle part corresponding to the red part will fit in the cavity created by the silicone negative mold, and the final product (using liquid plastic) will fill the cavity to create the green part.
For machinable wax, I will use 150 mm x 150 mm x 40 mm block. After modeling the grip, I made it into two halves and put on the block. Then I created two registration pins and two grooves. The conic one will be used to pour liquid plastic and the straight one will provide a path out for air trapped in mold cavity.
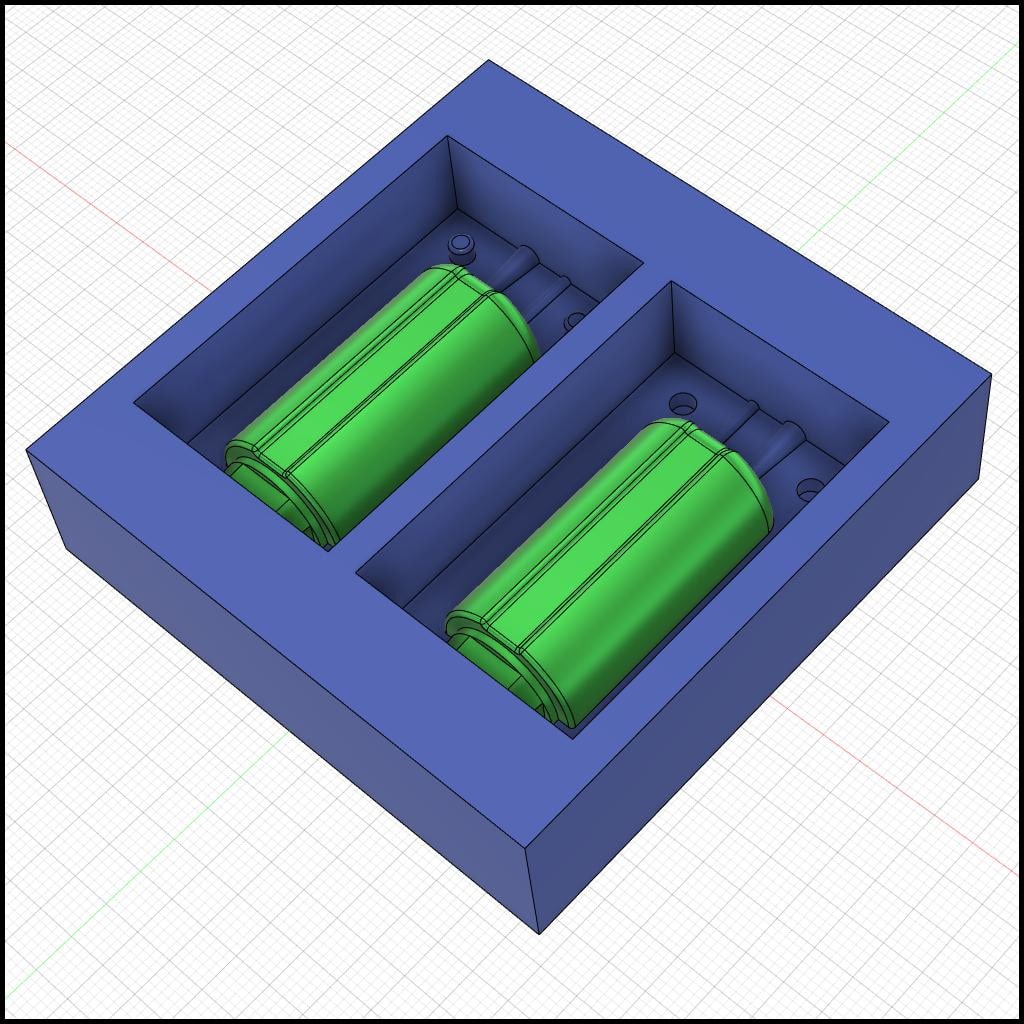
Note that the taper angle used (2 DEG) to extrude cut the wax block. This will make it easy to remove the silicone mold after curing.

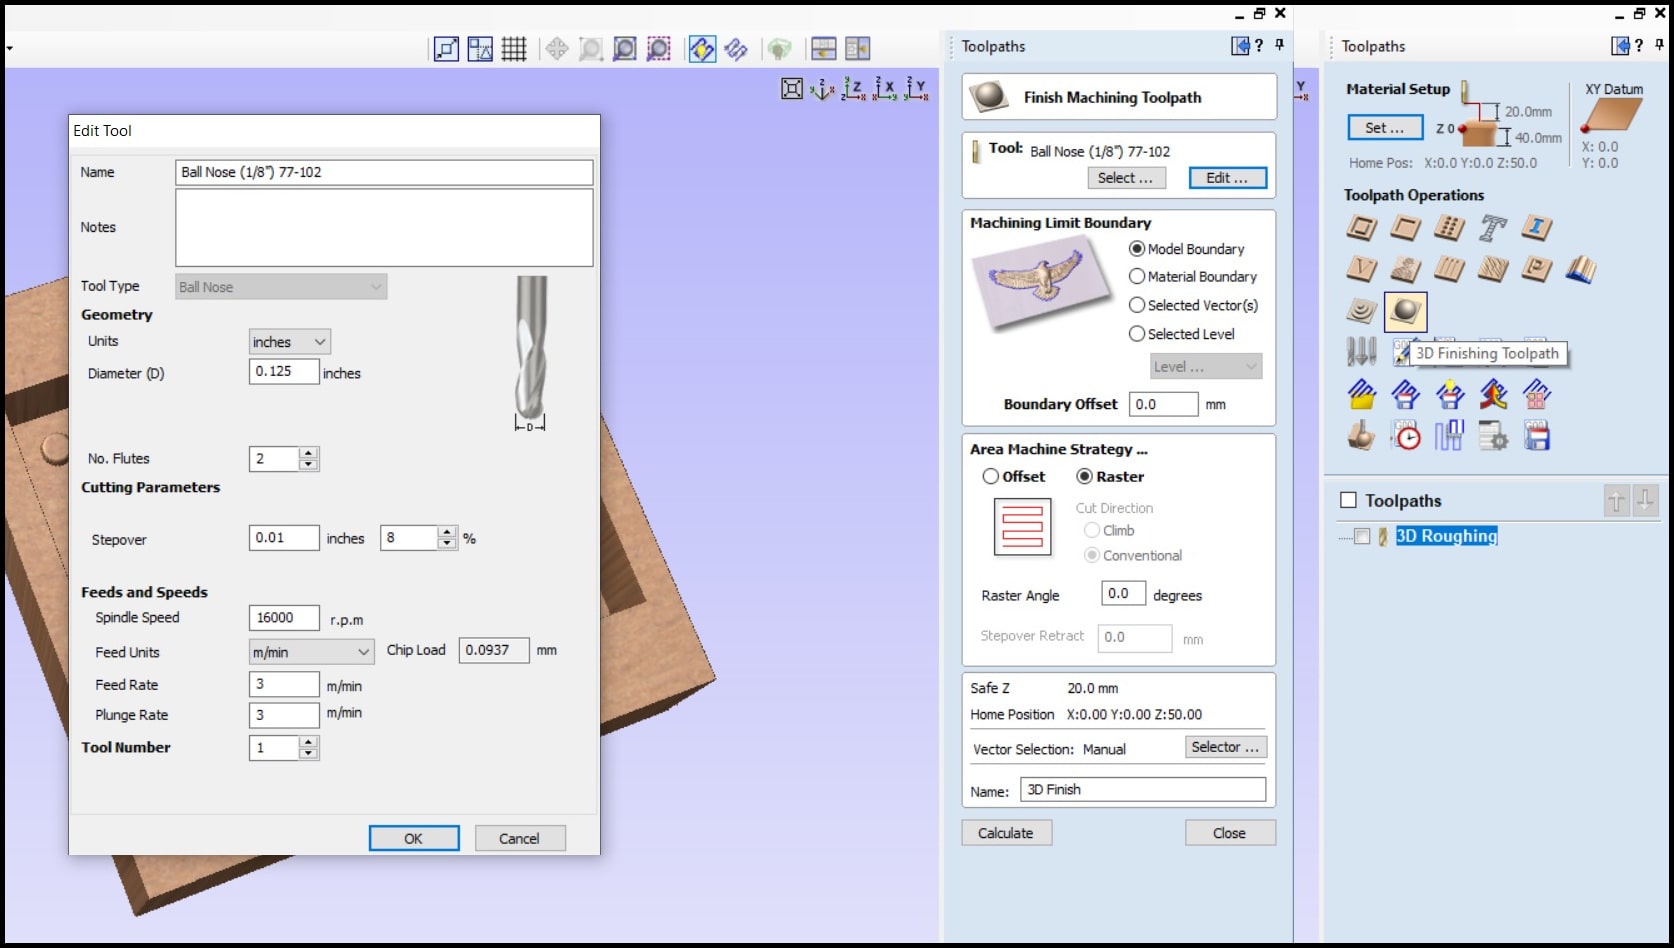
Roughing and Finishing Toolpaths
I used VCarve to create the toolpaths. For rough toolpath, I used 2 flute straight 0.25” bit, and for finish toolpath I used 2 flute ball nose 0.125” bit.
Step 1: Open VCarve and create a new file. In job setup, insert your machinable wax block size. Click “File > Import > Import Component/3D Model” and import your 3D STL file.
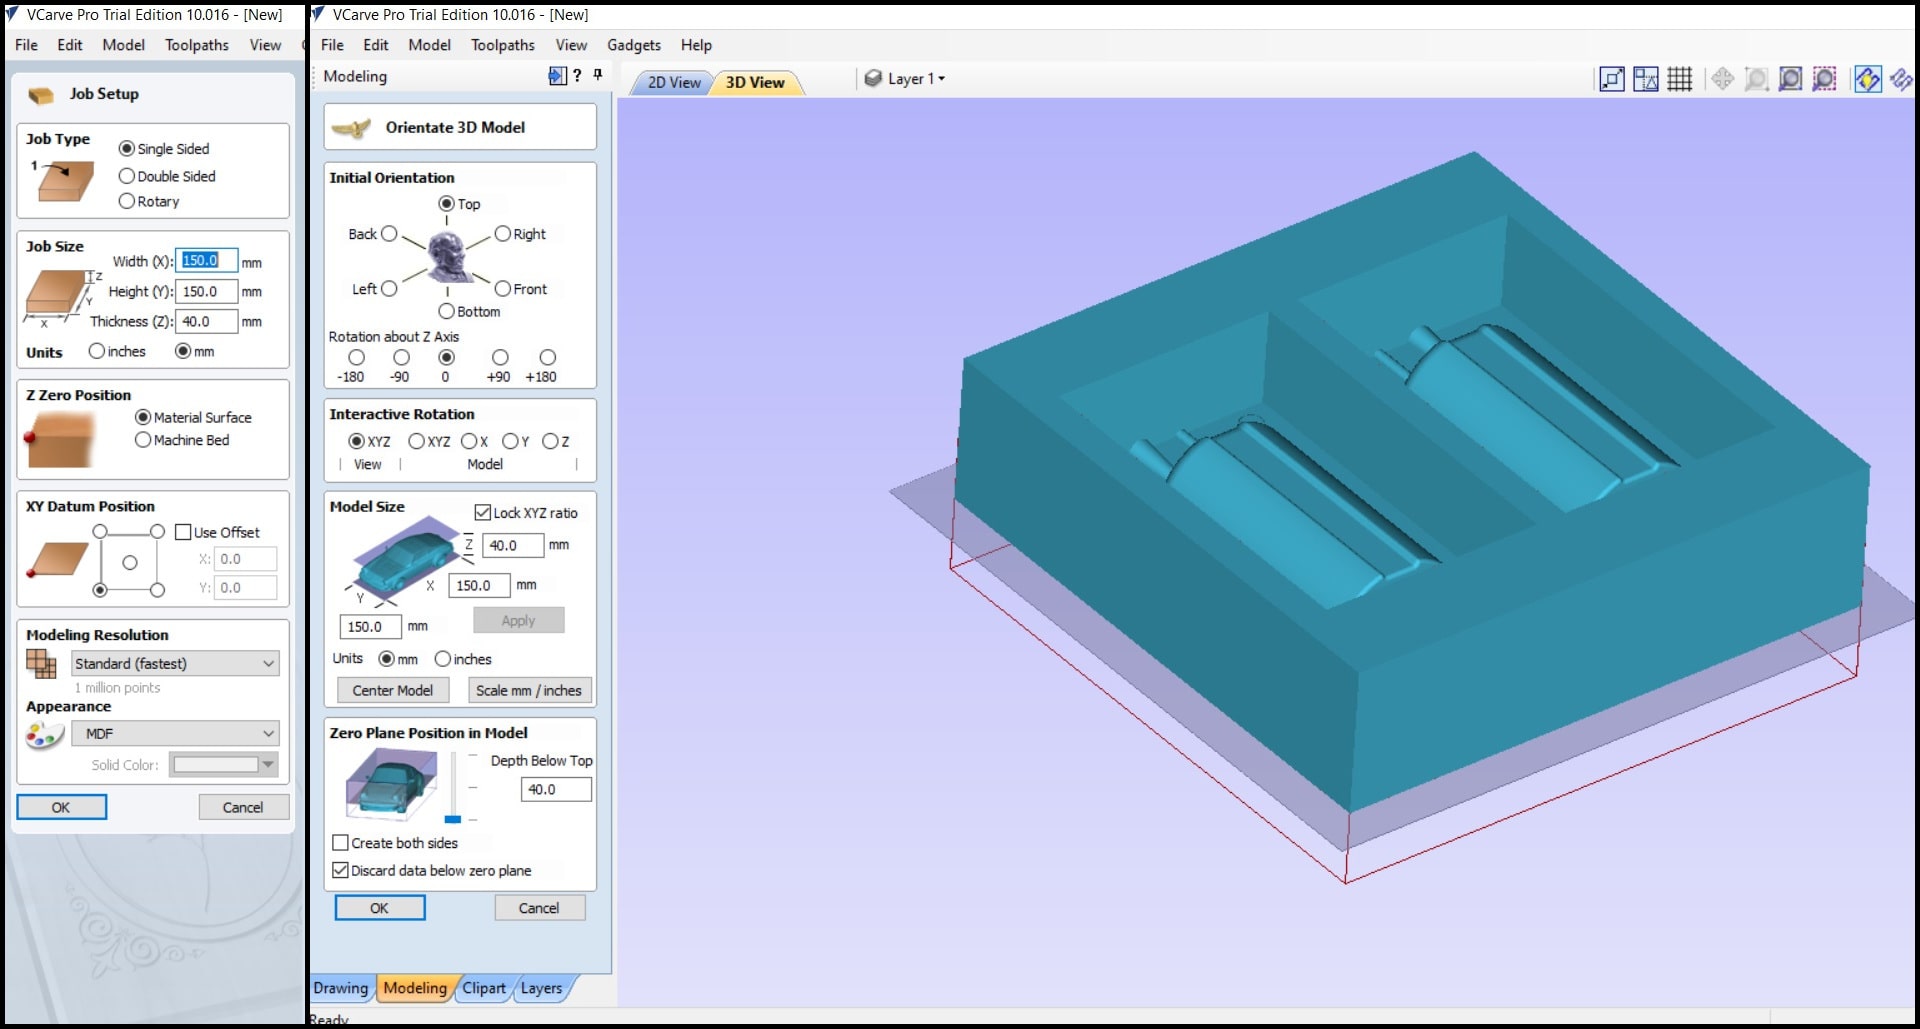
Step 2: Click on “3D Roughing Toolpath” and fill for material setup. Click Ok.
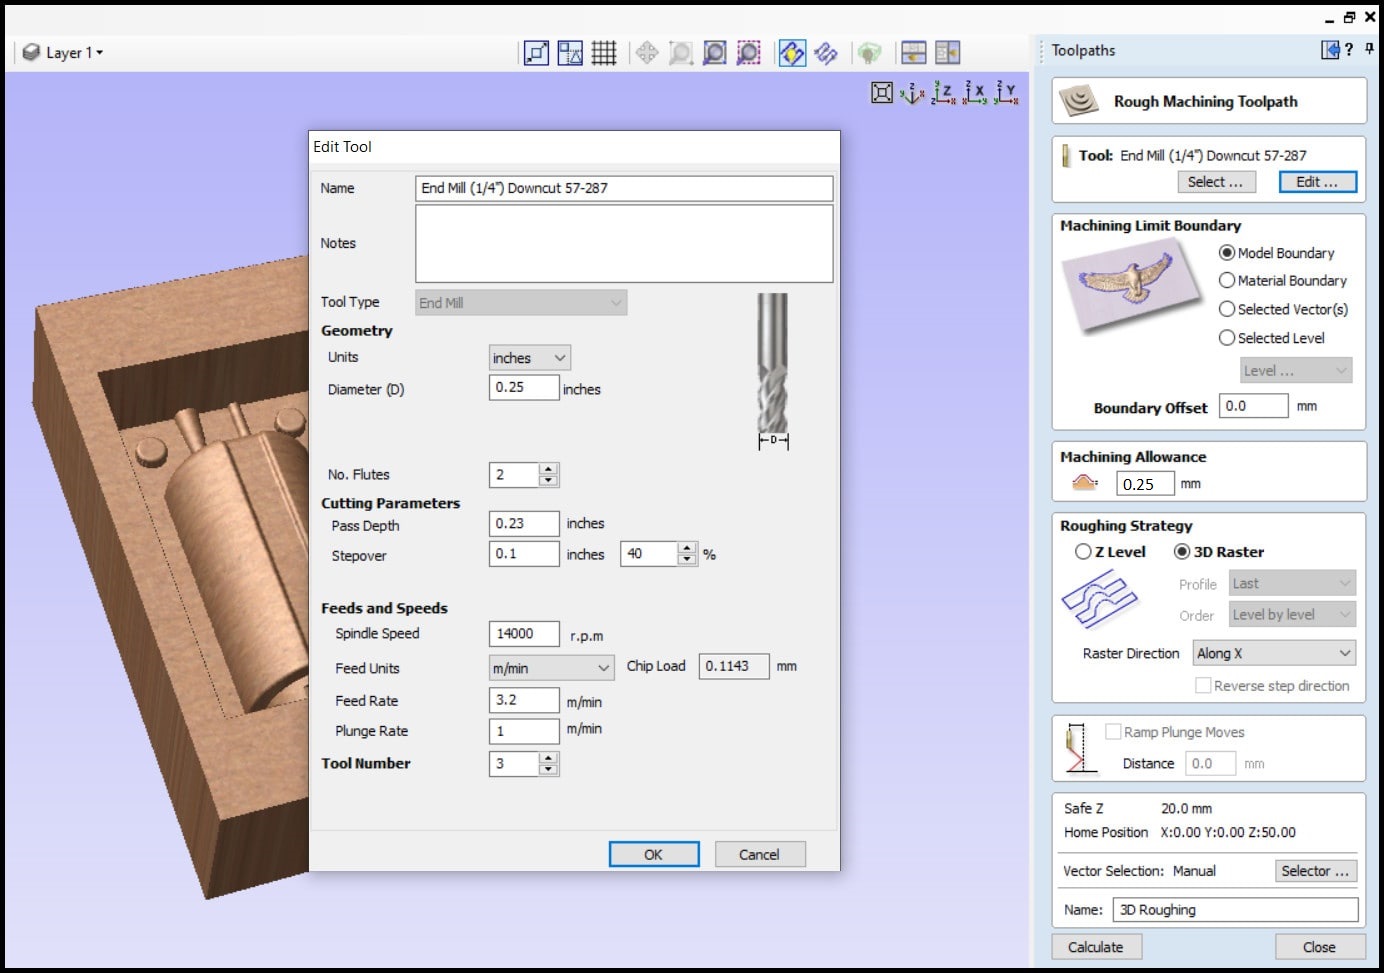
Step 3: Select the tool for 3D roughing, in my case 1/4” endmill. Click “Calculate”
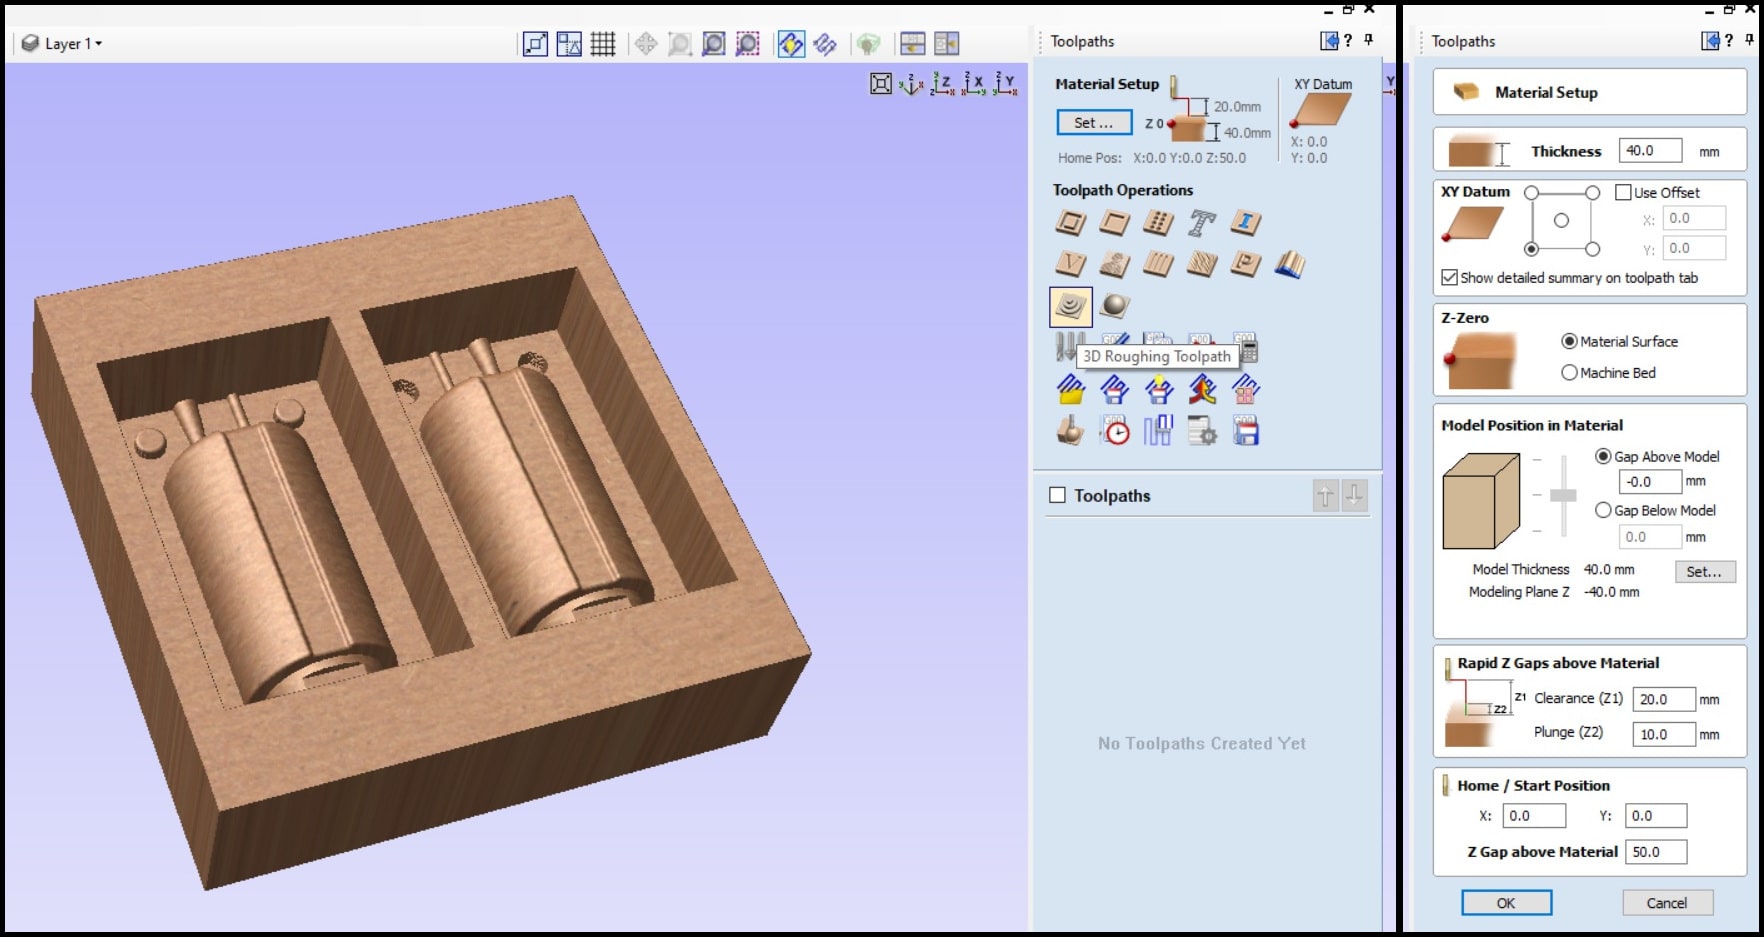
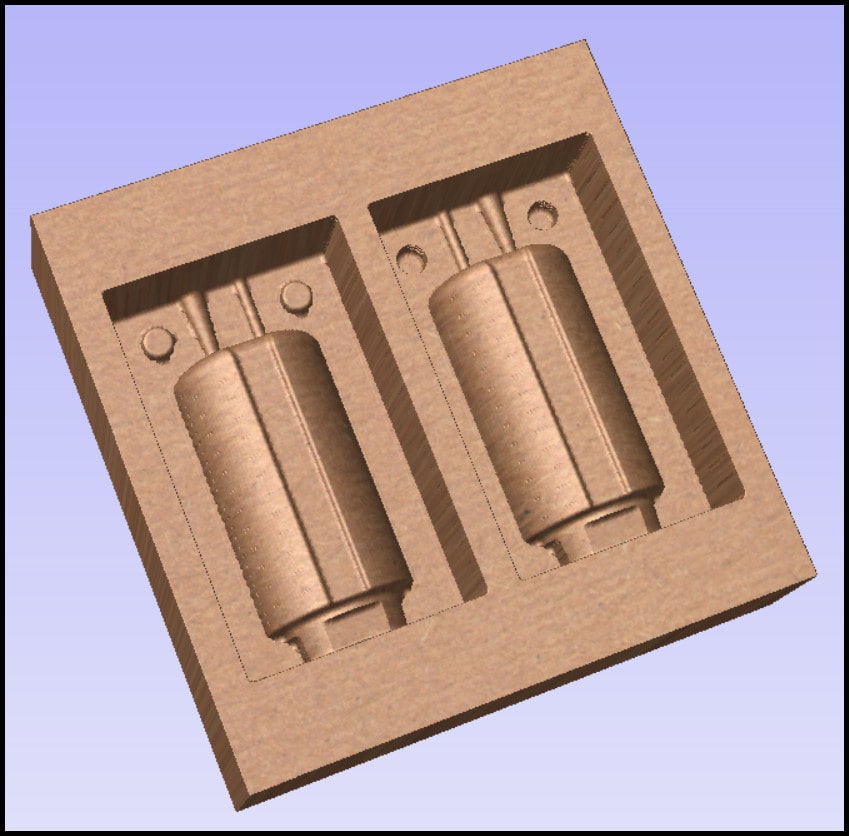
The image below shows the result after the 3D roughing.

Step 4: Click on “3D Finishing Toolpath” and select the tool for 3D finishing, in my case 1/8” ball nose. Edit the endmill and change the step over to a small value (I used 8%). Note that the 3D finishing toolpath is a single pass.
The image below shows the result after the 3D finishing.
Step 5: Save toolpaths to use on the machine.
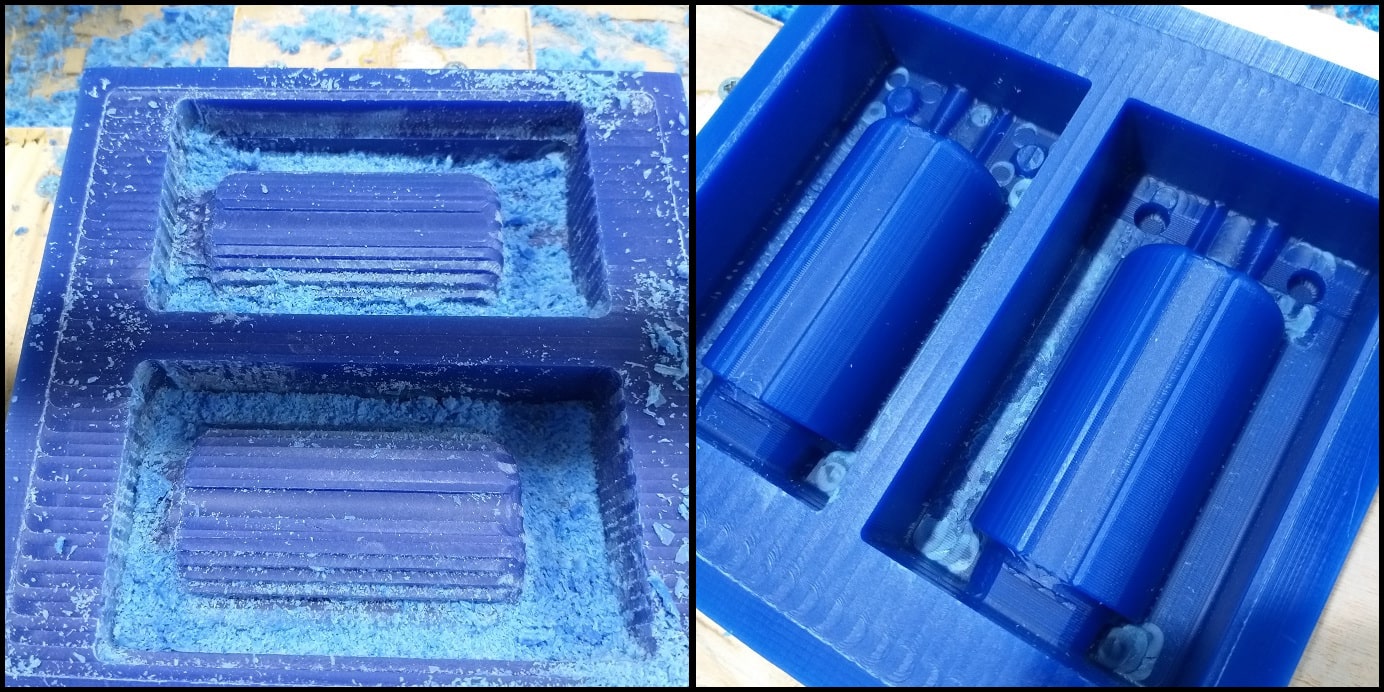
Milling the First Positive Mold Using Wax Block
For milling, we used ShopBot and saved toolpaths from previous section. To know more about milling using ShoptBot refer to Computer Controlled Machining week.
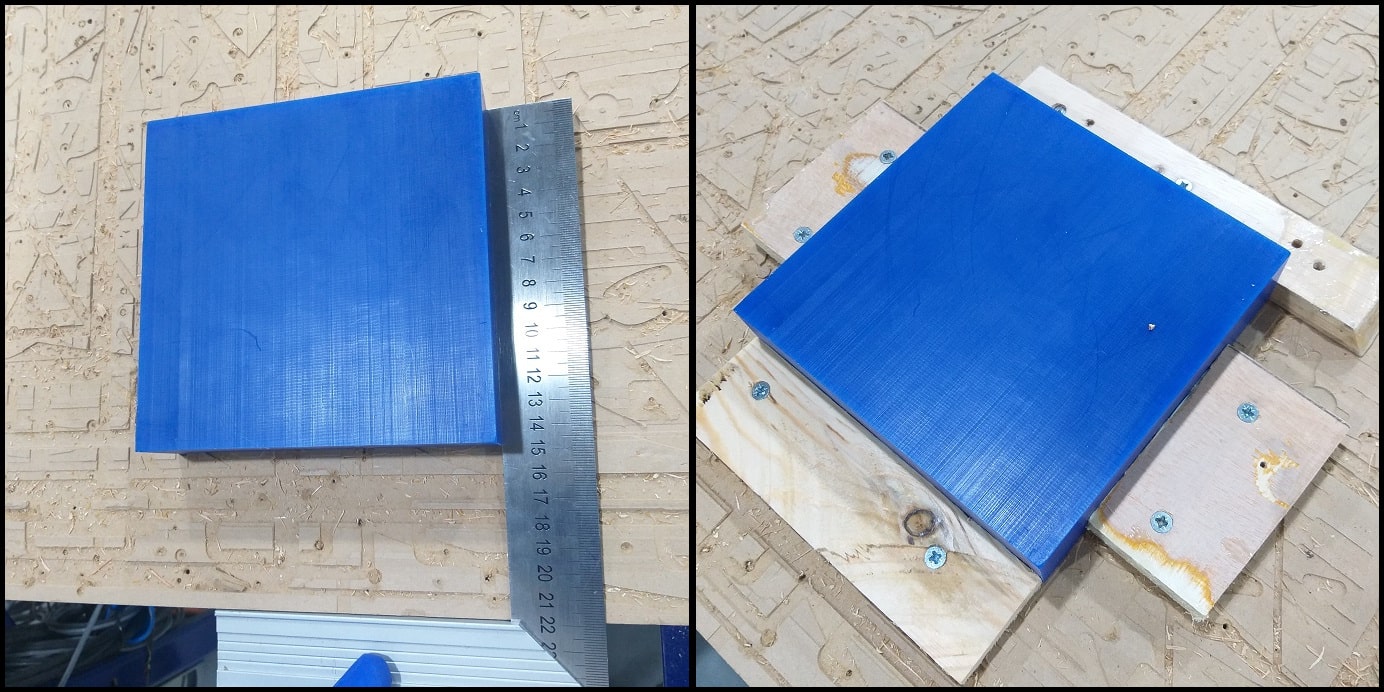
For my mold, I used machinable wax stock (150 mm x 150 mm x 40 mm). We fixed the block to ShopBot table using wood pieces and wood screws.
The 3D roughing took 30 minutes and the 3D finishing took 60 minutes. Some of the wax chips at the end of 3D roughing were somehow attached to the block. It looks that excessive heat melted the both chips and block surface. That how surface imperfections, especially color variations, in the final product are explained. Anyway, those chips were removed in 3D finishing.
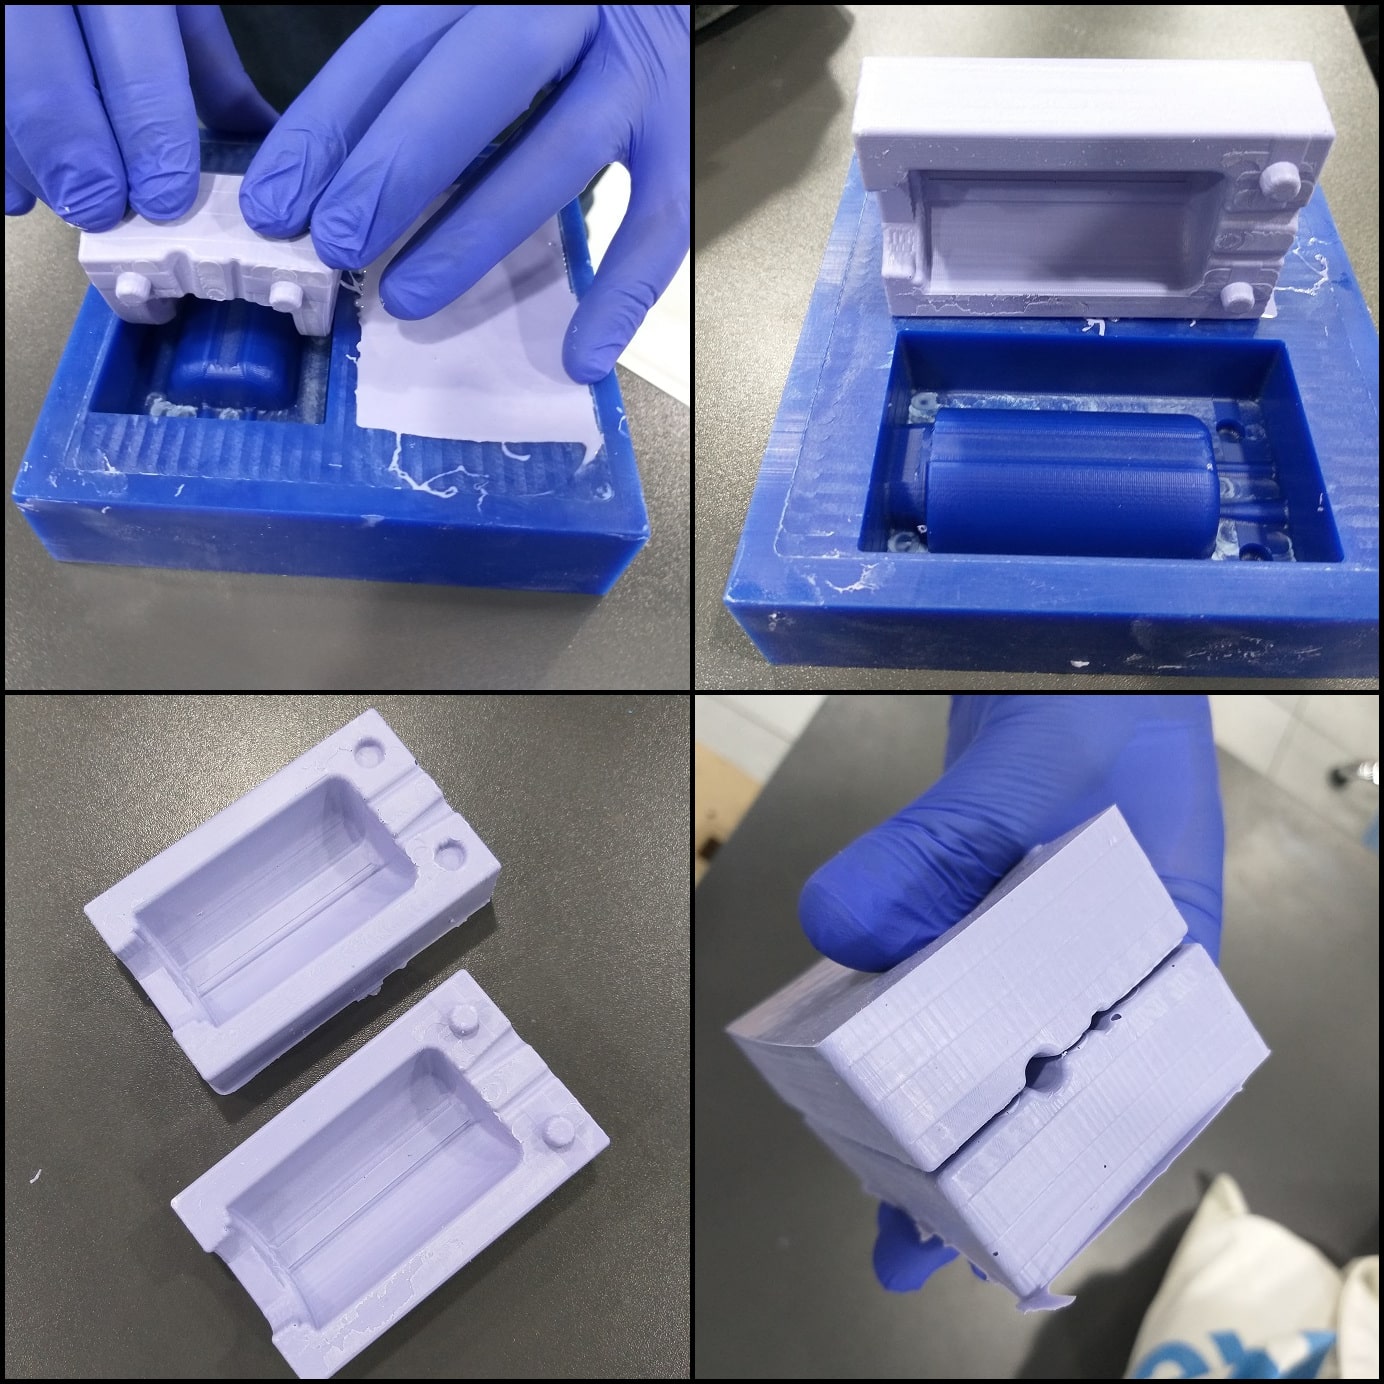
Molding the Negative Mold Using Silicone Rubber
In this part I used OOMOO™ 30 silicone rubber.
First I applied release agent to the wax mold and stirred thoroughly the content of A and B material containers before mixing.
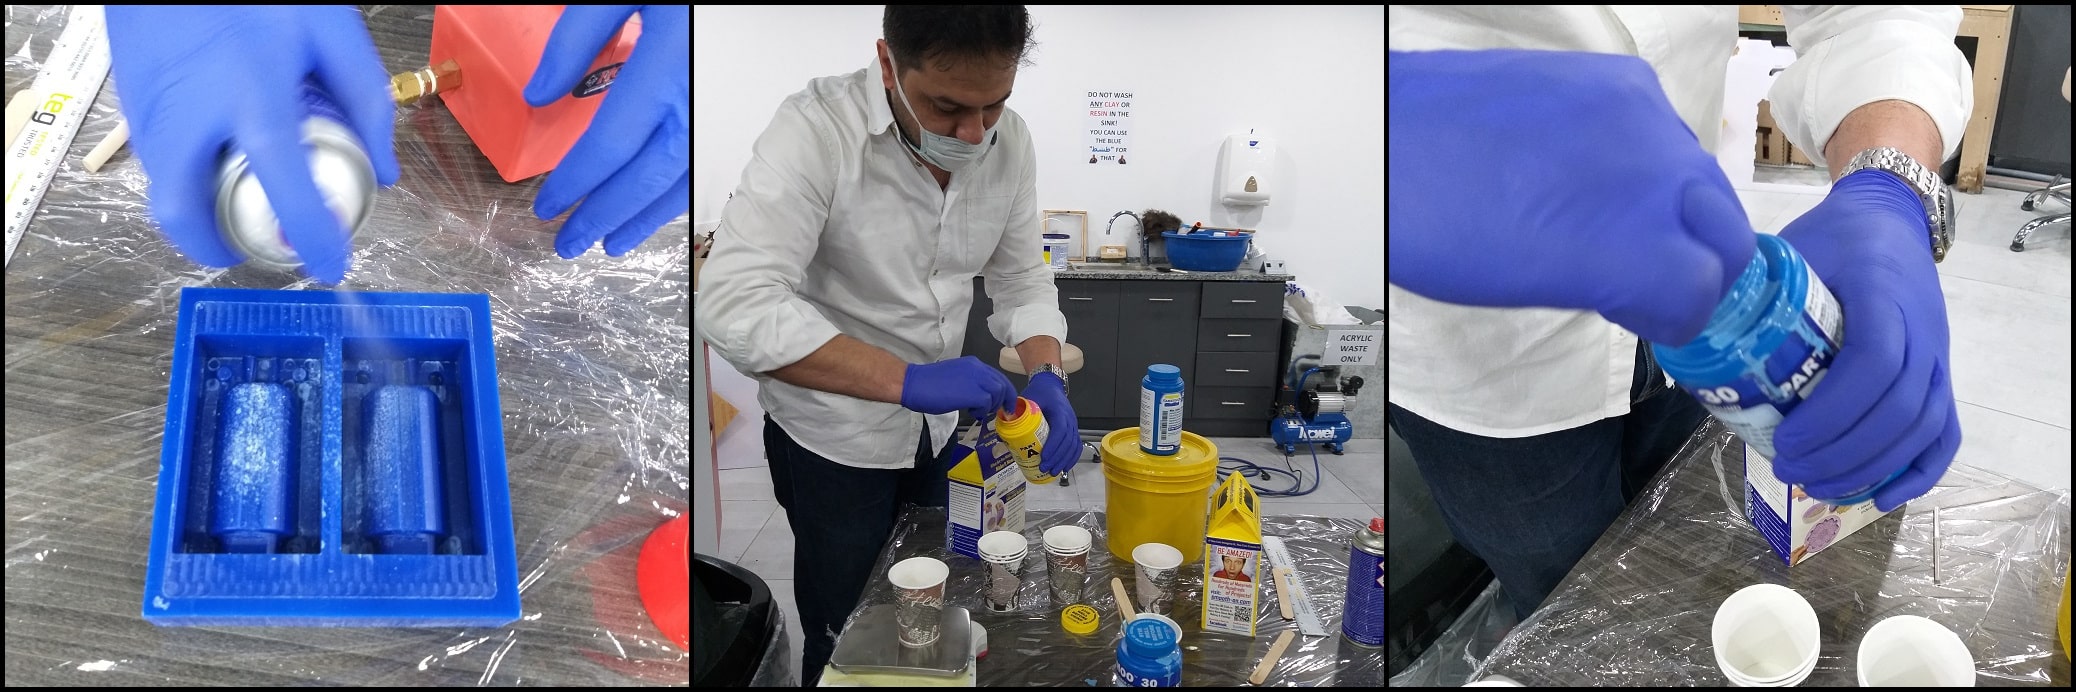
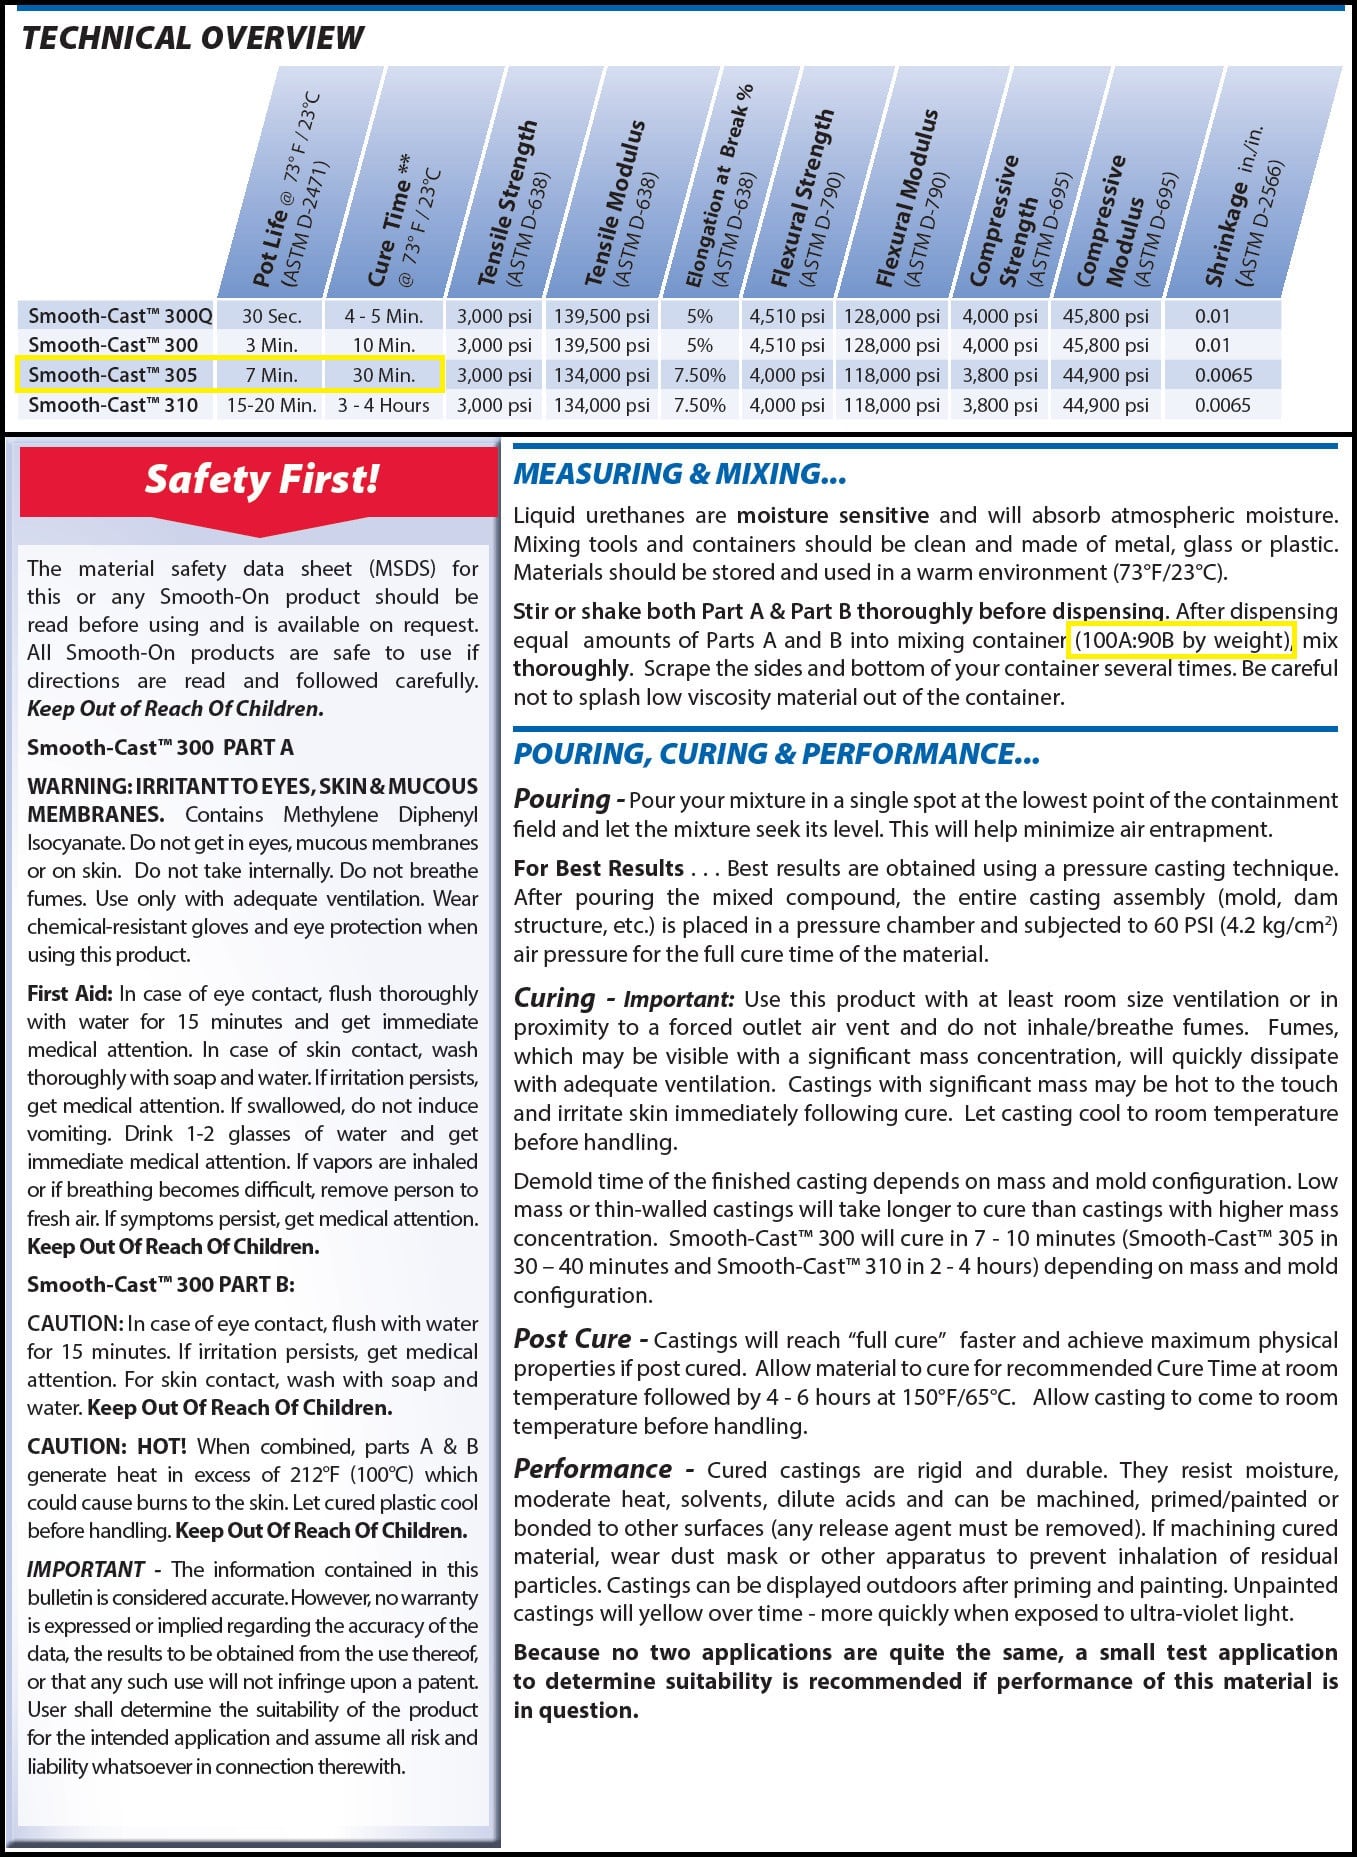
According to technical datasheet, mix ratio in 100A:130B by weight (or 1A:1B by volume). The first round I mixed 100 gm of material A with 130 gm of material B and mixed for a few minutes until mixture had a uniform color.
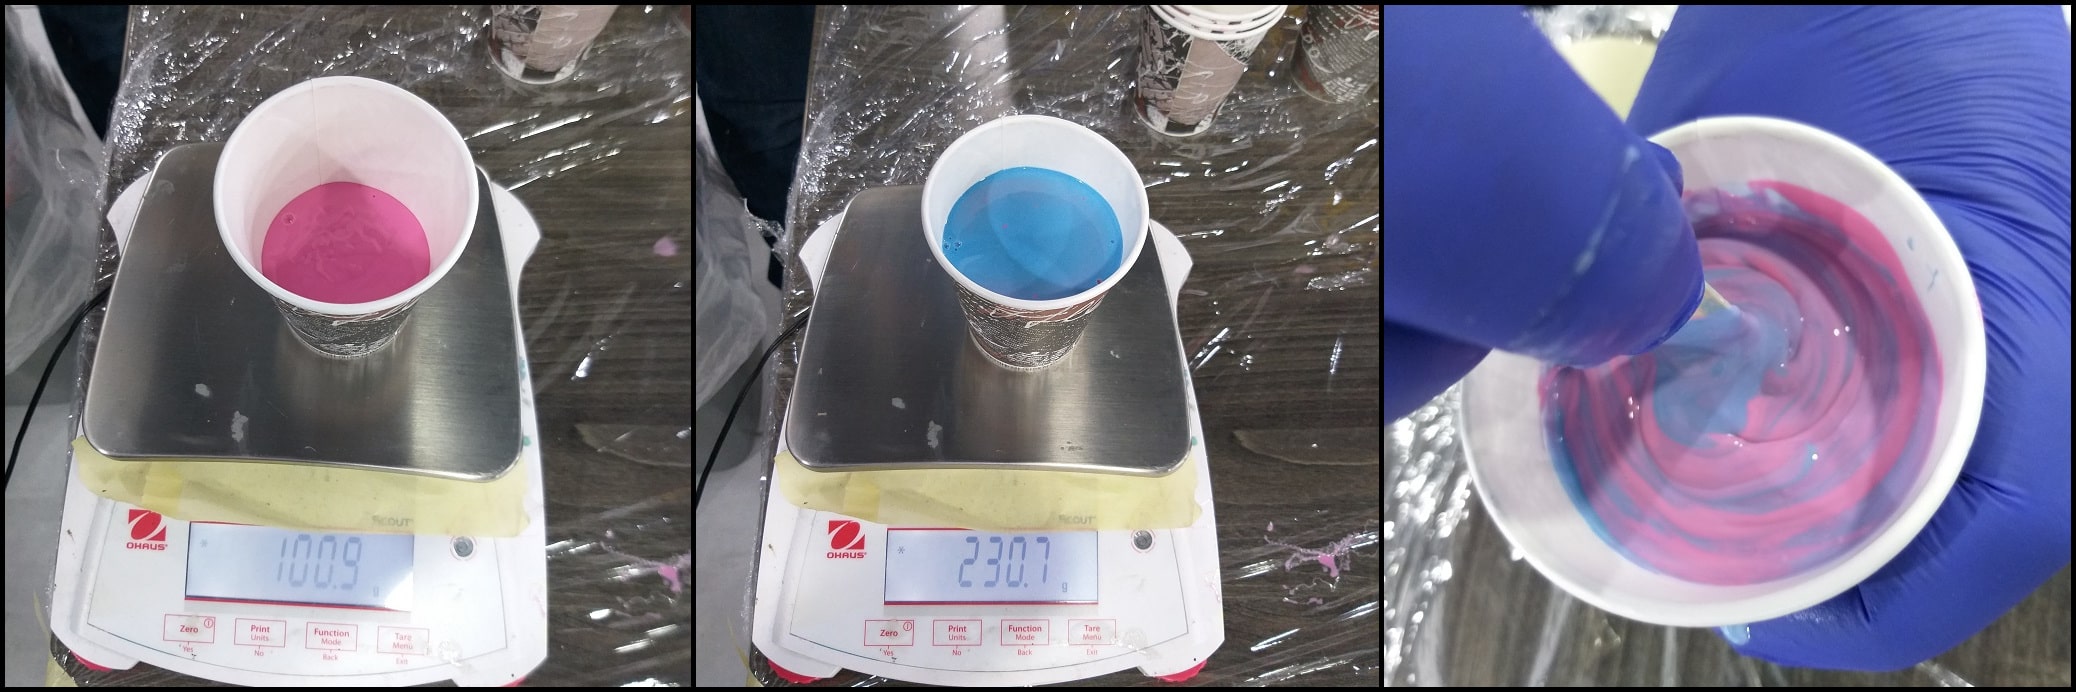
I started pouring material to the lowest point and slowly so material could find its way in the mold. This will reduce trapped air bubbles inside. The amount mixed was not enough, so I remixed 40 gm of material A with 52 gm of material B. You can see the uniform color in mixture.
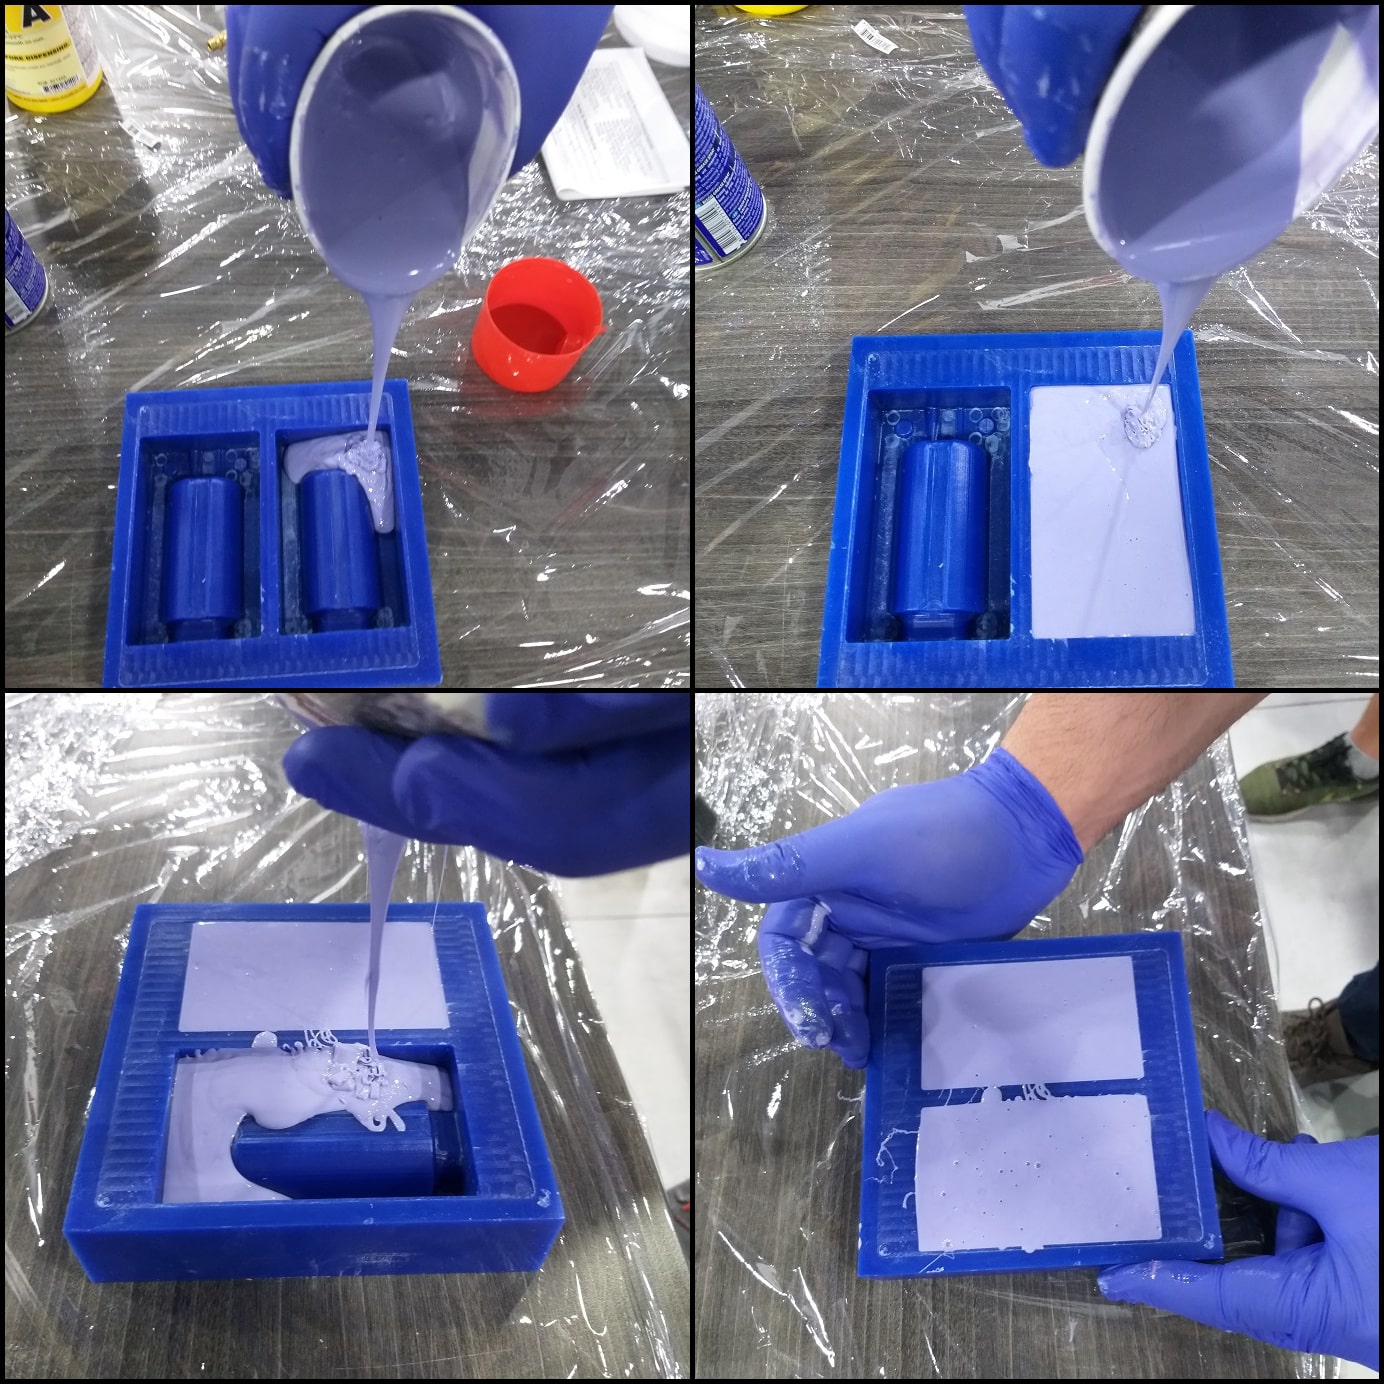
To reduce trapped air bubbles inside, I knocked the mold against table surface. This really worked as air bubbles were rising to the surface. The OOMOO™ 30 silicone rubber cure time is 6 hours. I left it at the lab for the next day.
The image below shows the result of making the negative silicone rubber mold.
Molding the Second Positive Mold Using Liquid Plastic
In this part I used Smooth-Cast® 305 liquid plastic.
The broken handle will be positioned as shown. Note that the red part in the 3D model generated a cavity where the handle should be.
First I applied release agent to the silicone mold and stirred thoroughly the content of A and B material containers before mixing. According to technical datasheet, mix ratio in 100A:90B by weight. I mixed 50 gm of material A with 45 gm of material B and mixed for a few minutes until mixture had a uniform color.
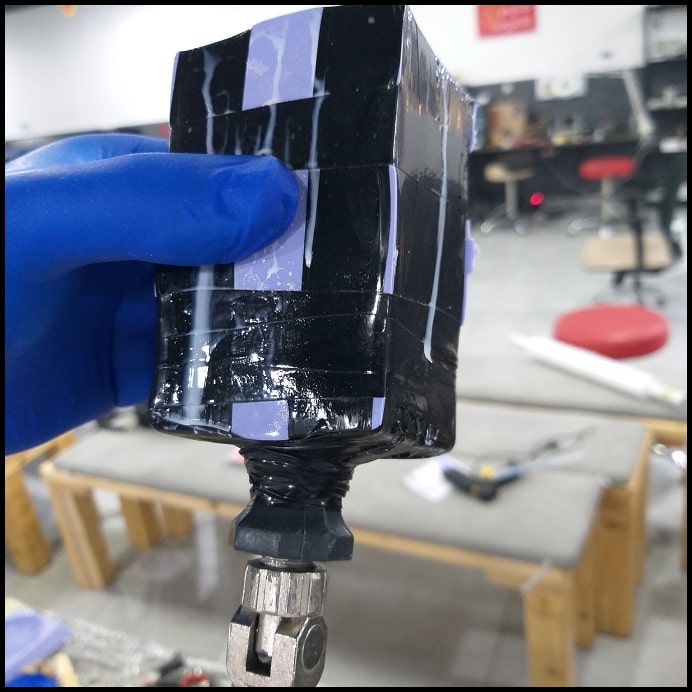
The first try I fixed the silicone rubber mold using two wood pieces and clamps. Then I made a funnel using a plastic sheet to pour the liquid plastic mix into the mold. There was a leakage from the bottom where the handle fits to the silicone mold.
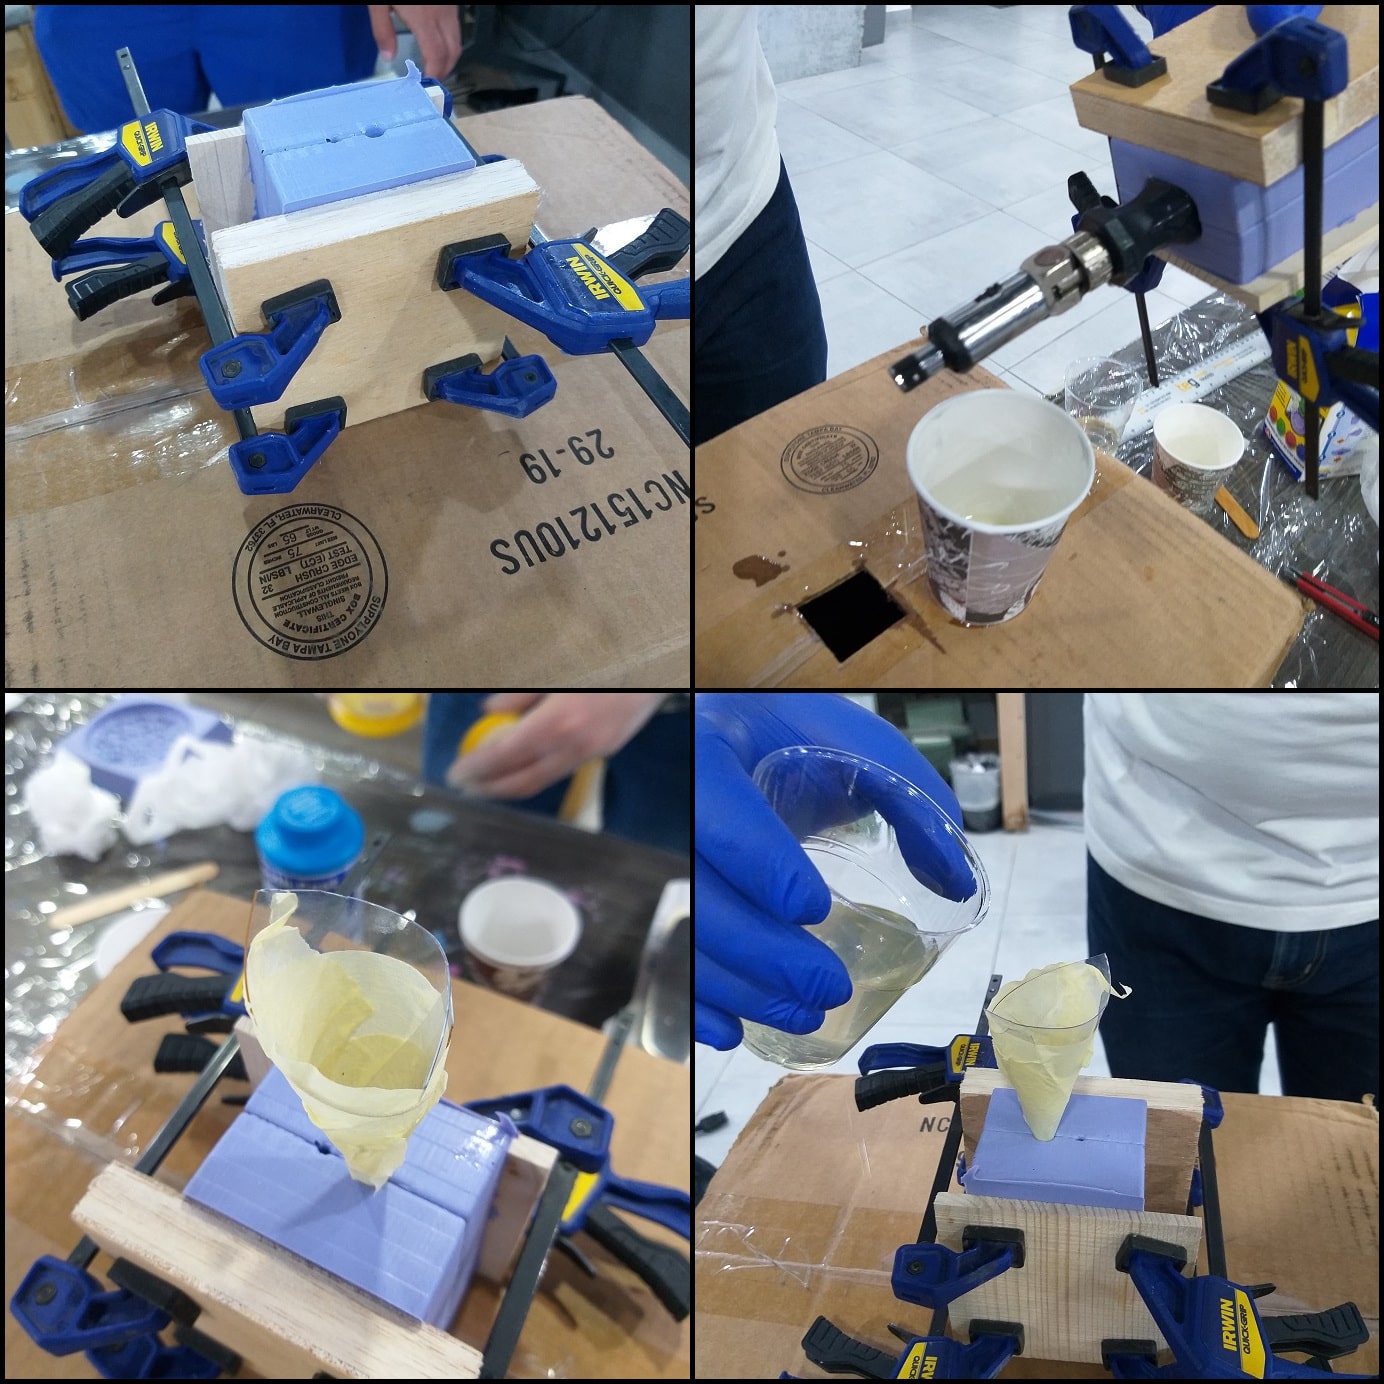
Then I tried using electrical tape around the mold and it worked and stopped leakage.
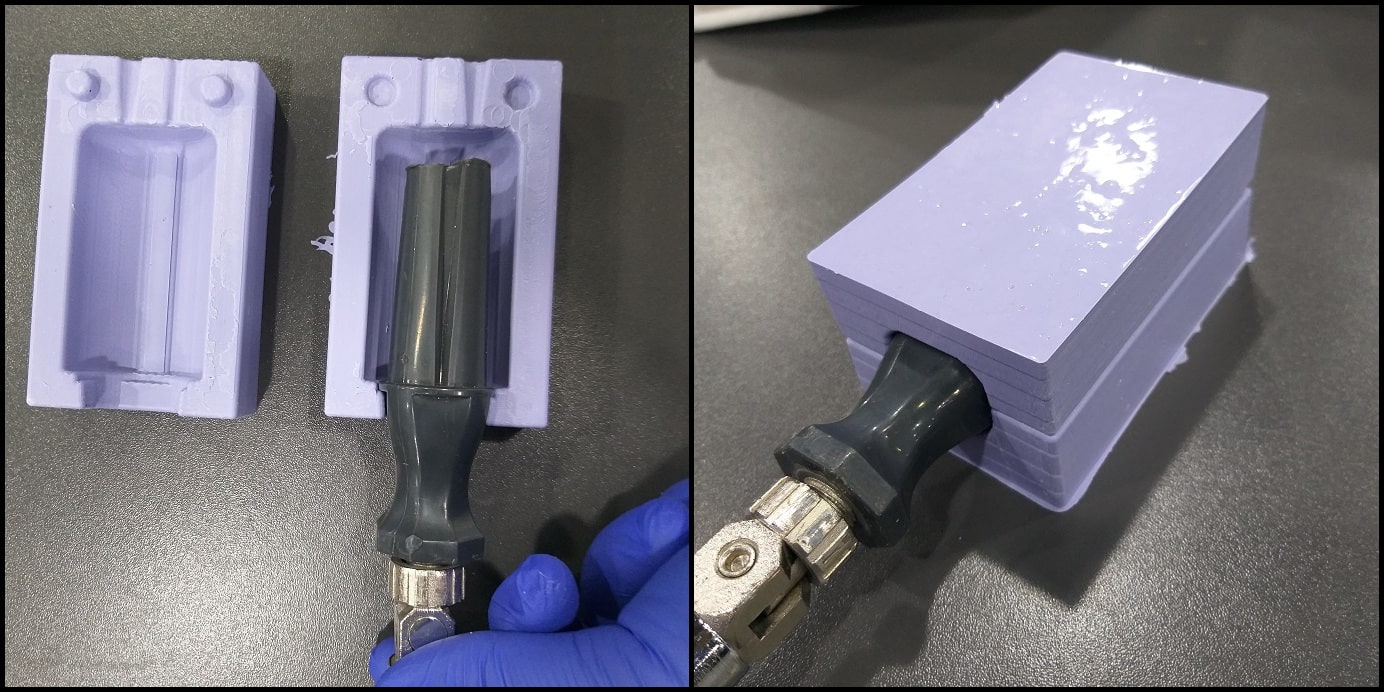
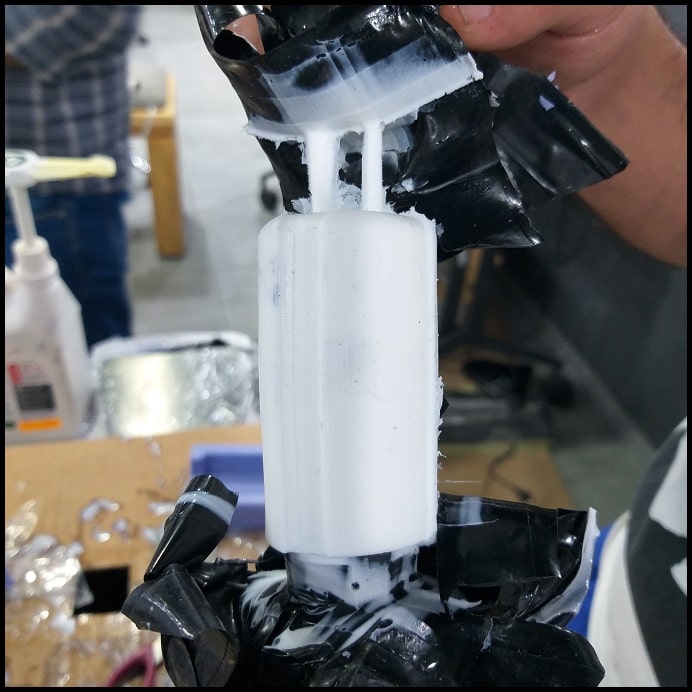
After curing time, I removed the tape and unassembled the silicone mold. Note the straight groove for trapped air and the conic groove to pour material. Using a utility knife and sanding paper I cleaned the liquid plastic mold.
Problems and Fixes
I looked into the problem of wax chips that were attached to the mold block after 3D roughing. I think the main reason was that the vacuum was not on while 3D roughing, which made the chips to accumulate and stay attached to the block.
The first try of using liquid plastic there was some leakage from the bottom where the handle meets the silicone mold. I fixed that using electrical tape. I would recommend making the same mold upside down. The place where the handle is attached to silicone mold will be used to pour the liquid plastic.
Hero Shoot!
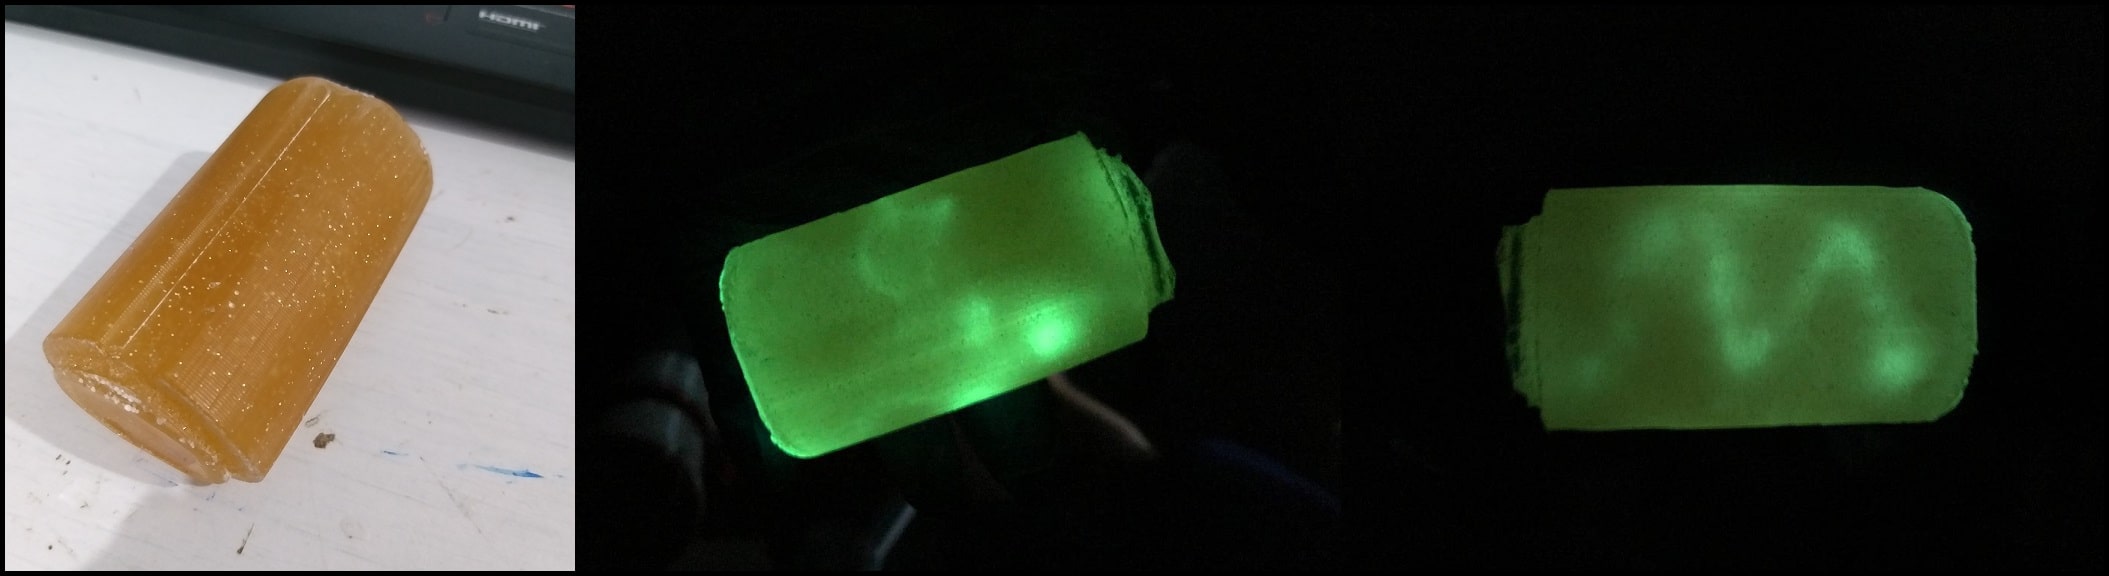
Extra Material: Glow in Darkness!
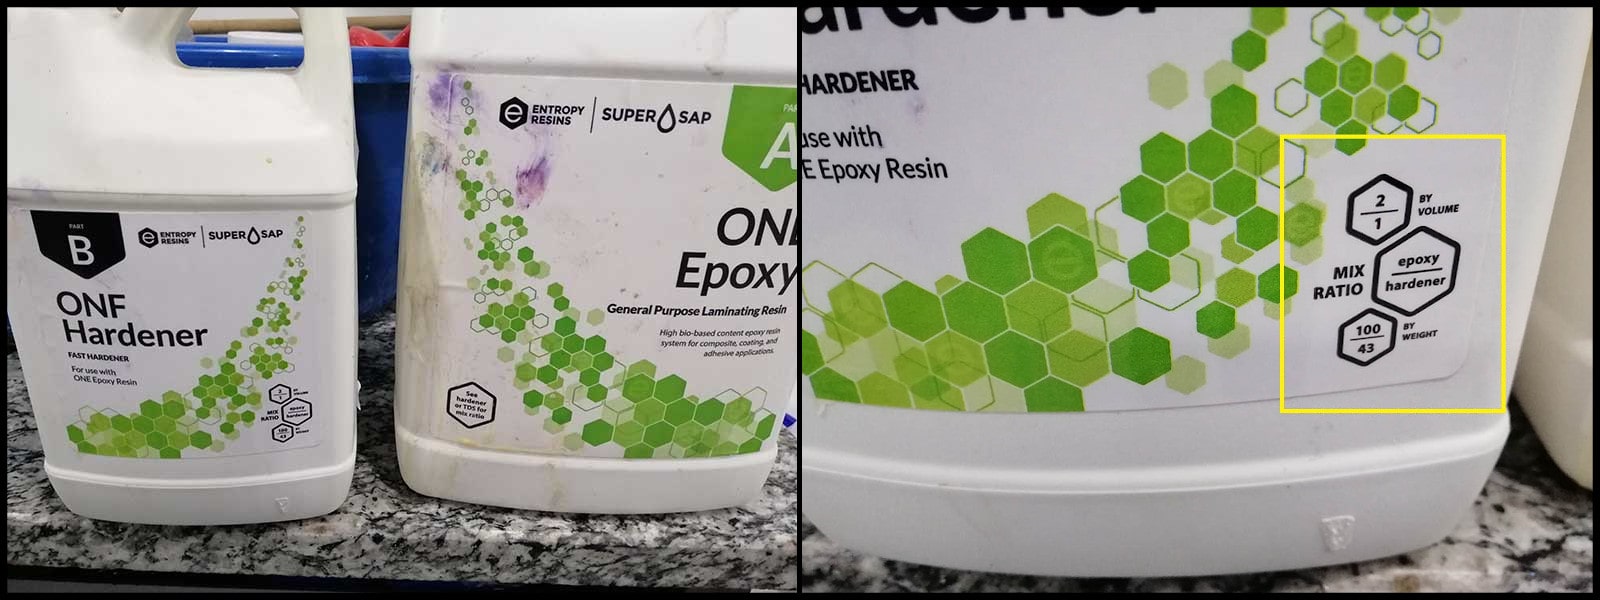
I used the same silicone mold used before and Entropy Resin One with ONF Fast Hardener to make a solid block. The mix ratio is 100:43 by weight. So I mixed 50 gm of resin with 21.5 gm of hardener.
I mixed to the resin glow in dark powder and glitter powder. The block can be charged by light.