W5"New template"3D Scanning and Printing
This document is under Construction
- in this week "The assignments", I, WE will:
- OK, We have 3 types of 3D printers in the lab, CR-10, Ultimaker 2+extended and Prusa MK3s.
- buiding space (25 x 21 x 21 cm)
- filement size (1.75mm)
- Layer height start from 0.05mm
- support for a lot of materials PLA, ABS, PET, HIPS, Flex PP... etc. , we usally use PLA..... the nozzel and bed can also support all theis materals with a vorauity of tempretures
- Heated bed
- what else.... there are alto to like in this printer, and for more info please check this link: Prusa MK3
- support test
- scale test
- overhang test
- hole test
- diameter test
- bridging test
- design and 3D print an object (small, few cm3, limited by printer time) that could not be made subtractively:
- 3D scan an object
3D Printing & Scanning
-Group assignment:
Group assignment:Group assignmentA-Test the design rules for your printer(s)
the one that I am using almost all the time is Prusa, for all the specs and extra futurs that is avelable in it. I also have Alfawise u20 in my home, just as hoppy prinitng and so on.....
Now lets go with prusa MK3s specs :
most of use are using Prusa for printing, so all the team agread to work and test prusa sitting, and what else to search on for STL file that the grate Thingiverse (All In One 3D Printer test)
-This desgin will tes the following: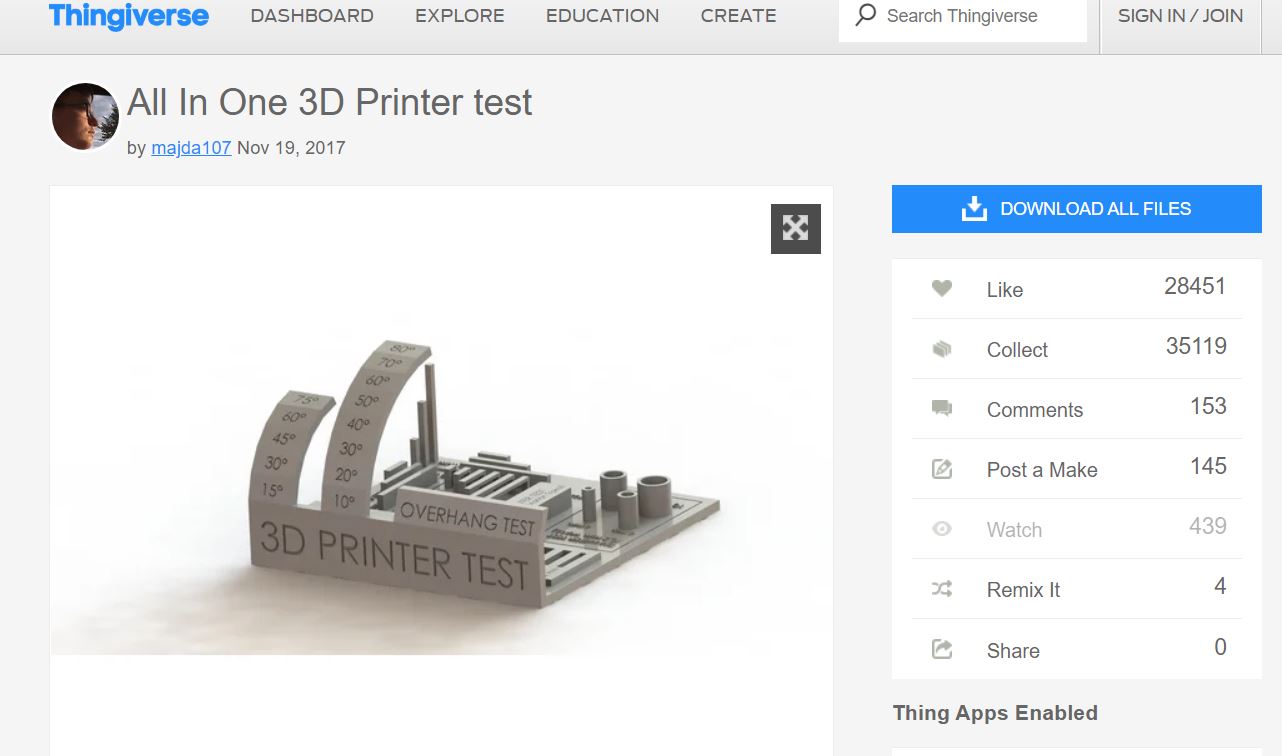
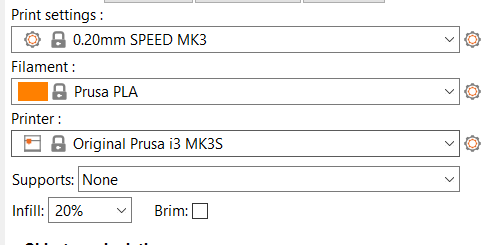
We are using PLA filament and 0.4mm nozzle:
how to use the sclicing software Prusa Slicer
first what are slicer softwares? they are a converstors from 3D bojects that we desgin in 3D desgin softwares like onsahpe and others to a layes taht the 3D printer can understand and work on..
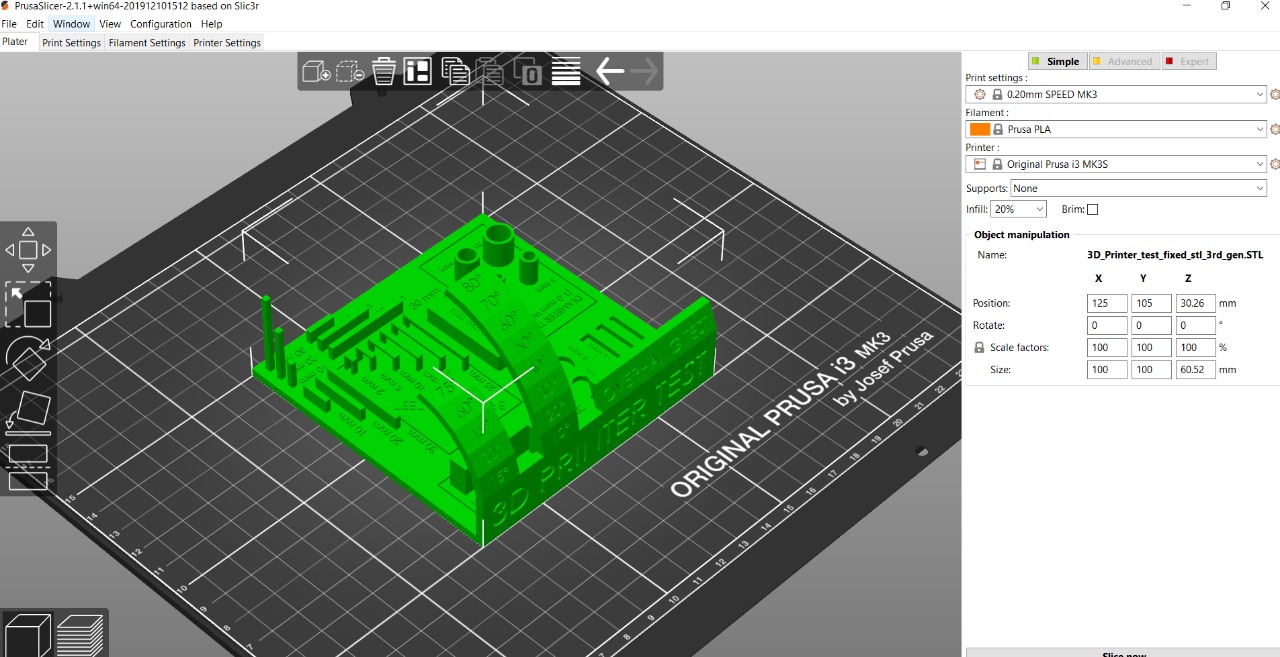
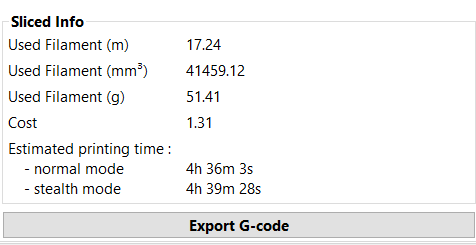
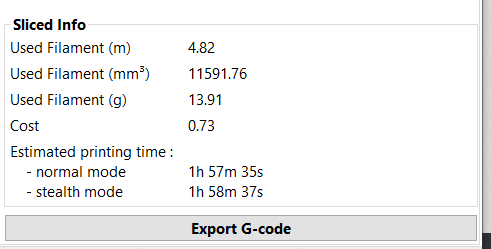
We are using this sitting for printing :
witht the preivous sitting, the slicer is giving the followin needed time, materials info for the print
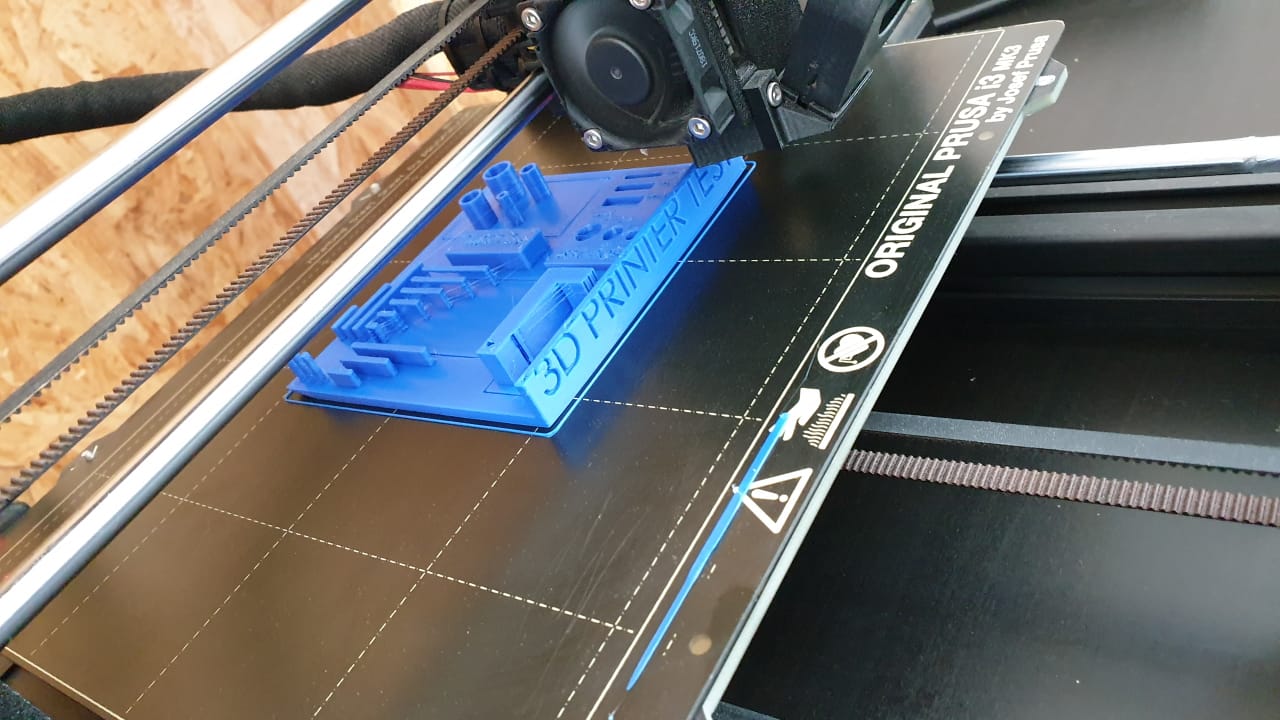
Save "Export G-code" and go to the printer
Please cehck the video about 3D printing the test object:
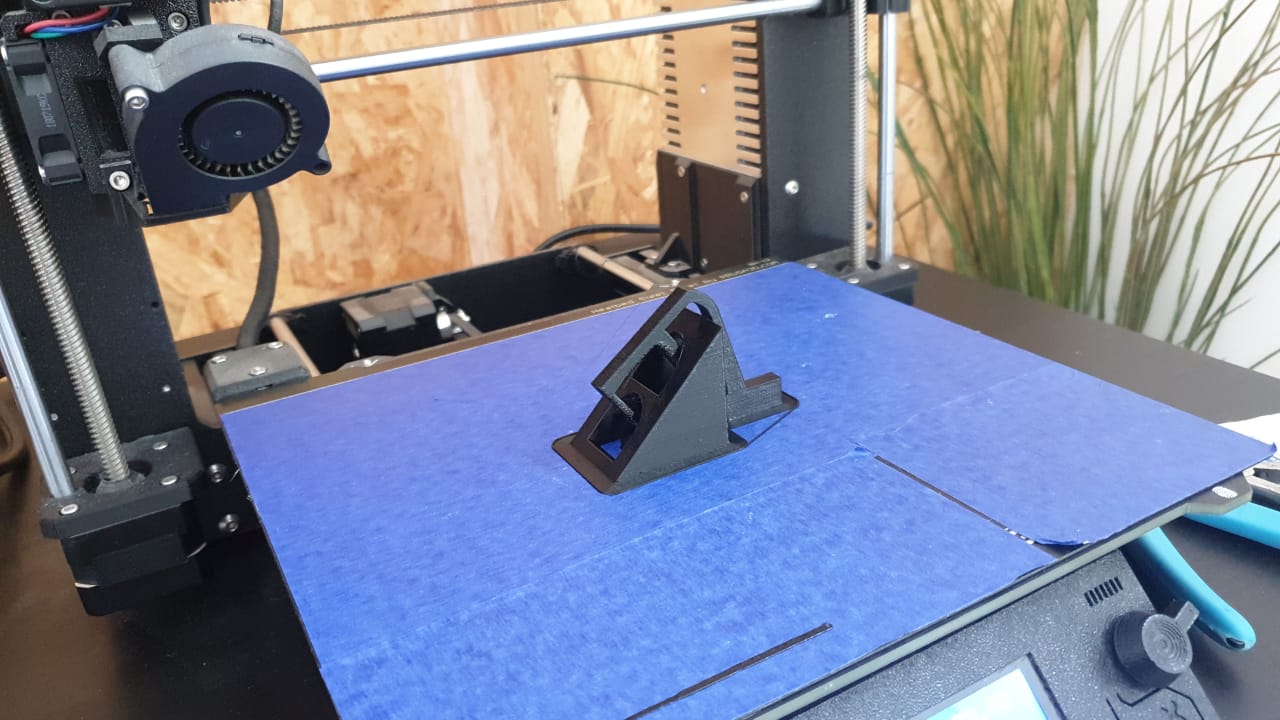
Printing, layer by layer....
after printing, we saw some probles with the finishing....

As you can see, there are some thine lines between the parts flying,Scalling was not perfect as well. with error of 6% for X with fast printing sittings and 0.2mm layer hight
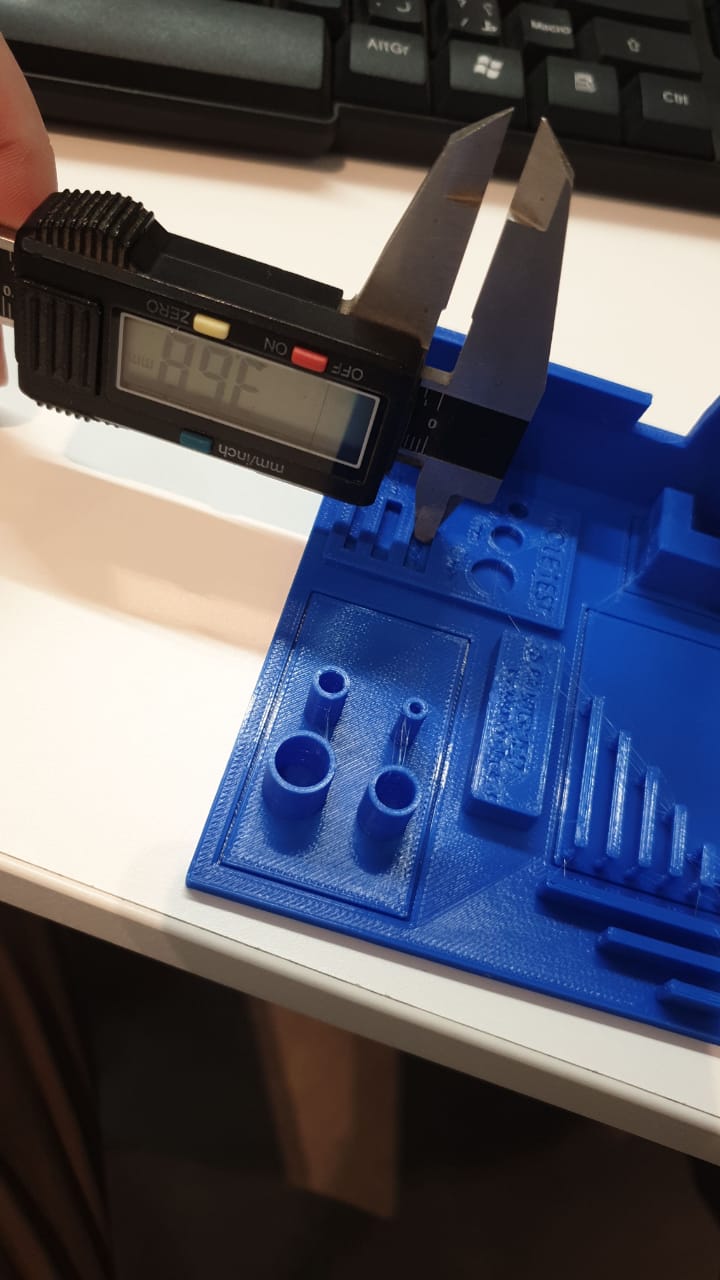
almost all other things were good
-Individual assignments:
***(and optionally print it).
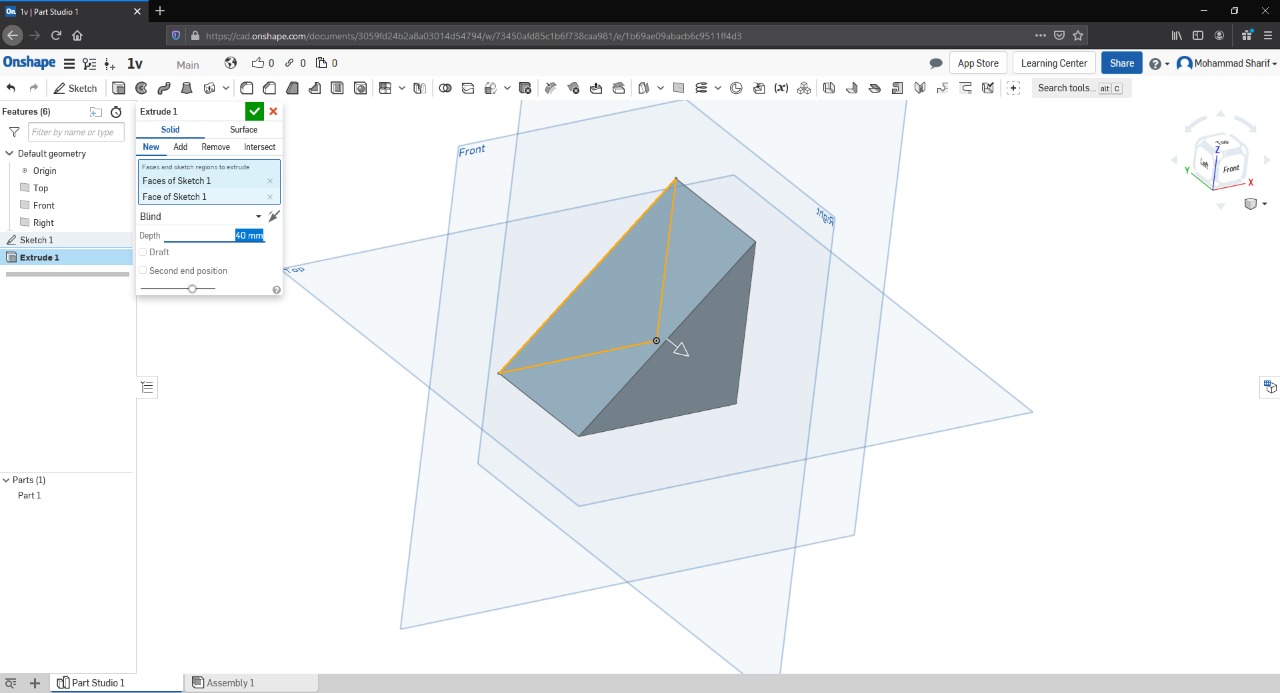
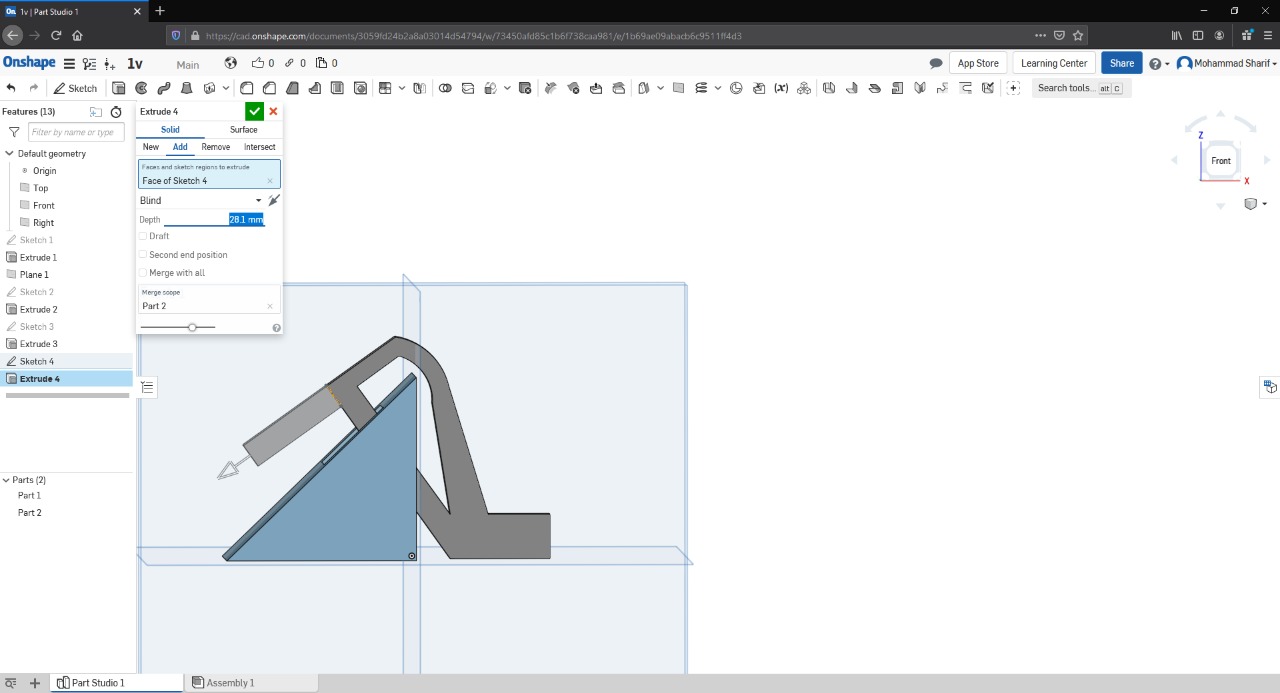
-Individual assignments, lets start with the Desgining the shape :
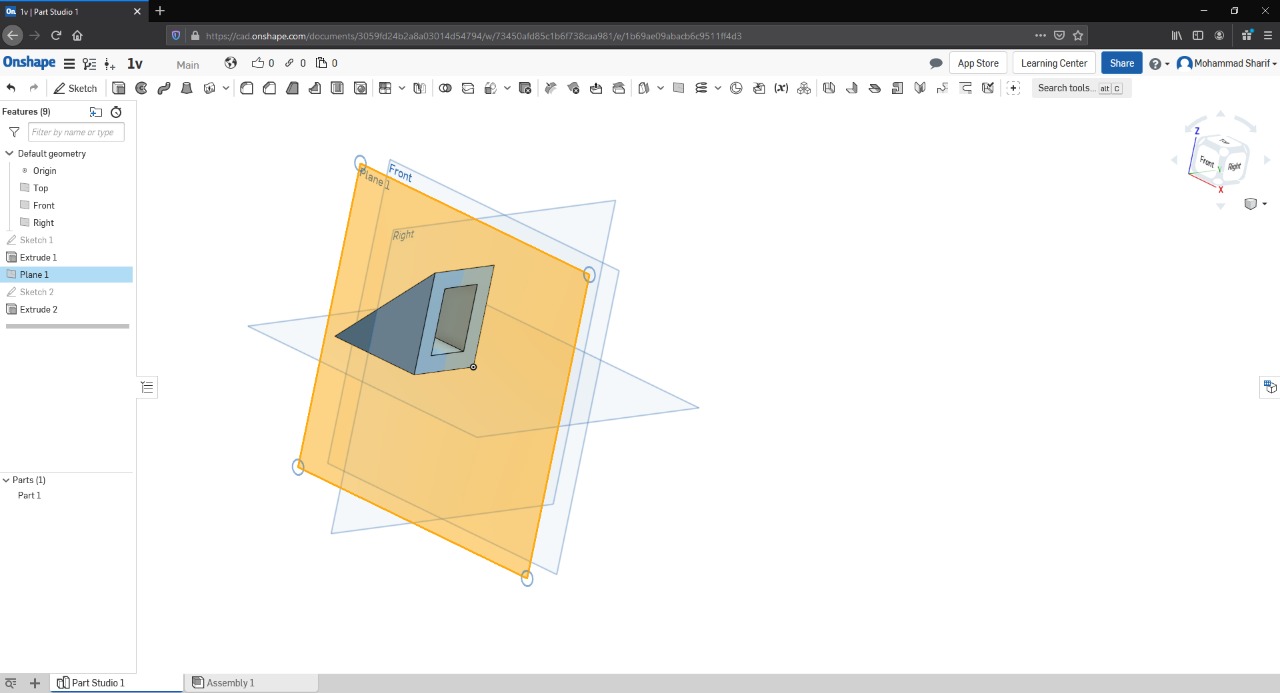
leys draw a triangle in the front surface:
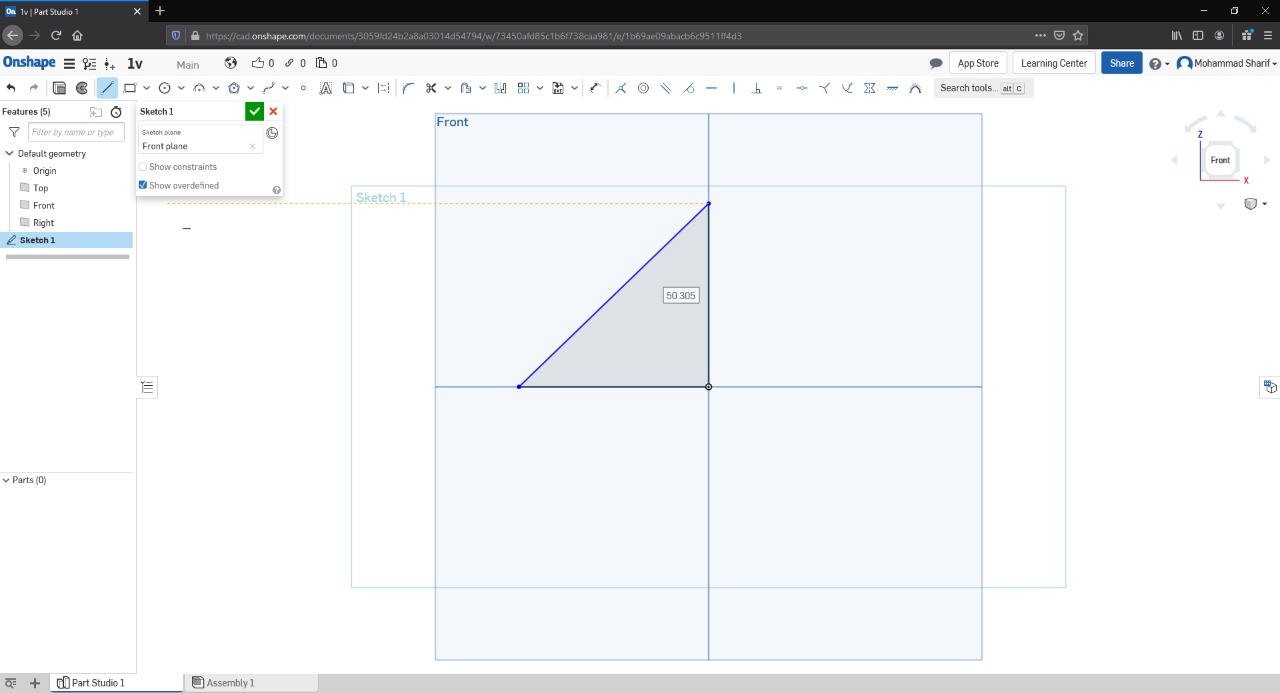
extrode it to 40 mm
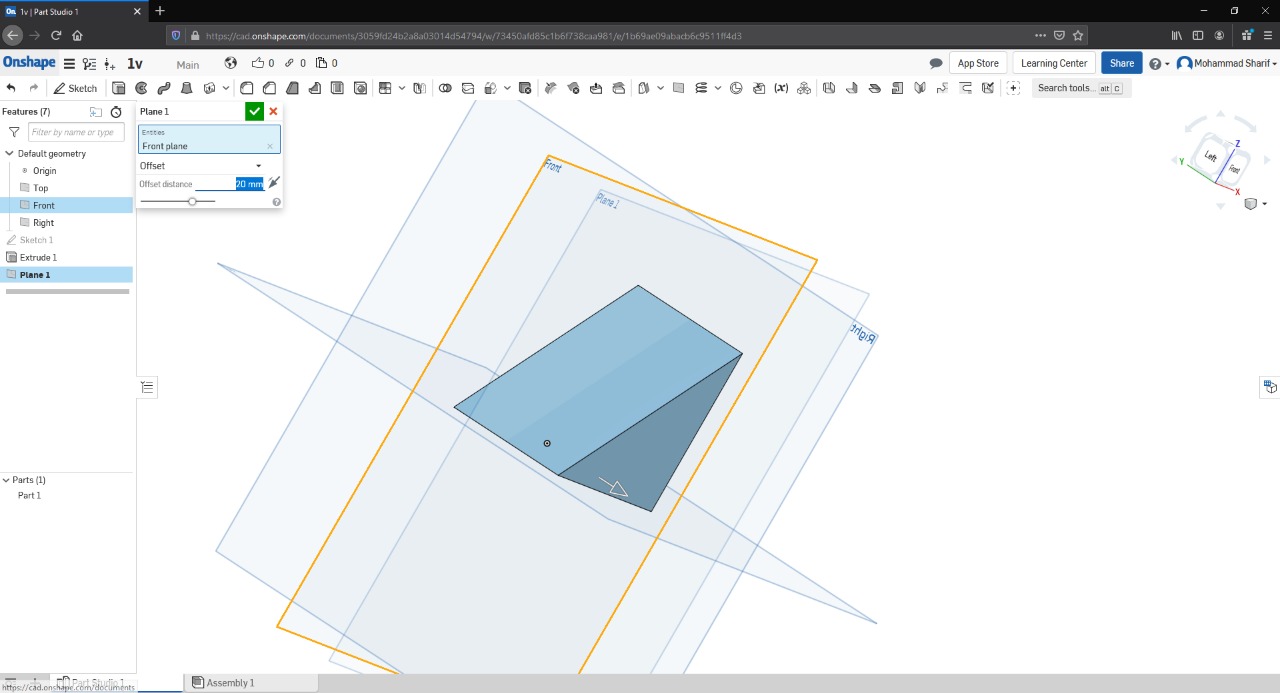
lets make the extruding in offset mode, so 40mm from the middle of the part will be extruded, 20mm to each side of the front surface
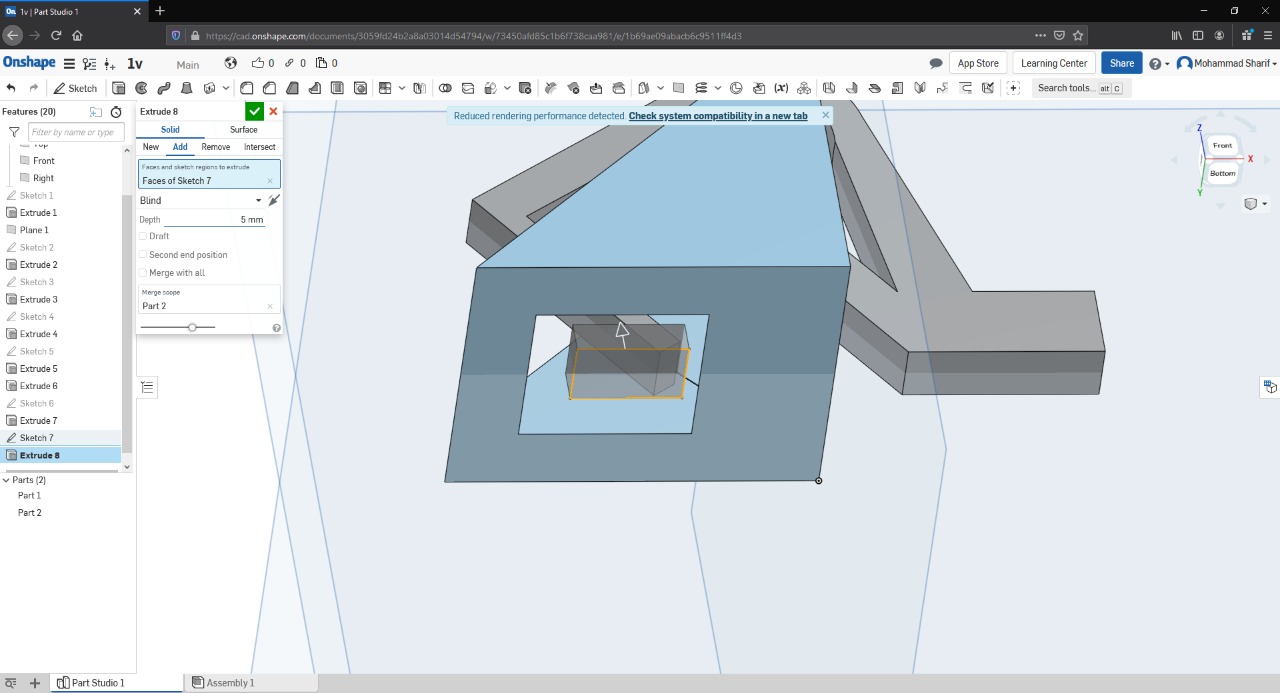
lets draw this shape in ton of the design faces, within the skitch tools:
then from extruding tool, choose remove option:
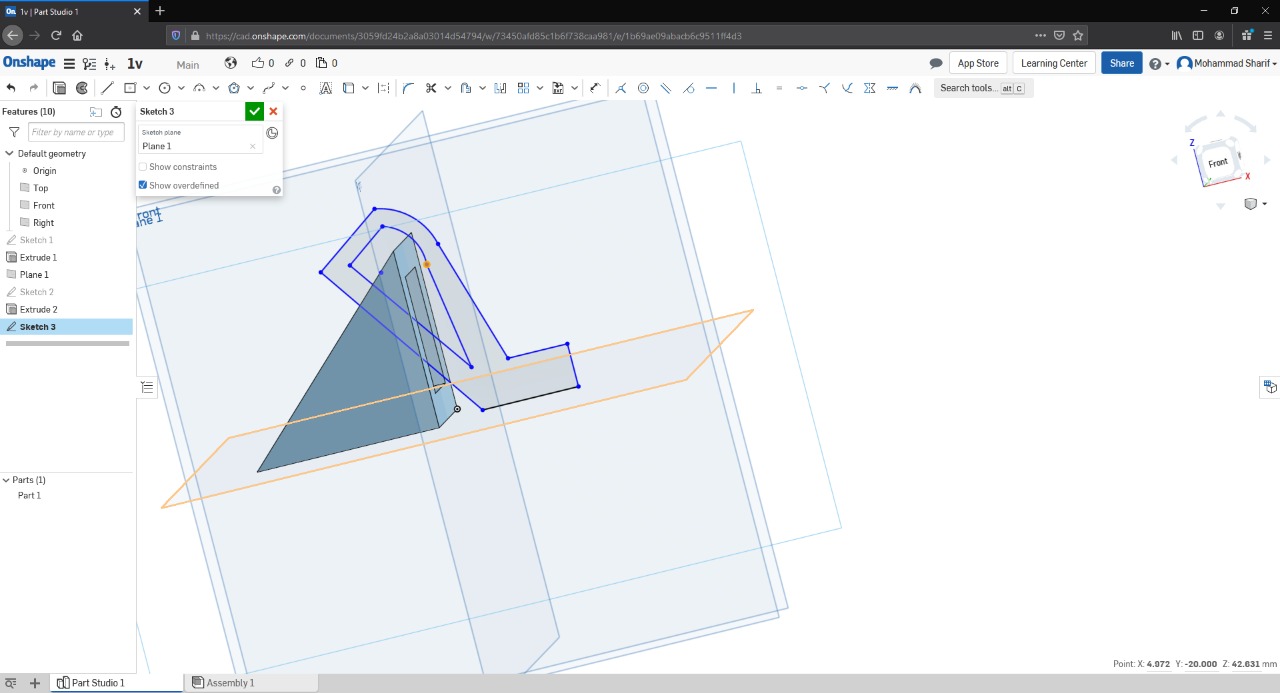
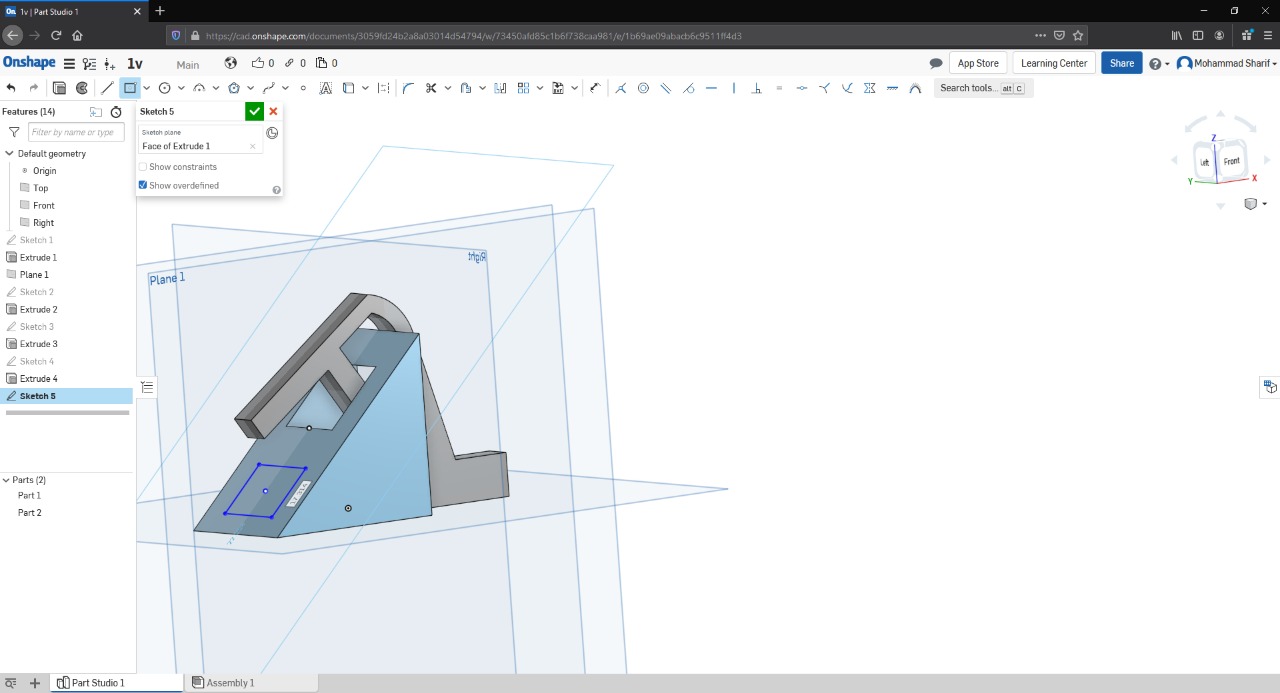
lets make another working referace surface ,from front surface, and make sure that it is in the middle of the object you made:
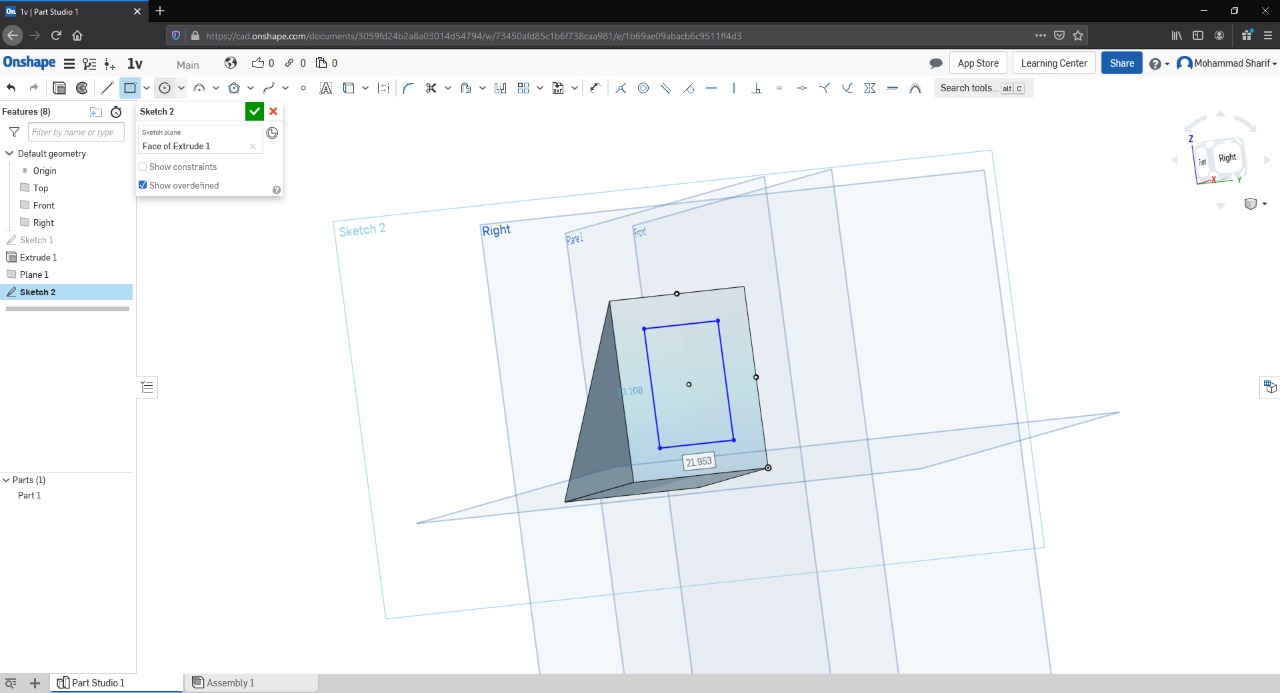
from skitch tools, lets draw this shape, make sure that it gose insde the hole in the first desgin, just remember to draw the new shape on the new surface you made
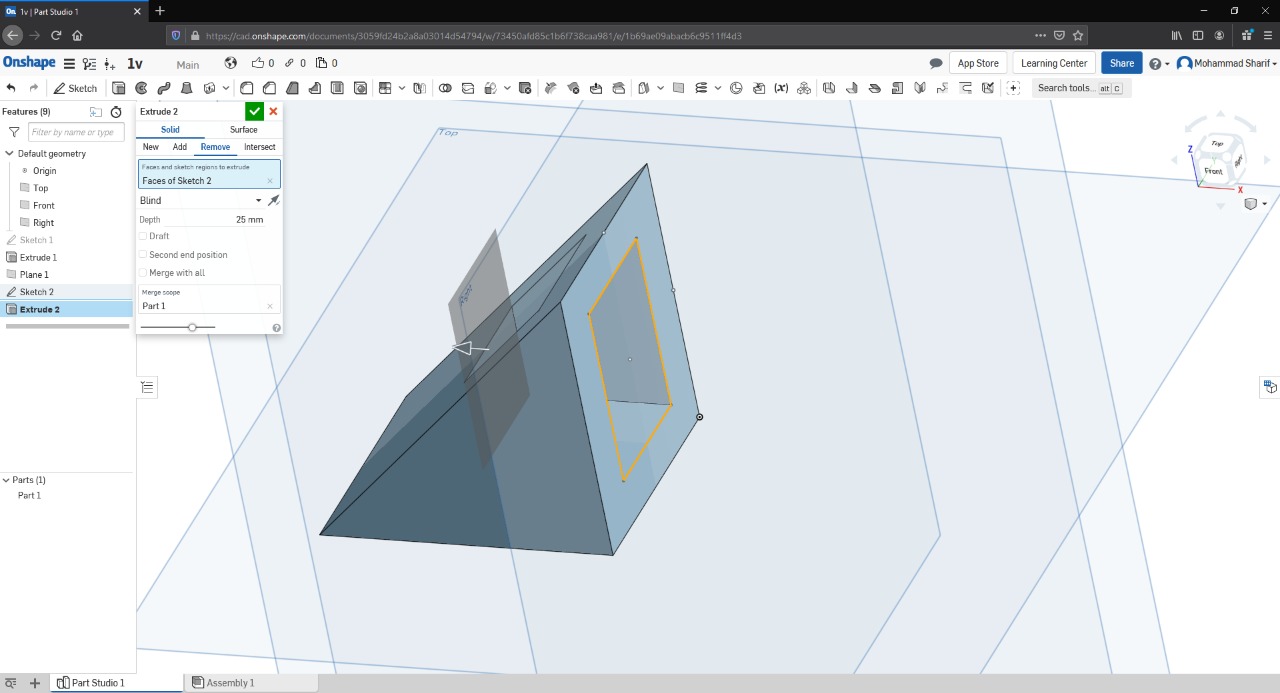
extrude the new shape
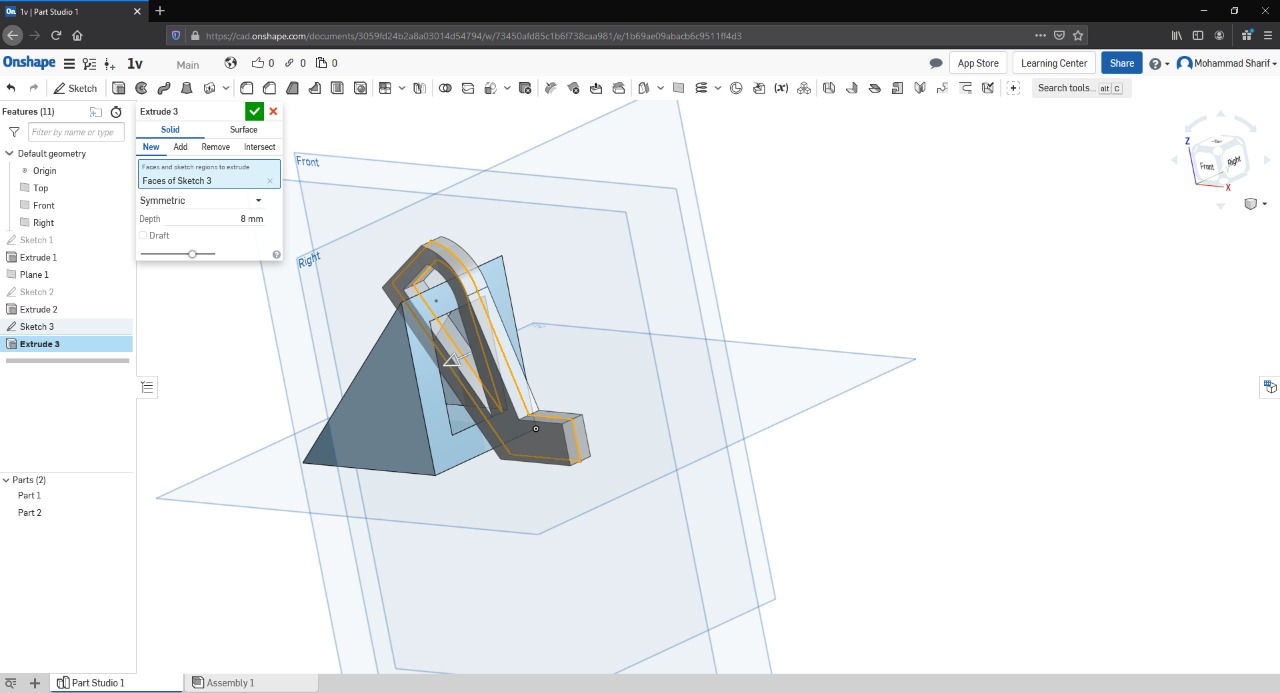
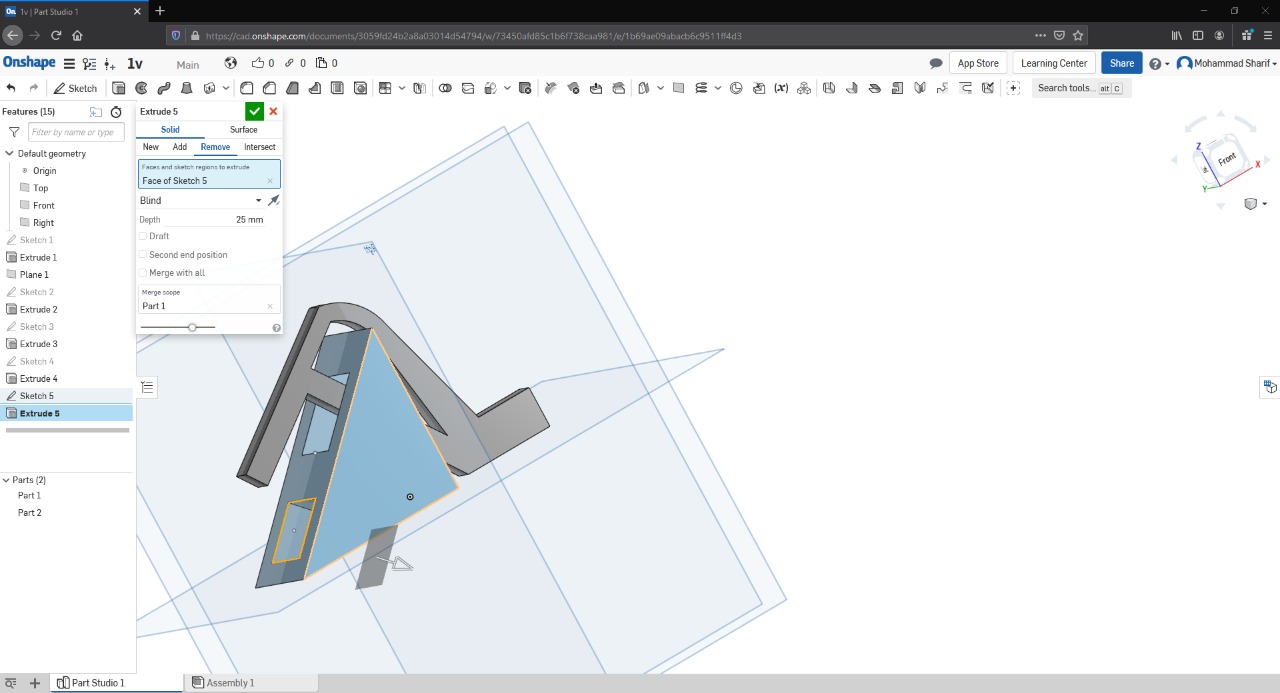
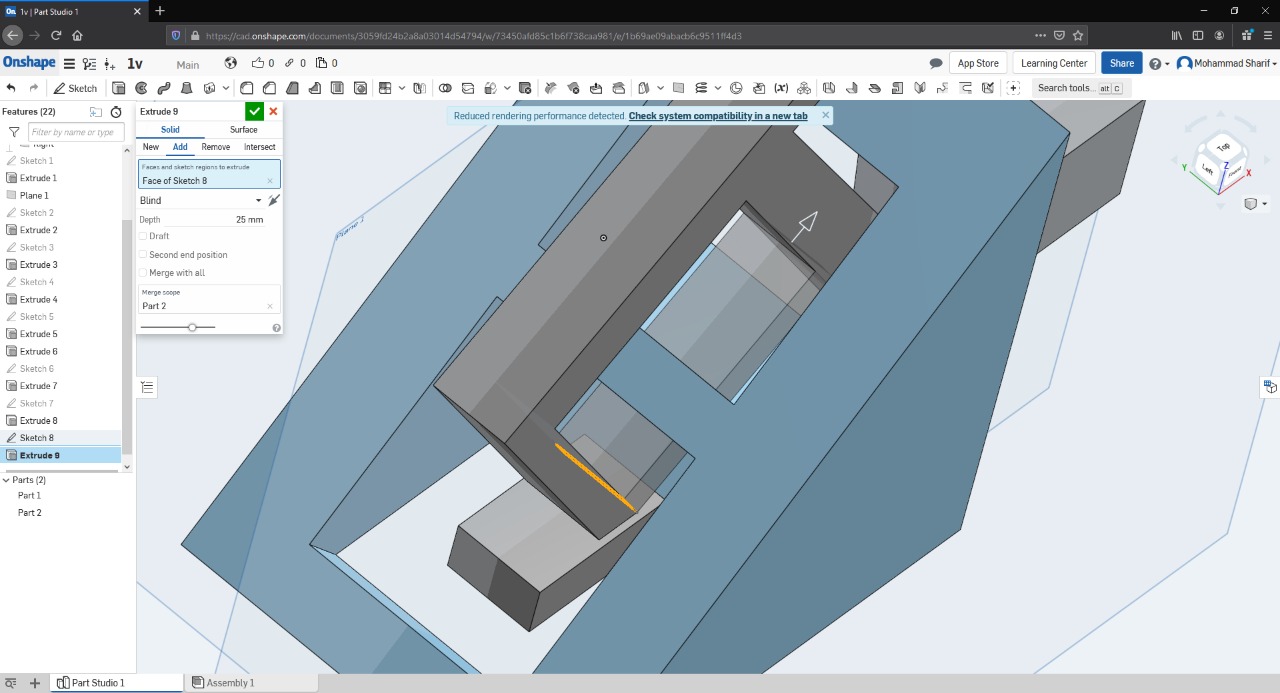
new, lets make the shape ore complex with the following steps(most of the next steps are using the same tools we used previouslly)
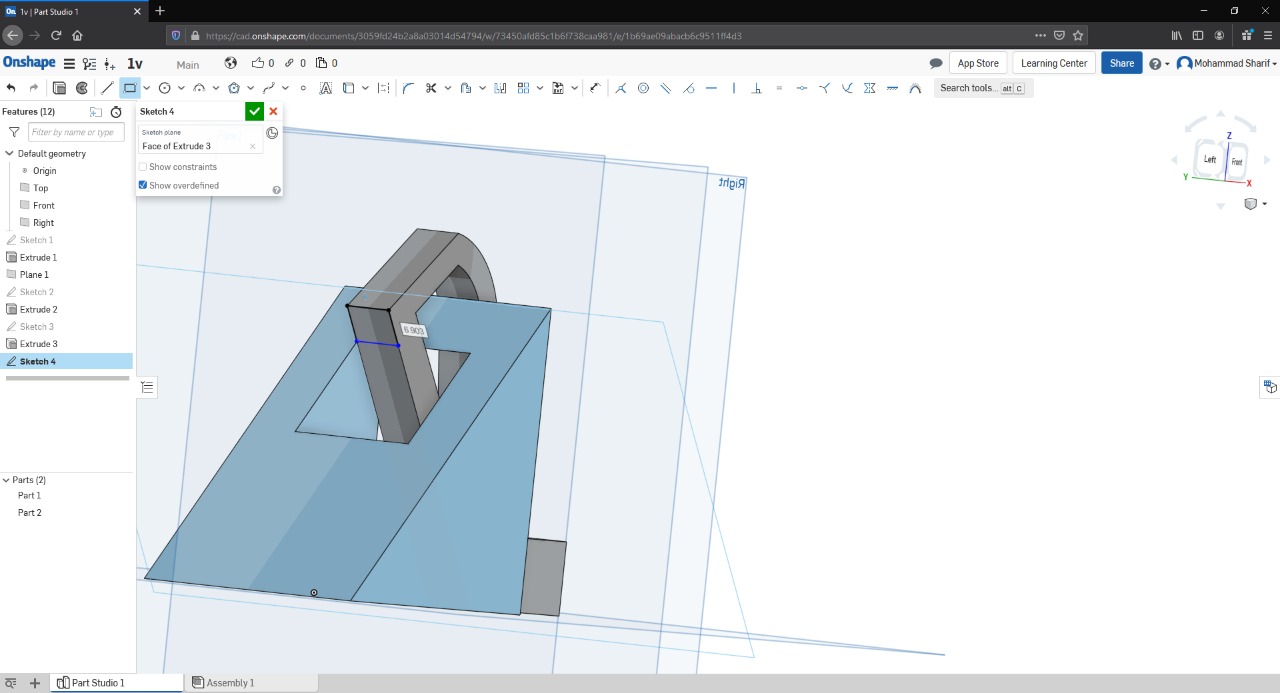
Draw a triangle on this face
then extrode it
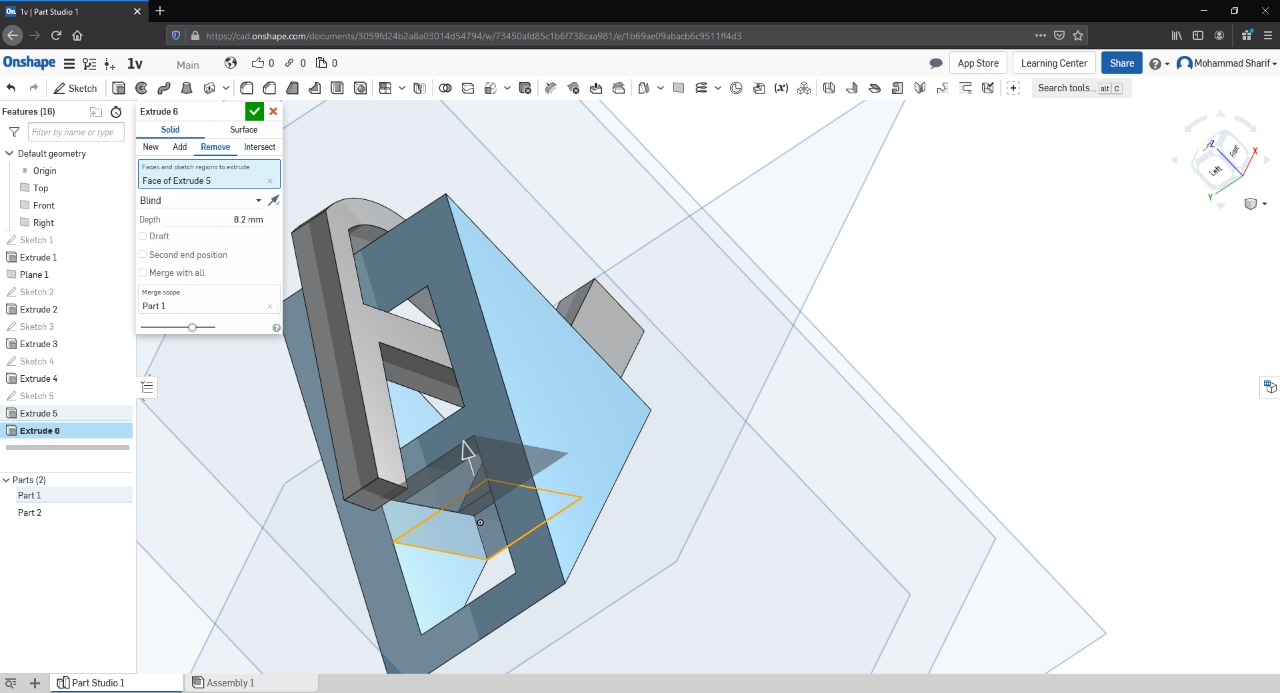
within te blue object, draw another traingle to make a hole
let the hole cut throu all the blue shape
another on insde the blue object to make a multi connected holes inside it, this holes will help to connect the selver shape parts together within the blue shape
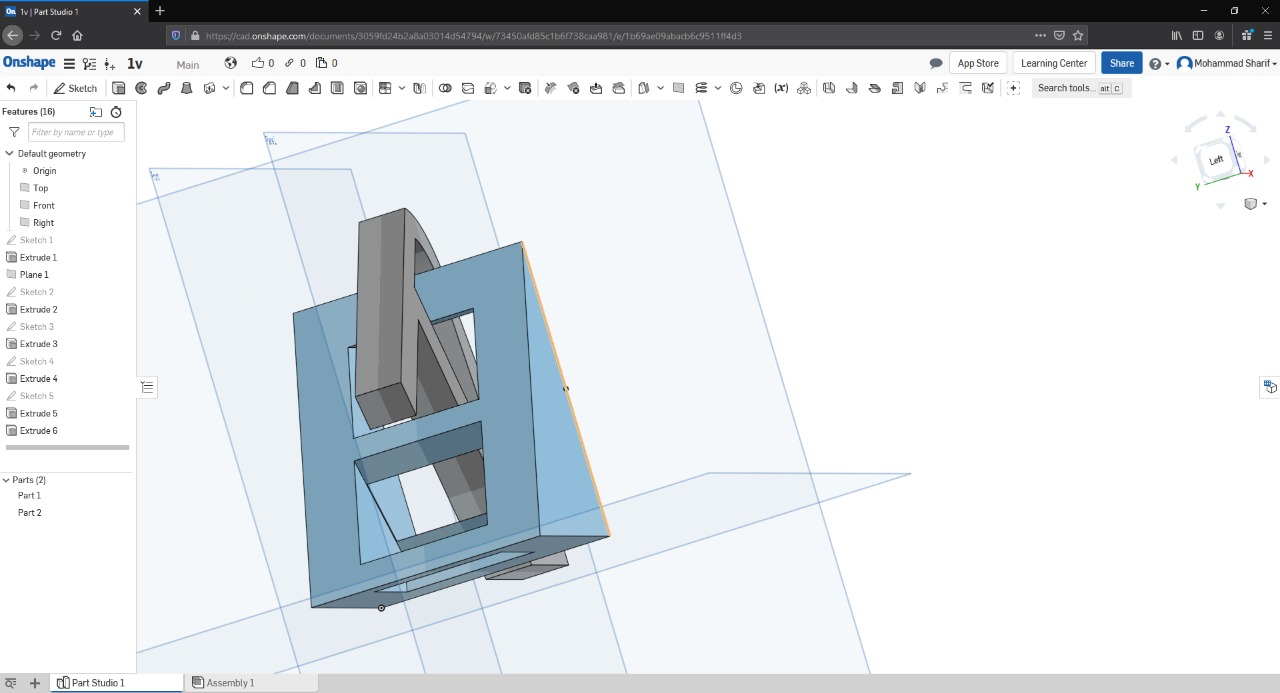
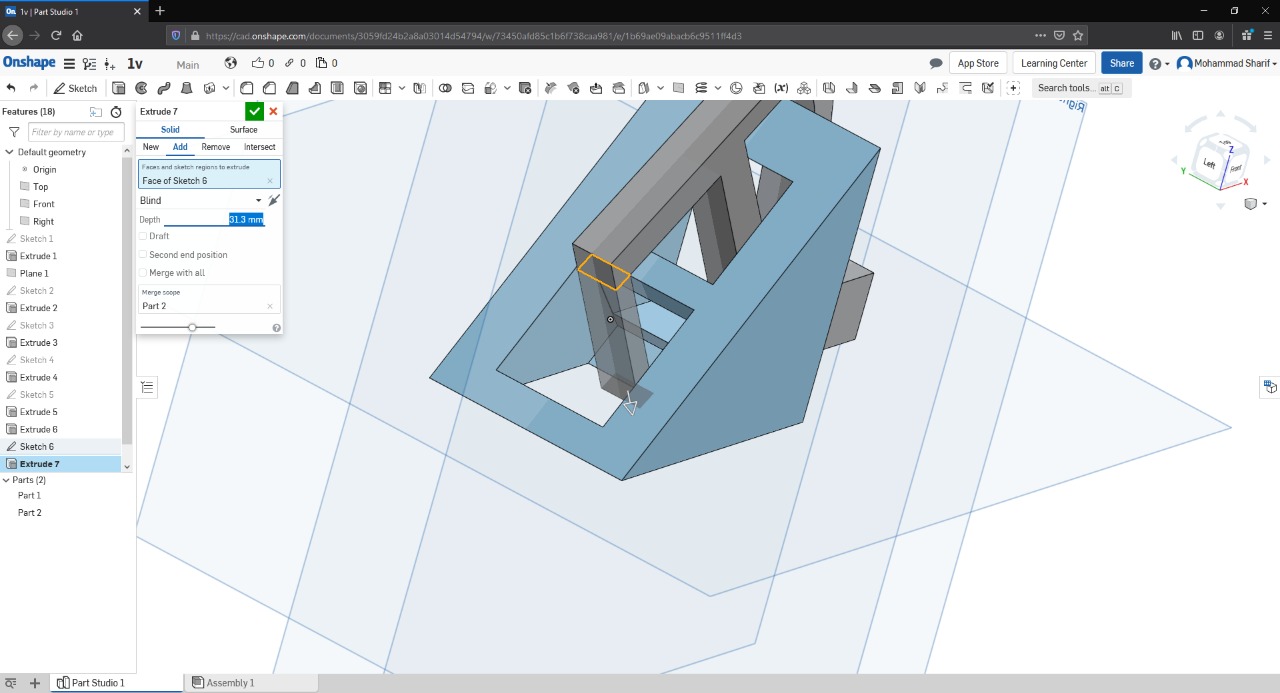
lets extrde the selver shape
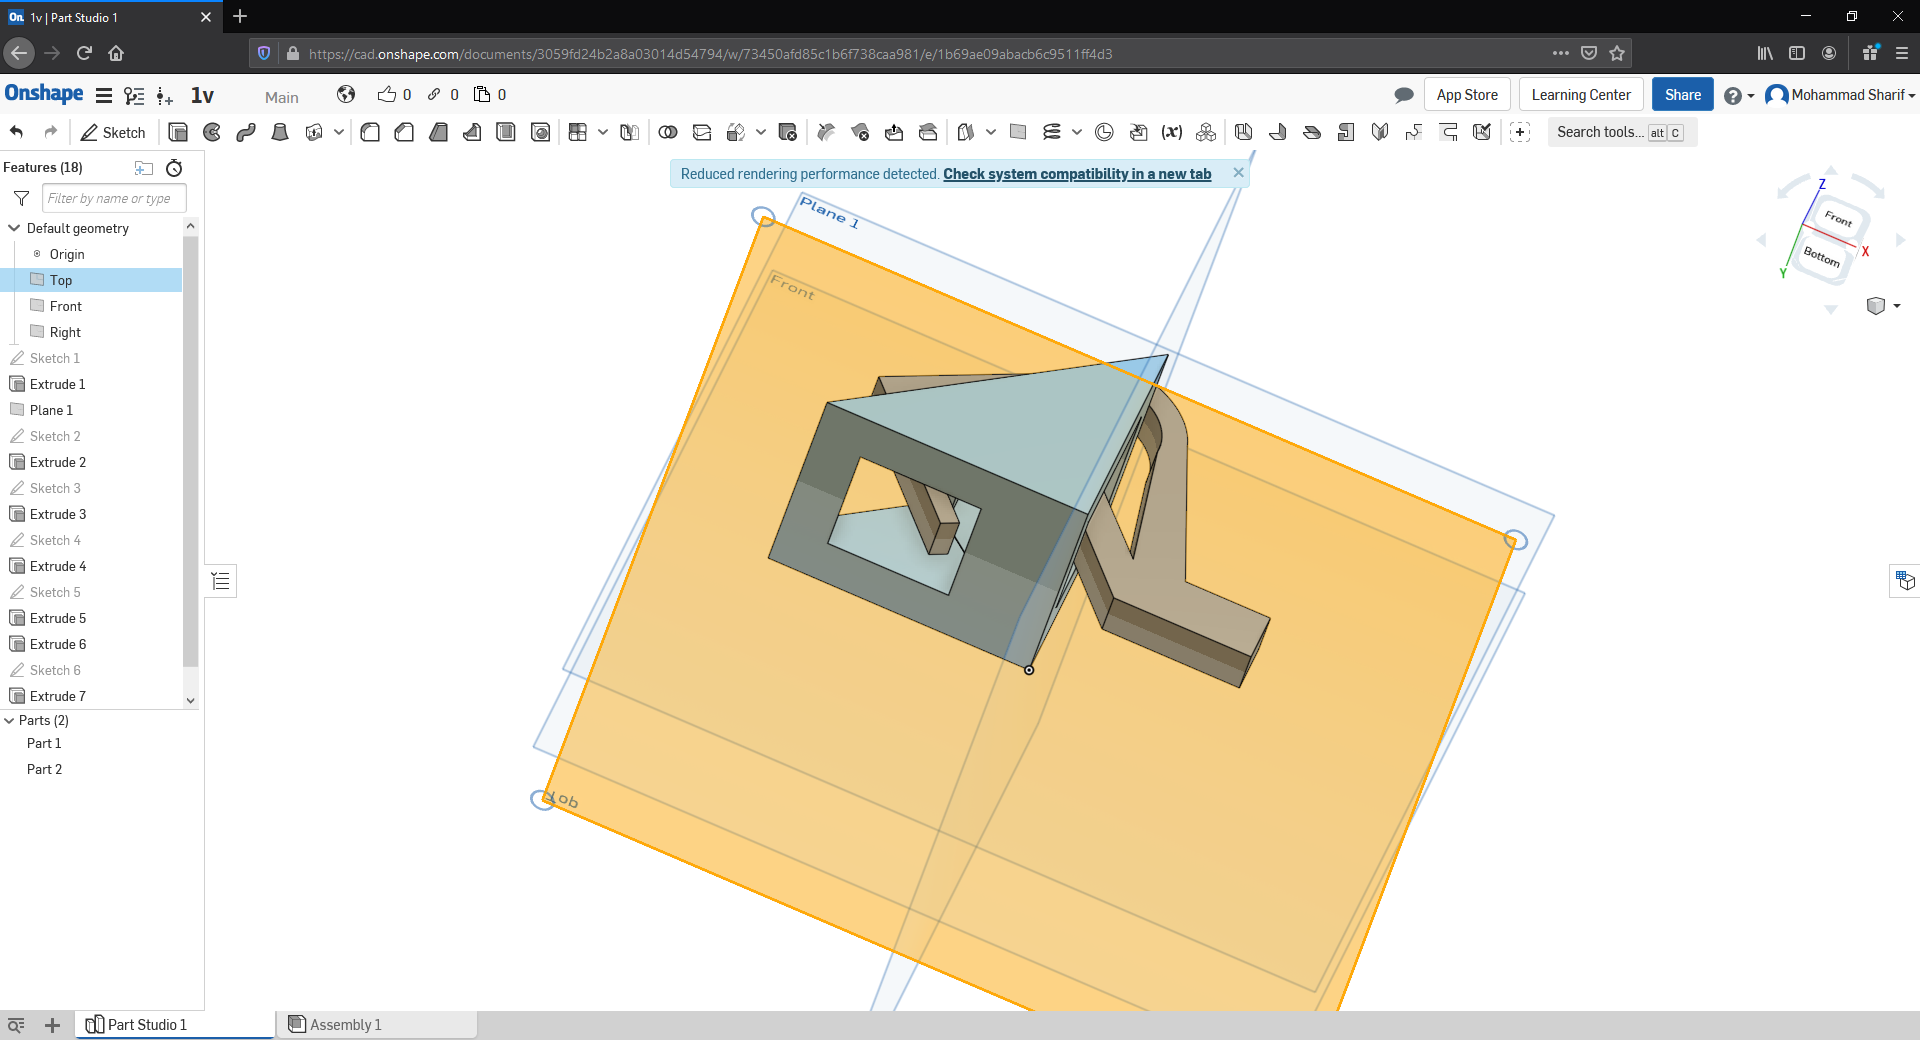
now, selver shape almost tuoch the ground
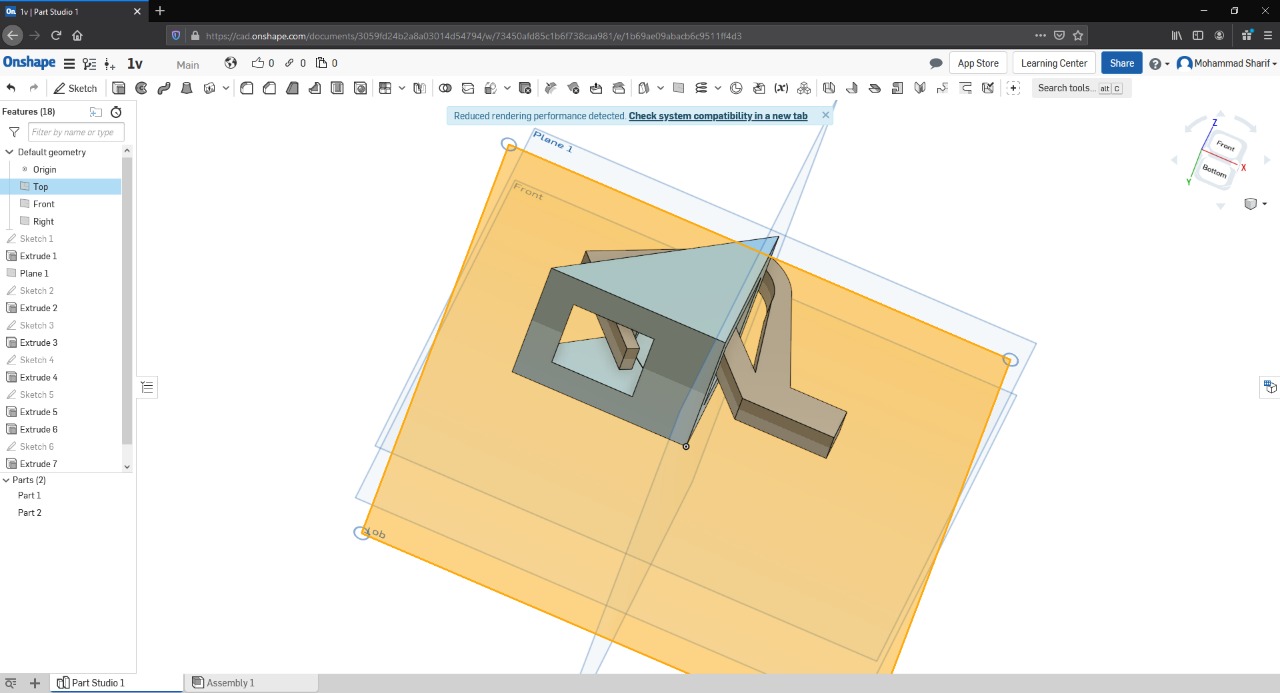
we need to add a base for the selver sahpe, so it can print the shape on it
here, the base, form rwaing a traingle and extrude it to the selver shape
as you can see, slever shape go through the blue shape in many connctions and links
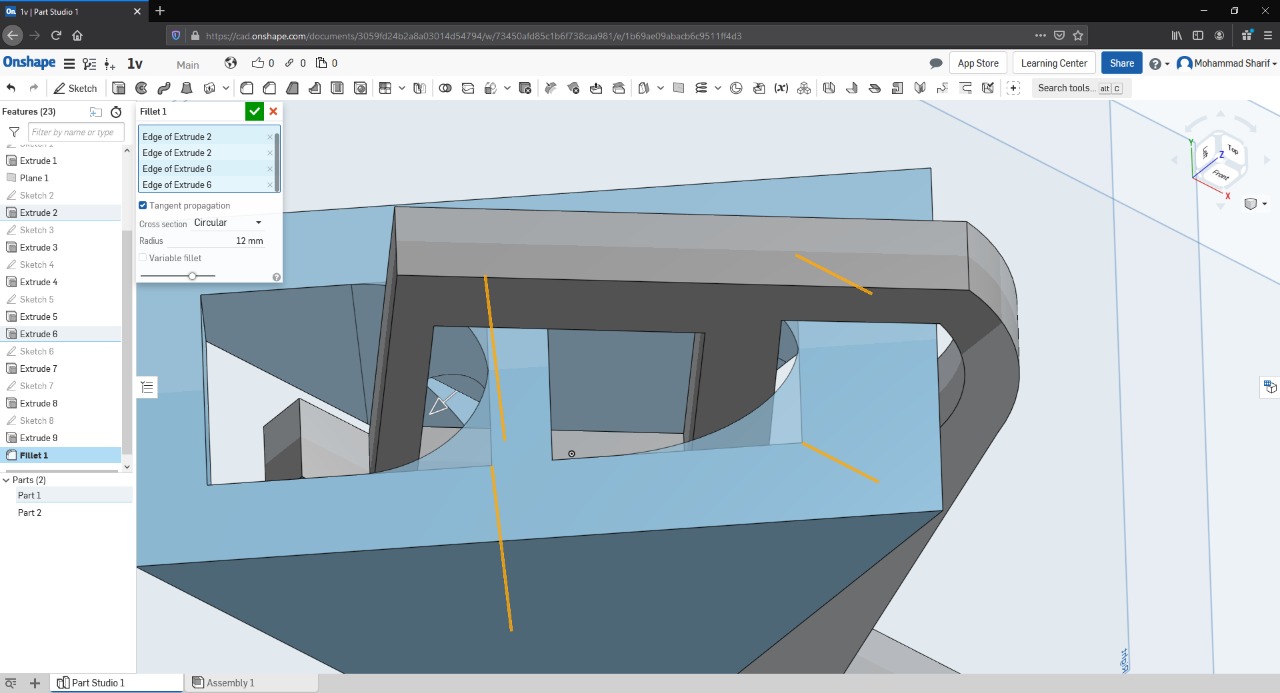
this type of connections and link within 2 parts in this way is hard to build using subrtactions methodes , plus this shape has alot of hard angles that only 3D printer can do if within 45 degree without support, and with the sutable speed to make the print stable.

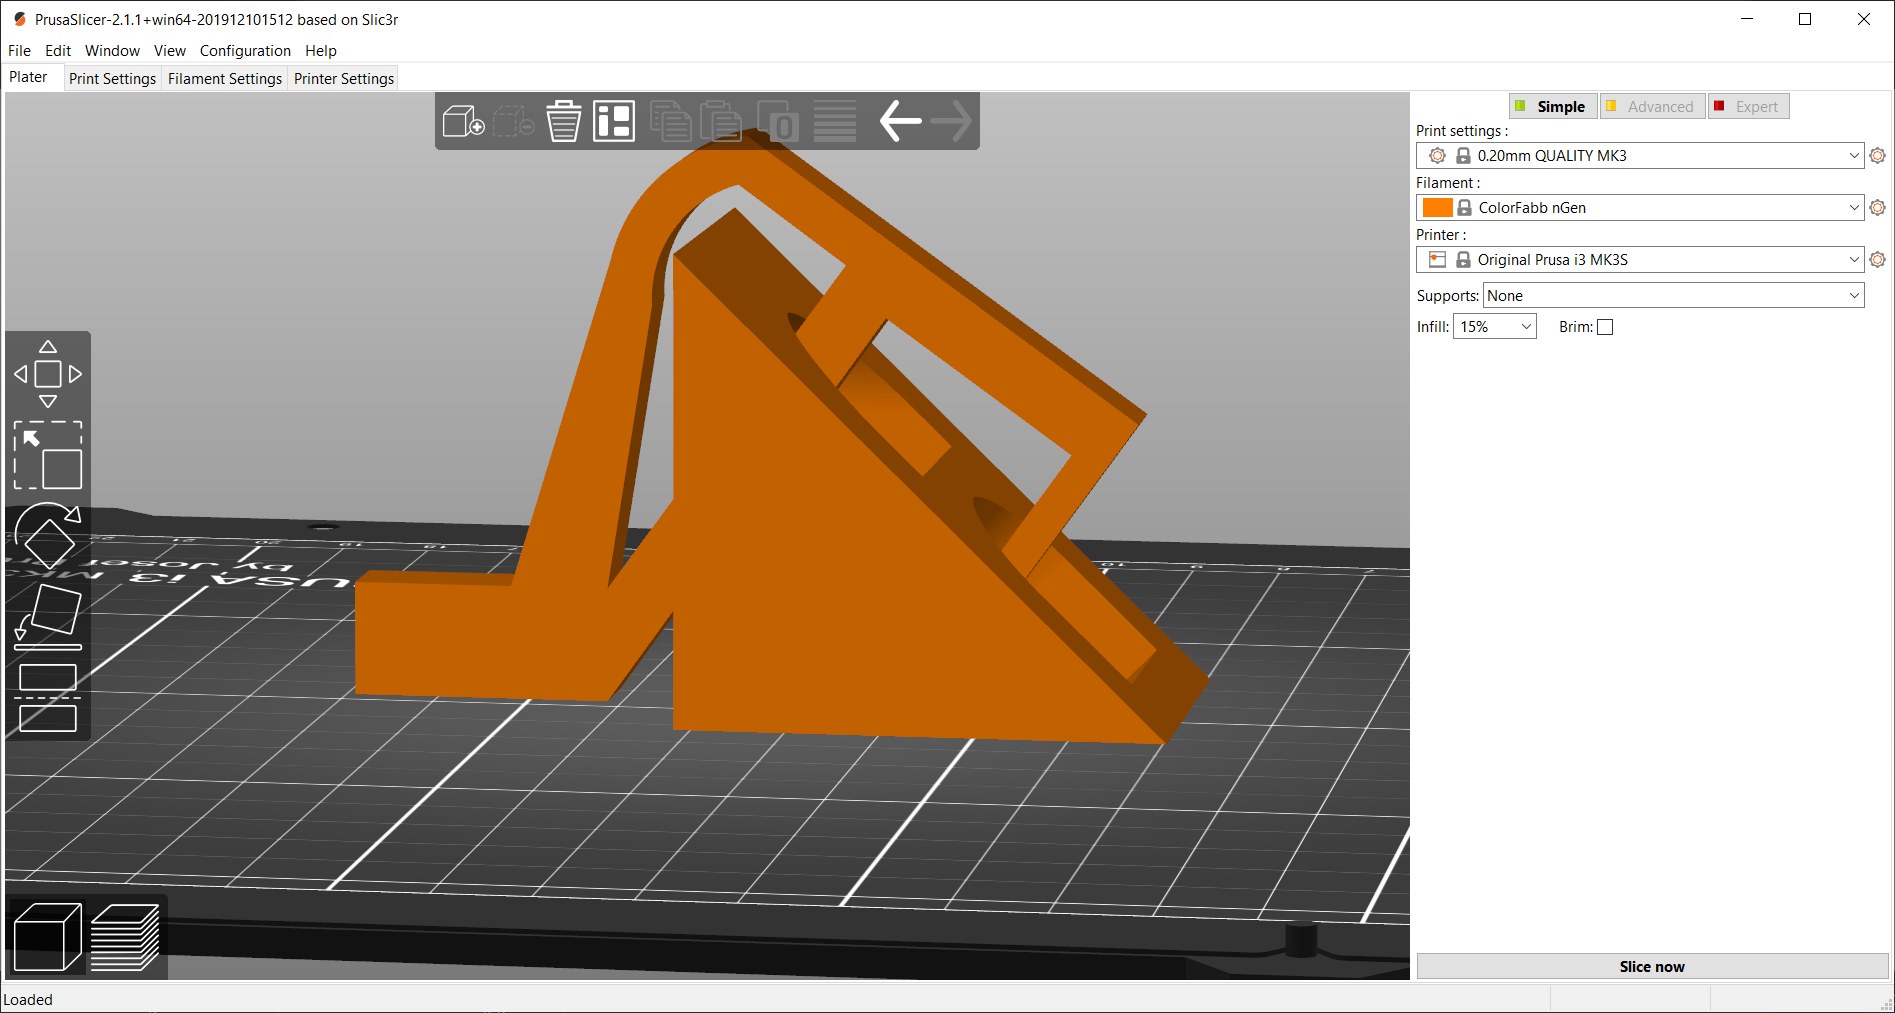
Prusa Slicer
we are suing Prusa slicer , check is't main tools in this image:
on the left side, we have the tools that can controll the locatin, scale, rotasion, facing the object to the printing surface and cut the shape
down to the lft we can choose if we want to see the shape in Layers or as 3d shape
to the right we can see the basics tools for the print...
you can see the sittings that I am using in the following
Time and matirals for the print:
abetter imange for the sitting :
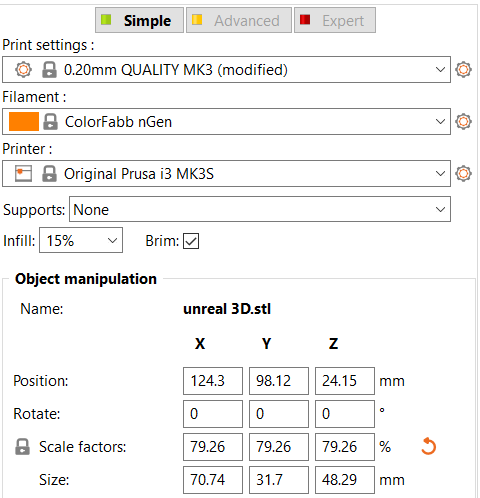
printing settings : can provide the main info about the outcomes of the print ; 0.2mm is the thikness of each Layers , the smaller the laier, the better the quality... for my< I usually use 0.15 to 0.2 for good quaily and fast print
filament; with this, you can choose the materials for printing, we care suing colorfabb in our printer
and ofcours, prusa has many models, we are using MK3s
supprot is not needed for this design, becouse the angel is within the rage of 45 degree
and this shape will not be used to drill the walls...............so 15 infill is more than what it realy needs; the more the infill, the harder the shape
You can find the final design at STEP form in this link: unreal.step
now lets print the desing:
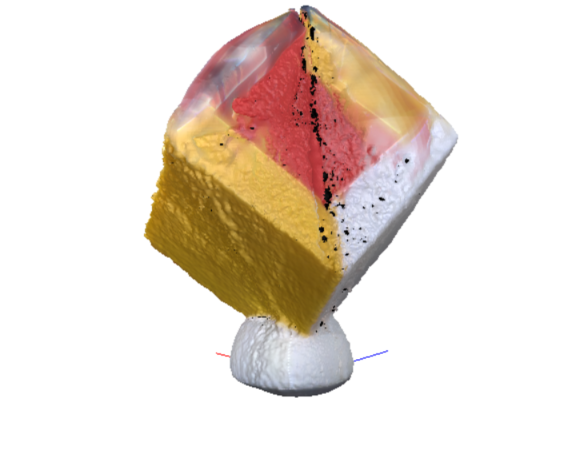
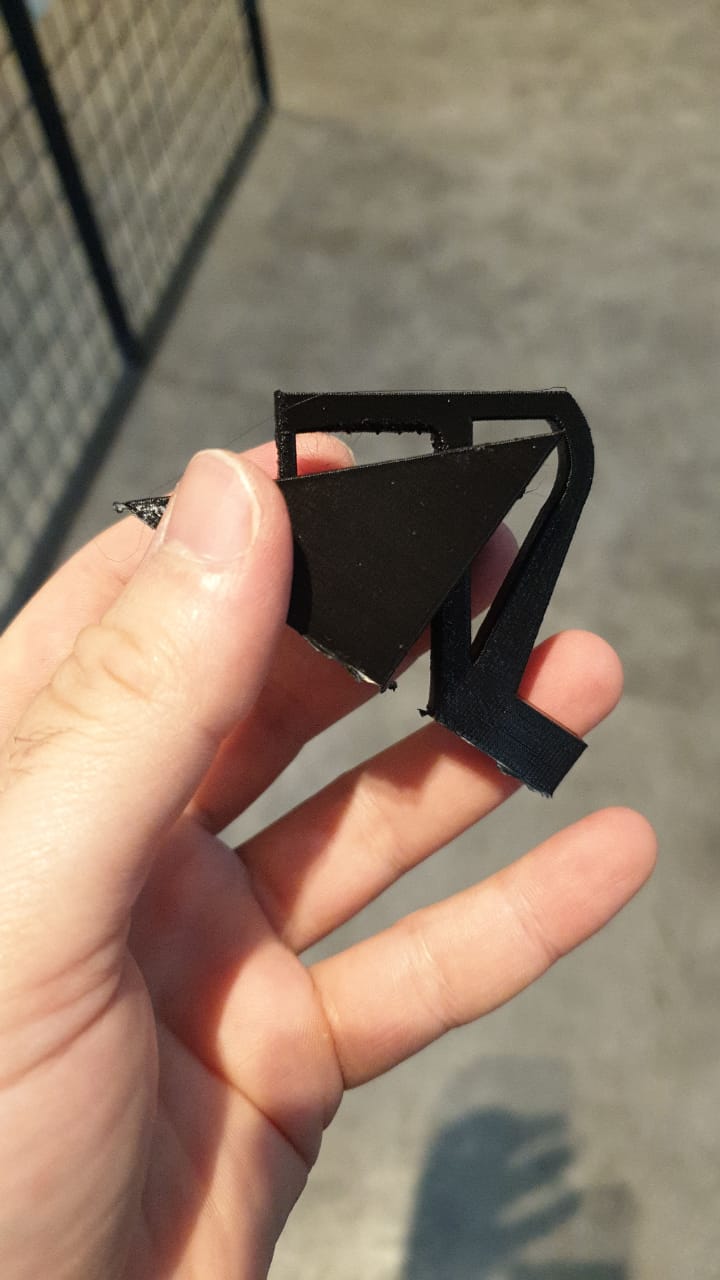
here is the object after printing, from diferent angles:

Some Problems WE faced
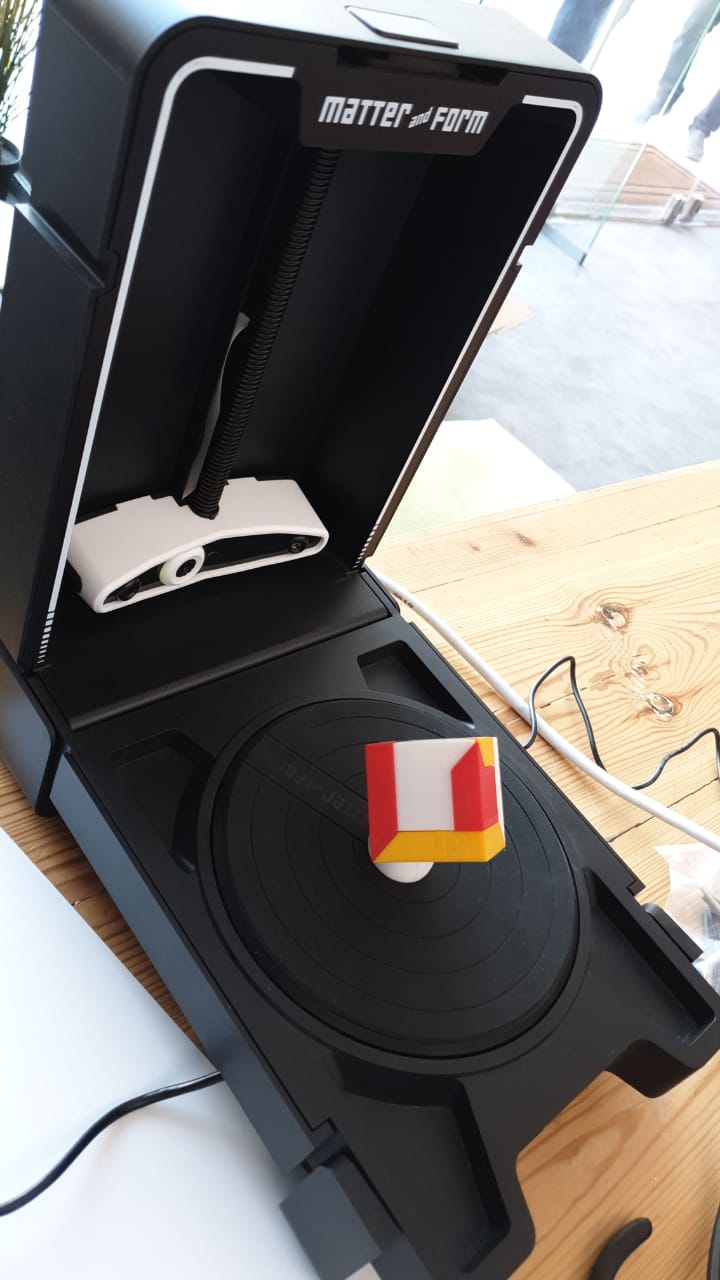
we cahnged the location of the 3D scanner, to have a better lighting conditions, then staerted scanning:
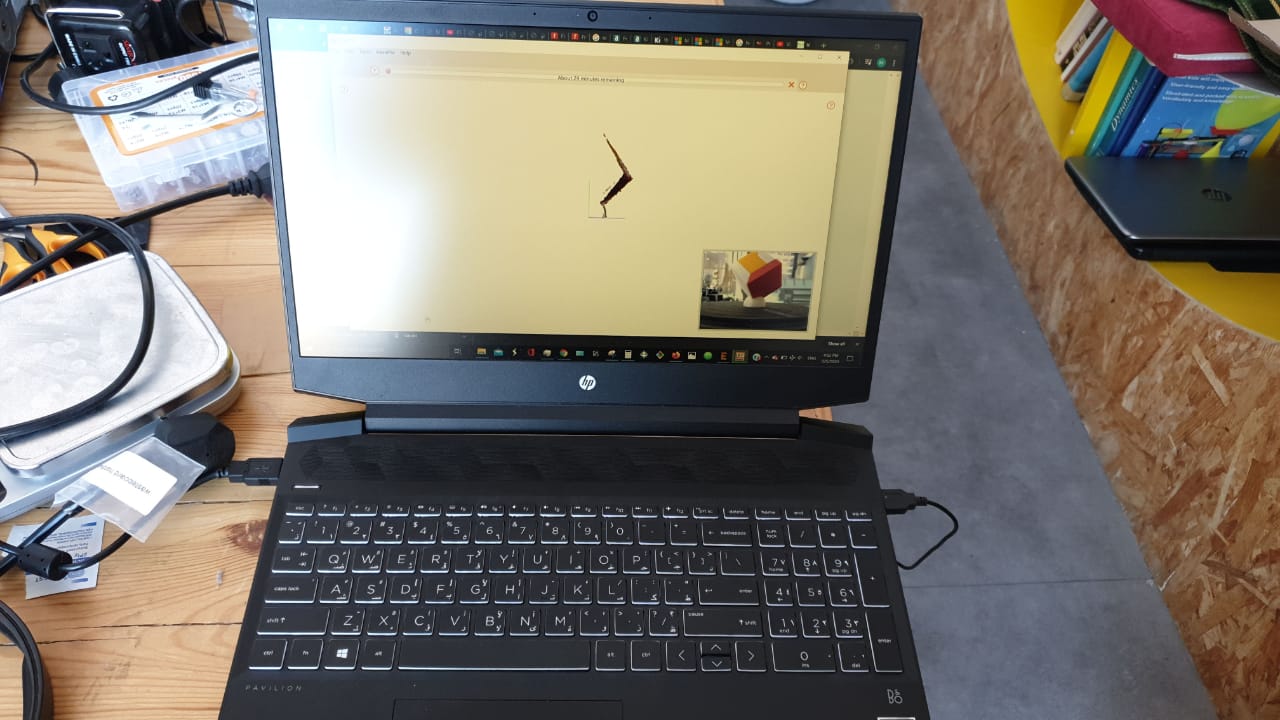

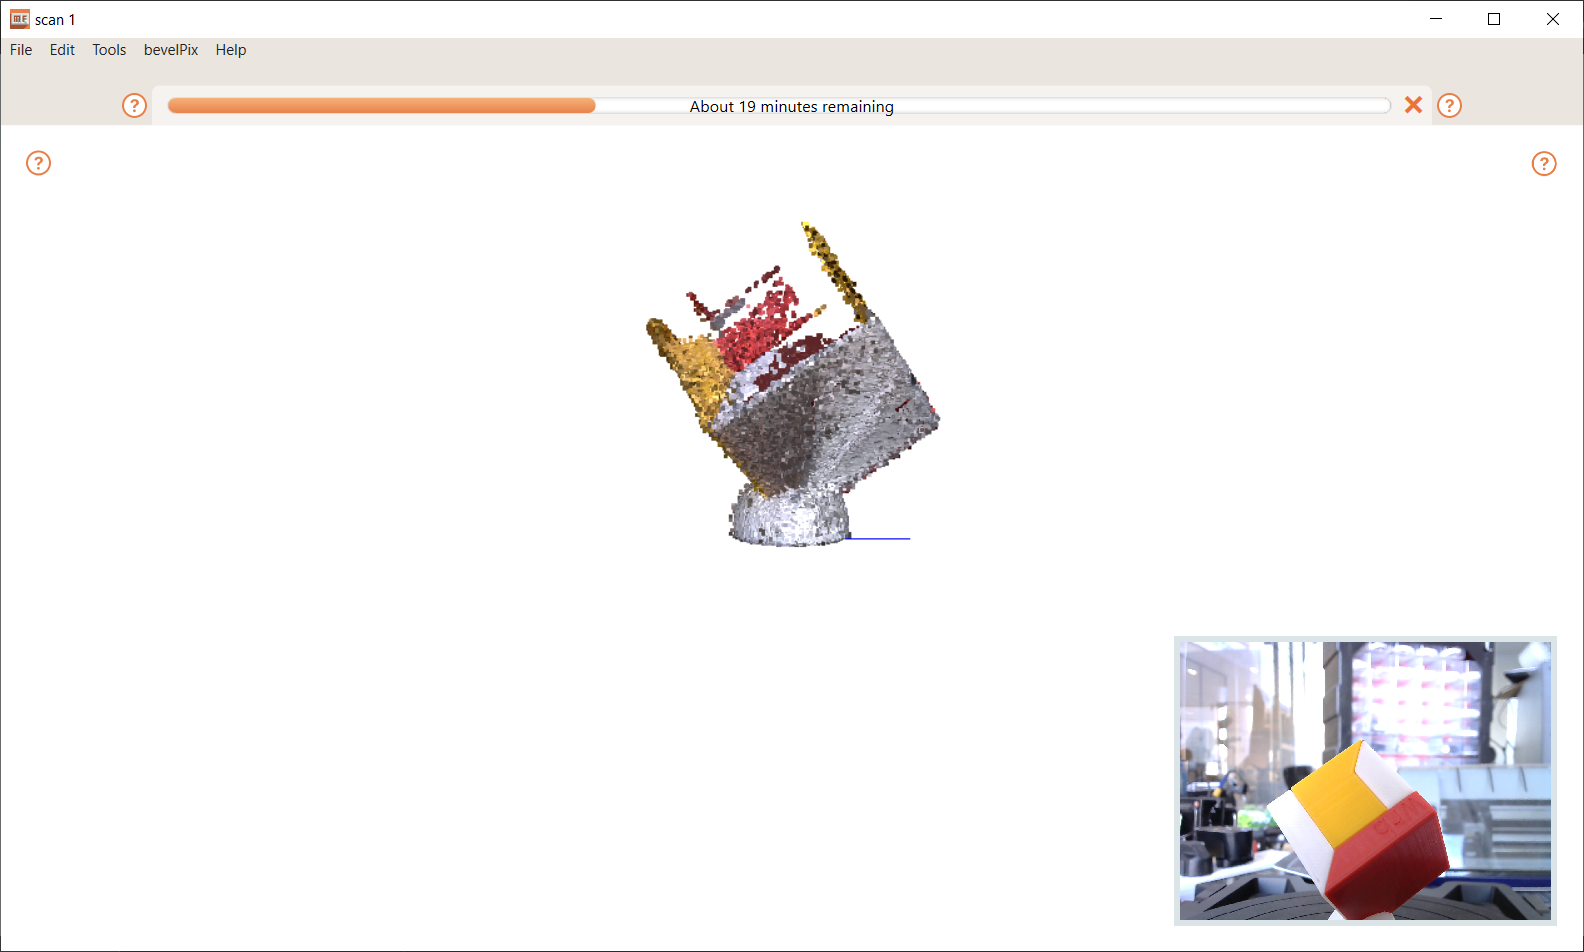
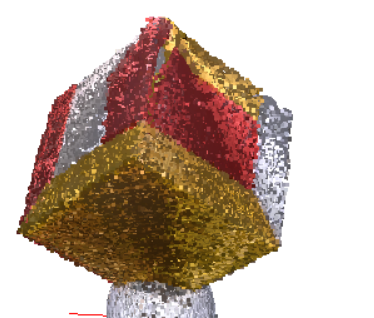
some scanning angle did not work with the shape, you can check the empty space in the top part of the shape:

lets convert it from only faces to 3D mesh by going to mesh option and choise the level of texture needed, then wiat until it finish:
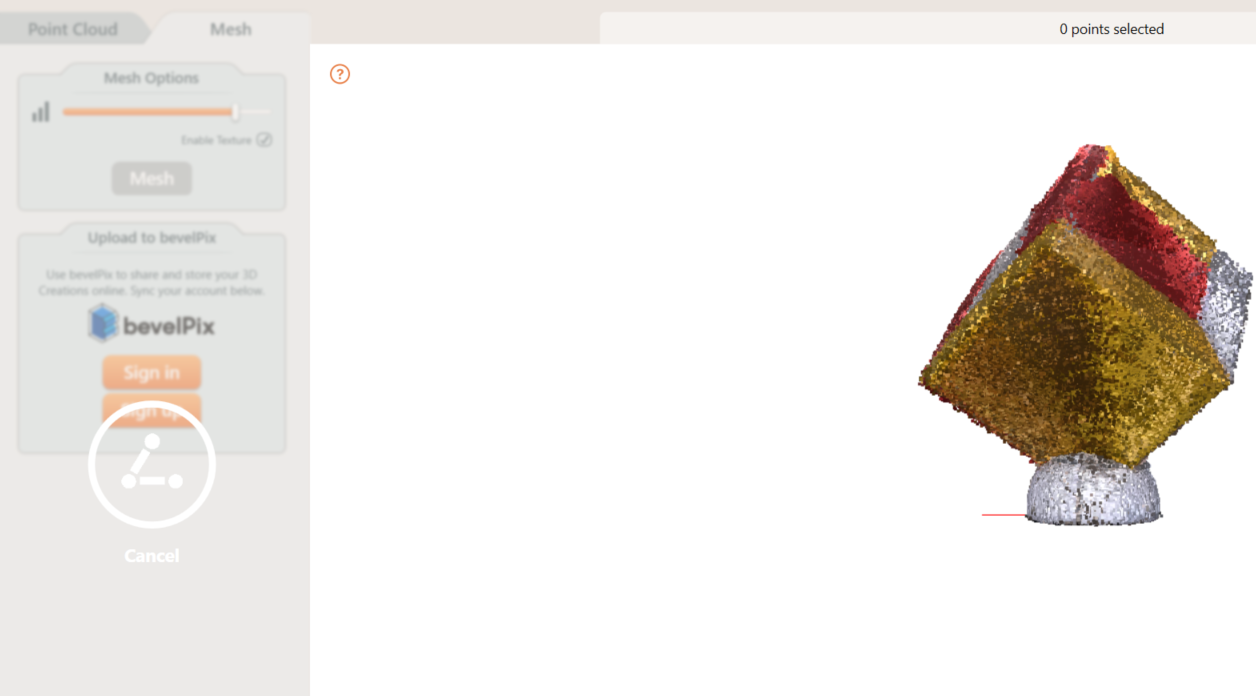
and there you have it..... the final boss of the game!!! this looks Miserable!!!!hhh: