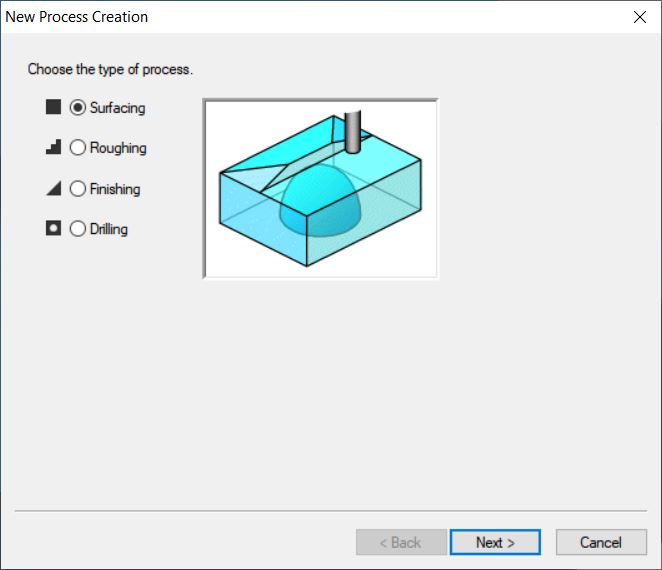
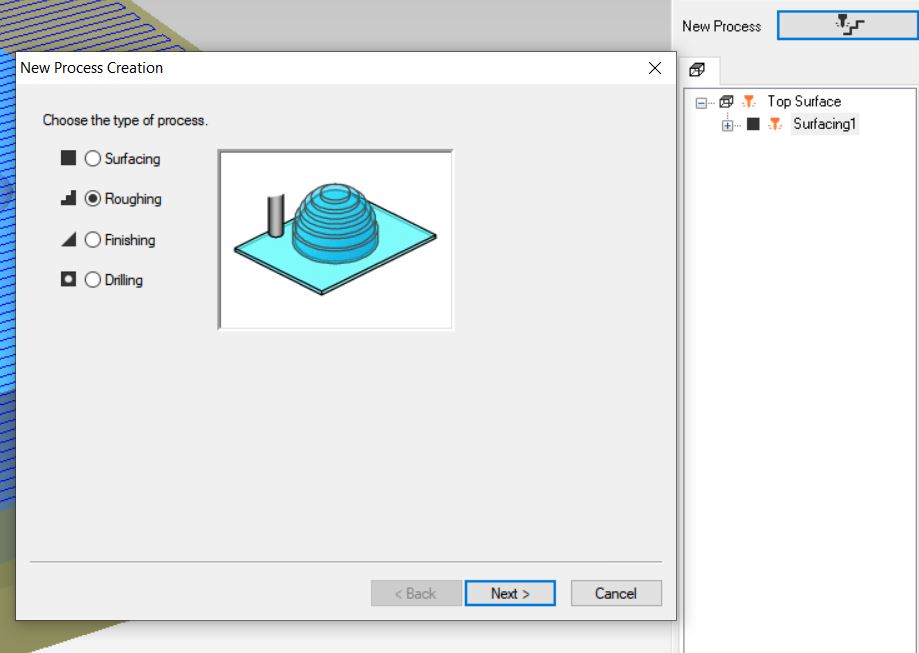
W17" Molding and Casting
make ?
always thingking, why 3D printing take soooo long time to build something, isn't there any other way to build 3D models (big quaintities) in another way of 3D printing....
just to know, that I allready know that there are many methodes to do taht, and one of them is this week SRM-20 milling machine from roland
-Group assignment:
Group assignment:Group assignmentso, what is miiling machine? A CNC that rotary cutters to remove material by advancing a cutter into a work piece. This may be done varying direction on one or several axes...."thank you for the infor, as if not everyone knows that..."
back to the subject, so this week , we will work on make mold uisng the milling machine using WAX as the mold mateiral, then we will pour the casting materils to make our product, just to know that the lab has been using
materials for thatso what we will make today?.... a small logo for my fablab "Talents", here check the design from the video below of how I made the colde in onshape:
I am making it from 2 pieces, both will lock on eachother and they have a hole to pour the mateiral inside, let's take a fast look to the desing steps:
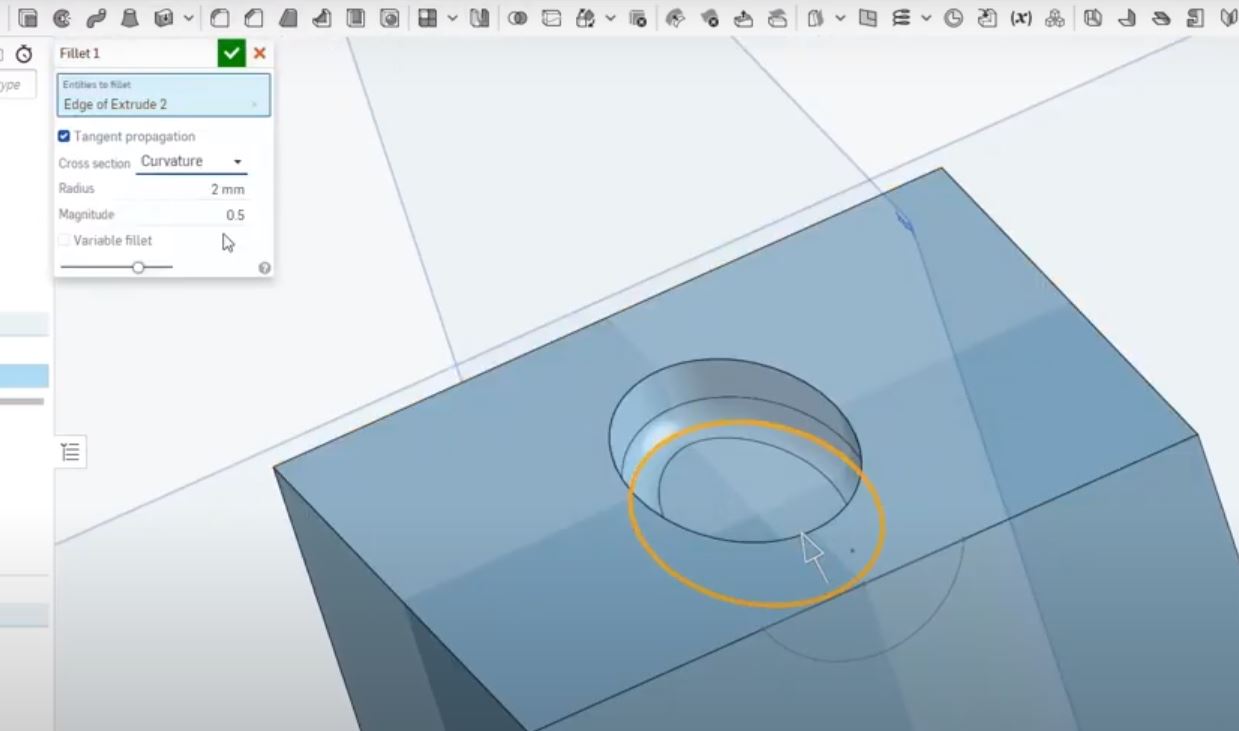
first, make the main shape of the design:
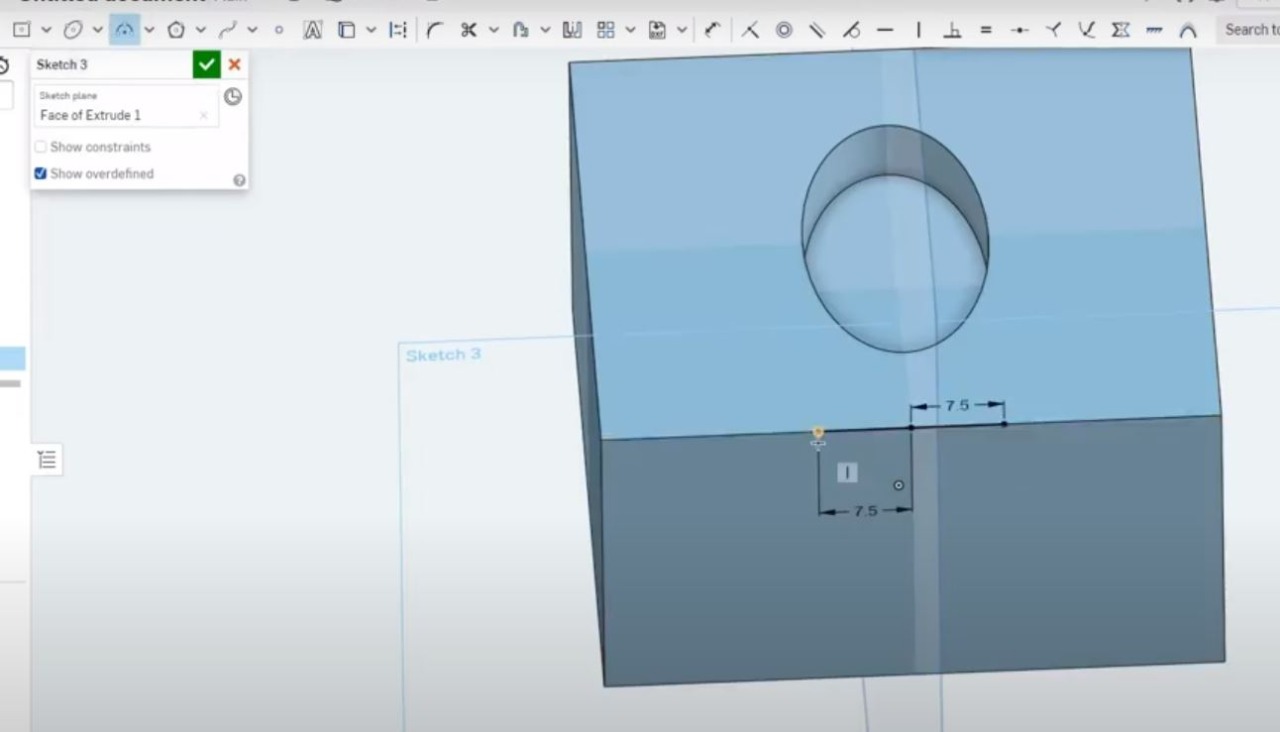
gave is some curves:
add test "Talents" to it :
make the other enclosure part
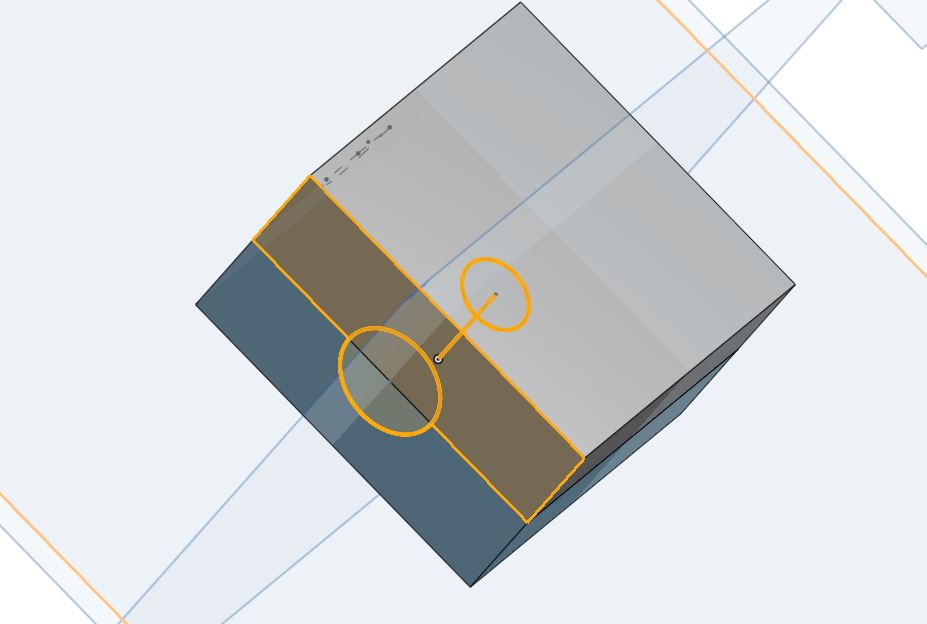
add holes to one side, and pins to the other, to make sure that the close togeter in a good way
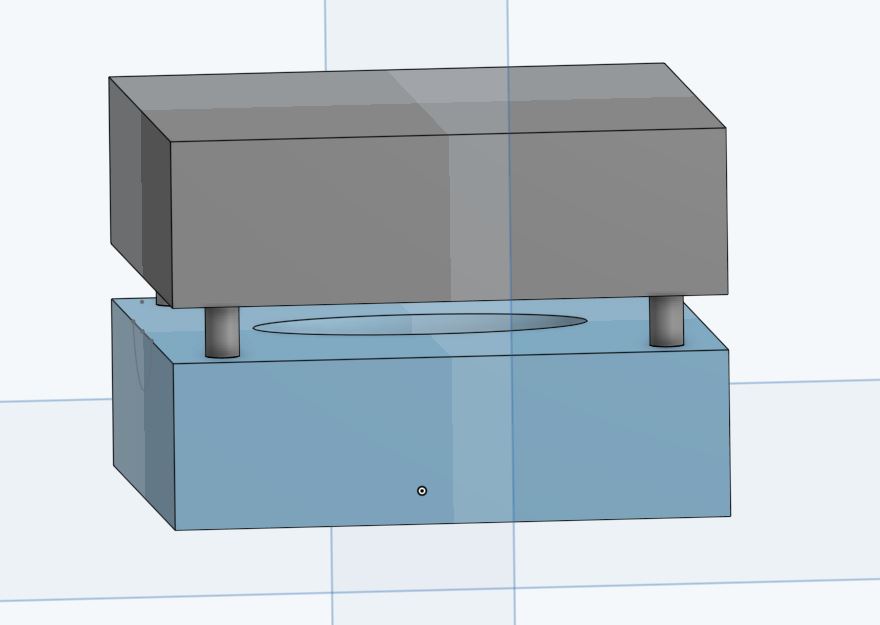
and don't forgut to add the hole to pour the mateiral inside
now lets take a look to the softwar that convert our desing form STL file form inshape to the milling machine, wich is called MODELA Player 4
a small peak to the final shape in MODELA Player 4:
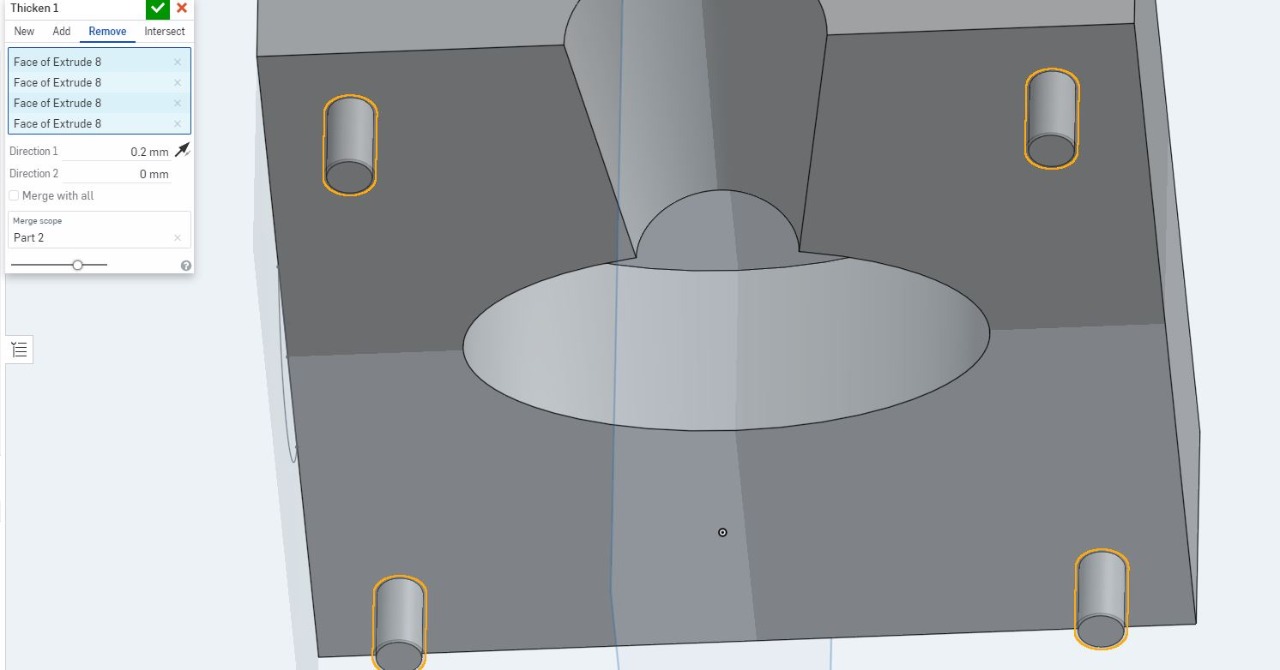
now let's go to the settings of the desing in modela, first from set tool uptop, chose model
here tou will find the size of your work :
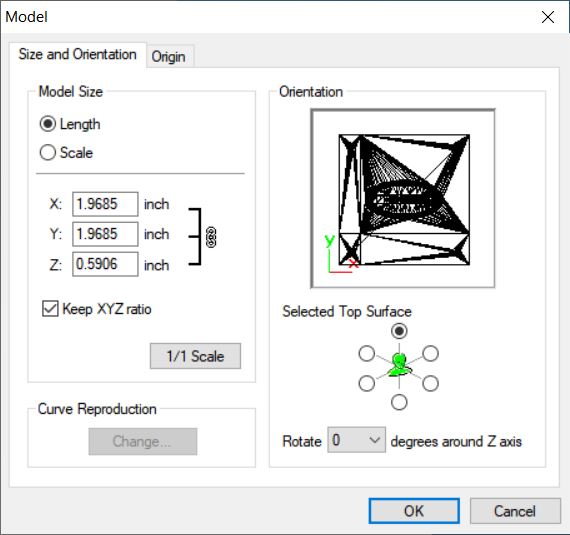
and pick the zero point for your work:

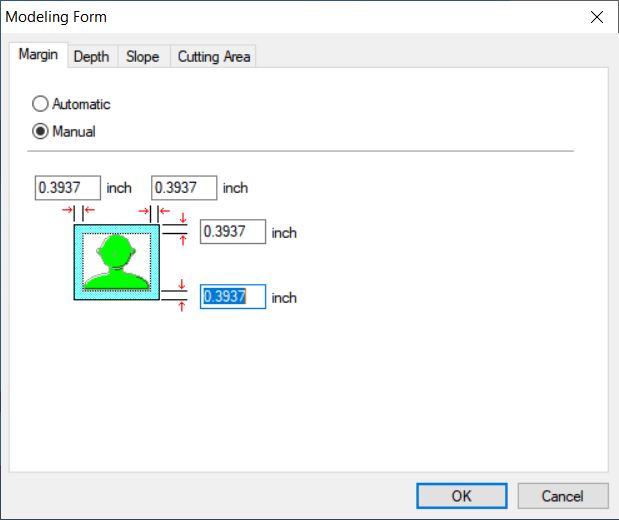
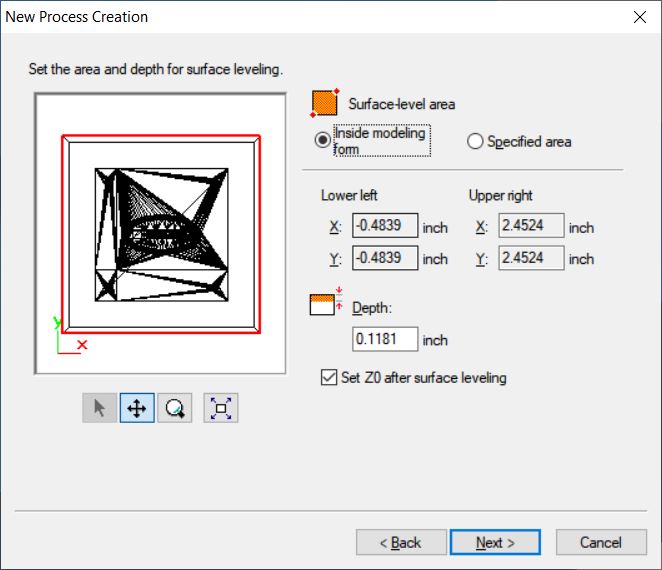
then from the same set tool uptop, chose modeling form, start with margin , and pick the free paces between your work and the work area of the machine:
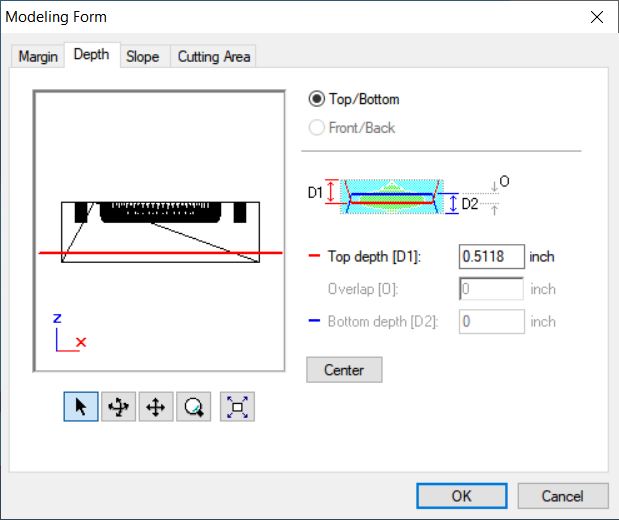
then to depth, were we chose how much the cut of the work needed to be cuted, baed on tour desing ofcource:
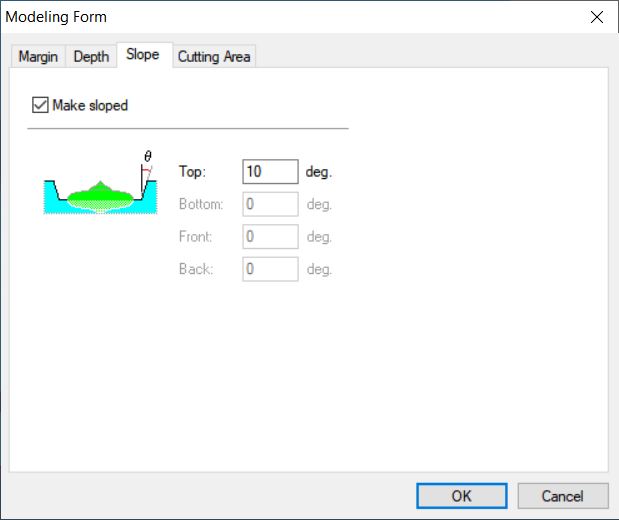
to slope , give it some degree, for my desing I took 10 deg to make it easier to ake of the work after casting
now, let's work on the cutting , first is surfacing the first layer:
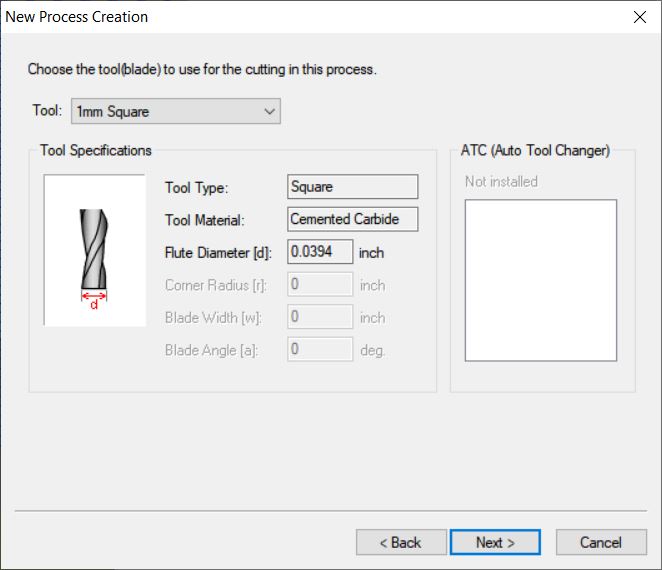
chose the bit you will work on, mine is 2mm square:
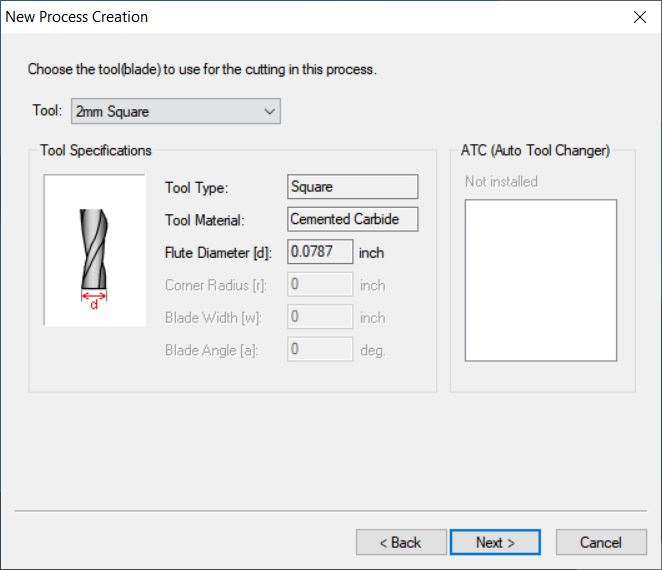
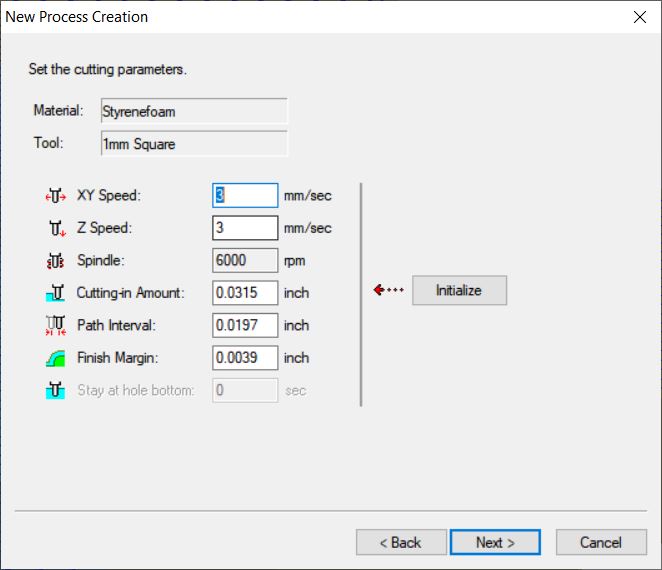
then make the depthe of theis process as 0.1181inch = 3mm
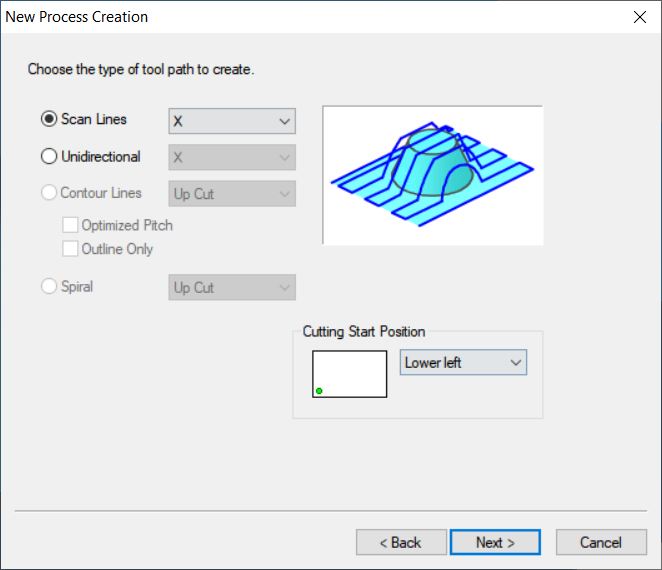
now determine the way the machine will move while working :
that is the steps for the surface cut, this steps were done again on 2 more operation on the shape, one wiht roughing and the other with finishing :

but ofource with some chainges with the bit size to come with a somther surfaces for the work ,this time with 1mm bit and lower speed:
you can seen a live viwe for your work if you downlaoded an extra Plugins called virtualmodela
and the outcome is :
waiting for the lab to open to work on the machine.....
check onshape design : STEP FILE
and check modela palyer 4 design : modela file
now, let's take a look at the final design for this week:
check design step file : step
this video will show step by step how to design it:
unfurtunatlly, the milling mahcine is not workin in the lab, waiting to fix it soon.......
--------------------------------------------------bub bub bub bab baaab baaaab....after some time......finaly back to the lab -_-
the previous fabacademy cycle milling machine is not working this year...for reasons , so I will use NOMAD883 PRO , check the link link
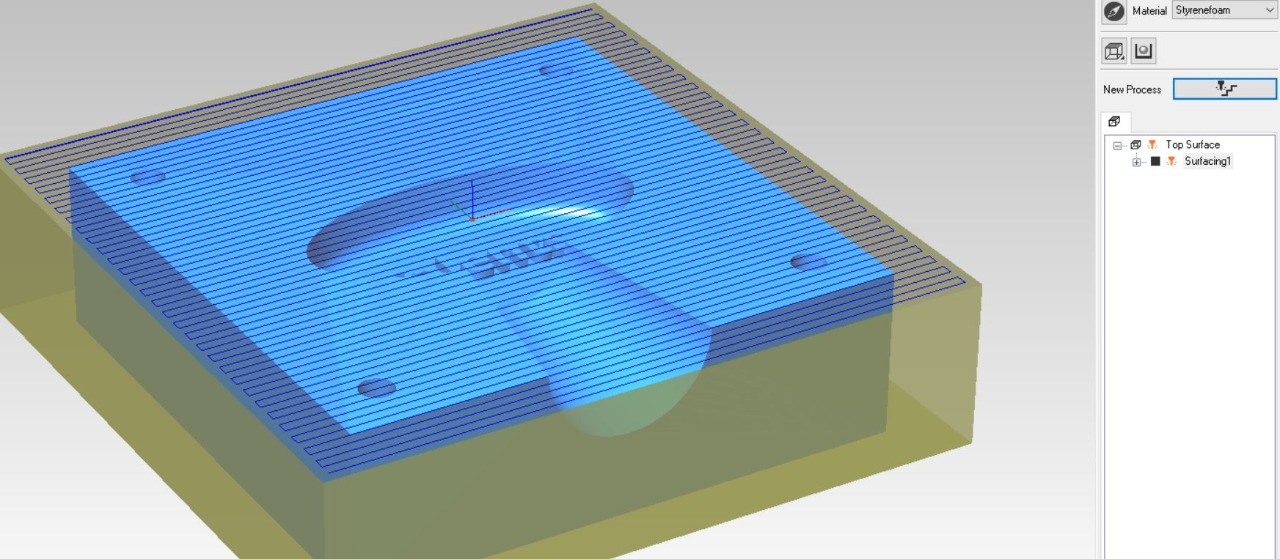
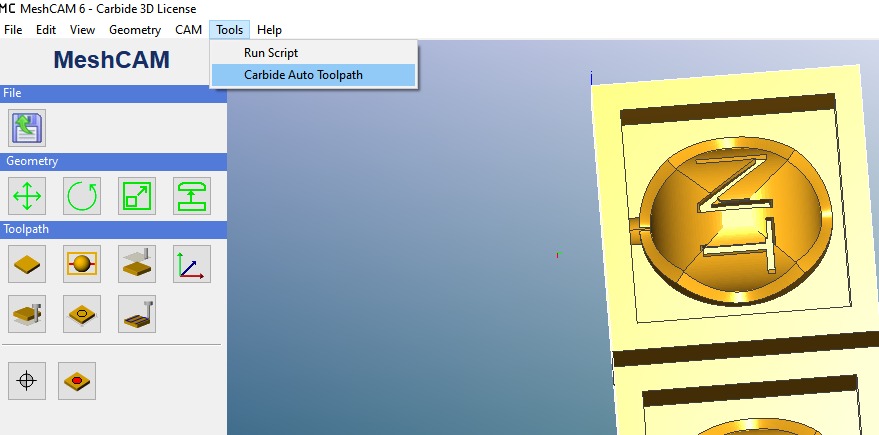
2 programs will be sued in this machine, first is "MC MESH CAM 6"which is used for convetring stl files that I designed using onshape and convert it to G-code and toolpath for the machine. the other program called "Carbide Motion" which is used to controll and operate the machine and send the g-code to it, let's check some steps for using the programs here:
after inserting the stl desing to MC MESH CAM 6, from the top bar, pick tools, then carbide auto toolbath, this will generate the g-code for the machine:
then chose the working materails and and bit type for the cutting then the "quailty-speed":
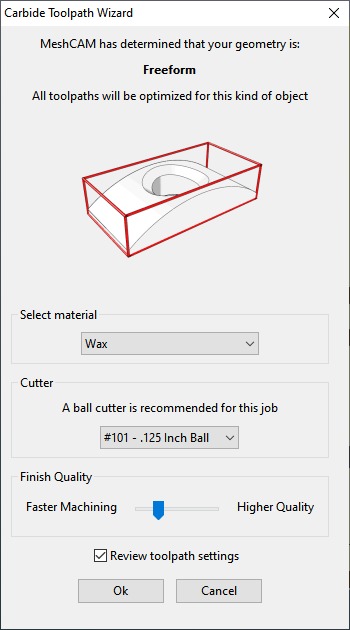
then some loading screen will showup, and then you can save the G-code
after that, go the the seconde pgrogram Carbide Motion, from load tool, add G-code:
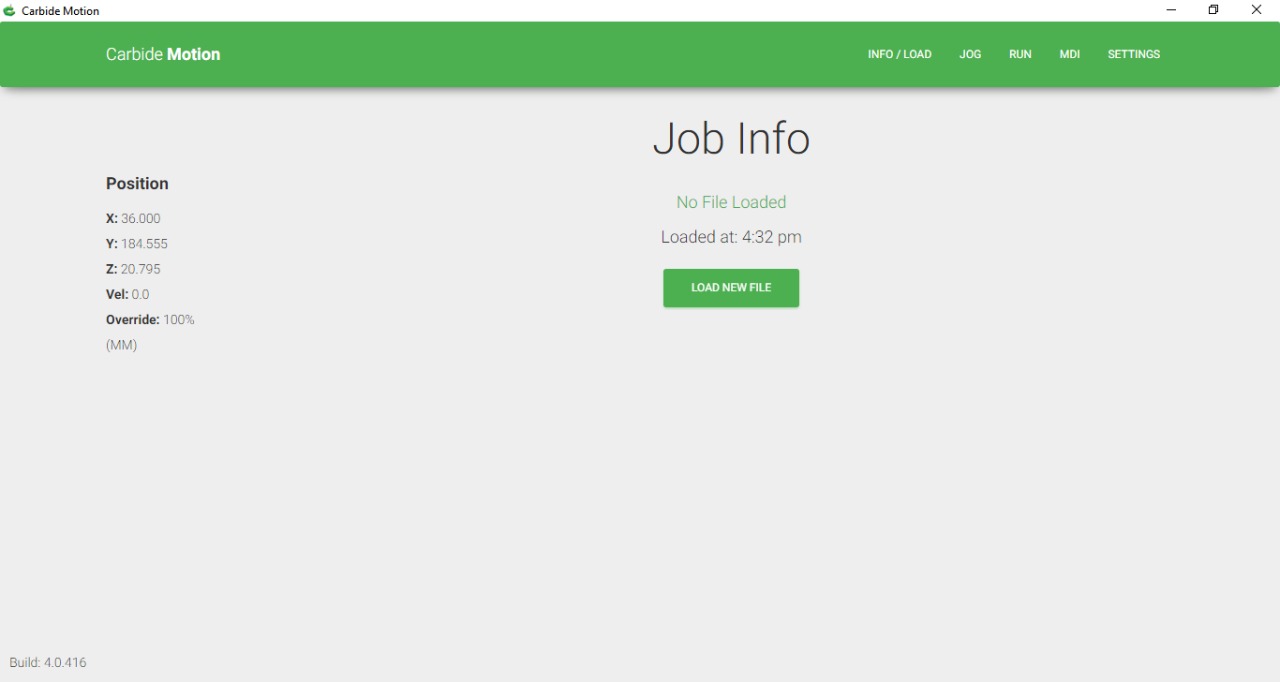
then go to run tool, and start working on the milling:
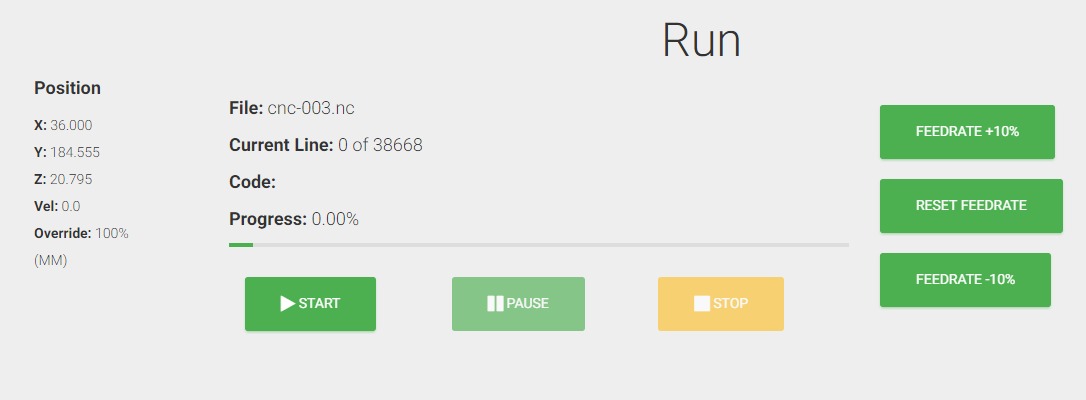
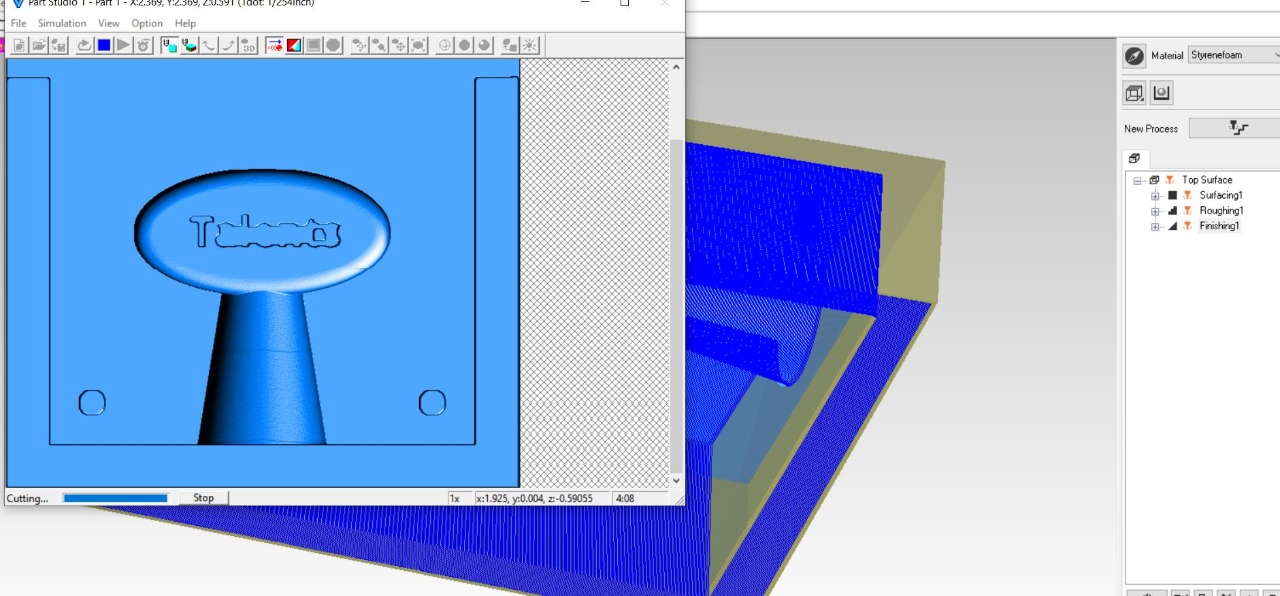
take a look at the mchainw while working :
and this one:
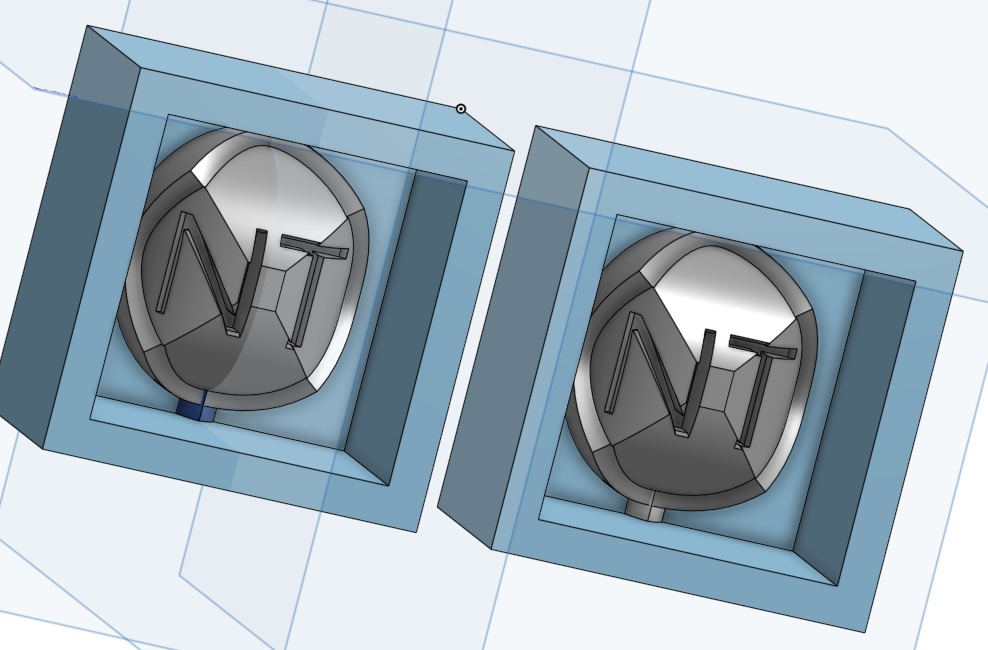
and heer are some models that comes from the machine, I ahve made any more just for testing...
then comes that mixing and fixing ....... booooring
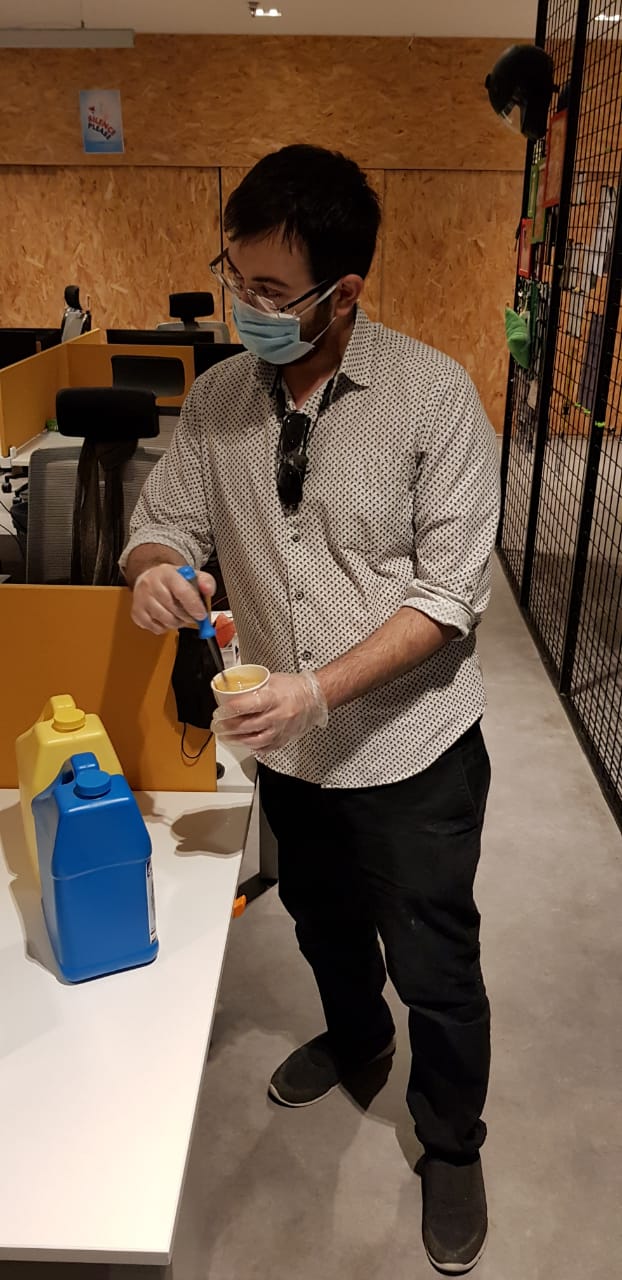
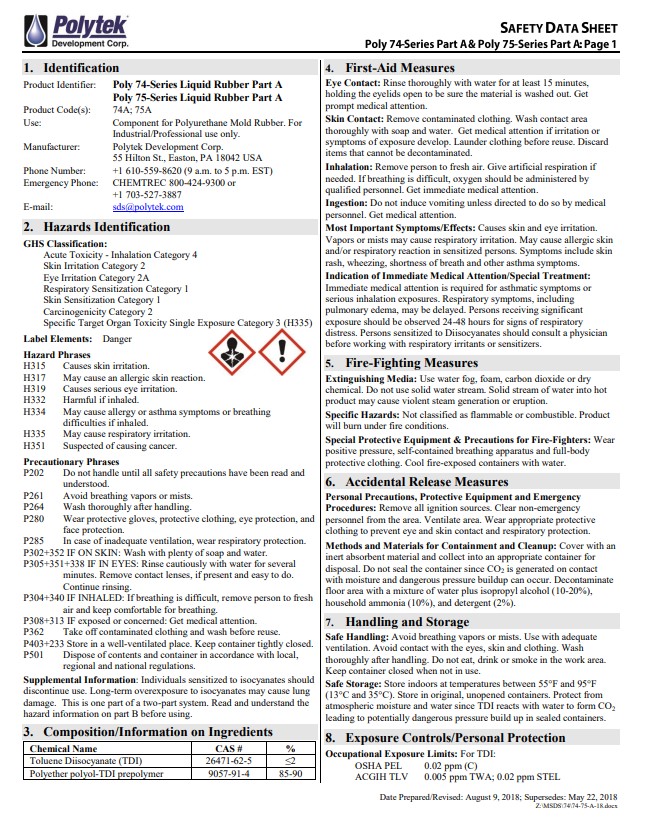
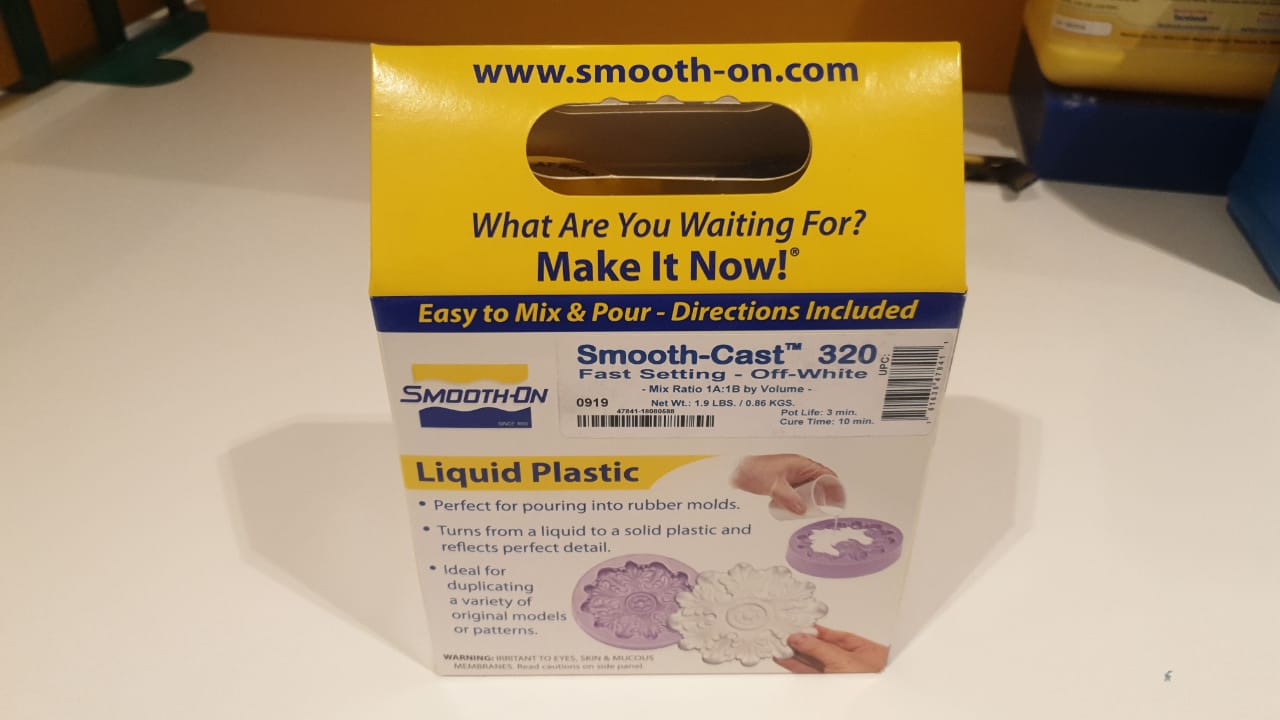
so I am using some toxic! or something like that, uncured plastic , so use a mask and gloves....
read the safety data sheet before starting to cast the molds _____I am using two different materials,check manufacturer of the material:
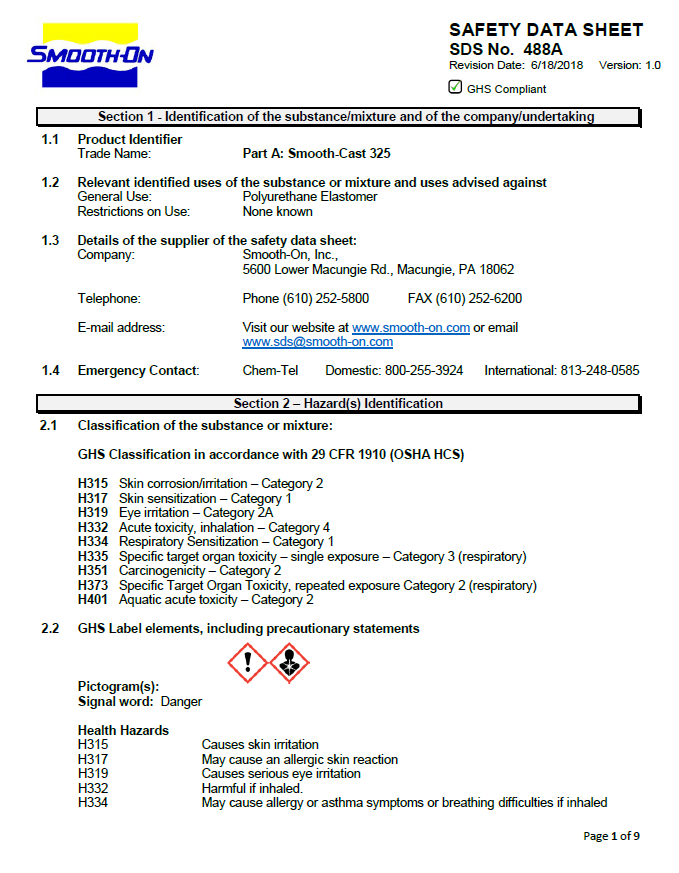
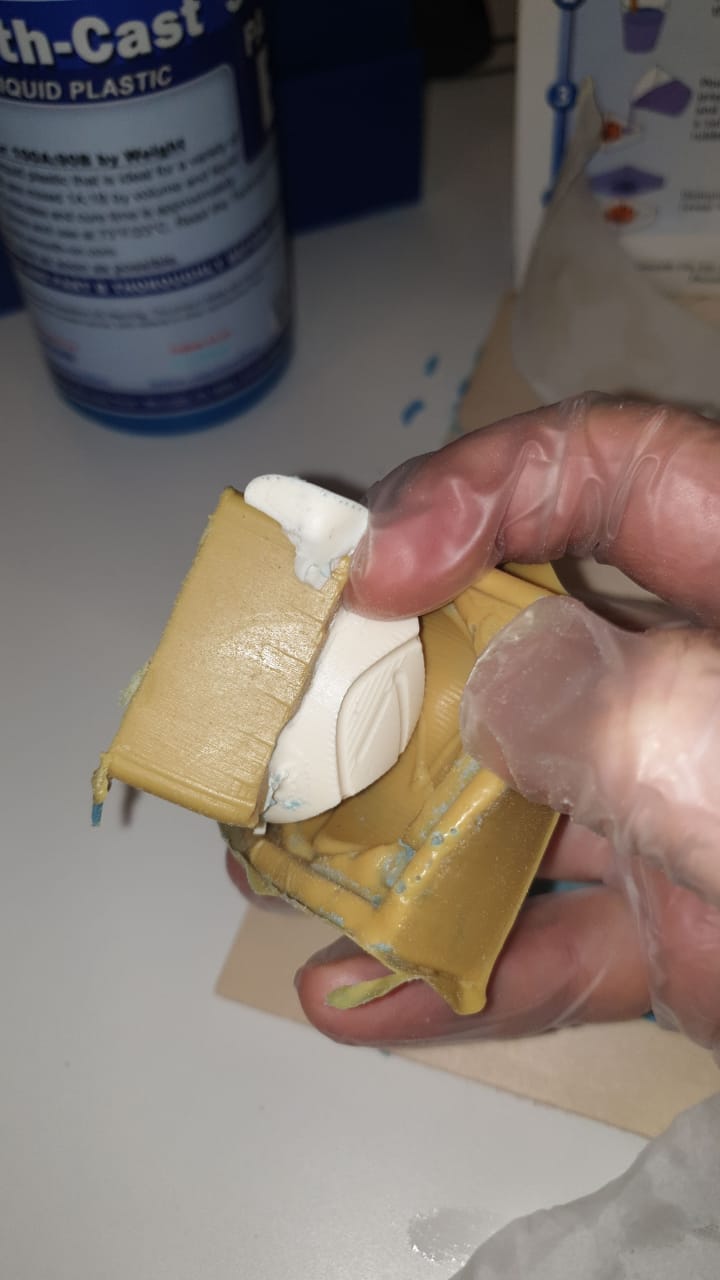
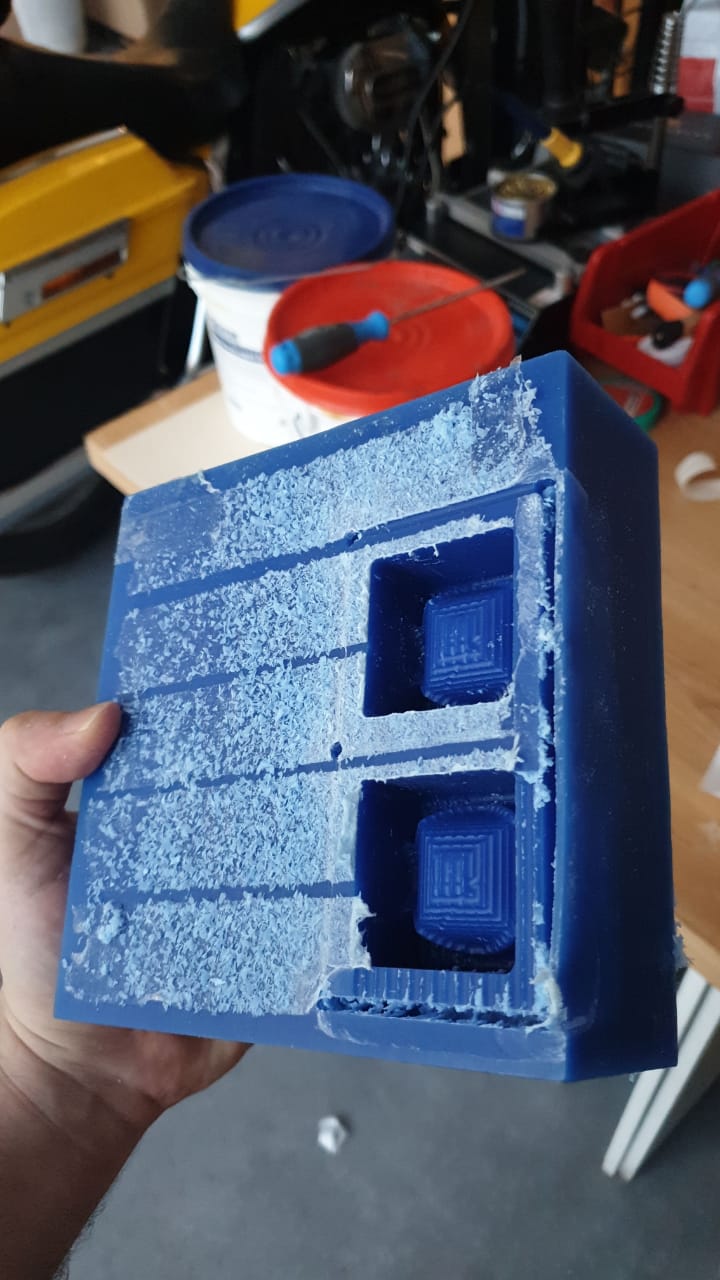
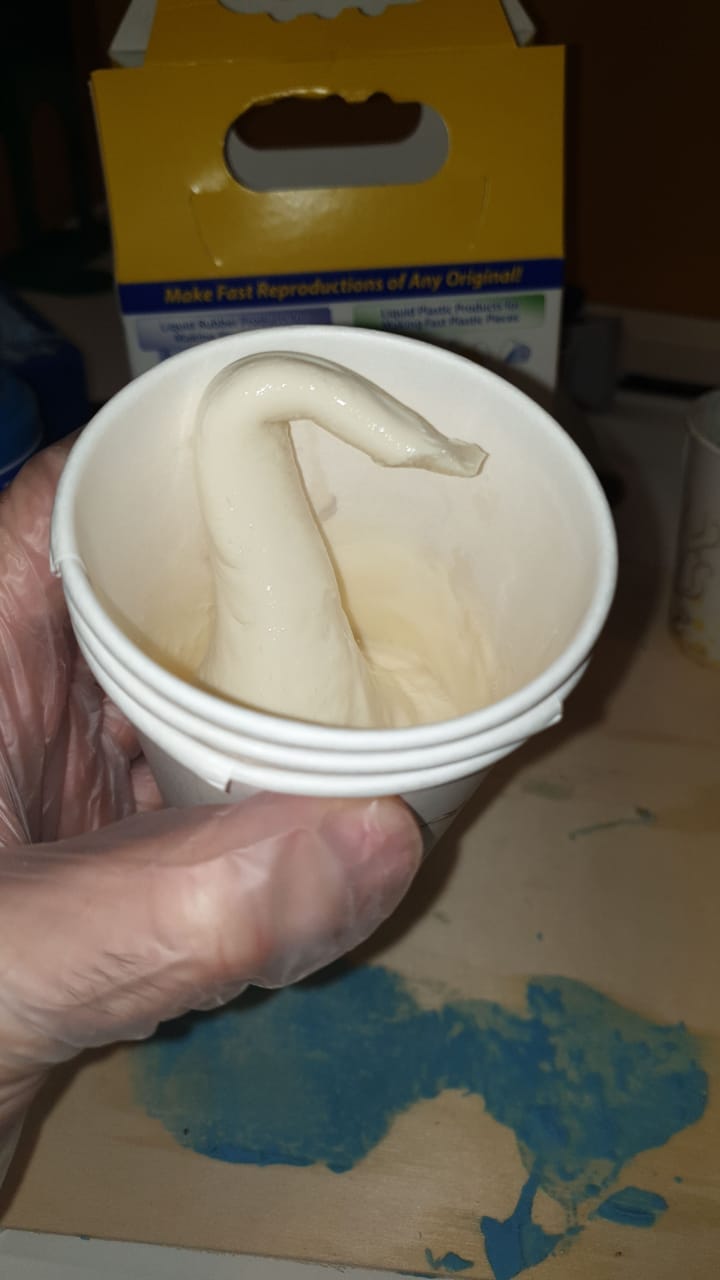
somehow, the first test was a big NO NO, check the pic, blue color did not work, yelow color worked fine:
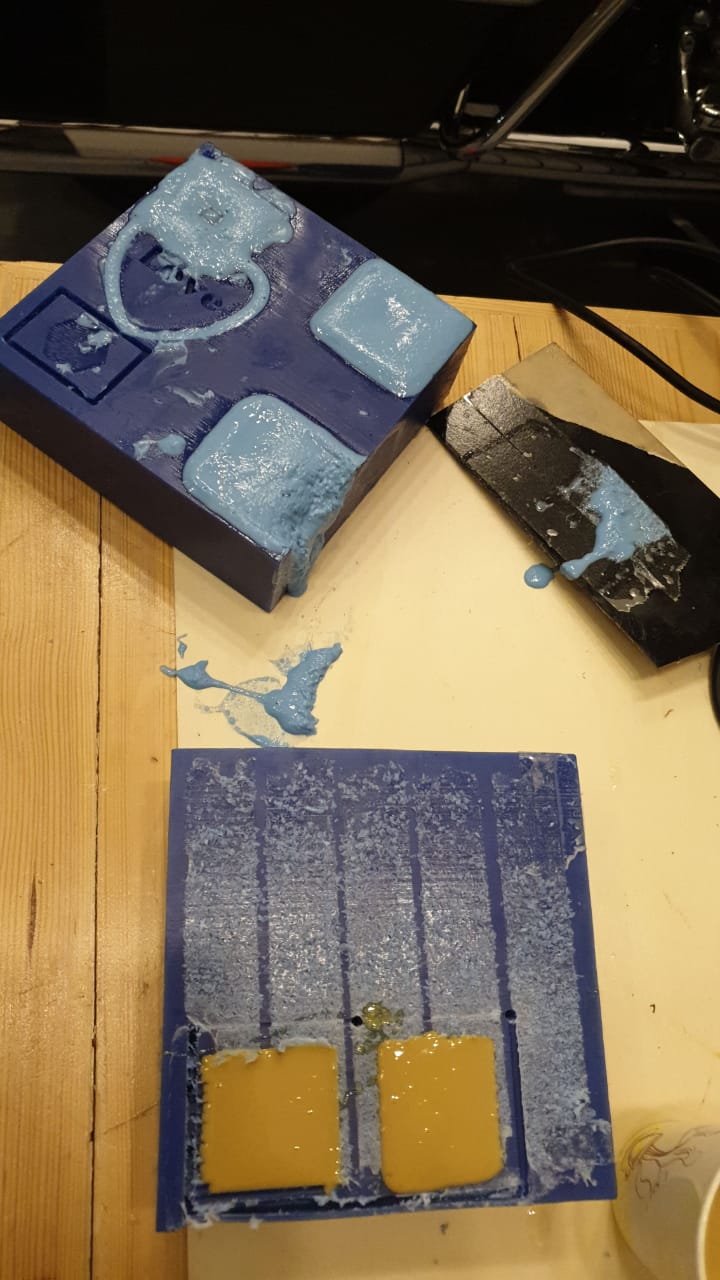
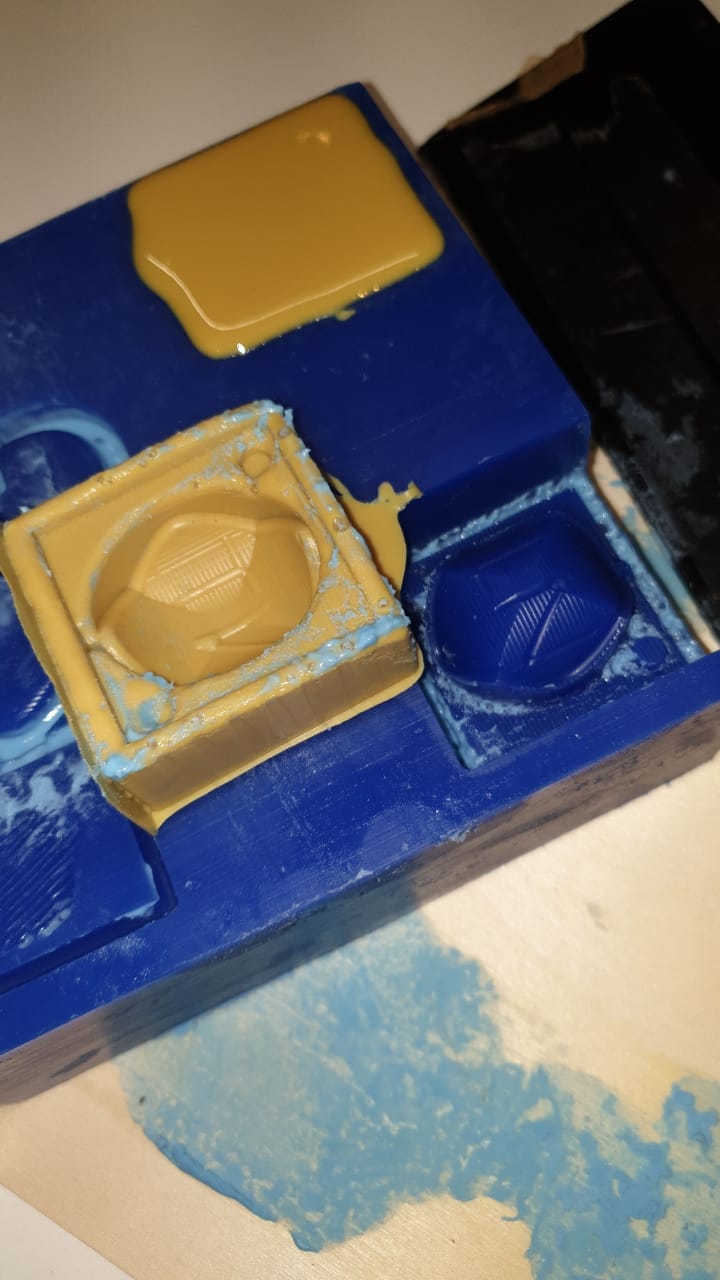
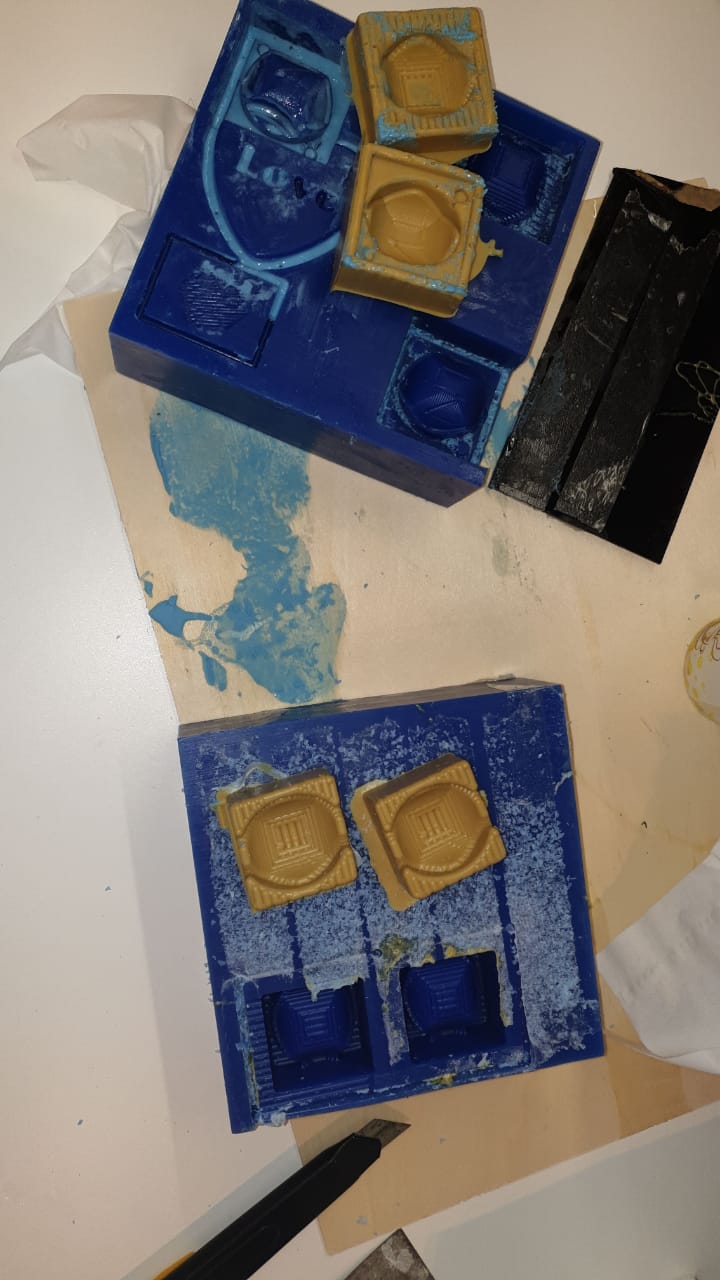
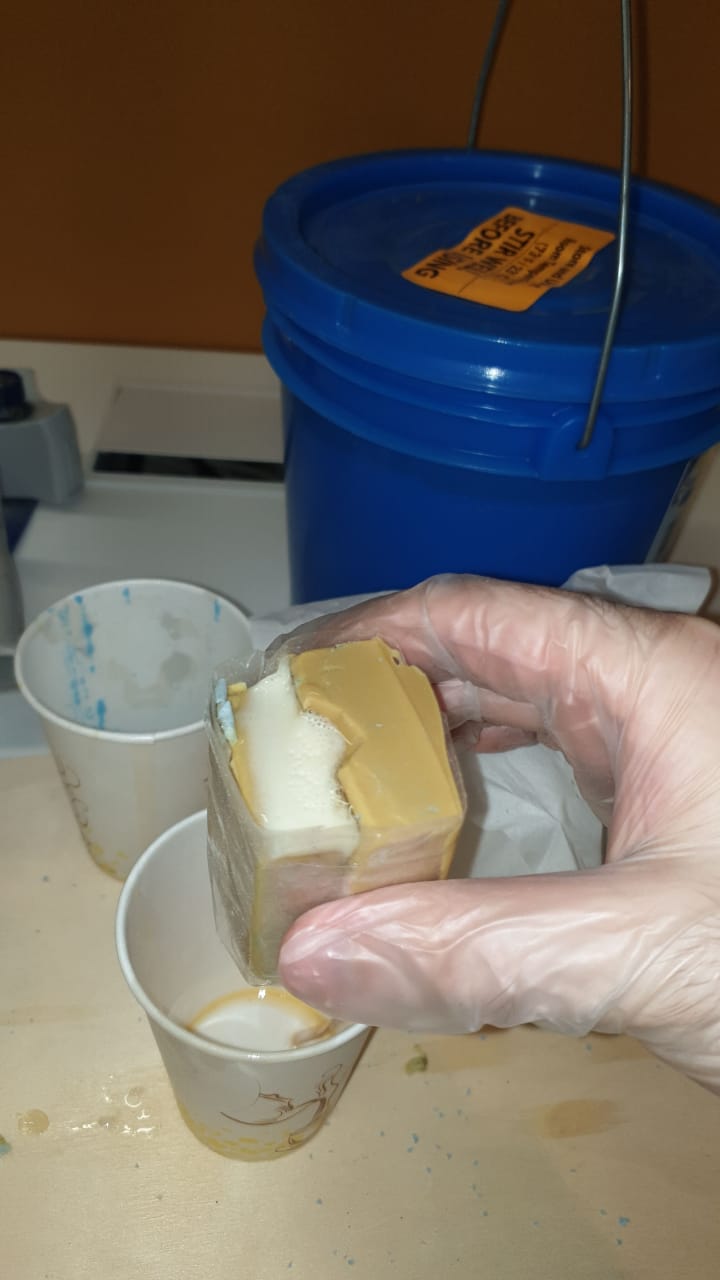
here is some resoults :
then go to the last mix for the plastic
first test was something eles!!!!!! a MONSTER came from the mix!!?!?!?
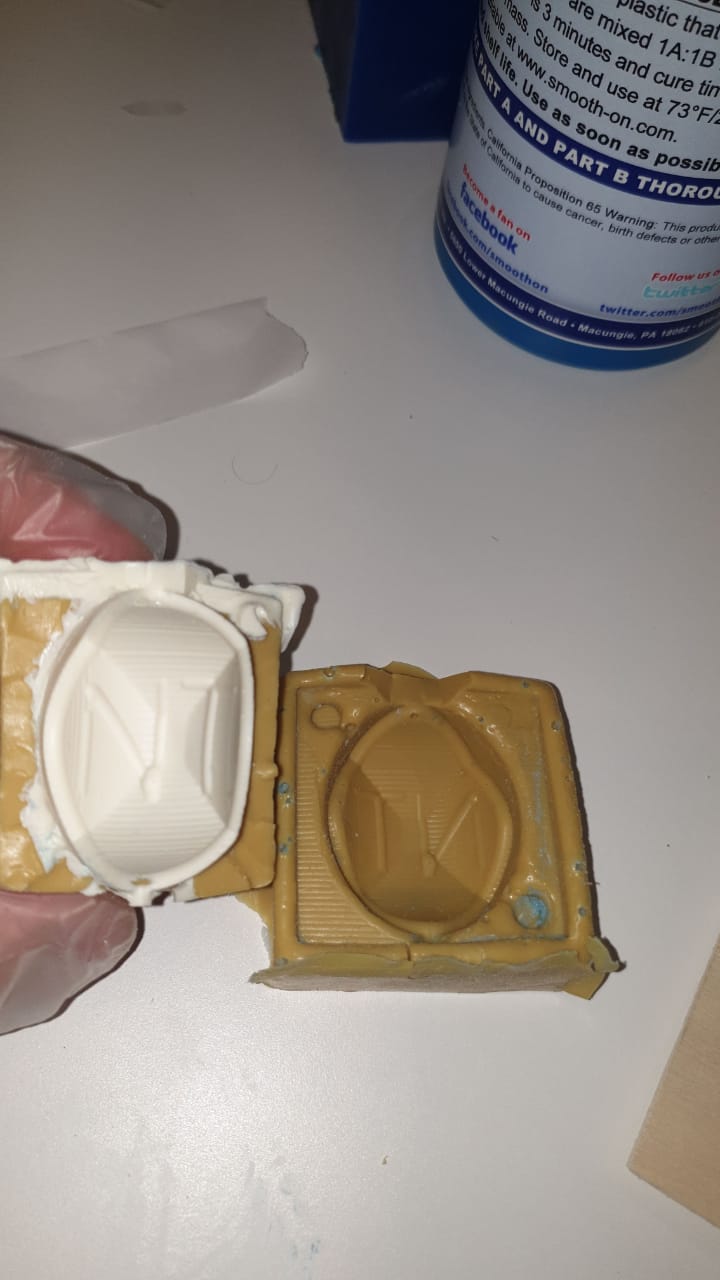
other test worked then I insert the mix to the it, then wated for 10 min
let's open it :