Group Assignment:
1) Test runout, alignment, speeds, feeds, and toolpaths for your machine.
Individual Assignments:
1) Make (design+mill+assemble) something big.
This was the most fun and creative week so far! I got the chance to think which object "bigger than a chair"
I wanted to make. Anything. I thought about many many many things (kayaks, stand up paddles, surf boards, study tables and so on)
but at the end I decided I was going to make a sunbed. The inspiration of my design came from this:
I looked up the documetation of Alessandro Alonzi from 2017
which made a sort of double chair and his design was very usefull to me. I used Onshape to design my
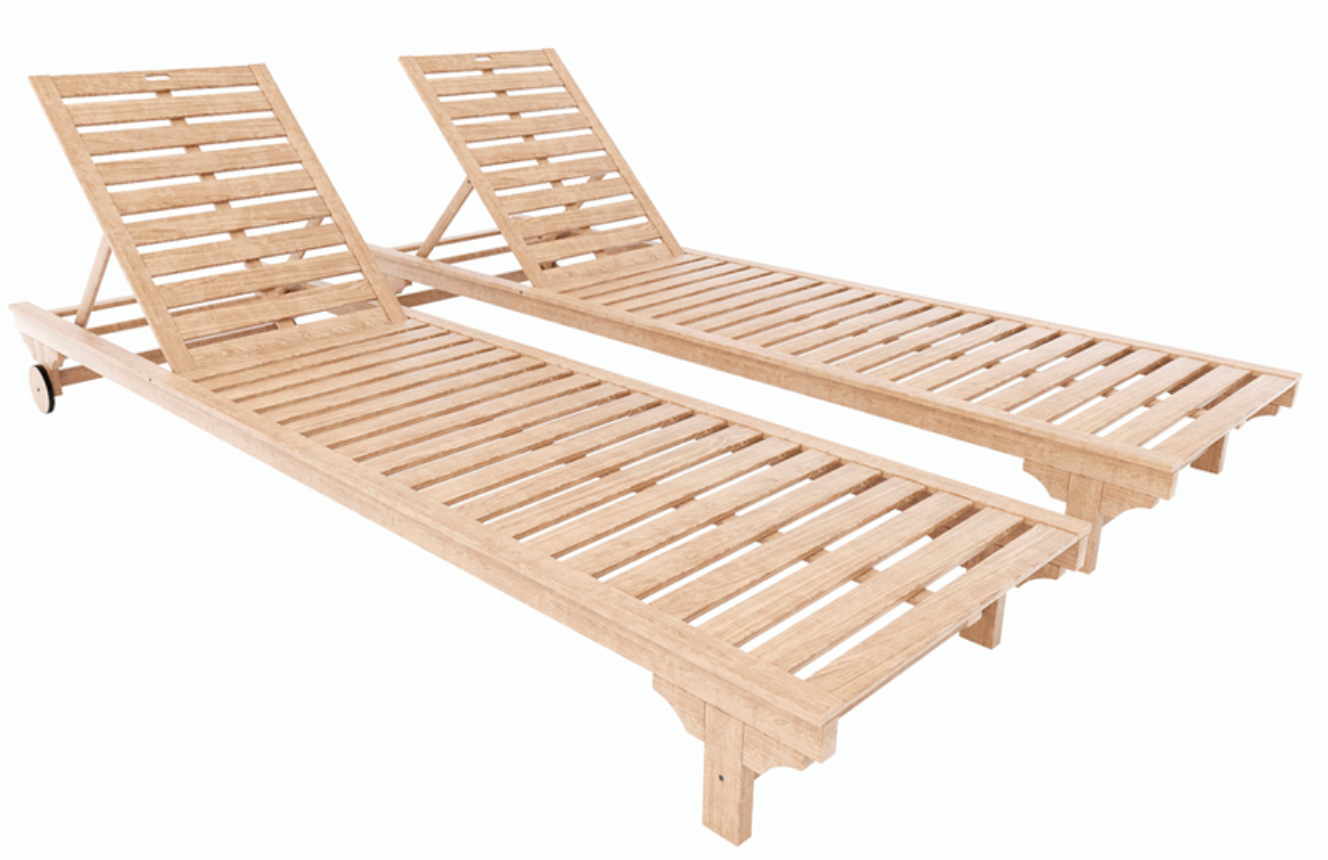
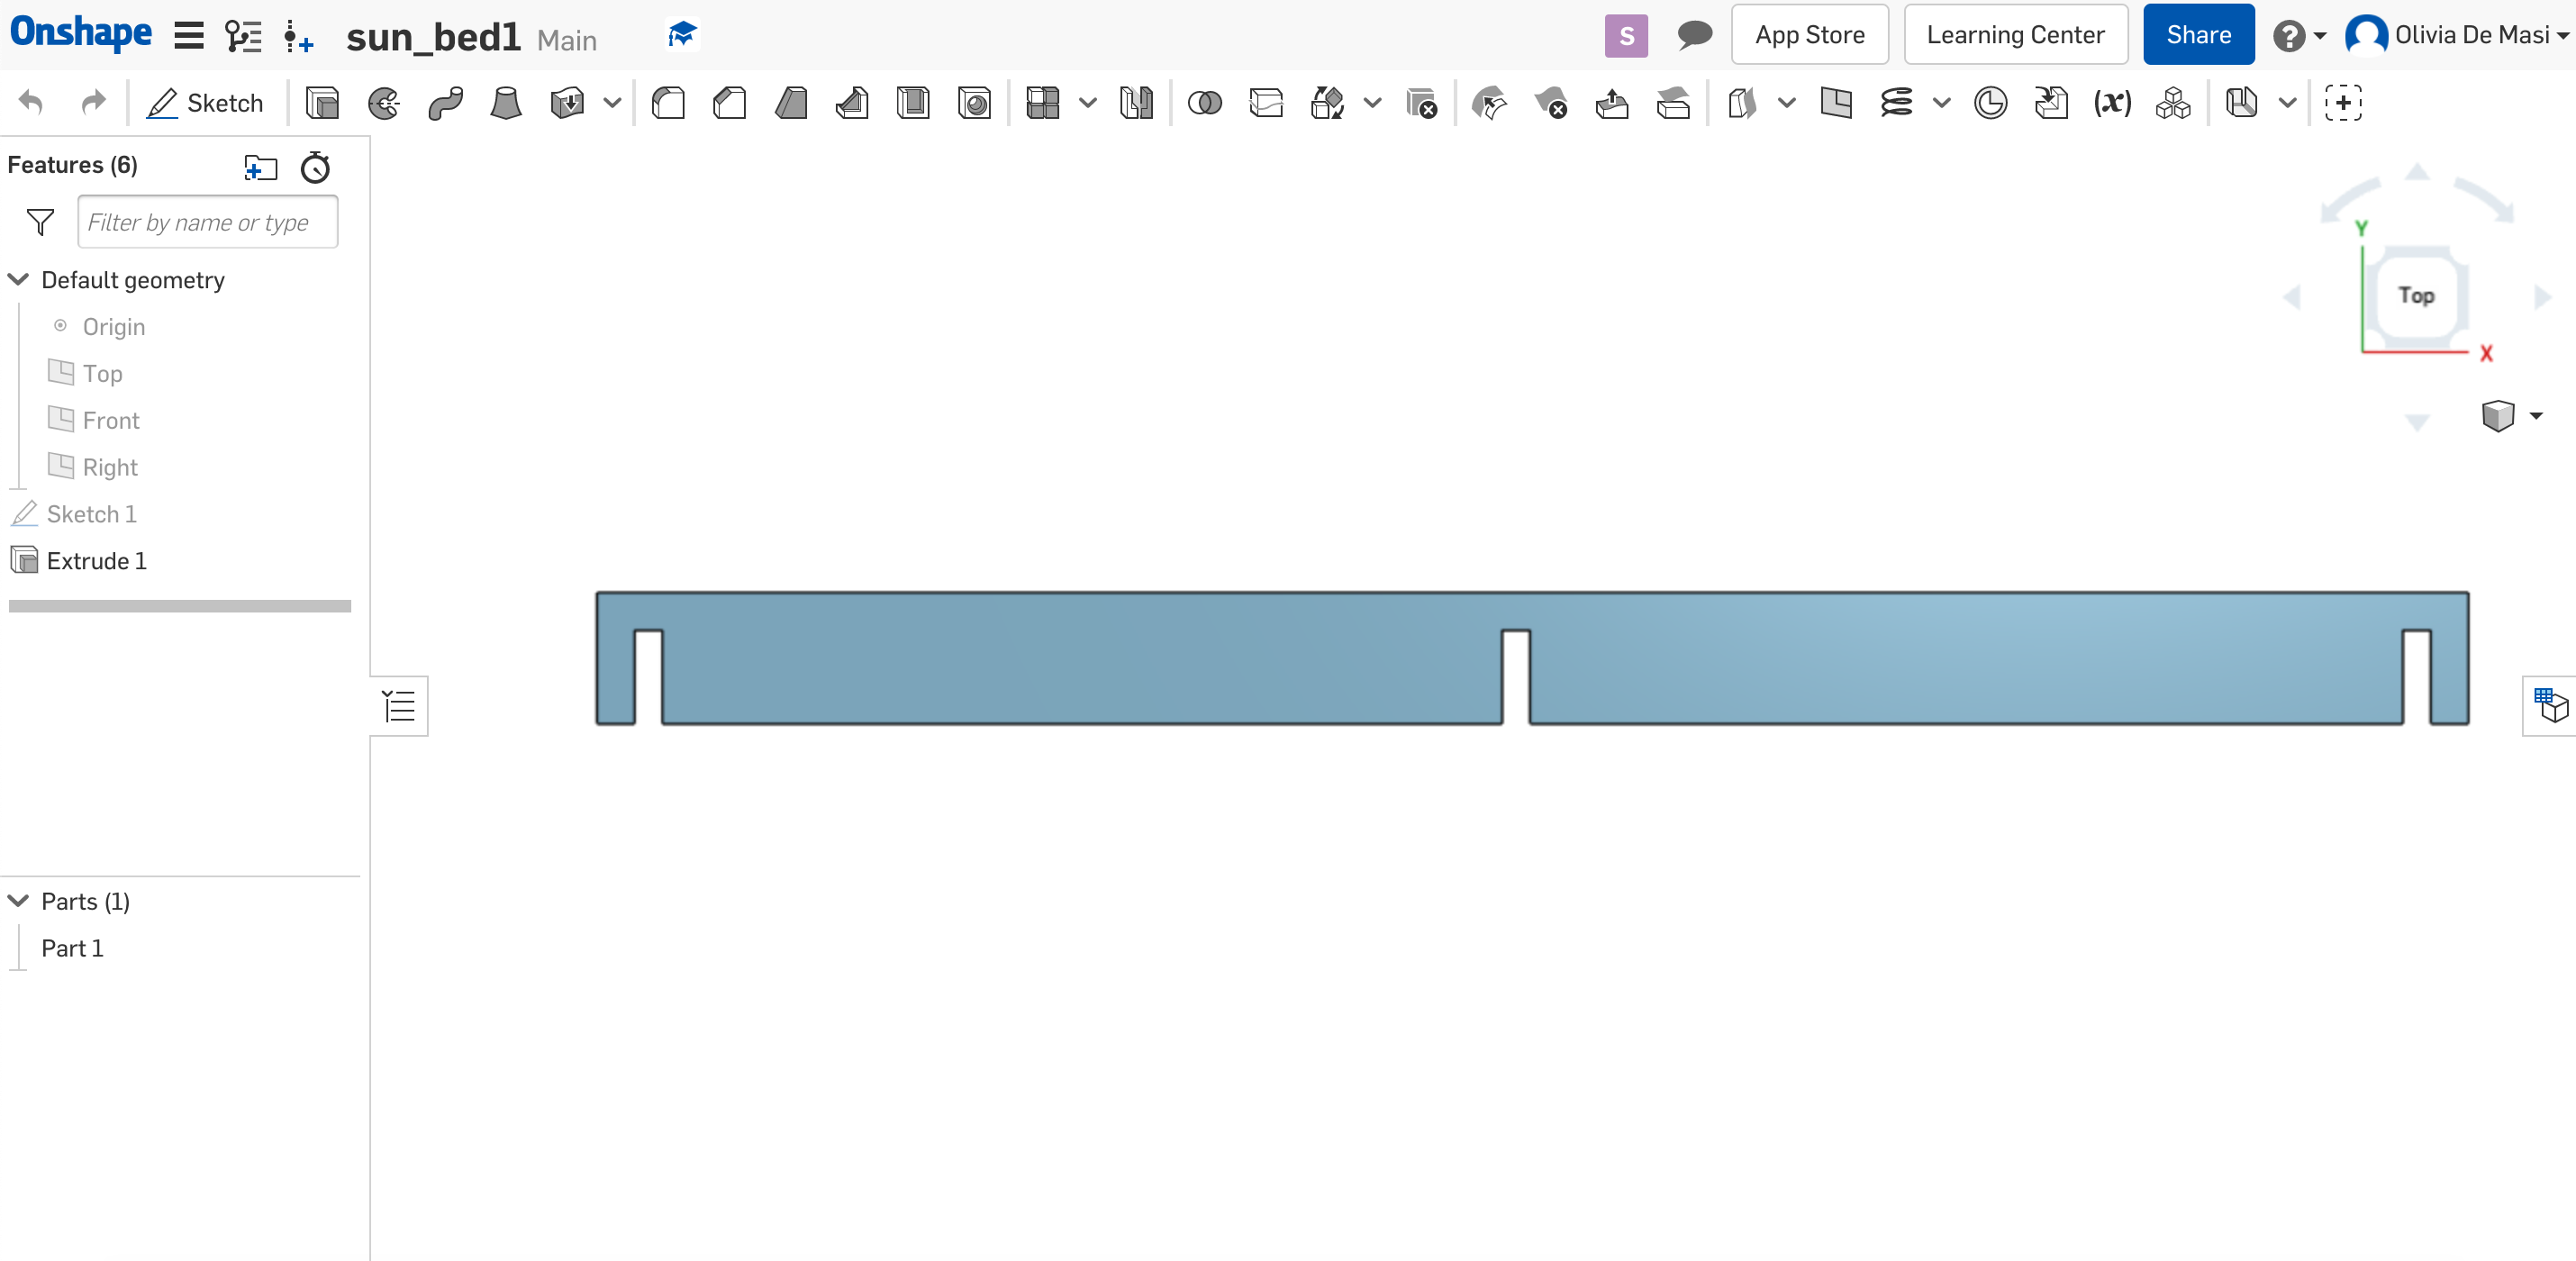
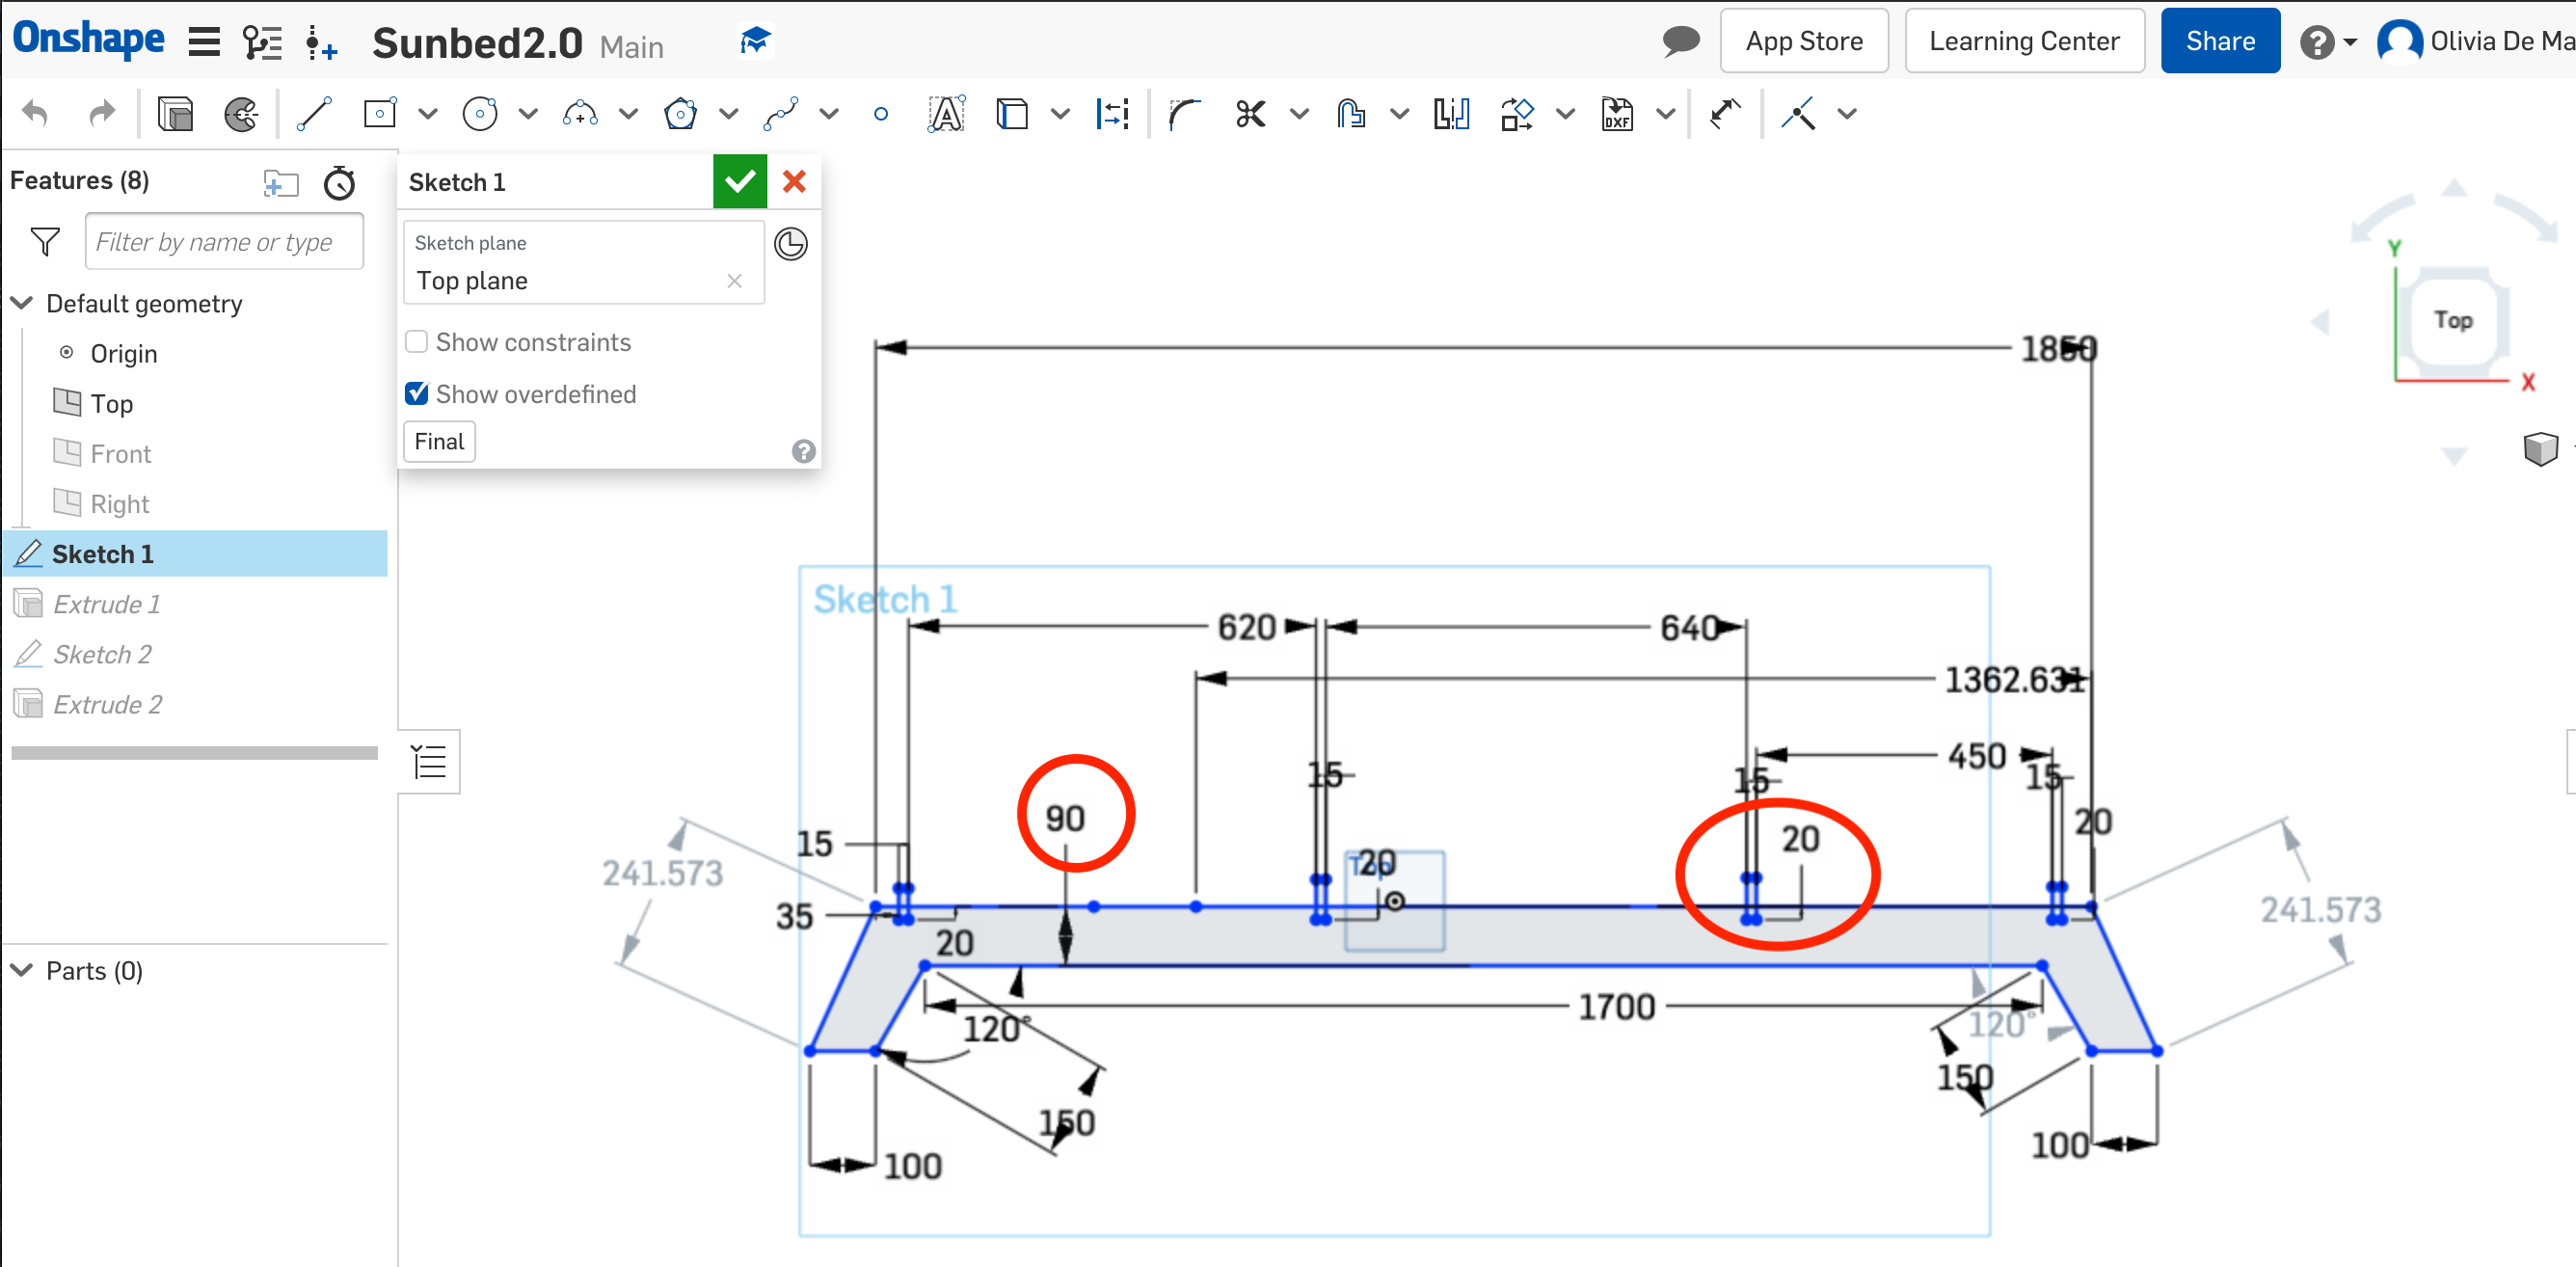
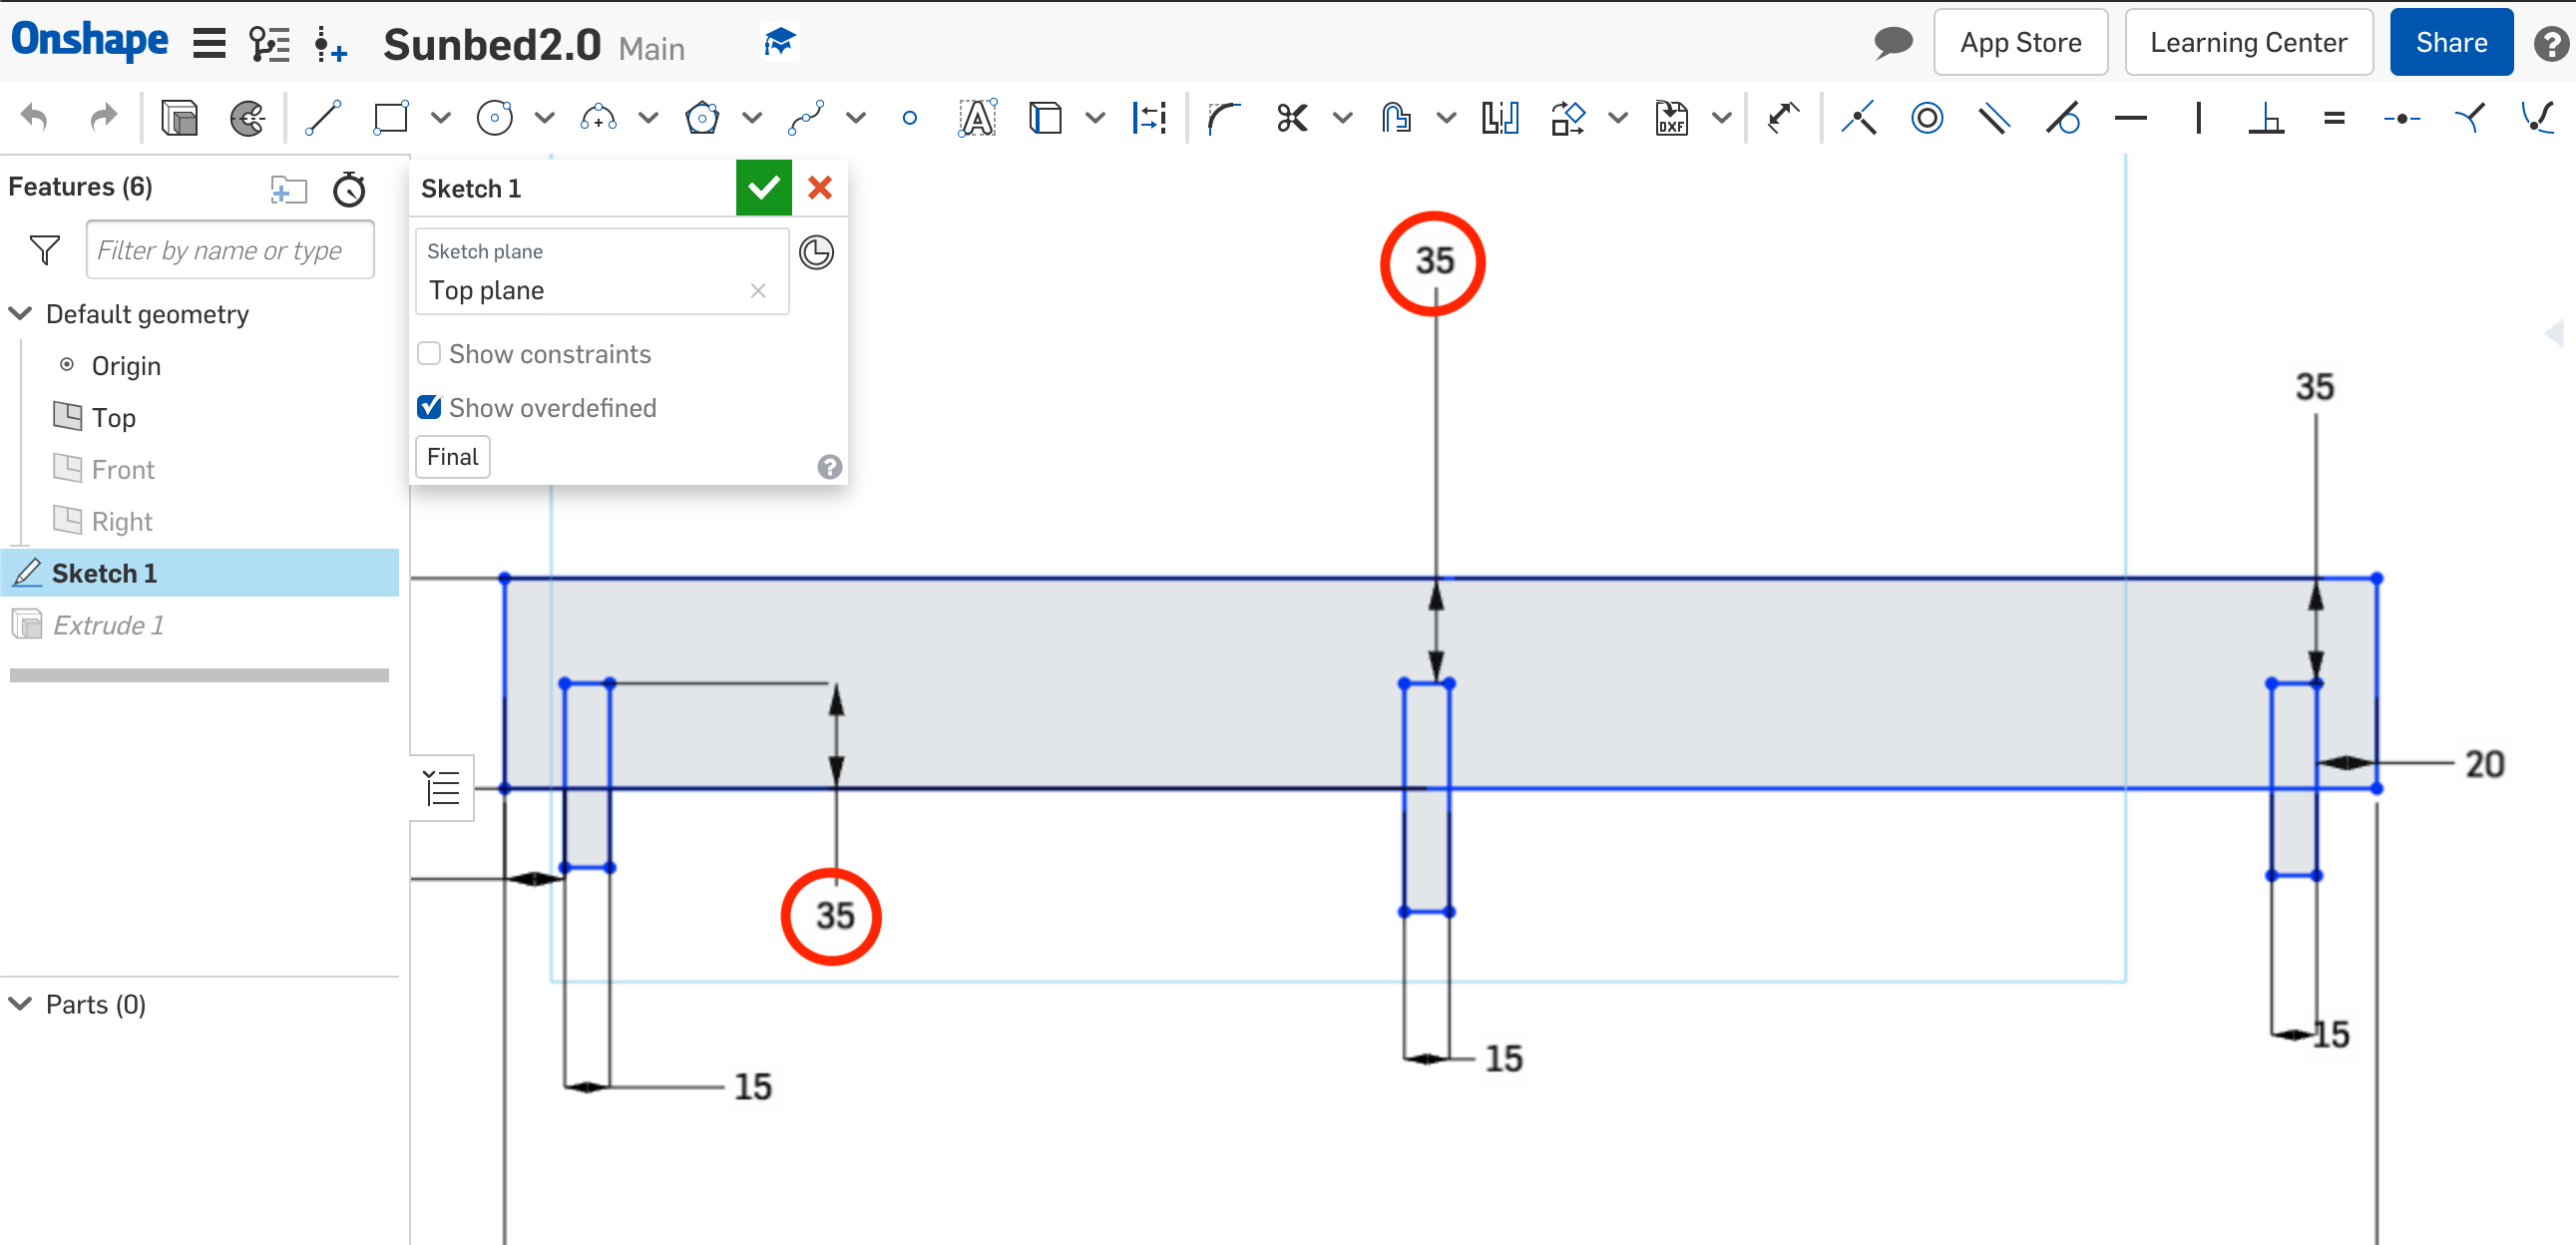
sunbed. I strated creating the lateral structure of the bed. These are the measurements that I've sketched for the right side given a 2.50 x 1.25 x 0.15 mt OSB pieace. The small
rectangles are going to be the holes where I'm going to insert some supportive bridges.
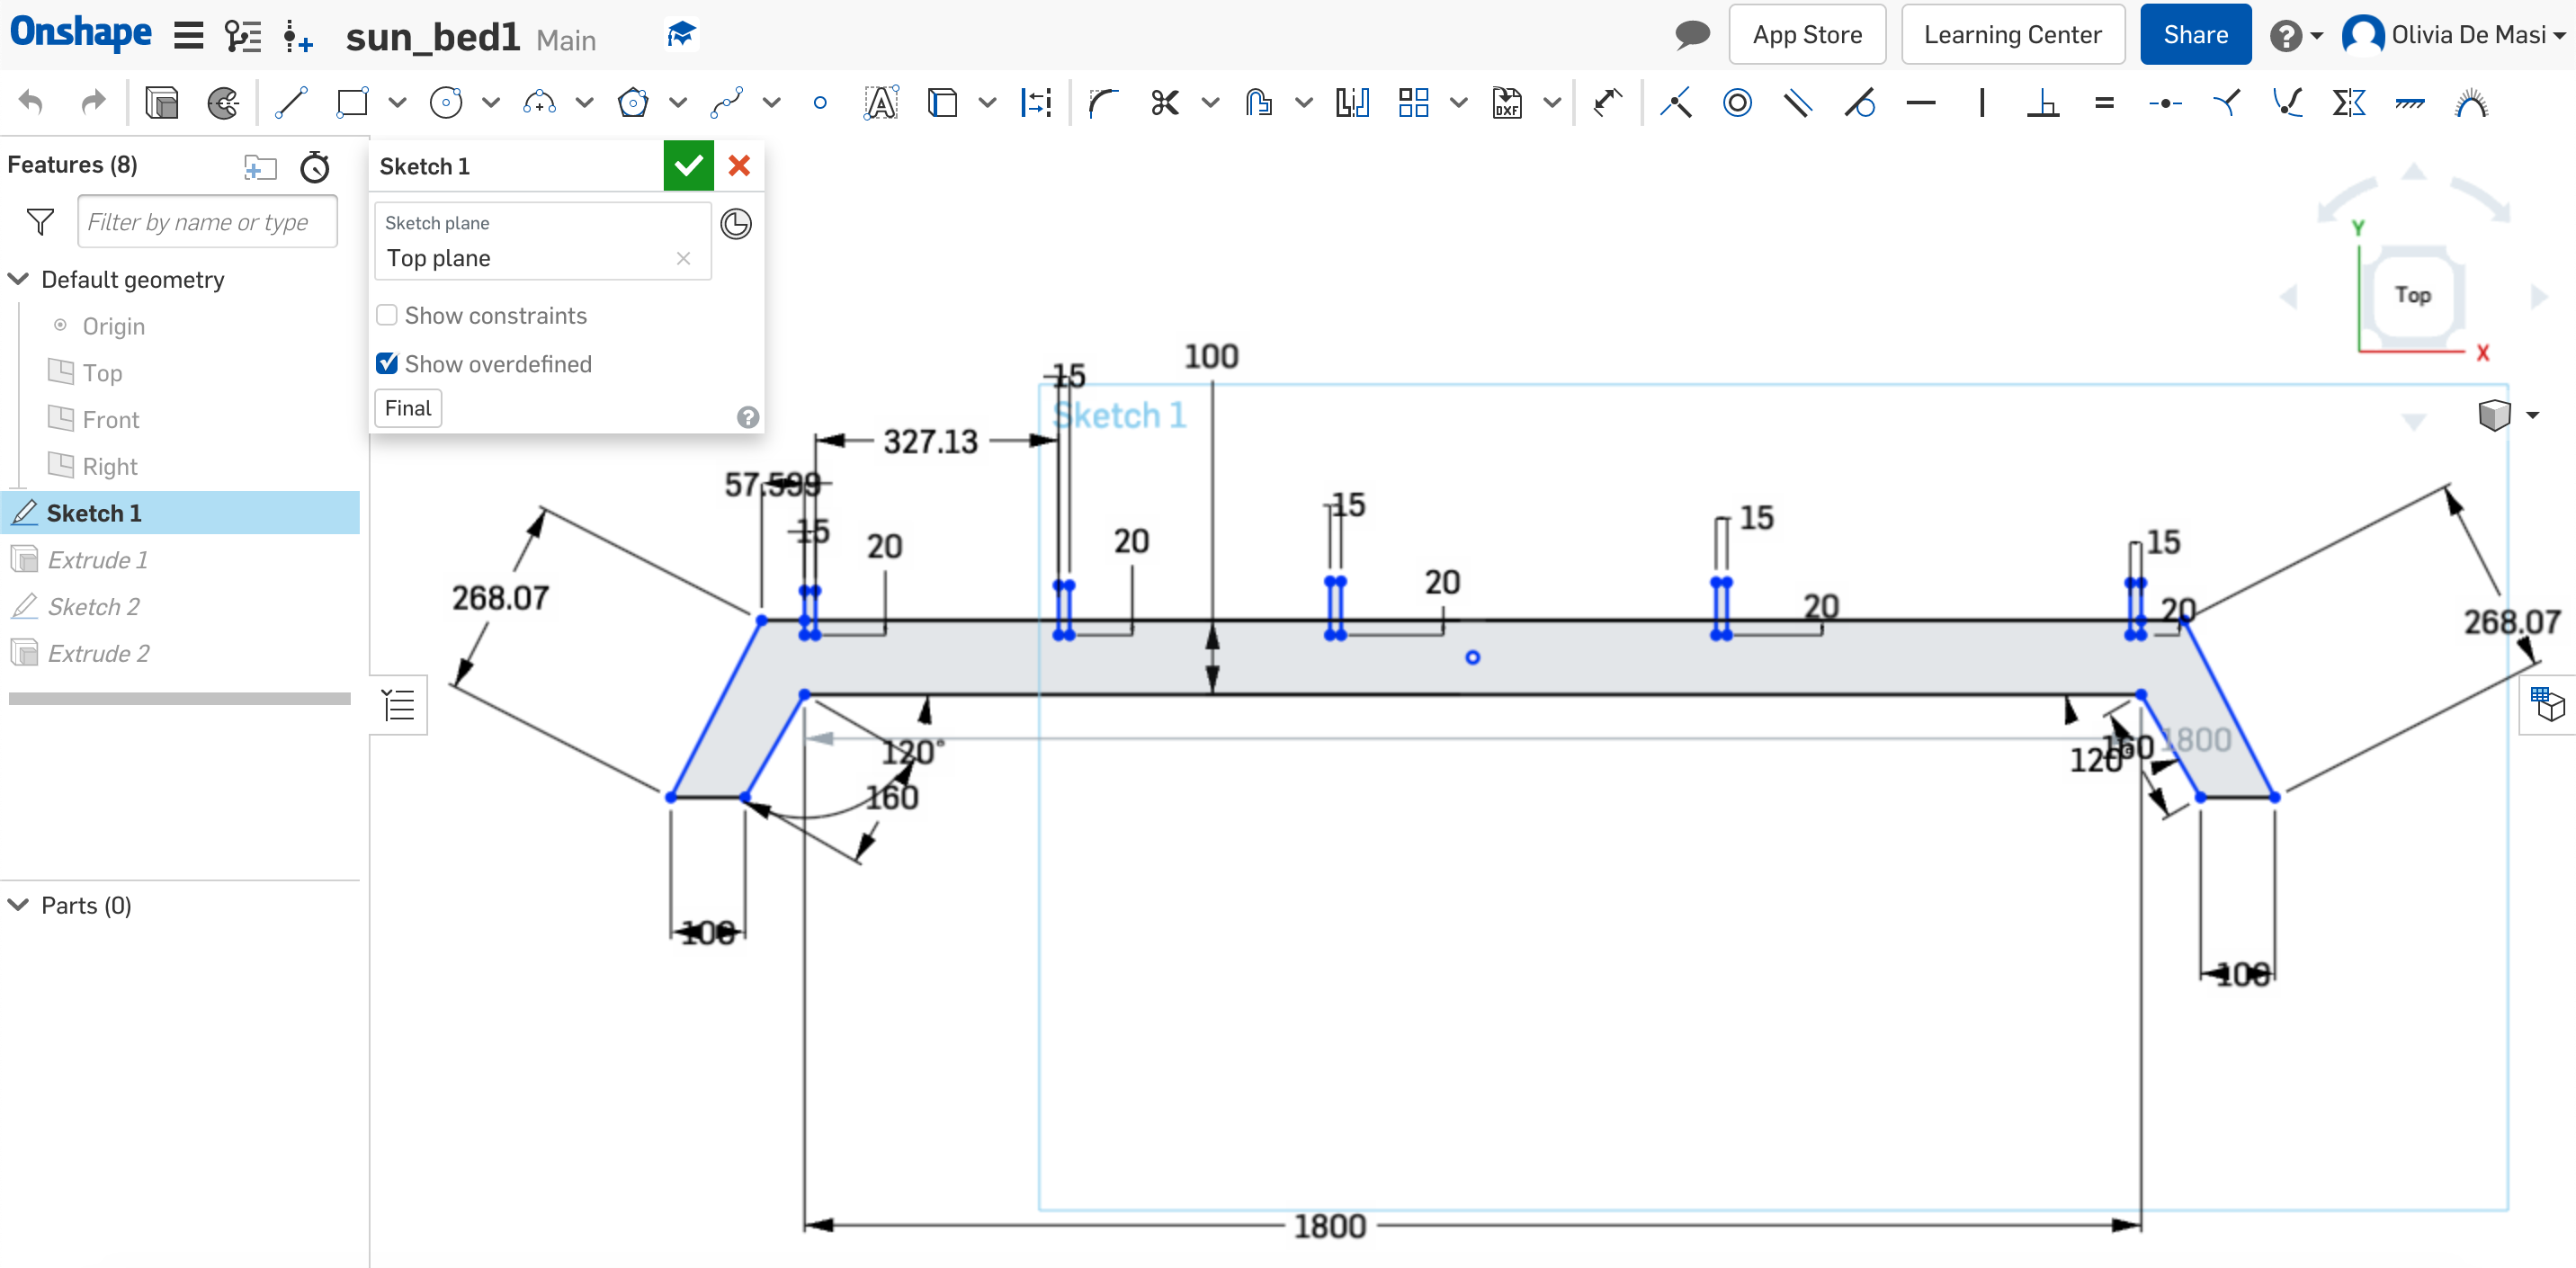
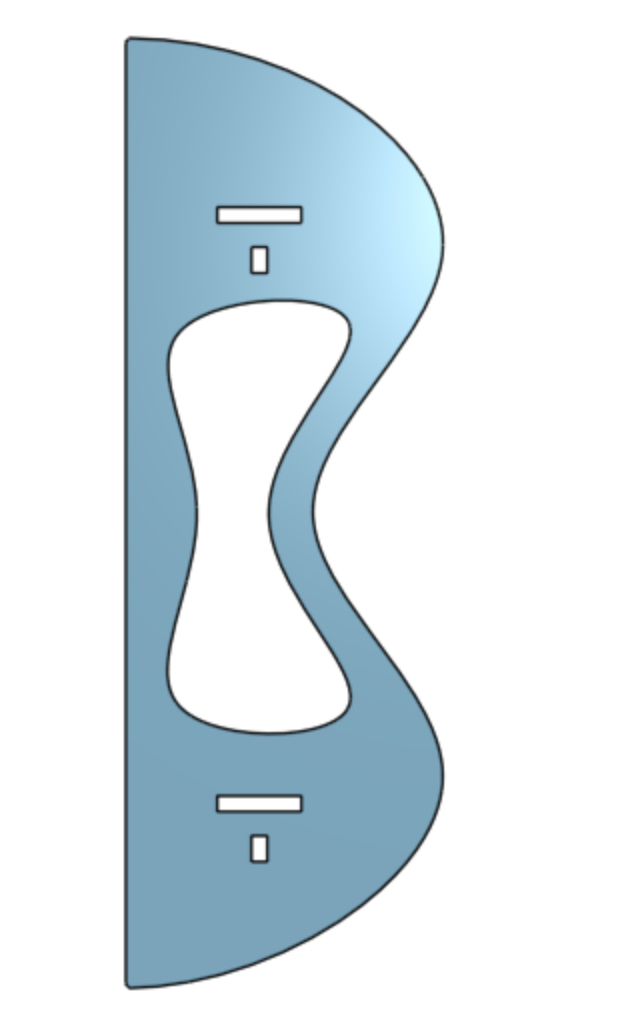
Whether the rectangles in the next picture represent the hole in which the normal slats will sit.
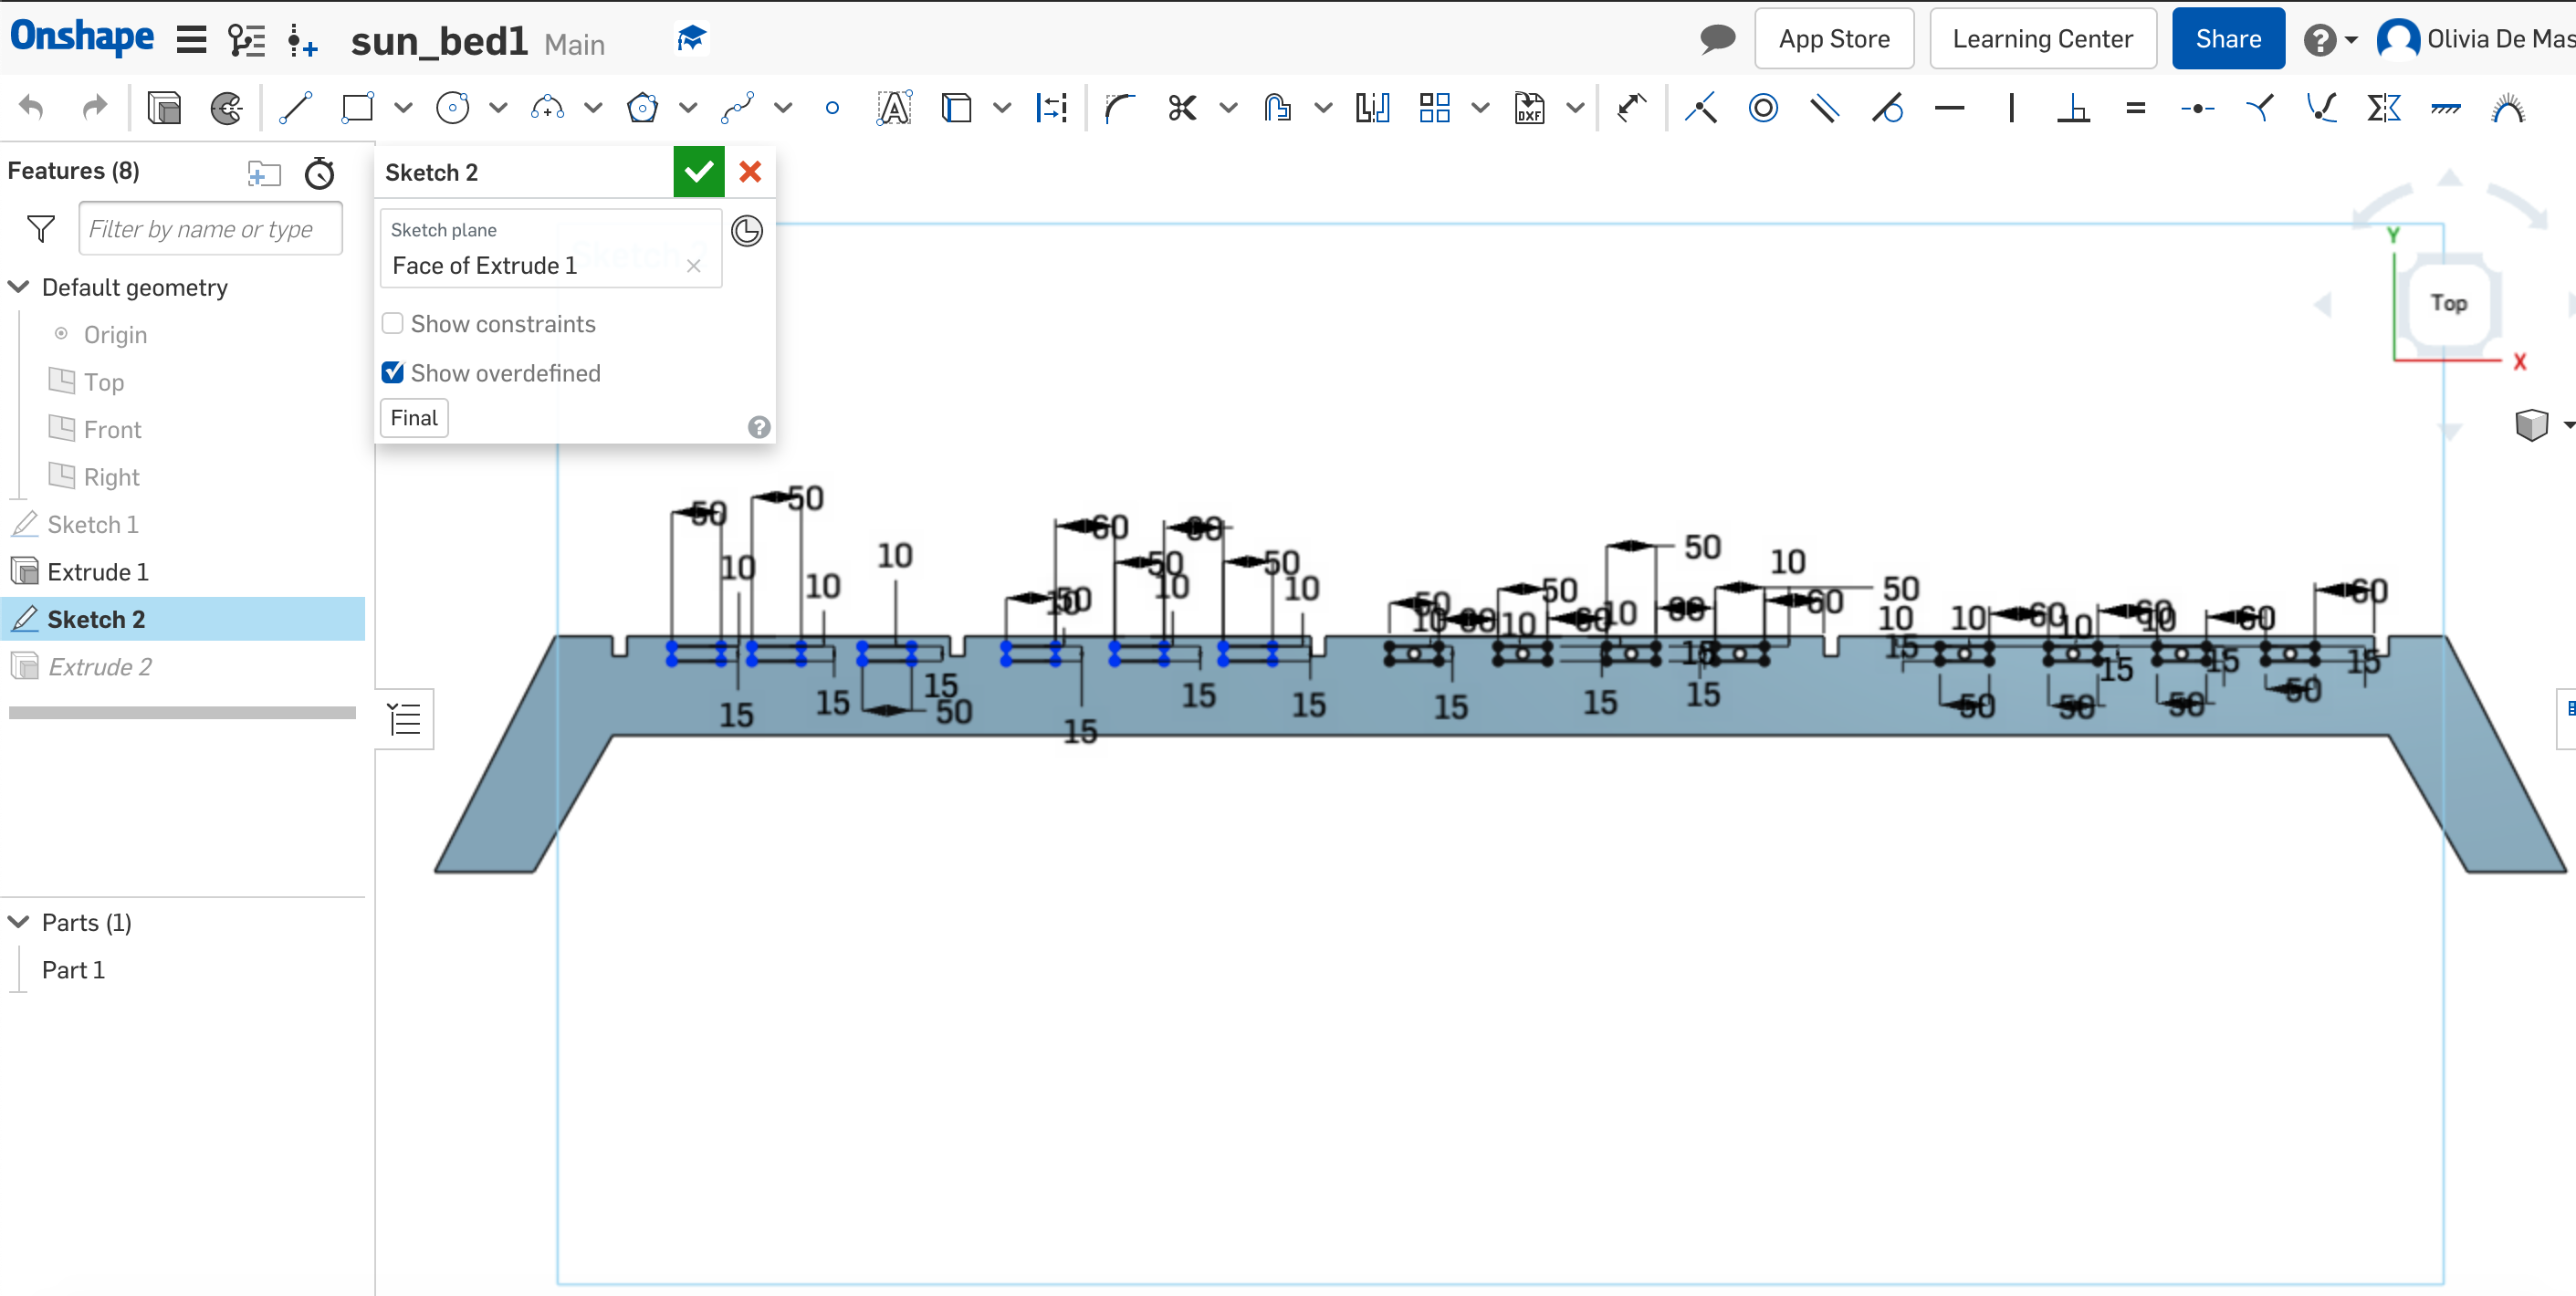
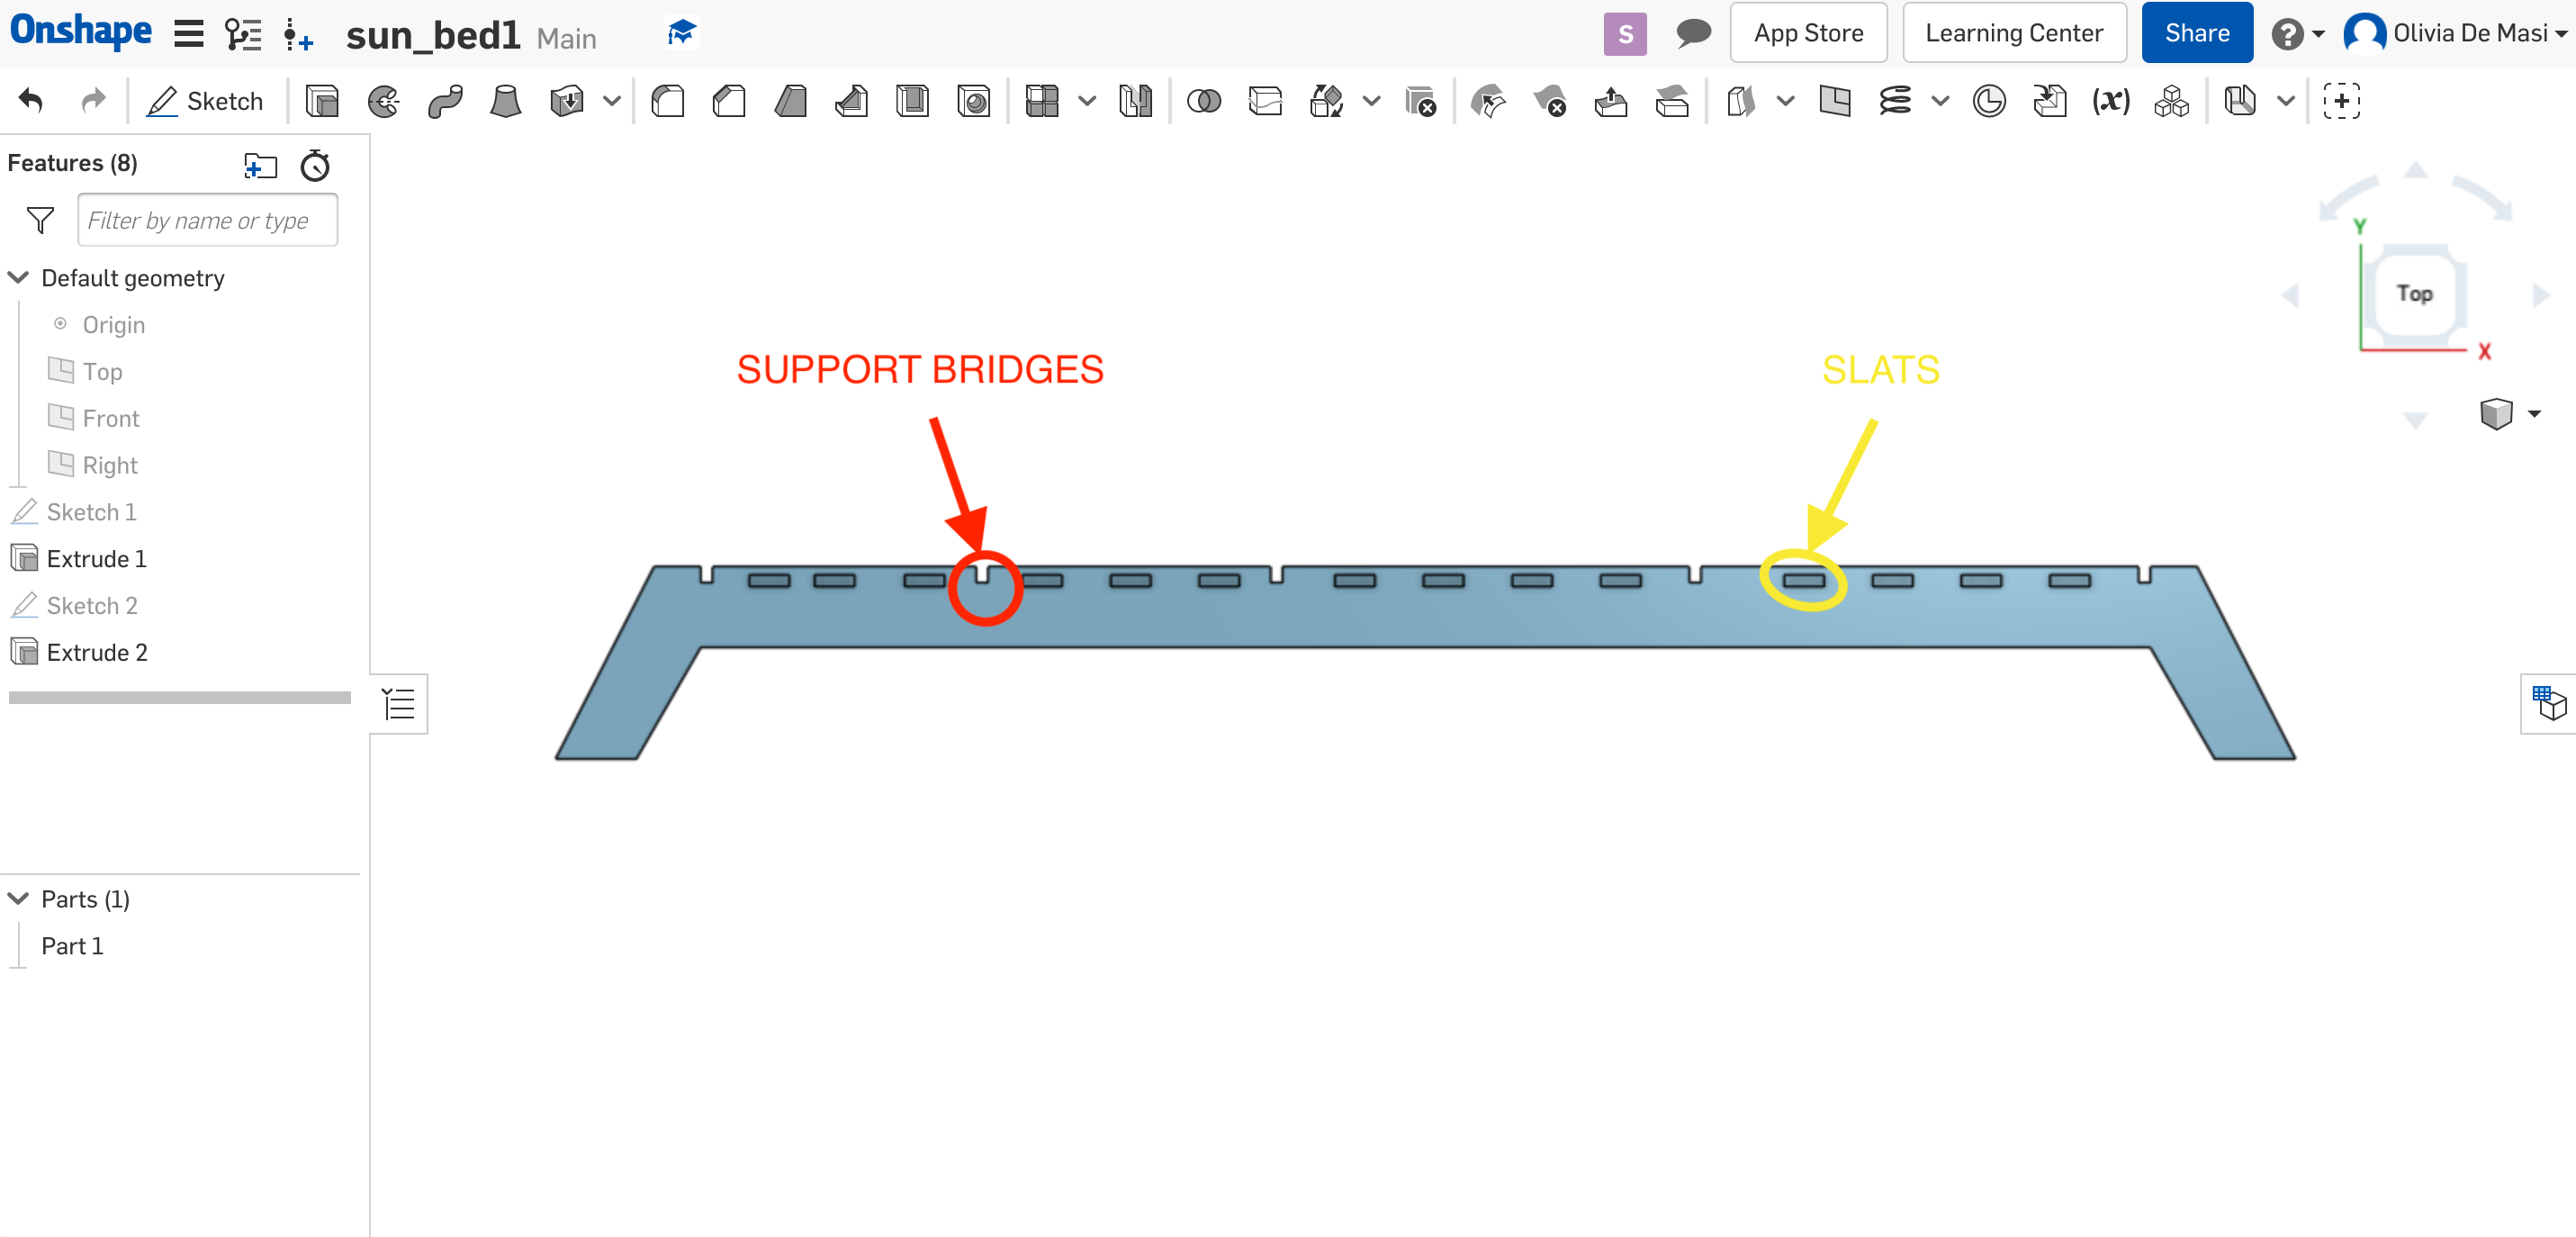
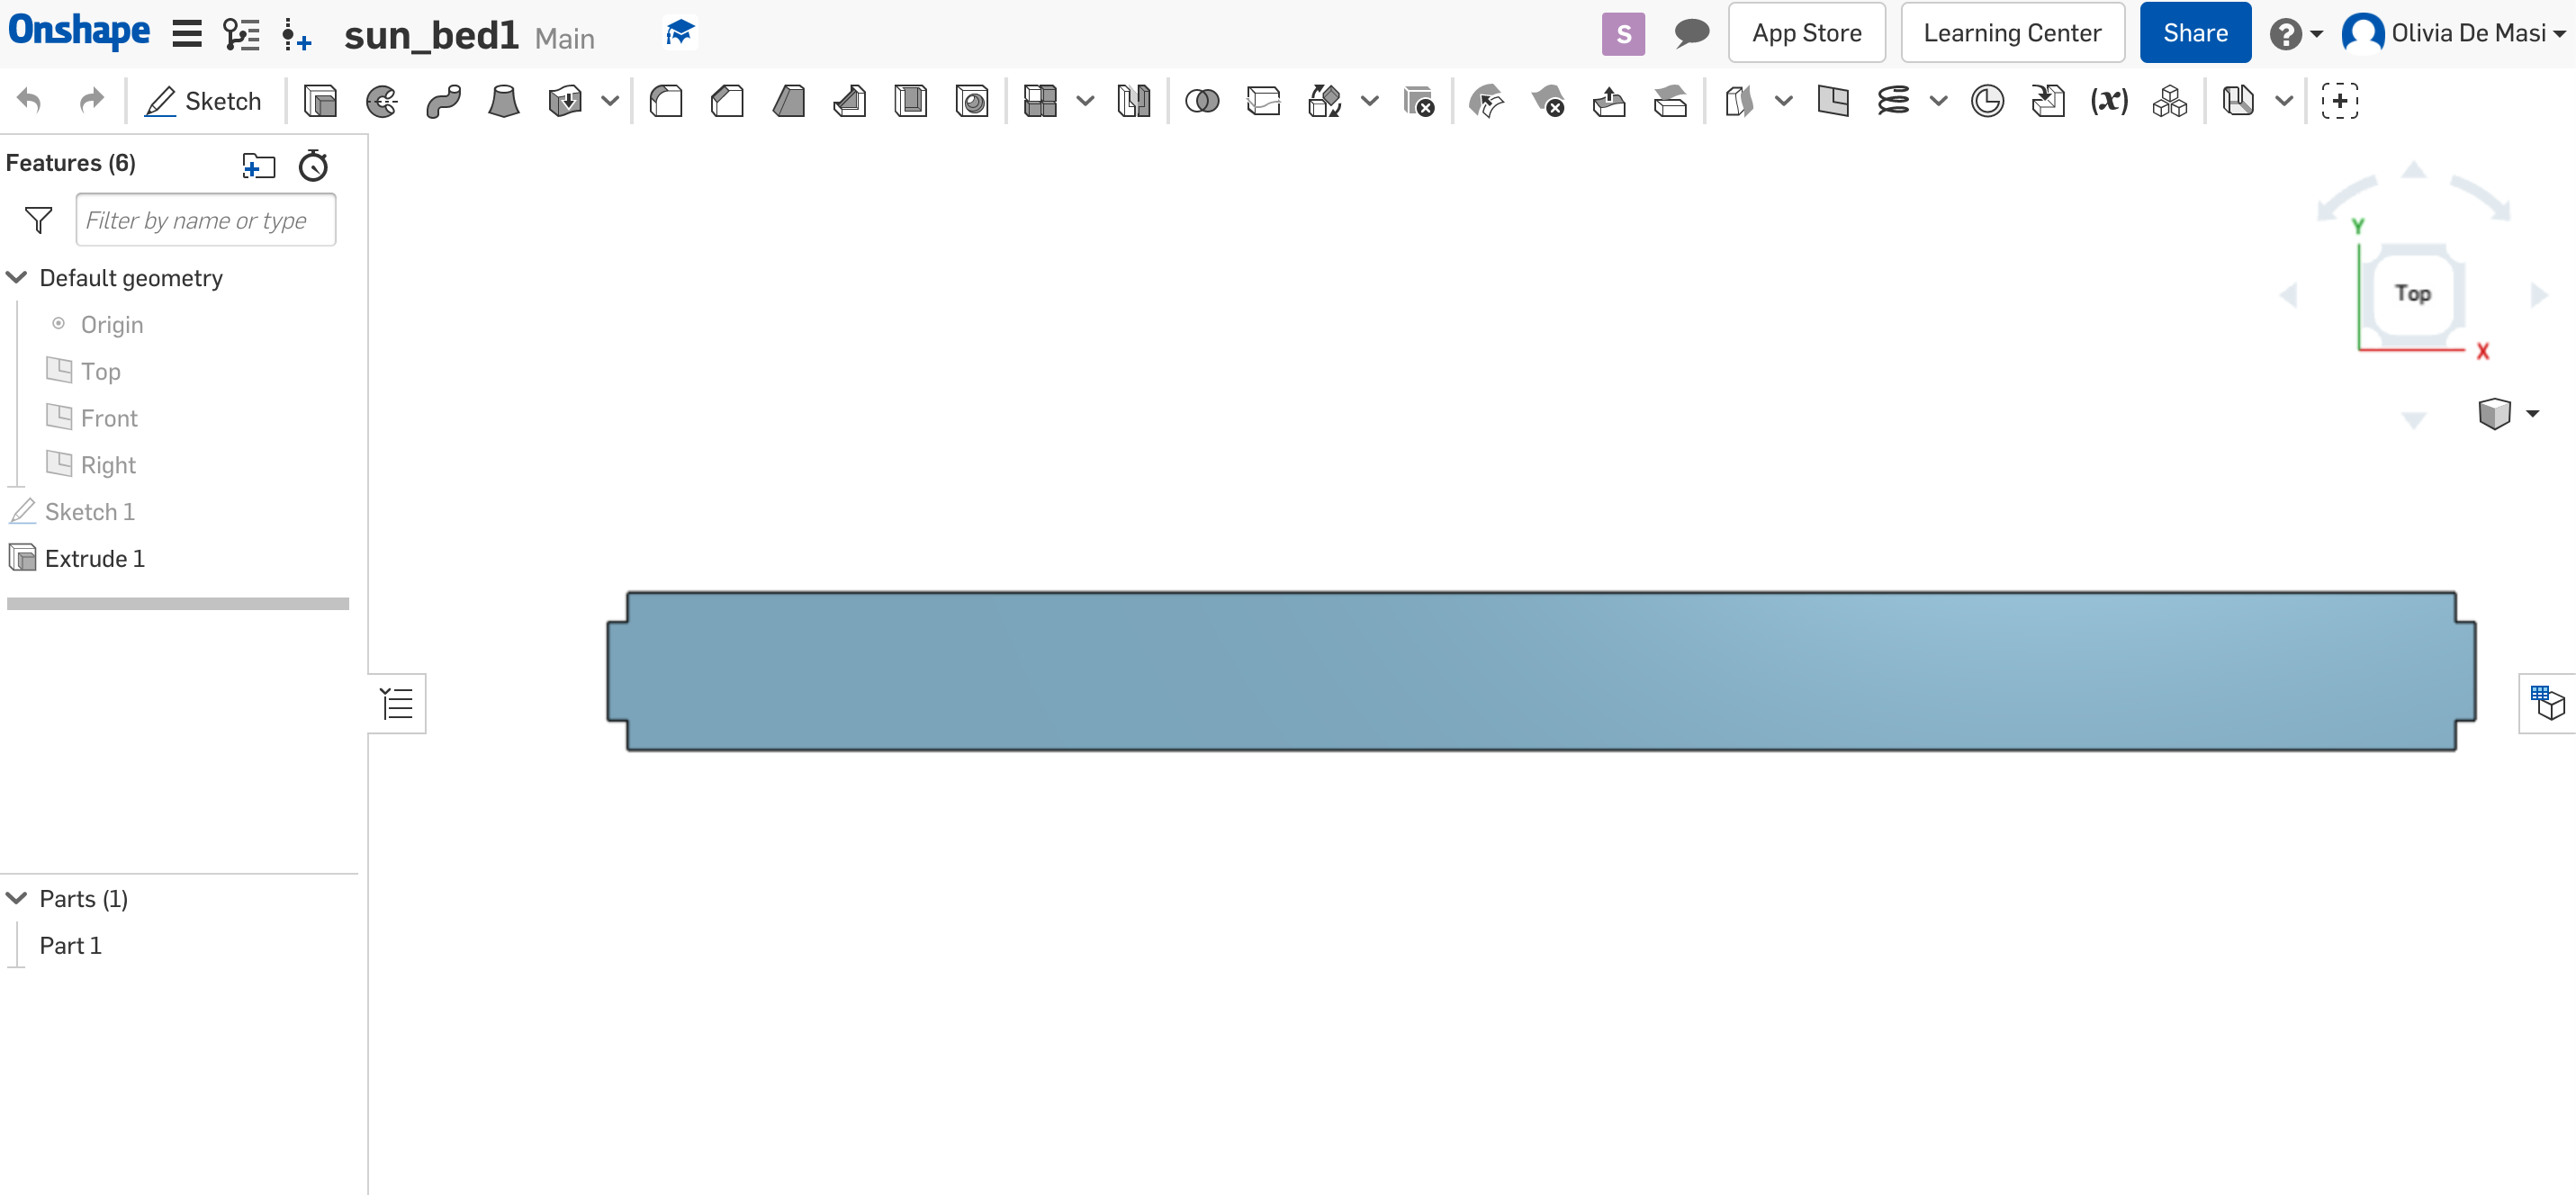
So this is how it appears now. I've done the same thing for the left side.
After I designed the sides of the bed I decided that is was not going to be strong enough to support itself (it's only 1.5 cm thick)
so I inserted a central support aswell through which the bridges will lay.
FOTO STRUTTURA CENTRALE
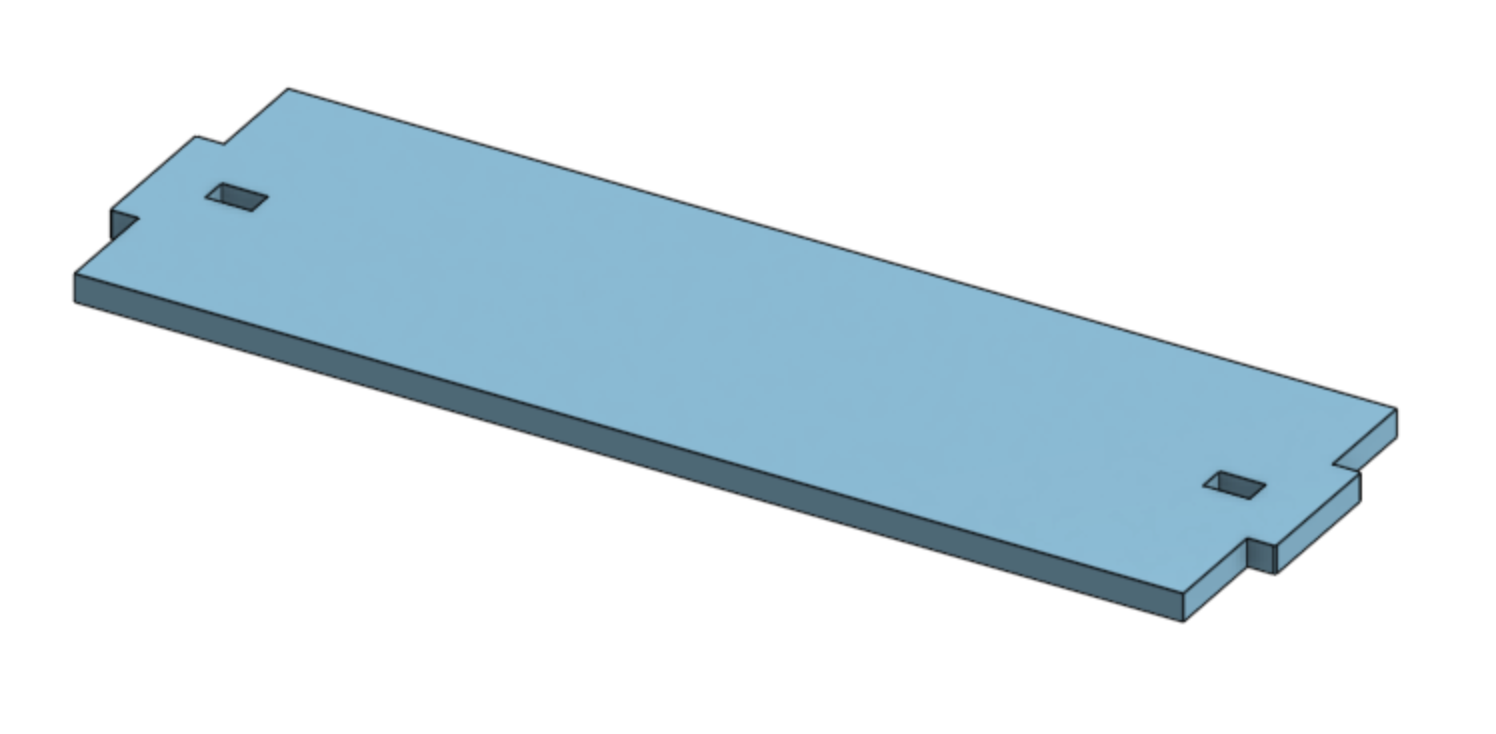
This is the desing of the support bridges I drew to make the sunbed more stable.
I then designed the slats:
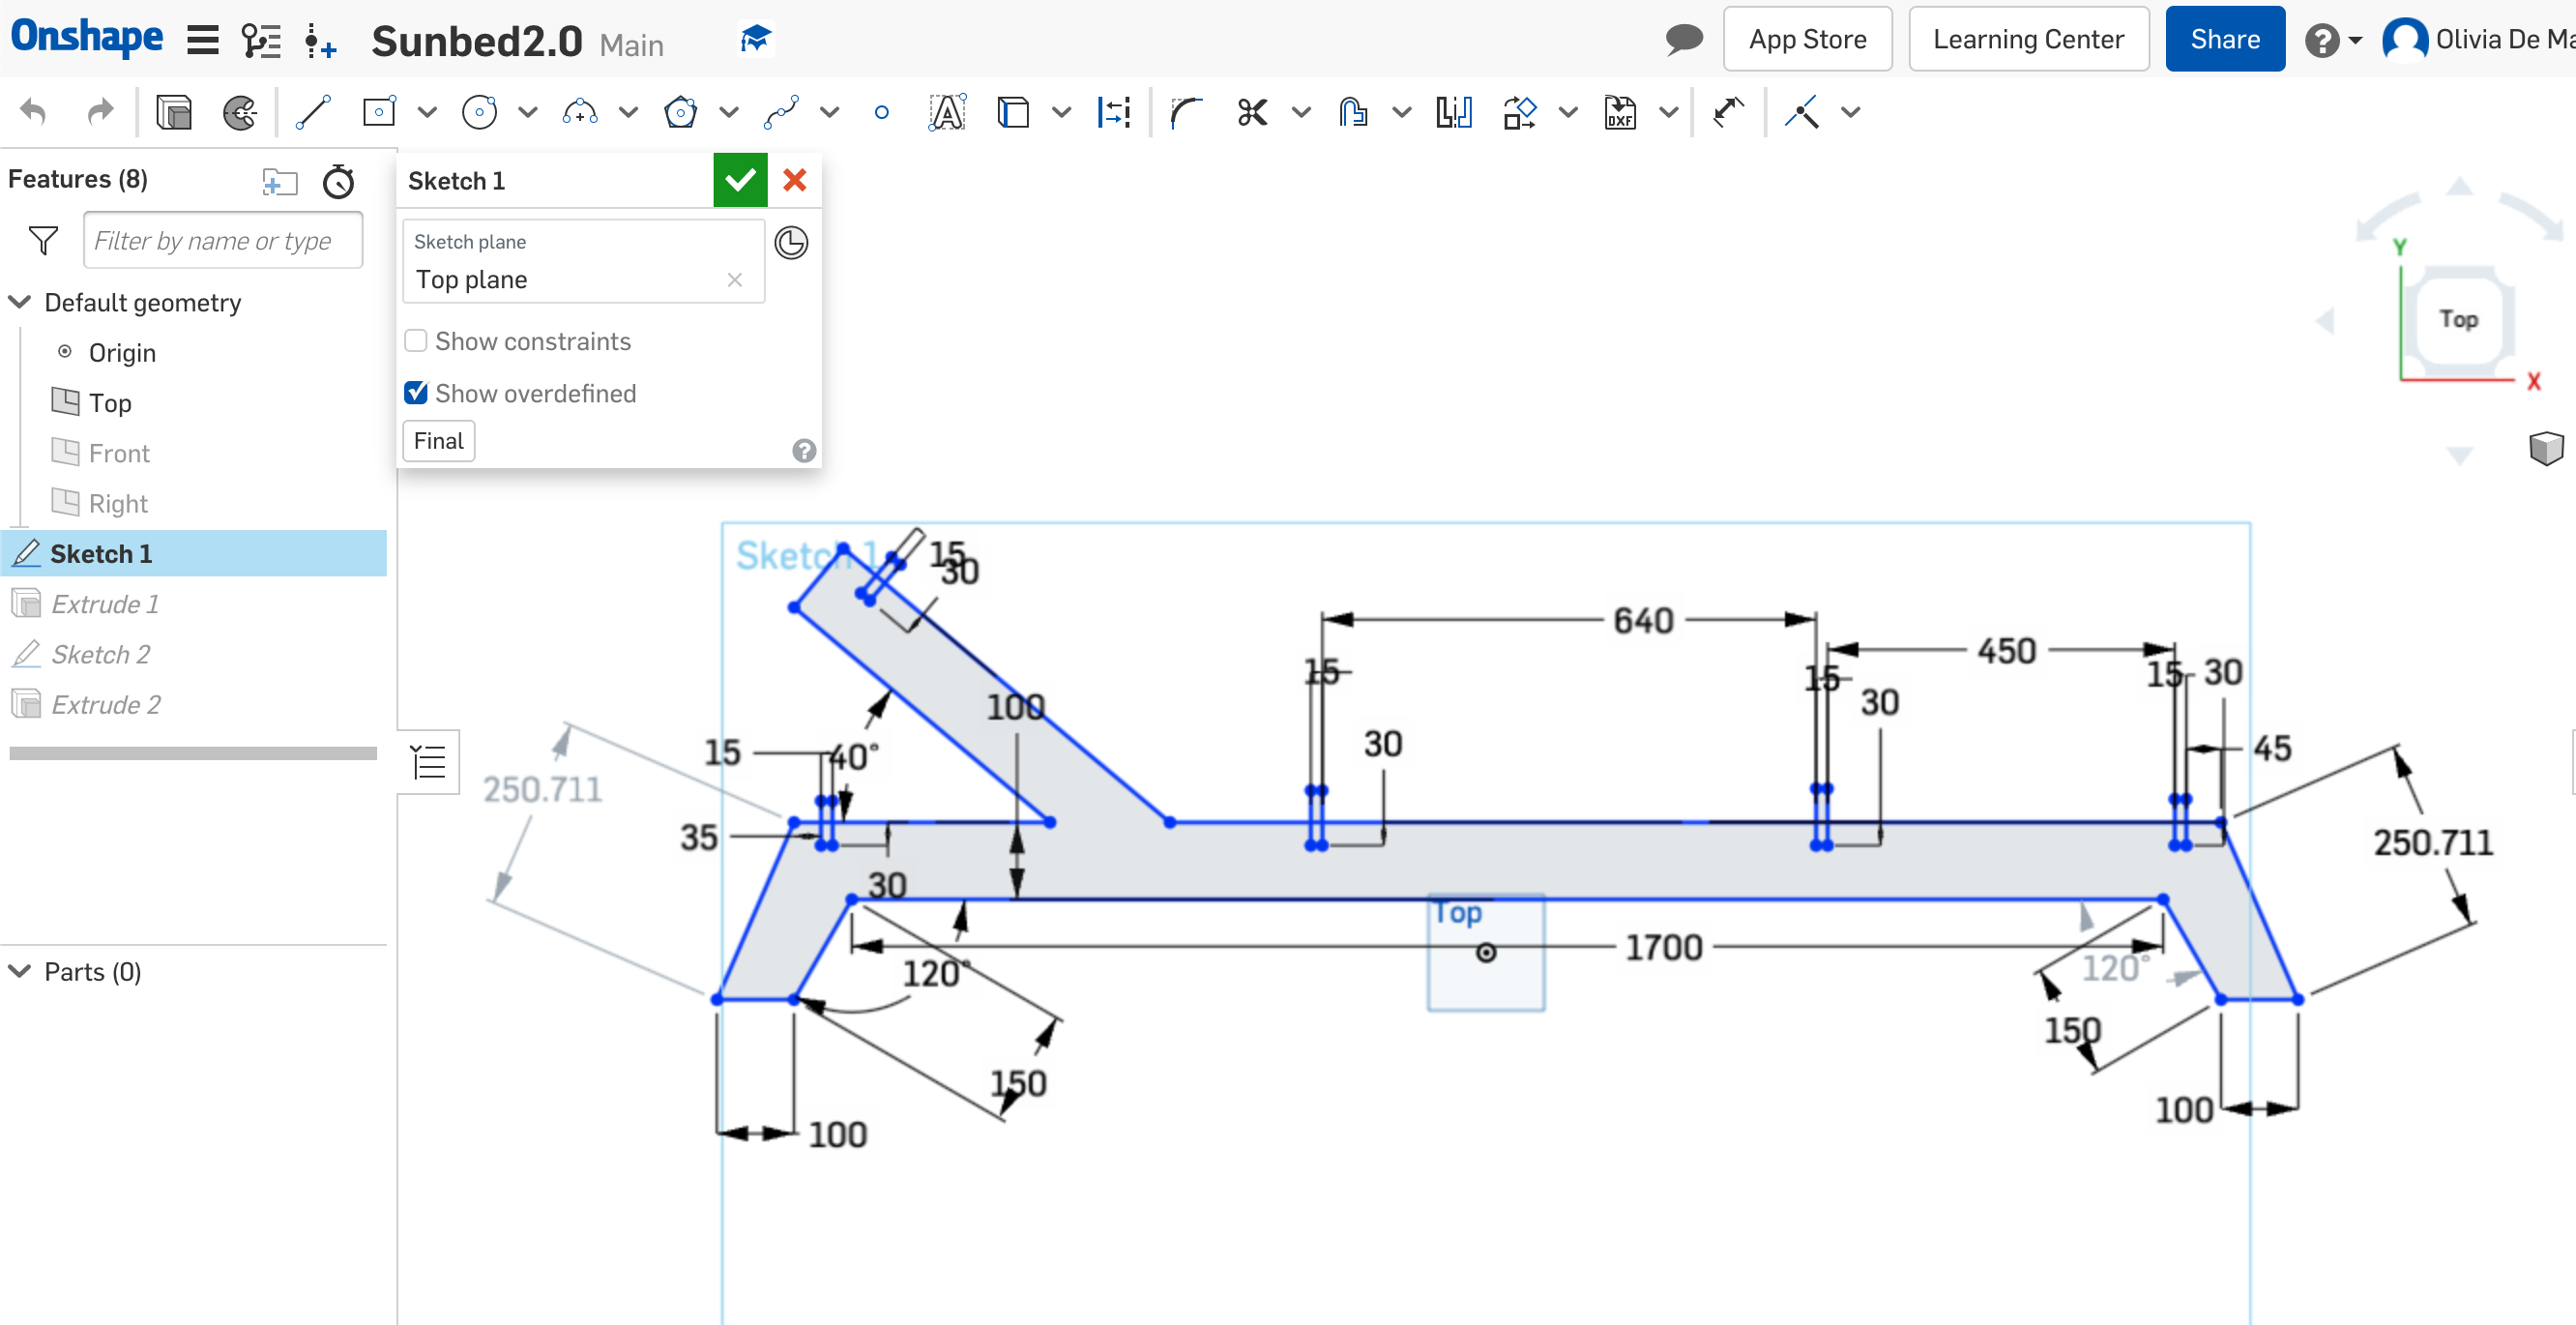
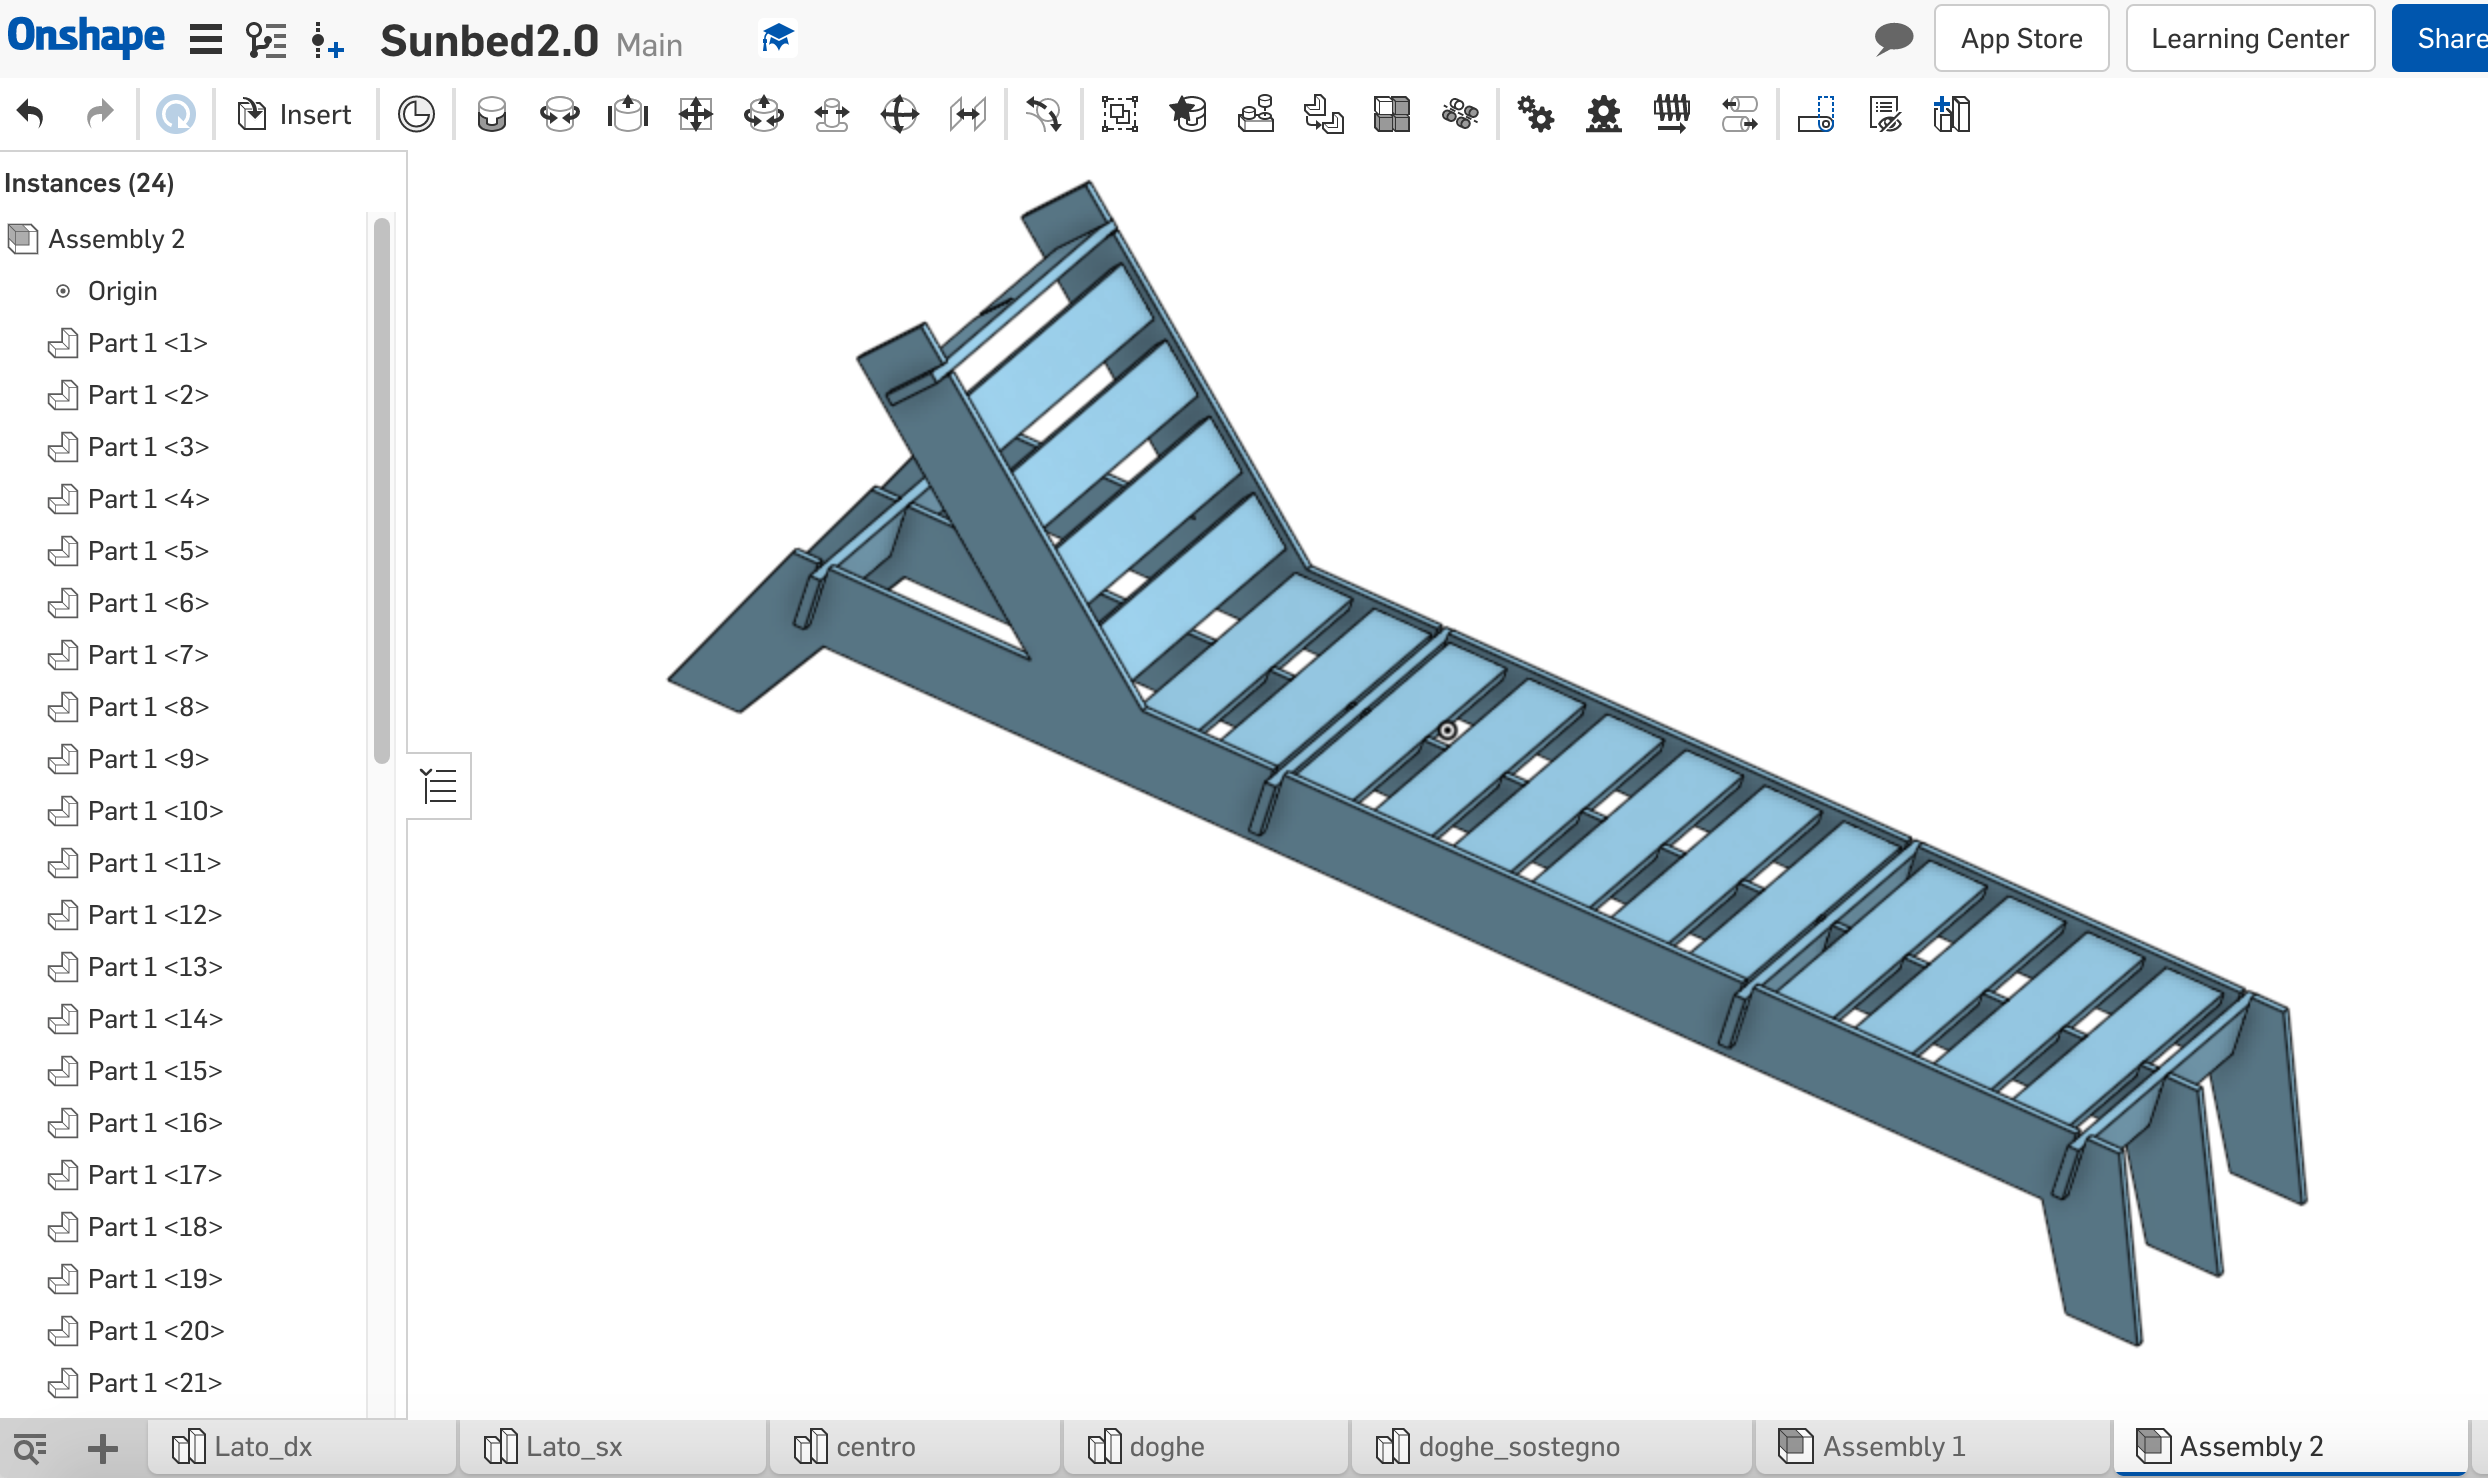
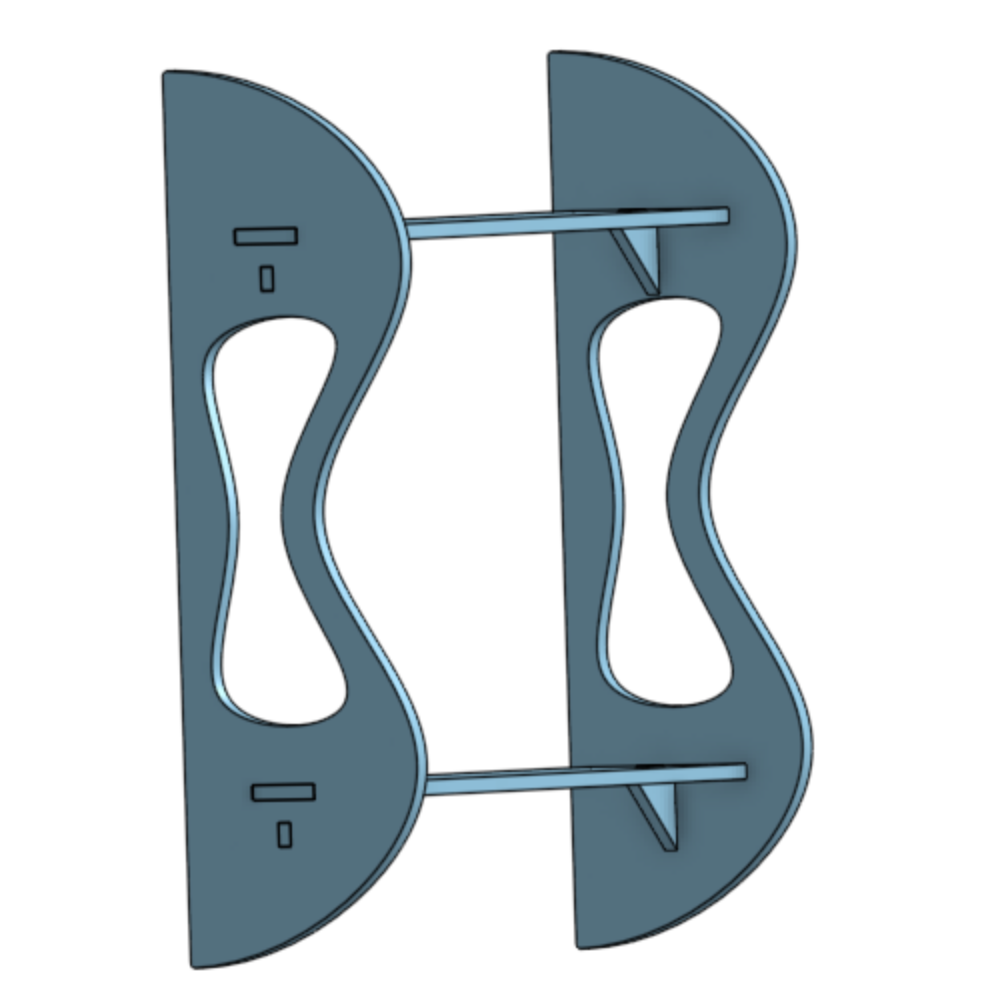
When the basic was done I decided that I wanted to implement my sunbed with a headrest structure (like the one in the example pic). So I changed a bit the design of the whole structure:
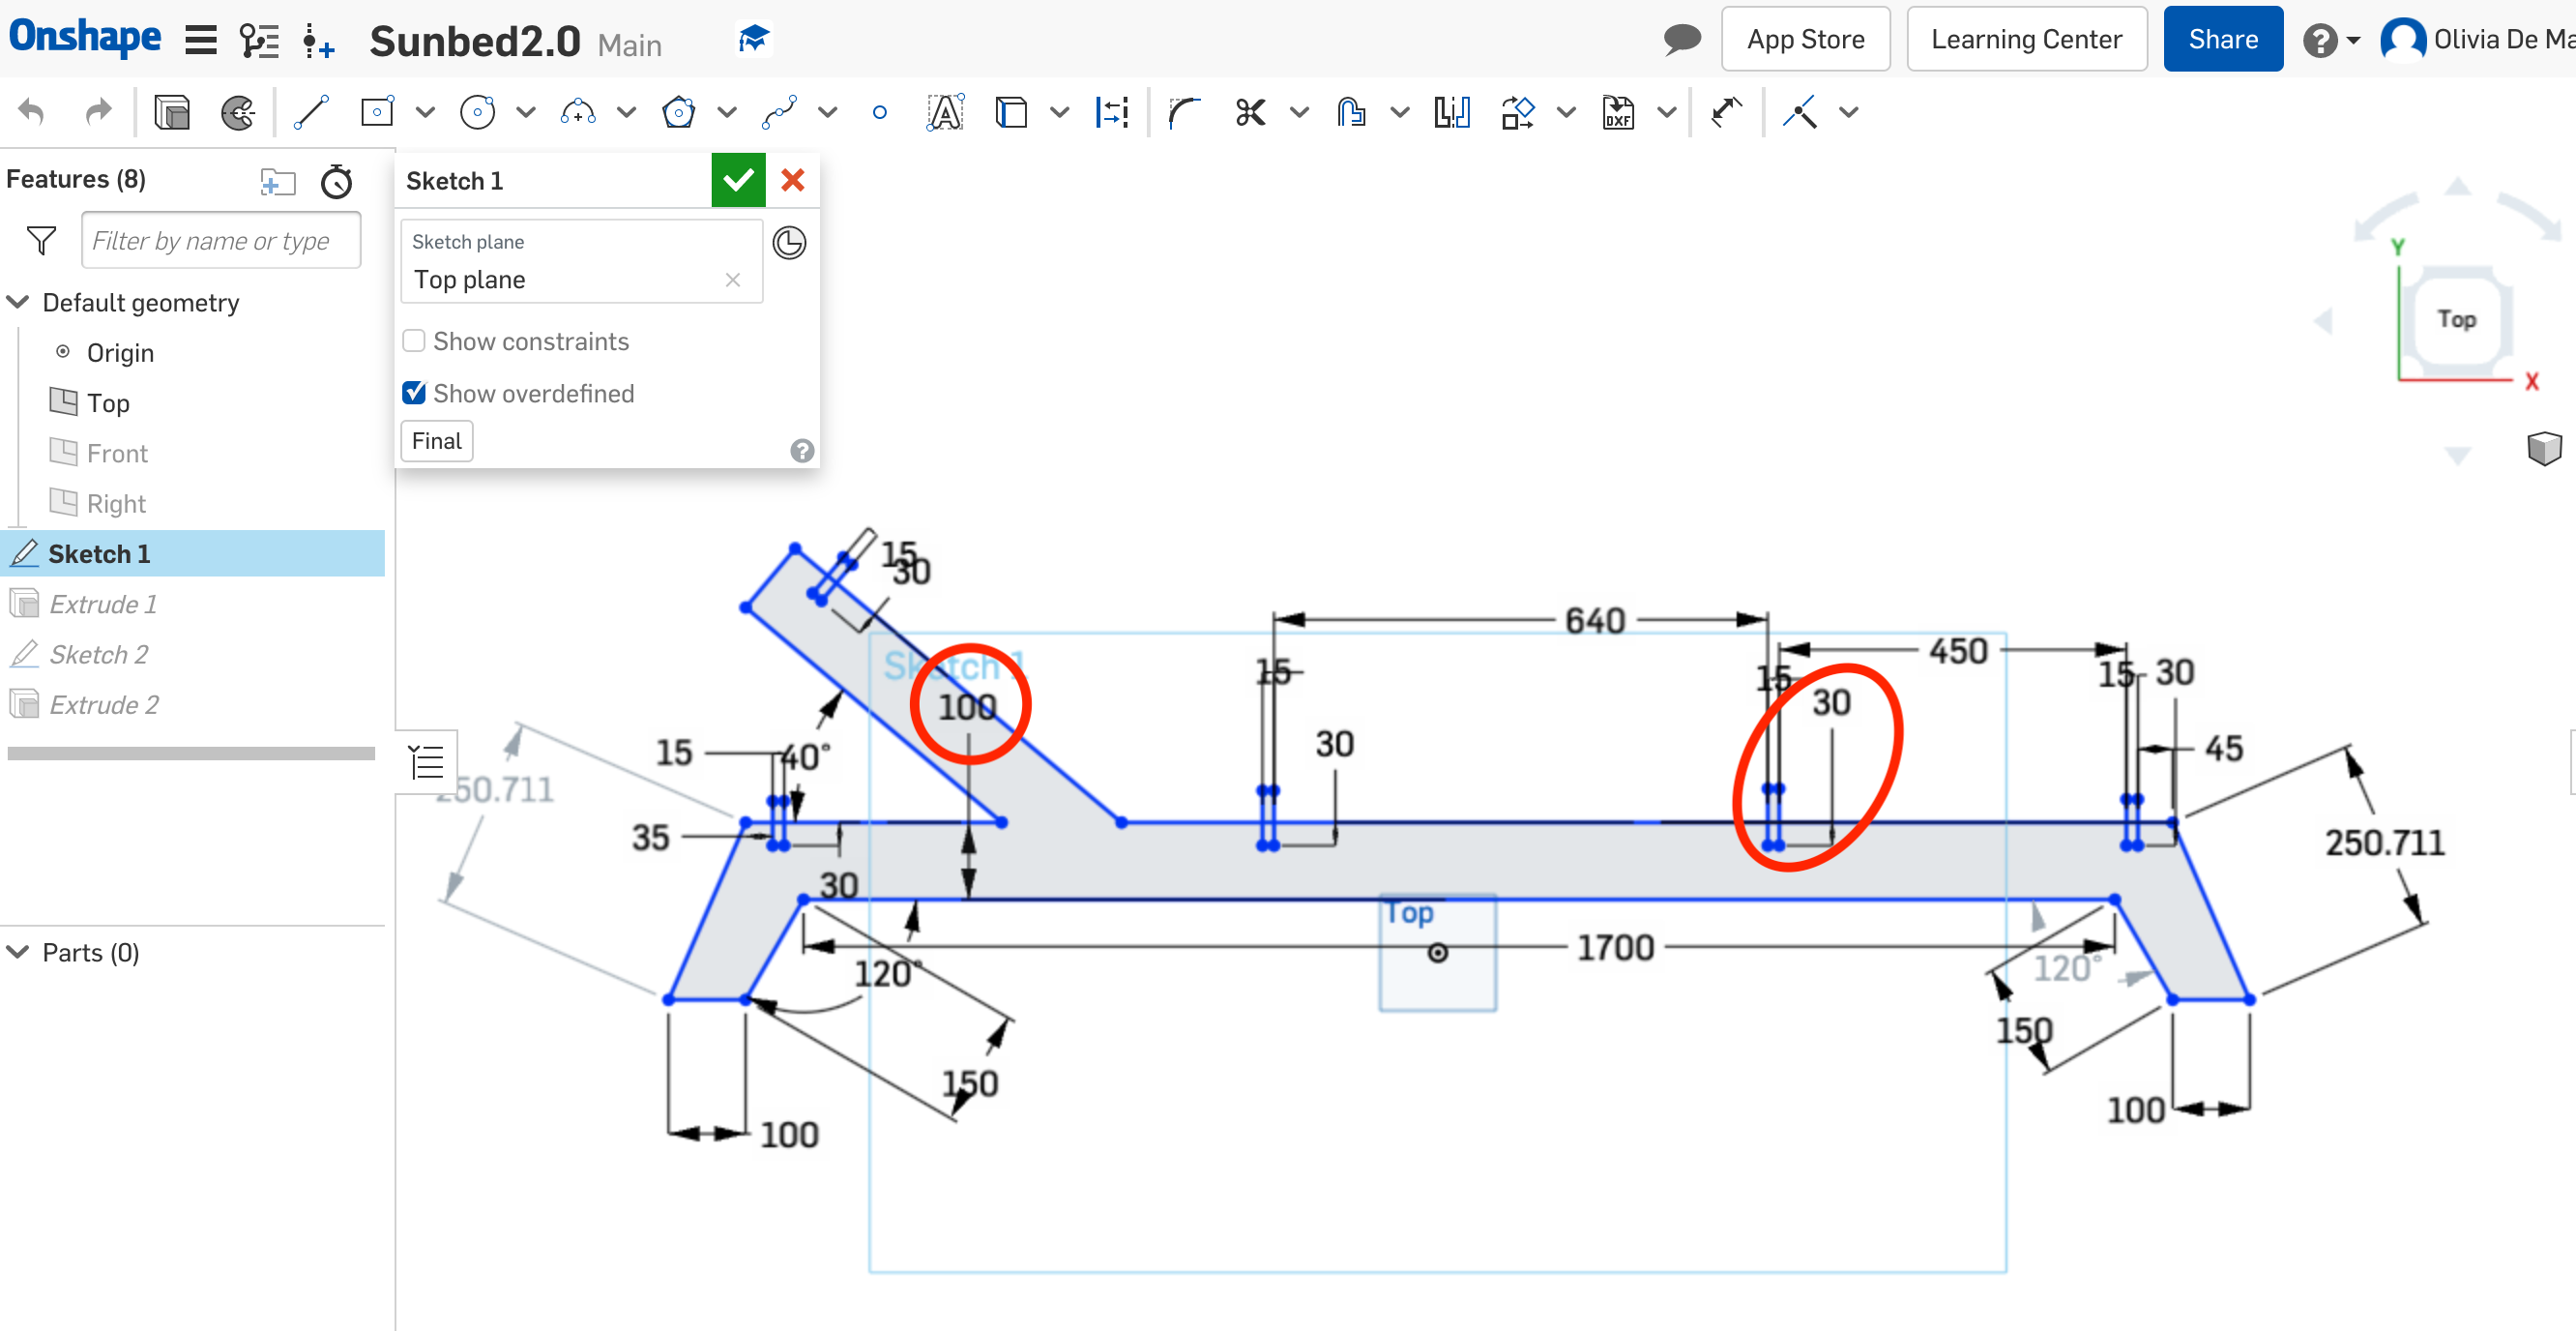
I have done the same structure for the other side, in a specular way obviously. I then modified just a couple of measure of the central part because I didn't add the headrest in that part. Having two kinds of slats though (normal slats and support bridges) I had to adjust the measurment of the central structure and of the support bridges because I didn't want the bridges to stick out. So I had to lower the central structure by 1 cm and add to the holes for the brides 1 cm. This way the middle of sundbed is all on the same level.
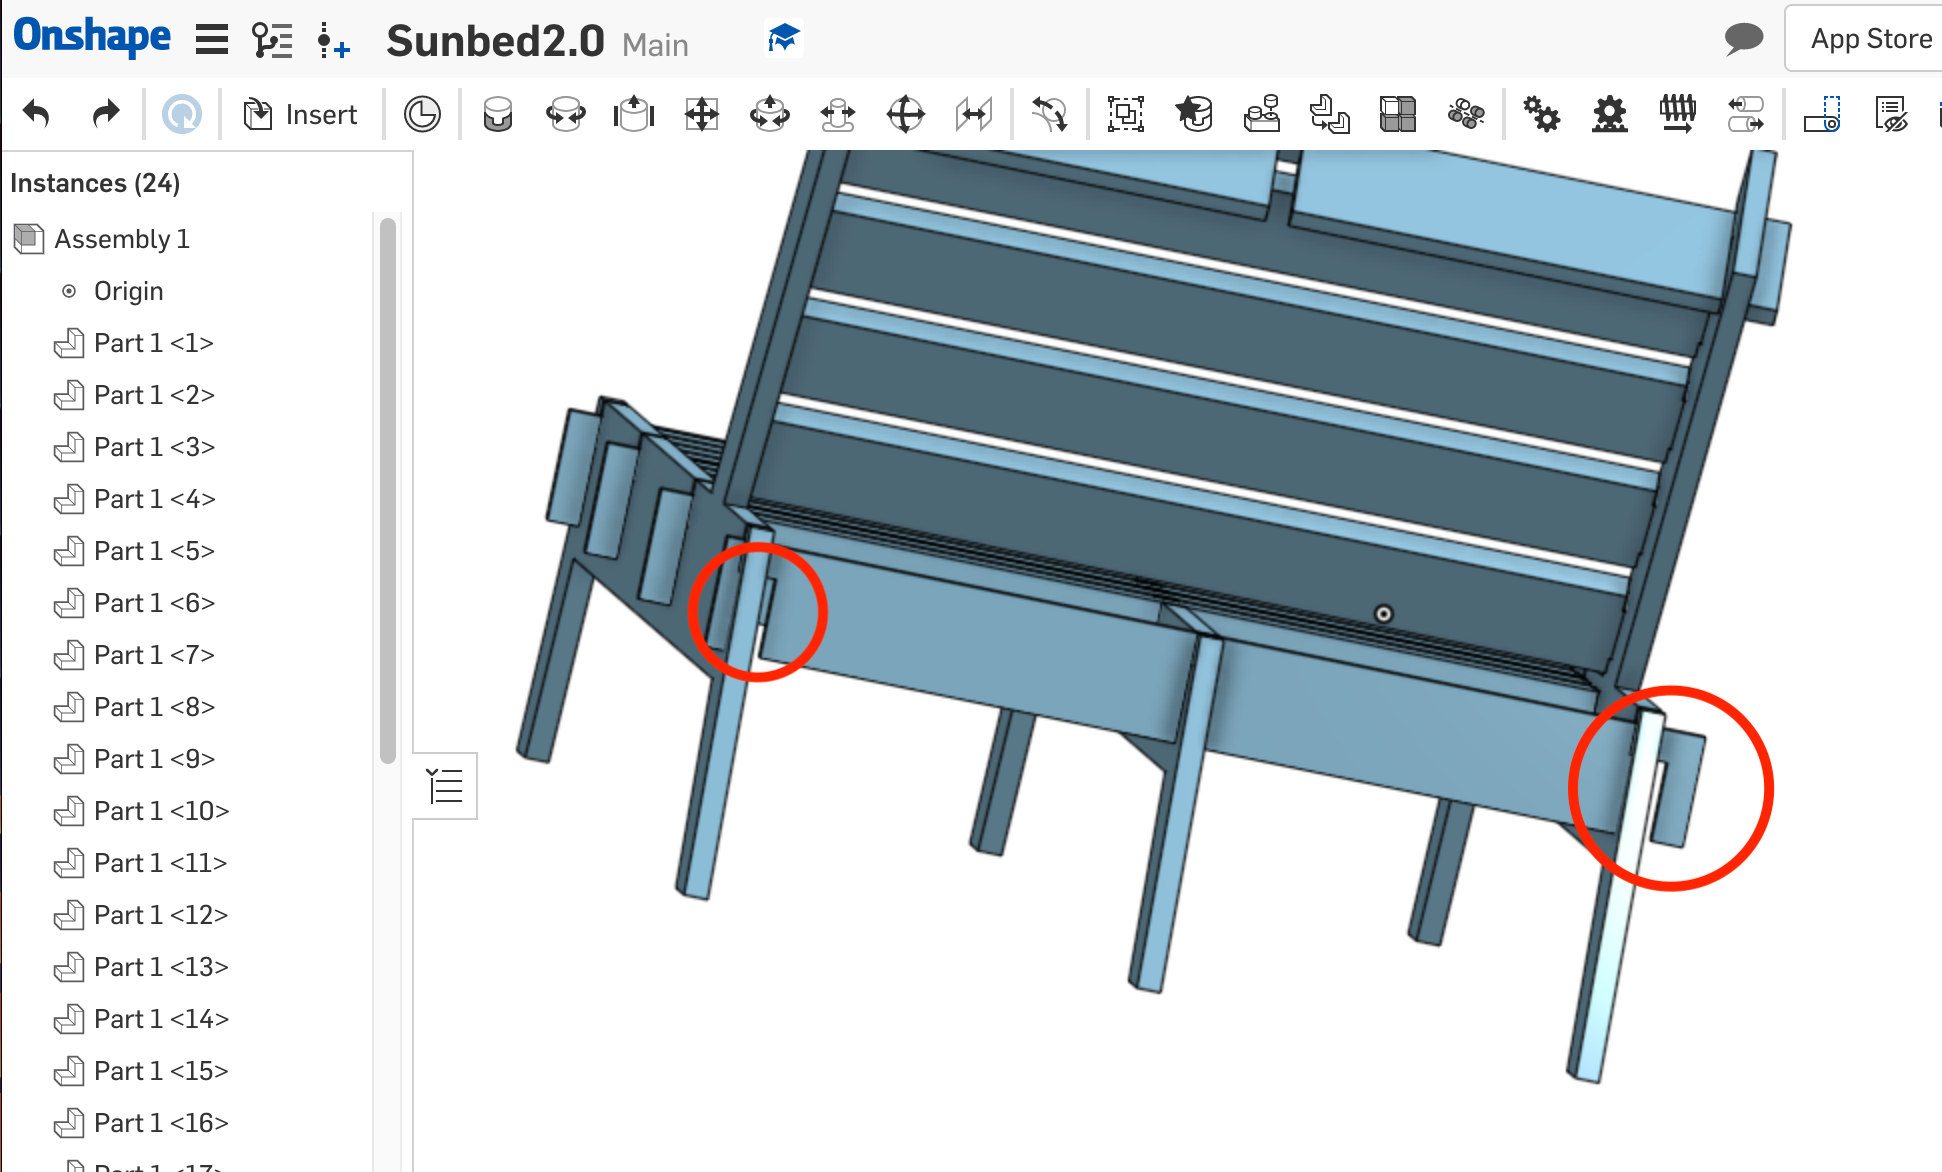
I then left the slats as they were and assembled the whole thing. In the first assembly onshape did something weird. It looked like something was wrong with the first bridge on the head side. It looked too big, but the rest of the assembly was perfect.
After triple checking and wrapping my head around the measurments I thought it was impossible so I decided to try to do another assembly. This time everything was right. I still don't now what happened but I'm just happy that my sunbed works! As soon as I get back in the lab I will cut it and document it.
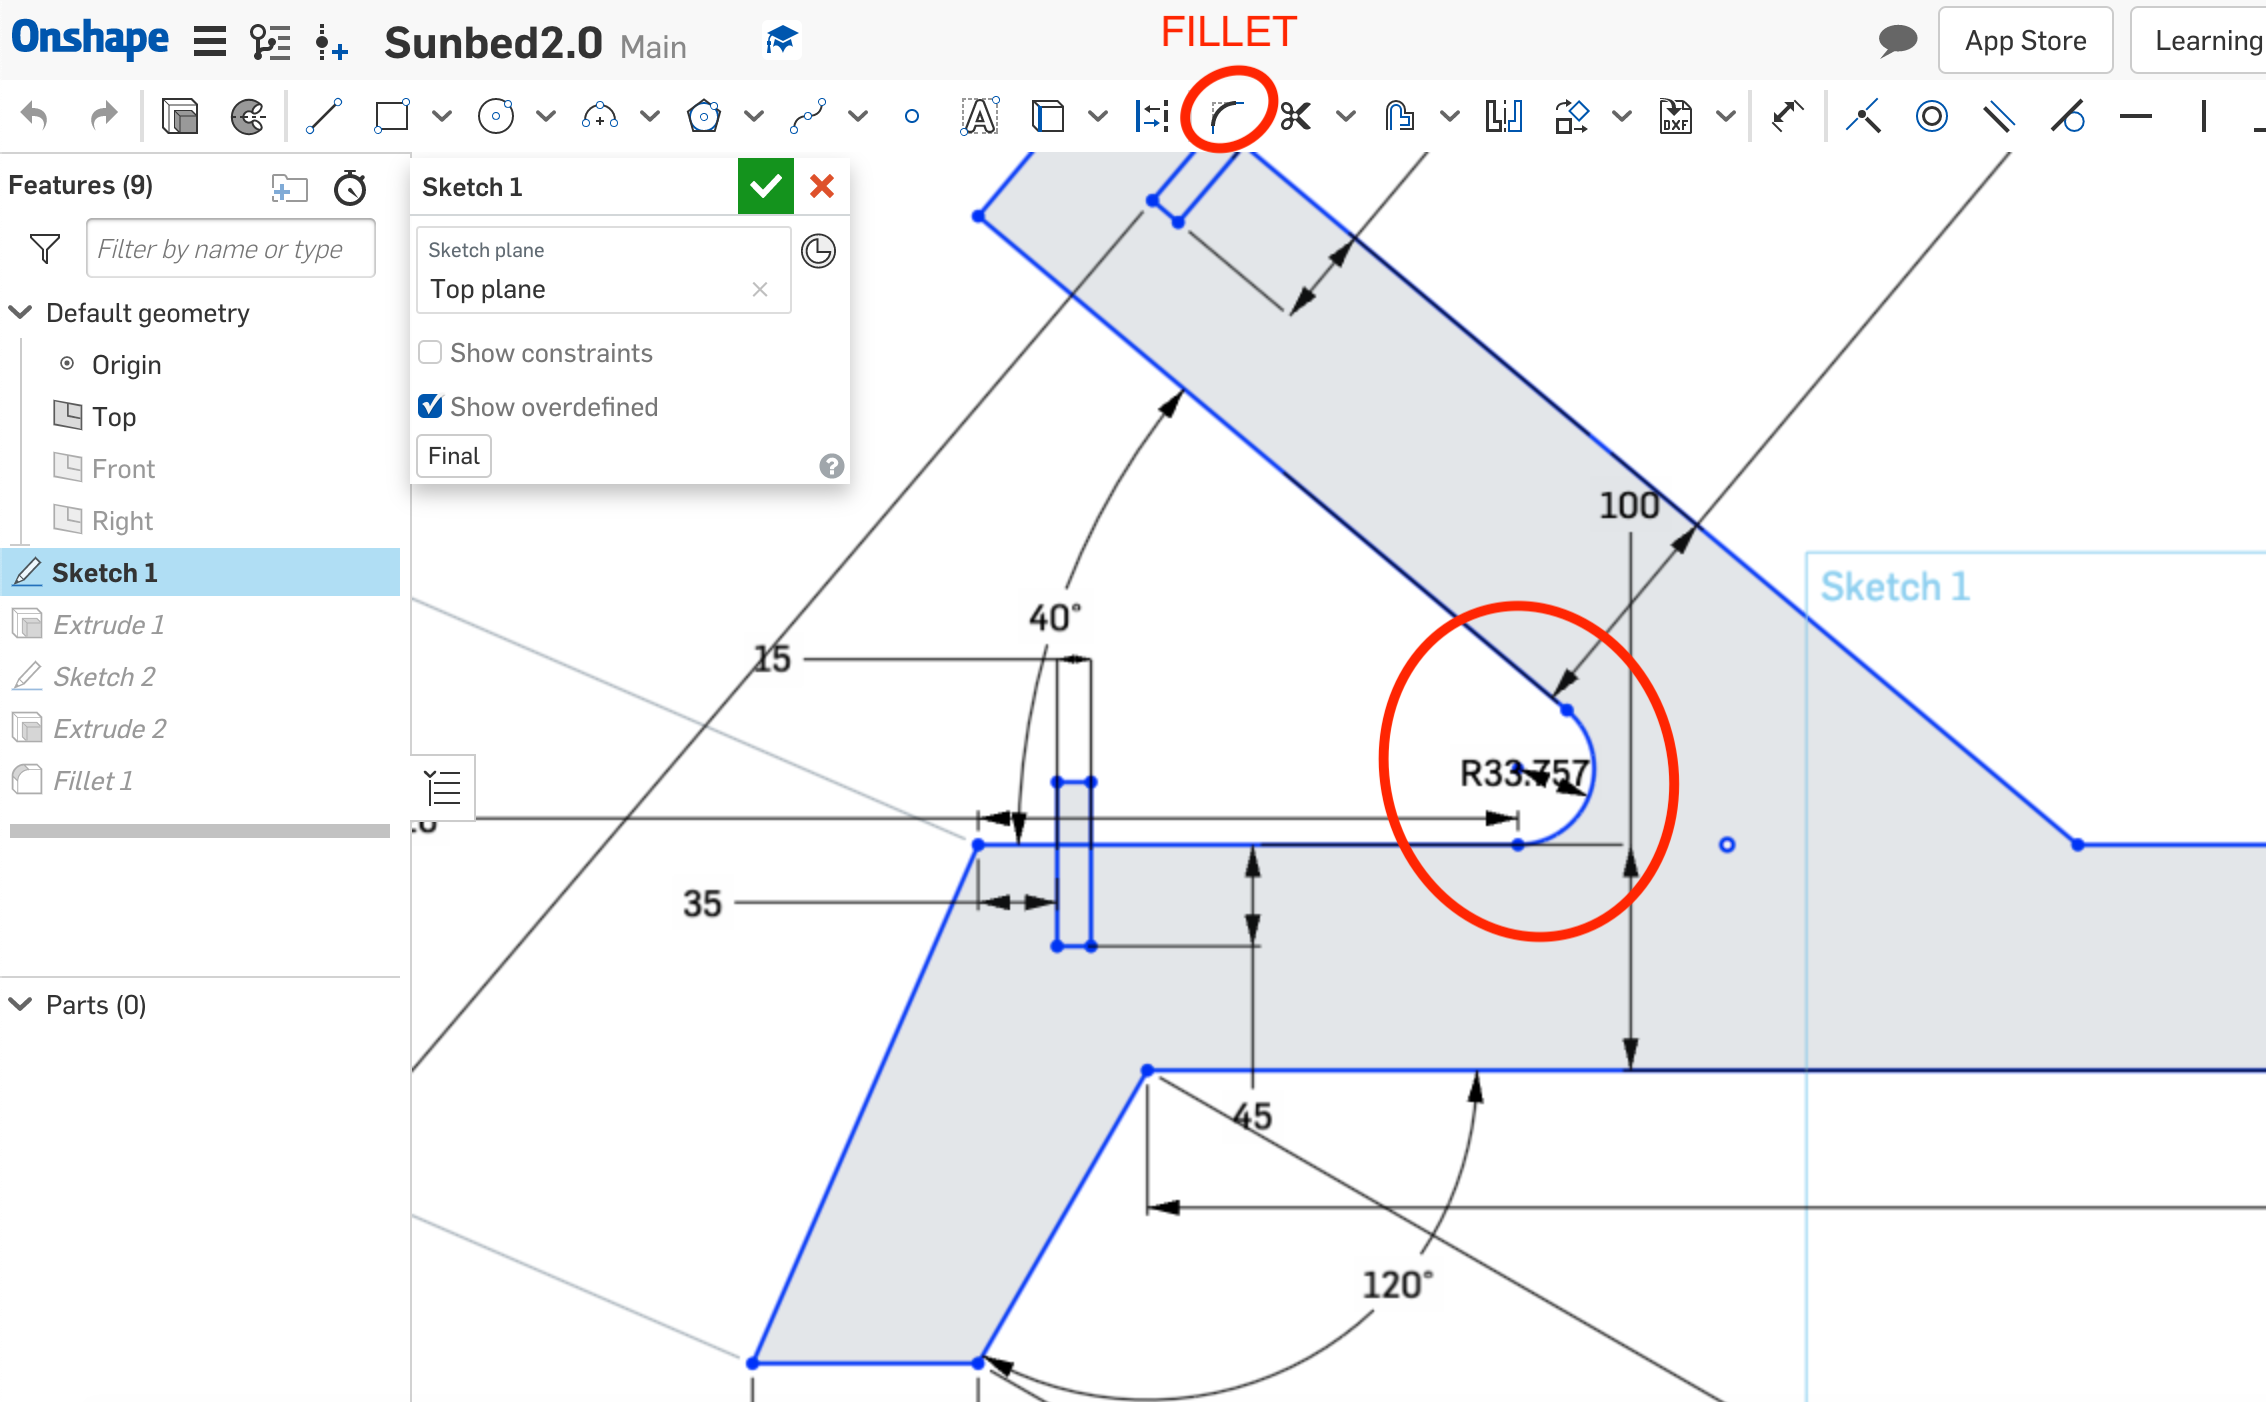
To make the cutting easier and a little bit faster my instructor suggested me to do a couple of things:
1) Round the corner of the headrest to make it more solid:
2) Round the sharp corners of the slats and of the basic structure to ease the cut:

3) Change the depht of the holes in the support bridges to have more stability:
Now that I can go to the lab and cut my sunbed, I've decided to make a new design for another object so that my cutting time is less (I'm going to make fewer pieces) and during this months there was also a problem with the wood boards. Infact the wood boarded so I'm going to try to position my few pieces in the less boarden place of the board.
I designed a book shelf for my home. So I started with the main structure (lateral parts):
I then designed the shelfs (2):
And in the end I designed 4 brackets to make the structure more stable and solid (so maybe I can actually put some books in it):

So this is what the assembly looks like:
The group documenation with all the safety roules and the initialization process of the machine and the sofware are to be found at this link .
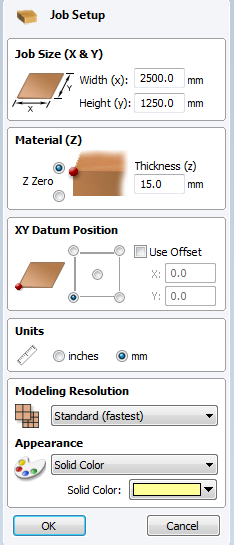
As a first thing I set the work surface (thickness, hight and width of the material), when the previw showed up on the screen I checked that is was like the one we had on the machine.
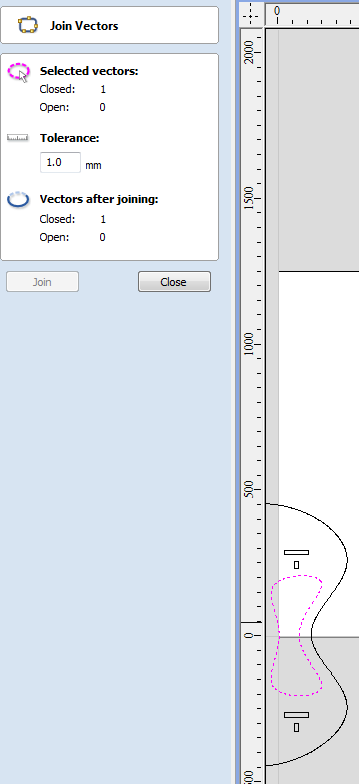
After importing the DXFs from Onshape I joined the vectors by selecting each vector and press "join vectors" as the picture below showes, to be sure everything was closed and the machine could work smoothley:
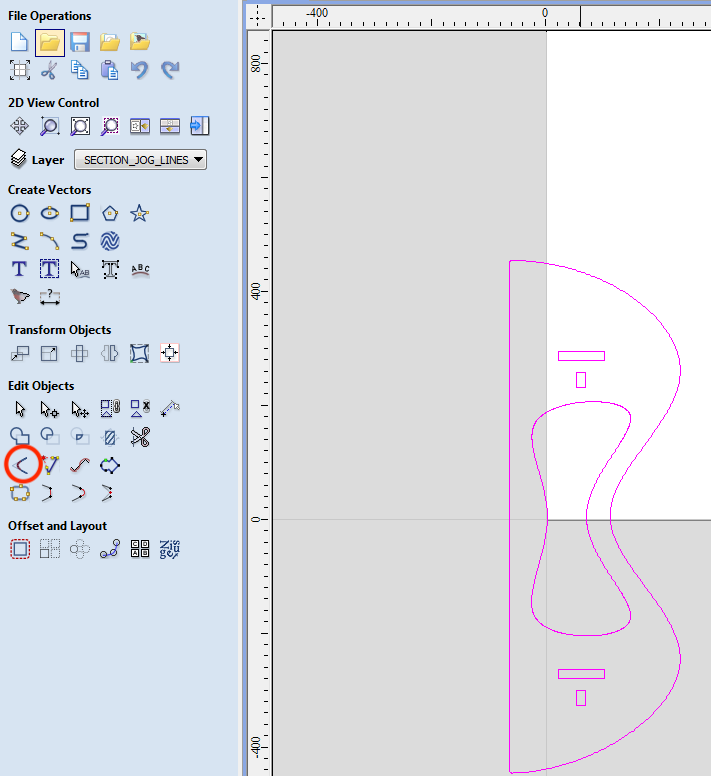
An important part for my work is to create t-bones where I have joints so that I make my life easyer when I'm going to connect two pieces. The one highlited below is the comand to make t-bones:
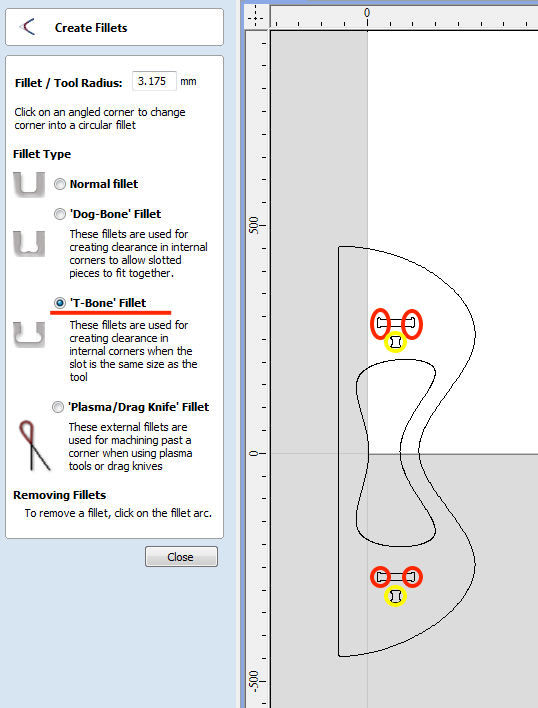
The I inserted the radius of the tool and selected the kind of fillet I wanted, in my case that was a t-bone as I said:

I selected the angles where I wanted the machine to place the t-bones (wich was where I had the joints):
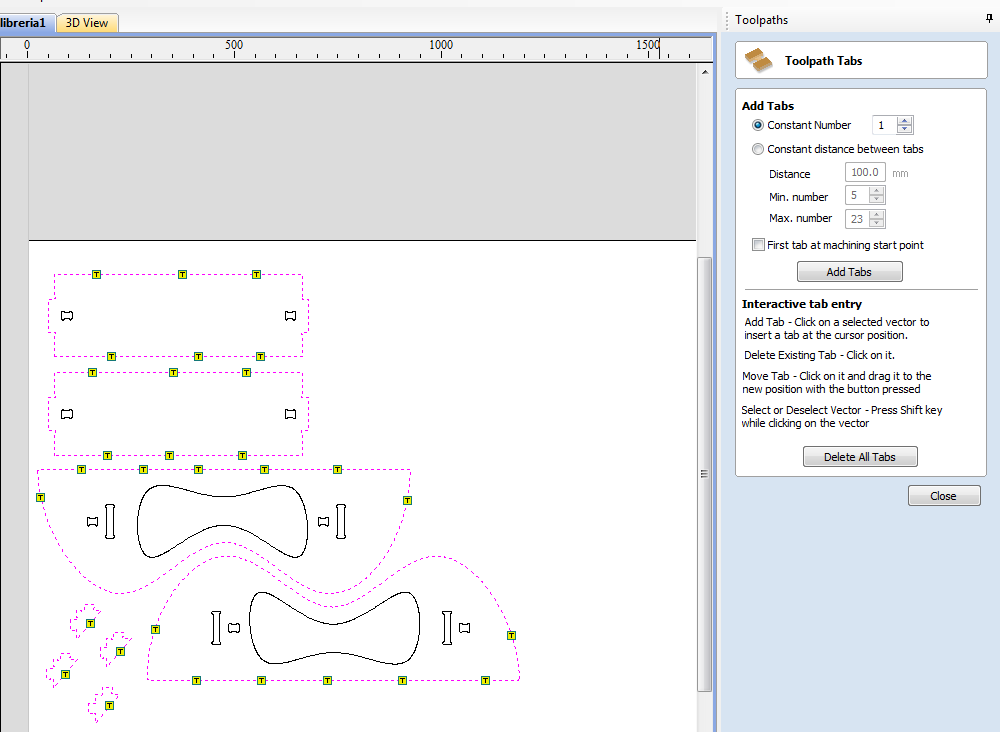
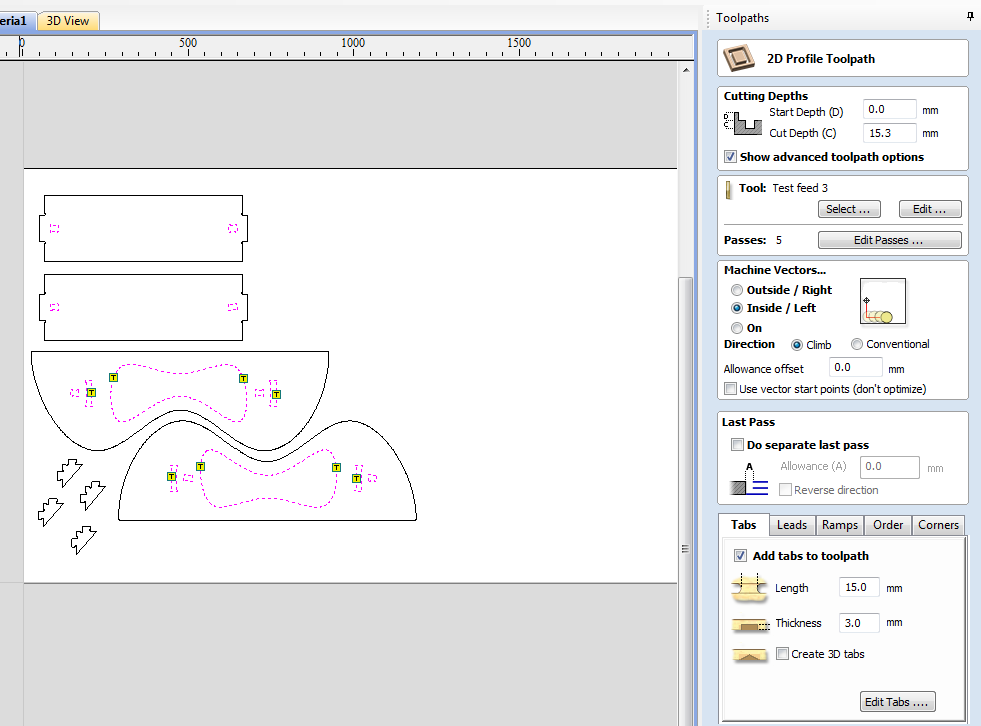
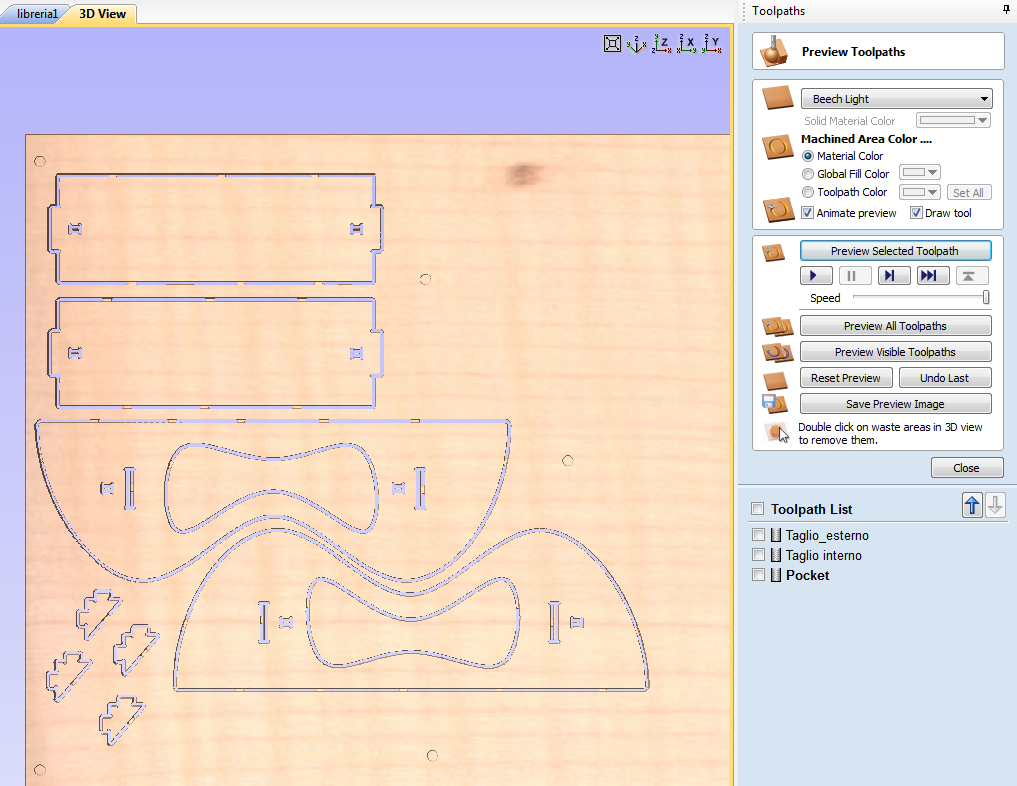
In the toolpath menu I added the tabs to keep my cutted pieces stable (this means the machine leaves a tiny piece of wood uncut that most likely keeps the cut piece from flying around when the cut is over), first in the external and then in the internal cut:
The picture below is the 3D preview of the toolpath where you can see the tabs aswell.

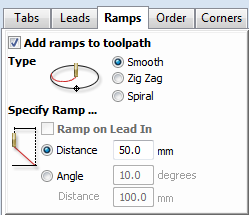
In the end, after the suggestion of my instructor Simone, I added ramps 5 cm long to help the endmill plunge smoothly.
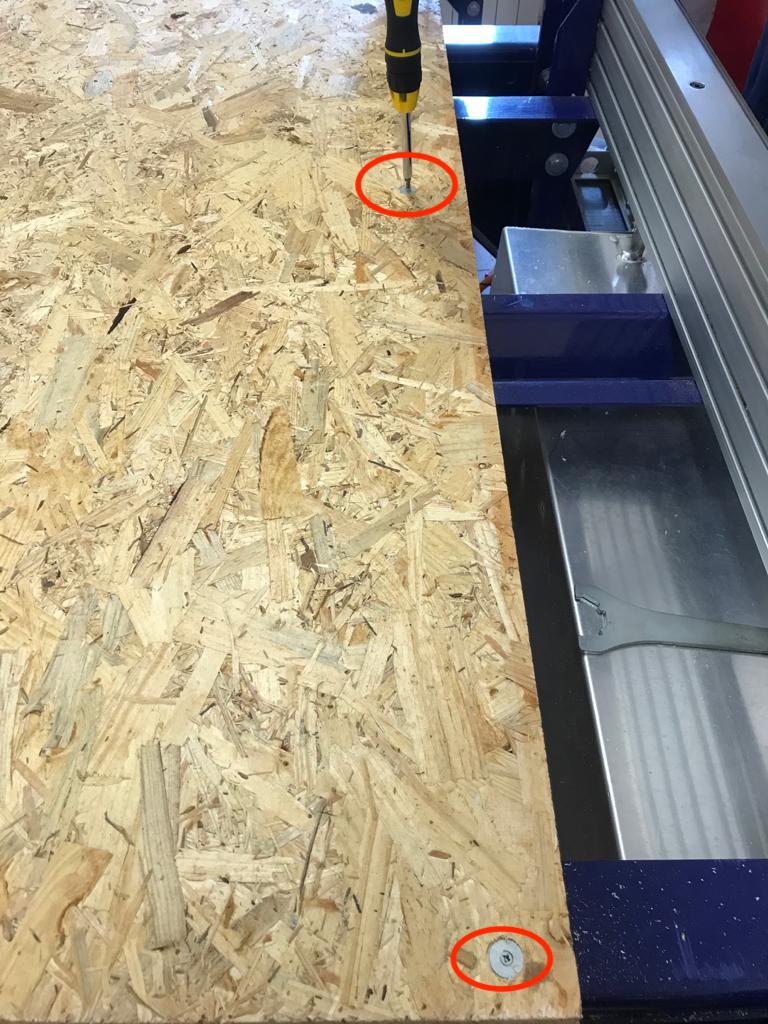
To secure the wood board and to avoid it's possible boardening I wanted to put screws and washers so my instructor told me that one of the safest ways to to position the screws without risking collision with the endmill is to draw 2 mm round pockets on the work surface:
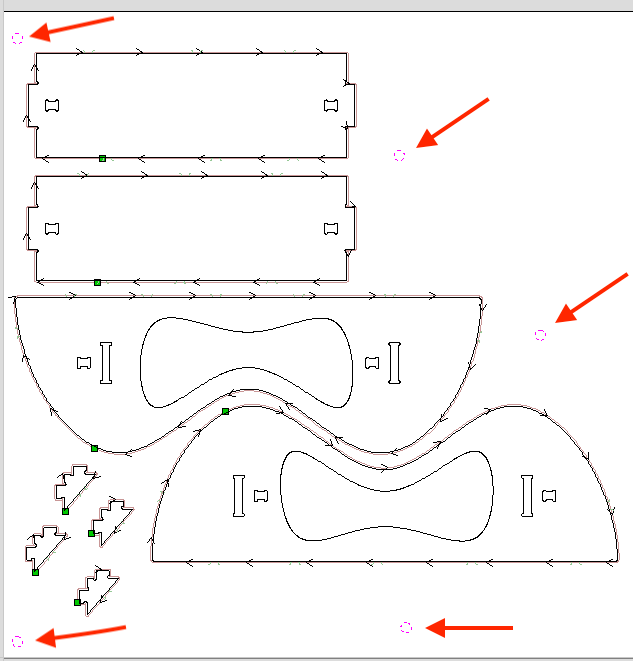
And this is the final cutting preview of my work:
After setting the x, y and z on the shopbot panel I lounched the pockets cut. Then I inserted in the pockets the washers and the screws.
I set the z again because when I secured the board with the screws I probabily changed the grip of the board. Then I lounched the internal cut first and then the external cut.
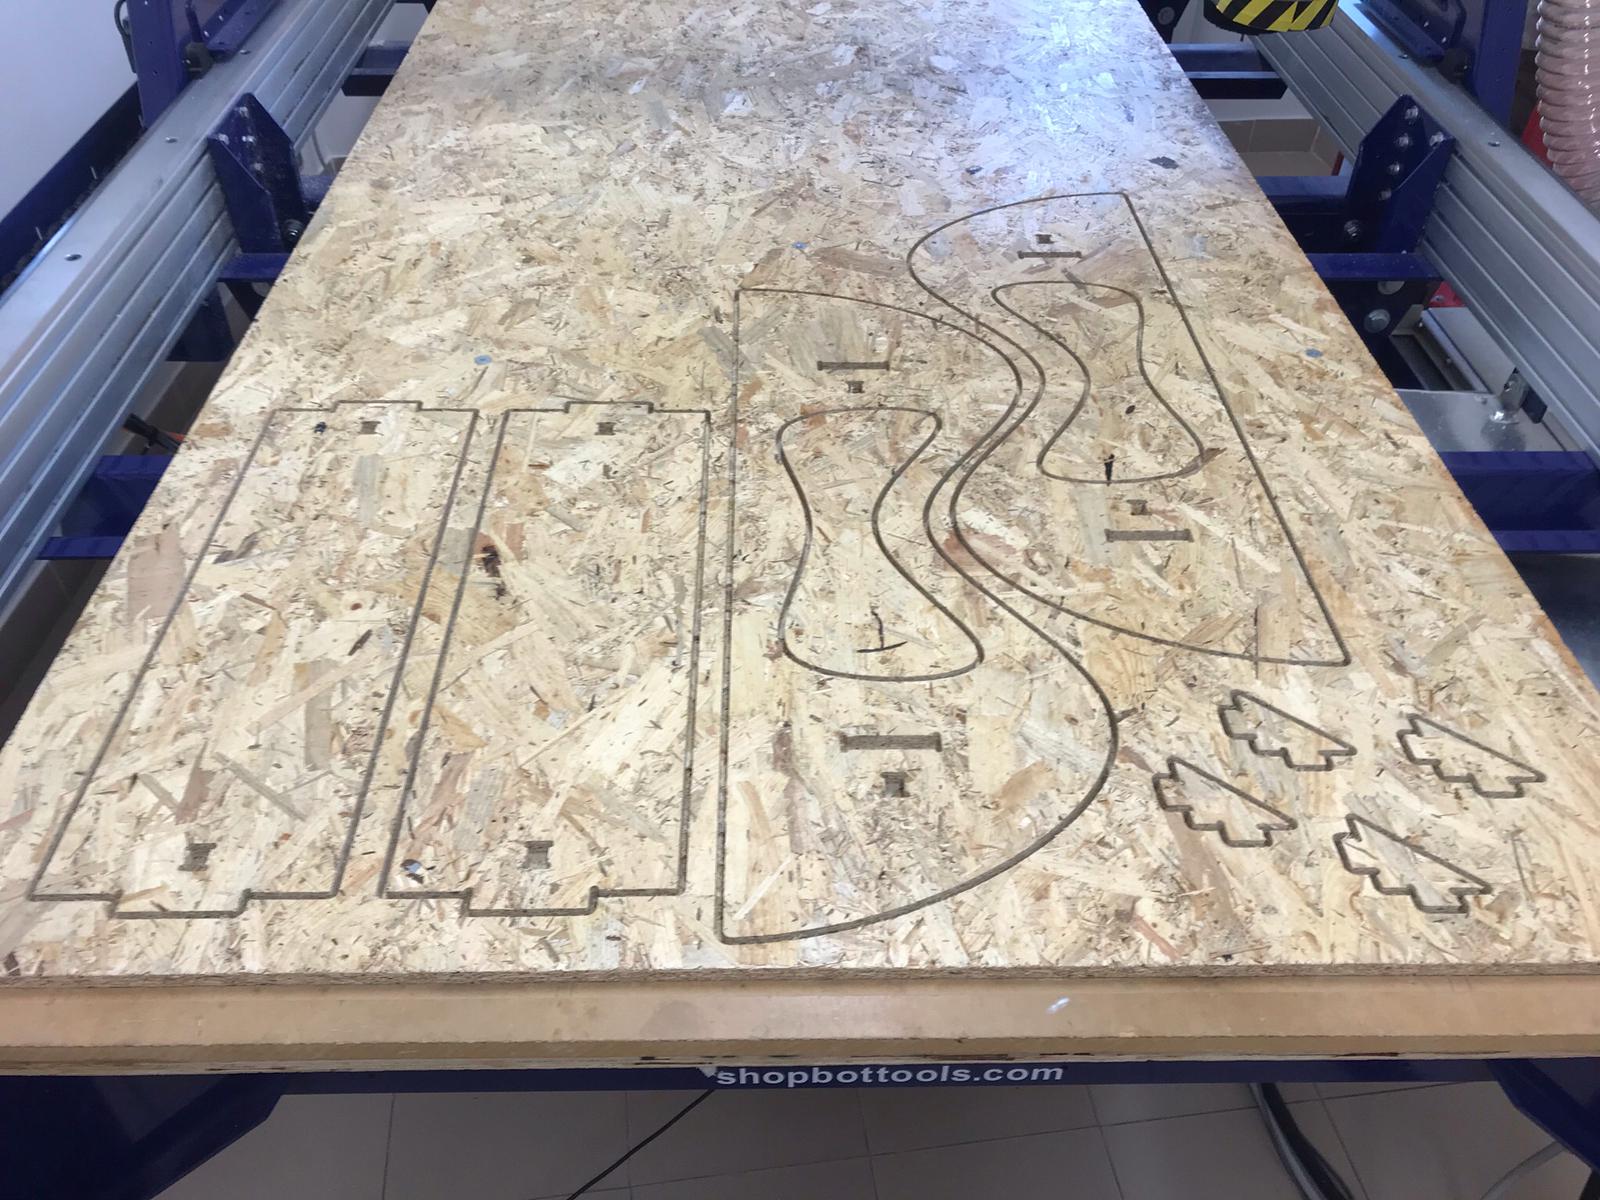
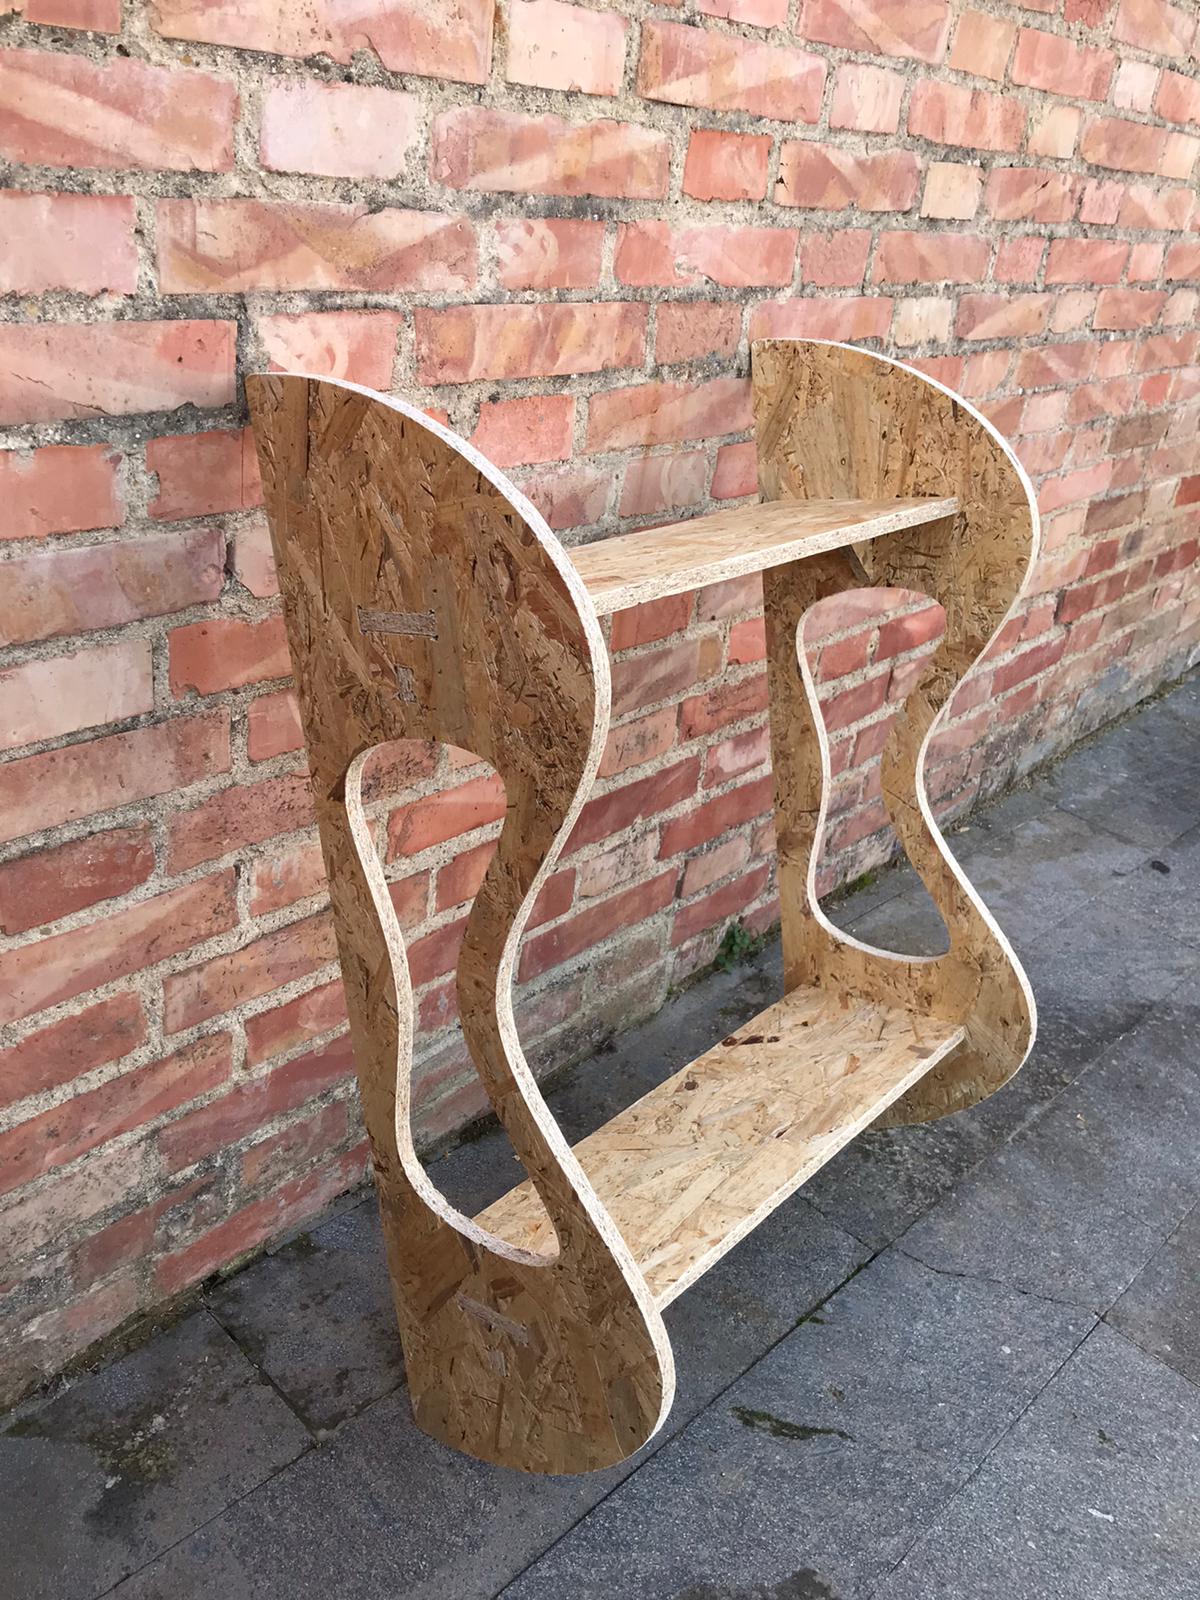
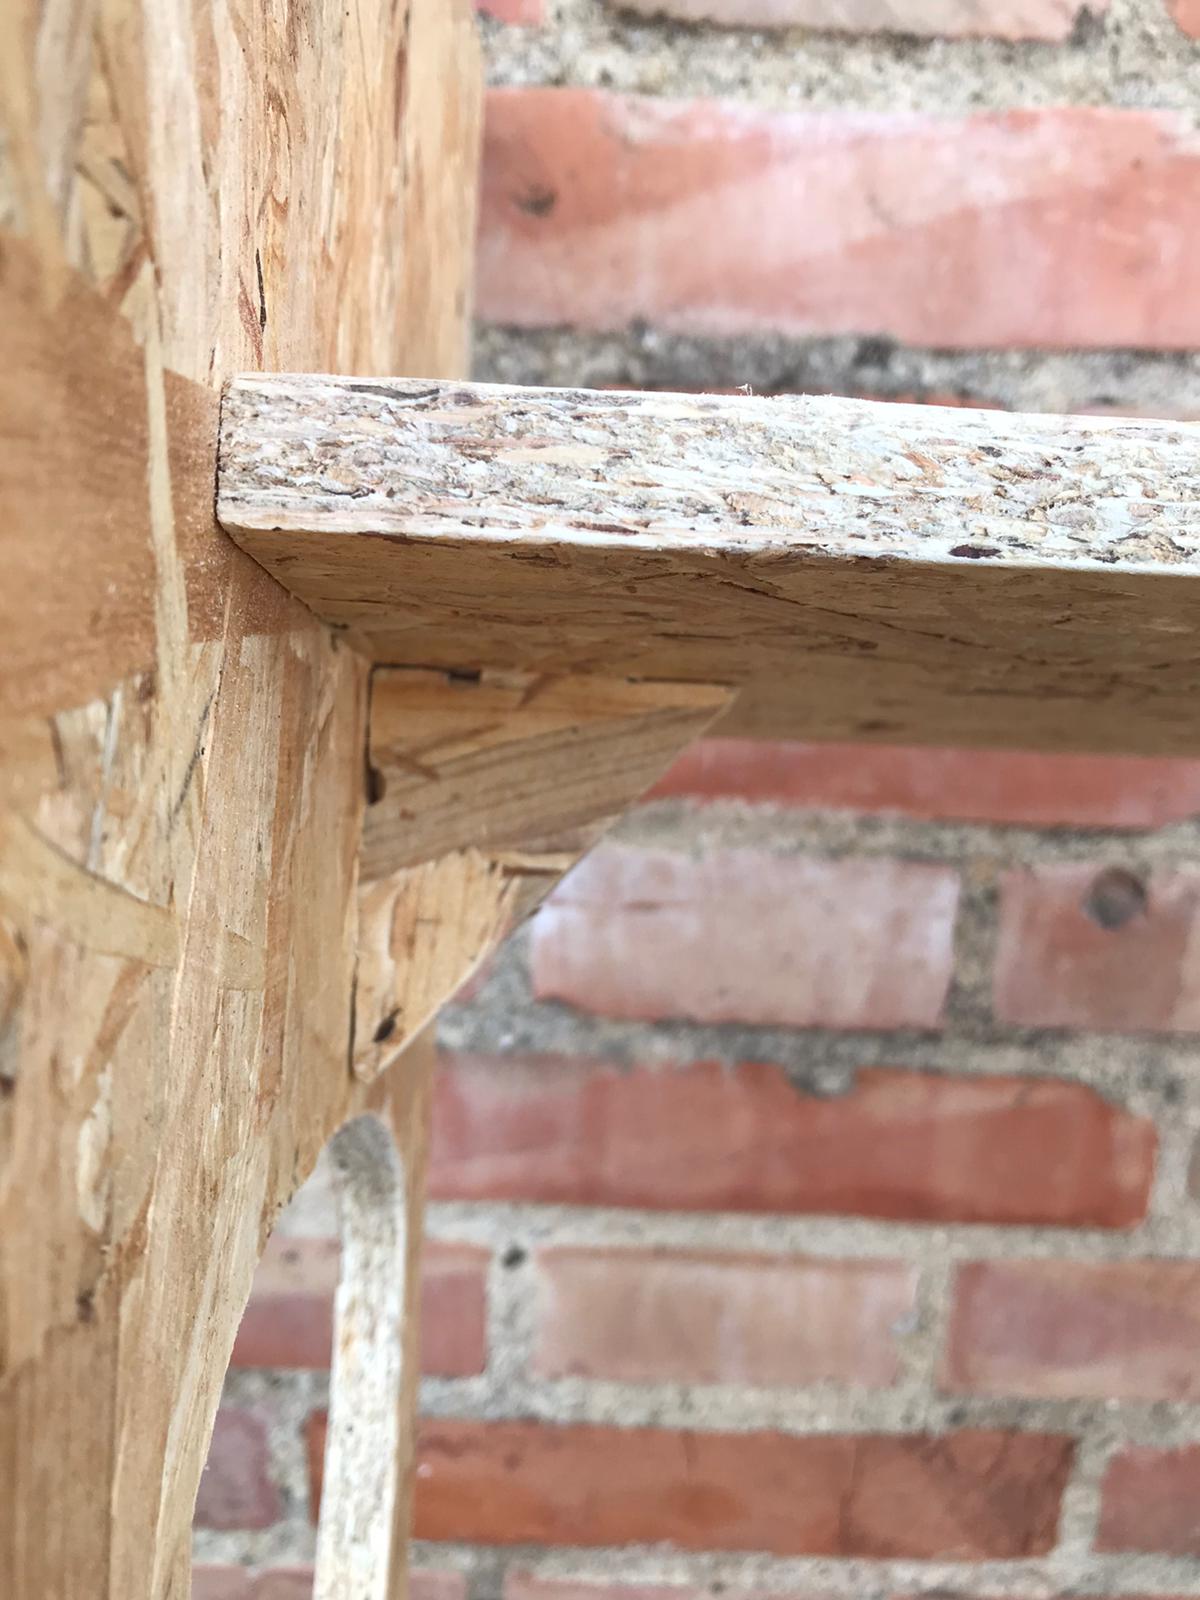
To take out the cutted pieces of my library I had to brake the tabs first. I then had to properly file all the pieces to take out the splinters and make everything smooth. So I was able to put it all toghether and this is what it looks like:
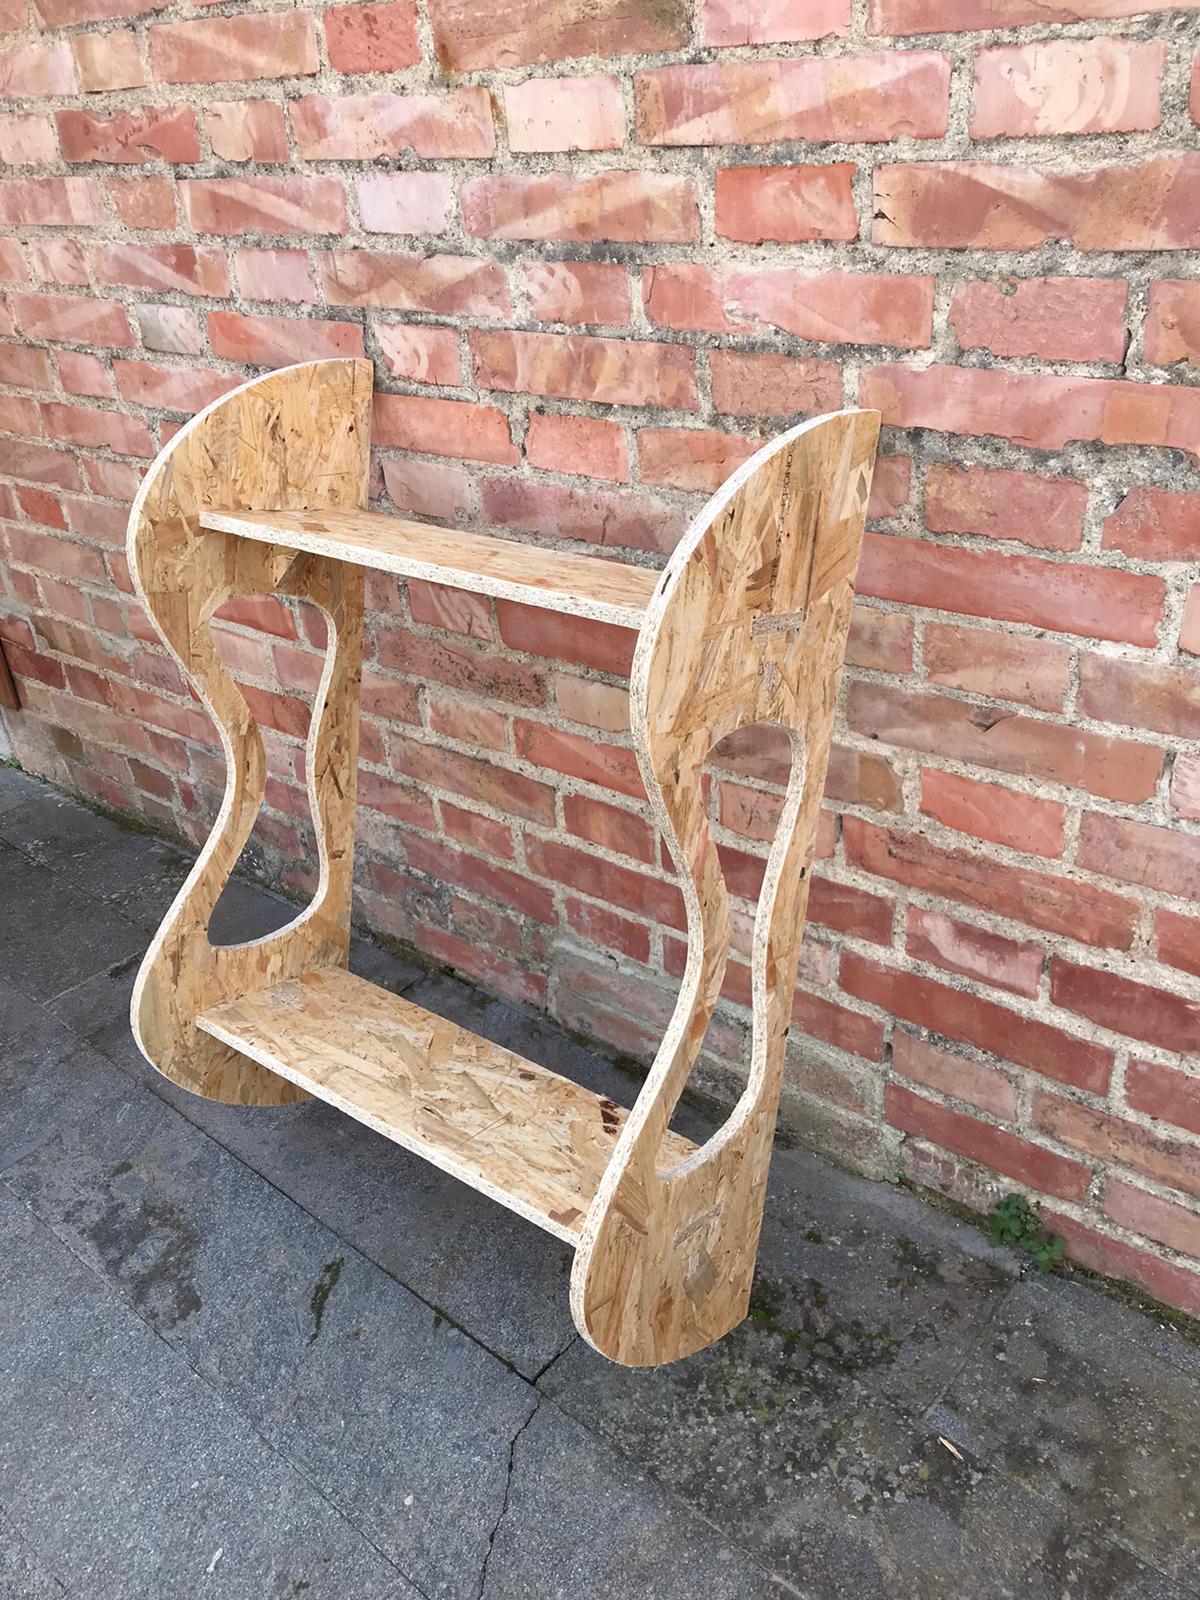

- As soon as I get back in the lab I will cut my sunbed and document the result.
- I changed my plan and cut a book shelf instead.
To make the 3D model downloadable I used Sketchfab. I created a free online account with which I can make my models public and get an embedded code too.