17. Wildcard Week
This week I worked on defining my final project idea and how I can apply a fab technique that has yet to be assigned. For this week I want to use a vacuum former to create the soft light filter for the top cover of my leaf light. I wanted to use the mold created in the week prior to shape the soft light filter.
Research
PETG is the plastic being used with the vacuum former. Plastic bags were tested to make a composite that could be molded. However this process did not work. Vacuum forming requires that you research your material. Knowing the reaction of heat to the plastic being used and at what temperature that will happen is extremely important.
PETG
PETG stands for Polyethylene Terephthalate Glycol. I found the vacuum forming properties on-line through Bridgewood. They explain that this material is thermoplastic that is easy to form and often the chosen materials to use. It has good strength and very good formability with high definition results. This is important to my design. I added leaf veins to show more detail in the final product. I was impressed by the properties and decided to use PETG.
The next thing I would need to know what the material softening point. This is the point at which the material is best suited to be formed. Tool Craft Plastics supplied a very useful plastics data sheet.
PETG is listed at 83 degrees Celsius which is converted to 181.4 degrees Fahrenheit. When heating the plastic this is the temperature I aim to heat the plastic to.
Digital Mold Newly Created - Explained Switch
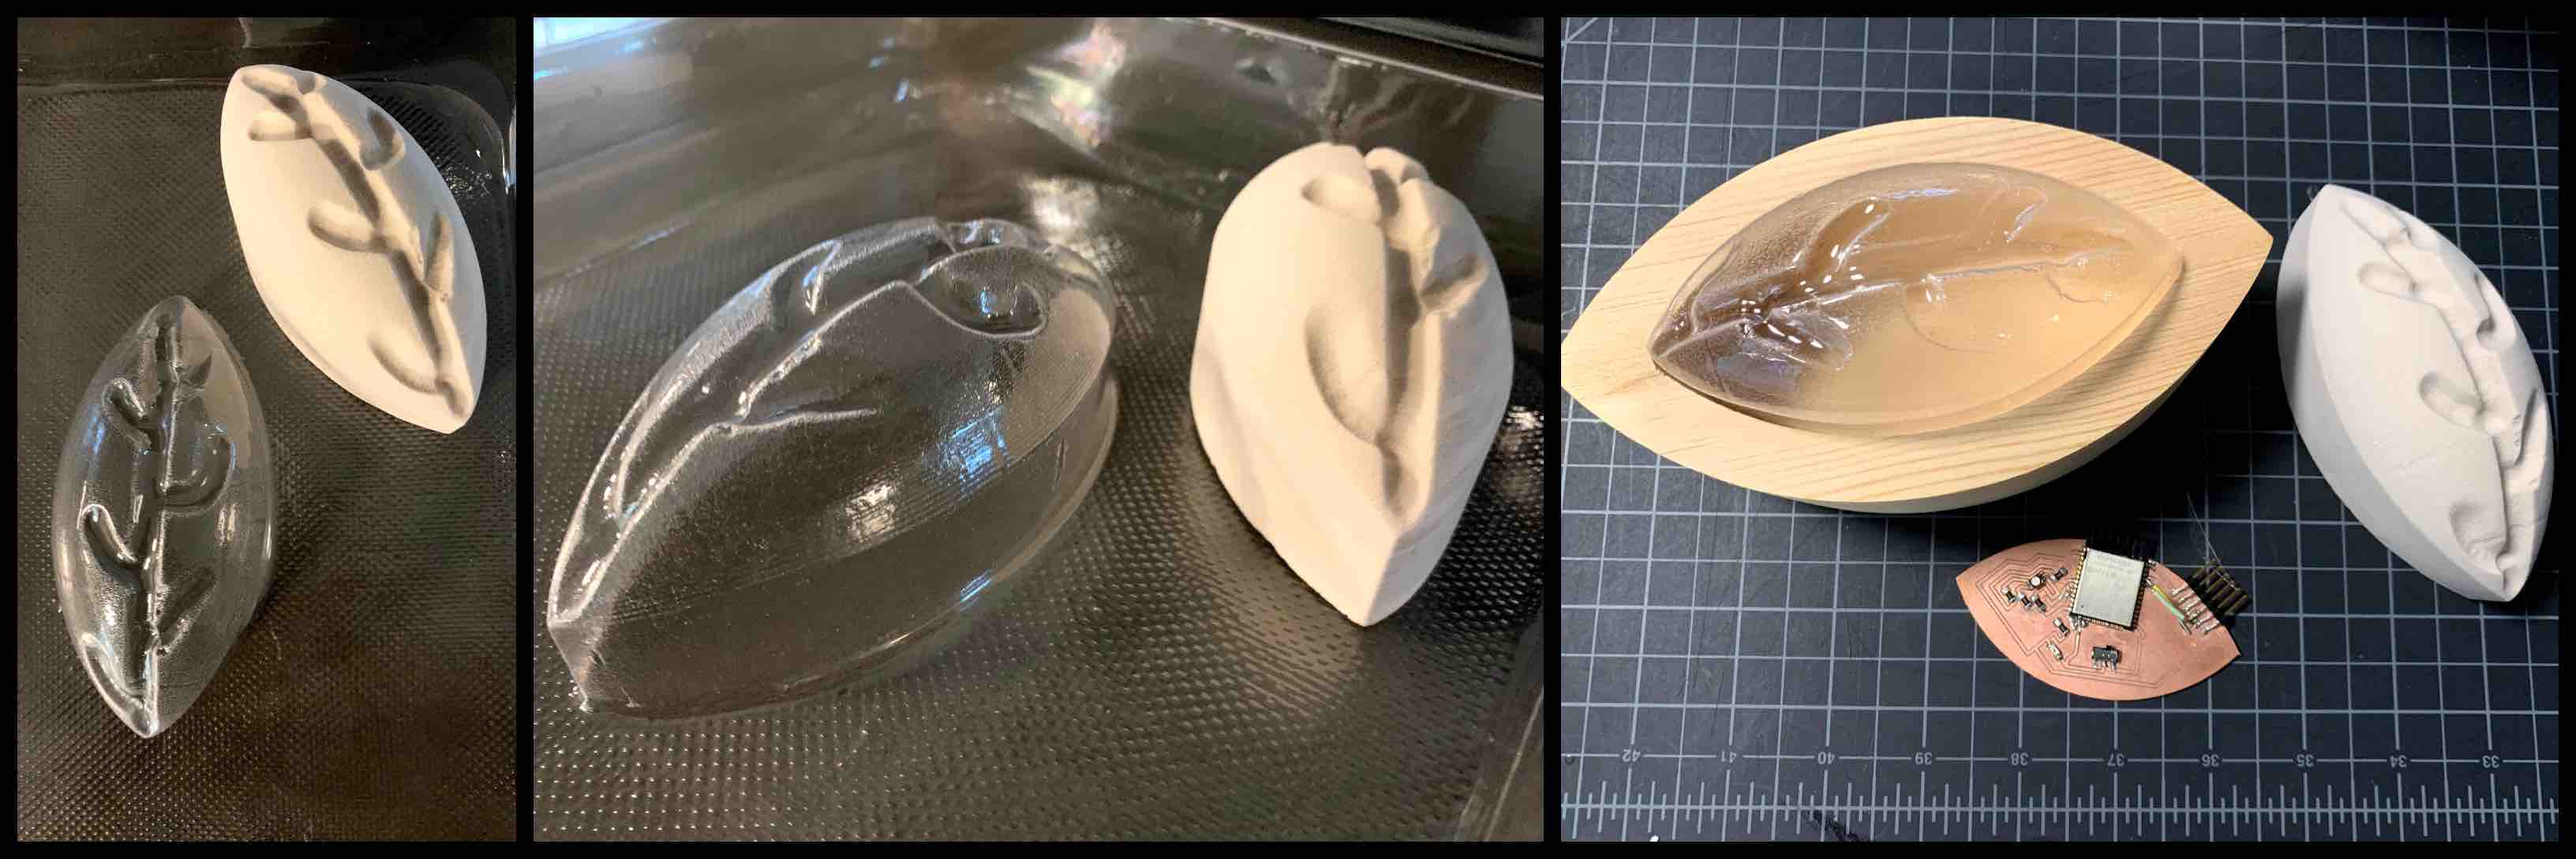
My next step was to recreate the mold being used. As mentioned in the previous week on Molding and Casting I created a casting I was originally planning on using. However, this final version was not compatible with the final frame made.
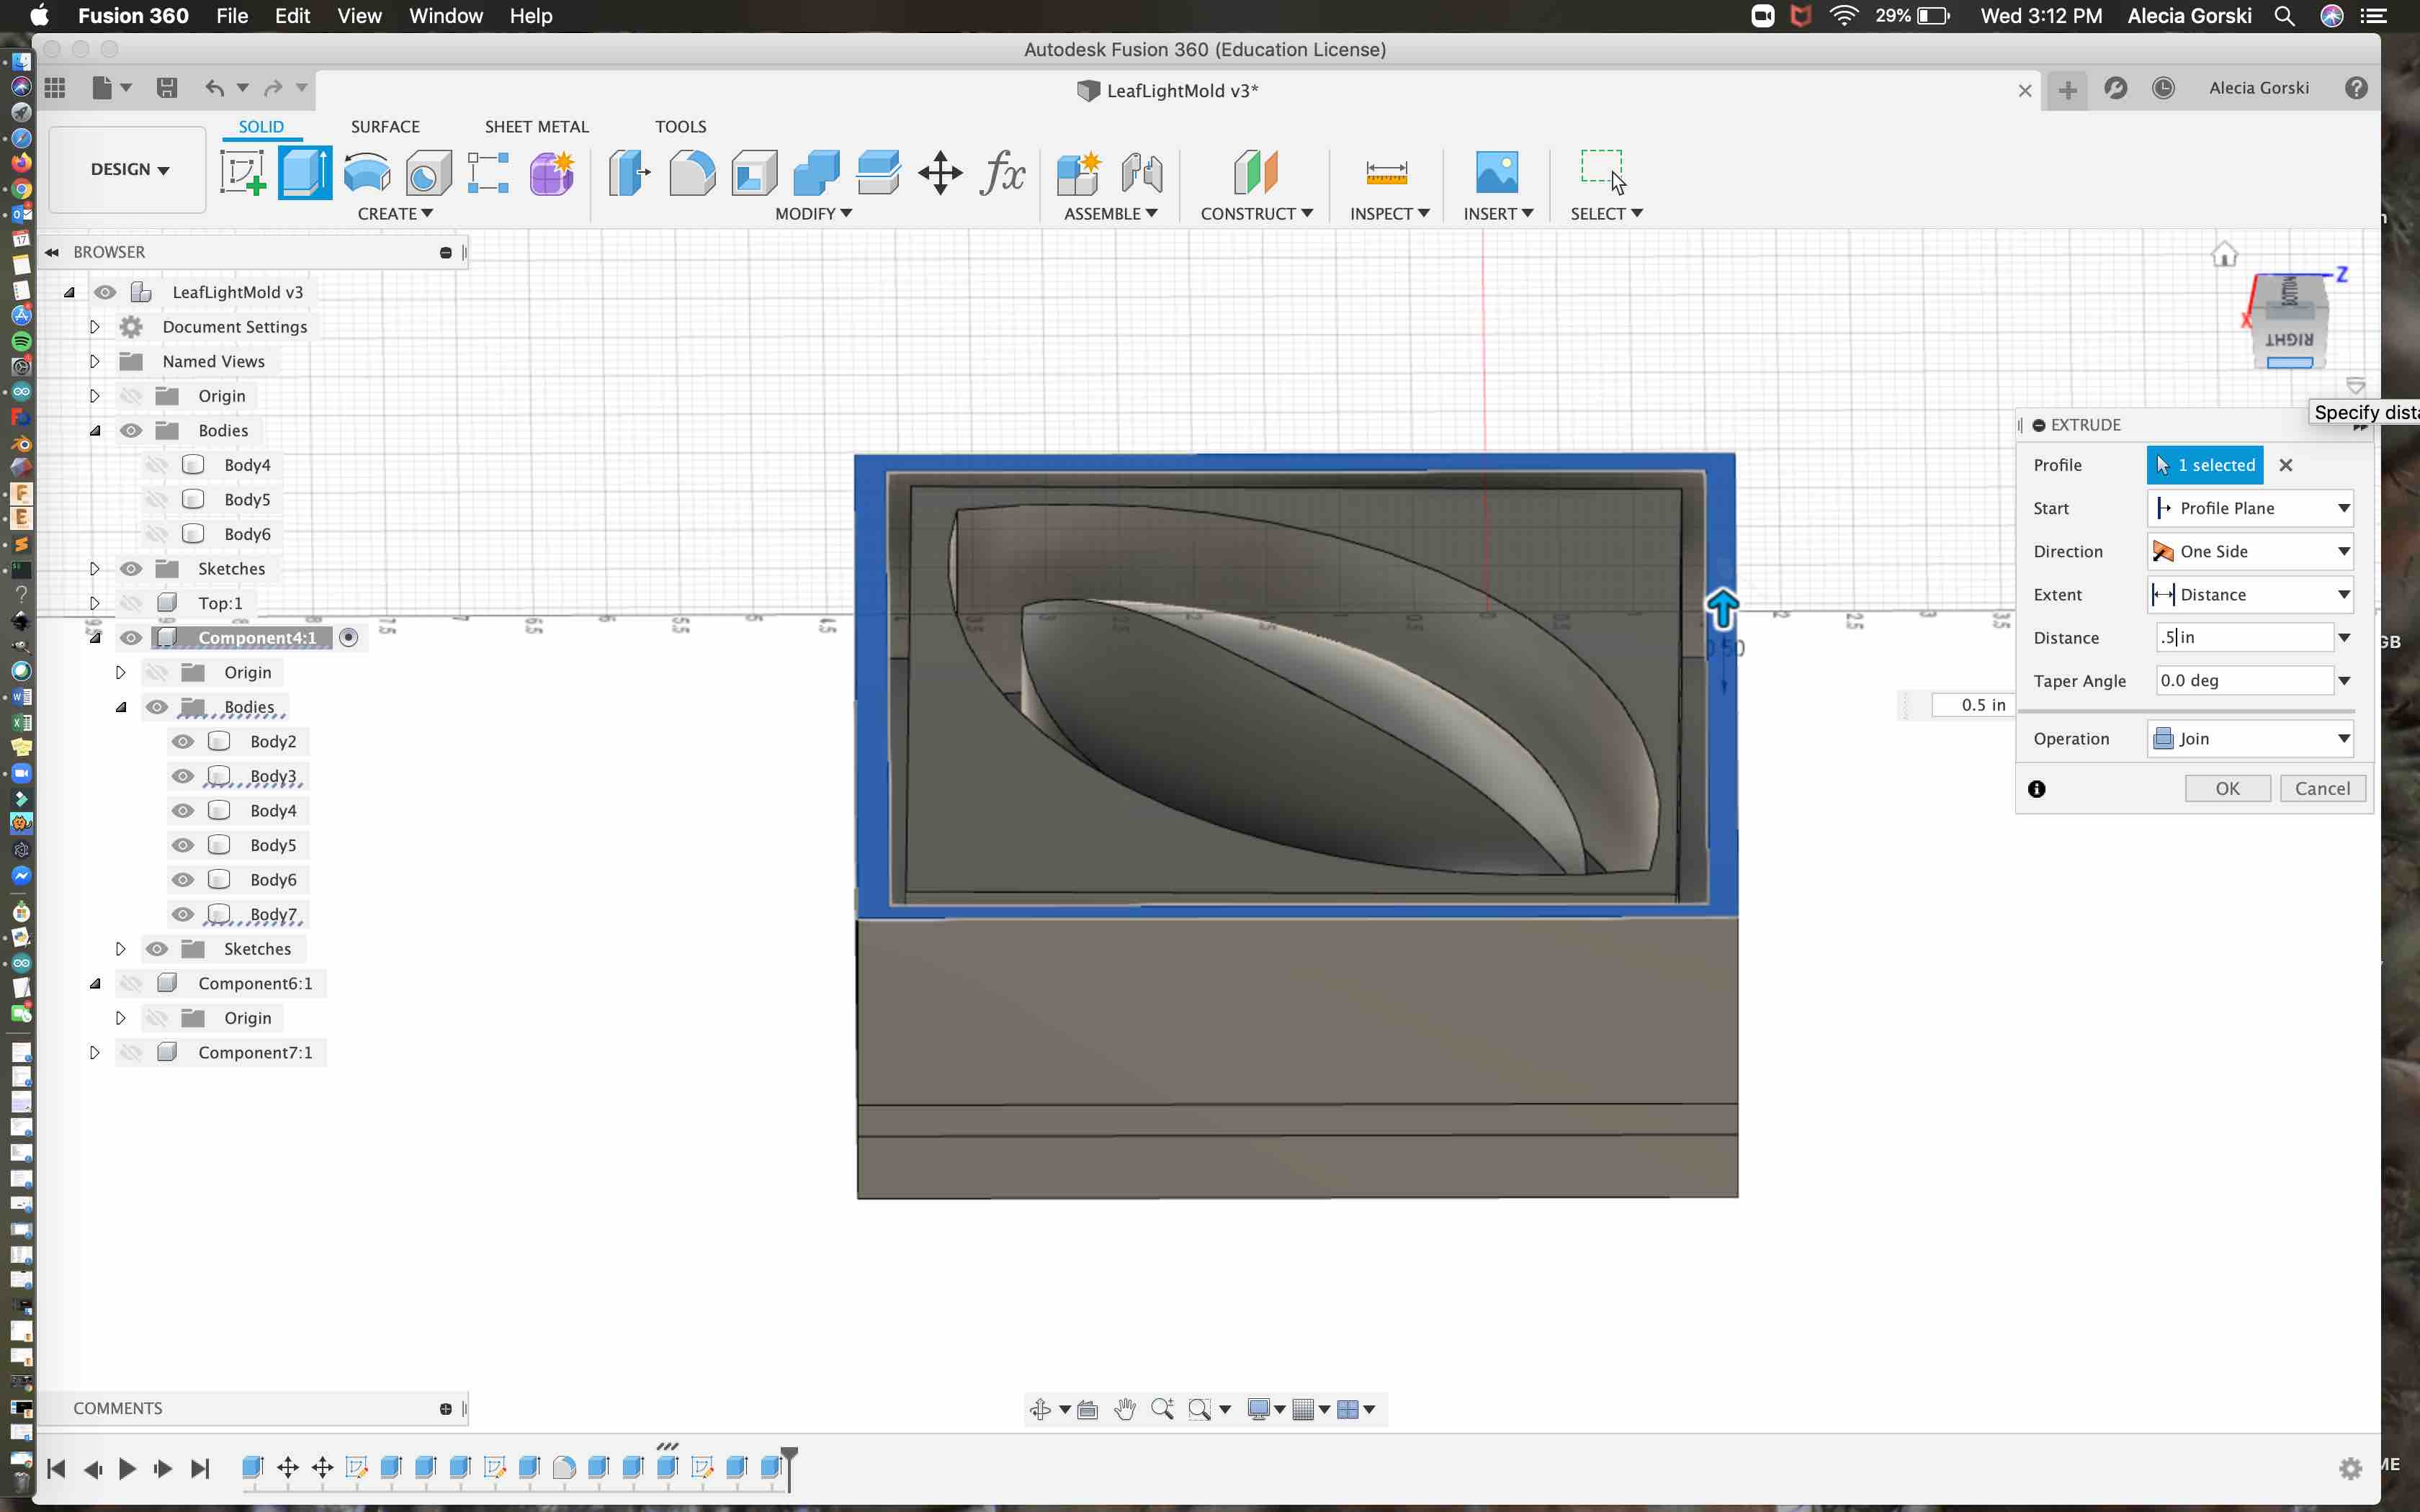
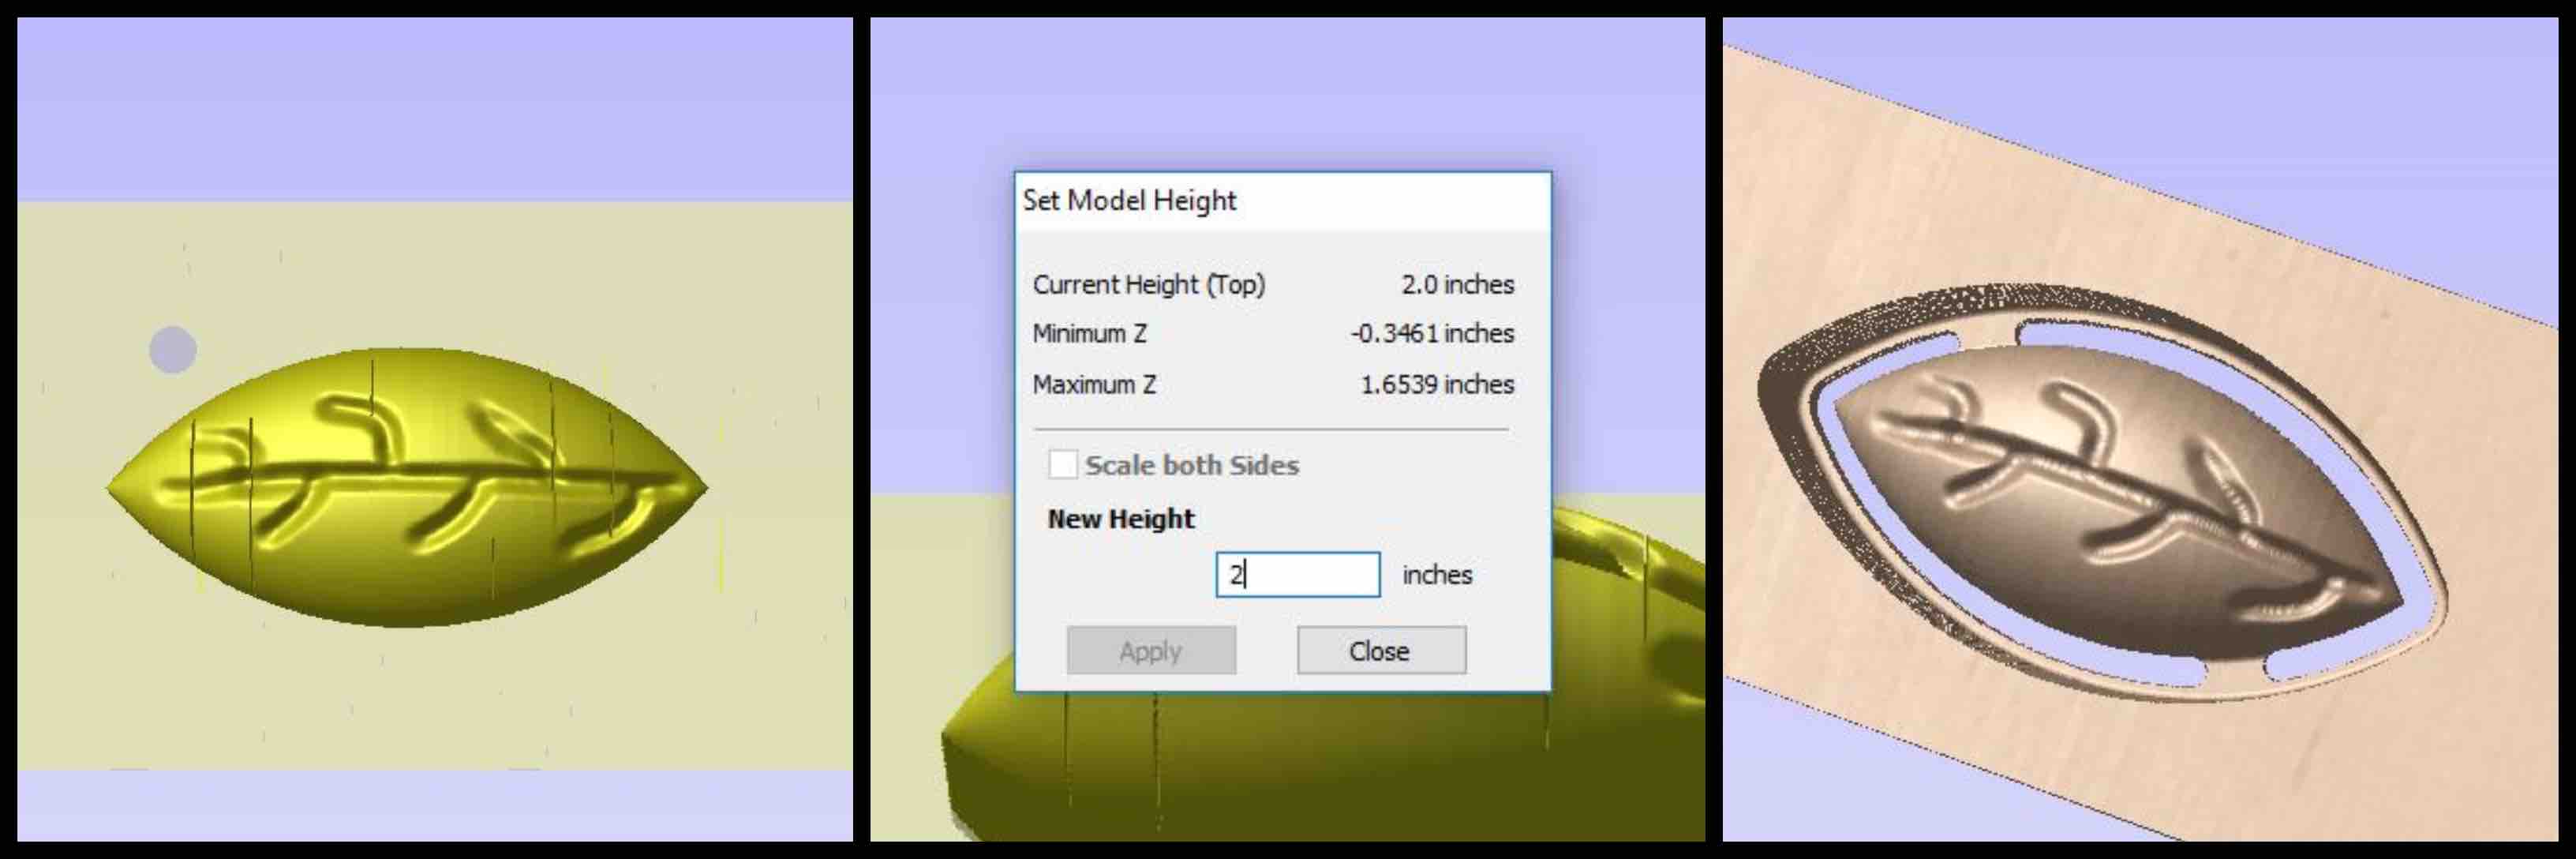
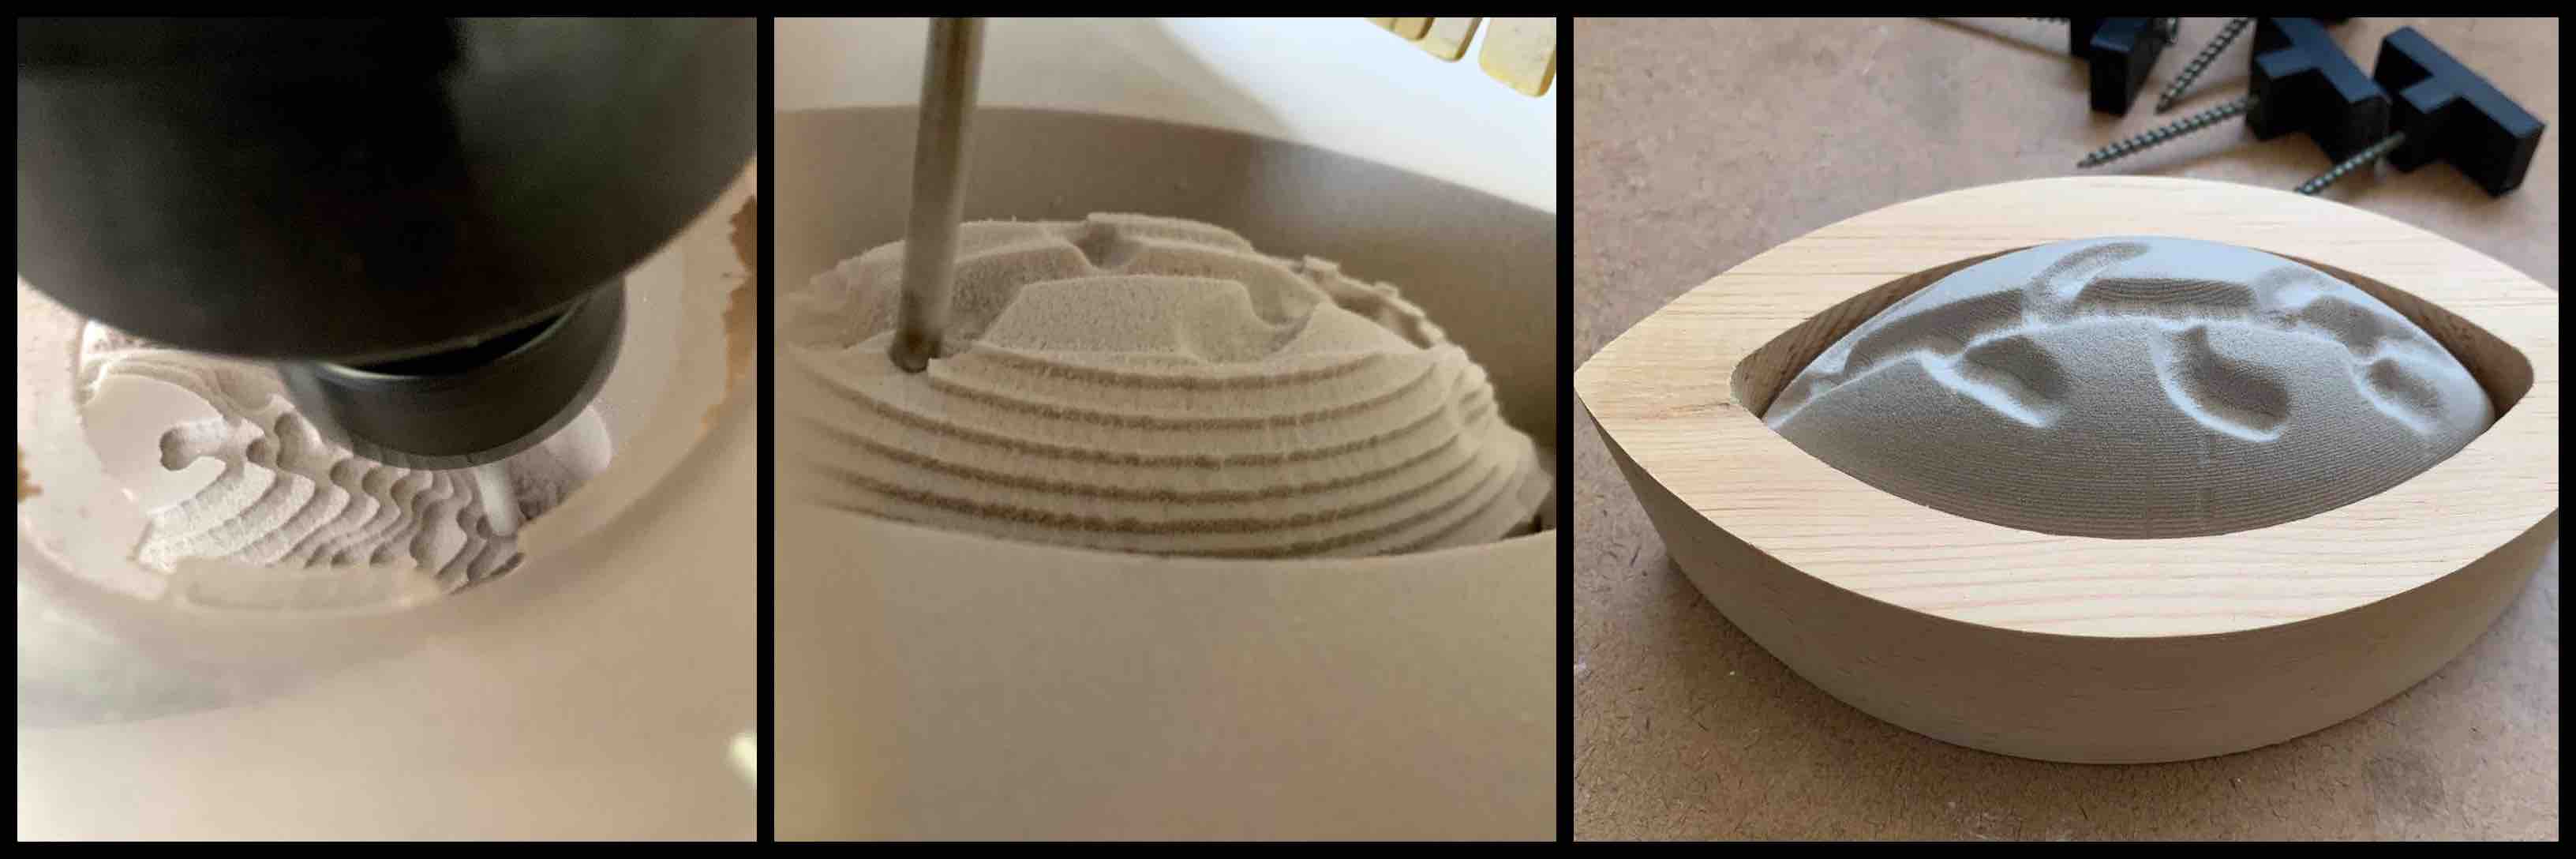
Using the original Aspire file I created the 3D shape in Aspires 3D modeling tool bar. I added the dome and used the drawling tool to add the leaf vein recess pattern. I set it to the specific height I needed, 2 inches.
CNC Mold from REN Board
With my design changes I also changed materials. Knowing I needed a porous material for vacuum forming so that the air can apply a tight vacuum, I decided to use some scrap ren board that was donated to our lab. The proporties can be found on the CMT website.
I had to create 3 tool paths for this shape. I needed to boarder to be removed, I needed the roughing pass, and I needed my finishing pass. The outline pass was done using the half inch 2-flute end mill. The roughing and finishing passses were done with the use of the eighth inch ball nose end mill.
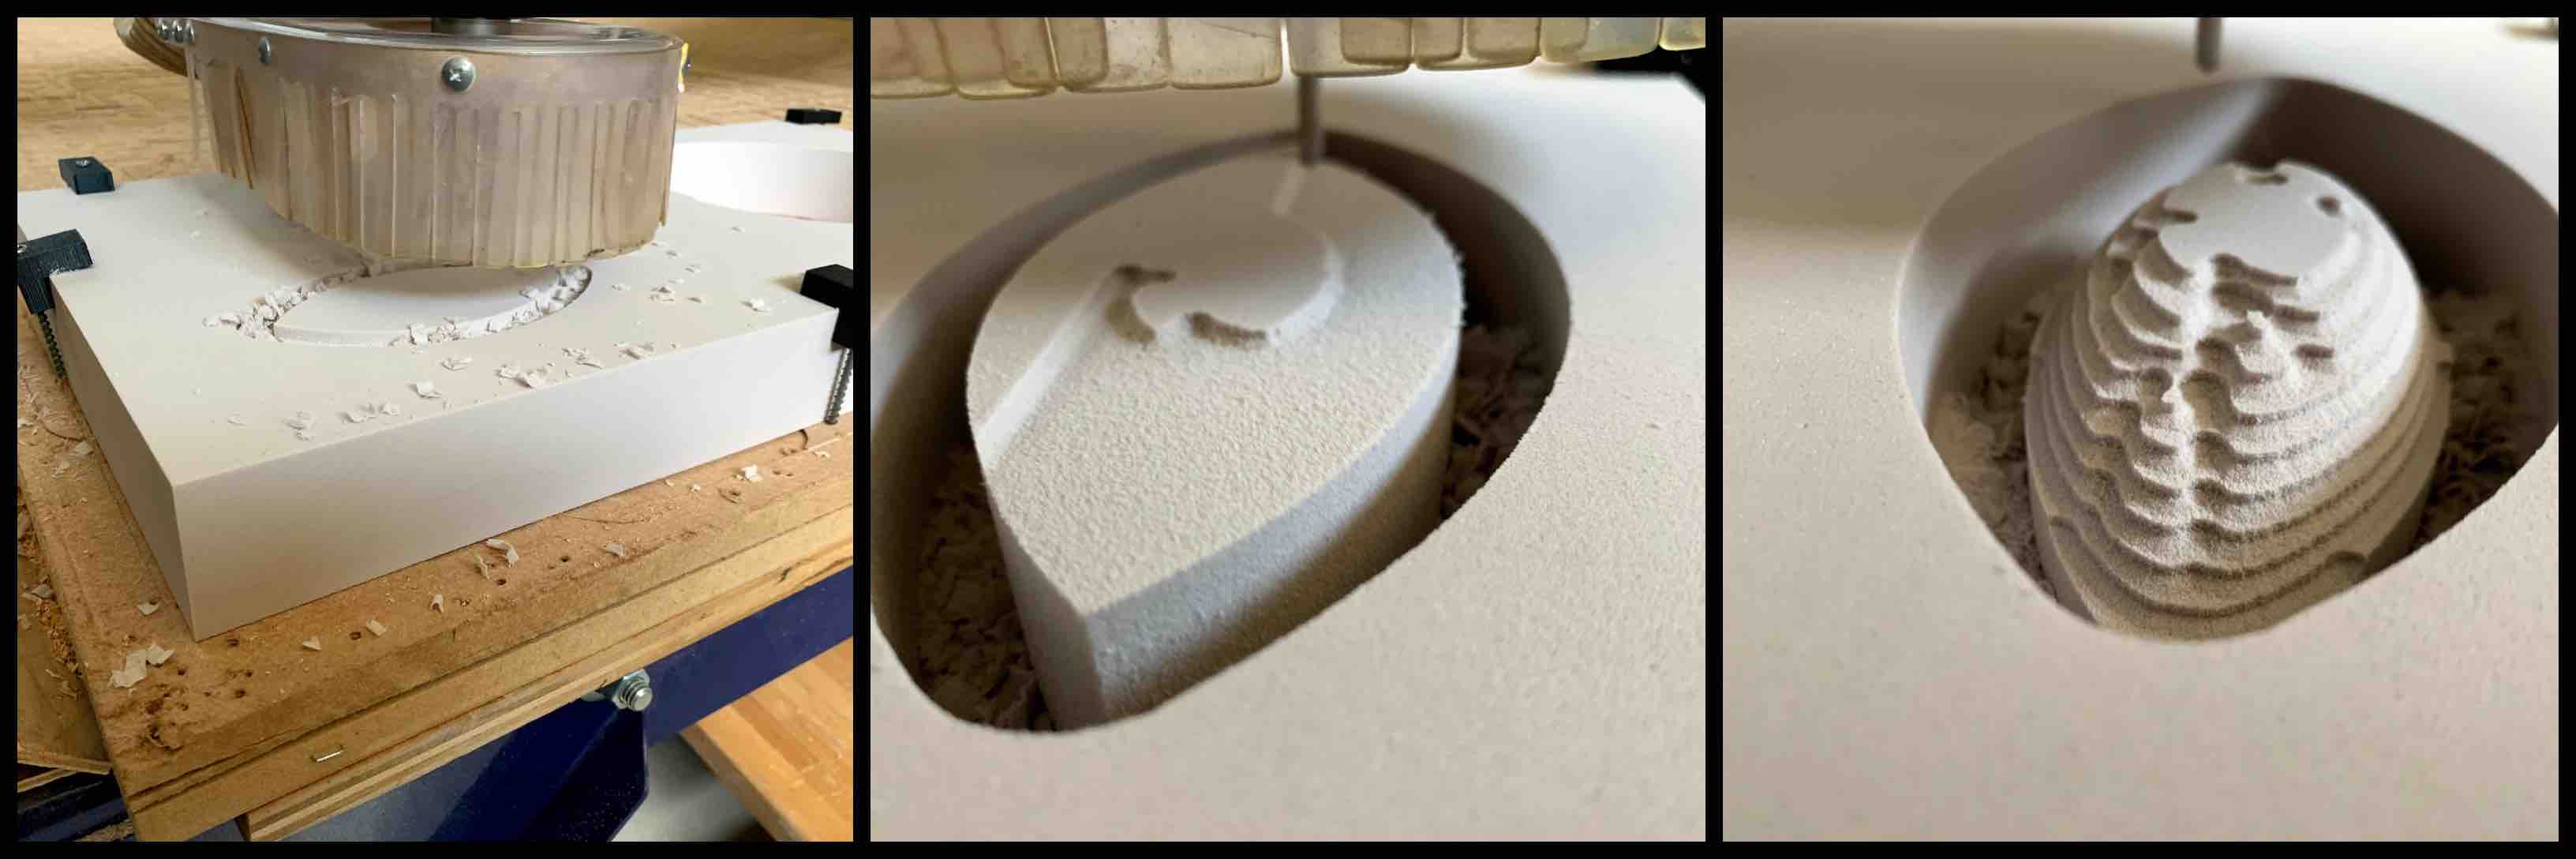
The roughing pass was broken down into 10 steps. Once those 10 steps where complete the ball nose end mill completing the finishing pass. The finishing pass smoothed all the edges and created the smooth dome shape. The leaf vein representation was left indented into the material. The final Ren Board piece was perfect and fit into my final shell perfectly!
Roughing to Finishing Paths
Vacuum Former Process and Materials
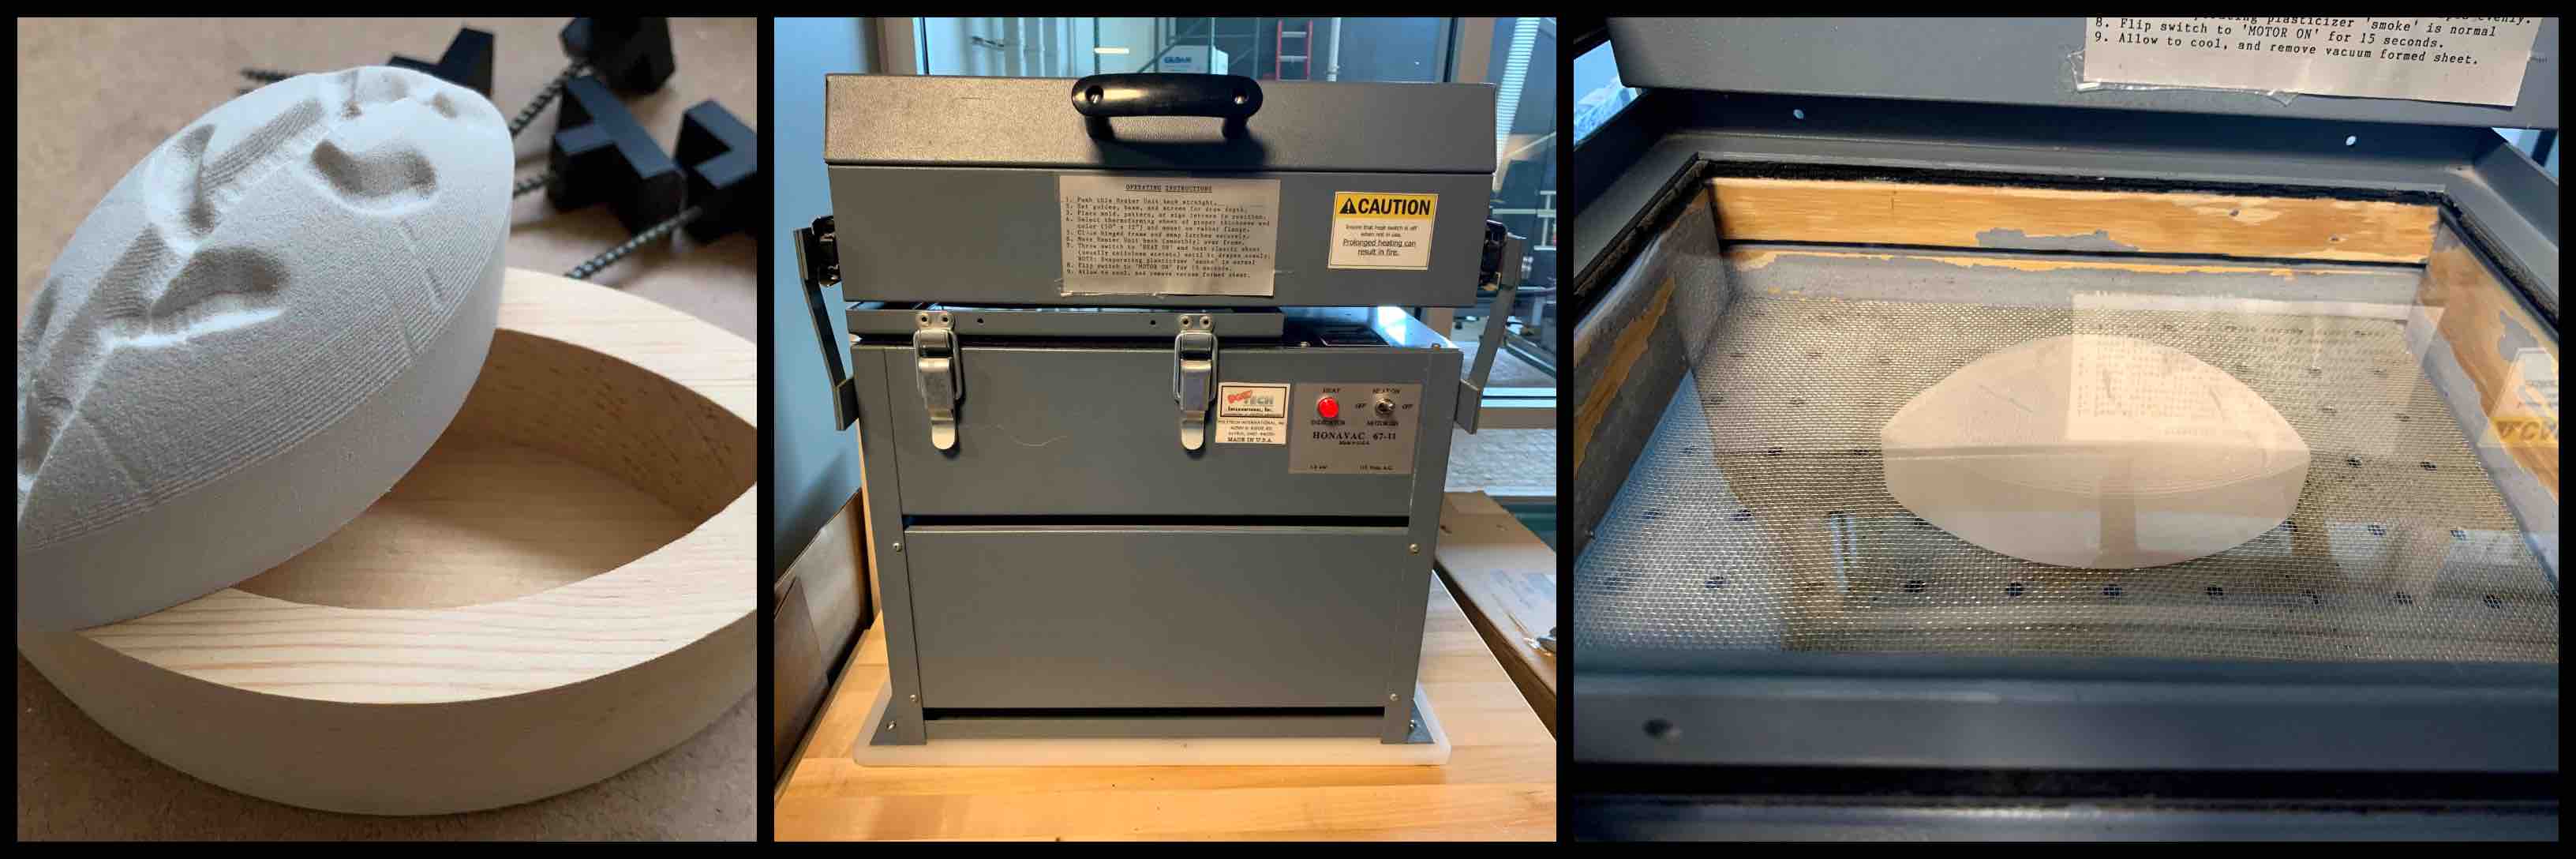
My final step was to Vacuum Form! Our lab has a Honavac Vacuum Former. This machine is made of 3 main parts. There is the vacuum chamber, the plastic sheet holder, and the heating coils on slide rails. The first step is to slide the heating coils - top component to the machine - backwards and out of the way. The plastic sheet holder has two front clips. With those undone, it can be lifted and moved up out of the way. When I fist began using the machine the bed was not low enough and my part overlapped the plastic sheet holder. This would not work because the plastic must lay flat with out touching anything else. I lifted the bed from the machine and moved it down to the next lowest level. I replaced the bed and my part now fit perfectly. The plastic sheet is then placed correctly into the window, and refastened into place.
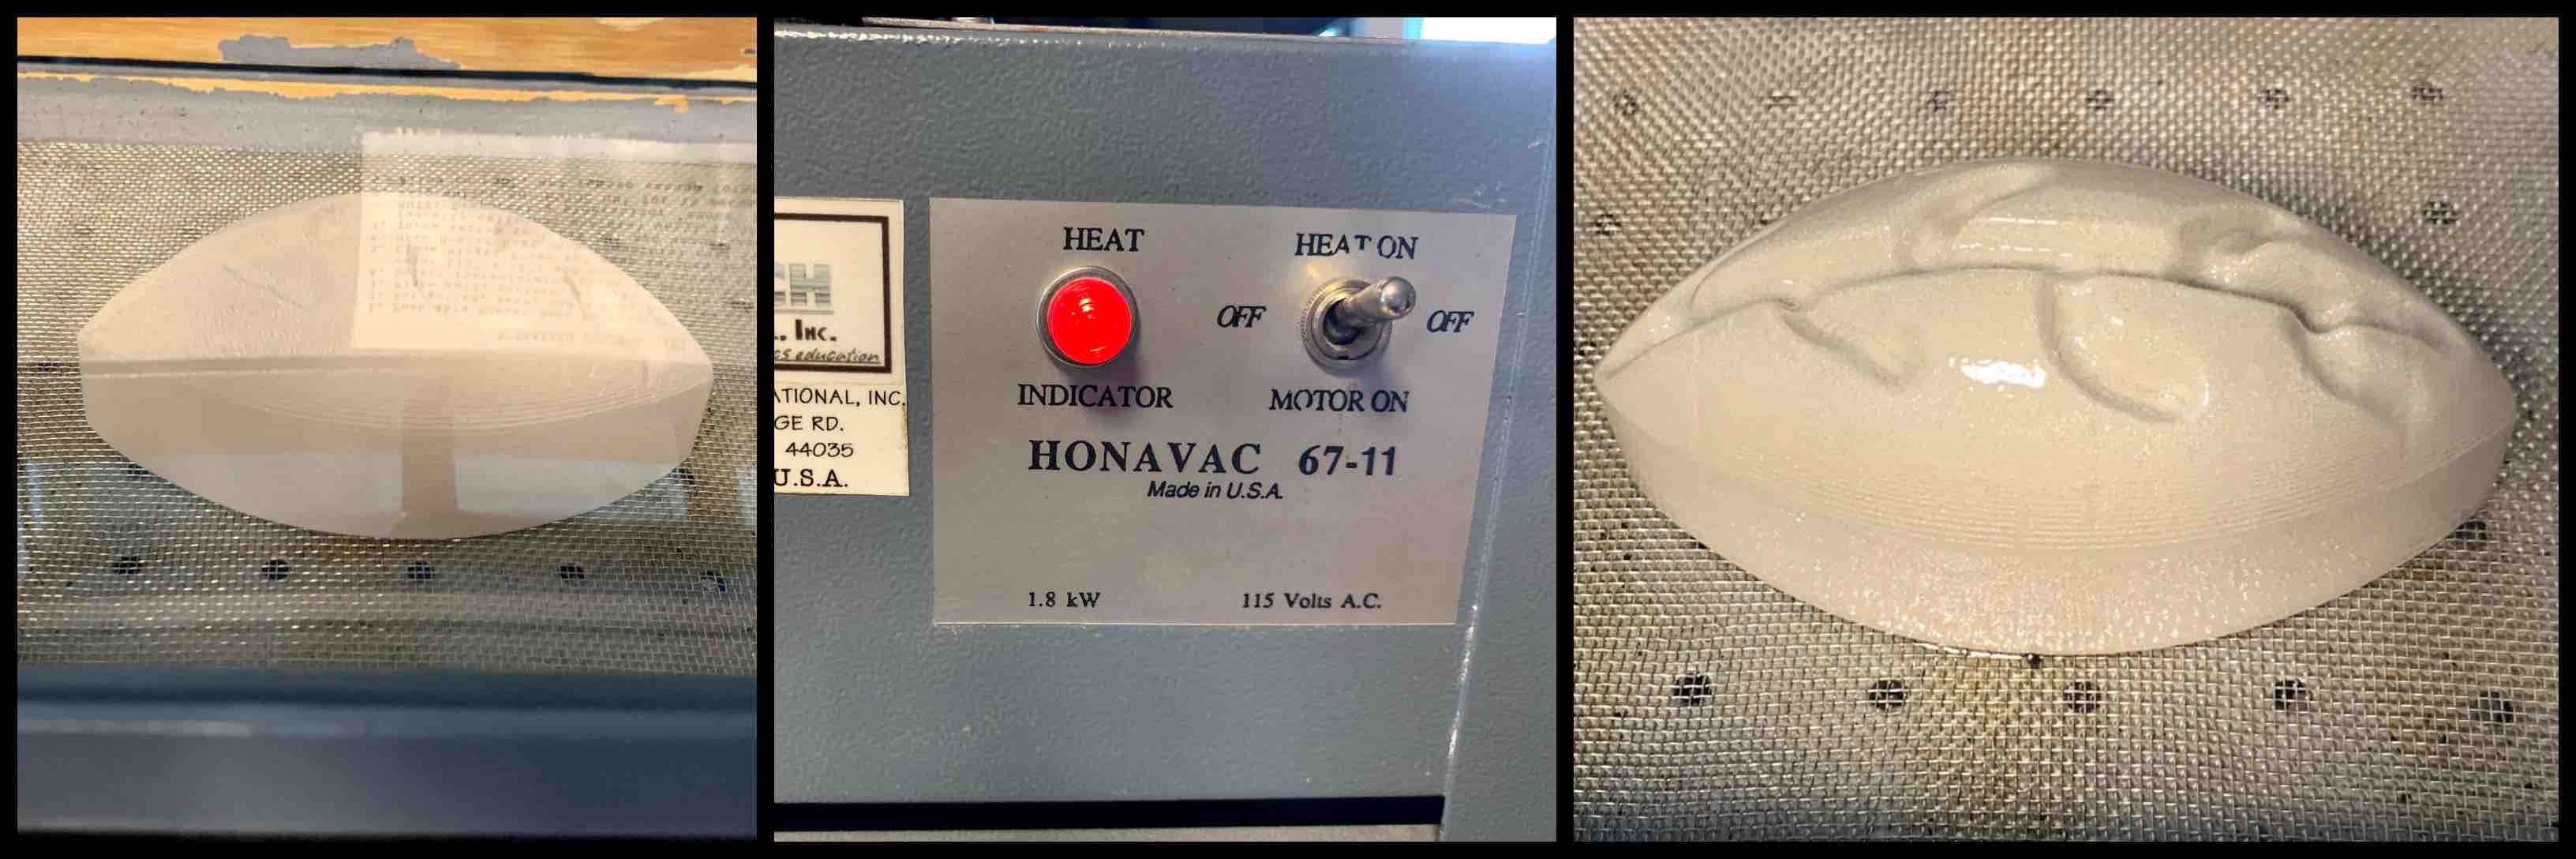
The vacuum former has a toggle switch on the front with three options. There is the heating options when flipped up, the vacuum option when flipped down, and the off potion when snapped into the middle.
With the part loaded to the bed, the plastic sheet secured in place, and the heating coils pulled back in place over the plastic the toggle switch gets flipped up. The heating coils then begin to heat the plastic. This is the point at which the plastic should be monitored by heat to reach the correct malleable state.
Once the plastic reaches the correct temperature the toggle switch should then be flipped into the downward position. This enables the vacuum and if the plastic is to the correct temperature should mold to the shape of the cast.
My first two attempts were not successful. During my first attempt the vacuum was activated but the plastic was not yet hot enough and did not mold. It created a small lump when it did contact my piece but could not be pulled all the way down.
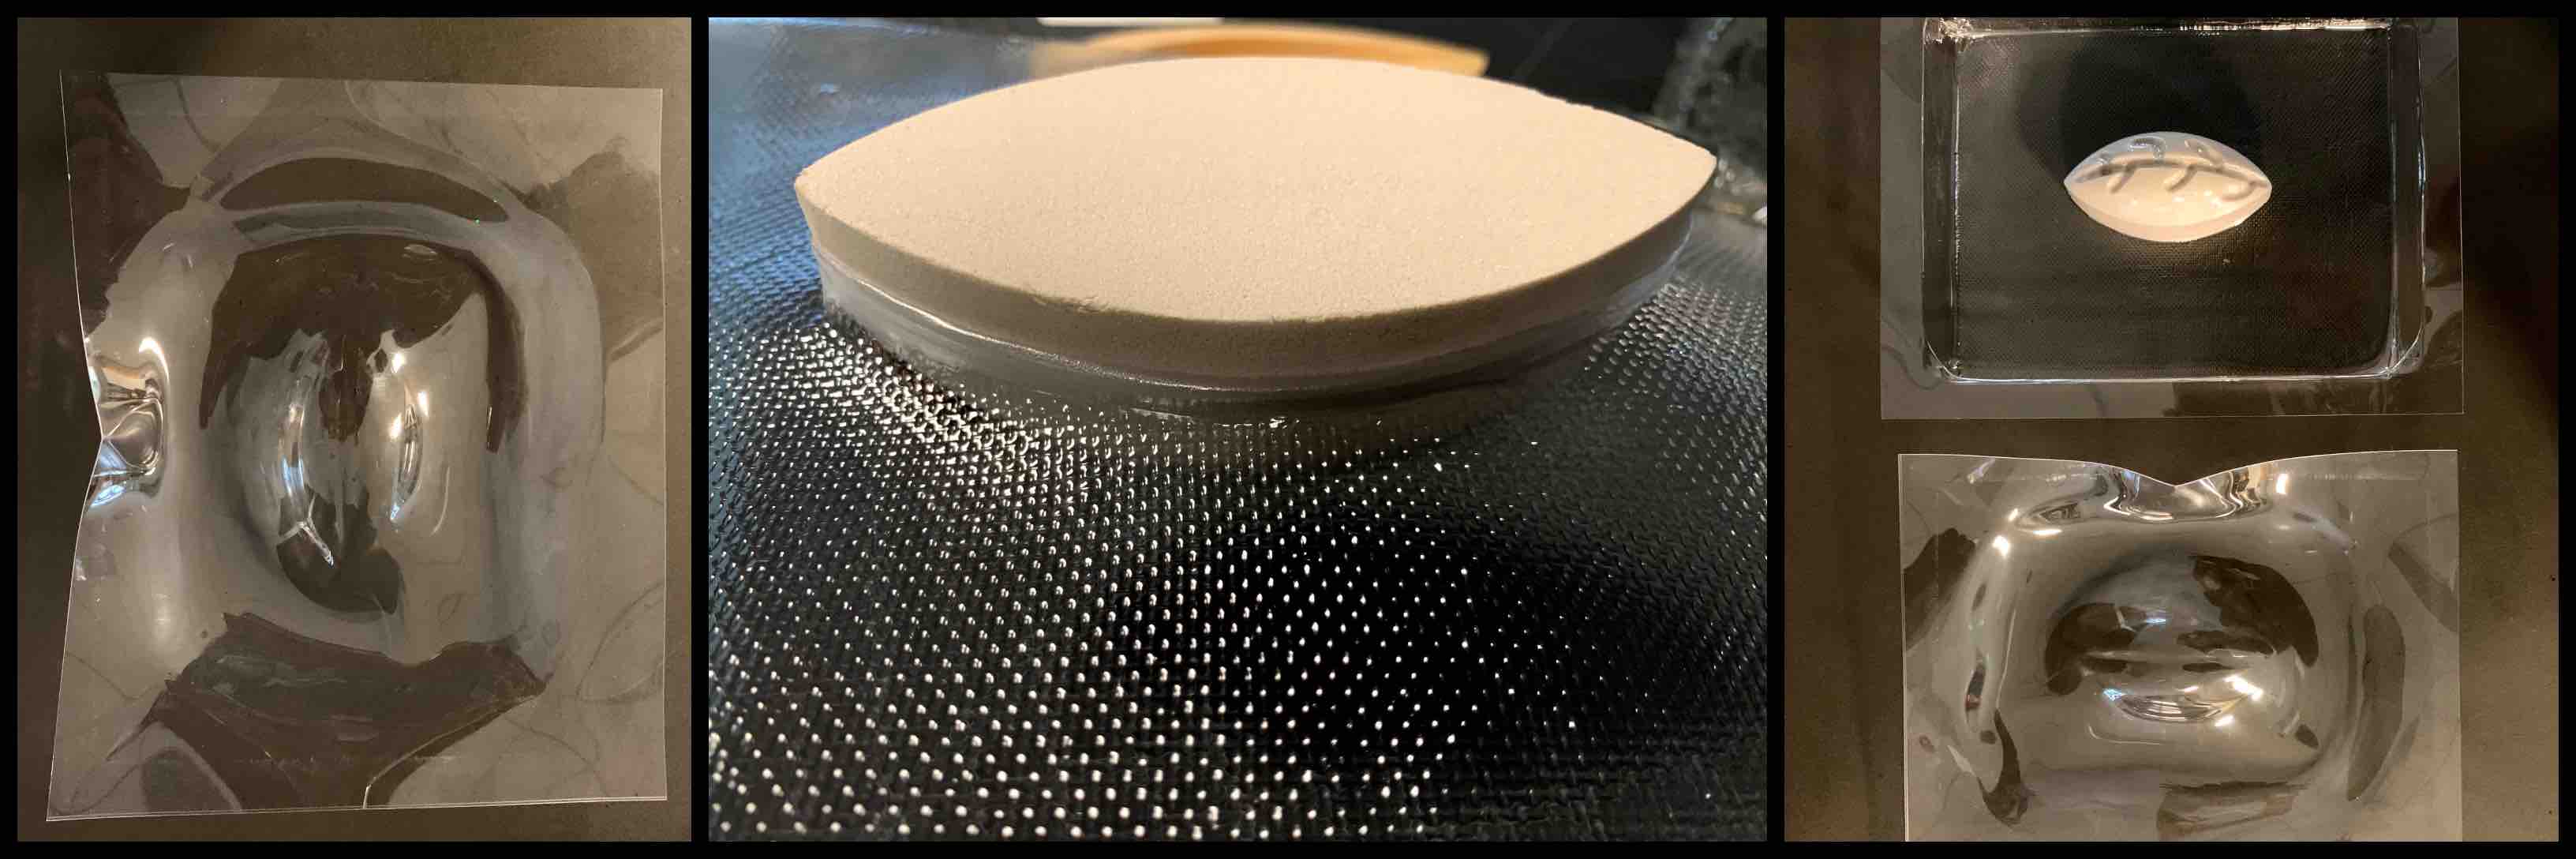
The second attempt was actually formed and melted to the top of my piece. I had to use an exacto blade to cut up the sides and pull this apart. It left particles of ren board behind stuck to the plastic. However, this did not do any substantial damage to my piece being formed so I tried again!!! This time I tried one slight difference. I applied a layer of Universal Mold Release lightly to my ren board leaf. With the ren board being so porous it soaked in. In this case I did not let it set for the time suggested and placed it into the vacuum former immediately to be used.
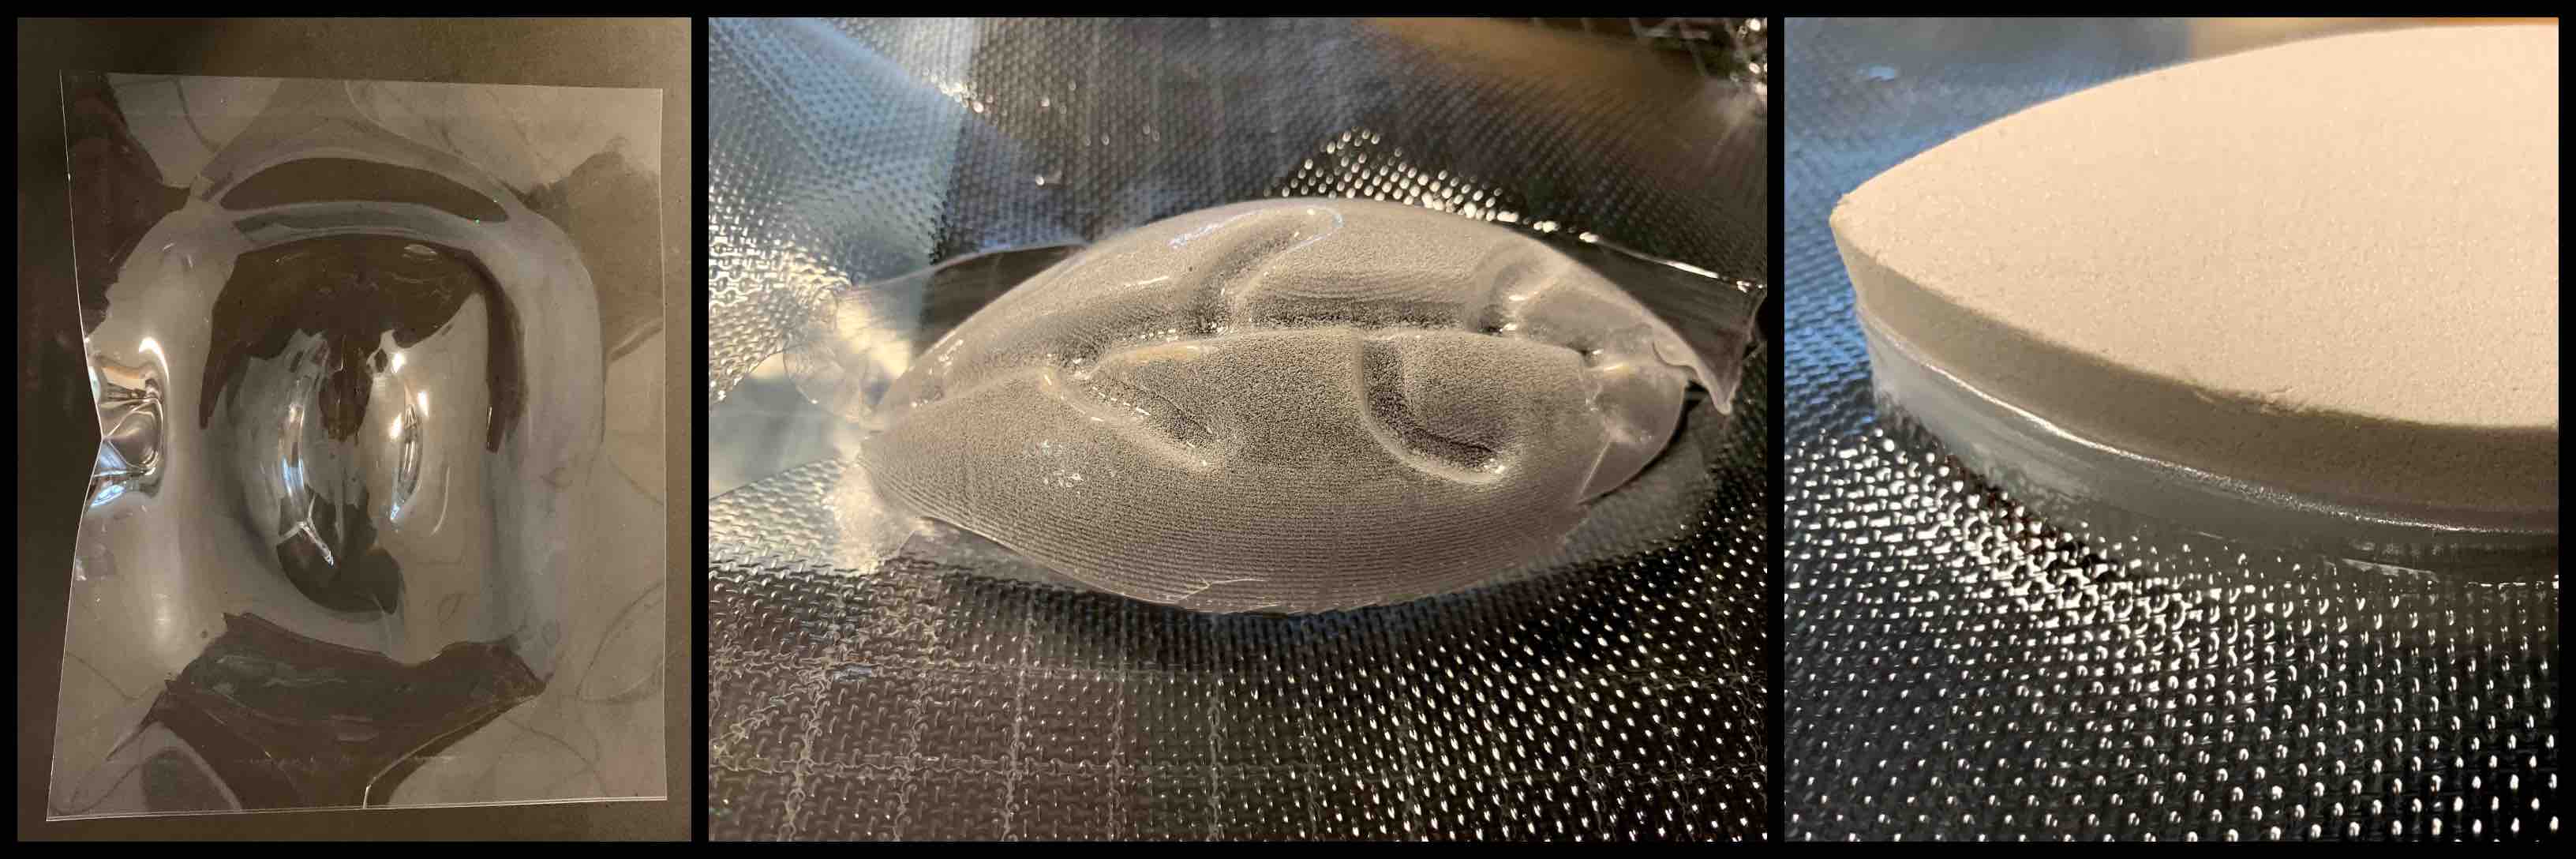
Final Forming
My final form turned out perfect. I was so pleased. At 40 seconds of heat applied to the PETG sheet and 15 seconds of vacuum applied my piece made full connection and form, as well as being removed from the final creation. It fit snuggly into my final frame and I am one step closer to my final project coming together.