13. Interface and Application Programming
This week I worked on better understanding interface and application programming.
Useful links
Research
Knowing little about applications and designing or deploying them, this week was both intimidating and intriguing. Until gaining access to my local lab I was able to review many different application building assistants. Knowing I wanted to focus on an application for an Apple device I researched the MIT application maker App Inventor but decided I needed to try something a little different. I did some research and decided to use a program called App Hive.
After more research on my final project I came across an application interface that communicated with the ESP 32 Dev board I had. I plan to use the ESP 32 for my final project and was able to more efficiently test the connection and process using Blynk.
Starting New
Using Blynk I was able to program a wireless connection between my cell phone and the ESP32. The circuit created allows the ESP32 to communicate with an LED. In this assignment I was able to control the LED and turn it on and off with a button in the application.
Blynk
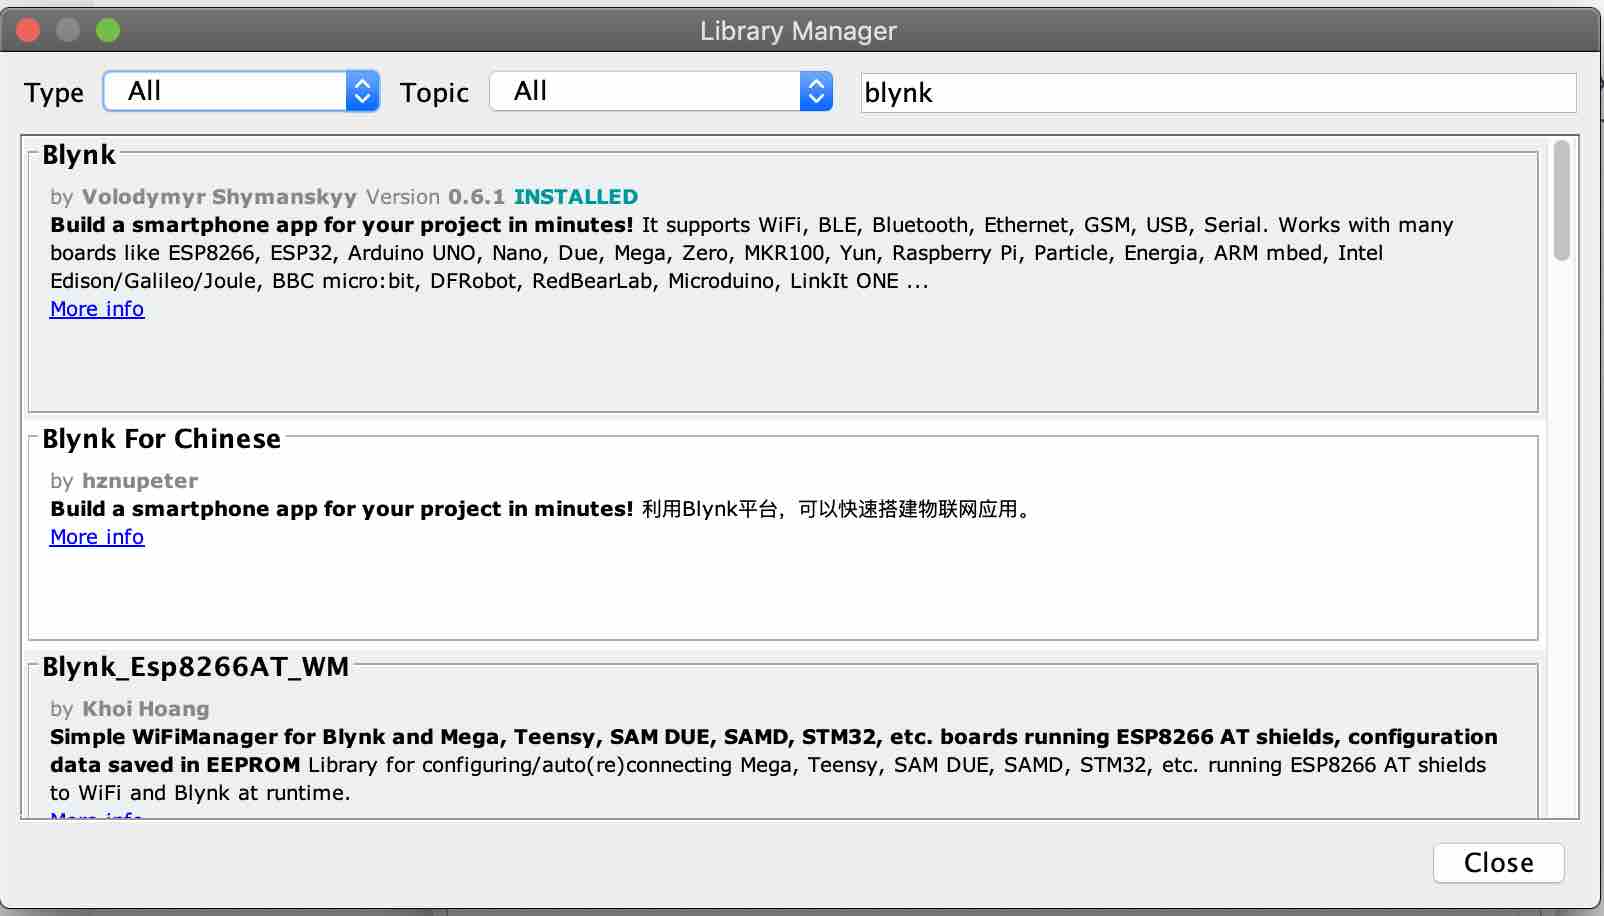
Blynk is a program that allows the user to create an application. This application can then be used to interact with a microcontroller built into a board. However, in order to use Blynk the user must have a board with Arduino IDE and have the library in the Arduino software.
Using the Arduino tool bar at the top of the screen I was able to select manage library. Once that was selected it brought up a dialog box with many different options, Blynk being one of them. I then installed the Blynk Library. With this library installed I was able to access the WiFi Scanning options as well as the WiFi connection options for the ESP32.
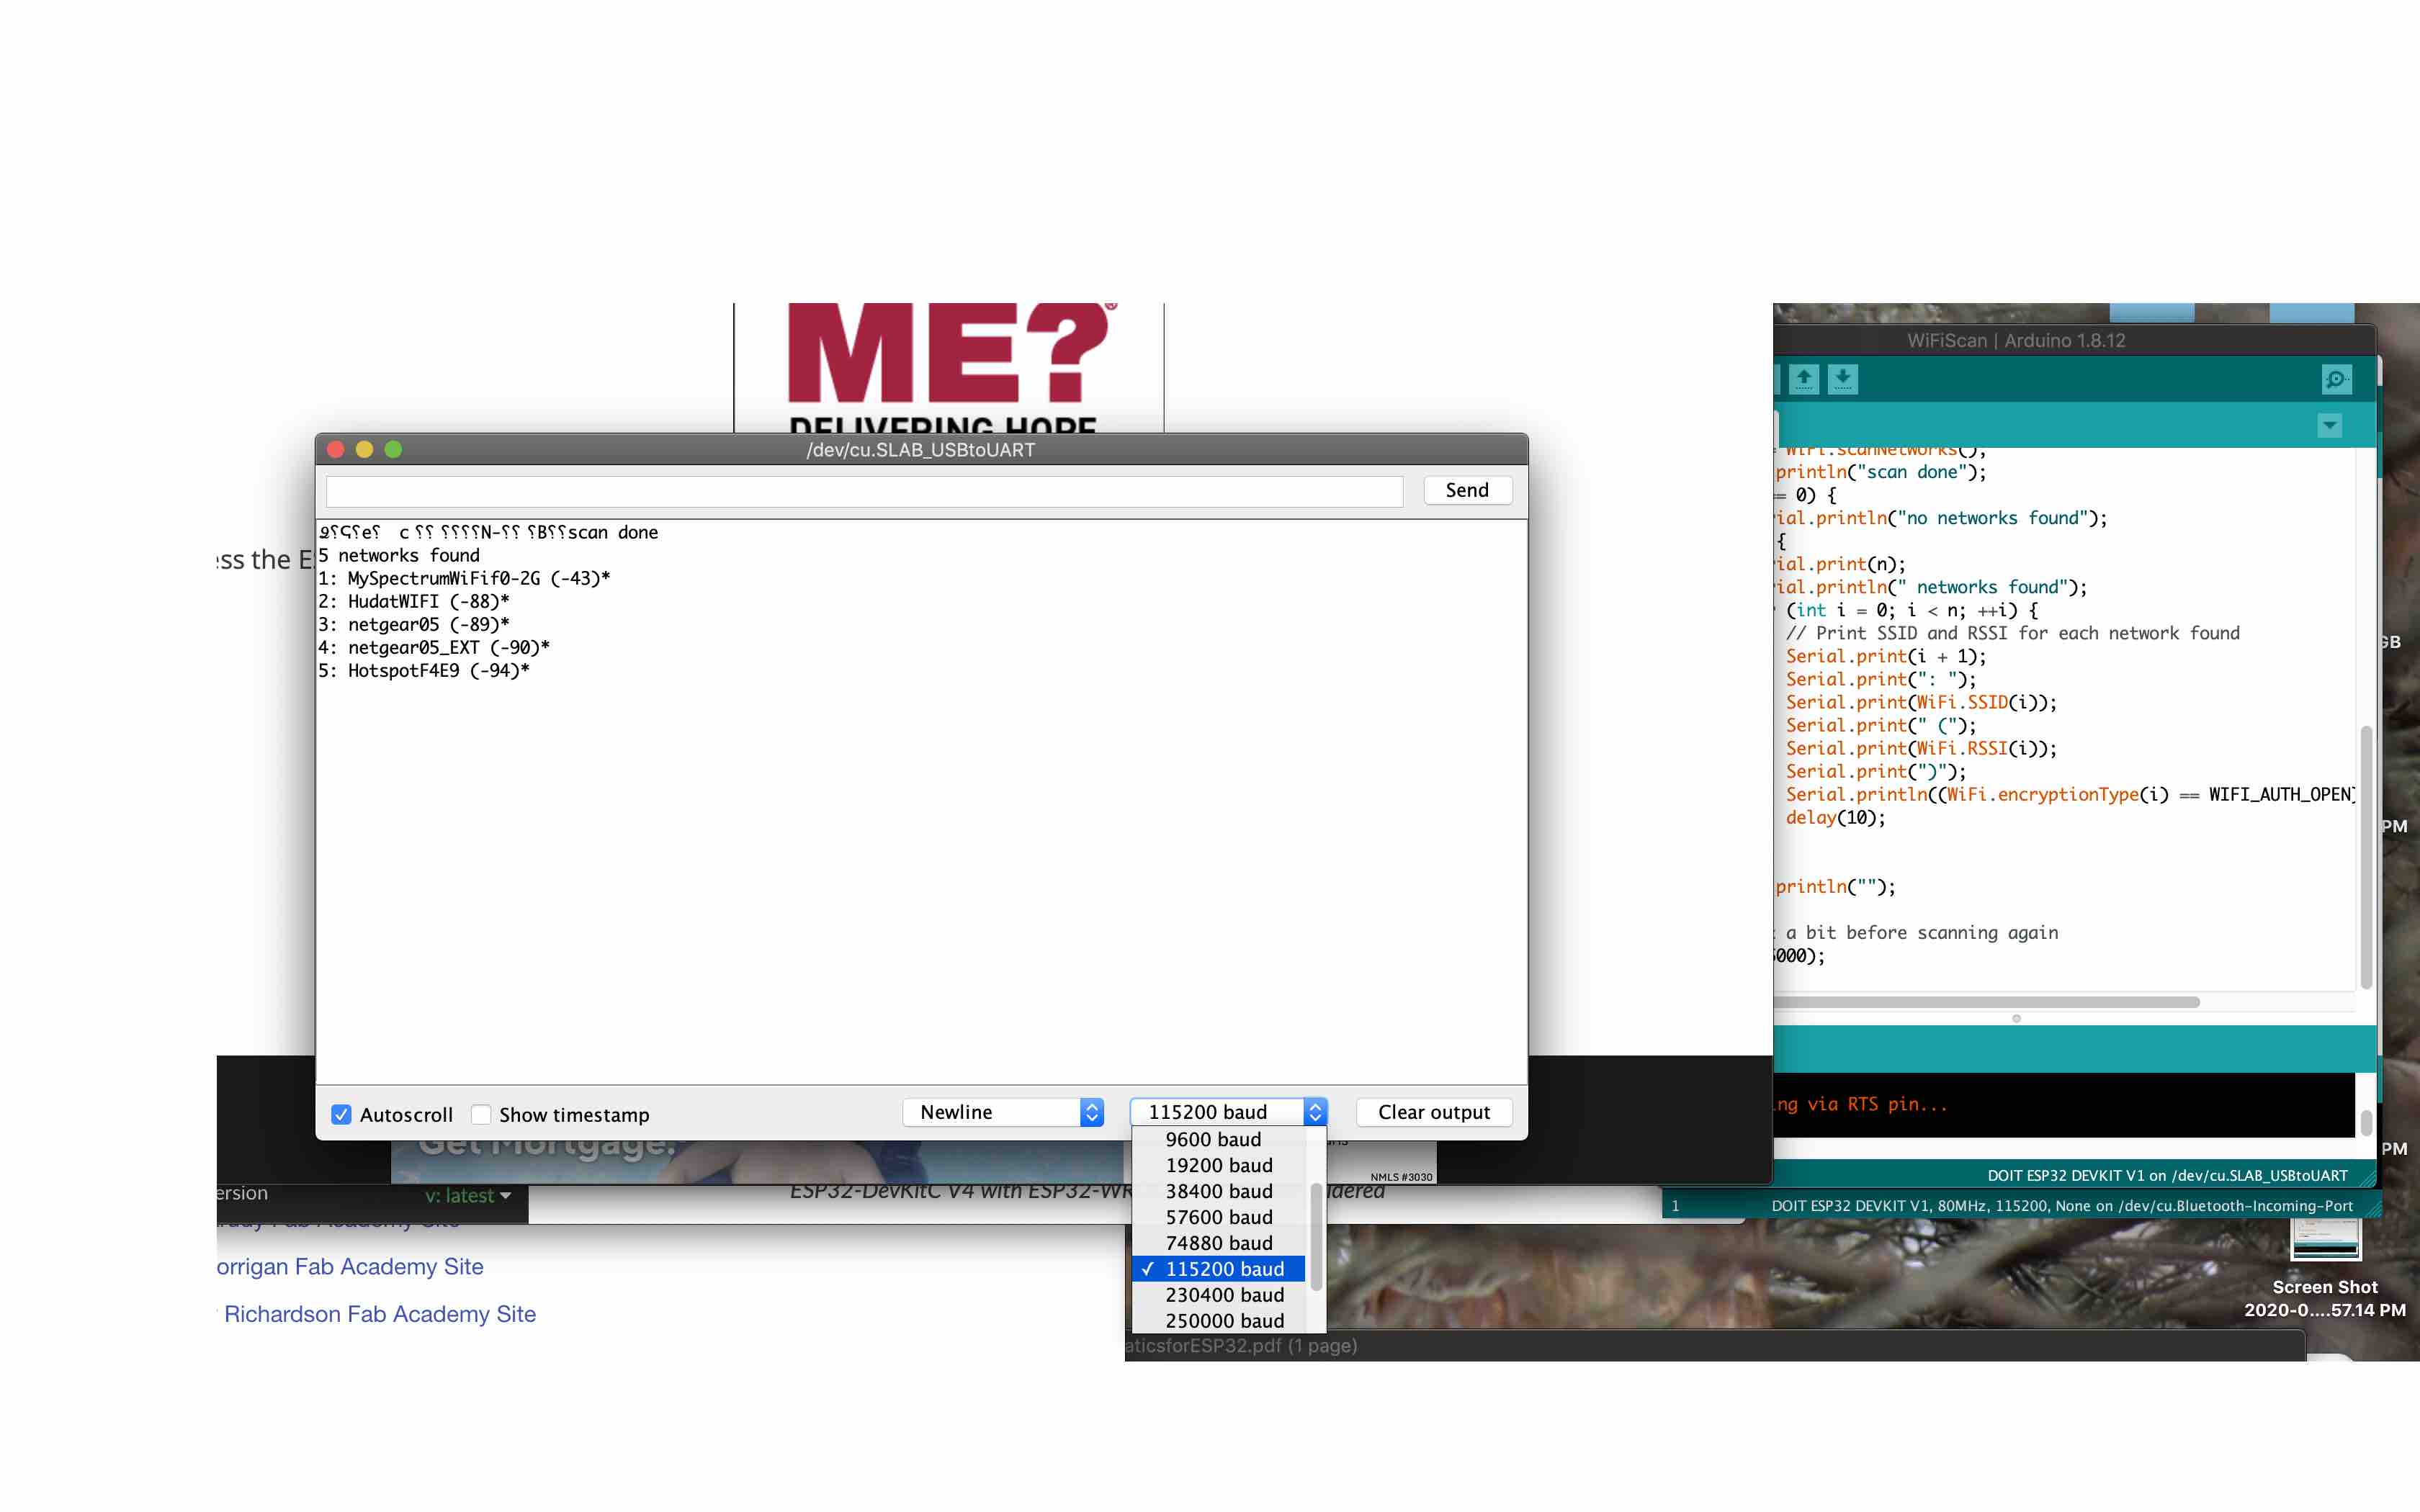
To be sure I could connect to my ESP32 I ran a WiFi Scan. This is a code that I can run in the Arduino Code window. Once uploaded I can select the Serial Monitor in the upper right corner. This is signified by a magnified glass. THis then opens a dialog box. Once the correct baud is matched to the code the WiFi connections will show.
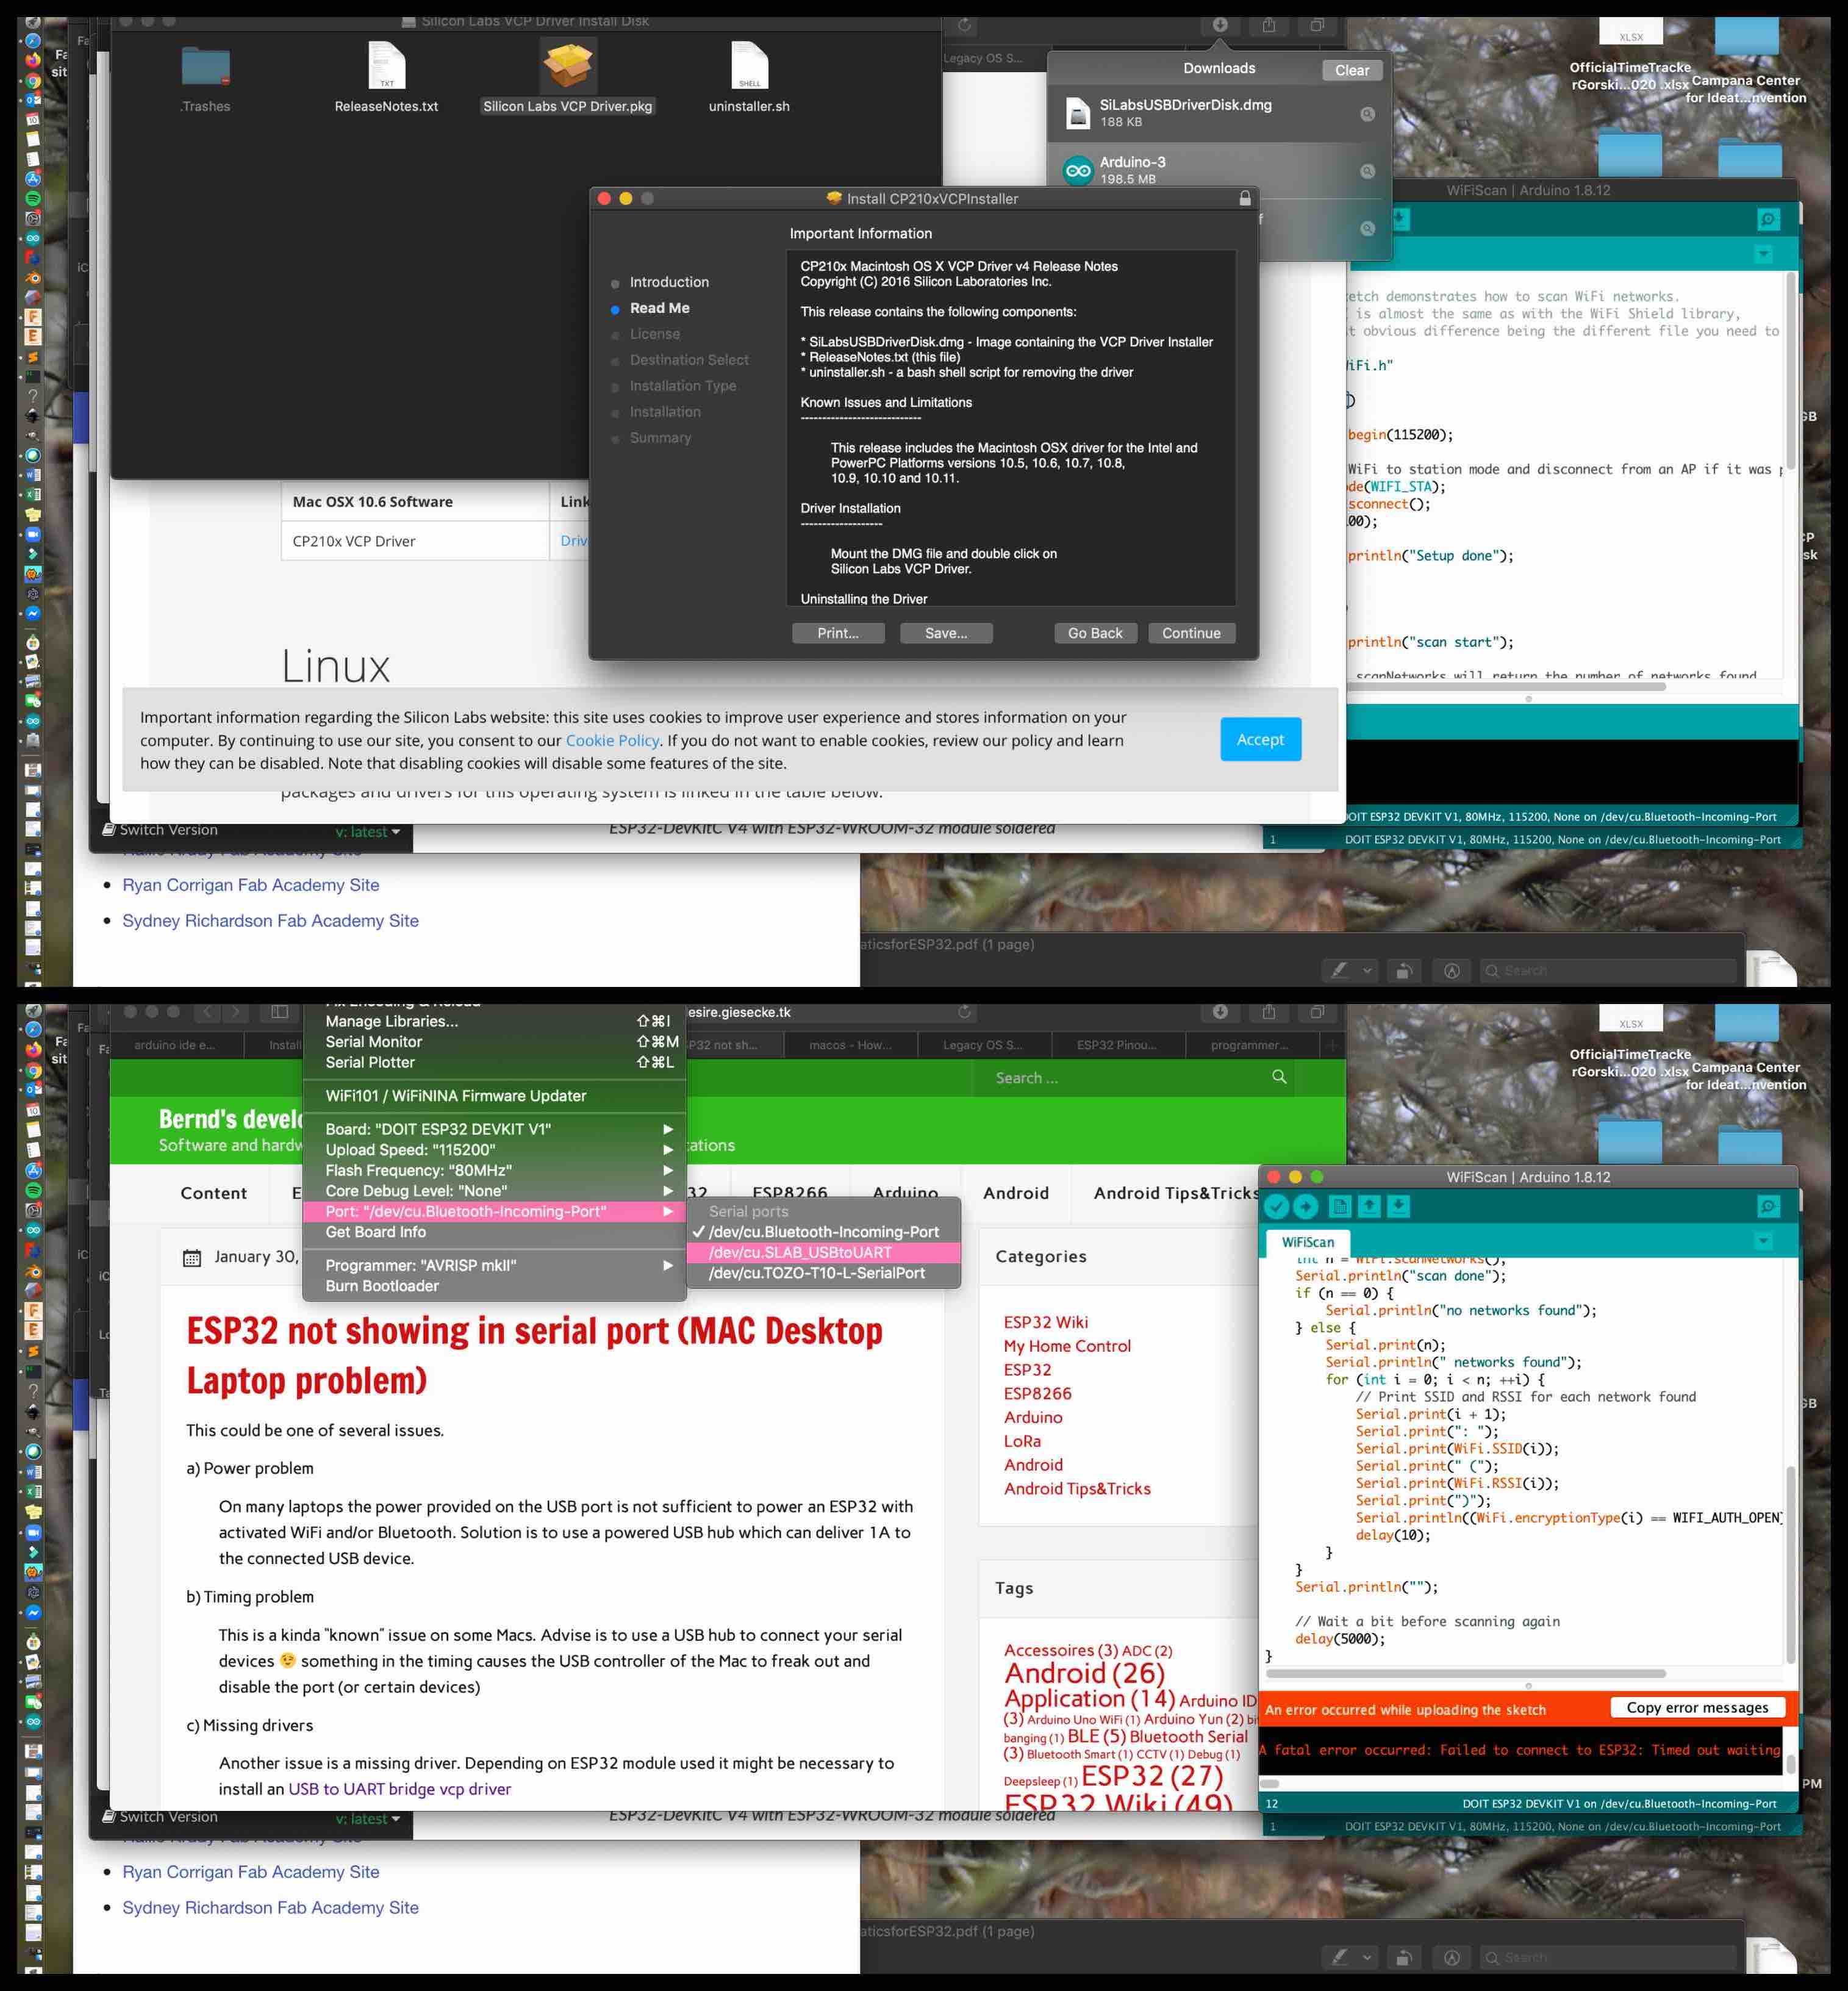
I ran into a complication where the USB port I was pugged into would no show. I researched this and found that ESP32’s, in connection with the Mac iOS, need additional power in order to show up in the ports. Instead of buying an extra port box (I found suggested as a solution online), I solved this issue by downloading and installing a Driver Disk. The link is above labeled as Silicon Labs. Once the driver was installed my port was found listed as /dev/cu.SLAB_USBtoUART.
With all of my connection issues now solved I was able to woke with the Blynk app. I downloaded the application to my phone and found it to be very user friendly. I started a new project and began to build the interface. When a new project is started there is a special Authentication Code that is sent to the users email. This code is very important to make the wireless connection.
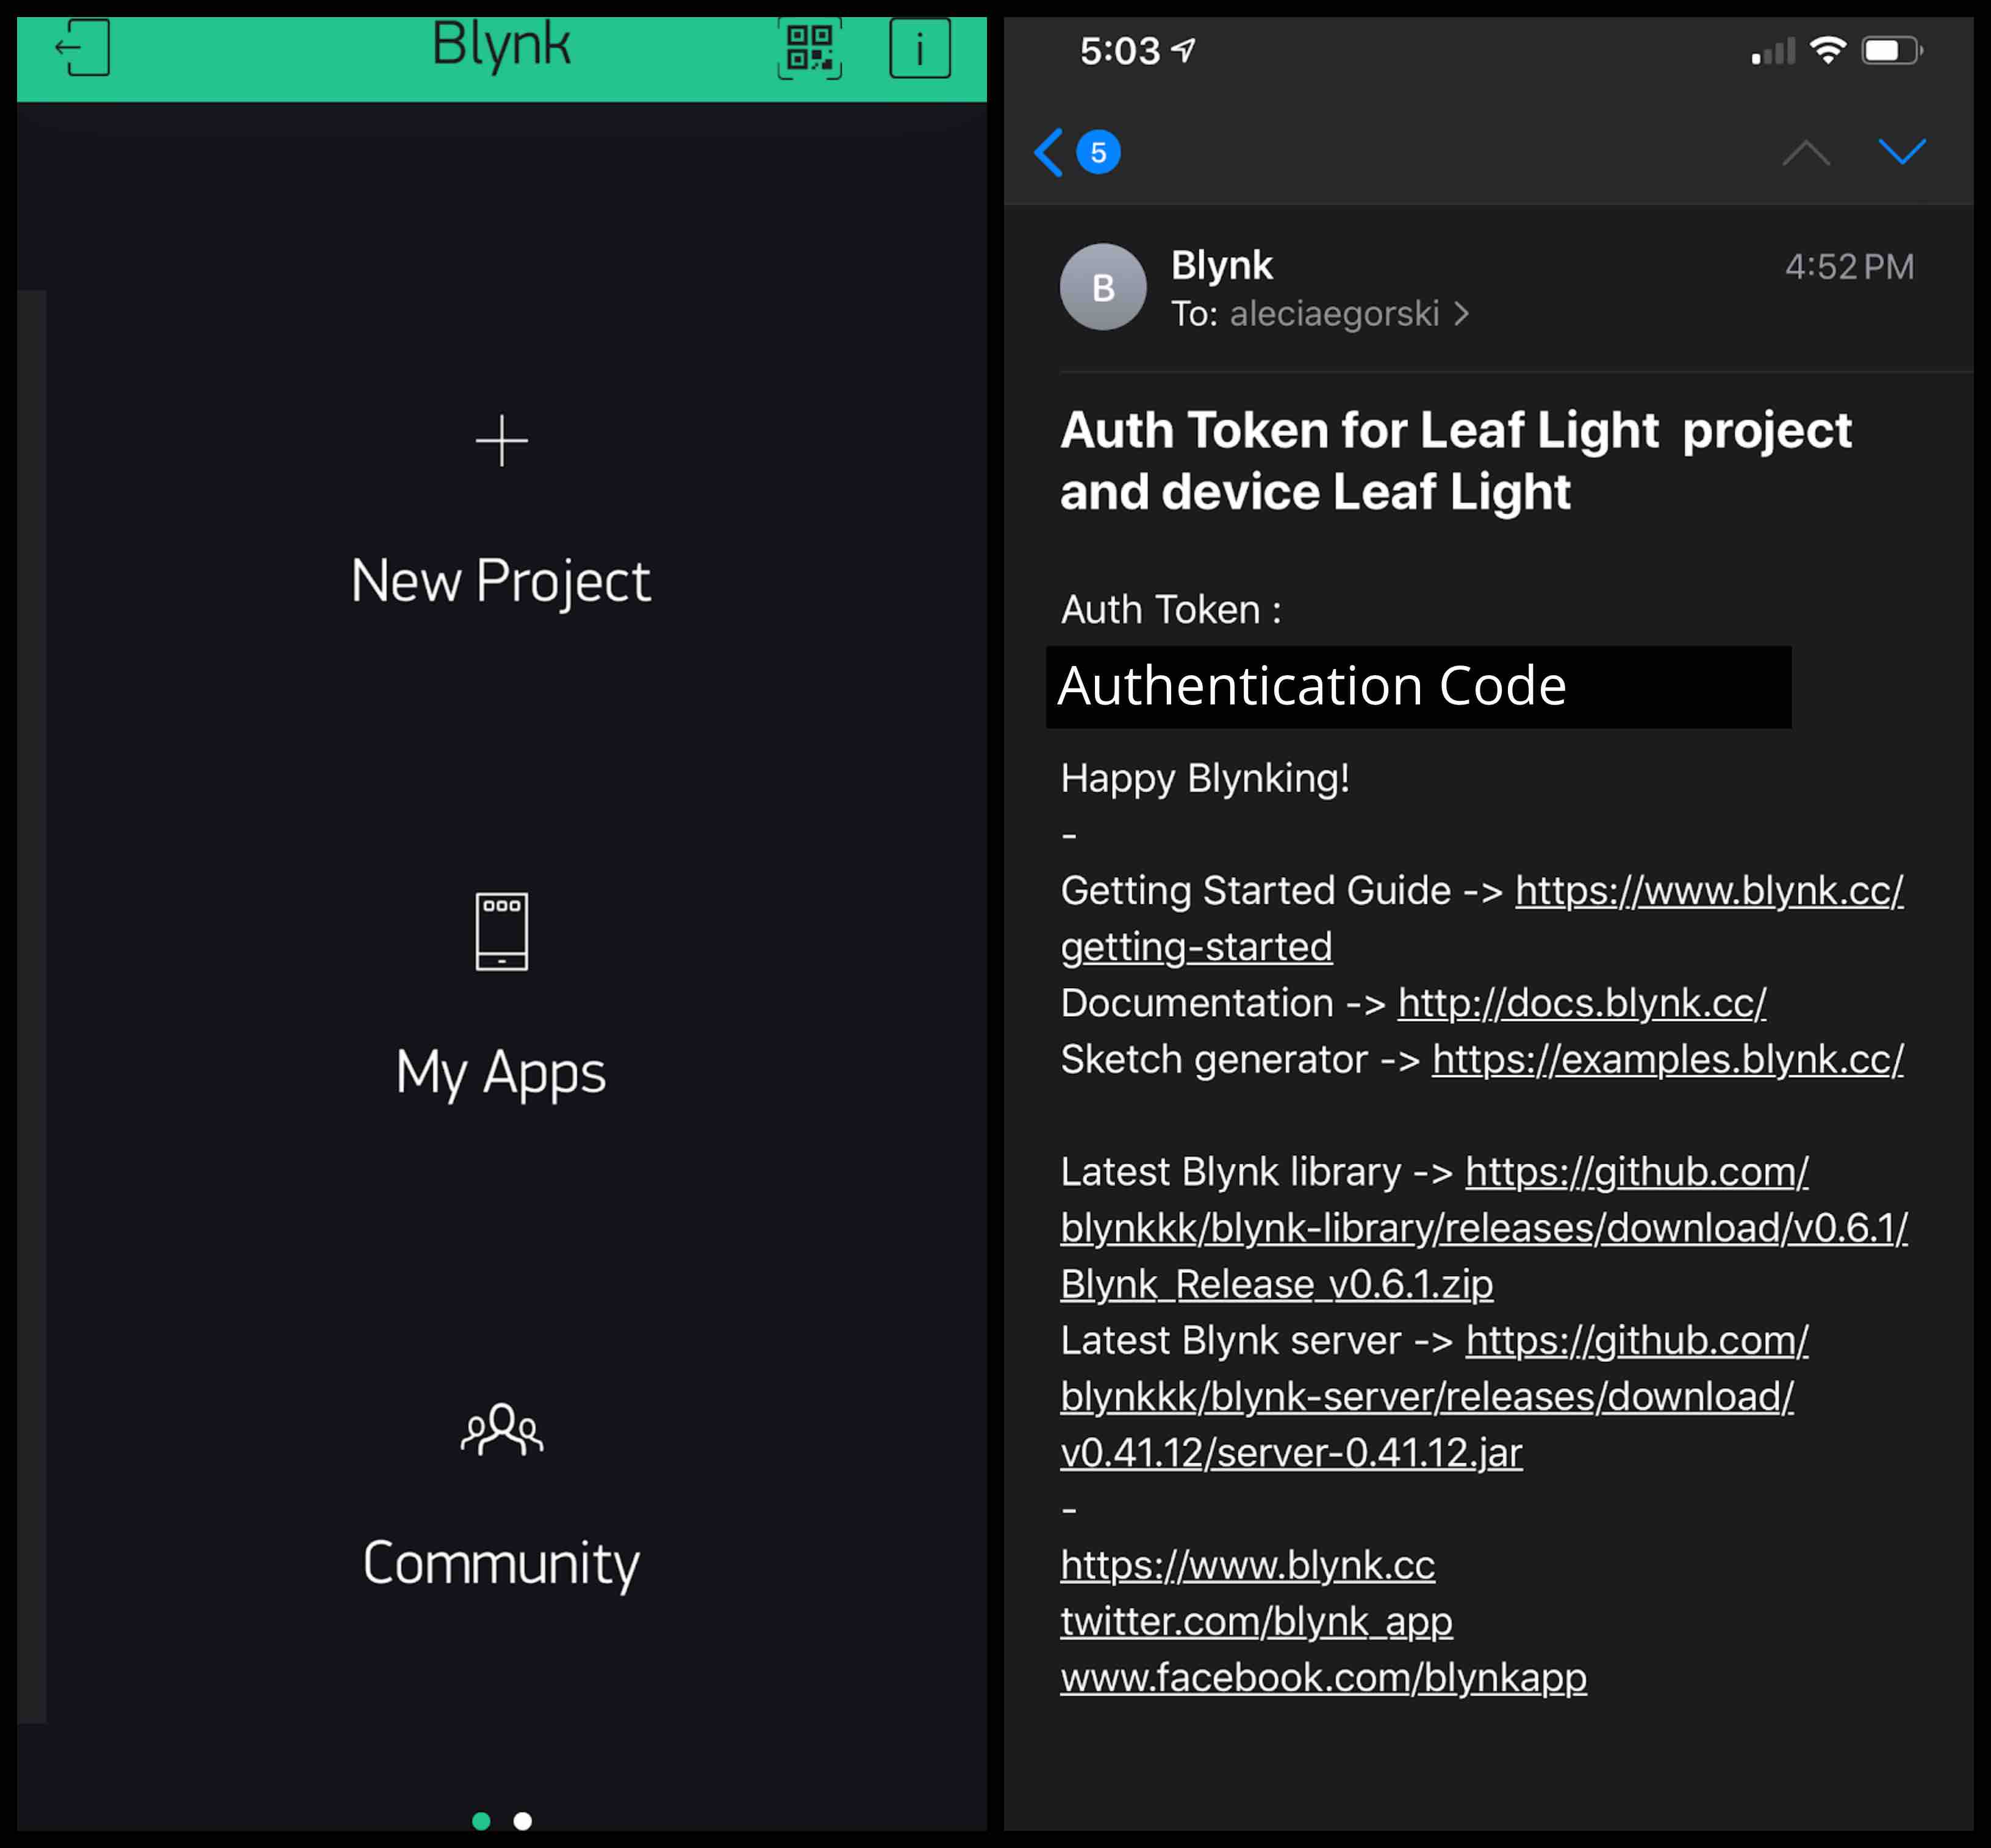
The Blynk application allows the user to set up how they would like to connect to the ESP32. In this case I used a WiFi COnnection. This is why I ran a WiFi scan to be sure I could connect correctly. When the new project loads the main screen, a simple tap will pull the widget menu from the right side of the screen. Here I was able to add a button. Each button can be assigned a different color, different actions, and assigned to different pins on the microcontroller.
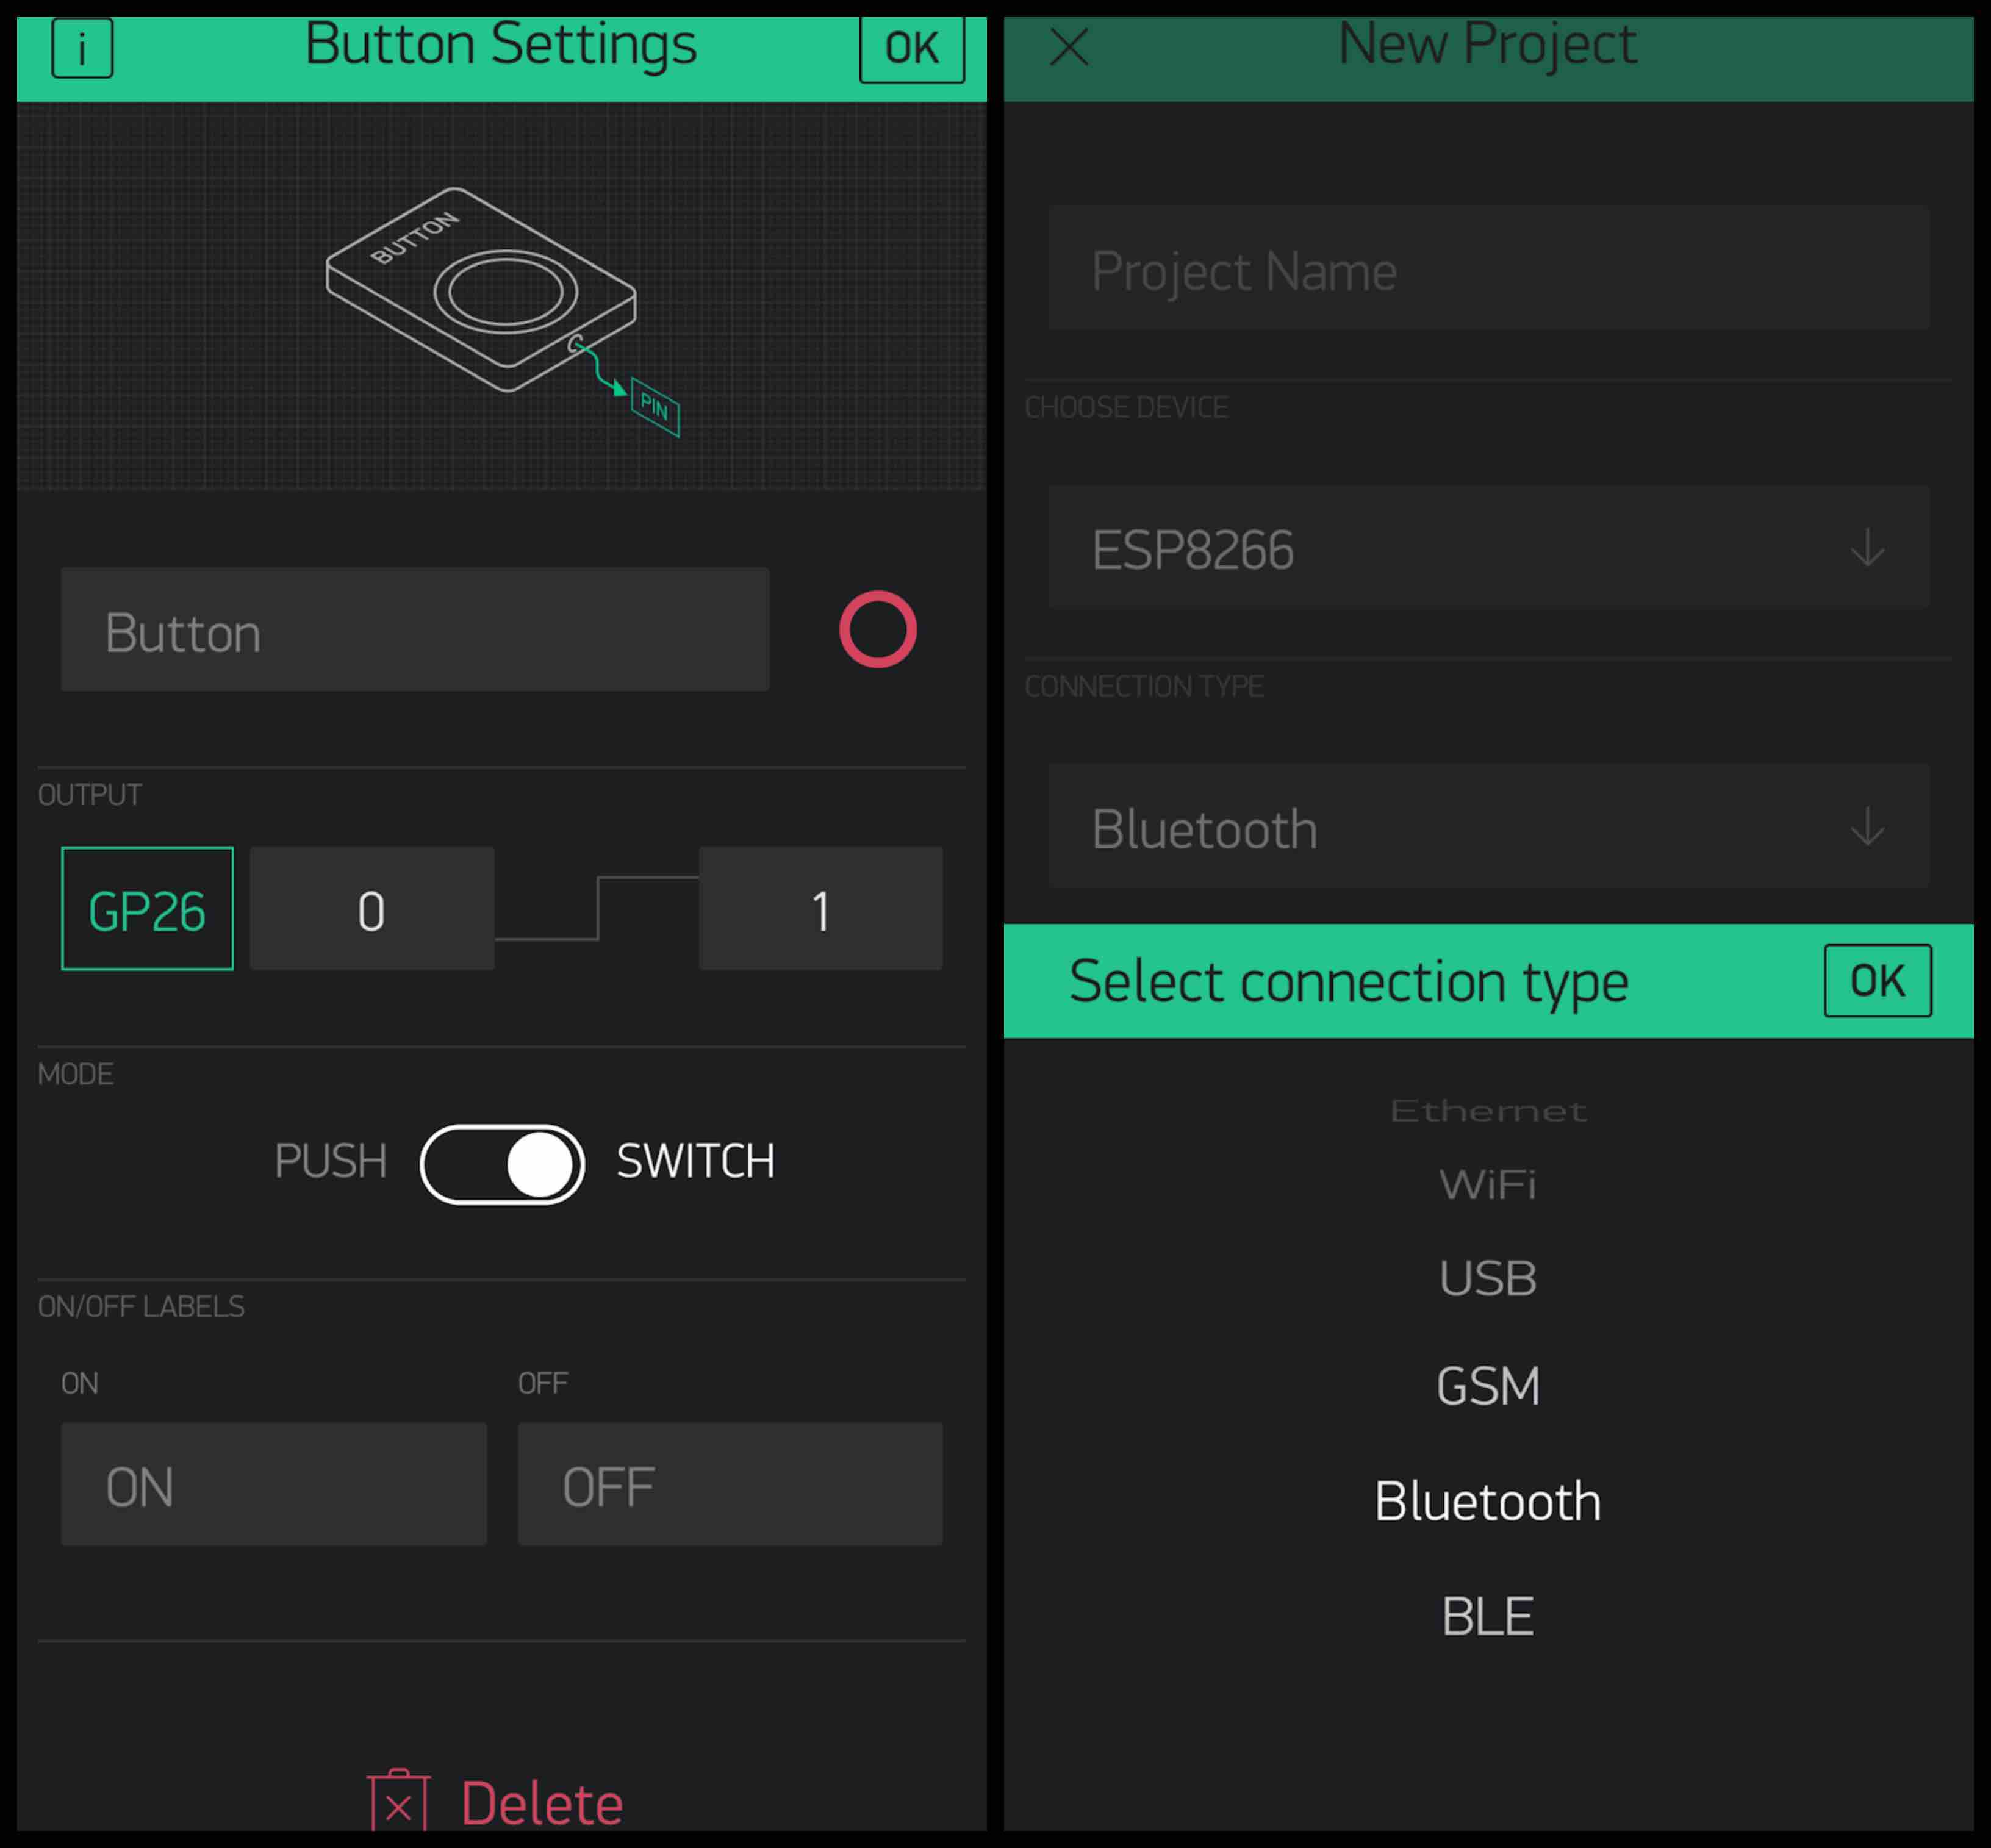
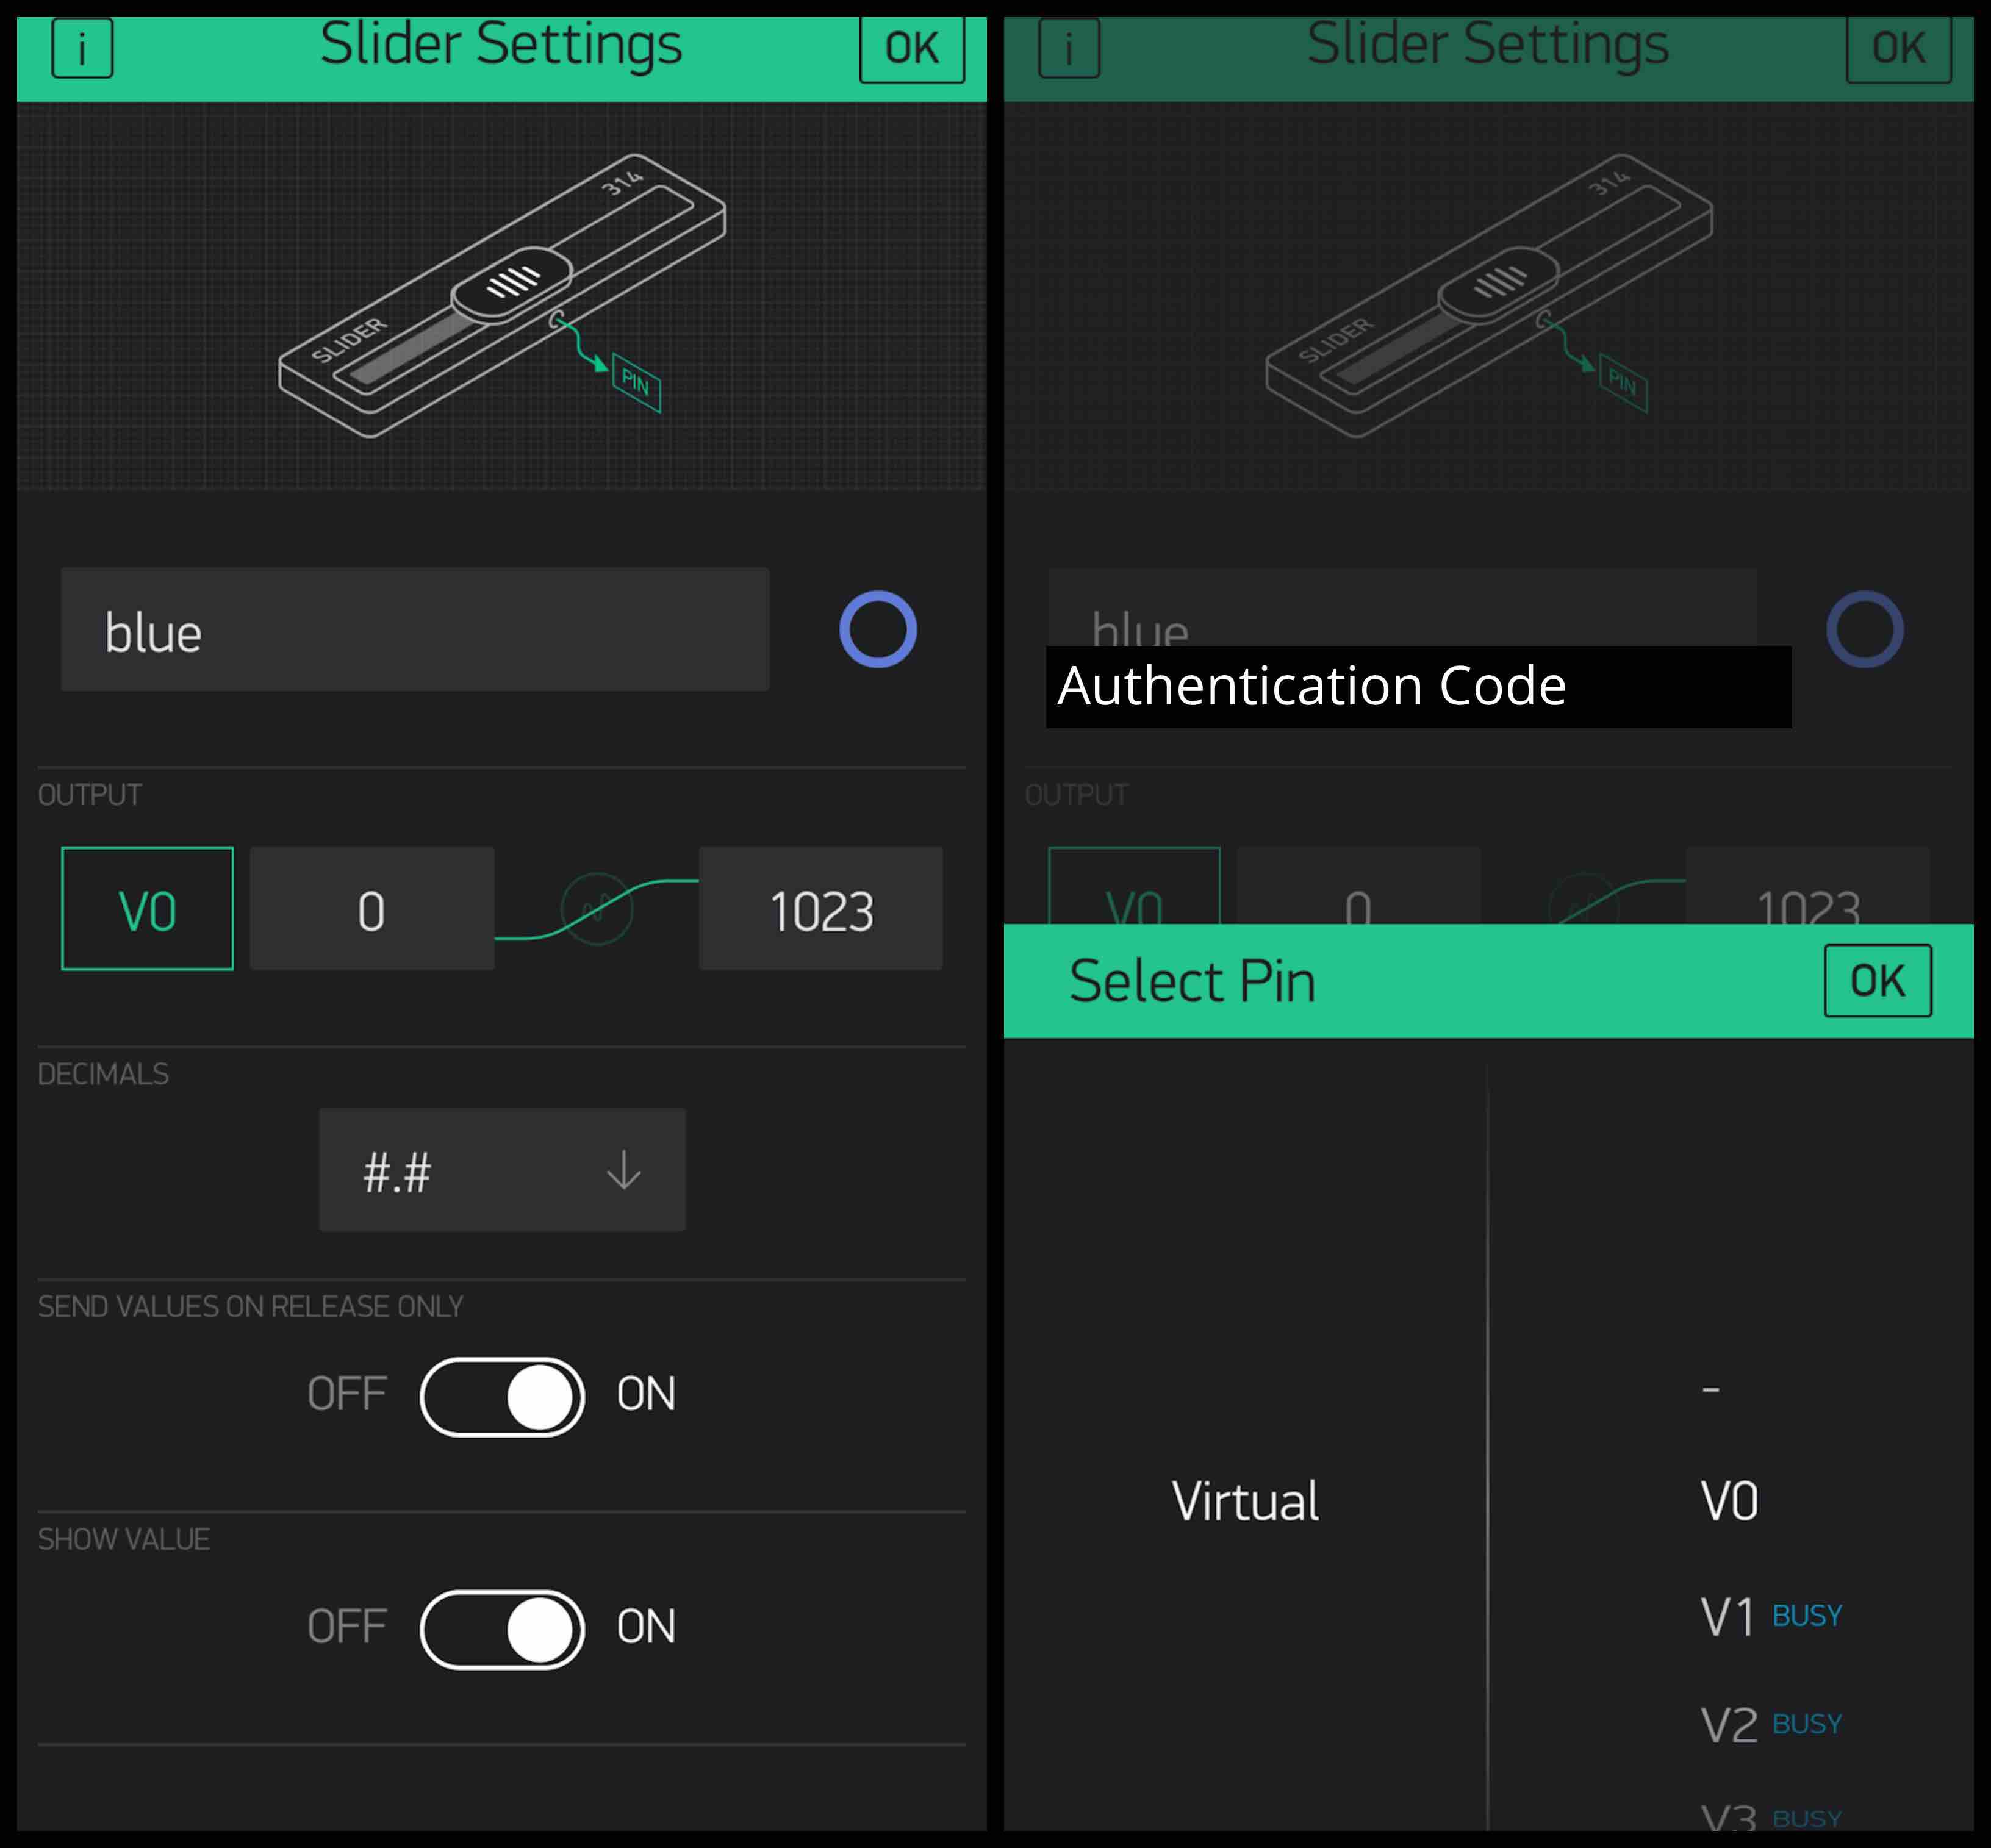
Buttons can have a Virtual or a Digital Pin Assigned. This will either be a GP (Digital Pin) of a V (Virtual Pin). The slide bar (another widget available for use) can only use Virtual Pins. Therefore these may be a more challenging tool to use. In order to understand each digital to virtual relation the user must be able to read and understand a pinout schematic of the ESP 32 being used.
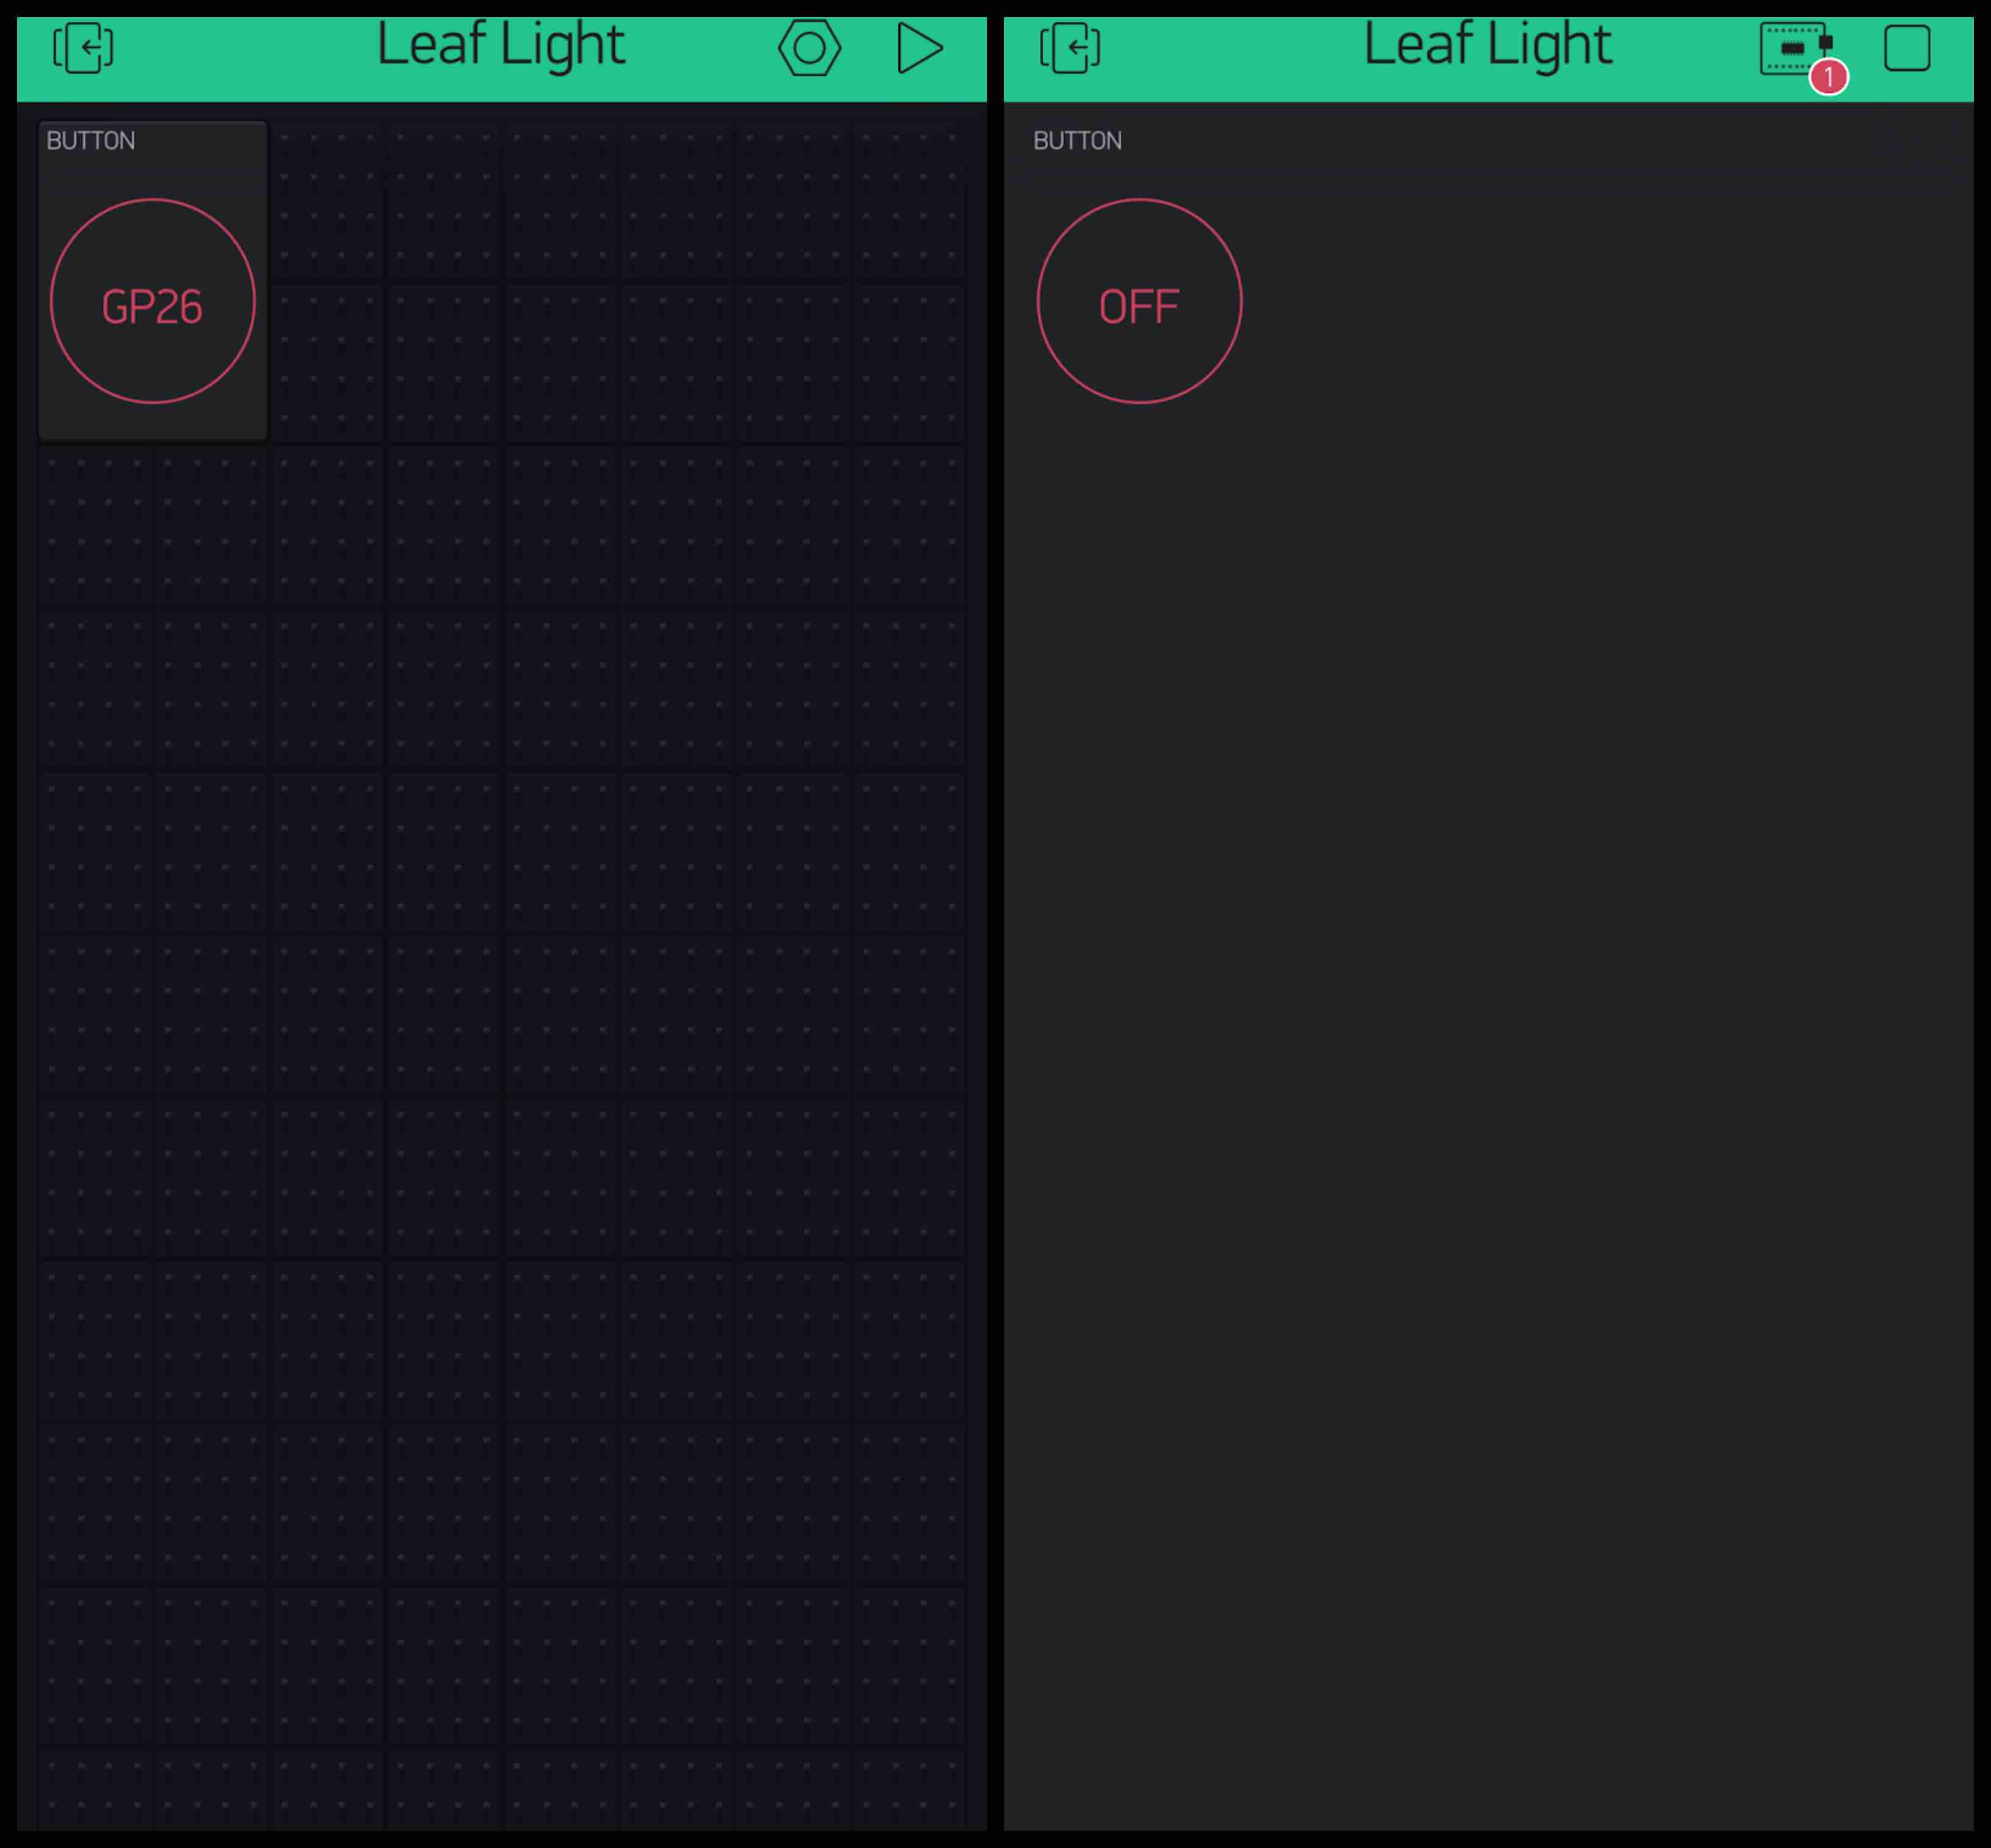
With the button chosen, color specified to match my LED I pressed the play button located at the top right hand of the screen. This then used the information I provided about my microcontroller and display to connected to my WiFi specifications. If there is an issue connecting to the board it will show a red circle error icon and relay a message that the board is offline. This must then be fixed by the user.
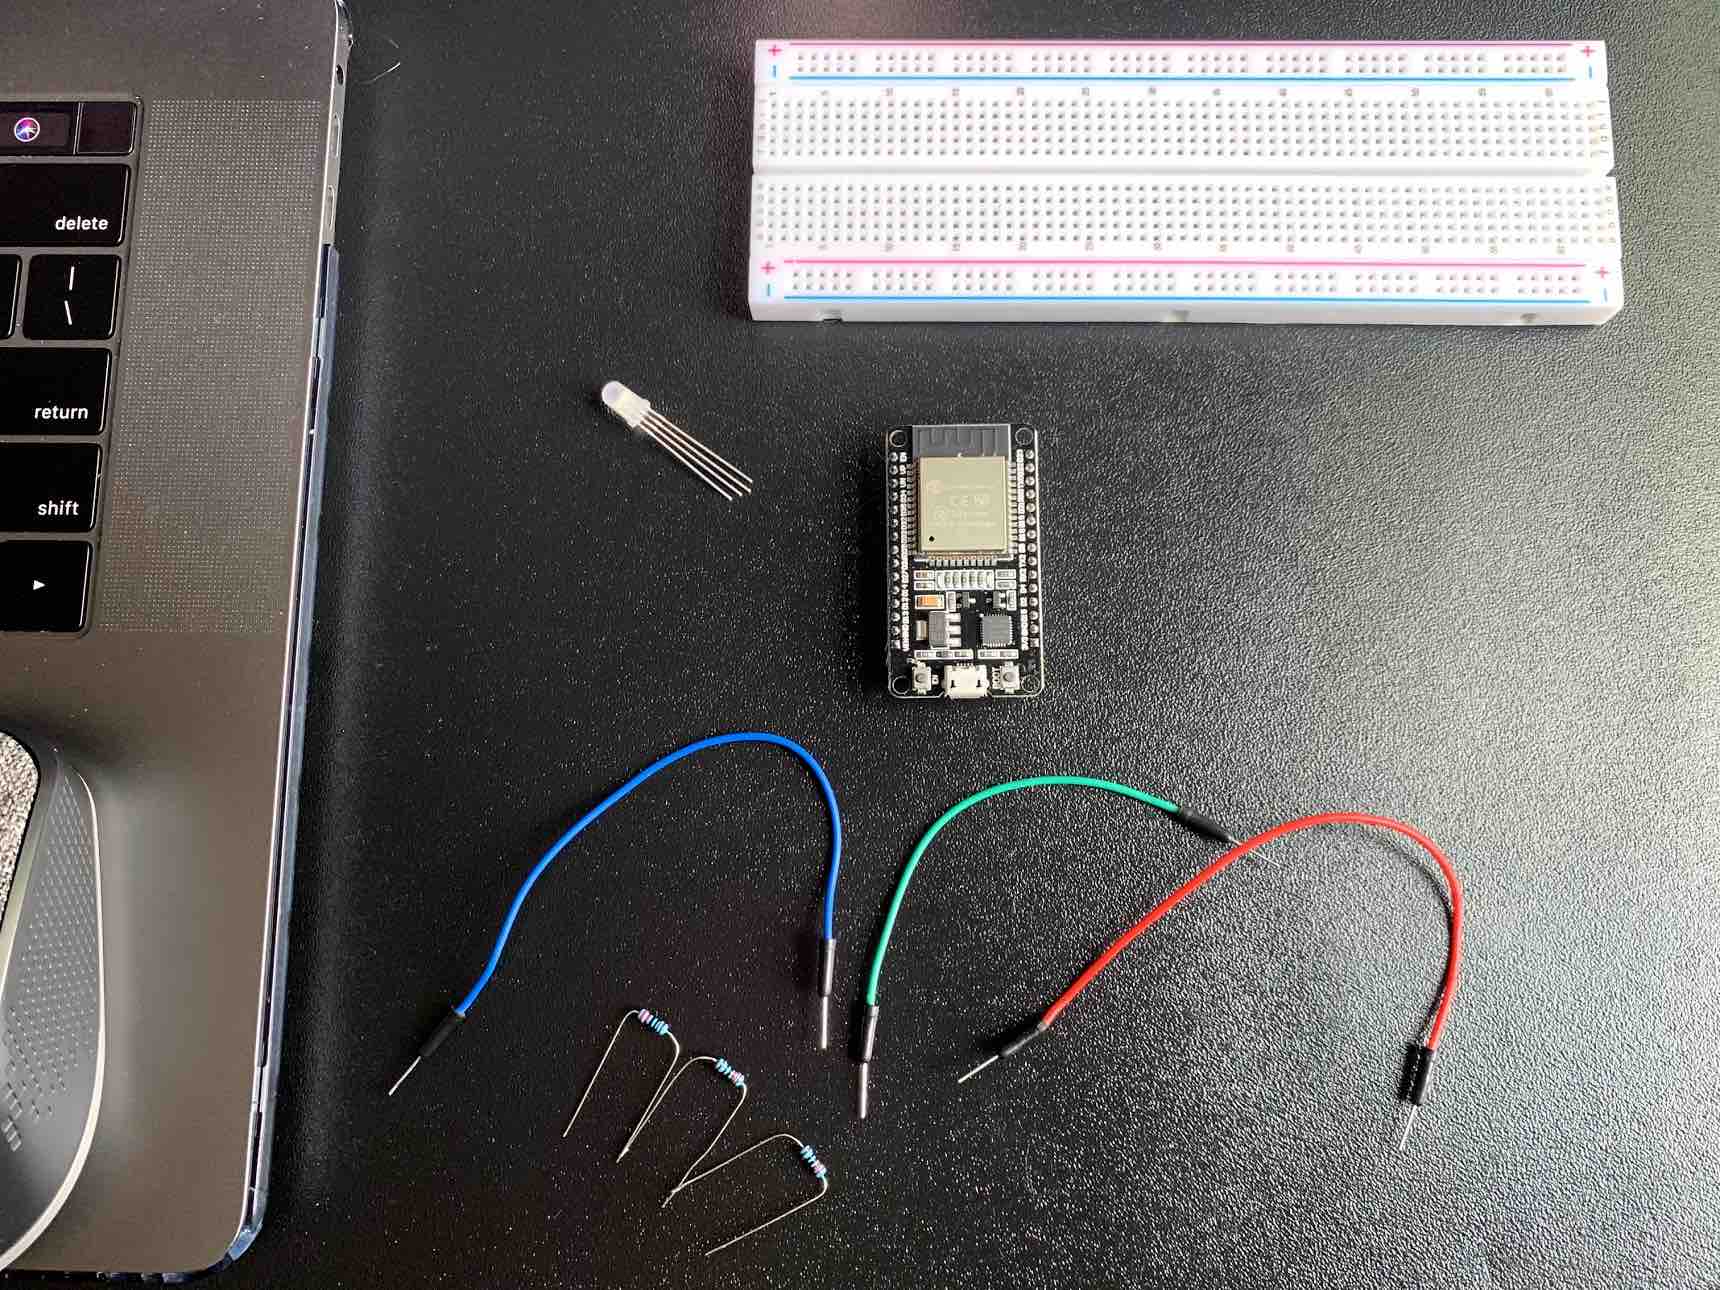
I used a breadboard, ESP32 Dev Board, 3 jumpers, 3 resistors, and an RGB LED for my circuit. The RGB was later traded for a Red LED to simplify and understand how the system works with intentions to develop RGB LED capabilities for the final project
Functioning
This video explains how the components came together with the many different software systems to communicate wirelessly with the LED circuit.
Blynk WiFi Code Connection
//*************************************************************
  Download latest Blynk library here:
    https://github.com/blynkkk/blynk-library/releases/latest

  Blynk is a platform with iOS and Android apps to control
  Arduino, Raspberry Pi and the likes over the Internet.
  You can easily build graphic interfaces for all your
  projects by simply dragging and dropping widgets.

    Downloads, docs, tutorials: http://www.blynk.cc
    Sketch generator:           http://examples.blynk.cc
    Blynk community:            http://community.blynk.cc
    Follow us:                  http://www.fb.com/blynkapp
                                http://twitter.com/blynk_app

  Blynk library is licensed under MIT license
  This example code is in public domain.

 *************************************************************
  This example runs directly on ESP32 chip.

  Note: This requires ESP32 support package:
    https://github.com/espressif/arduino-esp32

  Please be sure to select the right ESP32 module
  in the Tools -> Board menu!

  Change WiFi ssid, pass, and Blynk auth token to run :)
  Feel free to apply it to any other example. It's simple!
 *************************************************************/

/* Comment this out to disable prints and save space */
#define BLYNK_PRINT Serial


#include <WiFi.h>
#include <WiFiClient.h>
#include <BlynkSimpleEsp32.h>

// You should get Auth Token in the Blynk App.
// Go to the Project Settings (nut icon).
char auth[] = "Your Authentication Code";

// Your WiFi credentials.
// Set password to "" for open networks.
char ssid[] = "WiFi Name";
char pass[] = "WiFi Password";

void setup()
{
  // Debug console
  Serial.begin(9600);

  Blynk.begin(auth, ssid, pass);
}

void loop()
{
  Blynk.run();
}
My Board
My board was cut and soldered to be used with the ESP32 WiFi capabilities. Using the WiFi connection I am able to change the colors of the RGB LED with the application interface.
Work Completed First - Learned from but I am not using
Useful links
Why I Chose to Try AppHive
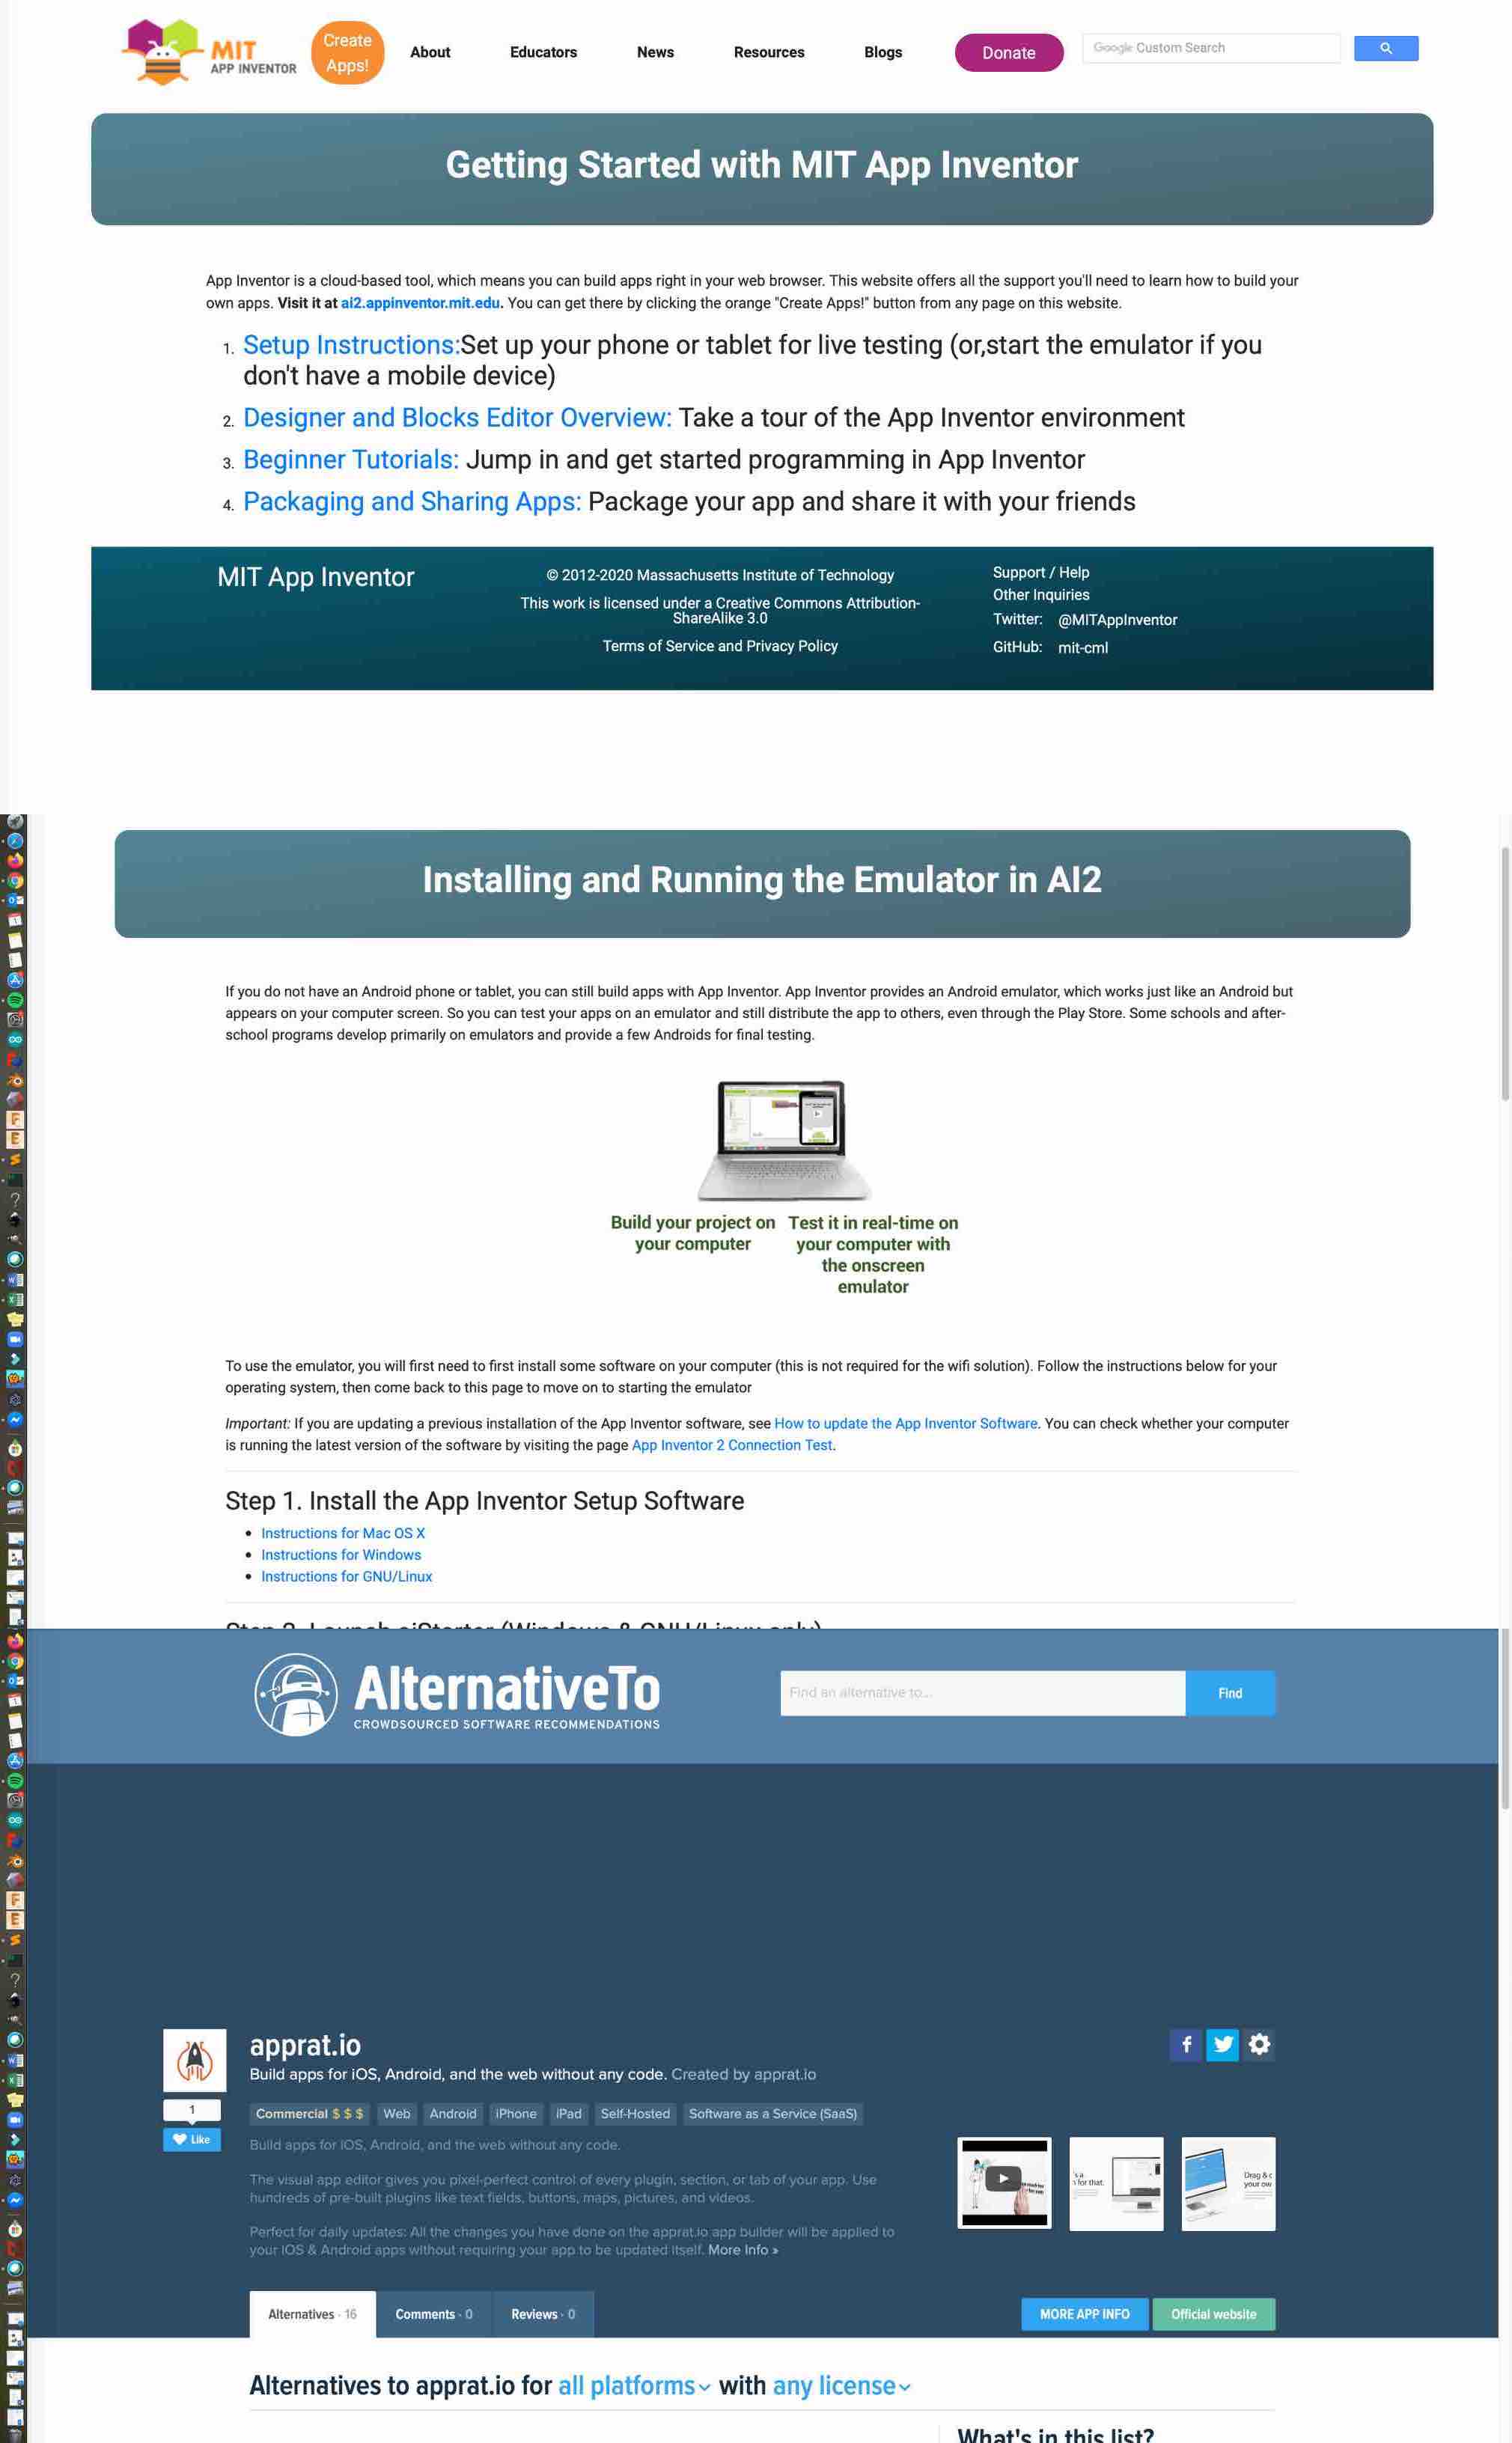
When I began to research what program I wanted to use I started with the MIT App Inventor. As I was working with this program I found that it only works to design and build applications for an Android operating system. Having an IPhone I knew I wanted to design and app that functions on my phone. I turned to the Internet to find a solution. I wanted to find a free source that could communicate with iOS and Android. Then I came across apprat.io and its capabilities to build for both operating systems and the web browser.
App Hive Start Up
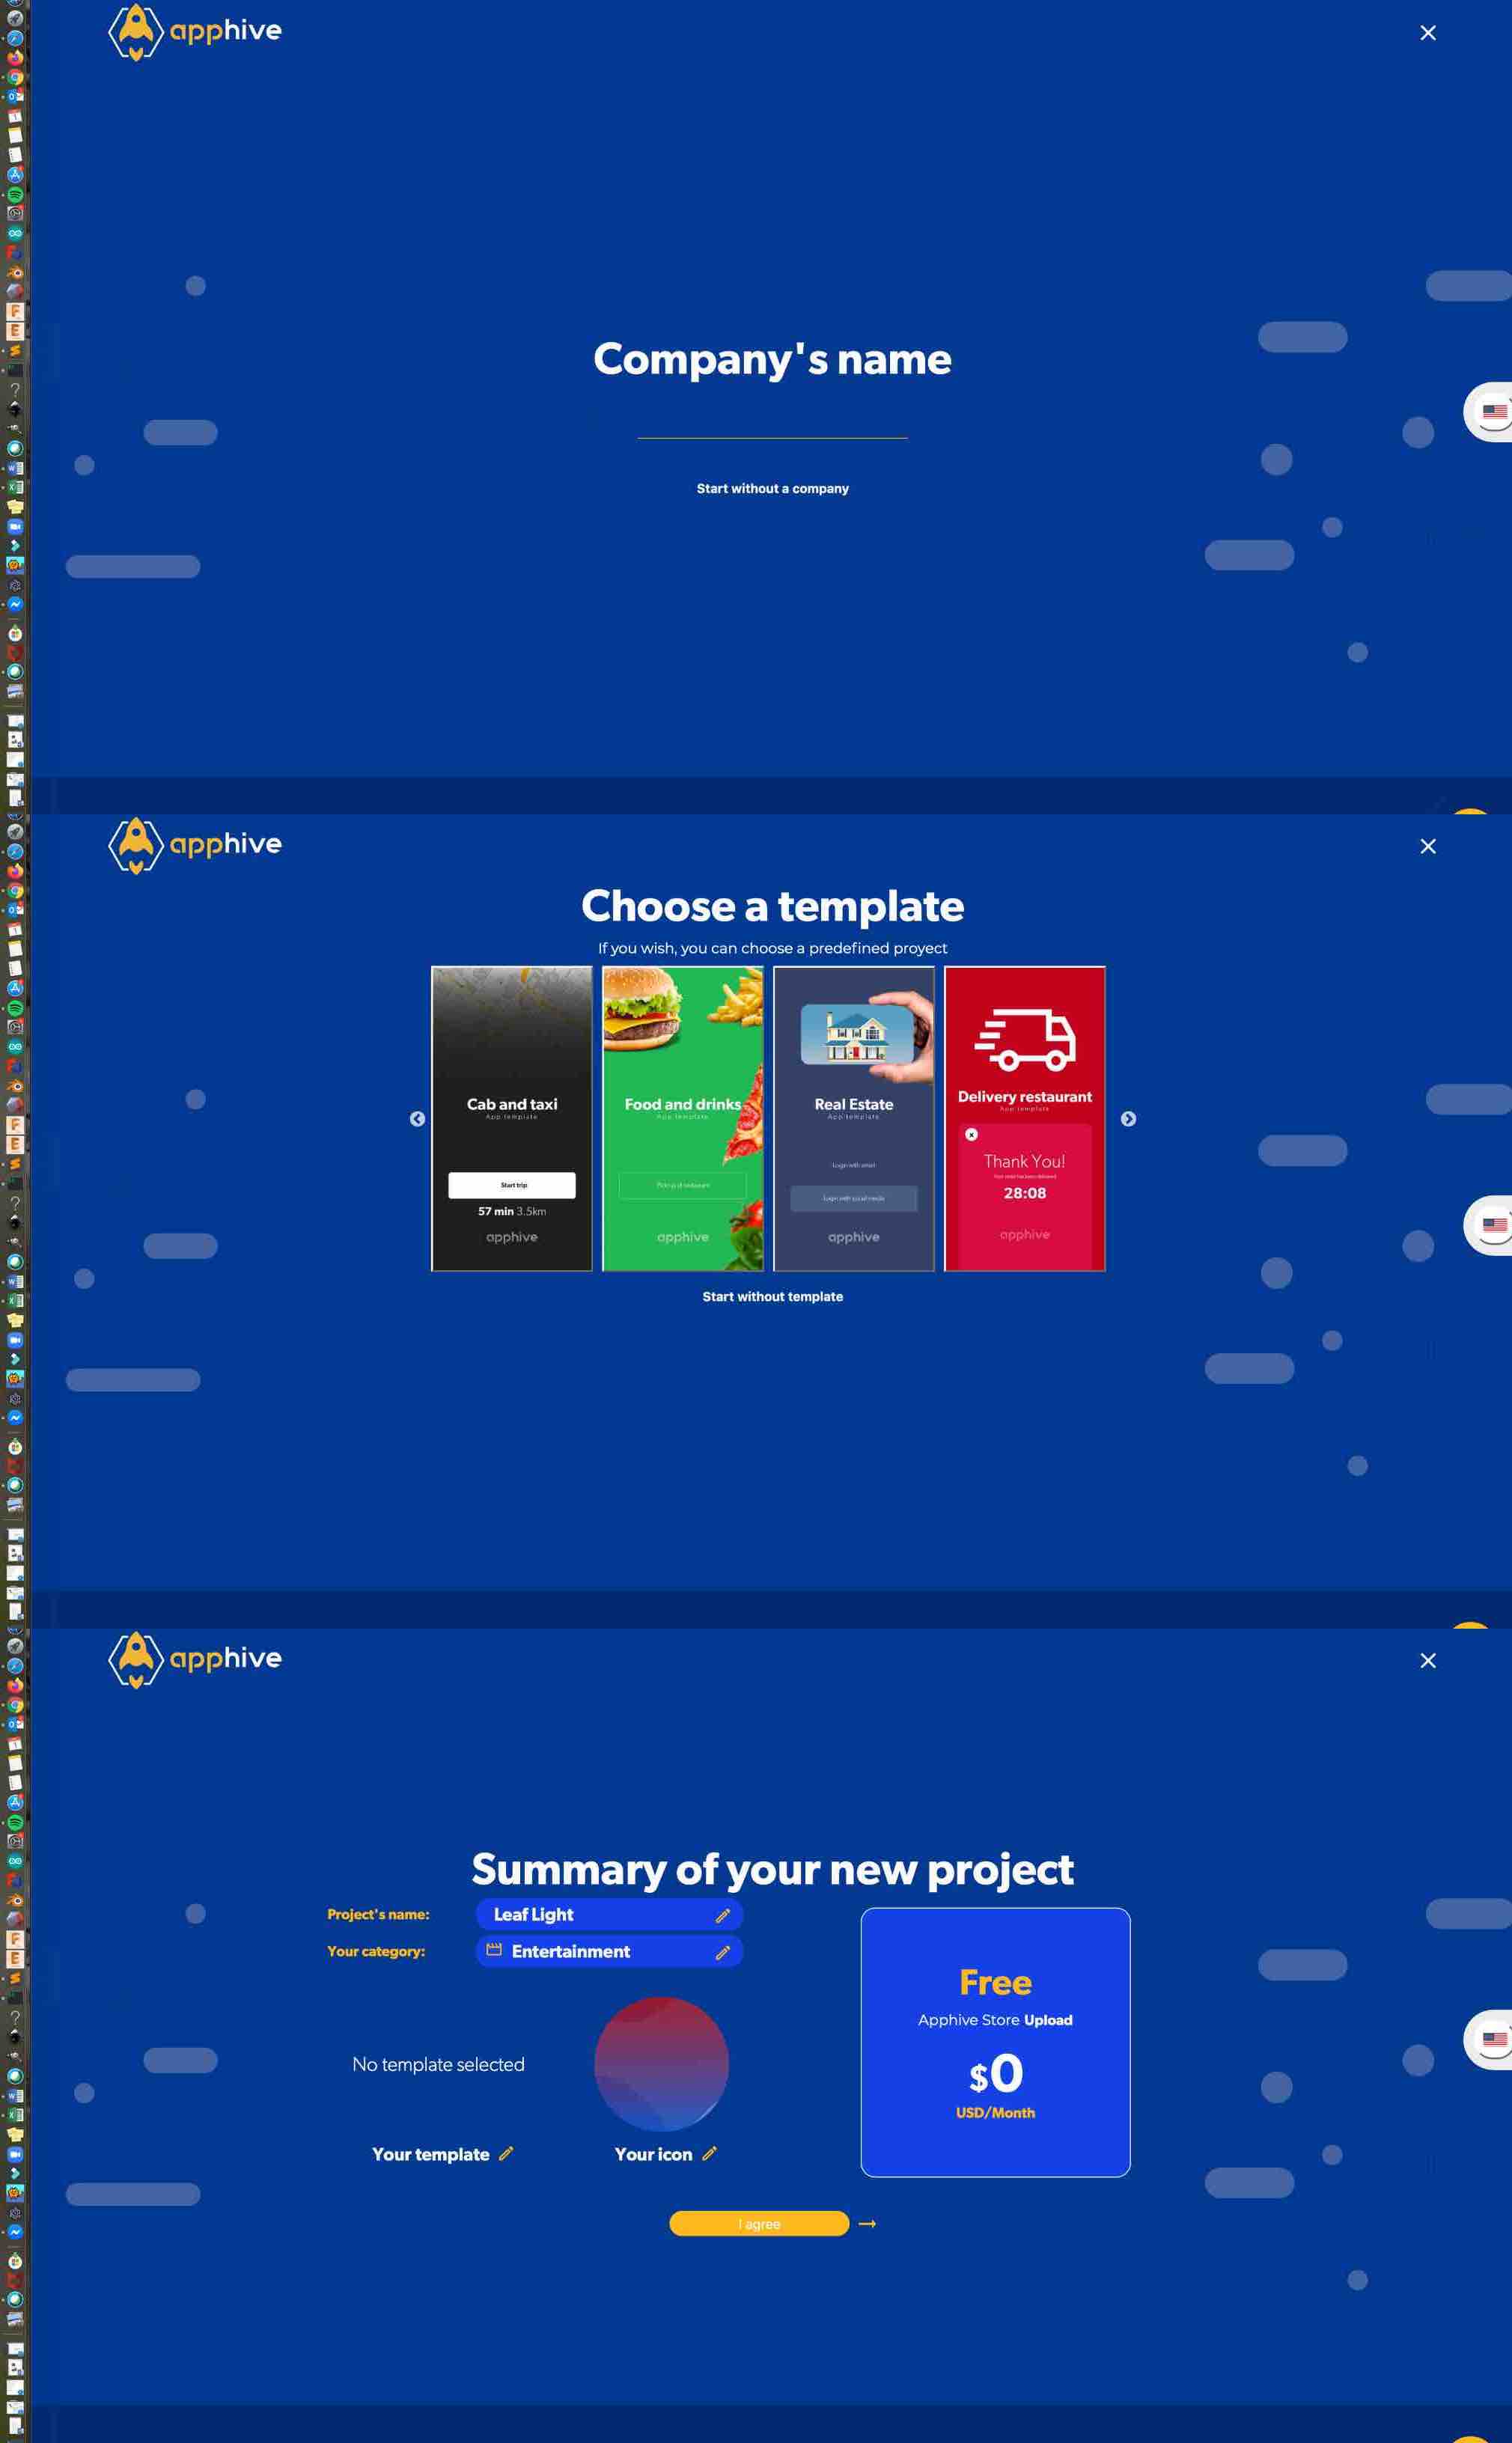
To start with AppHive I had to set up my free account. I registered with my information and clicked through the welcome screens.
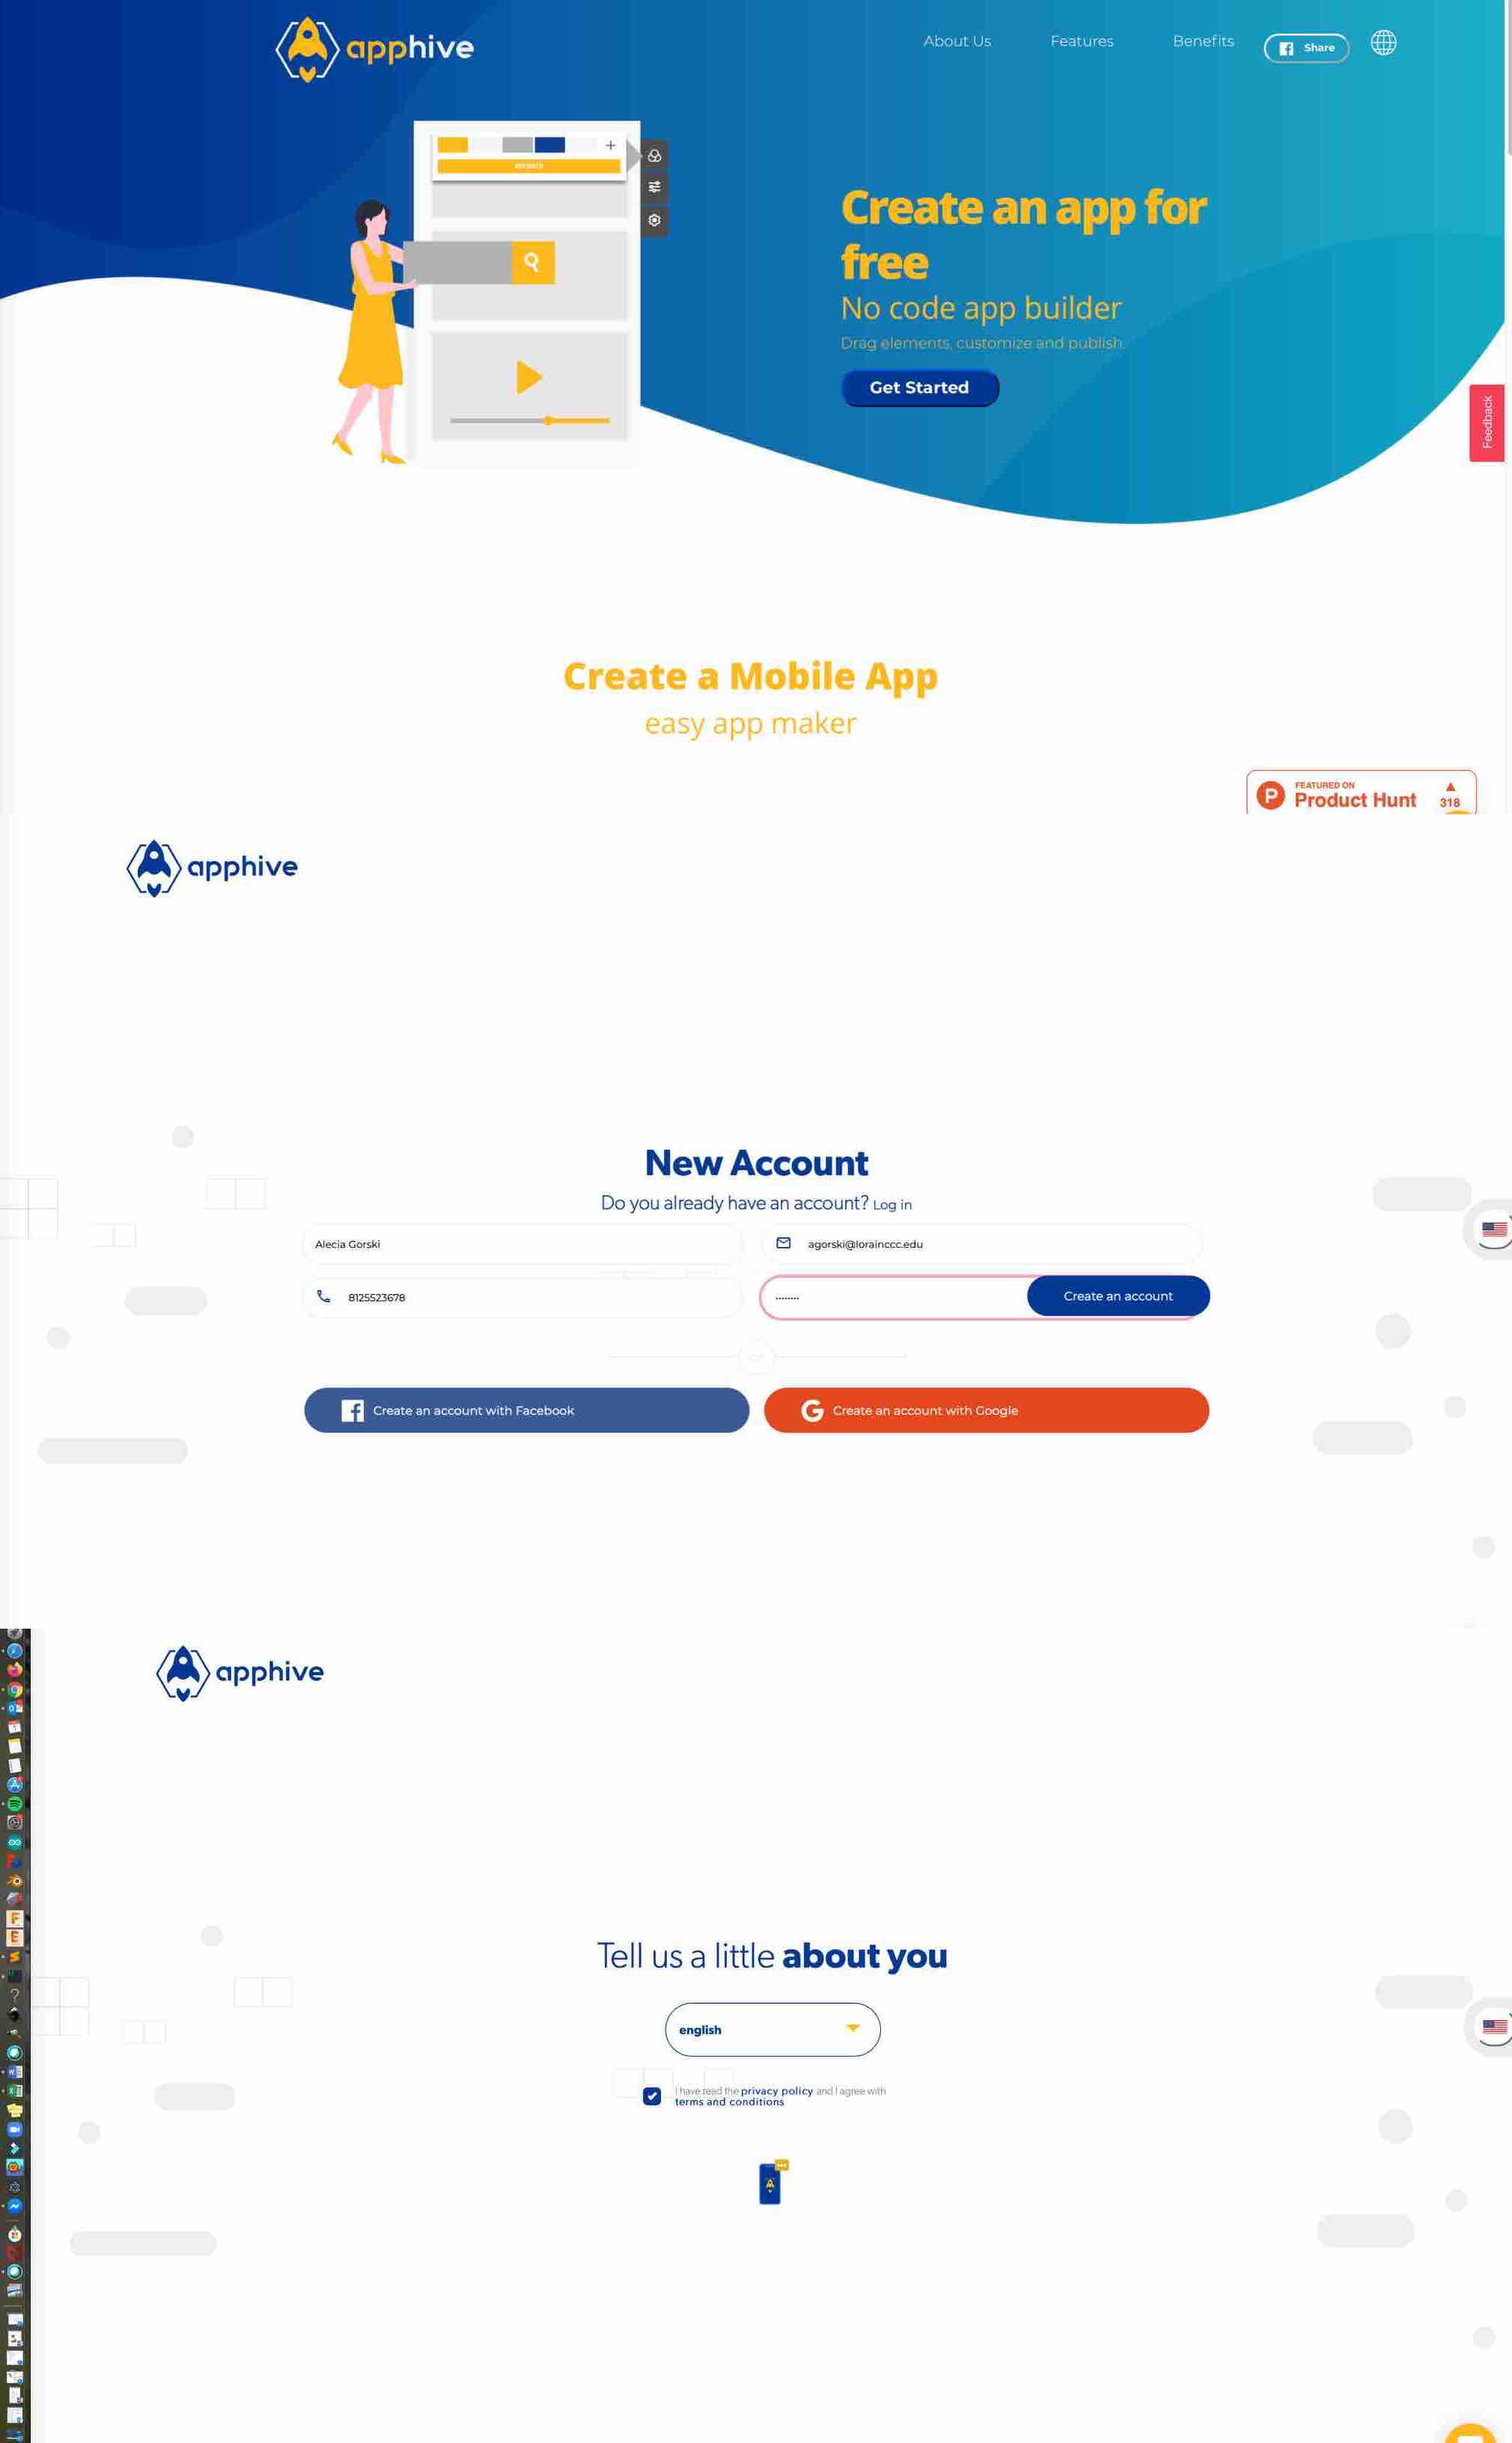
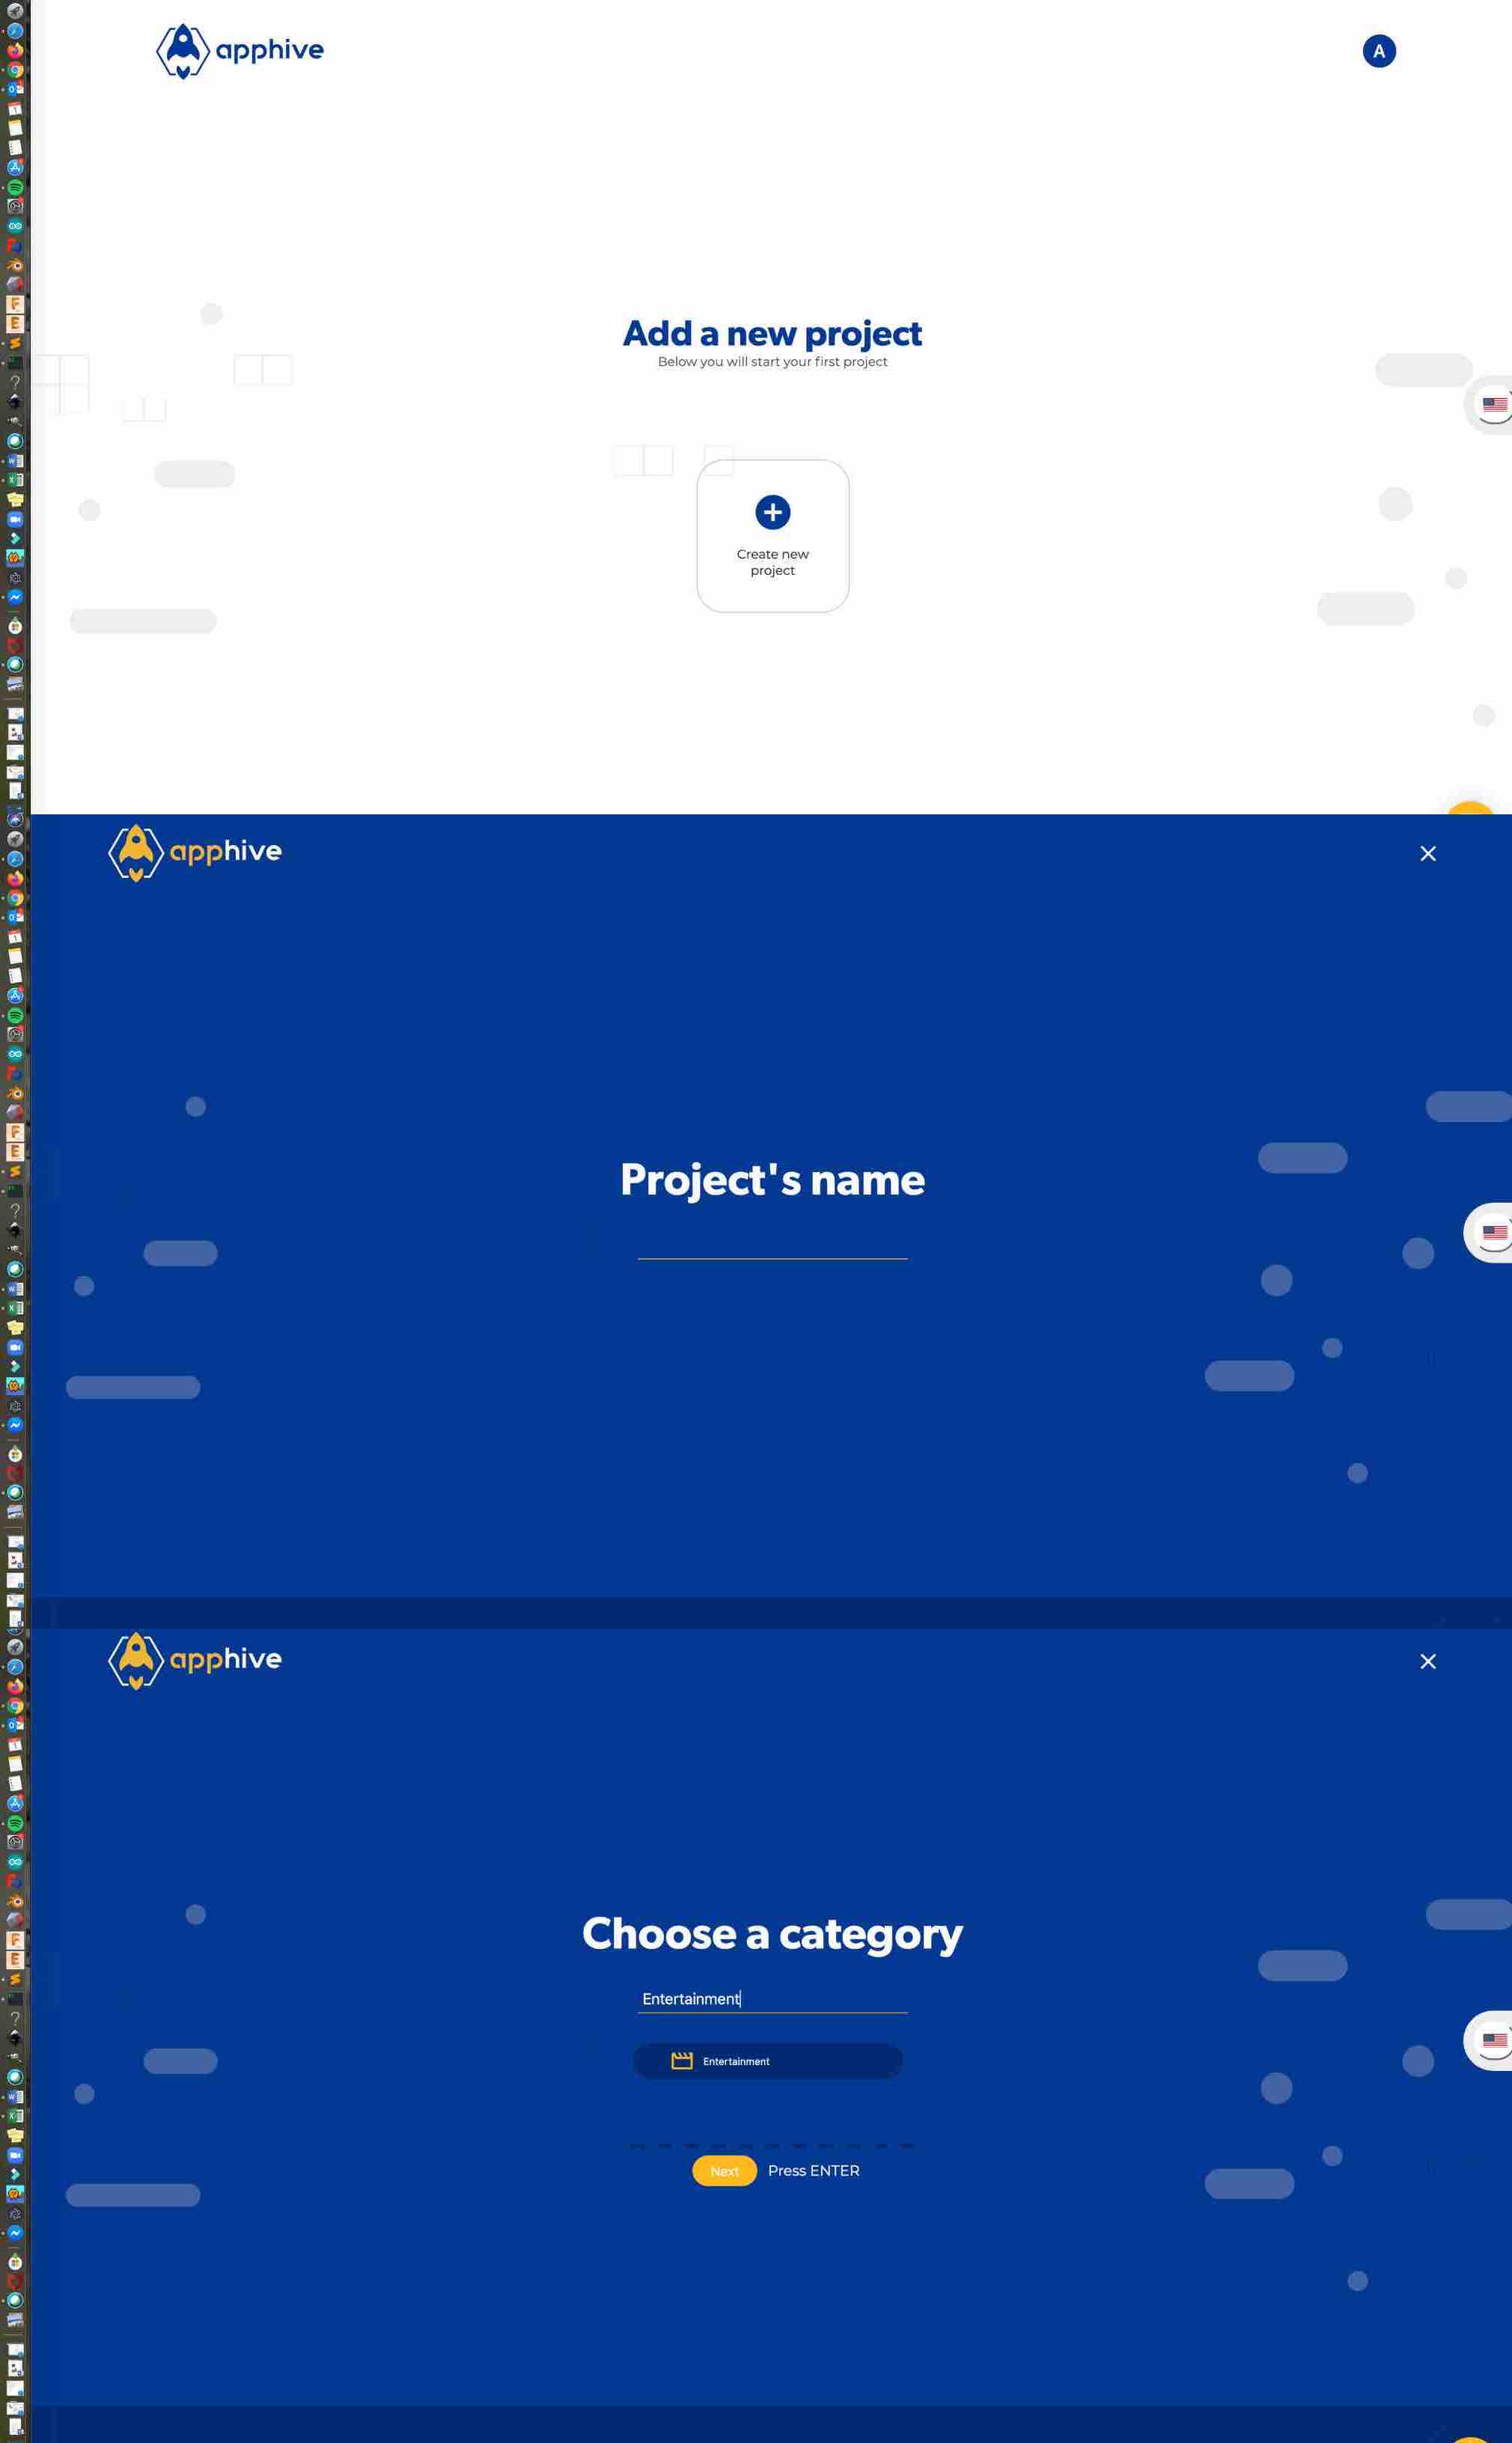
With my account set up I began to create a new project. I clicked the plus icon and it sent me to a screen where I was able to title my project. I called my project Leaf Light. The next step was to choose a category that my app fit into. This was a bit confusing and didn’t have much effect on the set up or design of my app. I chose entertainment and continued the set up process.
Adding a company name, choosing a template (if desired), and setting up the icon for your project are the last steps before designing and editing the vision of the app you want.
App Hive Creation and Design
I chose not to use a template. I wanted to design as much from scratch as I could. By adding an empty page I began the design process. I played around with the background color options. Knowing I wanted a greener theme I changed from purple to a shade of green. I was able to access a color pallet and with this I dialed in a unique shade of green. Having this option was a nice addition to personalize your app.
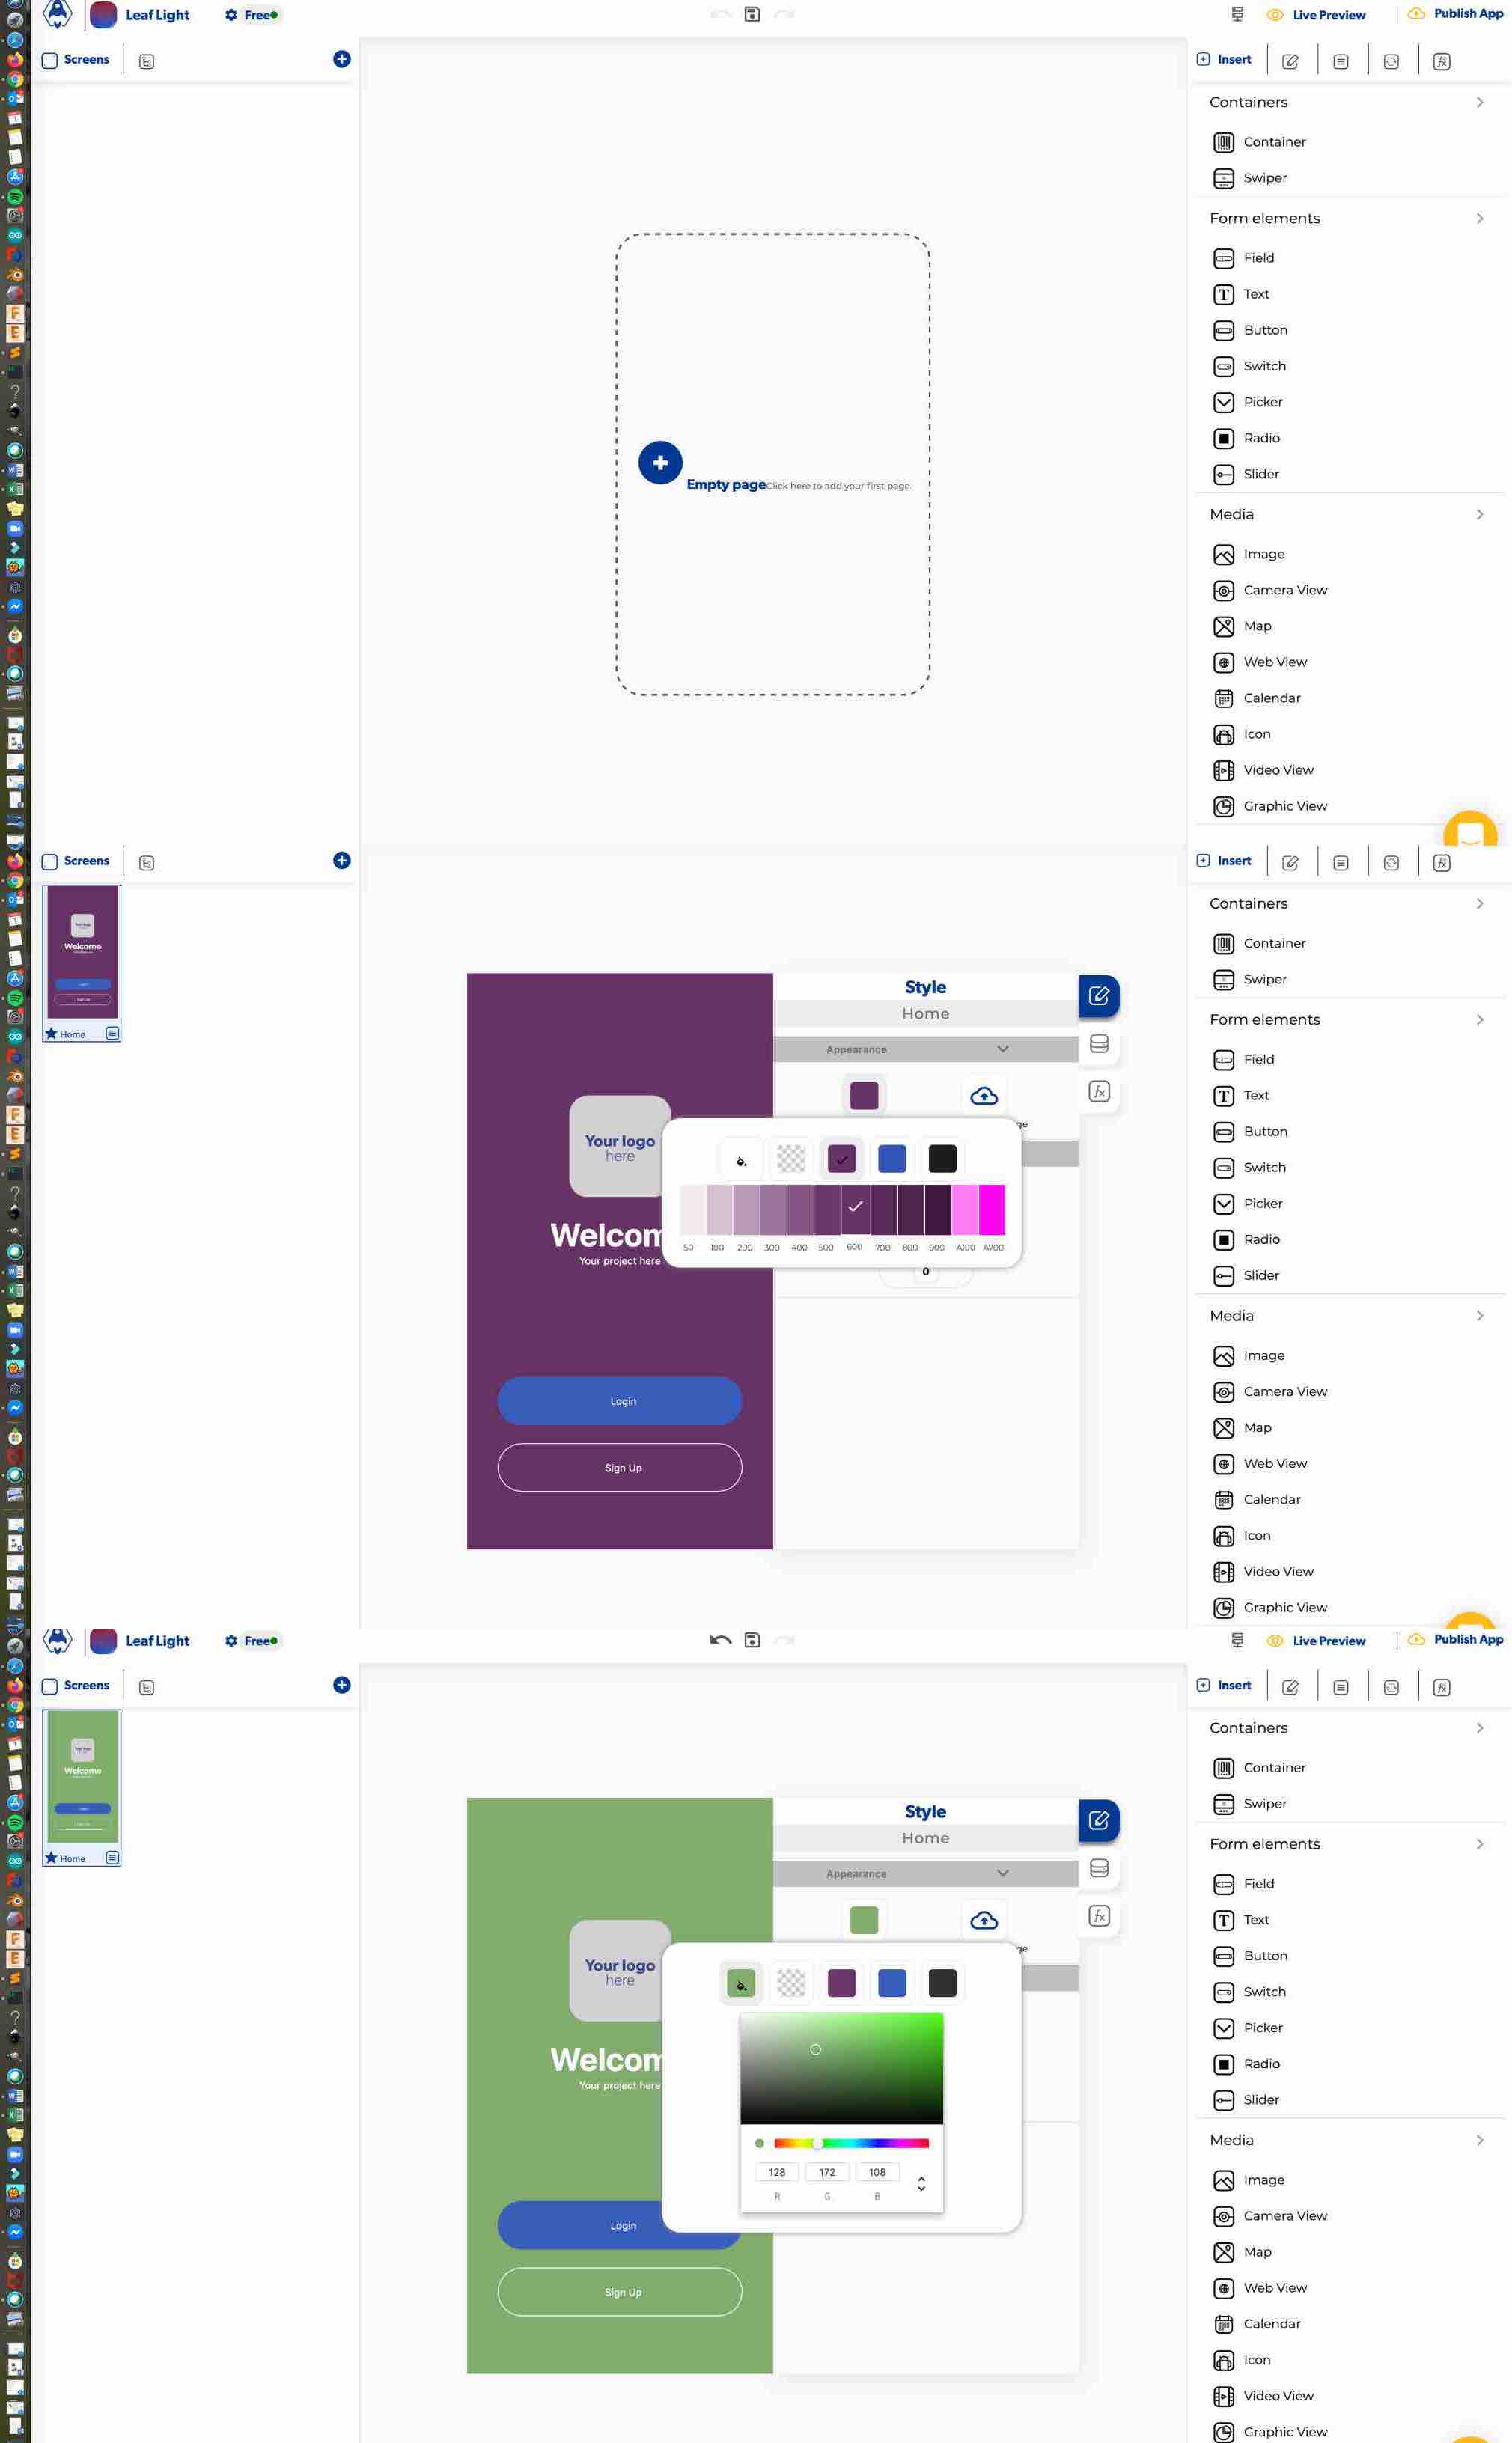
After working with the program more in depth I was able to find a theme setting. Once applied I had access to opacity options for green. With this menu bar I was able to have preset variations of the color I wanted. These variations were available for any color use, such as background, toggle menu, or text.

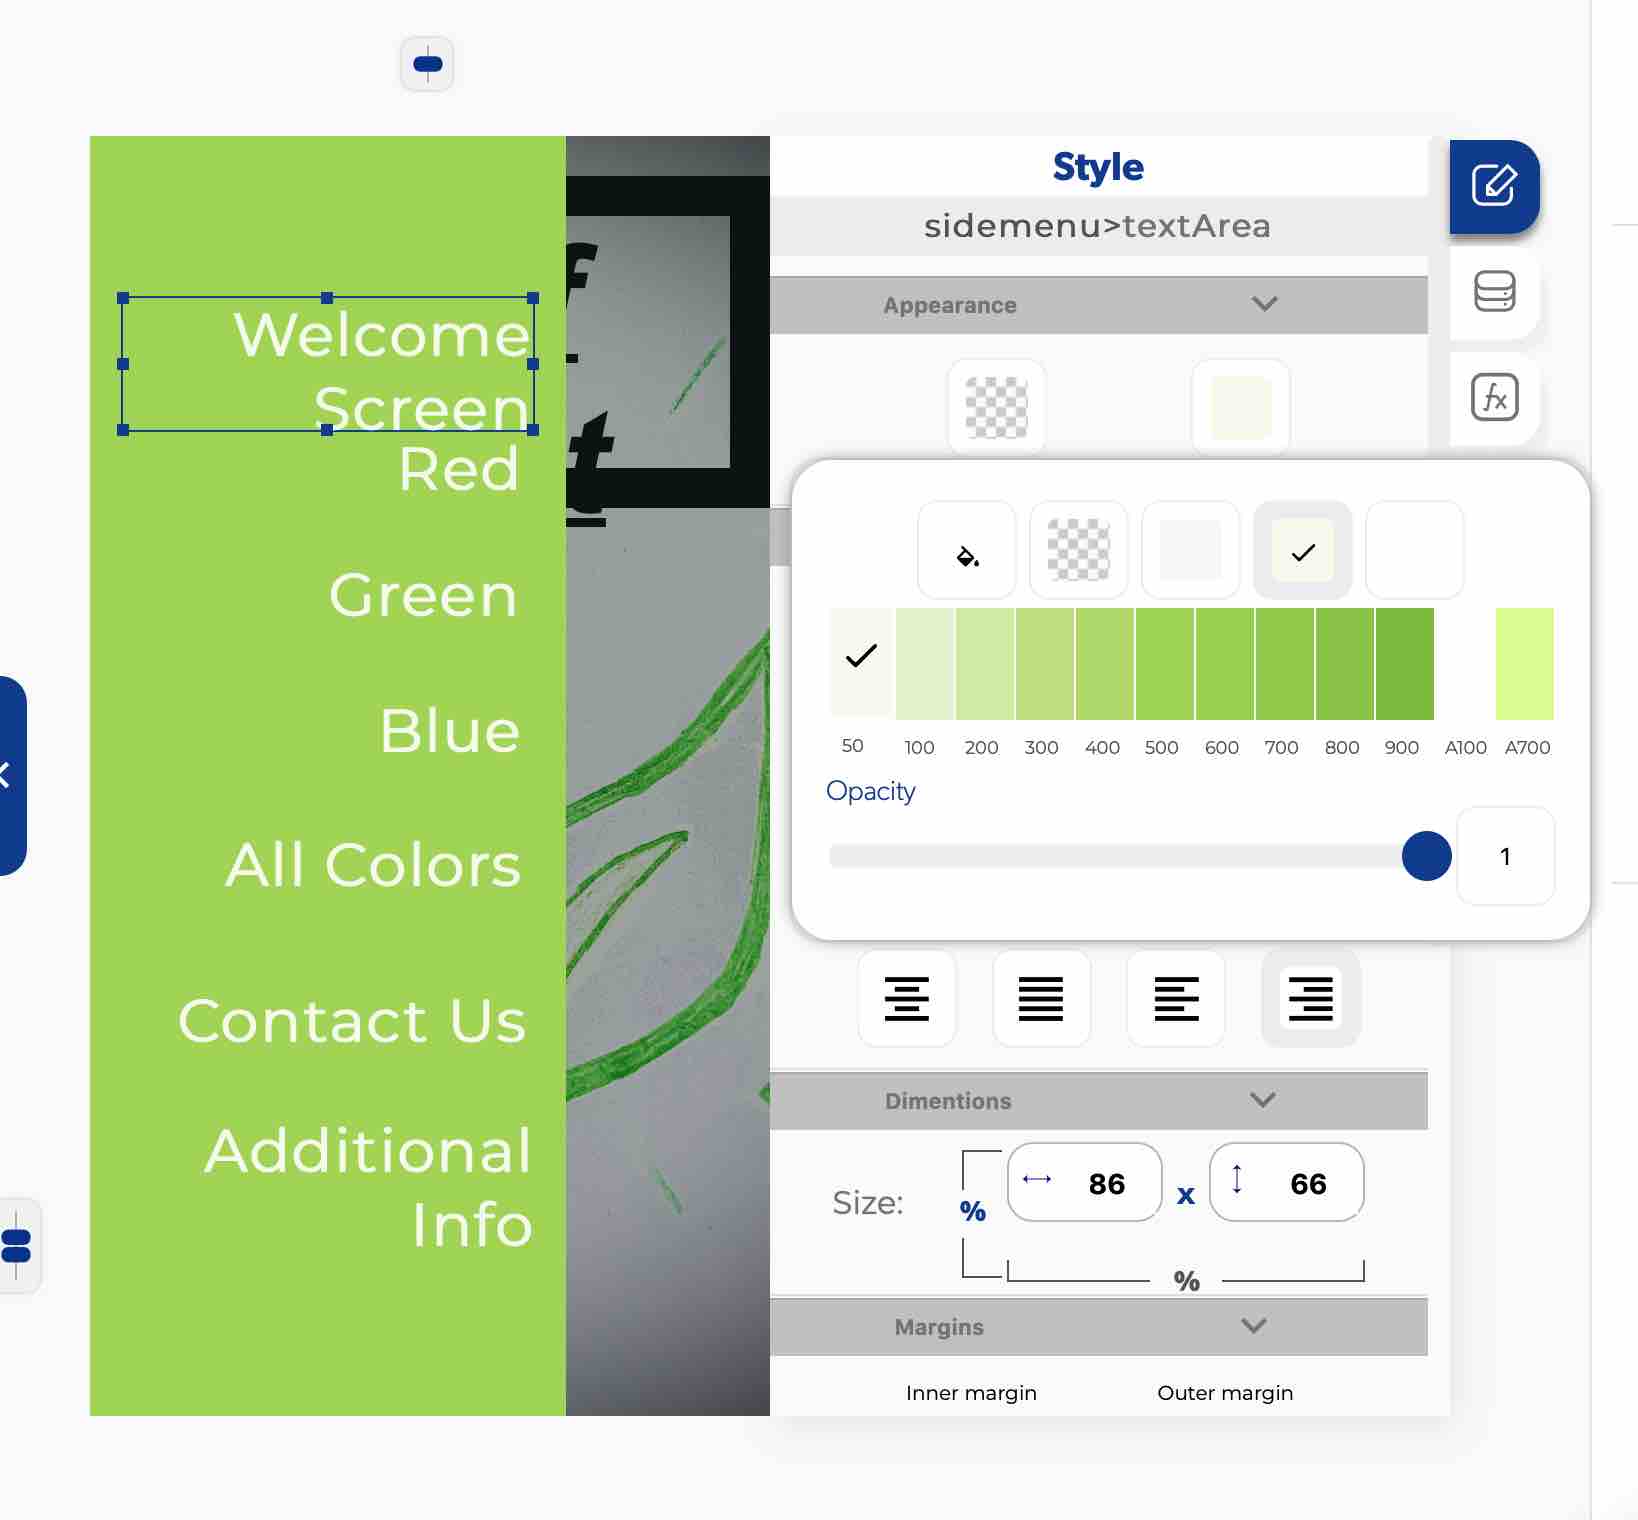
With text selected there will be a blue line to dot box. This box specifies which text is selected for changes. Keeping the the same green but with a lighter accent pulls the app together through each of the screens designed. I chose to use the 50 shade of the green. I applied this change to each of the different text applications on each screen.
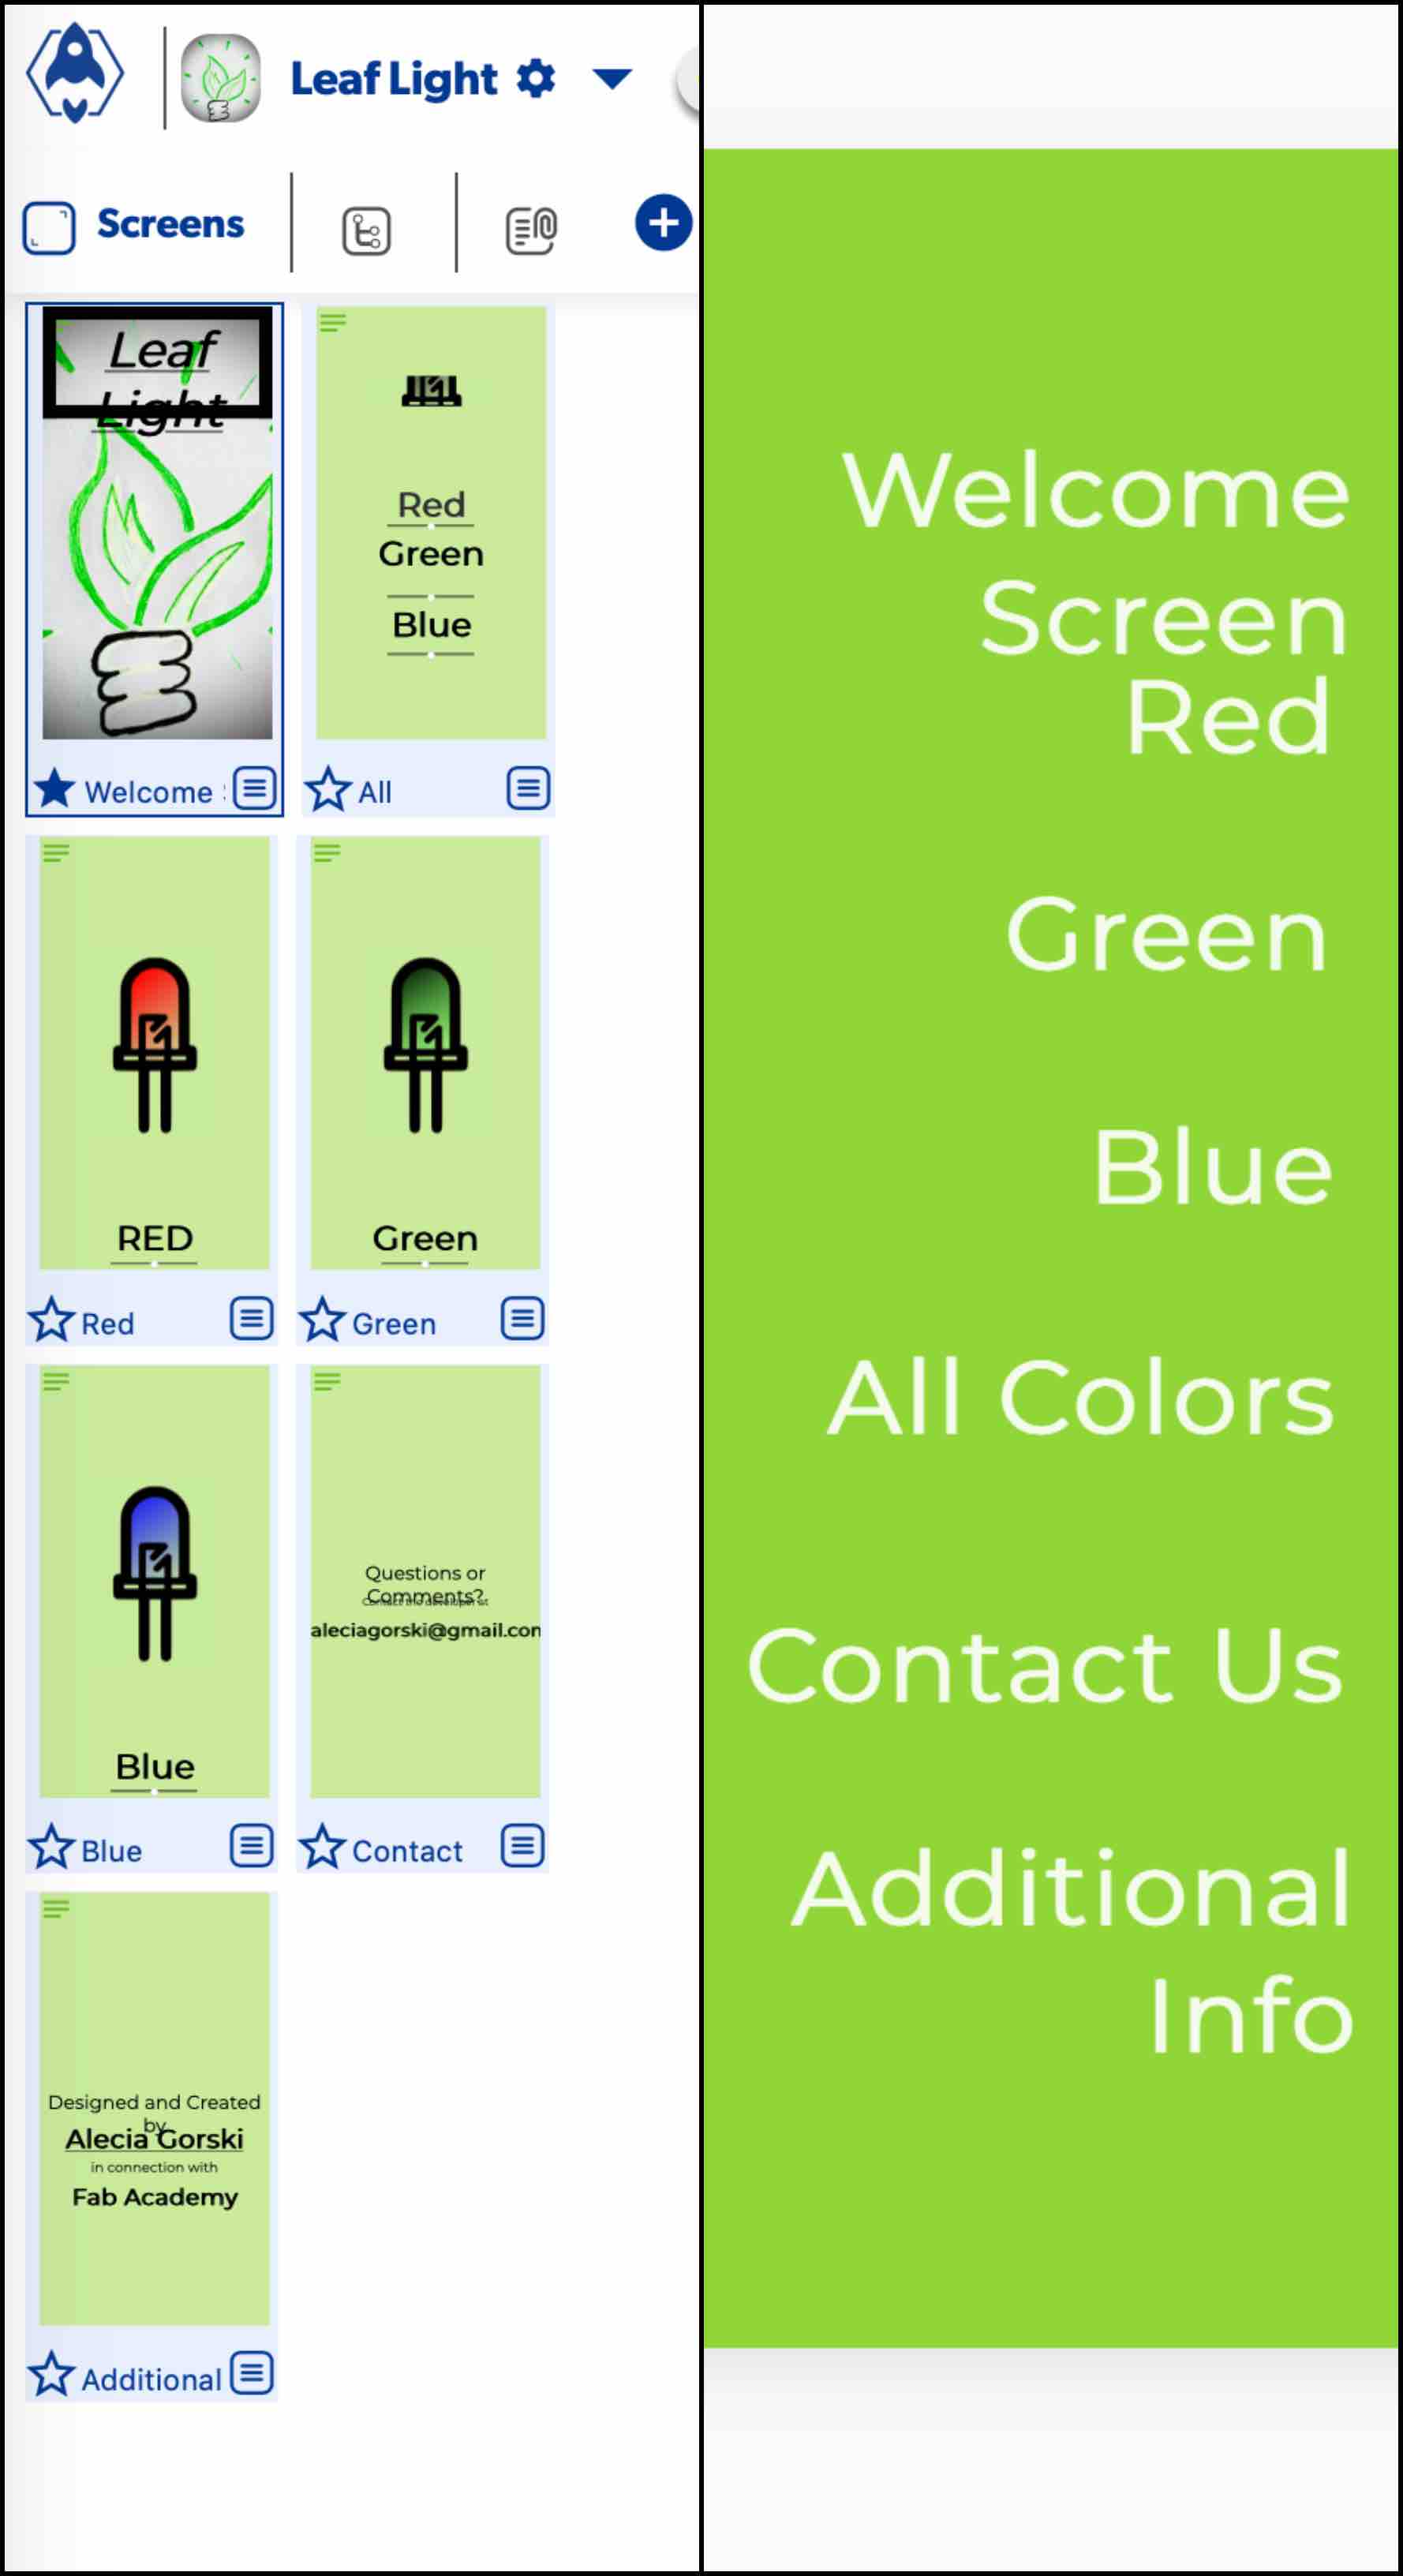
Another design option available is to upload images. The AppHive program allows you to upload images to personalize the design of you app. I created a leaf light logo that was designed to be two leafs coming from a socket and emitting energy. I took a picture of my drawing and uploaded it into the browser. The images tab then holds all images uploaded. I returned to my welcome screen and applied the photo as the background. This then became my welcome screen.
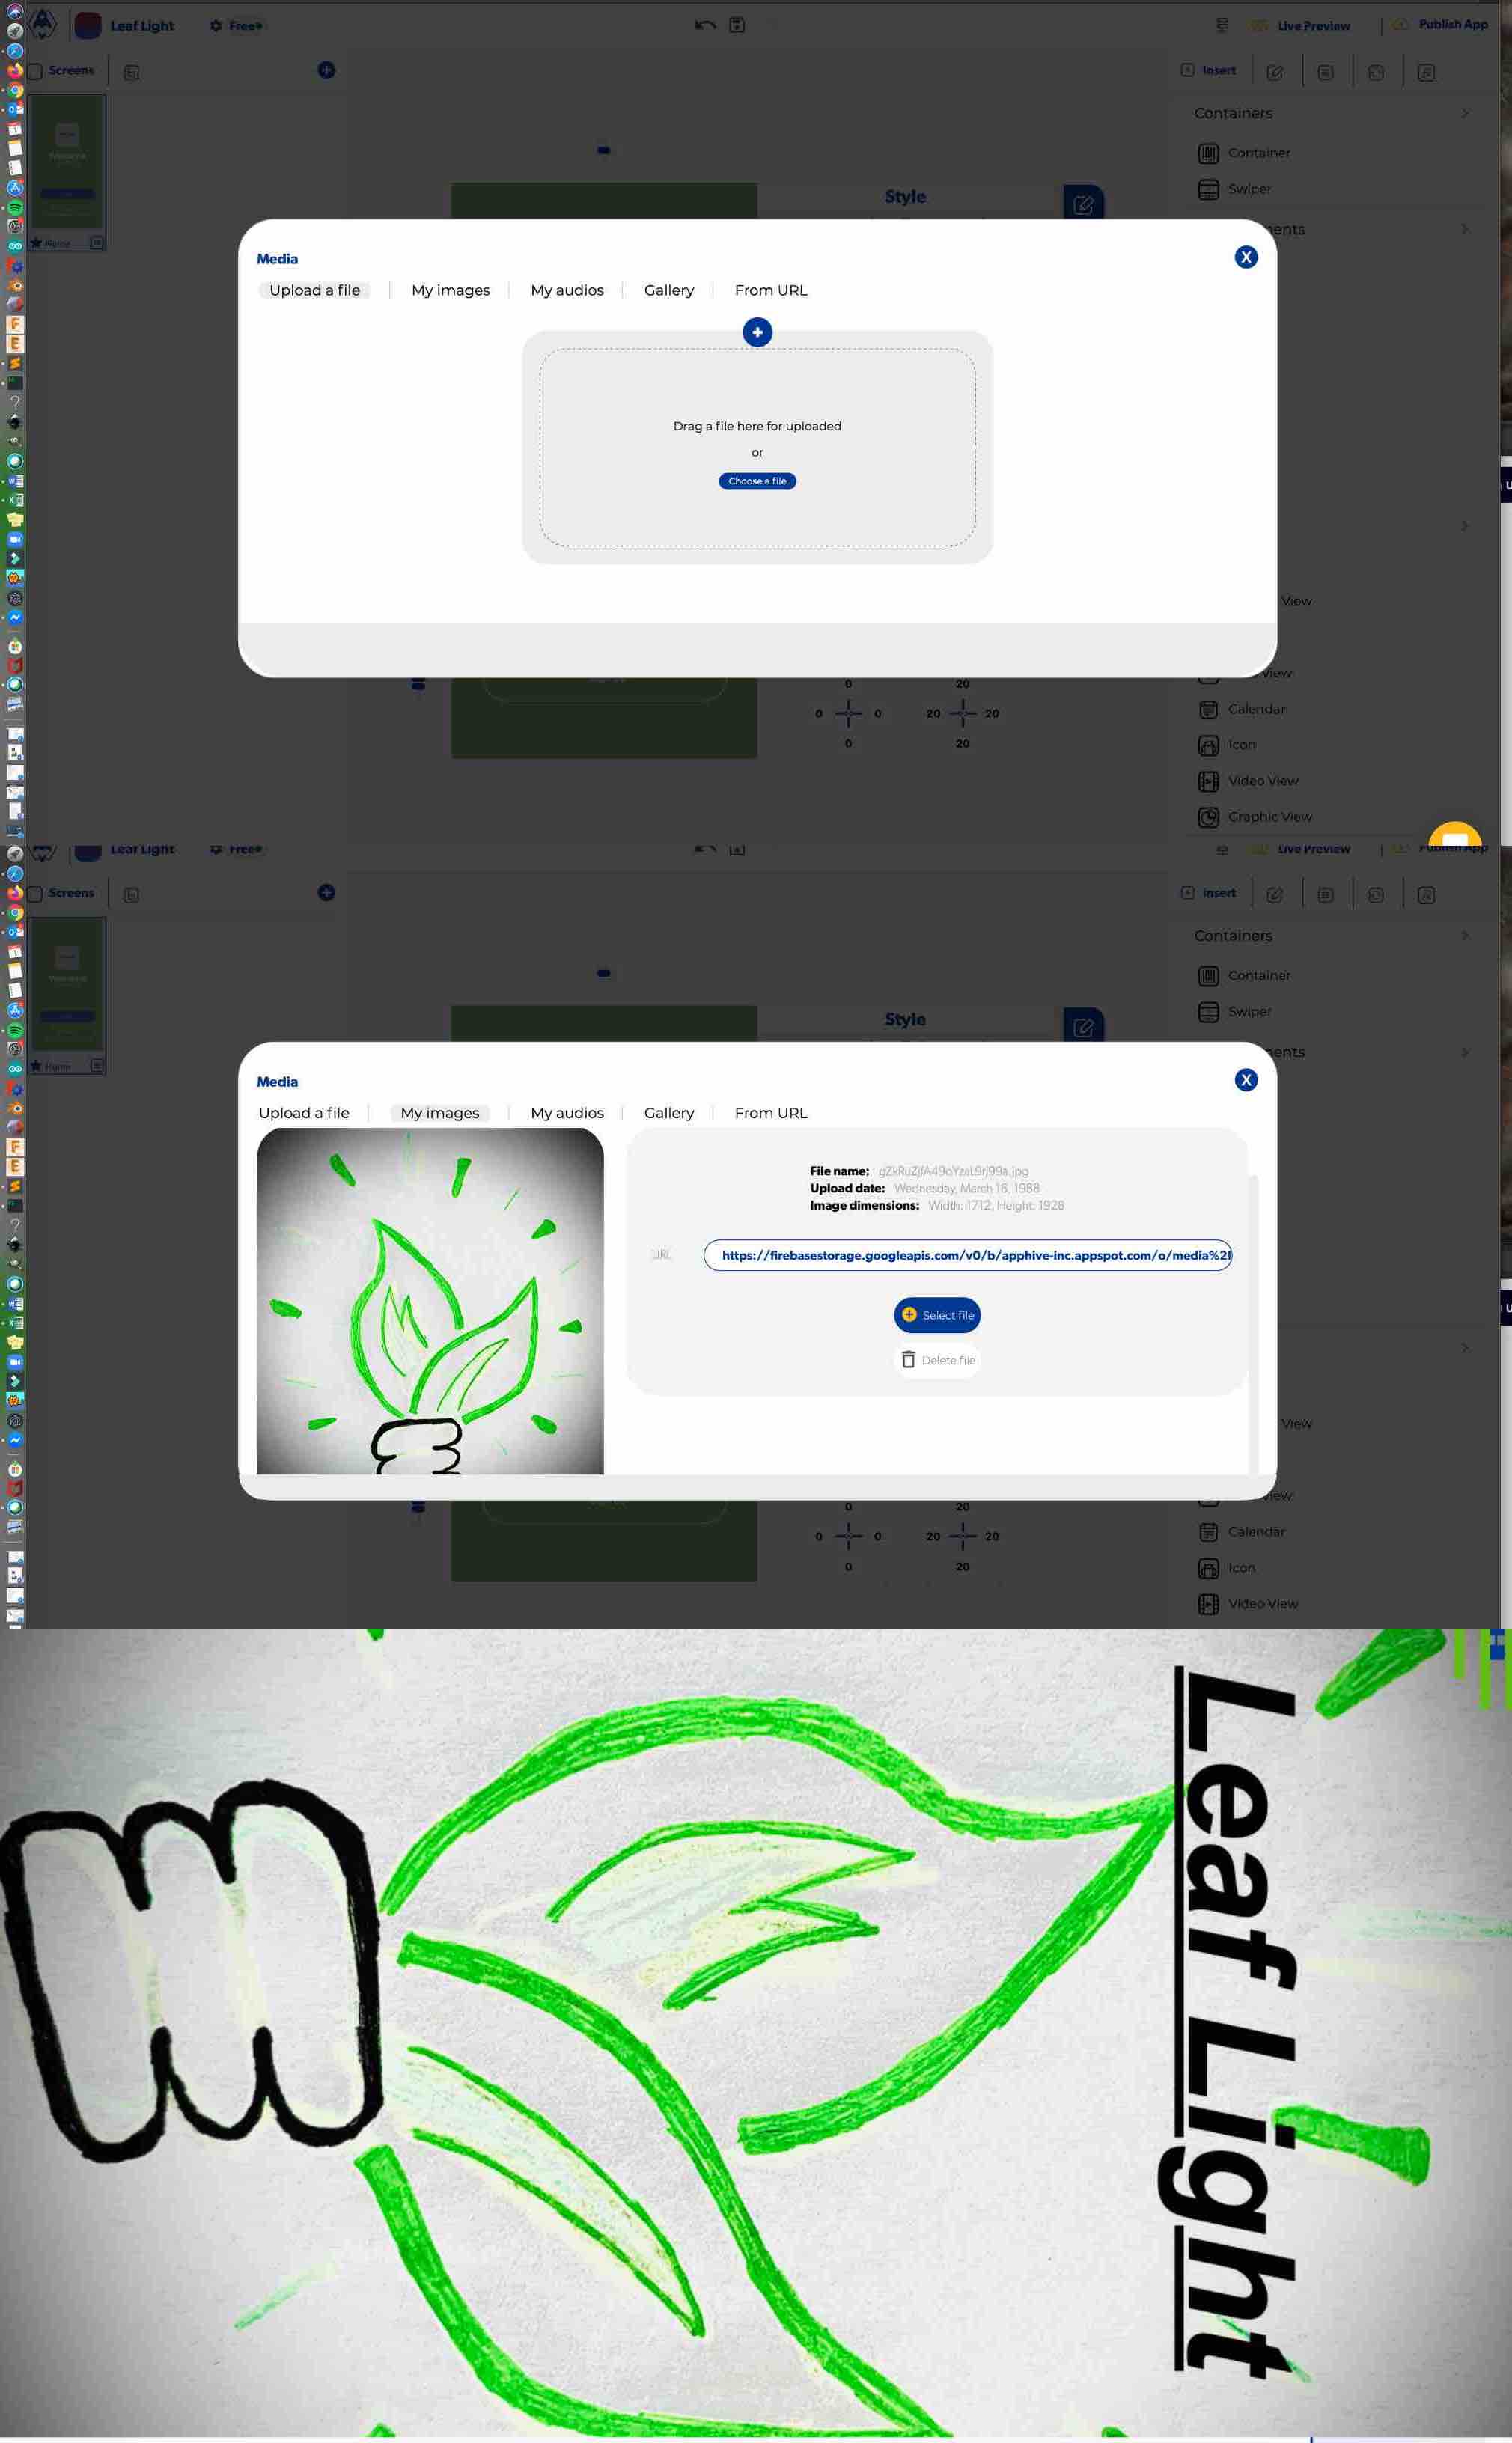
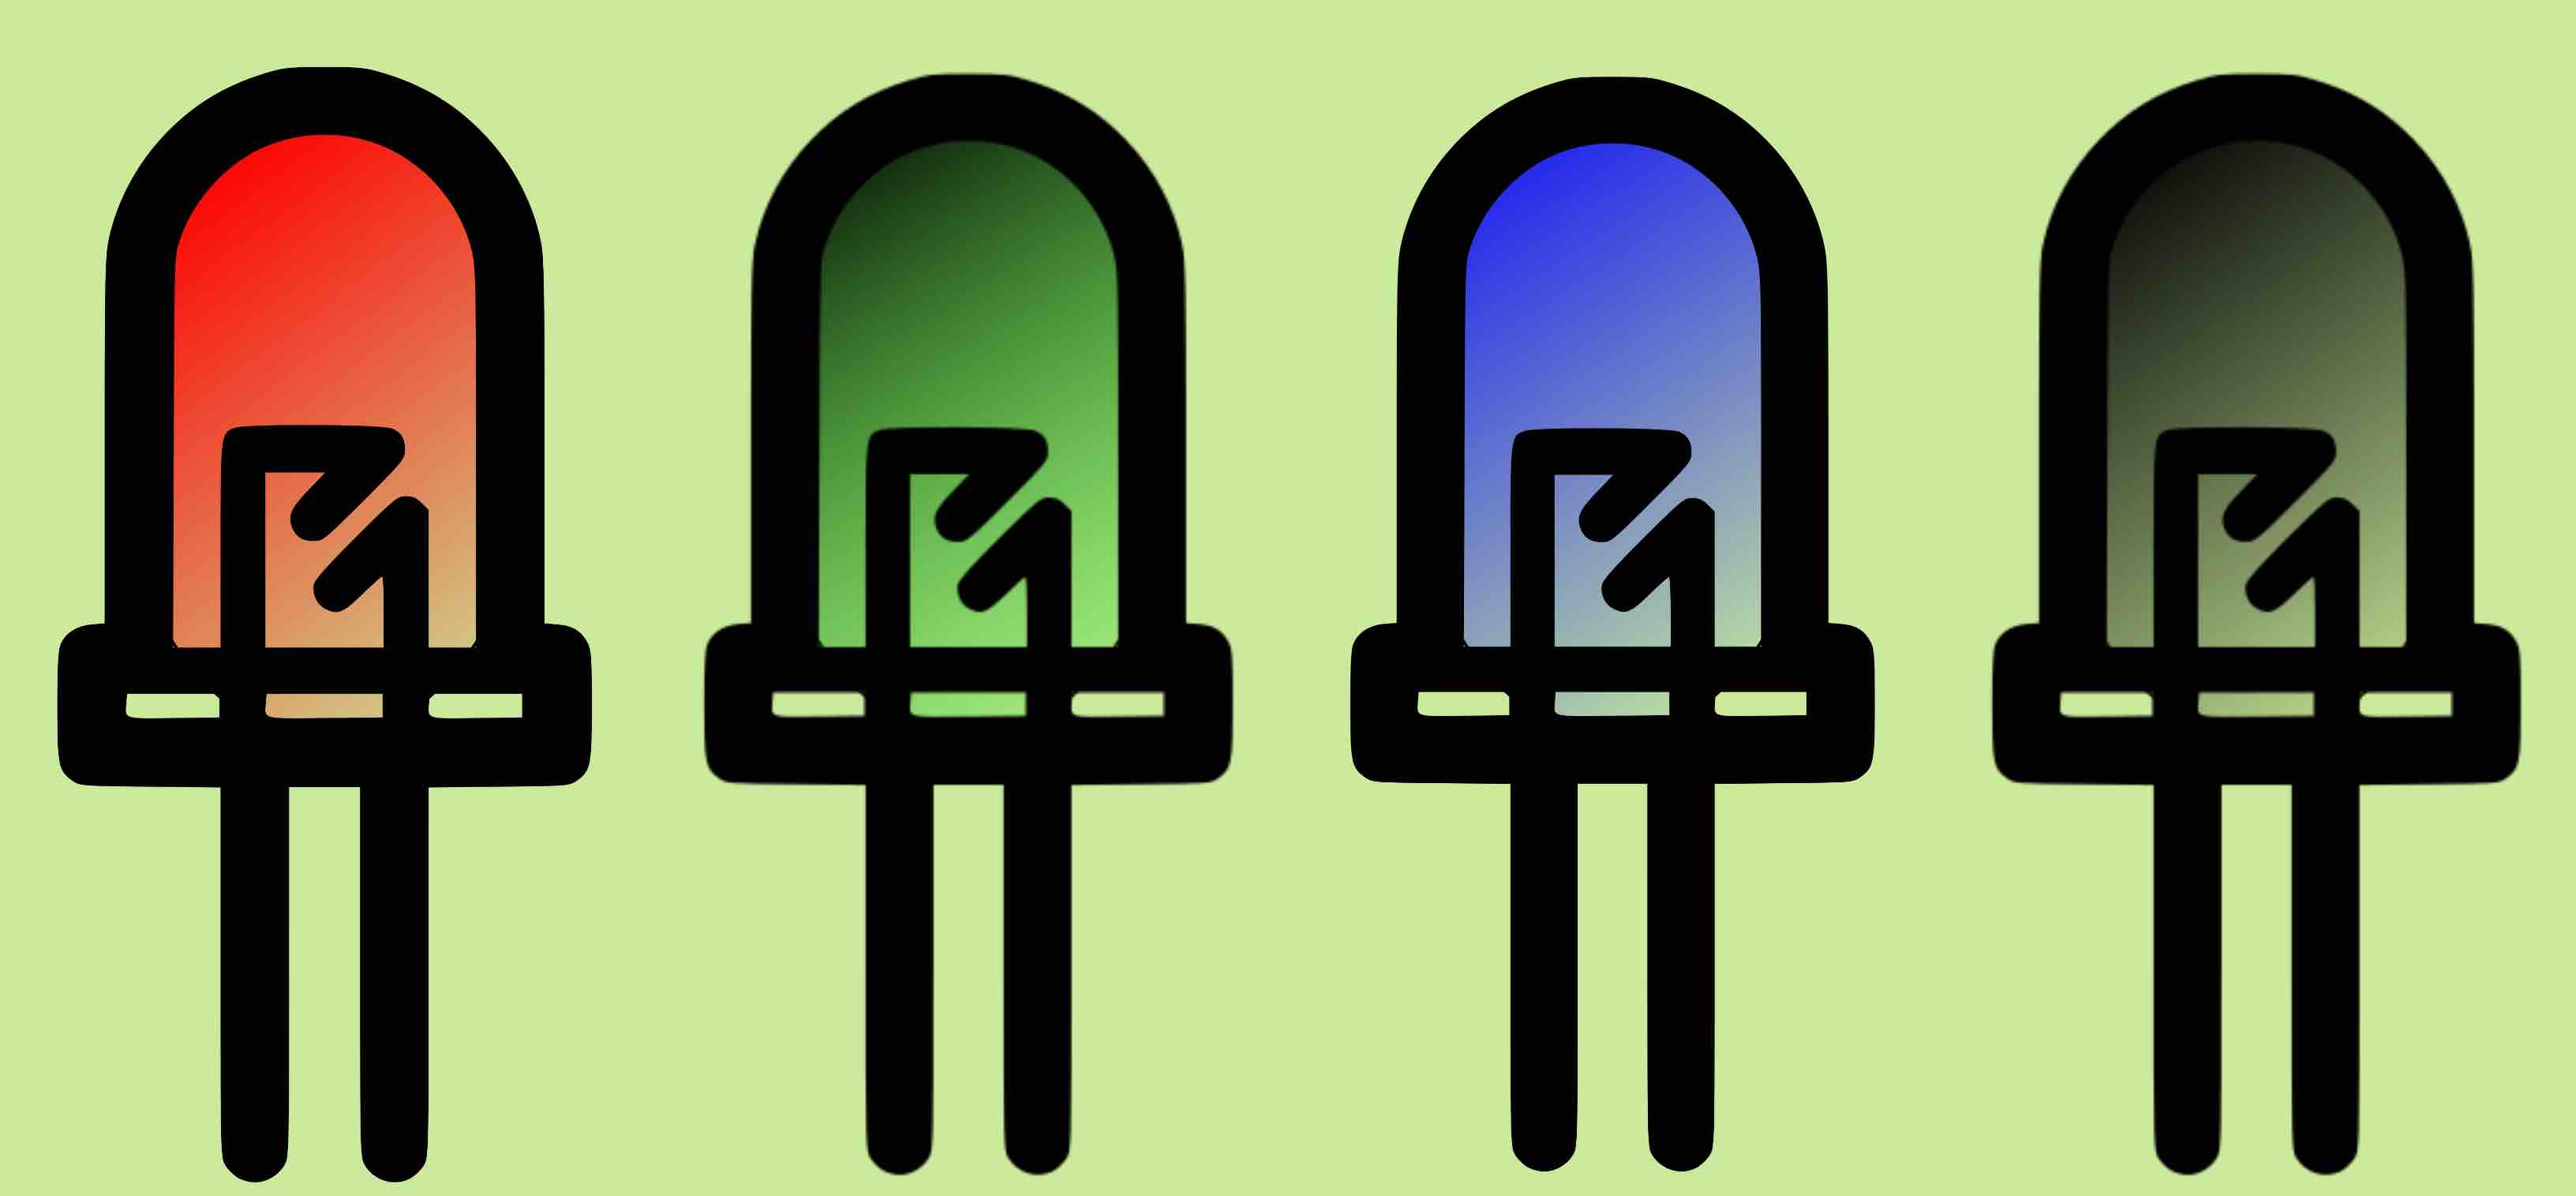
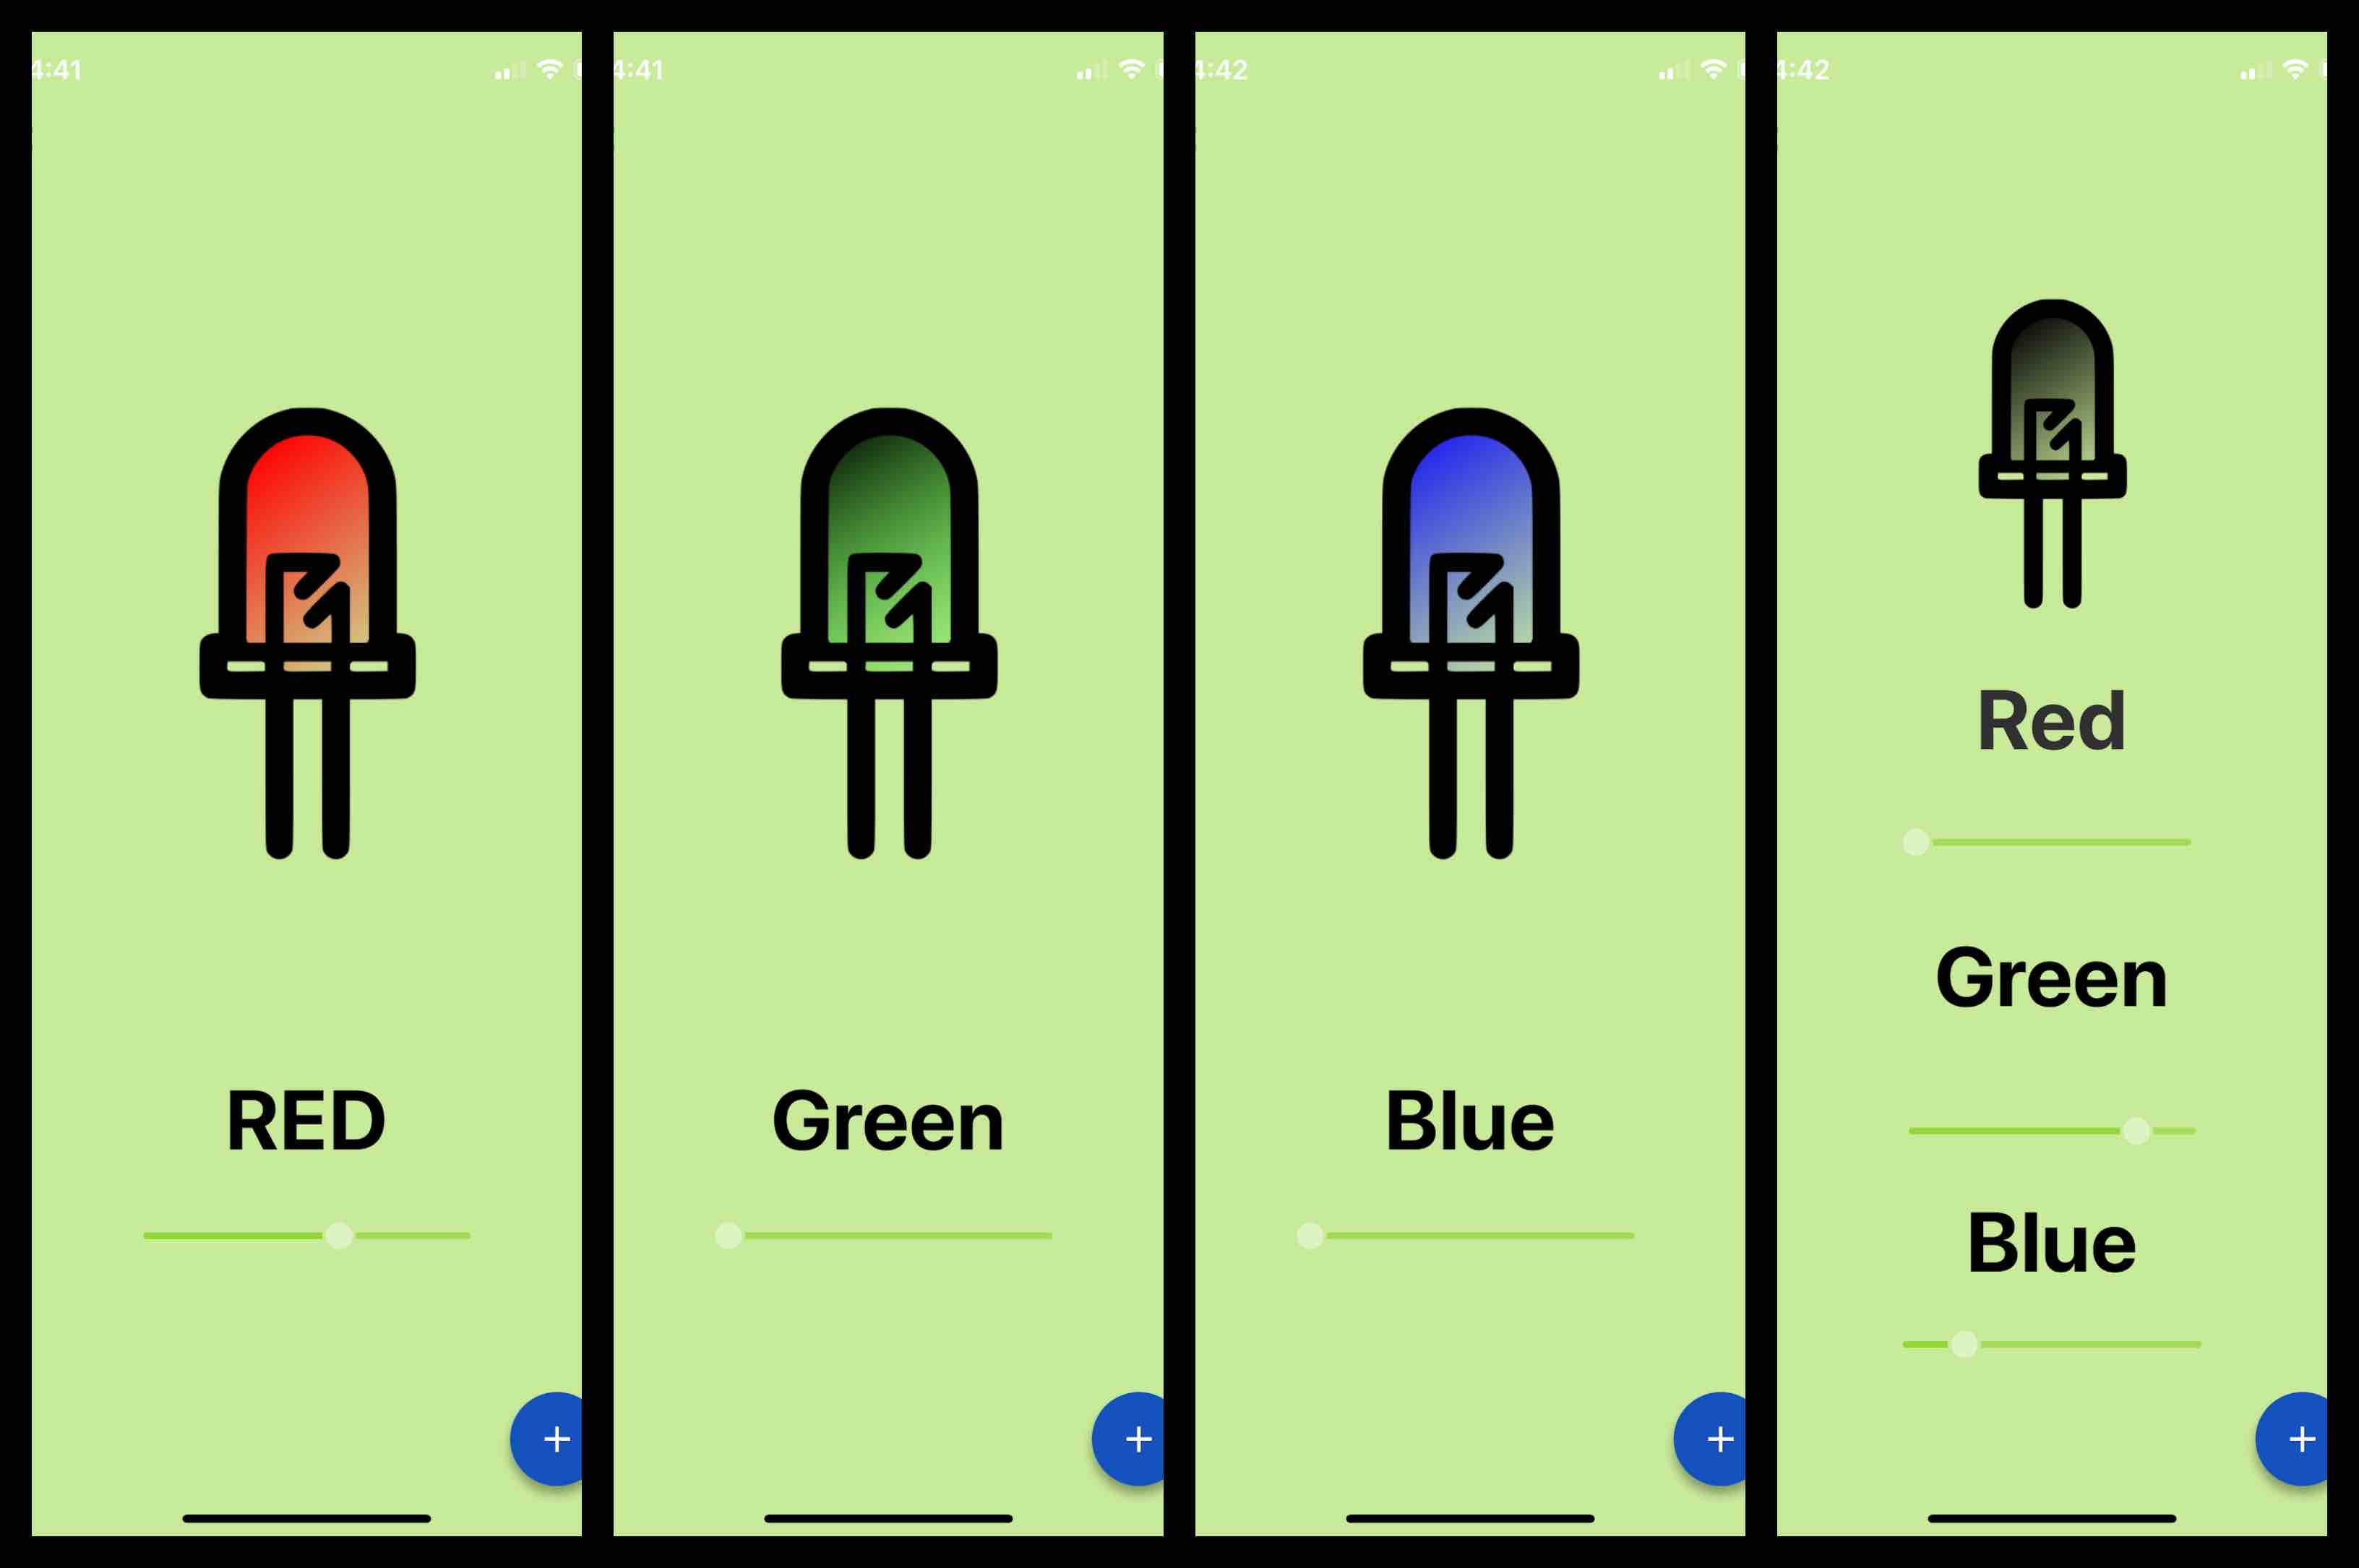
The other images I wanted to use were unique LED representations. Using this LED Icon I was able to apply a colored gradient to each of the bulbs in InkScape. I then matched the RGB values of the green background in my app to the background of the icon. This helped to make a seamless addition to the page. Using the options on the right of the menu screen I placed each image into the designated pages.
The AppHive design screen shows each of the pages you have created. This allows the user to select each screen to edit, and to have a thumbnail preview of the designs as they evolve. The program also allows the user to add toggle menus. These menus can toggle from the top, bottom, left or right. I designed mine to toggle in from the left when activated.
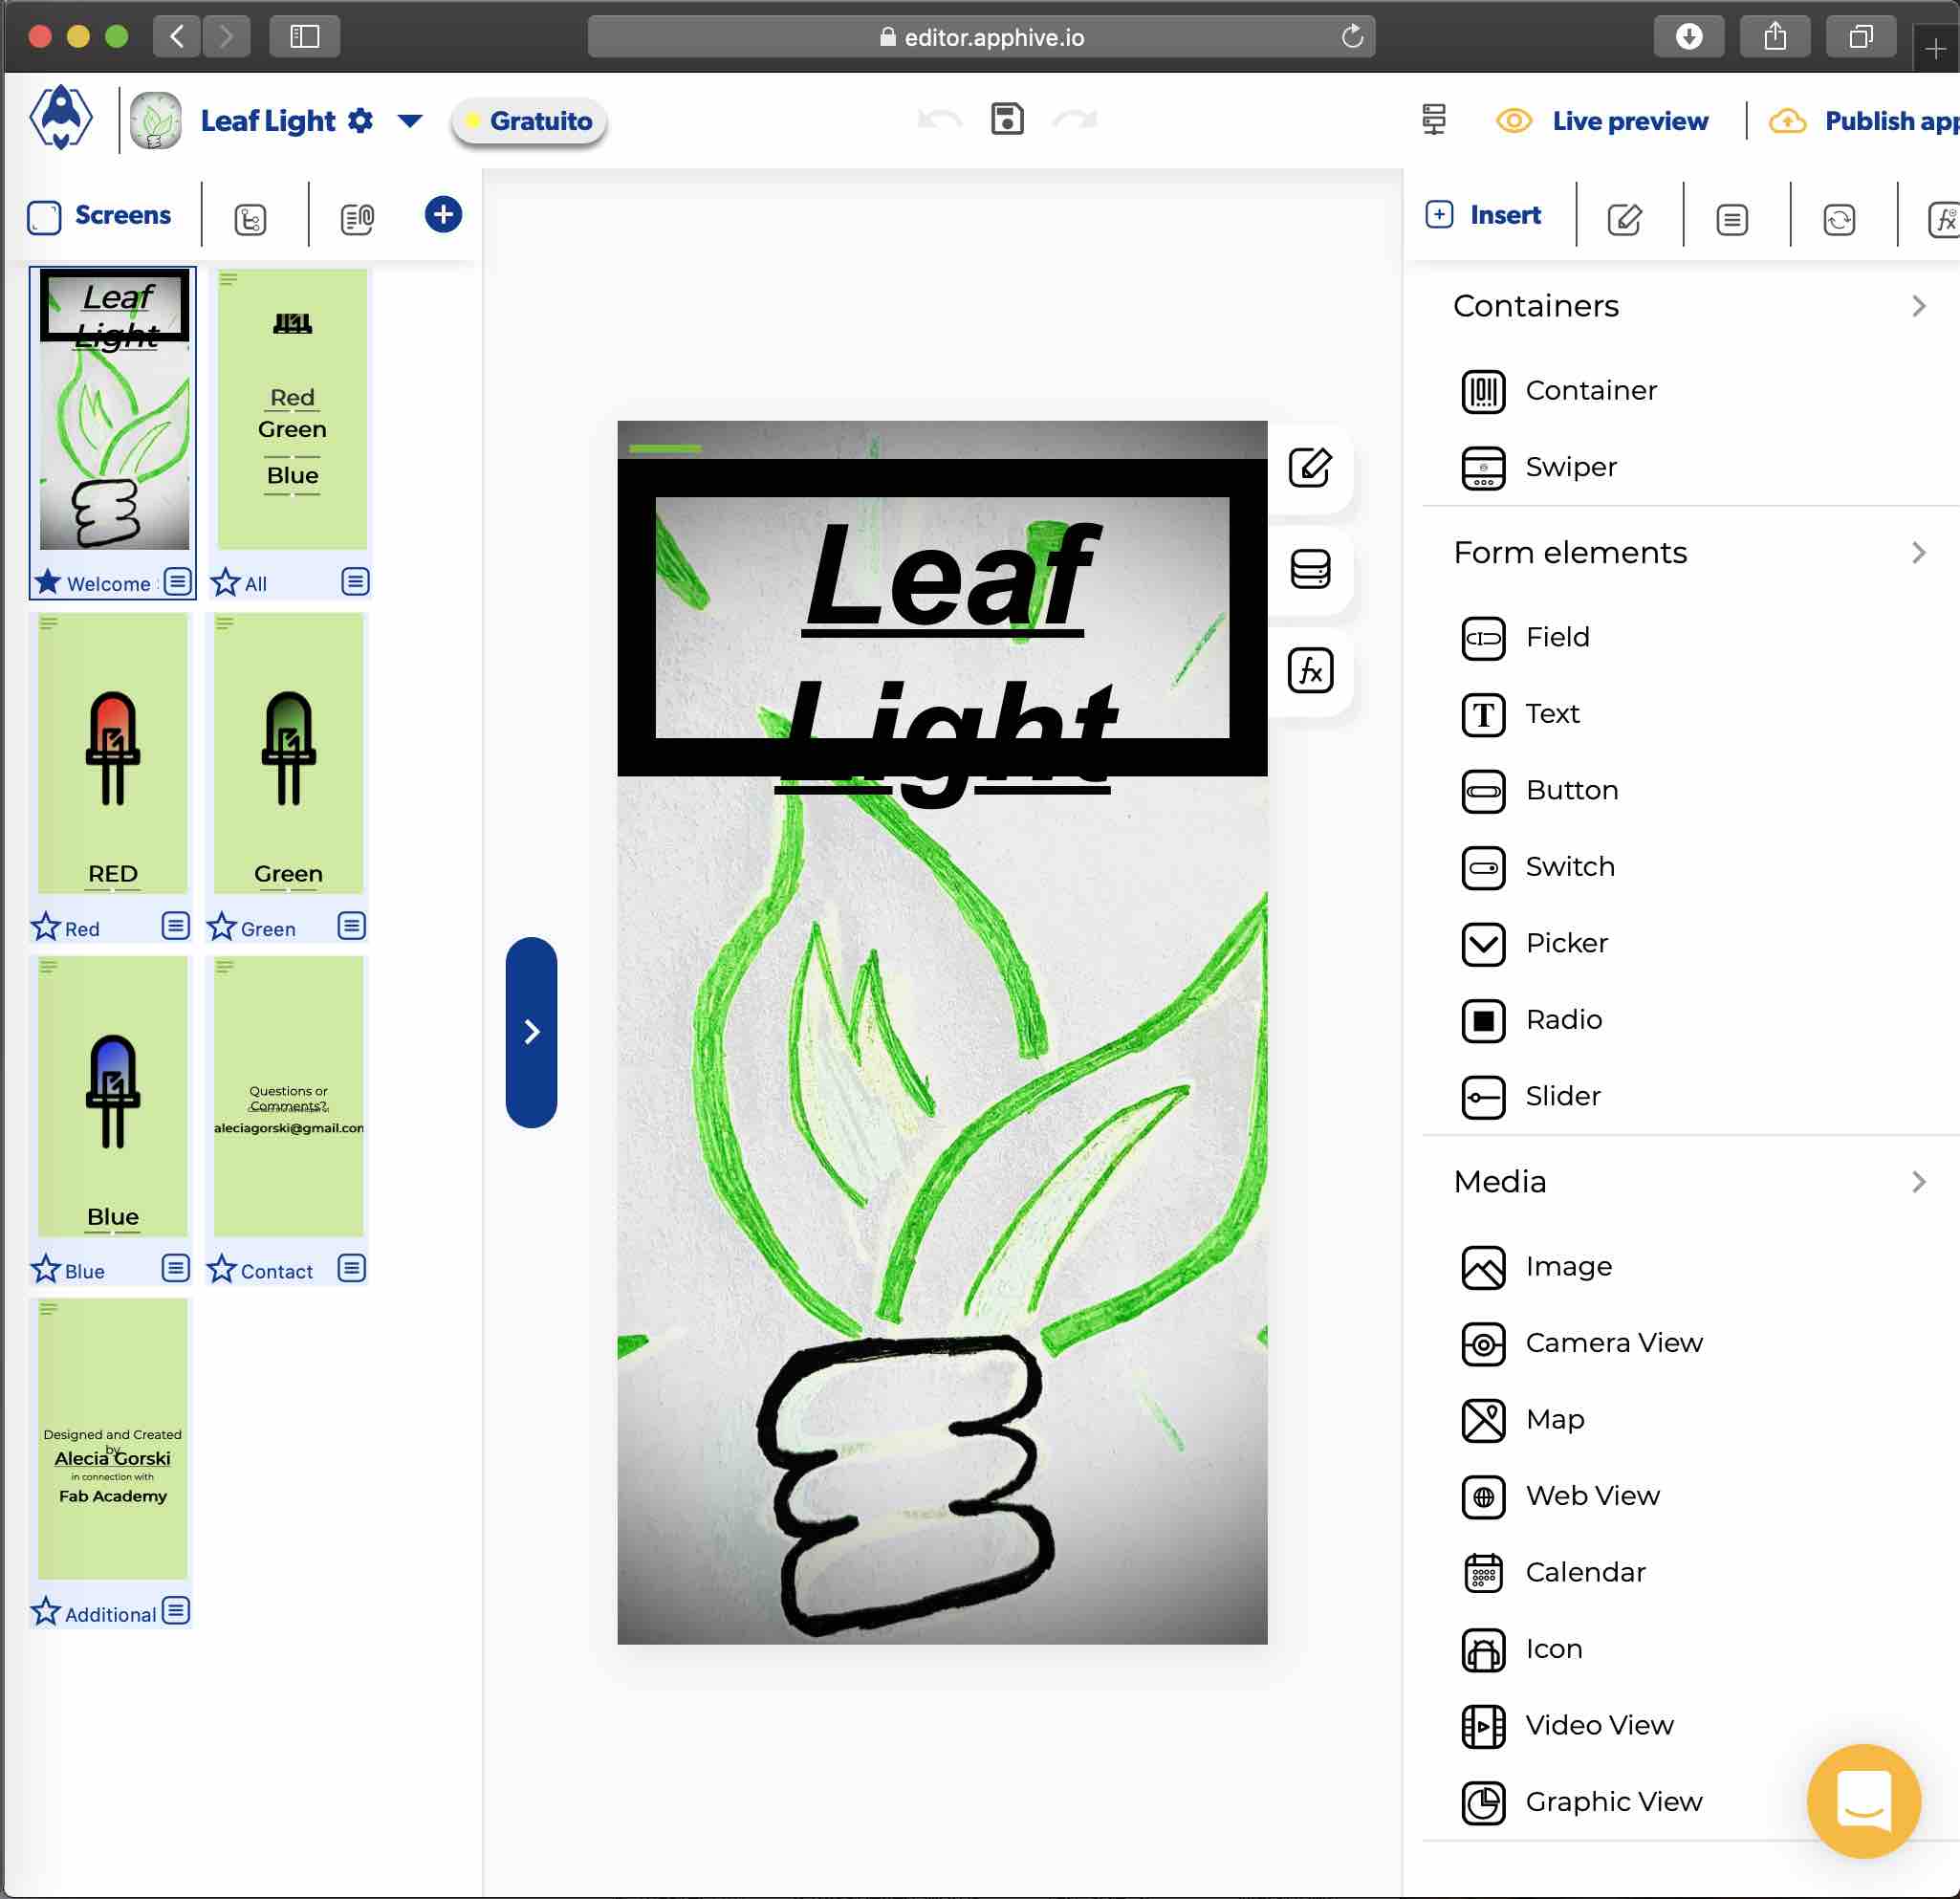
The main screen of the design process allows the user to see a preview thumbnail of each screen created, as well as a live view of the screen the user is currently working on, and on the right hand side there is a menu with different plug in options. This option helps the user to apply elements such as buttons, slider, and text. It also allows for media applications such as images, icons, maps, and camera views. When these functions are drag and dropped into the working screen they can be placed where desired and triggered by additional settings.
App Hive Button Function
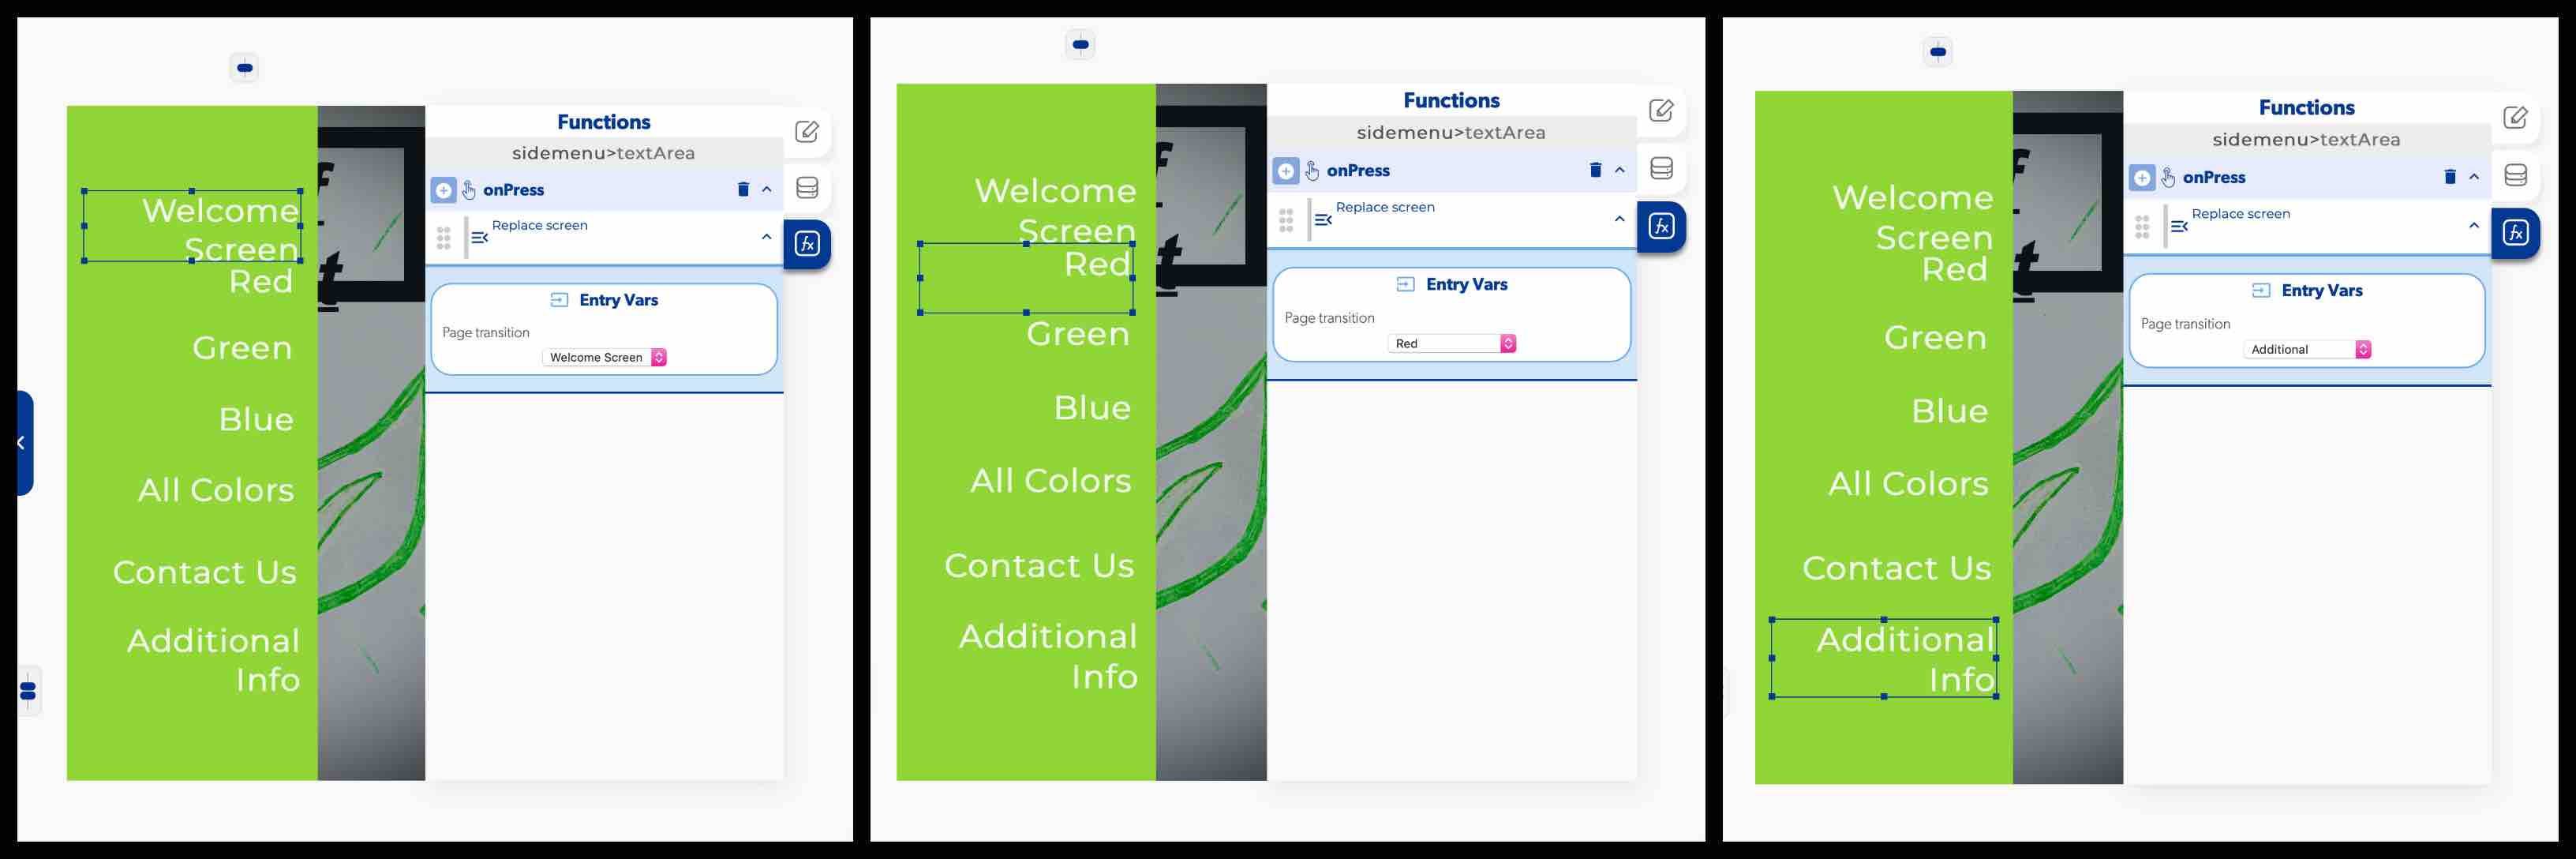
Placing the functions into the working screen is one thing, but if you don’t assign the button to react to interactions it will be visually on the screen but wont change anything. I found that I wanted my toggle menu to be activated when pressed. This function is called “On Press”. On the working screen the user will select the part that they wish to be interacted with. This will then provide the user with an editing option screen. The third tab down allows the user to add interaction on the function. By choosing to “Add event” the user can begin the interaction process. The option I chose was onPress. onPress I want the screen to be replaces. That was the next option I chose.
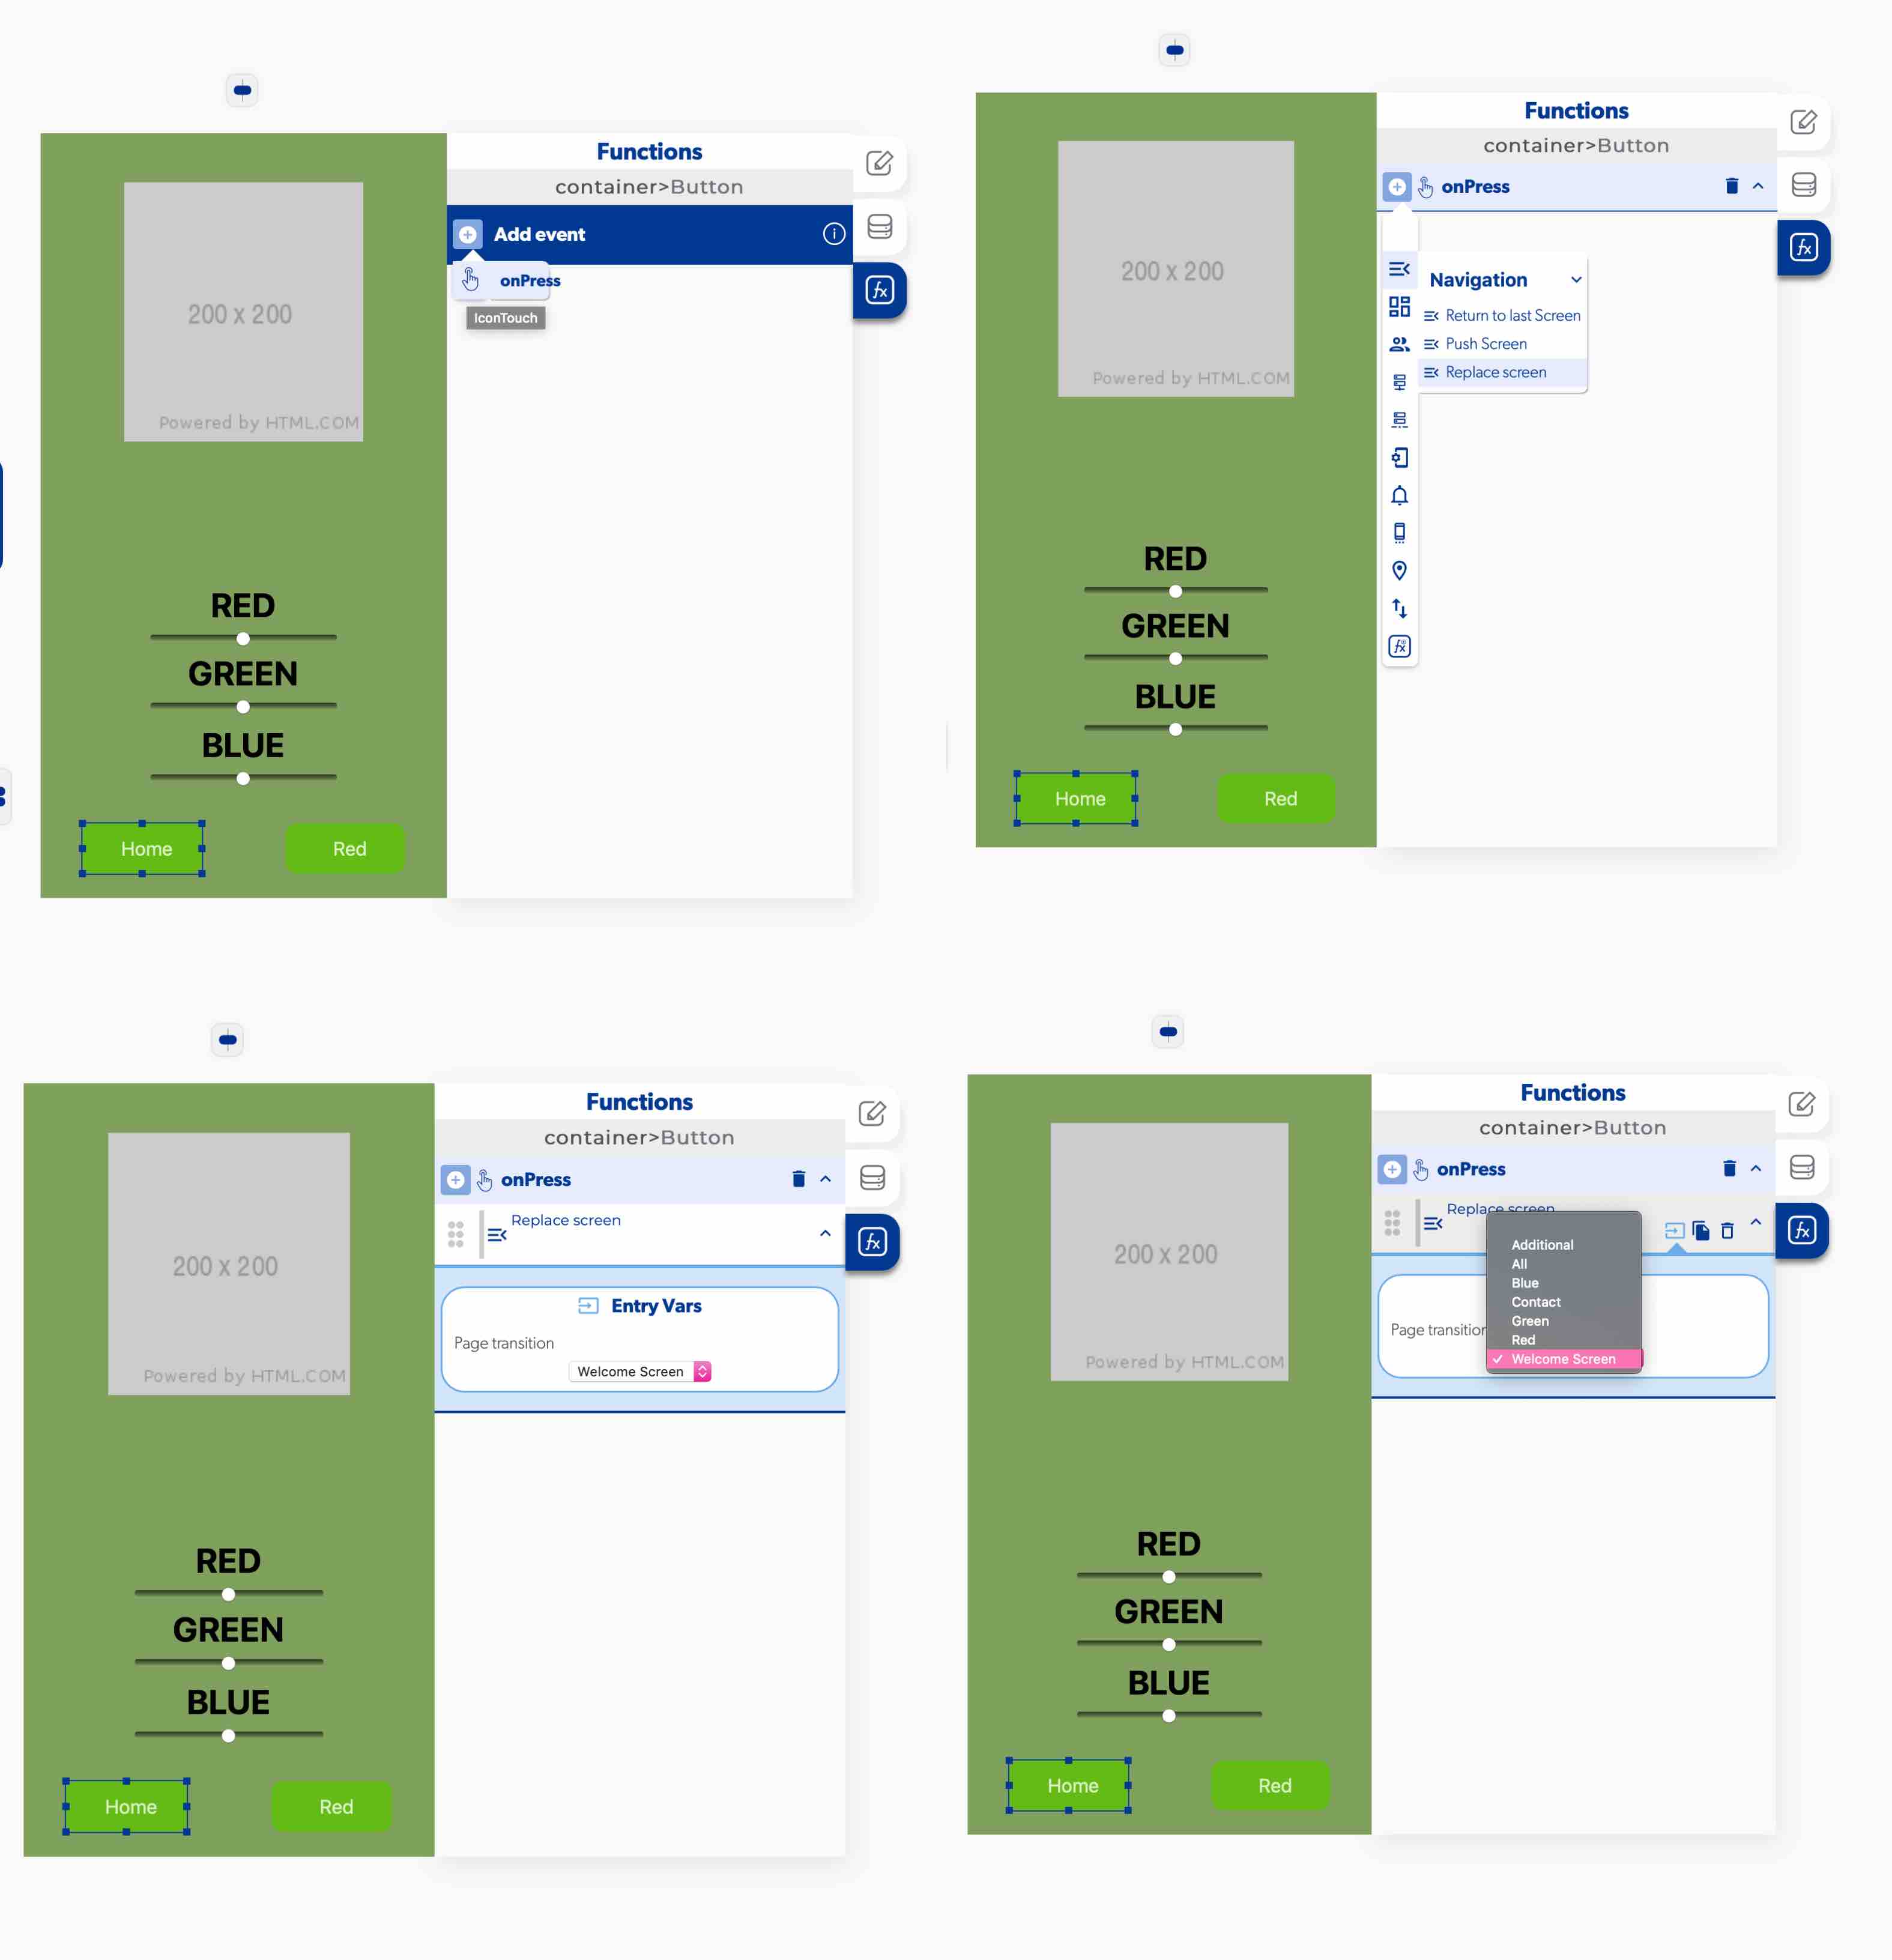
I then told the program which screen I wanted to show when pressed. When the home button is pressed it will replace the current screen with the screen chosen from the drop down menu. For this example the welcome screen was chosen. This was the process used to set up the left hand toggle menu. Each text was selected and set to replace the screen with that corresponding screen onPress. Moving through each of the test placements on the toggle screen I applied these functions.
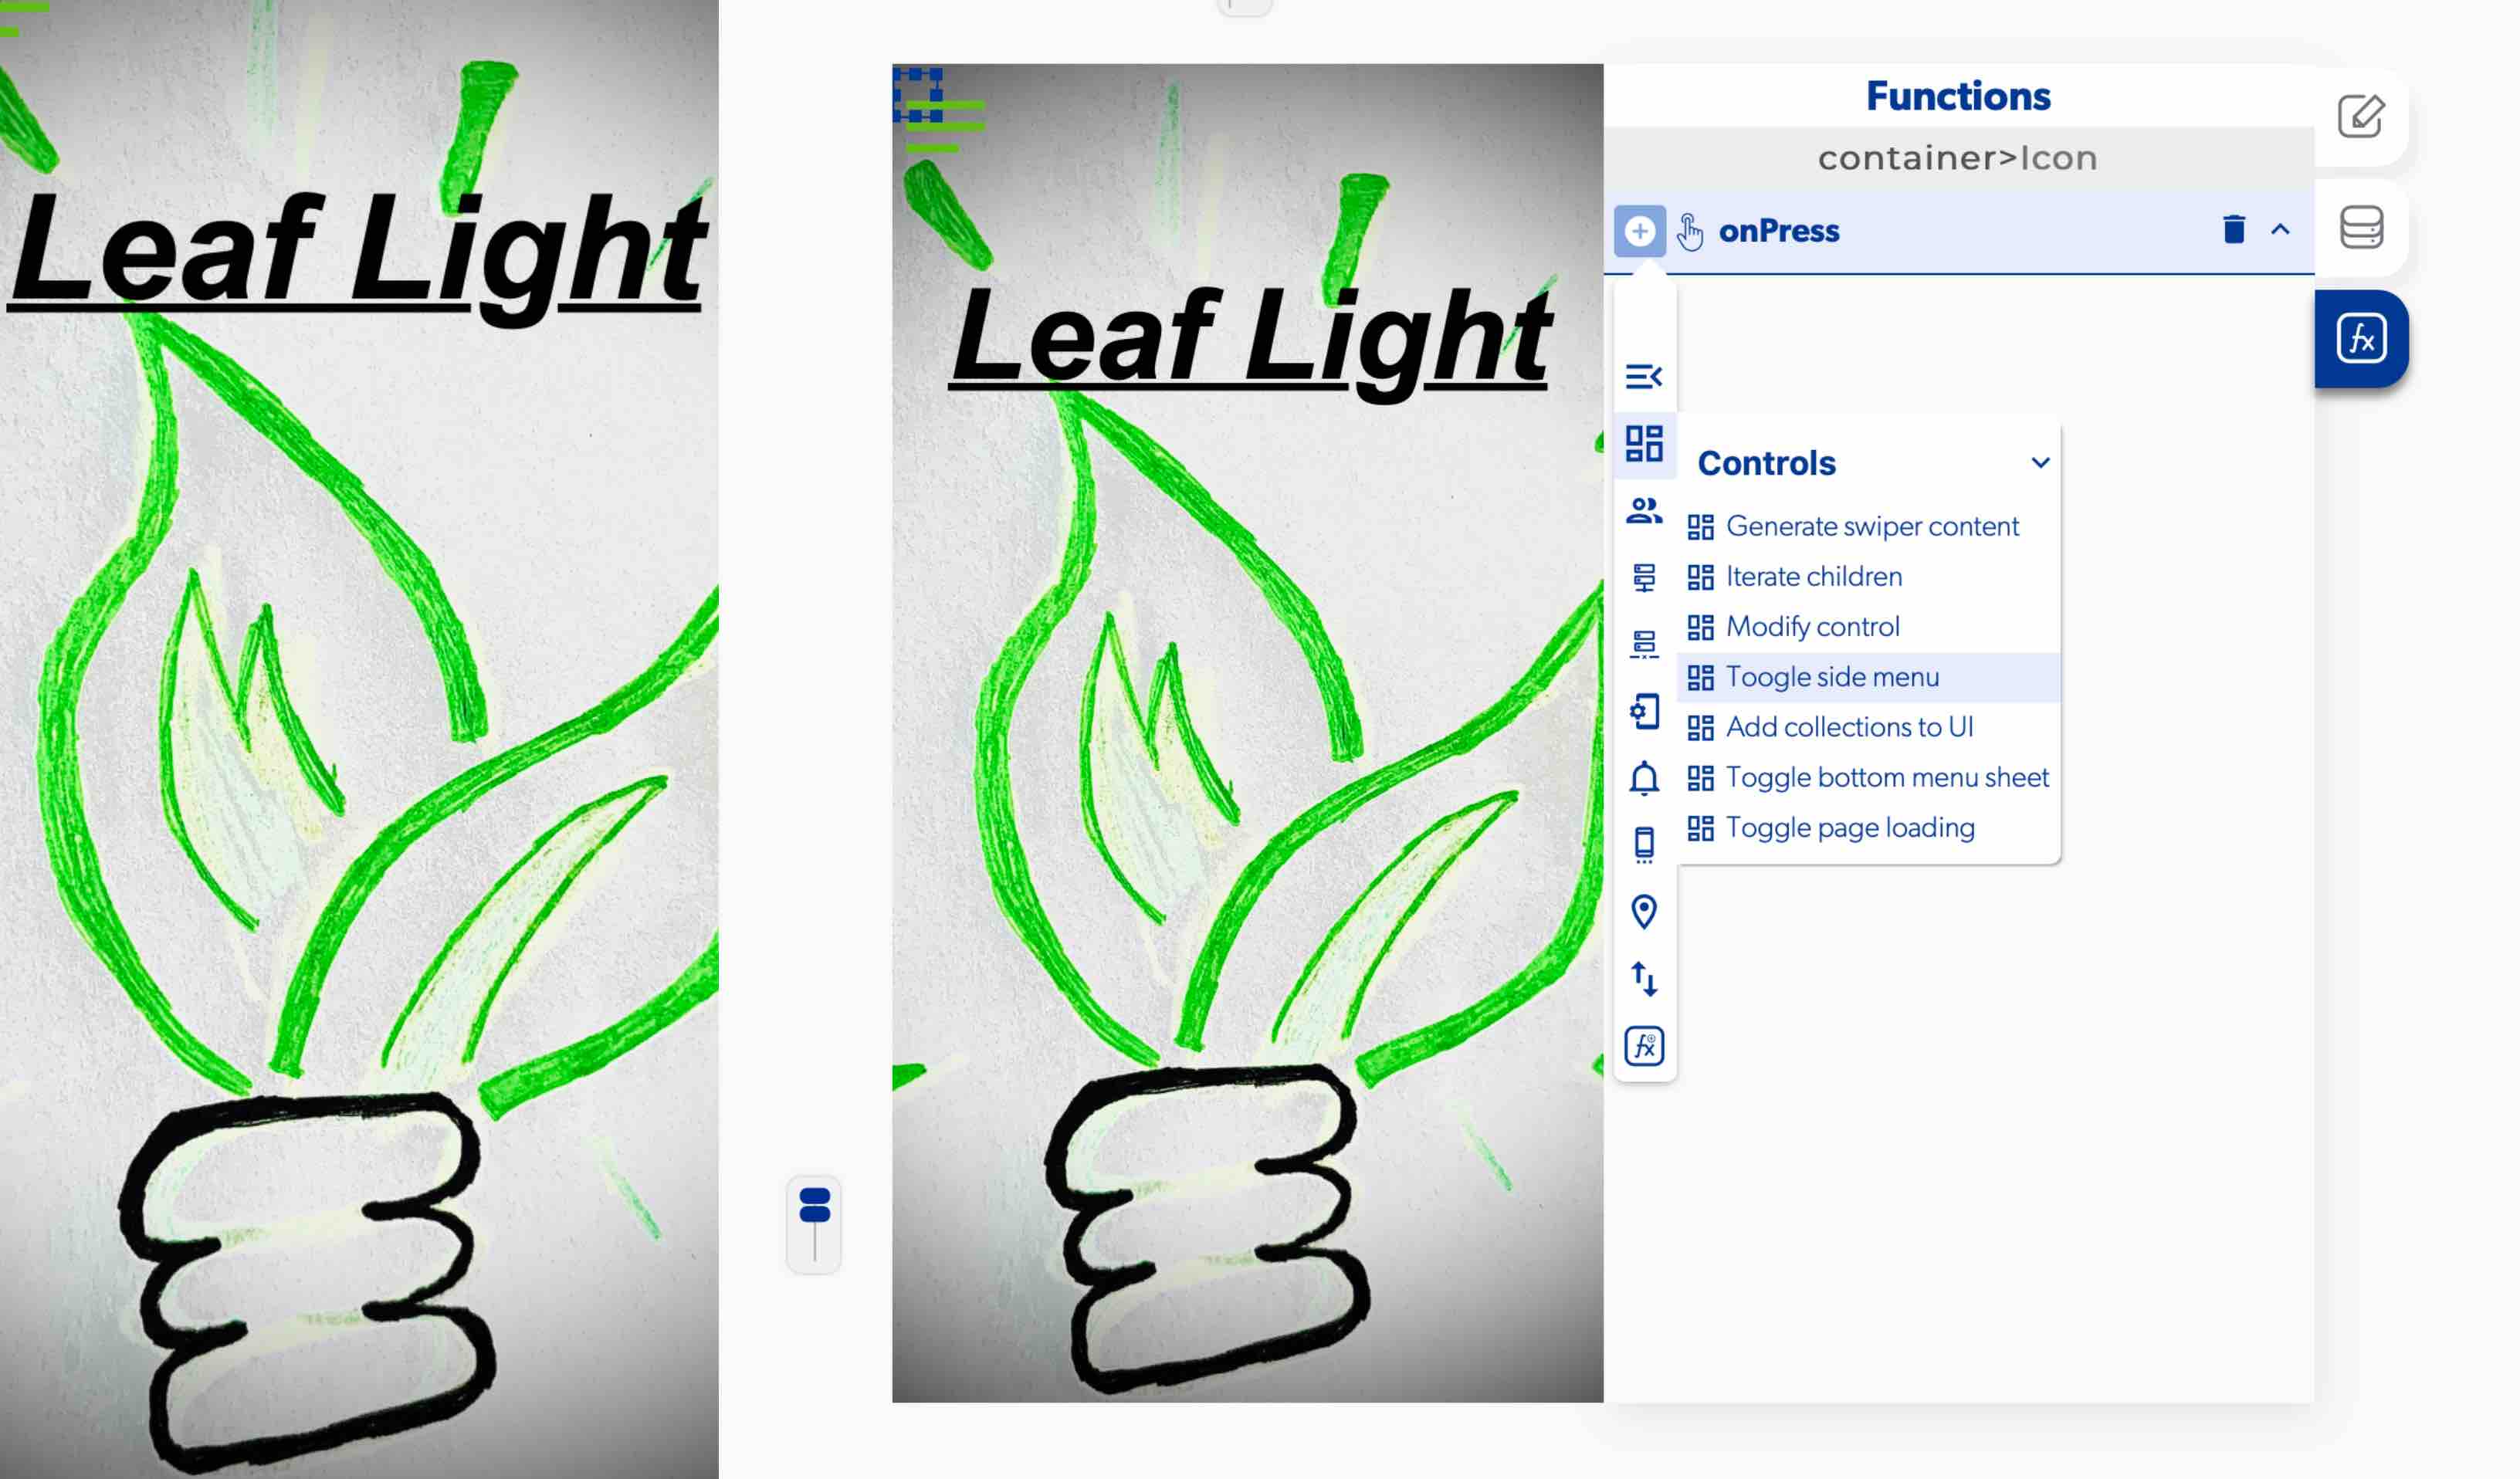
This process was also used to activate the toggle menu to come from the left hand side. In the top left hand side of each screen I placed and icon to indicate that the user can activate a menu. Each icon was then selected and an onPress function was added to activate the menu to appear. Once choosing onPress I chose the Controls option. Within Controls I was able to set Toogle side menu. This was added to each page.
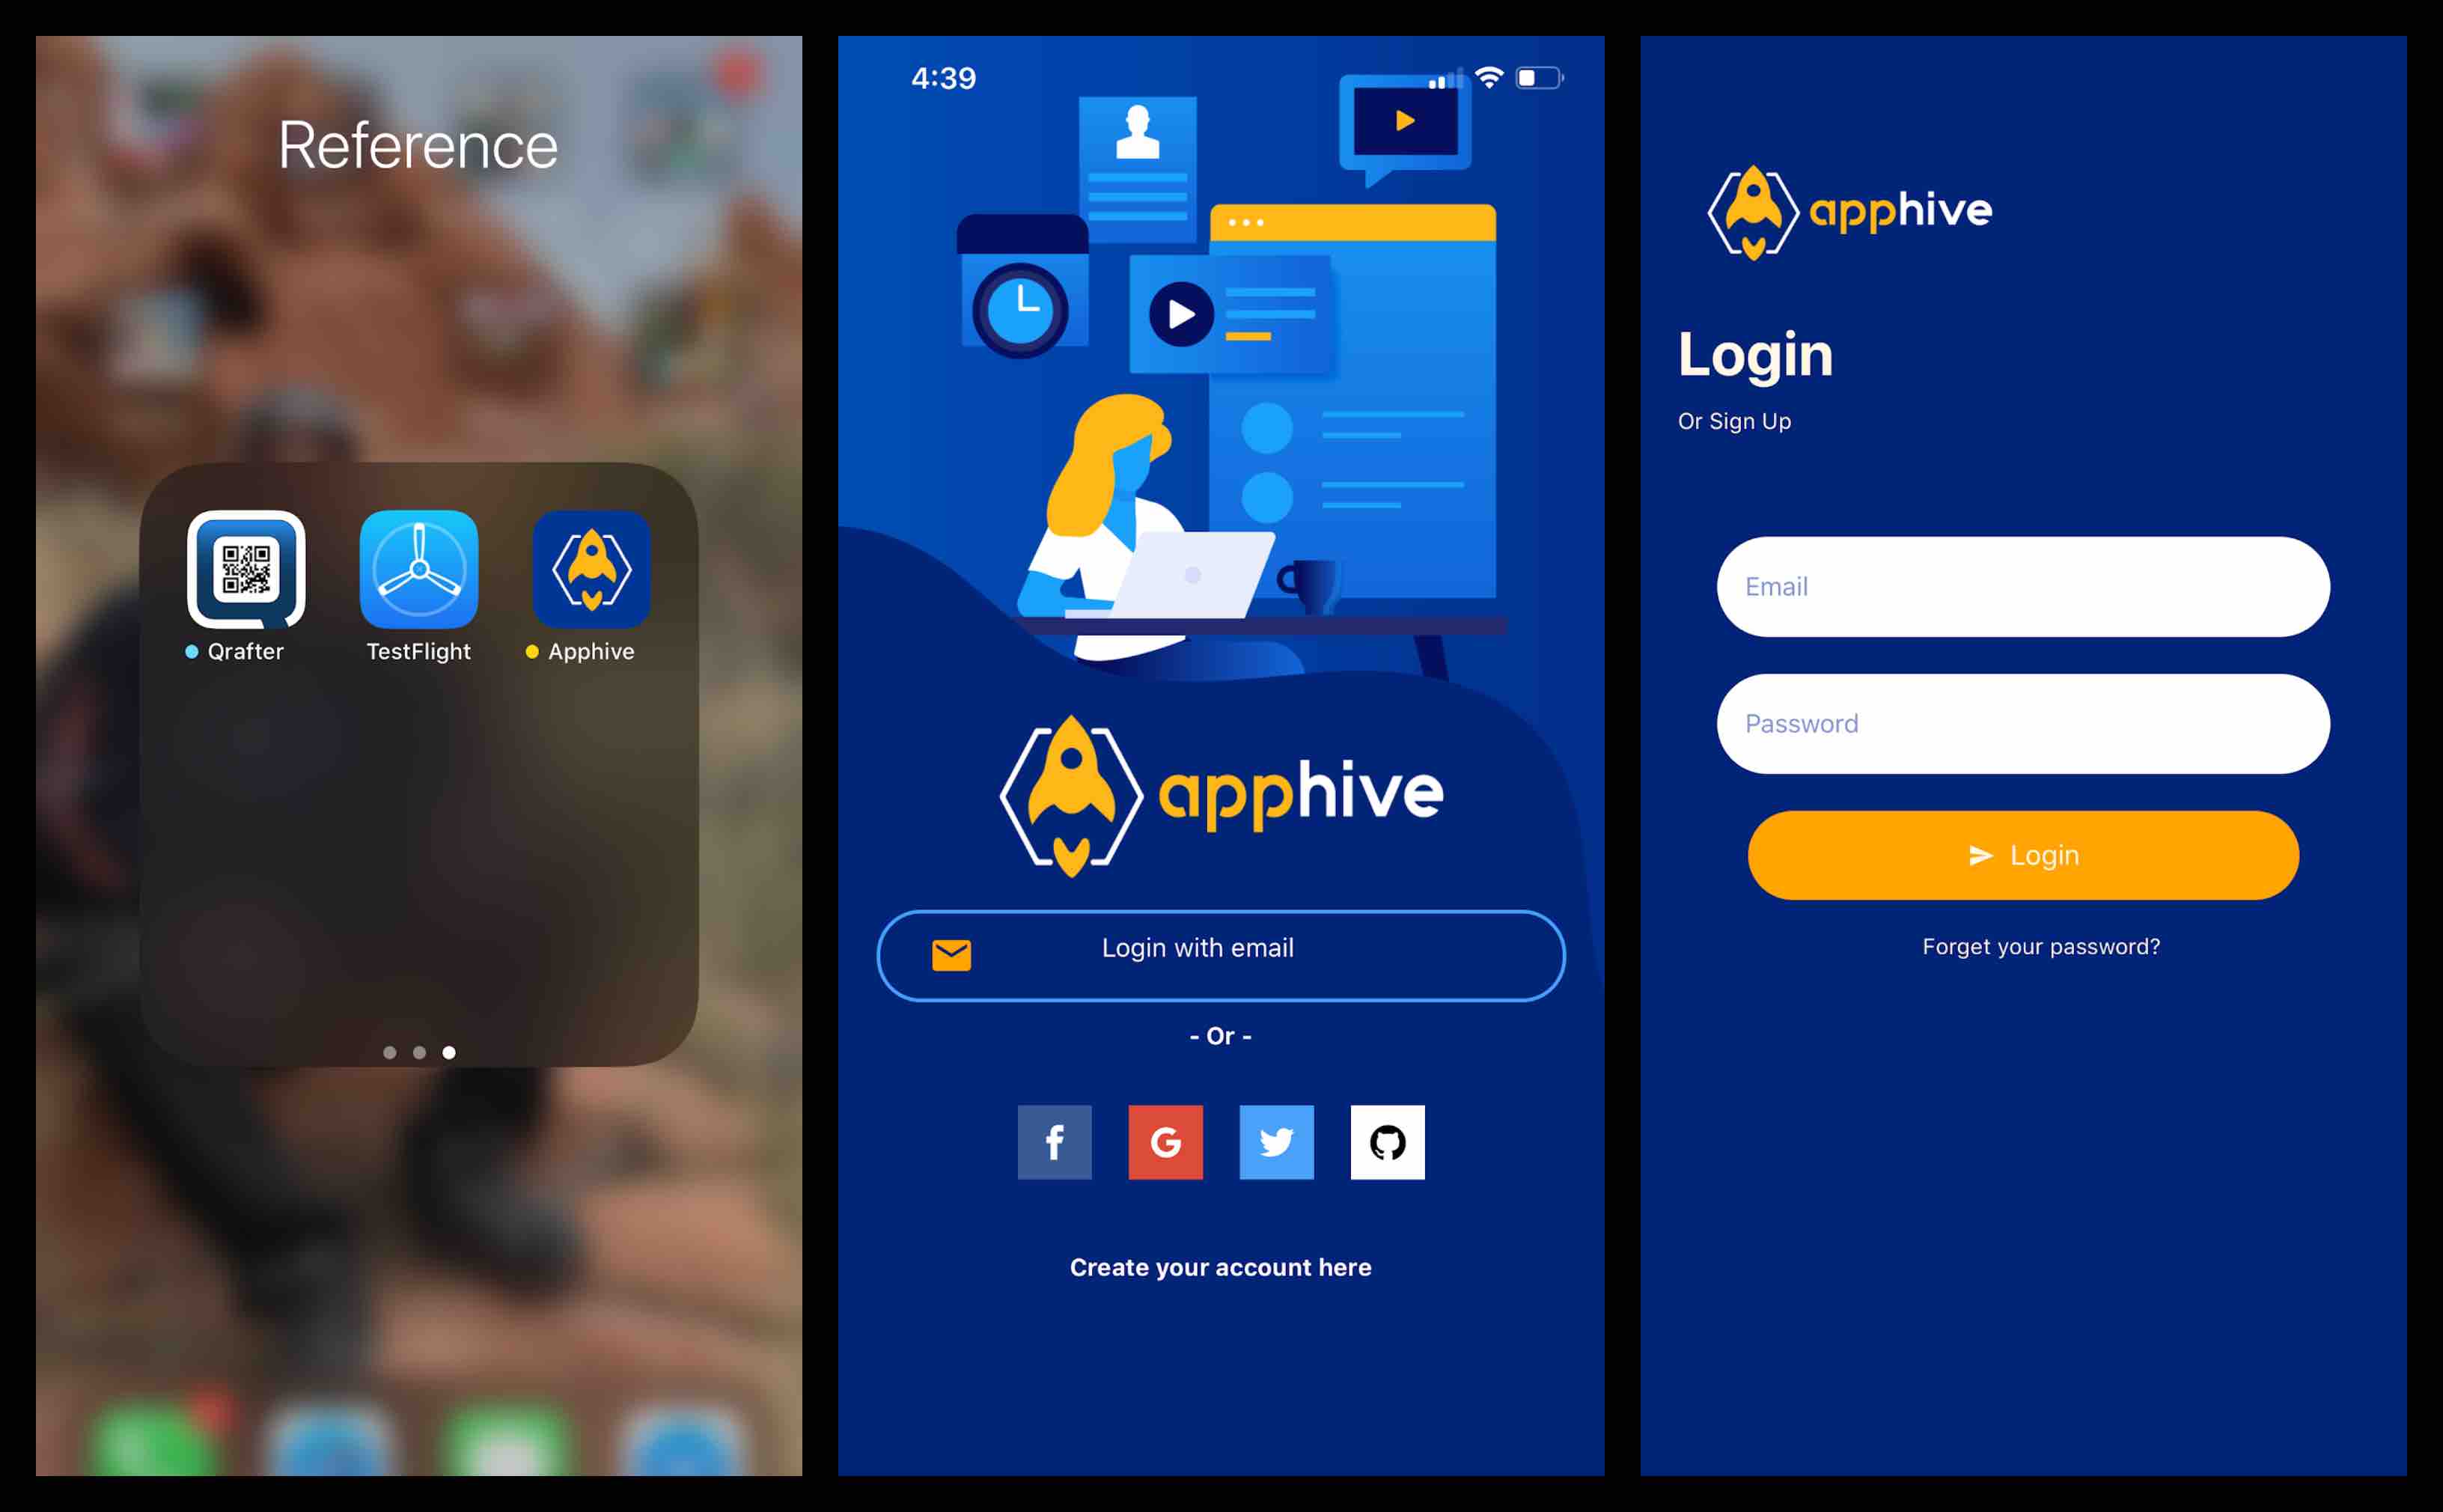
App Hive App on Phone
Once the app was designed and set to function how I desired I then began the process of using it on my IPhone. My first step was to download the apphive application to my phone from the app store. This then provides the user with different login options. I entered my login information previously set up and loaded the program up.
I was able to move through each screen as set up using the side toggle menu. Each icon triggered to bring up the correct screens. The slider also functioned by sliding back and forth.
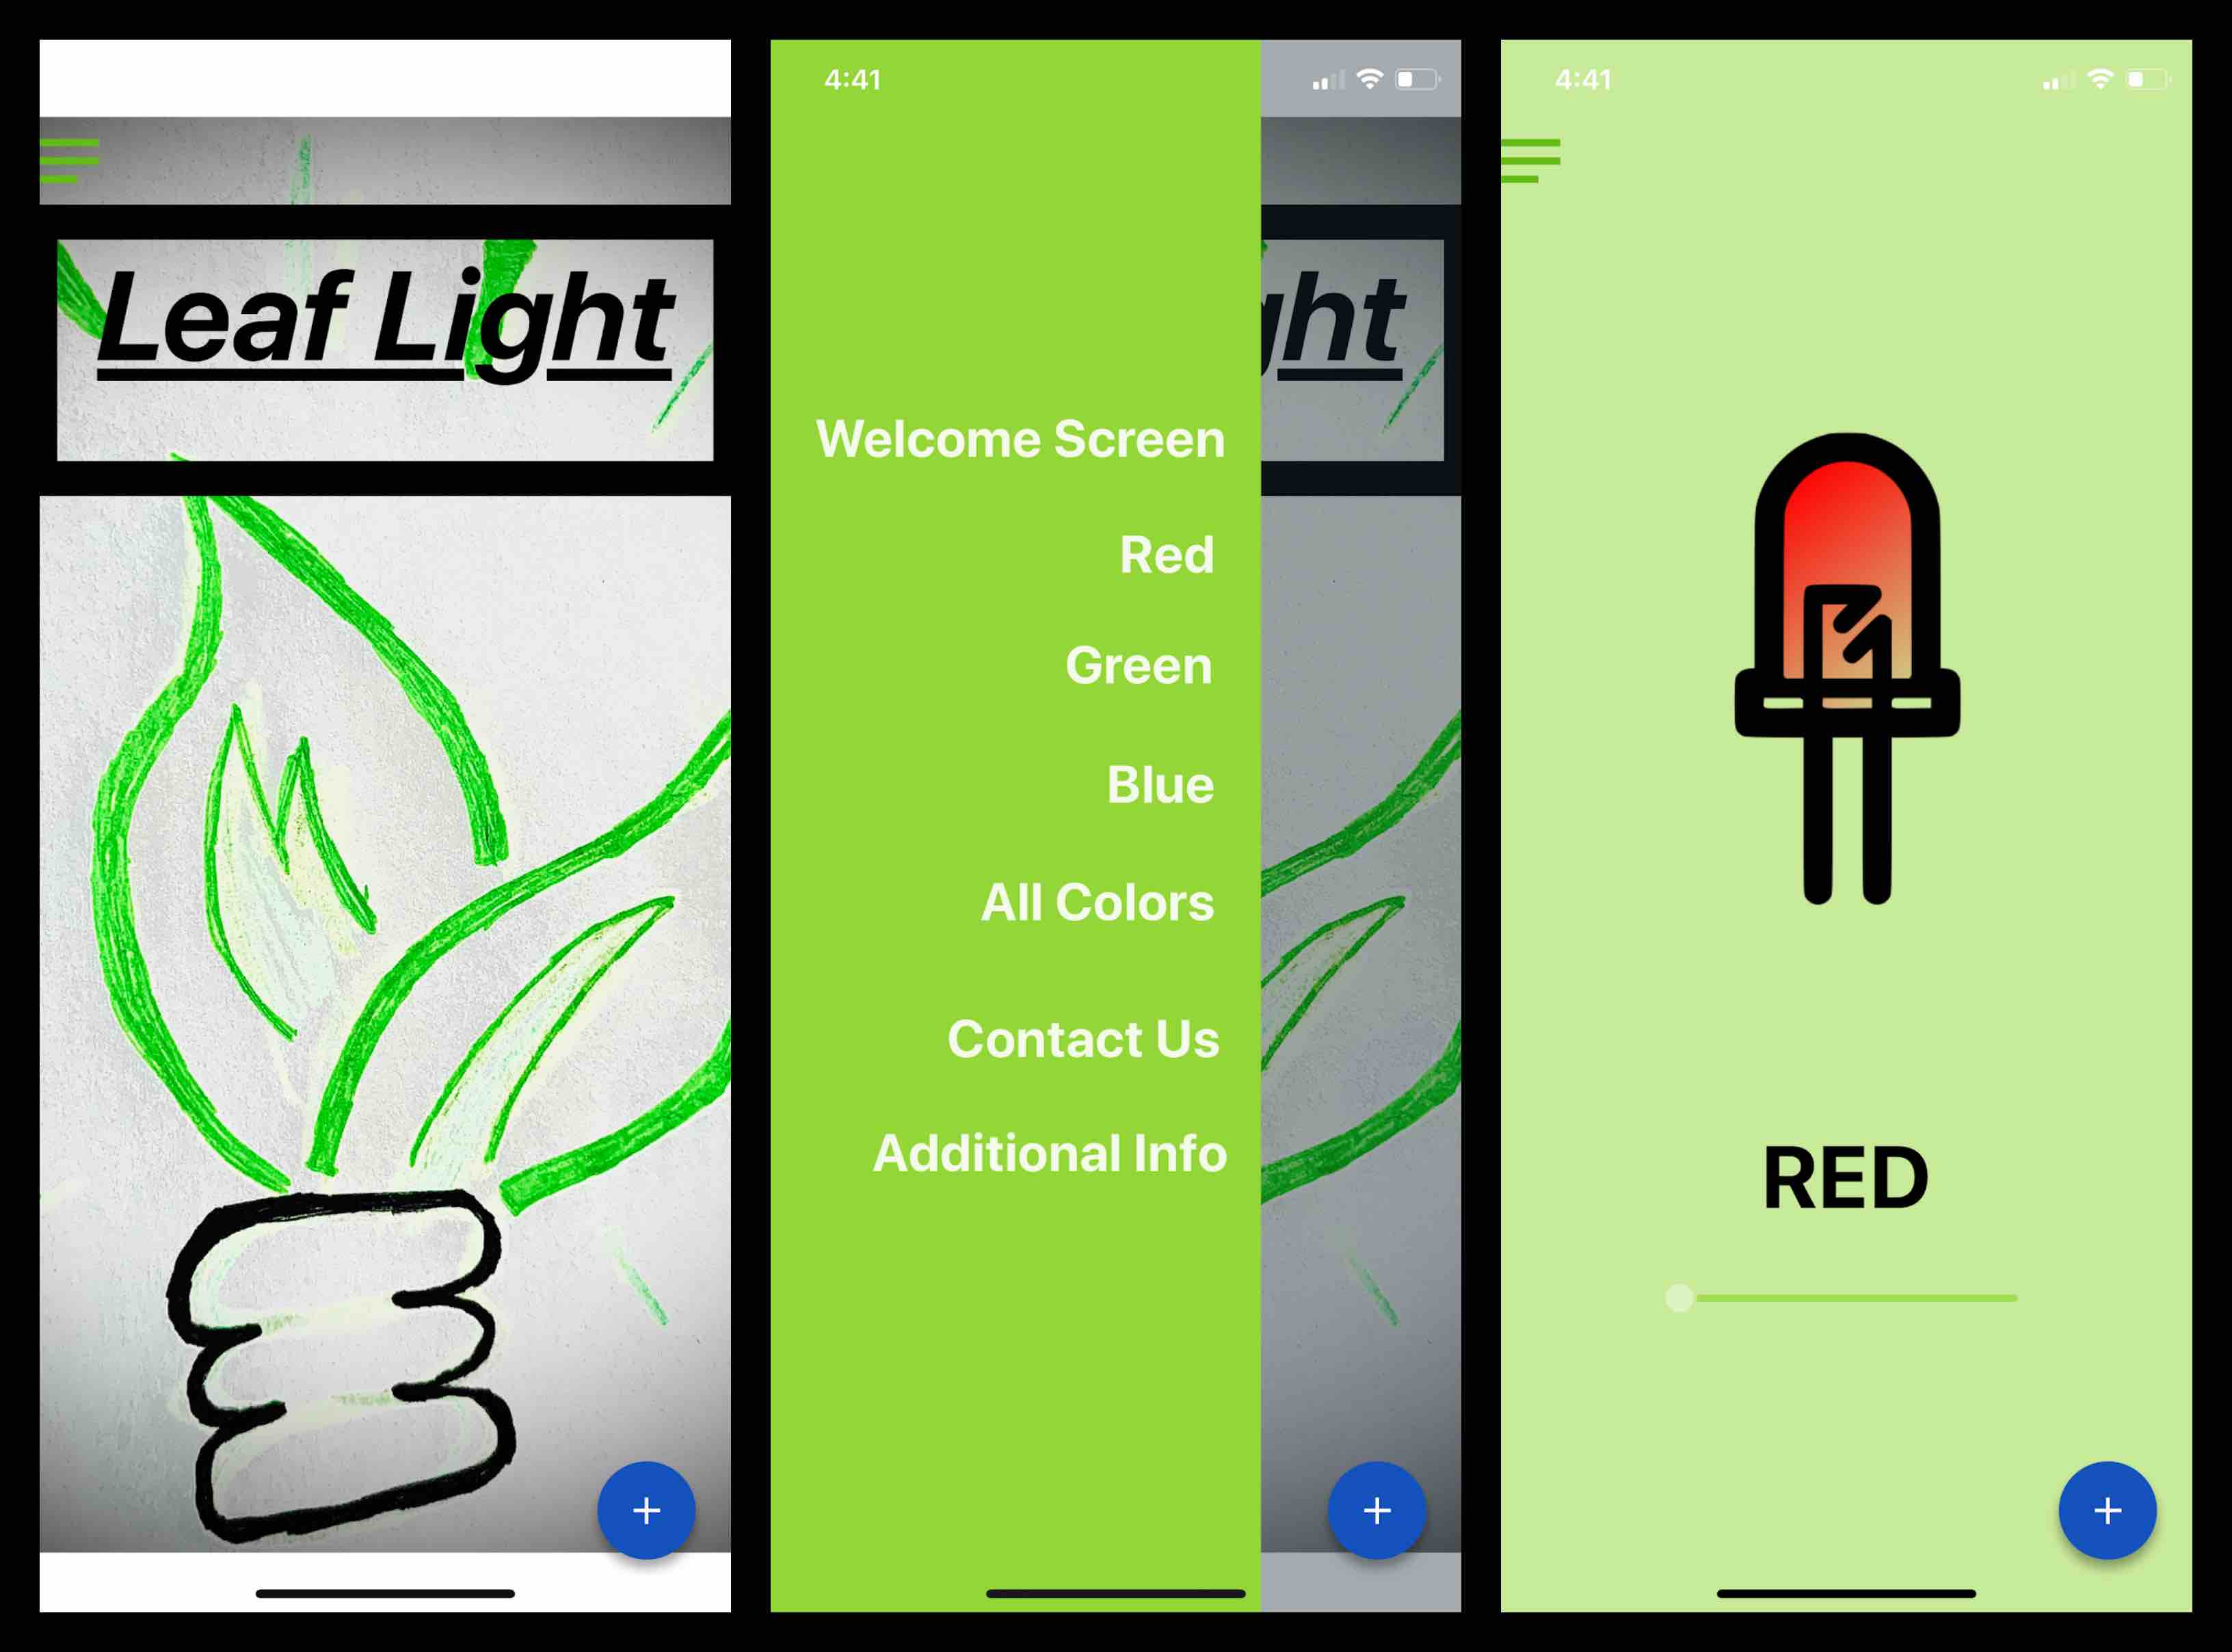
I was on the Red screen. I used the icon in the top left to trigger the menu. When the menu was triggered I then chose green. When returning to the screen it showed green. This worked to move through each screen.
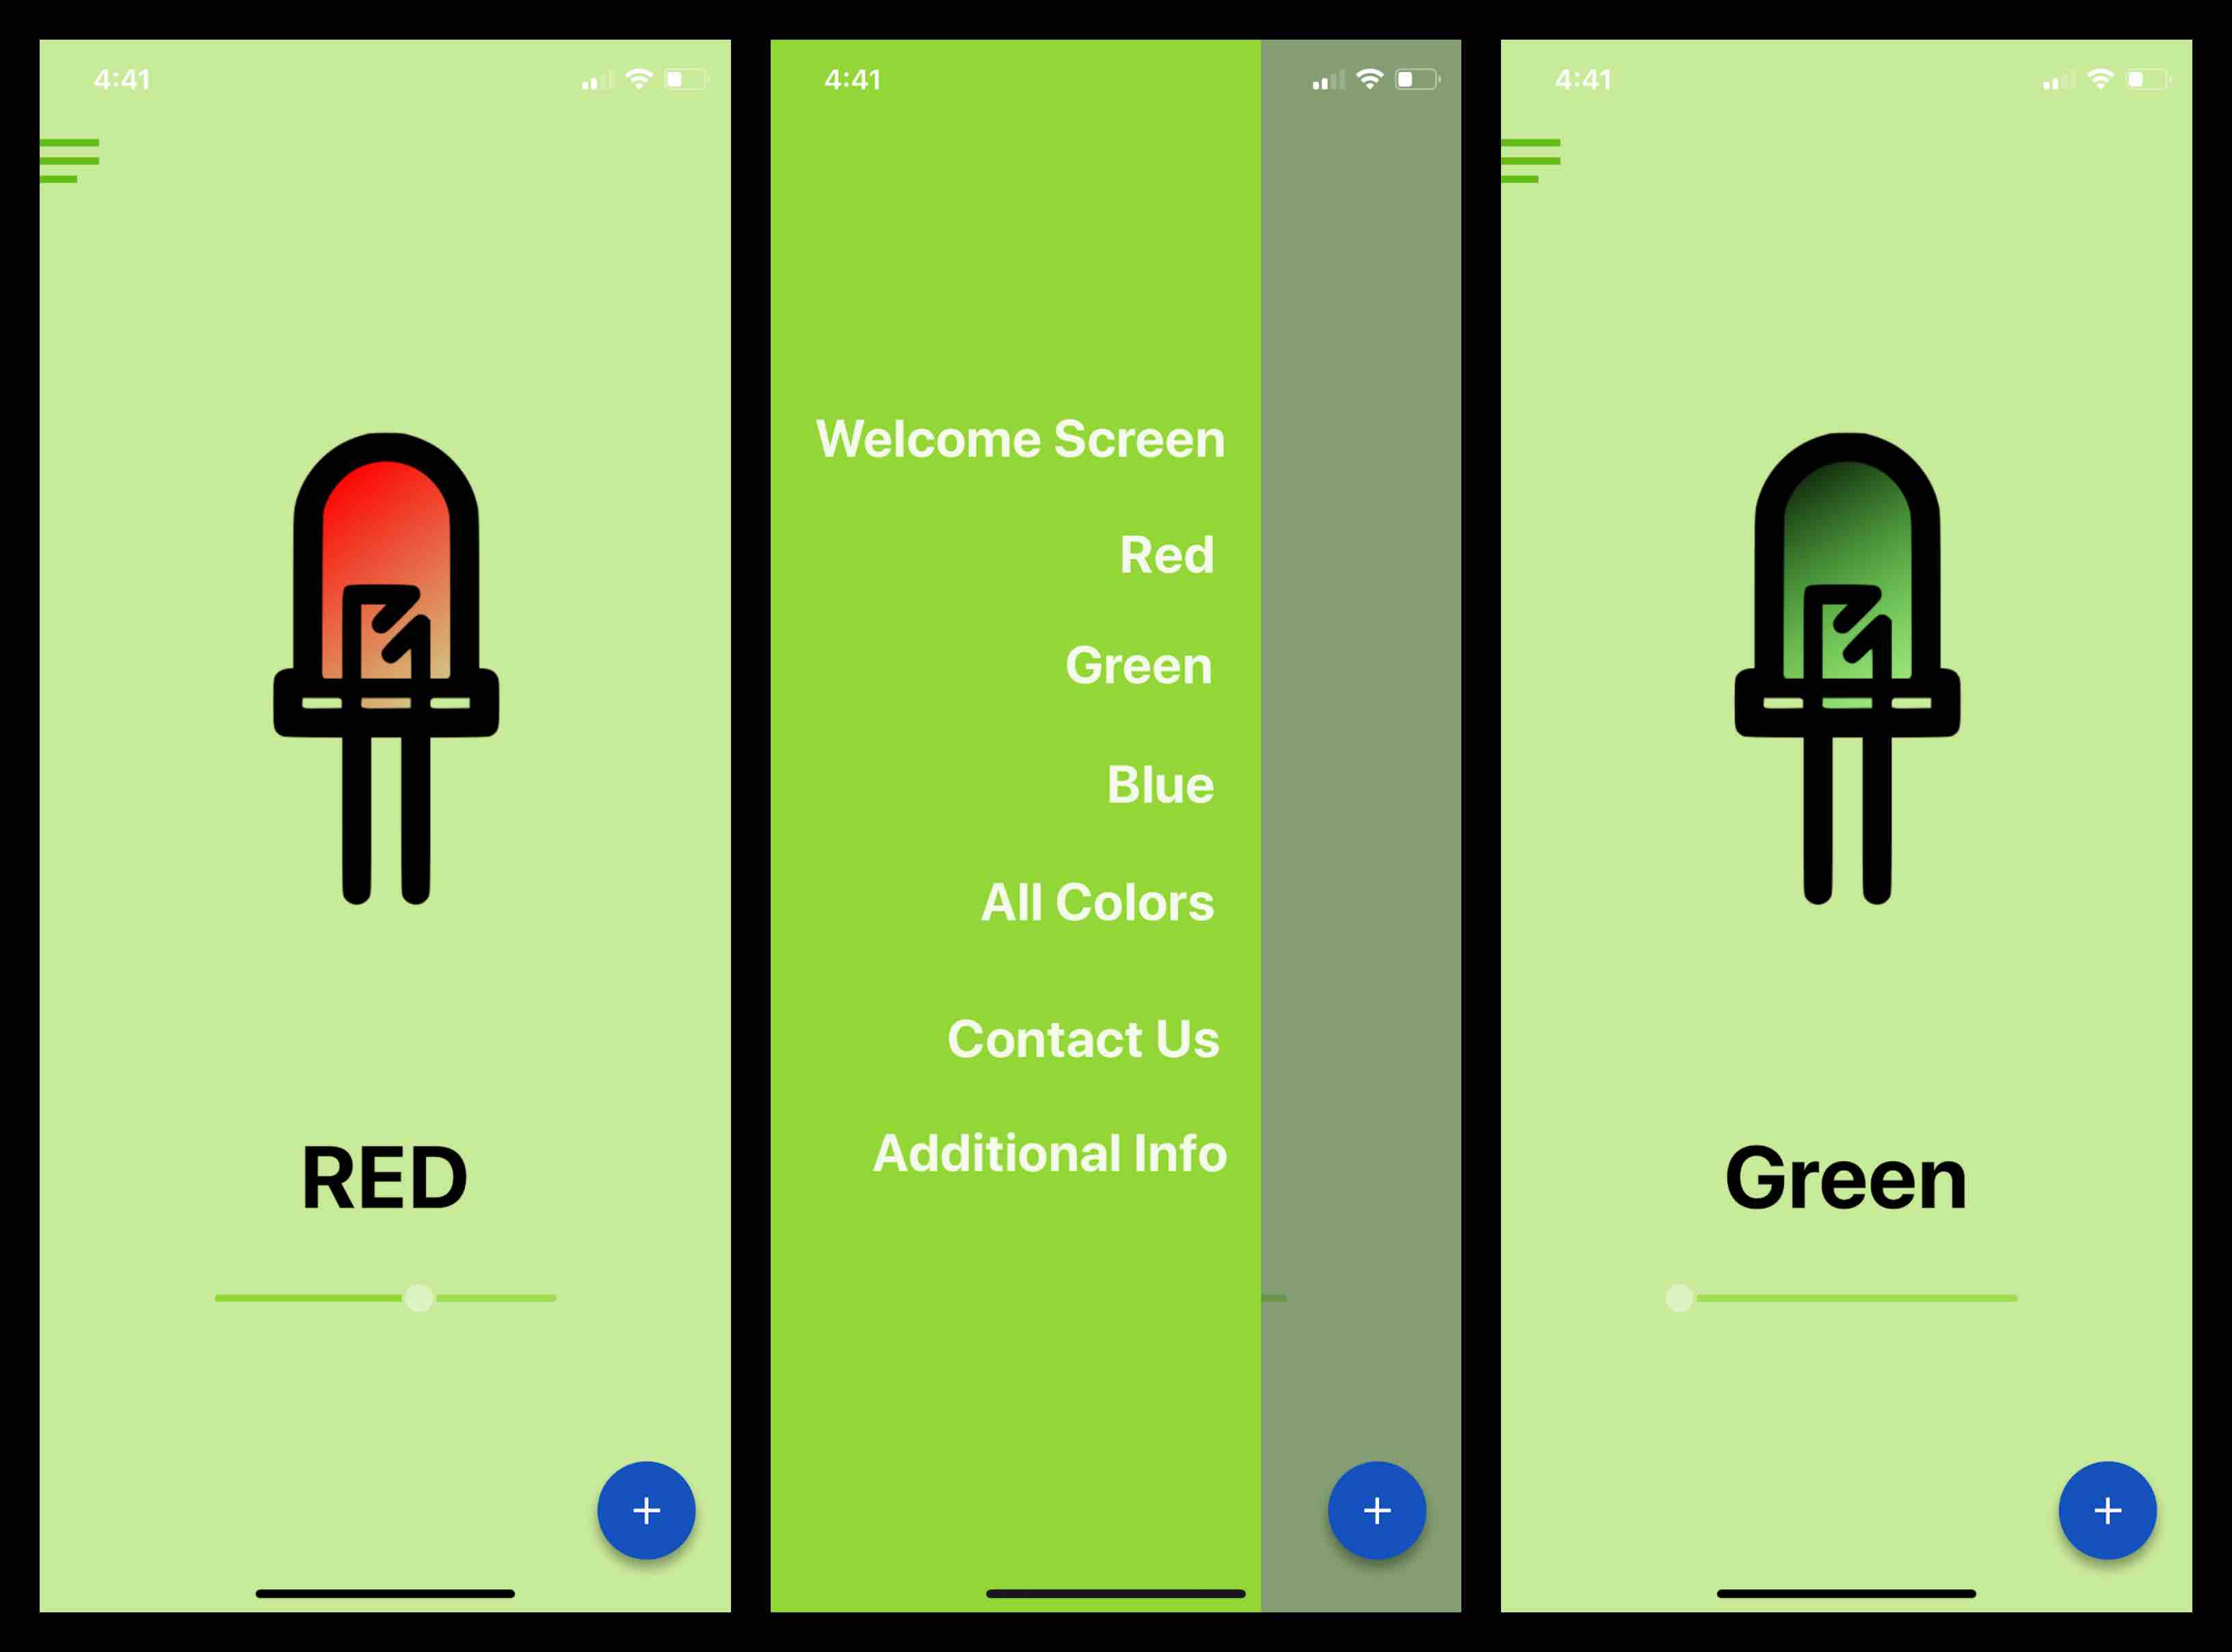
I was also able to use the blue plus mark at the bottom of the screen to reload the app, return to my applications created, and to change the position of the button.

Interactions
Complications
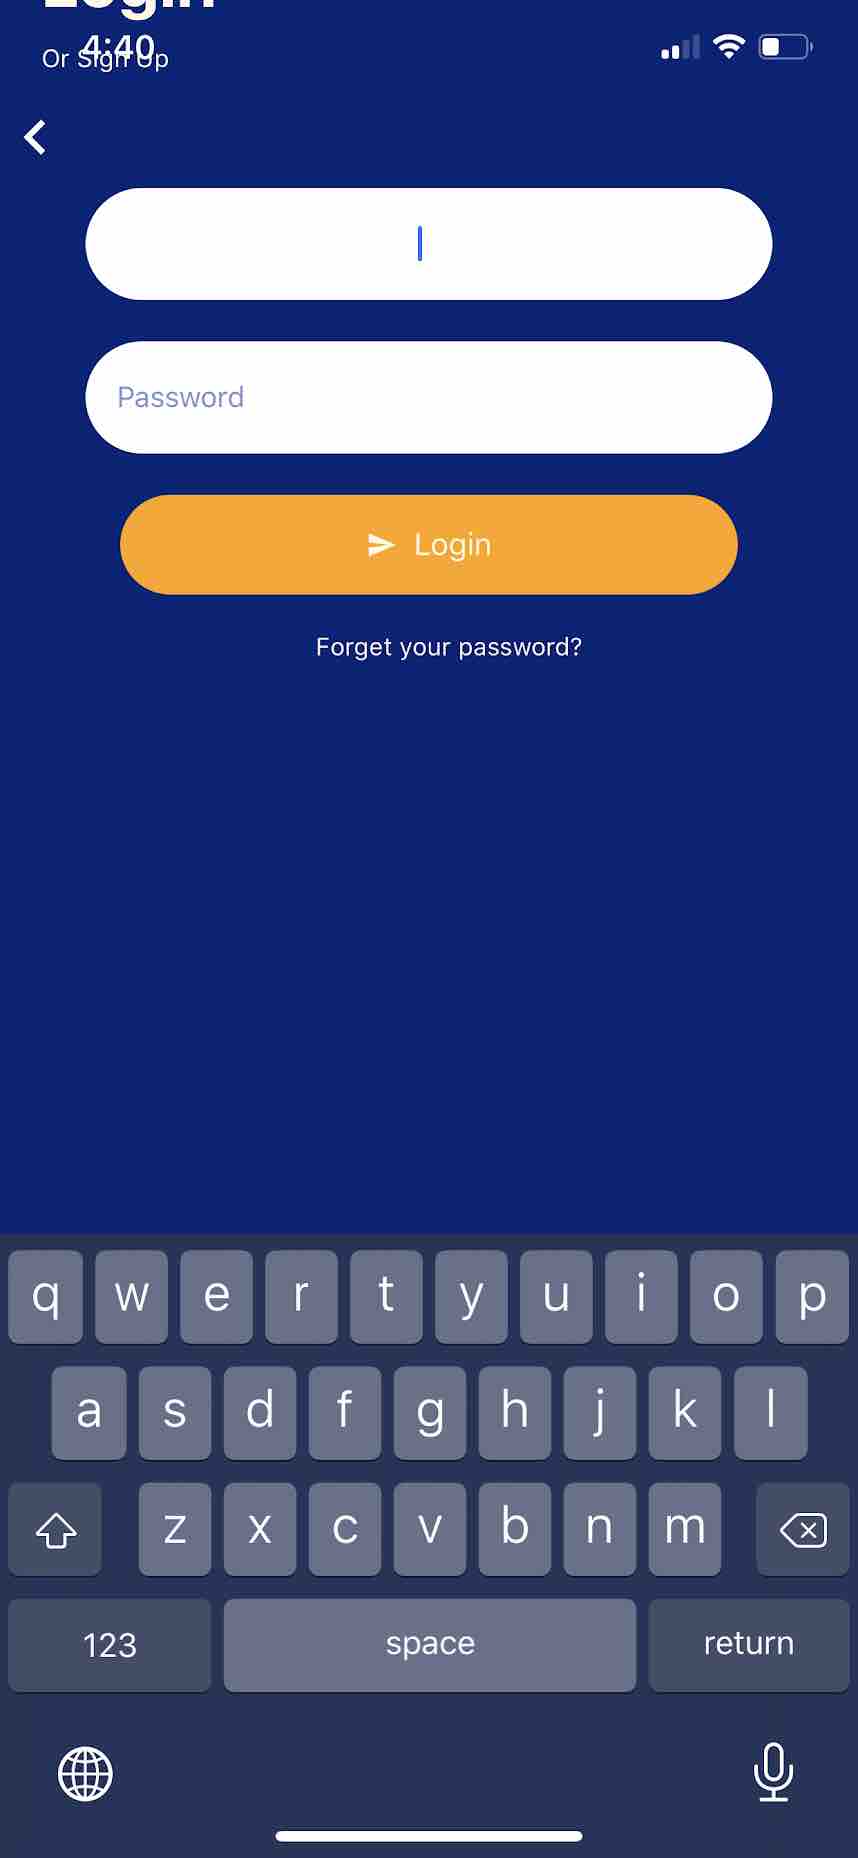
Disappearing Text
This has been a struggle to login each time because the text is not visible as you type. I believe this to be due to the app being a beta version and that some kinks are still being worked out.
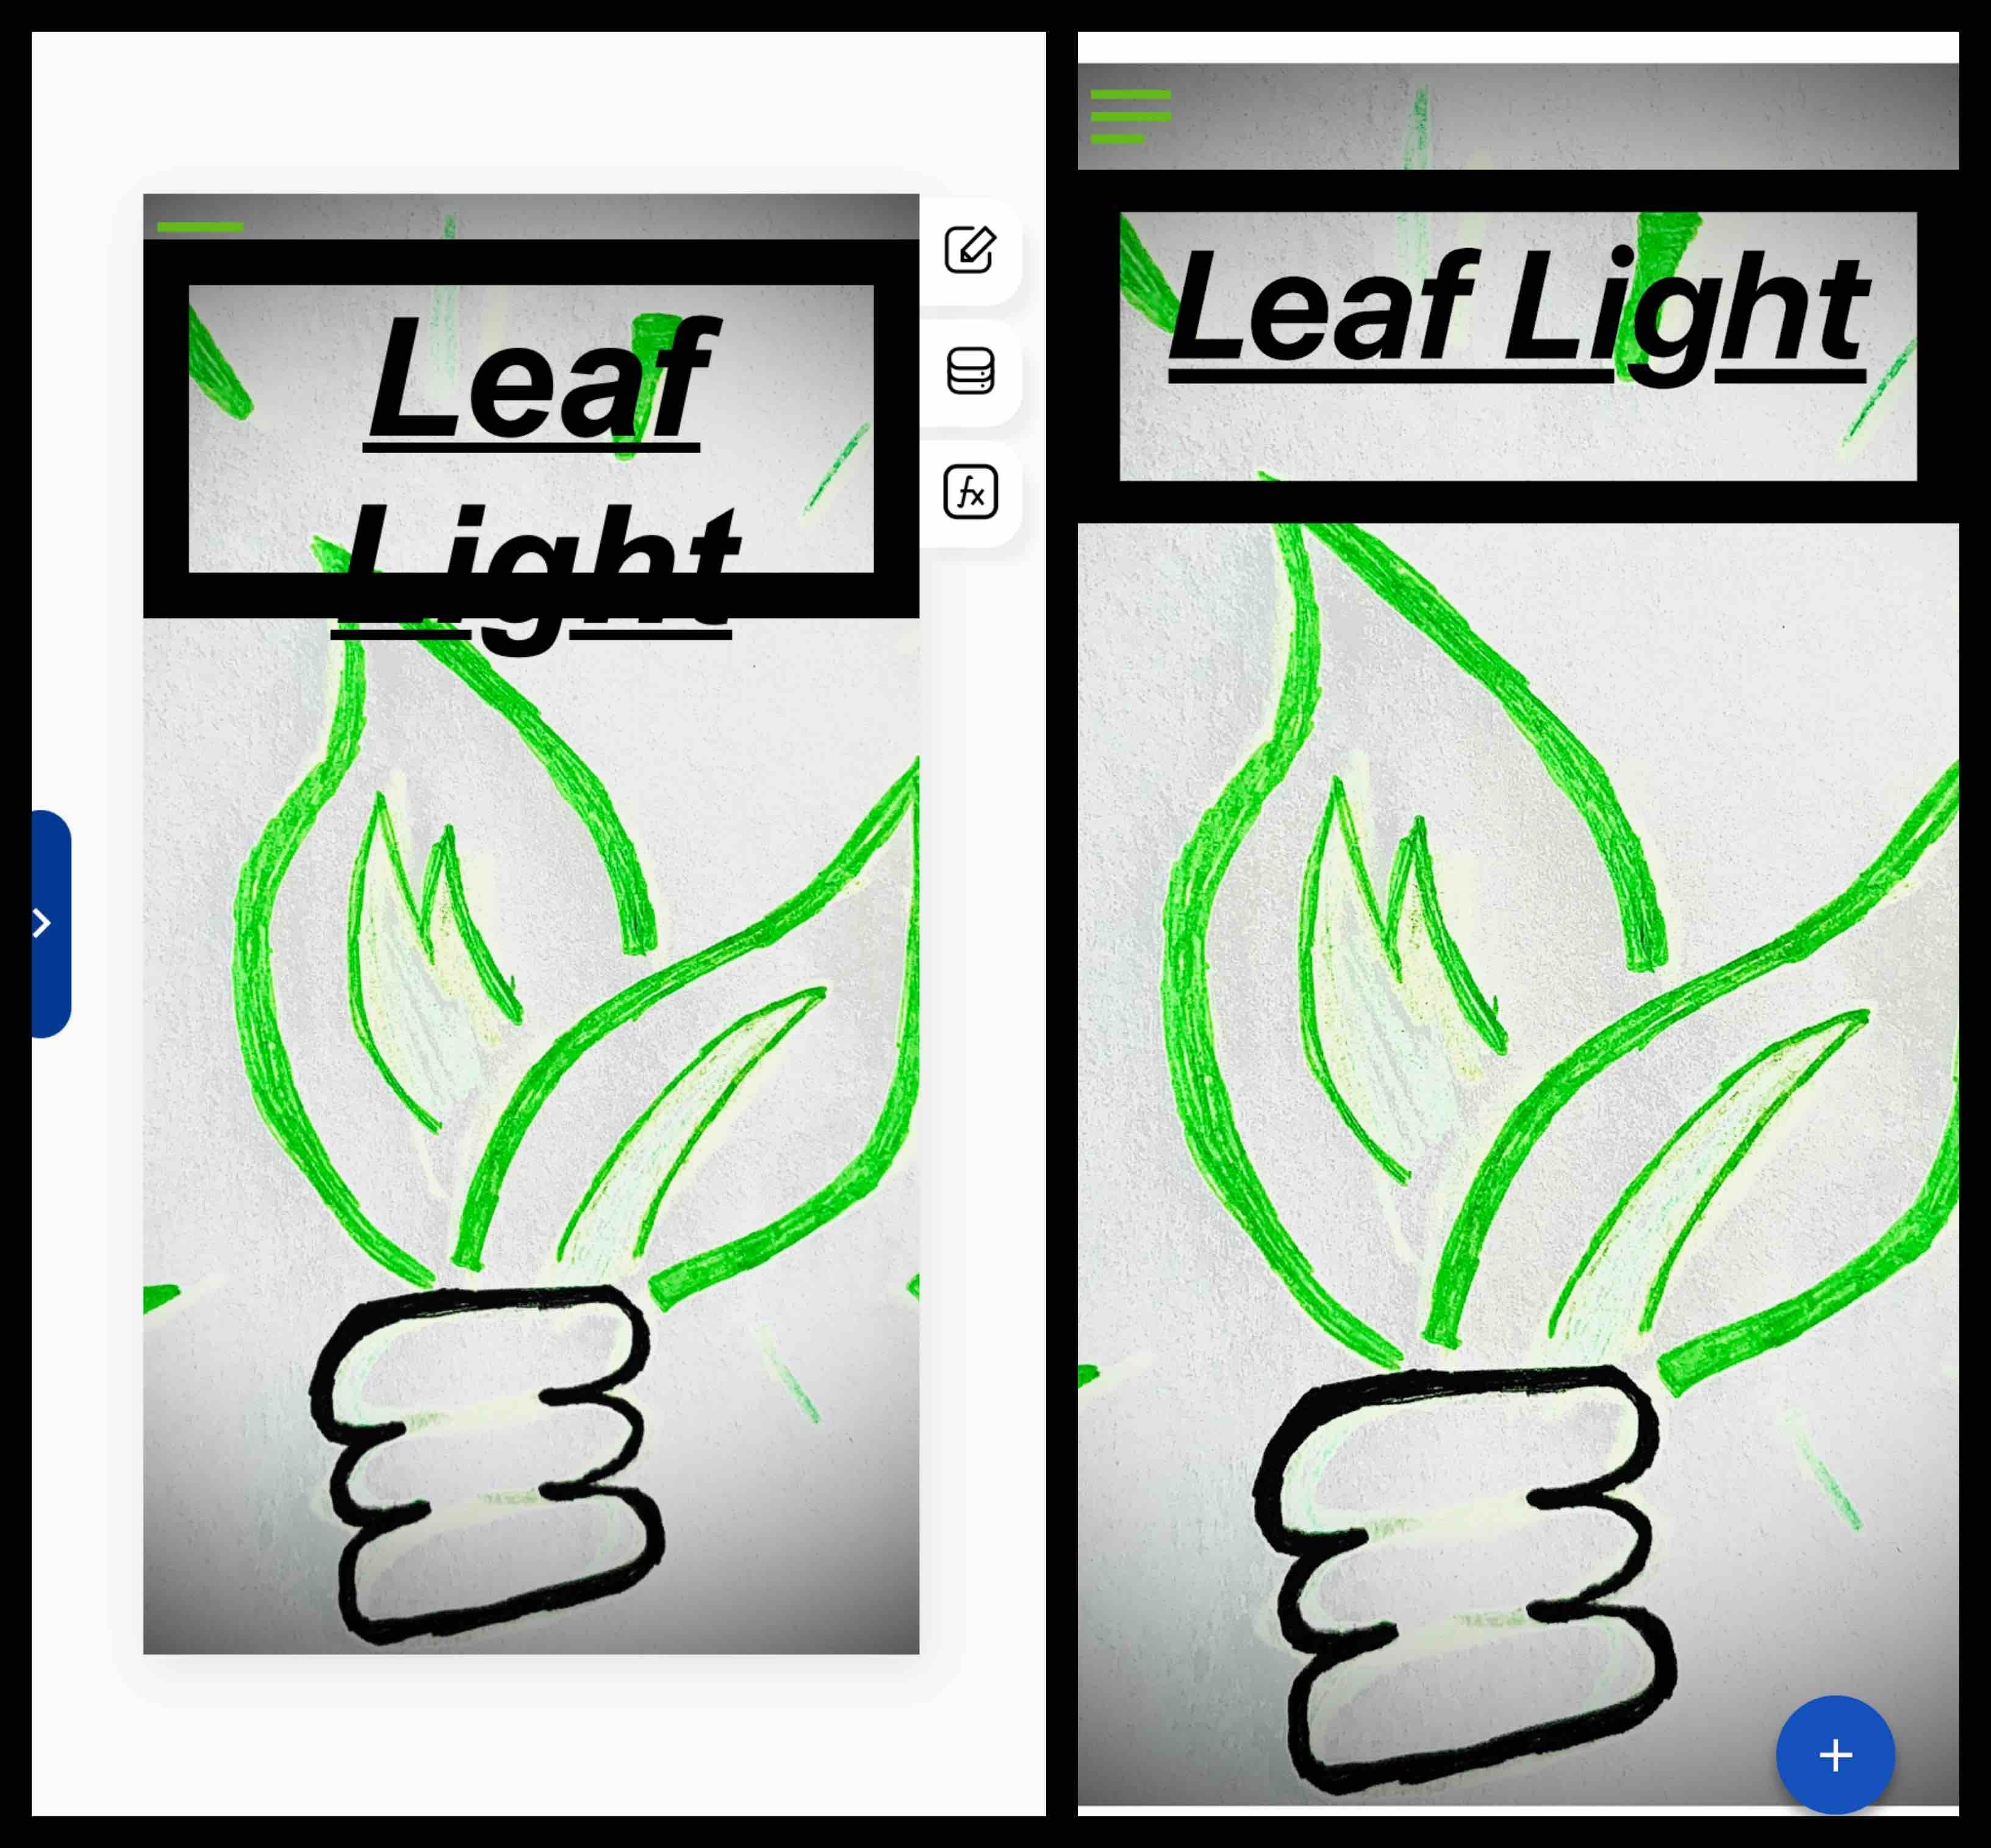
Different Appearances
This has also been a struggle. I had to design on my screen and reload the application on my phone to understand the actual visual effects. On the left is the desktop view where I was designing. The right is the real time comparison on my phone. This was difficult to track designing effects and visual differences.