6. 3D Scanning and printing
This week I worked on defining my final project idea and started to getting used to the documentation process.
This weeks Assignment: 
-
Group assignment:
-
test the design rules for your 3D printer(s).
-
individual assignment:
-
design and 3D print an object (small, few cm3, limited by printer time) that could not be made subtractively.
-
3D scan an object (and optionally print it)
First part:(Group assignment): 
-
As a first point to start , i choose to define the 3D printing and how does it works:
-
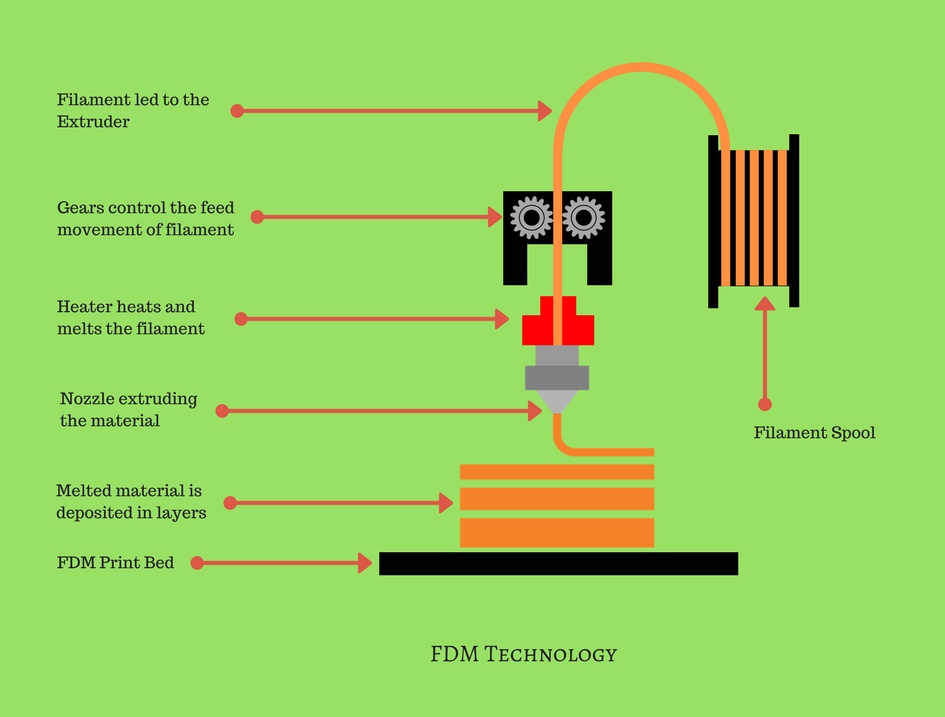
3D printing is a way of creating three dimensional (3D) solid objects. 3D printing is done by building up the object layer by layer. Usually,3D printers use plastic, because it is easier to use and cheaper. There is also many different materials can be used for 3D printing, such as ABS plastic, PLA, silver, titanium, steel and wax....
-
A 3D printer essentially works by extruding molten plastic through a tiny nozzle that it moves around precisely under computer control. It prints one layer, waits for it to dry, and then prints the next layer on top.
3D printing process:
We have in our Fablab Four different types of 3D printers which are :
Is designed to meet the needs of probably the most demanding users. The Raise3D N1 dual is a feature wealthy 3D printer with one of the vital highest specifications in the marketplace. It’s in a position to printing a range of materials with a nozzle temperature of as much as 300°c and the built in 7 inch touch screen makes the user experience second to none.

It has a nice, well-thought out design and a large print platform for its compact physical size, promising to be a great printer for 3D enthusiasts who don't have lots of office space.

It is a completely unique 3D printer allowing to print with up to 5 different materials simultaneously .It is so easy to use and less sensitive to the quality of filament.

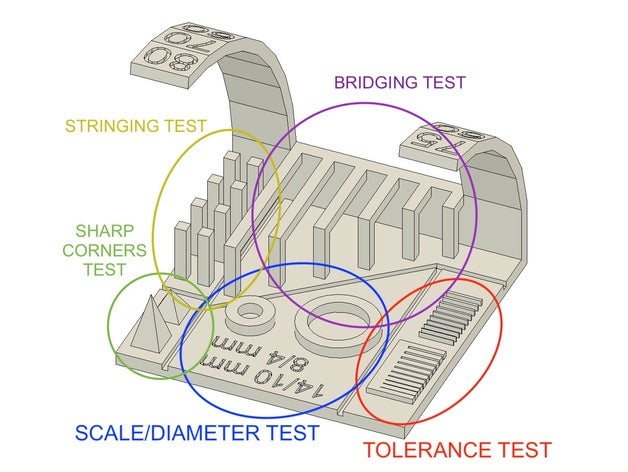
As a group we decided to use The Raise3D N1: with the PLA as a selected material ( WHAT DOES PLA MEAN: Polylactic acid or polylactide (PLA) is a thermoplastic aliphatic polyester derived from renewable resources. … PLA is the most widely used plastic filament material in 3D printing) . We selected a test file from thingiverse , we download the file and printed it , for the reason to understood our 3D printer design rules. here is the link to the test file.

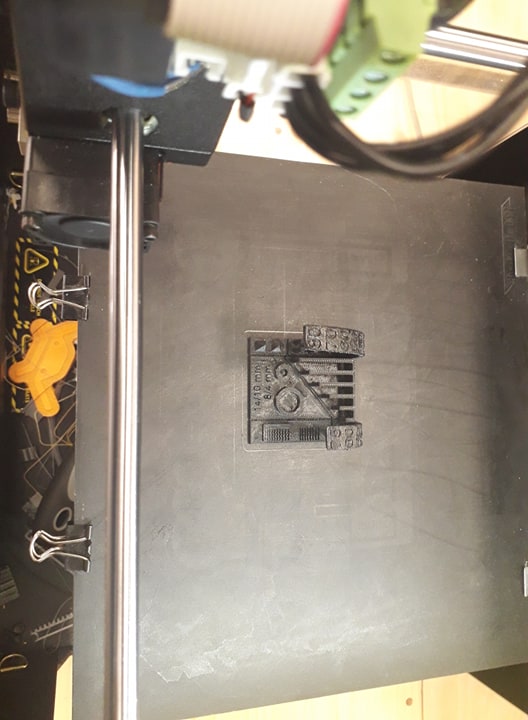
This test contains : overhang test, bridging test, stringing test, sharp-corner test, tolerance test, and scale test (diameter test) as it shown below :
Print Settings
Printer:The Raise3D N1

    Rafts:No

     Supports:No

          Infill:10%

            extrusion width:0.4mm
Printing steps:
1- We download the 3D printing software which is ideaMaker 3.5.1 .

2- we imported the file to the ideaMaker 3.5.1 software

3- we fixed the parameters and started the printing process:


4- we connected the software with the 3D raise printer using the WI-FI to start the printing opperation :


5-finally we got this result as it shown below :

For this week group assignment you can check our page by clicking here
Second part:(individual assignment): 
Design and 3D print (My robot wheel):
For the individual assignement i choose to design a wheel for my final project robot, so i started modeling the wheel using Fusion 360 software, below are the steps which i used to achieve the final result of my design :
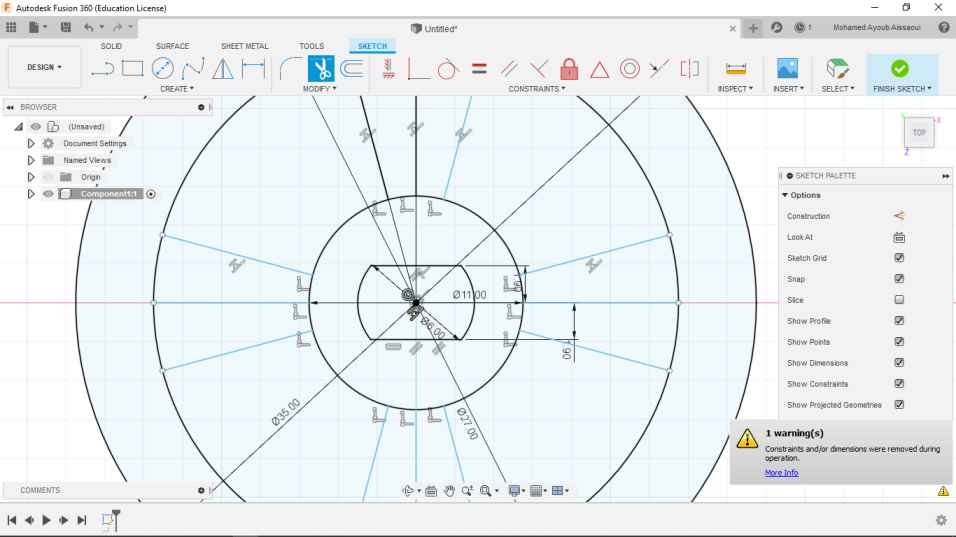
1- I started by designing 4 circles into each others then i used the trim tool to erase the extra parts :


2- I designed 8 lignes from the circles centre to the big one then i used the trim tool again to remove the unwanted parts .


3- After that i used the extrude tool to add depth for my design parts then for the beauty of the wheel i used the fillet tools:
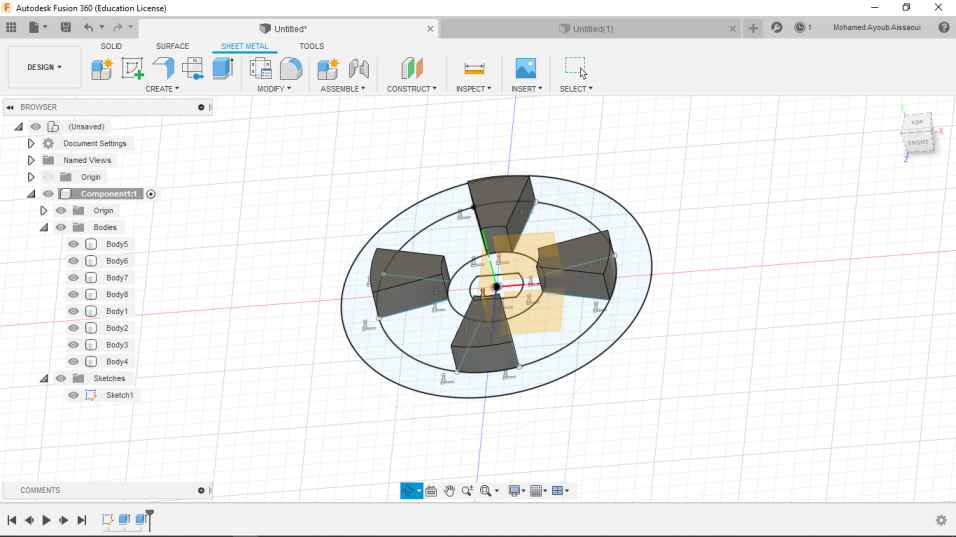


4- I turned the top face of my design and i started a new sketch on it , then i created a small circle then i extruted it as it shown below :


5- As well as the extrude opperation finish , i used another tool for the recent shape which is circular pattern to duplicate it around the body :


6- At the end i got a beautiful whell for my robot , after that i exported the file as an STL format .


Here is the link to The Robot wheel .STL file.
After i finish the file export i open ideaMaker 3.5.1 software to prepared the design with the right parameters and printed it.
1-I started to open ideaMaker and imported the .stl file.

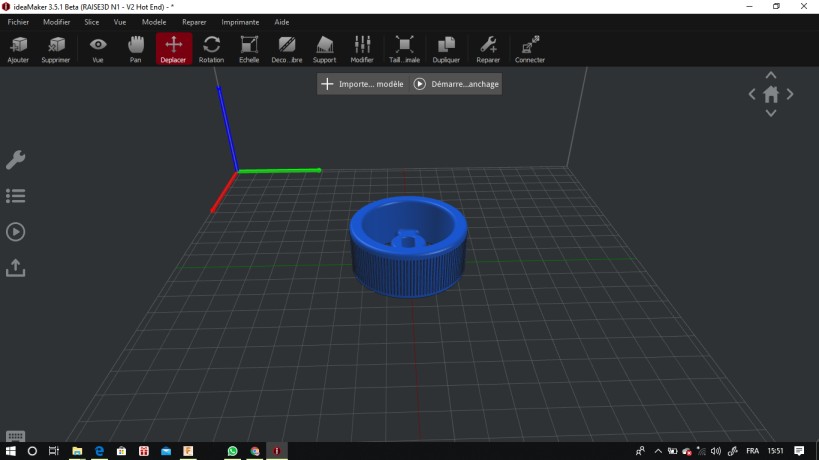
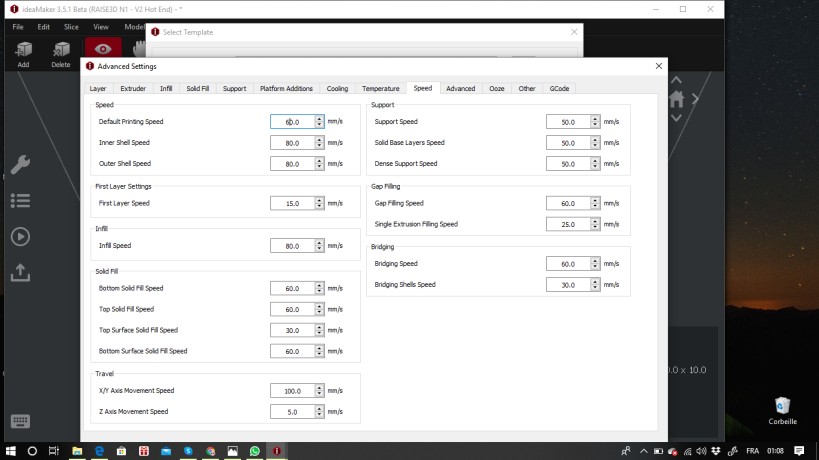
2-I selected the appropriate parameters to print the whell .
  layer heigt: 0.3mm

    shells:3

      Infill density:40 %

        default printing speed: 60mm/s


3- I sent the file to the 3D printer :
4-This is the final result :


This is the wheel fusion file
3D scan (small castle):
At the beginning iwant to identify what is 3D scan ?
- 3D Laser Scanning is a non-contact, non-destructive technology that digitally captures the shape of physical objects using a line of laser light. 3D laser scanners create “point clouds” of data from the surface of an object. In other words, 3D laser scanning is a way to capture a physical object’s exact size and shape into the computer world as a digital 3-dimensional representation.
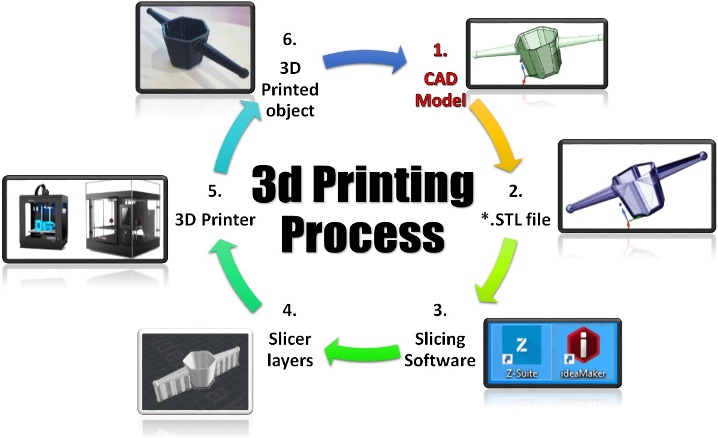
for this part of the individual assignment i choose to scan a small castle that i found it in our fablab. By next is a diagram that shows the 3D scan and print process :

I used Sense™ 3D Scanner to scan the chosen object (small castle) and this is the link to user guide in PDF format


steps to scan:
1- I fixed the chosen object in the middle of the fablab.
2- I clicked start scan in the right side of the software.
3- I held the scanner approximately 15 inches away from the subject, and i ensured that the image is centered on my computer screen.

4-Slowly and steadily i moved the scanner around the subject while viewing the image on the screen.

5-After that i clicked finish and below is the final image :

6-I exported the obtained file as an Obj format .