3. Computer Aided design(CAD)
This week was so interesting and challenging,so at first let’s define the means of Computer Aided Design .
What does Computer-Aided Design (CAD) mean? 
- Computer-aided design (CAD) is a computer technology that designs a product and documents the design process. CAD may facilitate the manufacturing process by transferring detailed diagrams of a product’s materials, processes, tolerances and dimensions with specific conventions for the product in question.
- It can be used to produce either two-dimensional or three-dimensional diagrams, which can then when rotated to be viewed from any angle, even from the inside looking out. A special printer or plotter is usually required for printing professional design renderings.
Raster and Vector 
Difference between Raster and Vector
- A raster images uses different colored pixels, which are arranged in a manner to display an image. A vector image is made up of paths, each with a mathematical formula, also known as a vector, which tells the path how the each part of the image is shaped and what color it is bordered with or filled by.
- Raster and vector are two different ways to draw up computer graphics. The basic difference between raster and vector is that a raster image is made up of pixels, whereas a vector image is made up of paths. Raster images are produced by digital image capture devices, such as digital scanners or digital cameras, or by pixel editing programs, i.e: GIMP , [Adobe Photoshop](https://www.adobe.com/products/photoshop.html) , Krita , [Image Magick](https://imagemagick.org/index.php) .... Vector images are typically generated using drawing or illustration programs, such as FreeCAD , Inkscape …

To start with 2D Modelling:
-
GIMP Download.
-
So what is GIMP:
GIMP is a cross-platform image editor available for GNU/Linux, OS X, Windows and more operating systems. It is free software, you can change its source code and distribute your changes. Whether you are a graphic designer, photographer, illustrator, or scientist, GIMP provides you with sophisticated tools to get your job done.
### My first step is to Draw a 2D Cube:
- GIMP OPEN
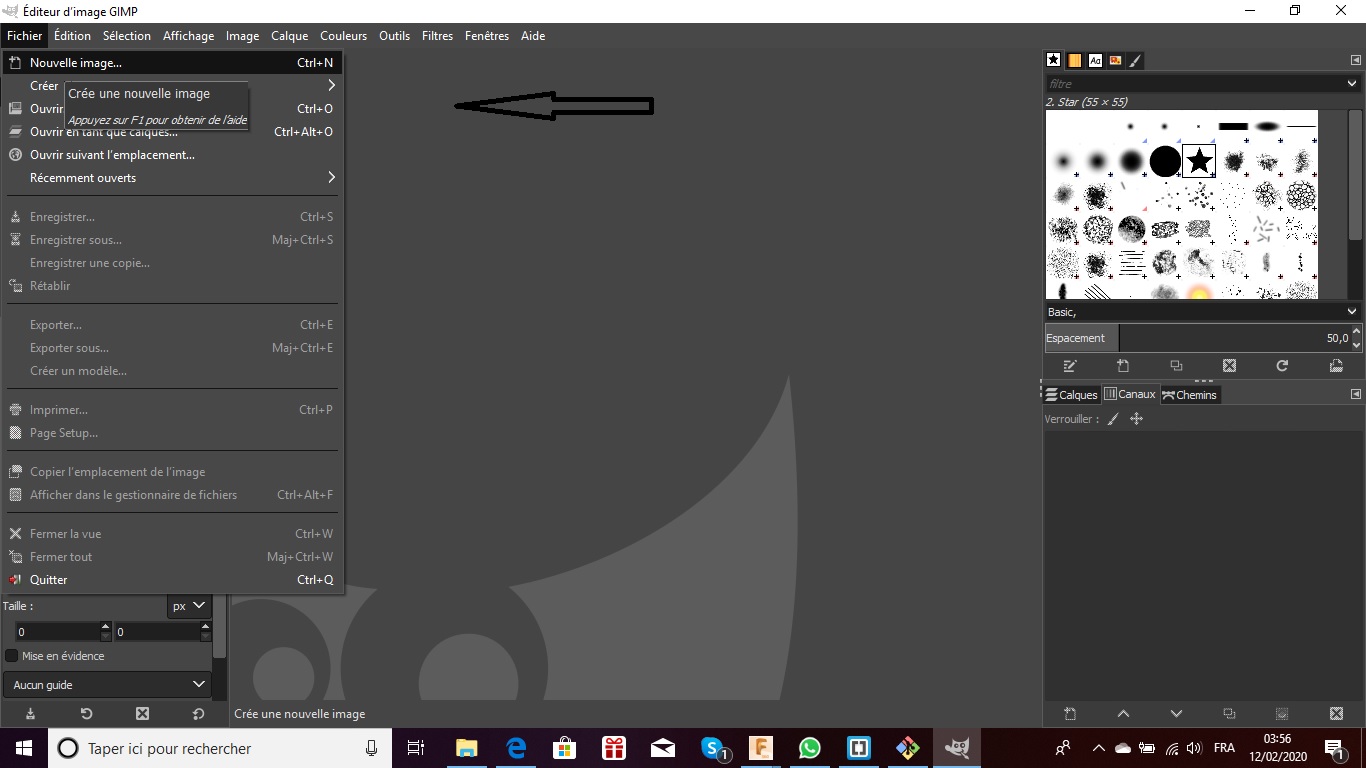
The first step before designing anything is to create a new image. Go to File>New image as it is shown below.
2- A window will pop up. Set the options as it is shown below and click OK :

3-In the toolbox on the top left corner, choose the appropriate tools that you require for your drawing and select the dimension. I selected the eclipse tool since I want to draw a cube as it is shown below:

4-Select: edit_ stroke selection_stroke see the image below :

5-Create a rectangle as it is shown below :

6- Select and create a new rectangle:

7- Apply the same steps on the second rectangle :

8-Link the two rectangles ,you can see the image below:

9-The lines at the back of the cube must be interrupted as it is shown below and that’s why we will use Erase Tool :

Draw 2D Logo using GIMP :
1_ 
2- 
3- Design a circle:
![]()
4- Edit and fill it with BG color:
![]()
5- Draw another circle inside the first one:
![]()
6- ![]()
2D models Files:
3D Modelling:
At first , I download Fusion 360 Education licence which allow me to use it for 3 years for free .Then i created an account in fusion 360 and then started with the design. Working with fusion 360 was so good, it was my first experience so i tried to use the youtube to know how it works.
- So what is Fusion 360:
- Autodesk Fusion 360 is a complex piece of software for modeling both onscreen assets (3D renders and animation) and offscreen physically manufactured elements. It provides parametric tools that allow a designer to edit components as specs change—without starting over from scratch. What’s more, projects can be shared among a group of designers using 360’s cloud-based design management system.
Steps to design
- First design:
1- Open Fusion 360 , new design , Then create a rectangle with the dimension that you need:

2- Set 2 lines and link them with the rectangle:


3- You will have this shape:

4- Now, select the bottom of the shape, then go for solid and select as it is shown below, and after the same for the rest of the shape :


5-This step is to design a circle with the appropriate dimensions on the top of the shape as it is shown below in the screen shots :


6- Now, select the designed circle to make it empty for that do the same as shown in step 4 :


7- Now, design two circles and link the to each other, one down and the other in the middle:

8- after the two circles are linked to each other and to the shape, remove the rest of the circle lines to have this shape. when you finish selecting the new created line do the same method as in step 4 to fill the empty space:


9- the shape design is completed, you will have this final design:


Second design: Spinner (Animation):
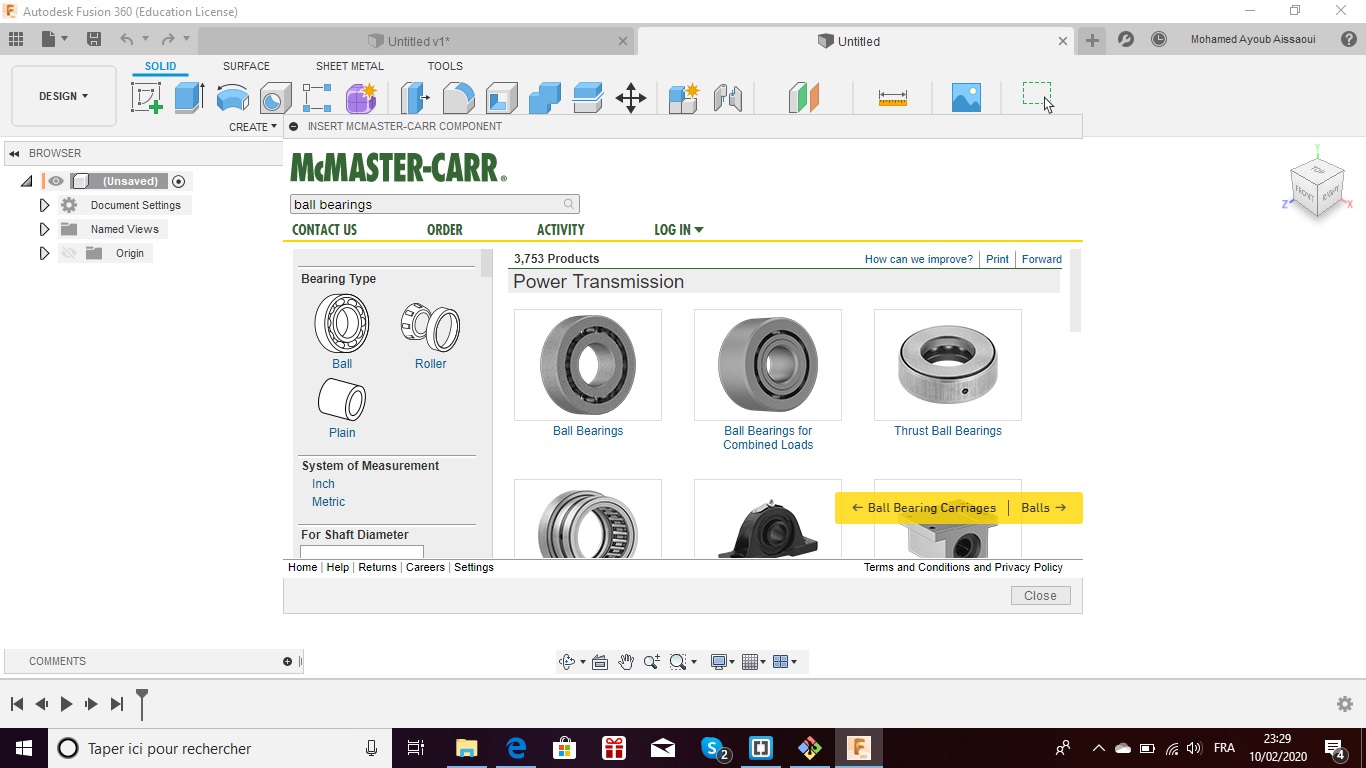
1- Open Fusion 360 and select Insert on the menu at the top (insert McMaster-Carr component) at it shown below:

2- Search for ball bearings, a list will show, you need to choose the first ball. After you finish, a ball bearing will appear on your sketch surface. see the screen shots below:


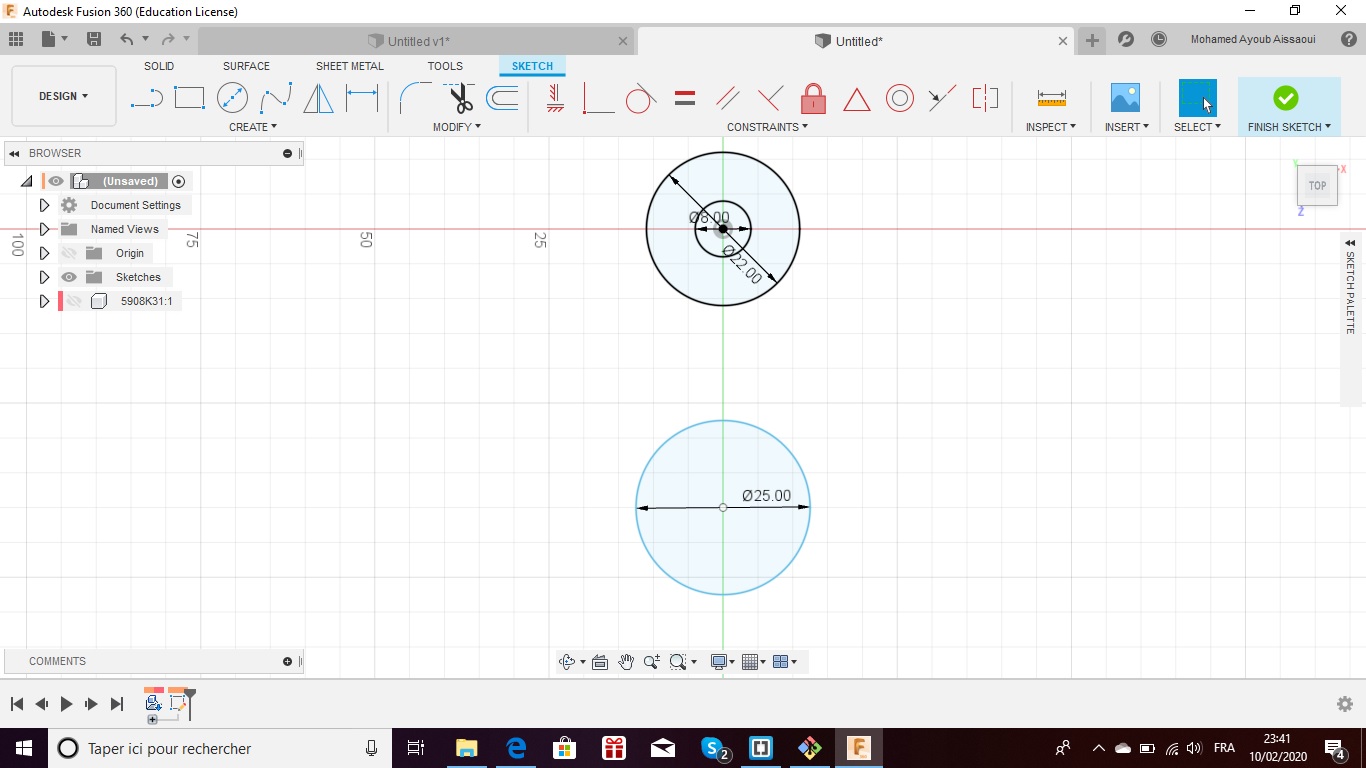
3- Now, you need to hide the ball, so the scratching surface will be empty, then design 2 circles inside each other with different dimensions :


4- Now, design another circle away from the others :
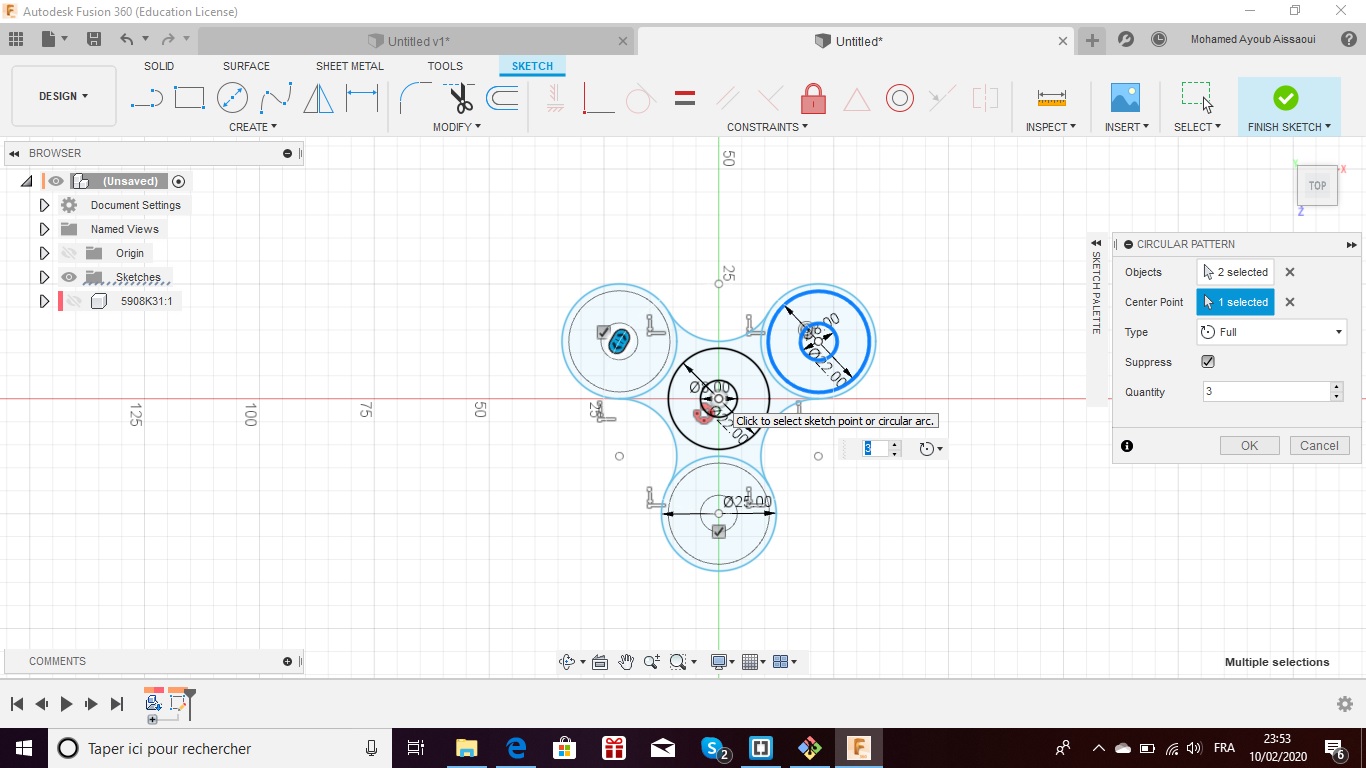
5-Now, Select all circles, then go to create in the menu and press (circular pattern) , a clone of circles will appear around the main circle as it shown below:


6- Delete the circles extra lines to have this shape :


7-Clone the small circle in the main circle with the others, to have in final 3 circles around the main and all are with the same dimensions :

8-Now, you need to appear the hidden ball so it will replace the main circle to have in final 3 circles around the ball in the middle :

9-Now go to: (menu-create-extrude) and select the body around the ball, a blue Arrow will appear, pull it until the body is on the same level as the ball :


10-Now, replace the design mode by animation and this is it: your spinner is created in animation mode and you can record a video that shows the spinner components:
