09. Mechanical & Machine Design
The group assignment
This is where you can find the documentation for our final tool here.
Personal Contribution
I have created the MkDocs and the git repository of our team.
I created the shopping list, soldered Barduino & CNC shields for the groups.
I designed the striking balls & thread part.
I helped in creating the organization between all teams to decide on the common rules, mentioned below.
The organisation of the project: the base.
For these two weeks, we had very little access to the lab.
The core part of the project was done by the entire group of students from FabLab in Barcelona.
The second part we carried out in smaller teams.
We divided into 3 groups of 3 people.
Each team designed a tool, manage to get their engines running and assembled their machine.
The base rules were as follows:
- The electronics will be a Barduino and a CNC shield.
- he XY motor move the machine around, while the Z is used for the tool.
- All machines will have a button. The button is lit until pressed.
Once pressed, the machine stops working for 10 seconds. - The machines are powered with a set of 3 250mAh Li-ion batteries.
We used a Gantt Chart and regular check-points to make sure there is a coherence in the design & assembling of the electronics & chassis.
Soldering the electronics & Debugging
-
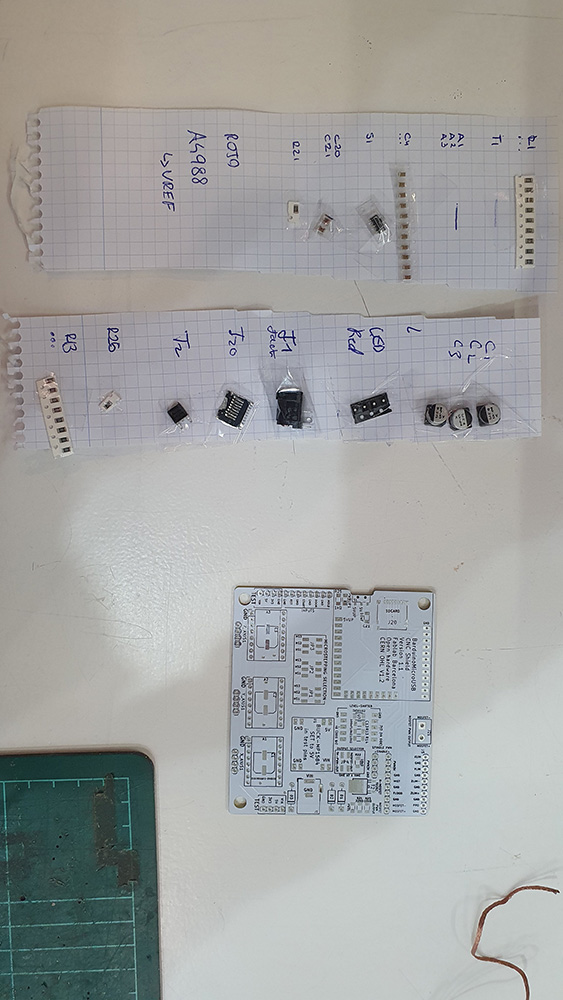
Along side Nil, I have made the shopping lists for CNC shields and Barduino.
taking into consideration the amount of components that need to be used, this would save us a lot of time. -
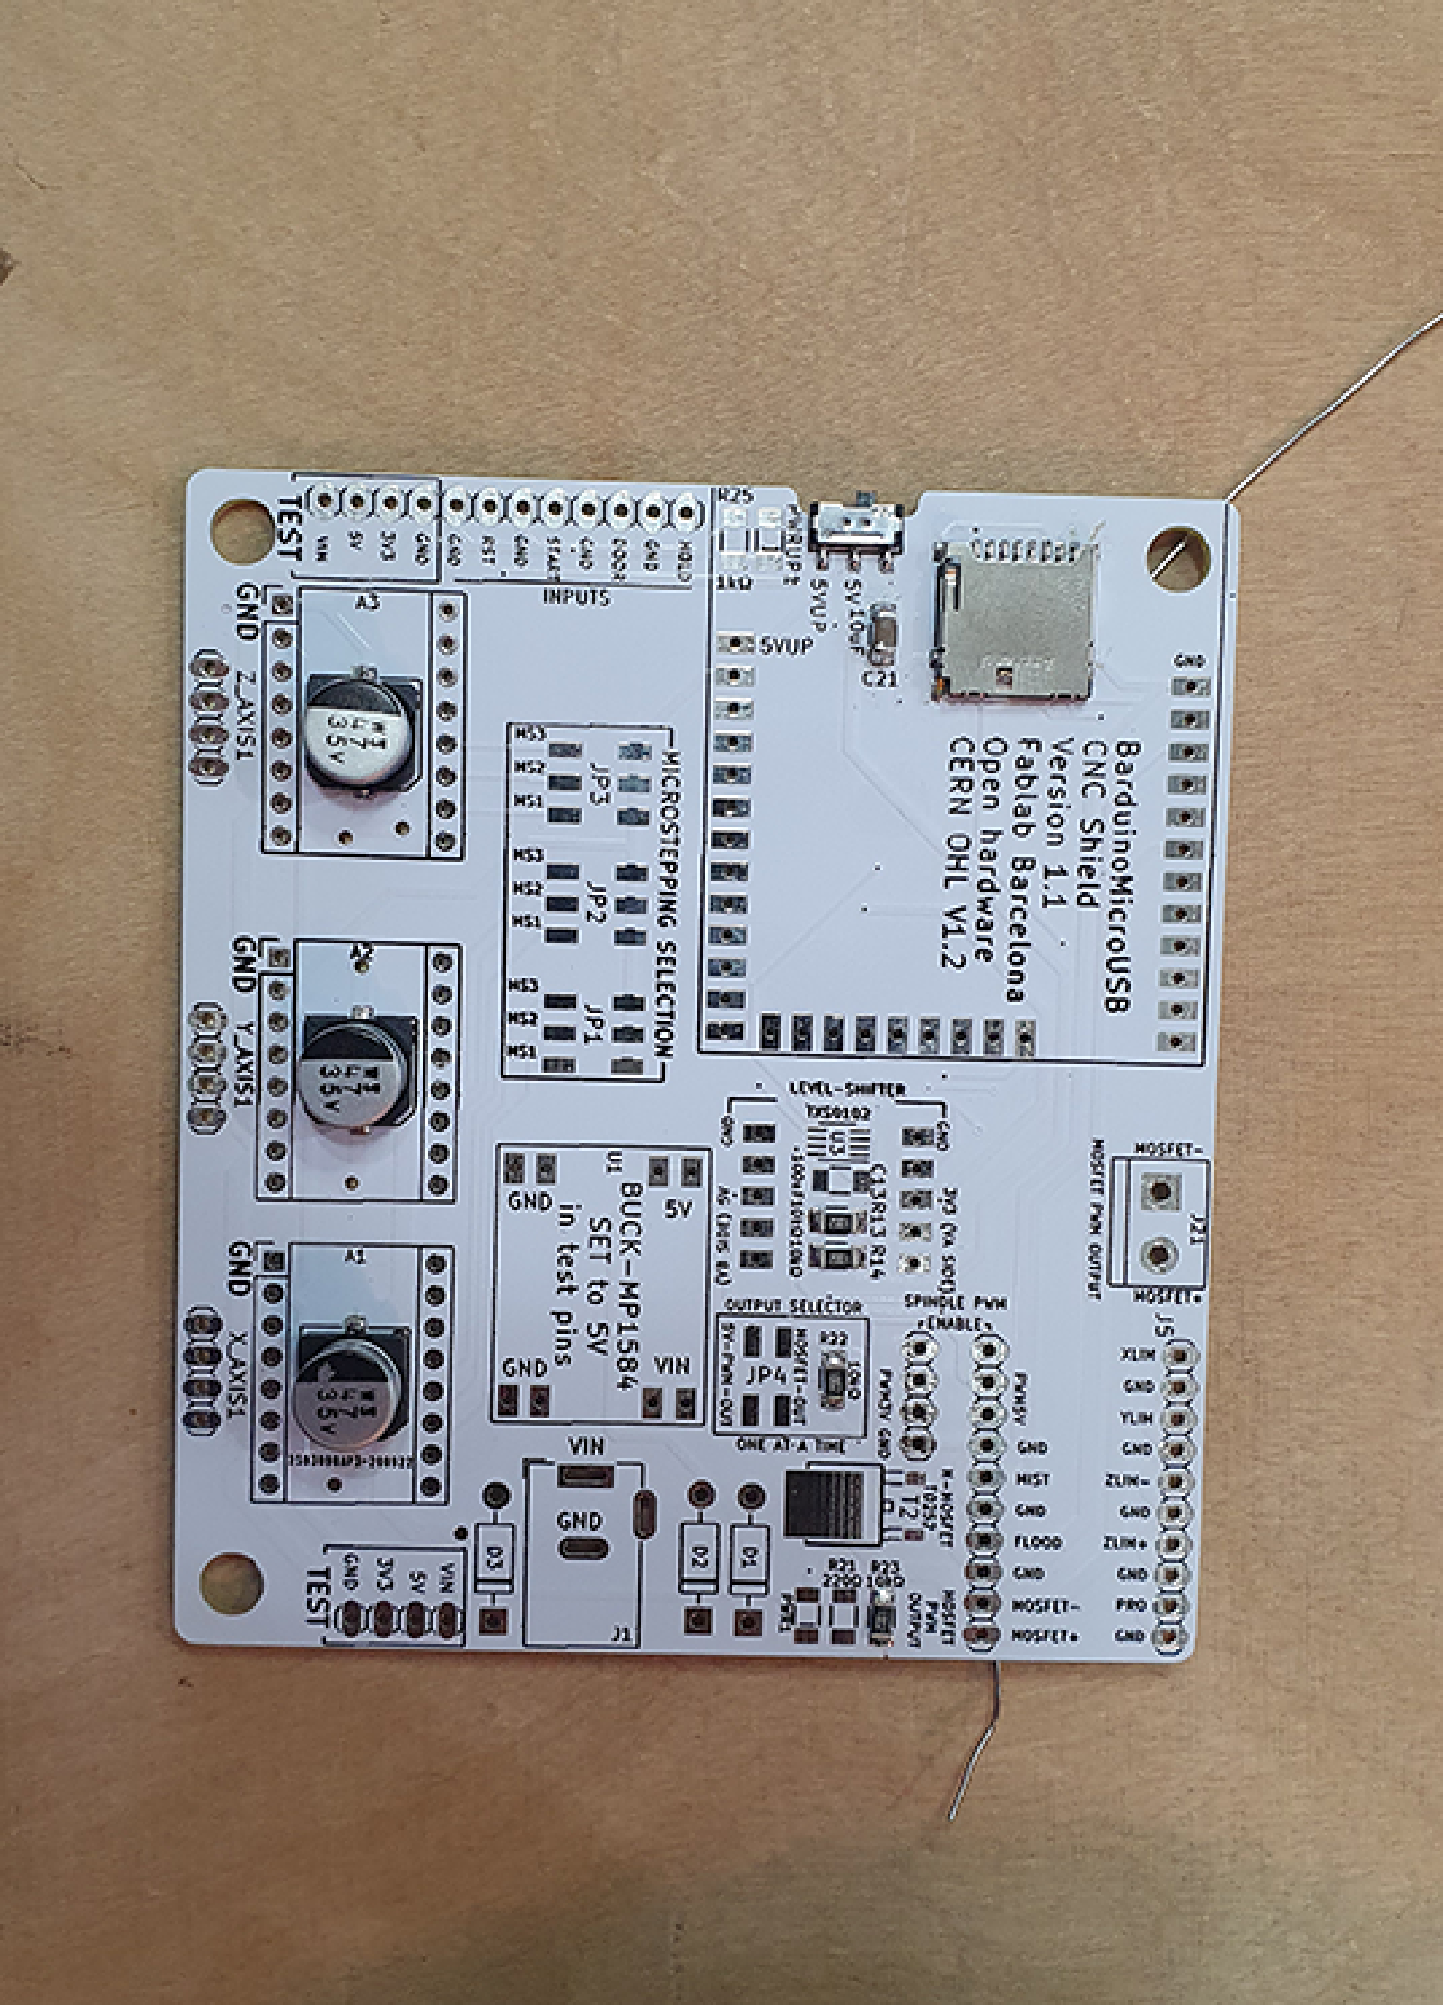
The PCB boards for both CNC shields and Barduino are already manufactured. What we needed to do is solder them well. Due to the lack of time, we have some mistakes happening, for example:
-
the voltage regulators were confused since the 5V ones were put in the 3.3V drawer.
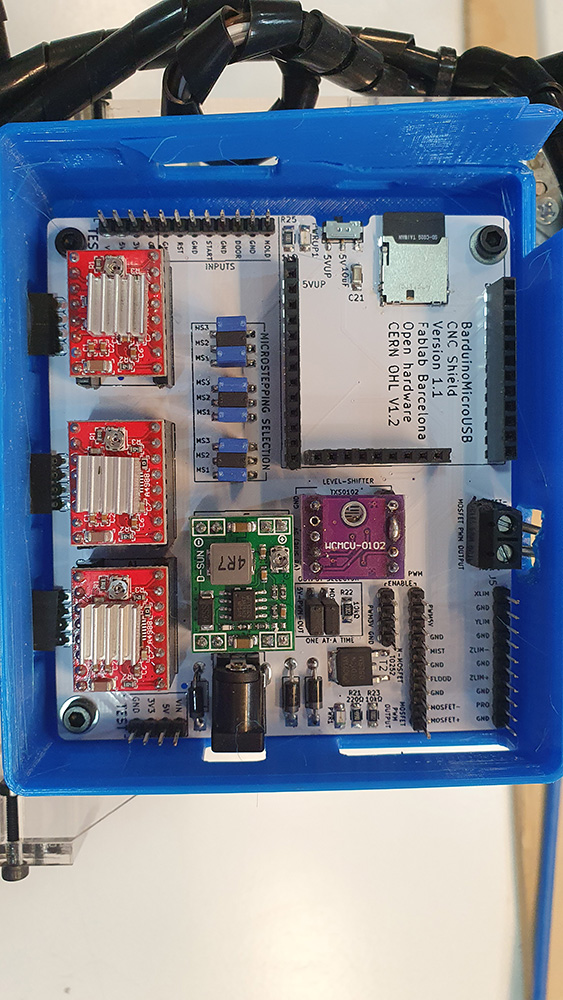
Setting up the stepper driver
This helped me understand what was done to make the stepper motors work.
All details or Barduino 2.2 are found in this Barcelona FabLab Repository
I will make a summary of what needs to be done.
Necessary environments
In this repo, we have all the files necessary for us to make our killing machine.
Needed Library
ESP 32 ESP 32 expressif ESP 32- Web UI ESP32SSDP arduinoWebSockets
Needed Board Manager
https://raw.githubusercontent.com/espressif/arduino-esp32/gh-pages/package_esp32_index.json
What to keep in mind
- Disconnect the Barduino from the CNC shield.
- Read this documentation.
- Put the esp32 espressif board on “programming mode”.
- Selecto board ESP32 - dev Module.
- Select “parition Scheme “Minmal SPIFFS”.
- Compile Firmware Arduino File. (Don’t panic if it takes too much time)
- Upload the code.
- Disconnect the board and change to switch to ” execution mode”.
- Fix WiFi credentials in Wificonfig.h while being on “execution mode”.
When it connects, it shold be connected to GRBL_ESP.
But it needs a fully functioning browser, so visit 192.168.0.1
- we need tp upload
index.html.gzfile from the data folder that was on the firmware files. - Before mounting the Barduino on the CNC shield, we need to switch the reulatior to 5VUP.
- Set-up the limit of each motor, that might be different. The Voltage measured from the screw or VREF to GND needs to be around 500mV.
- To connect the motors, we need to follow the wirign diagram of each motor.
- SET SSID for each Barduino
For details, please check group2.
Designing & creating the base
-
The base that was designed is modular, in order to able to experiment easier with where the motors, button and tool would go.
It was laser cut with cardfirst to make sure all fits. Then it was laser cut with smoked acrylic. -
A test for the screen sizes was done to see which size of screws we use.
-
The space for tool, motors & button were defined, making sure the button is accessible & works with all three fighting machines.
Embedded programming
Now that everything was set in terms of physical machine, as well as the communication between Barduino & the CNC shield, we were able to start thinking about the logic of our machine.
- The motors of the axis Z and Y needed to move the vehicle. Z needs to control the tool.
- The goal is to press the button of the adversary. Once pressed, the adversary is paralyzed and their button starts blinking.
- The machines will be controlled from a mobile phone through an application. The app is Wigi Hotspot based;the ESP create a wifi hotspot to which the users connects itself using mobile phone or compute is hotspot. There is no need to keep updating the Wifi connection if it changes, which is the case for the Wifi server.
All of the details are super well explained in our group documentation right here.
Tool: the concept
The idea is to iterate the design of a mine fleil. It will be quite a chaotic process!

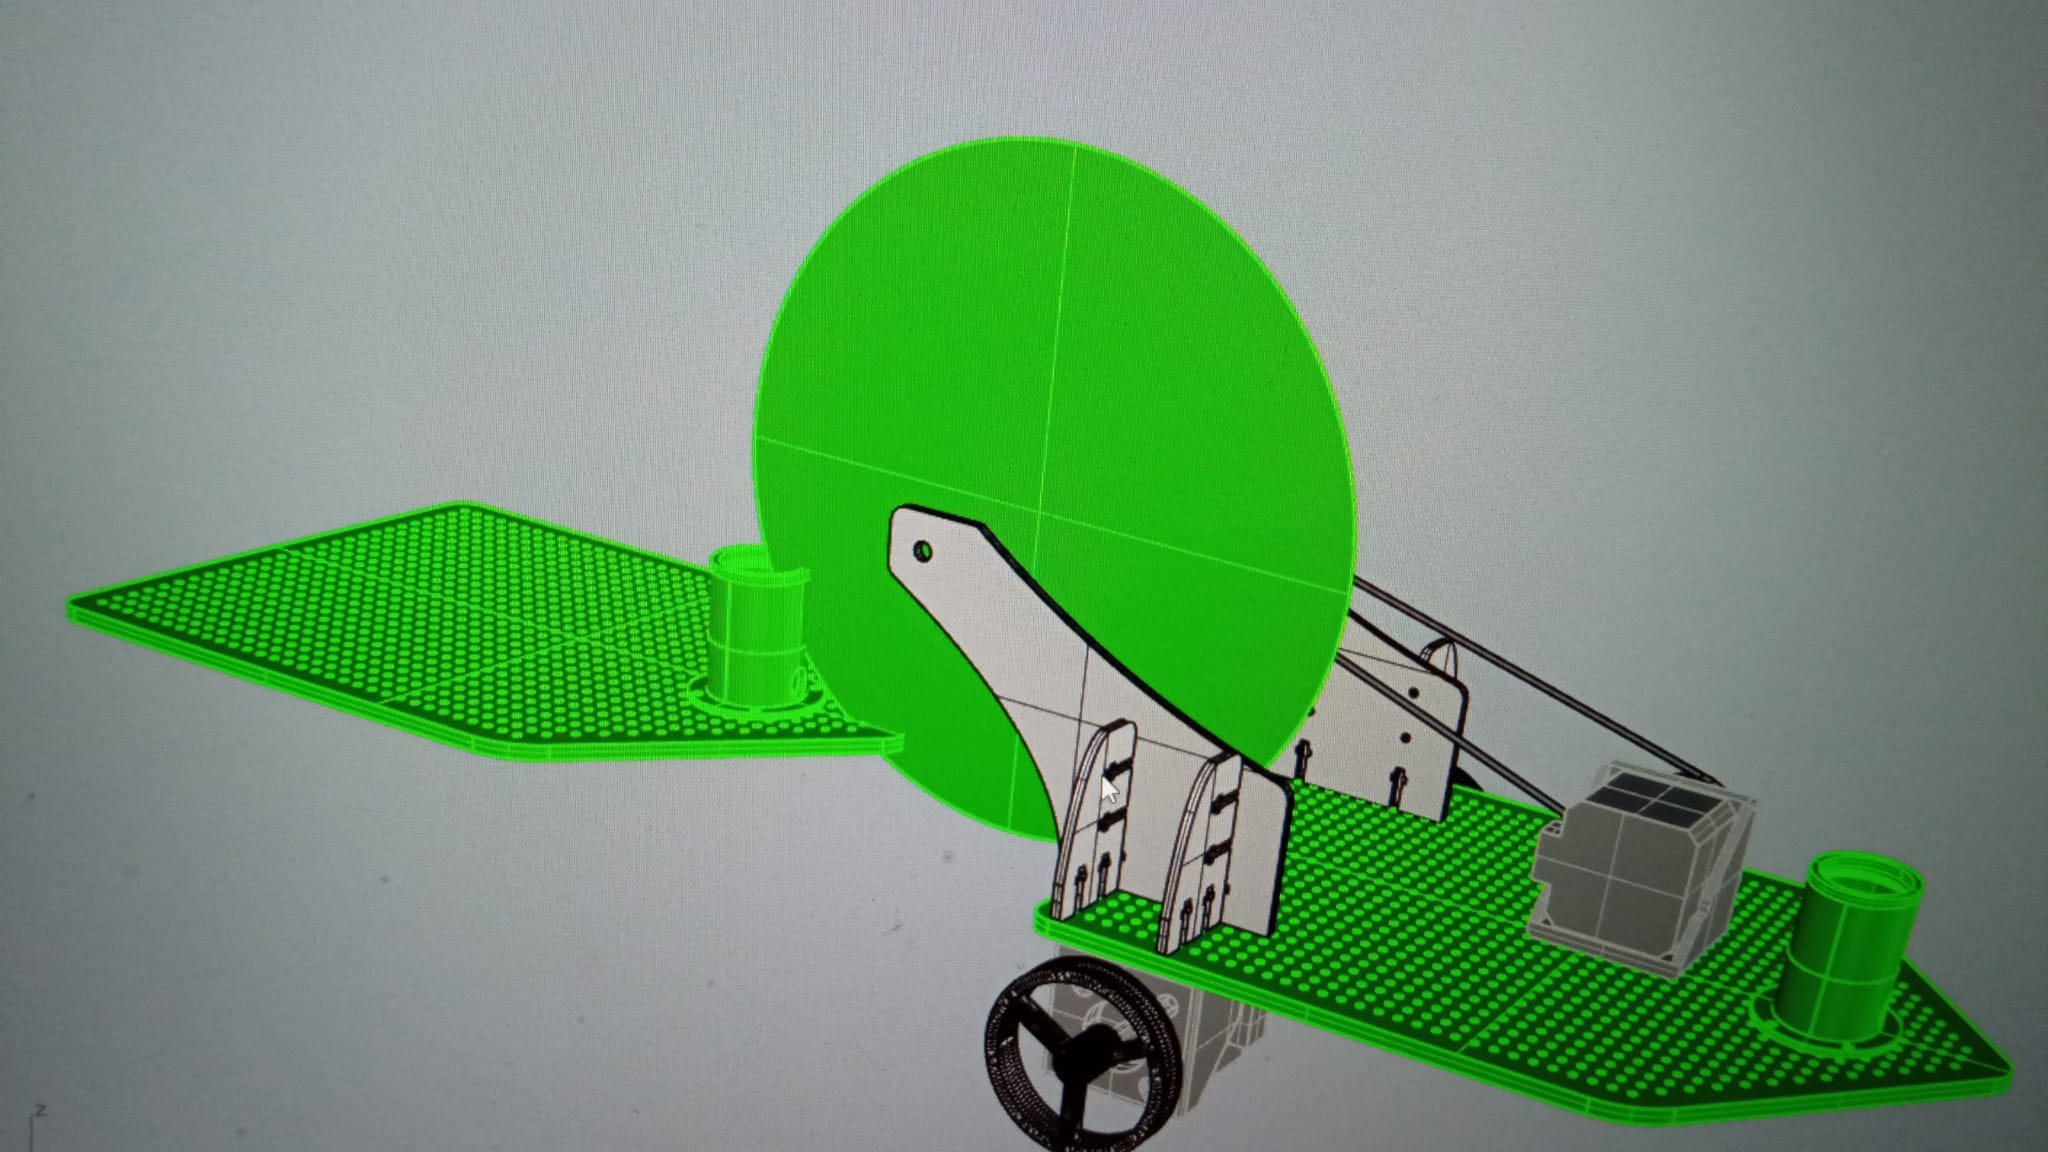
This is the concept sketch we had in mind.
Tool: the creation
I took care of creating the tip of the tool.
It included choosing the type of the thread and the striking balls.
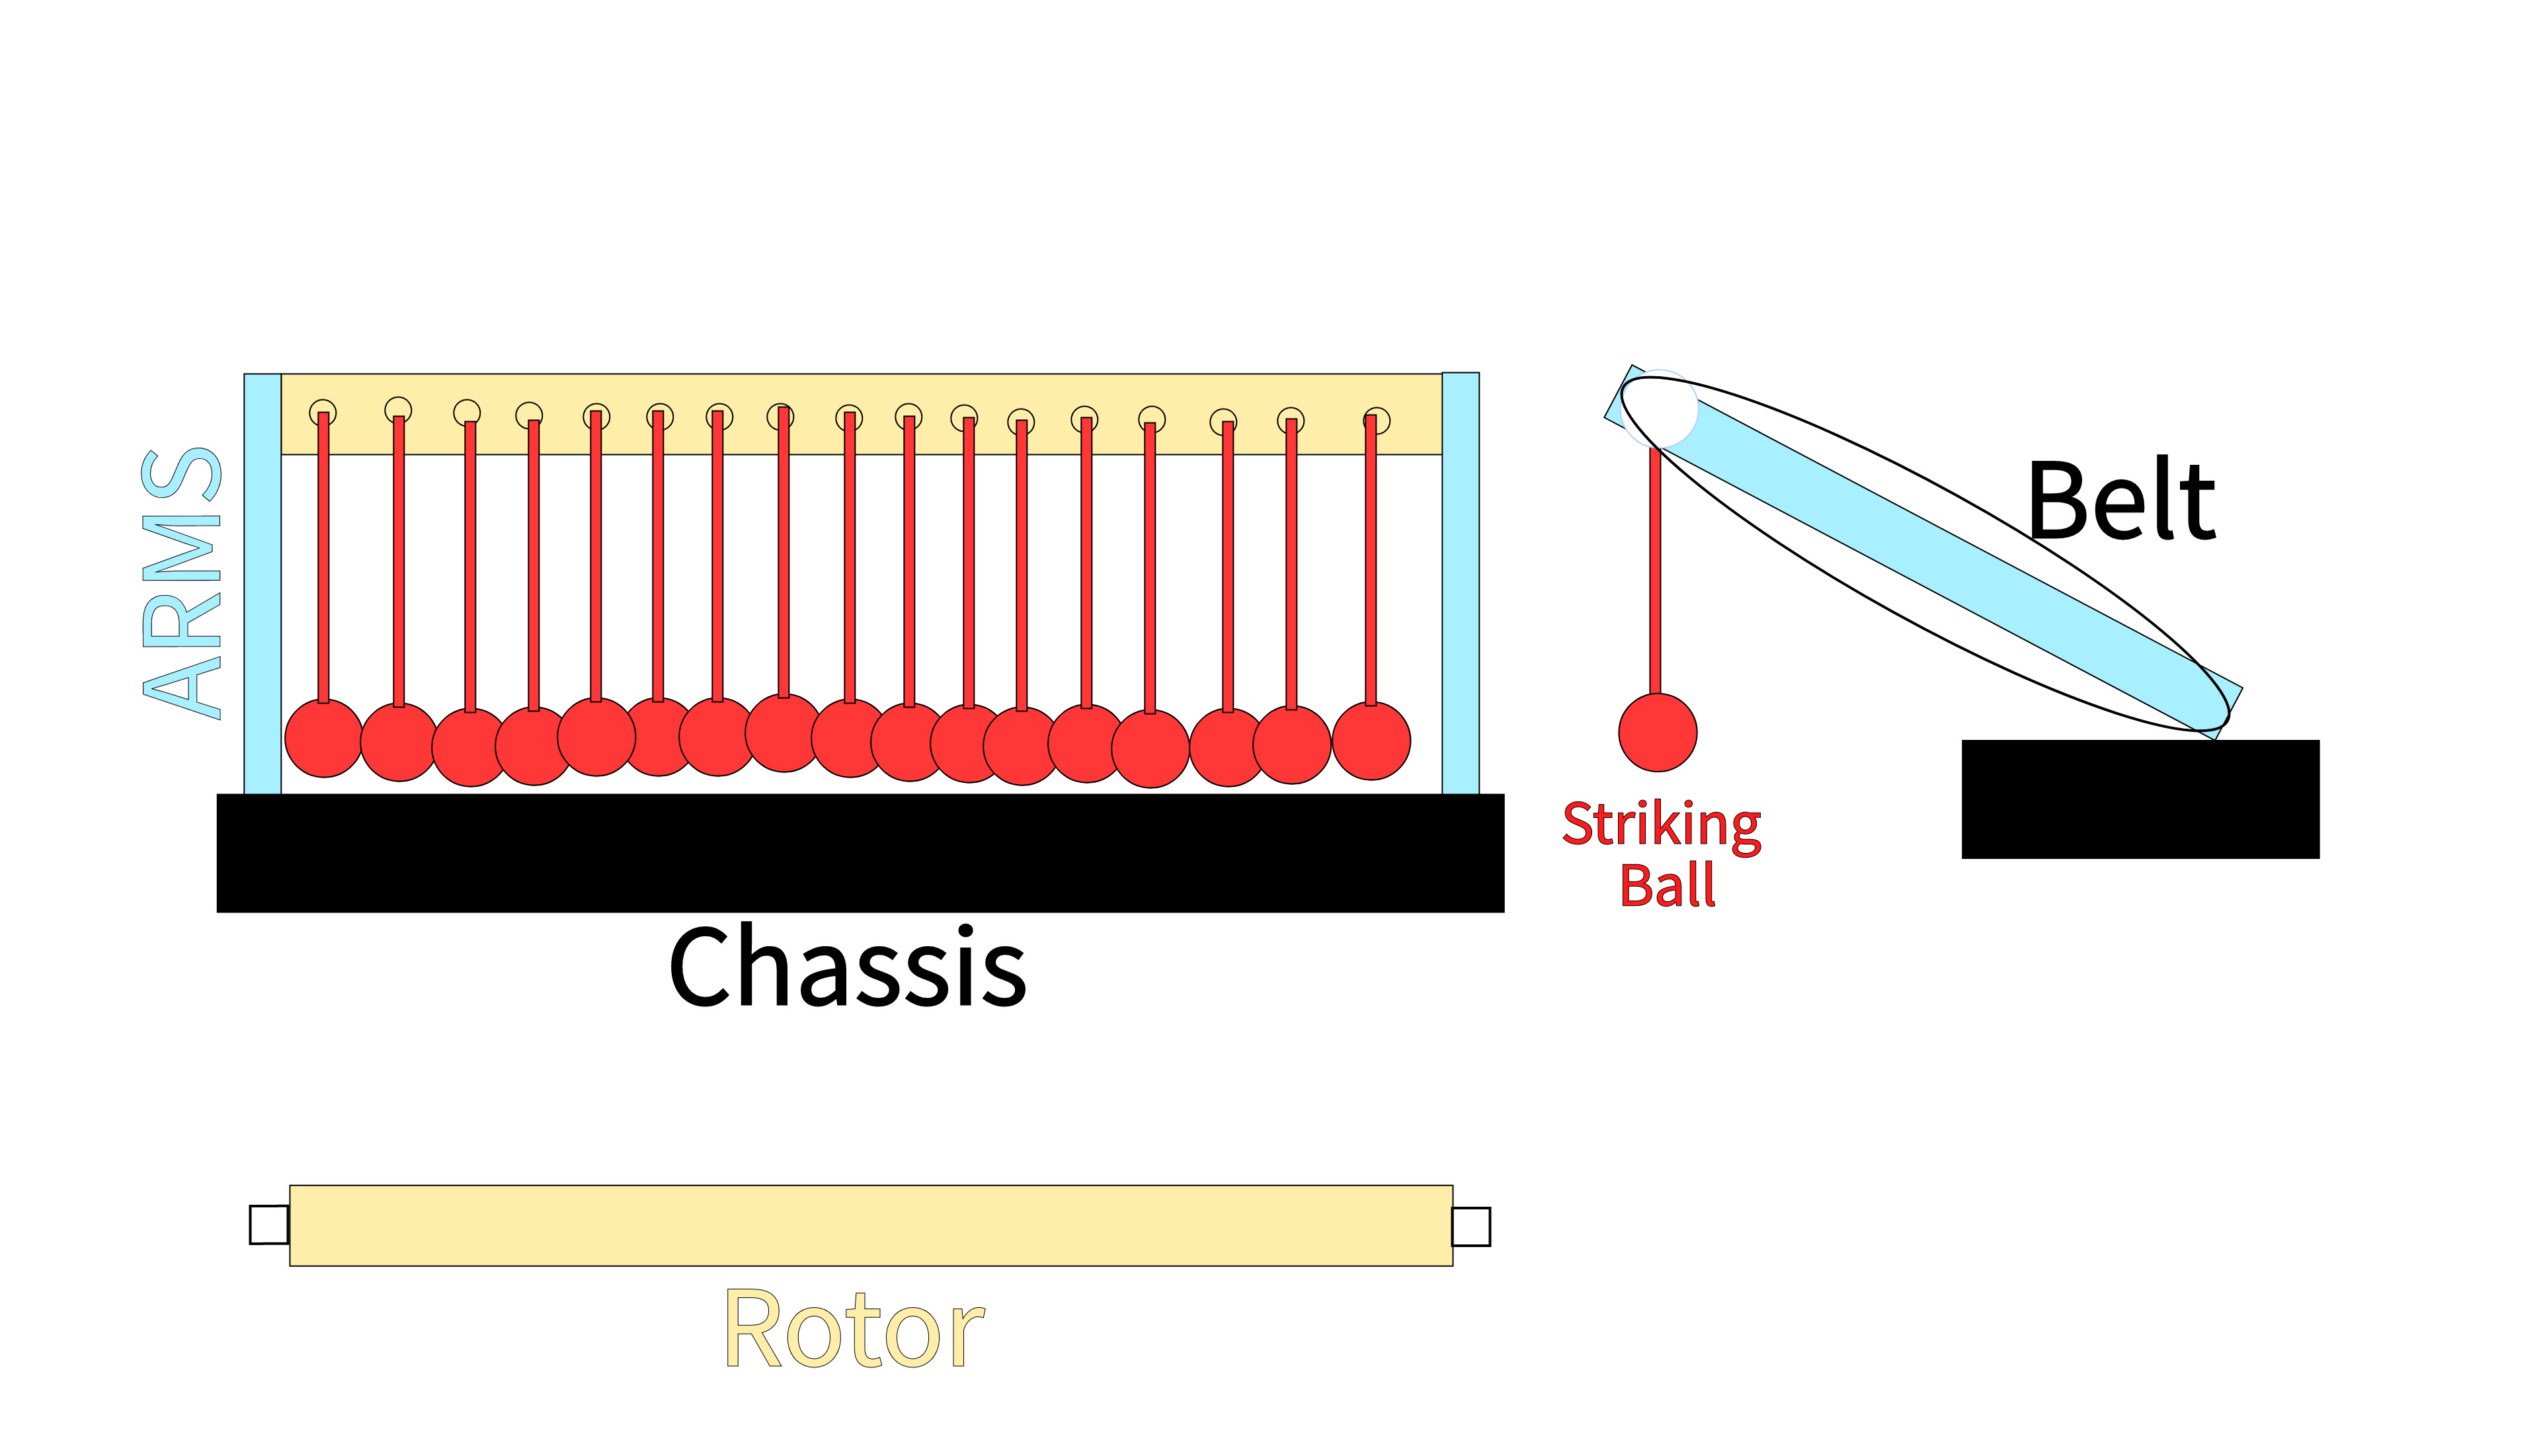
They were attached to the rotor, composed of two main areas.
One shaped as a pulley to be connected to the belt. The other contained through holes spread along its length. These holes would allow for striking elements to be attached to the rod with threads.
Furthermore, a driver pulley was designed and attached to the head of the motor. This pulley was designed to give an overdrive with a ratio of 3:1. This was done to allow the rod to rotate sufficiently fast to generate a significant striking force.
The ending of our tool which is too light at the moment. we have tried two different types of strings to see how they affect the force of impact with the button. Both ways were too light.
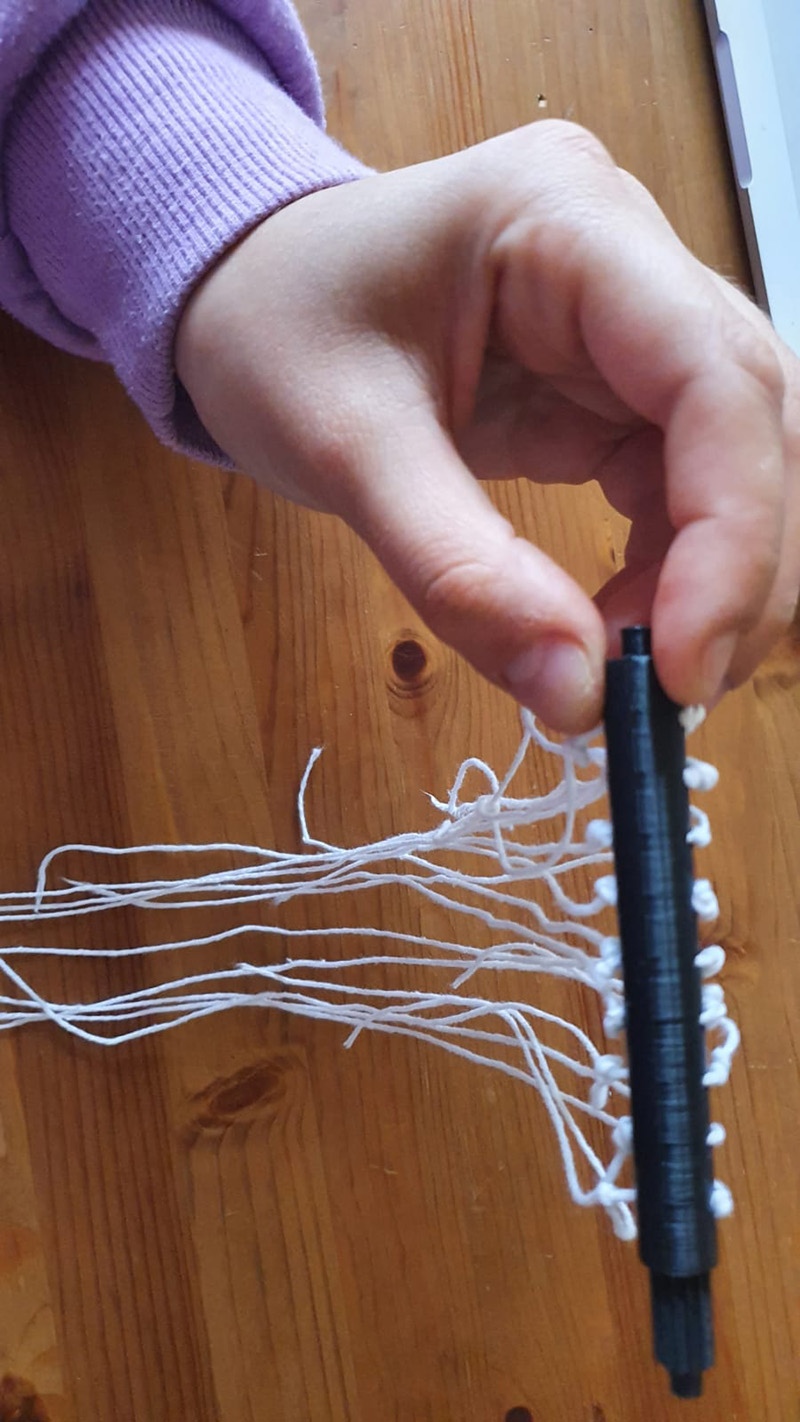
Eventually, after trying multiple threads, we used the most rigid one, so that the threads do not get tangled while rotating or after rotation of the axis has stopped.
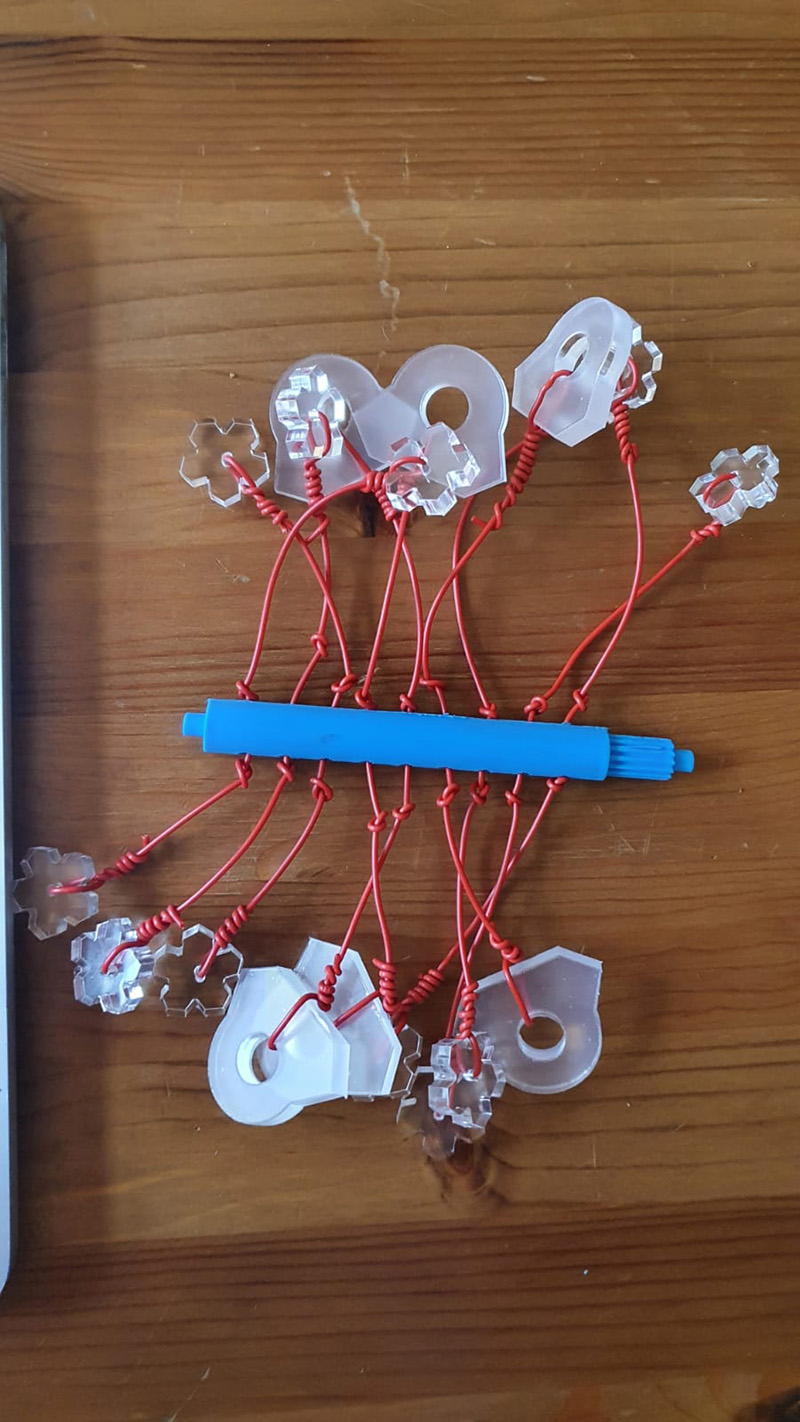
This is why we have decided to three 3D print a piece that will be heavier and might have a bigger impact using the lighter thread.
The shape of the ball at the end of the thread was an imitation of the actual mine flail. Also, we wanted to have edges that would help click that button.
Tool: the success
Learnings & Future Steps
Good Points
-
I have definitely gained more on the programming and electronics side. I understood how to connect motors of a brain, and how to work in multi-level boards.
-
I also learned that the machining principles behind a 3D printer, for example, is not so different than a drone. What changes are the types of motors, their power as well as the code behind it and the mechanical pieces used.
Bad Points
-
It was fast-paced. It took me a while to understand everything that we are doing. I had to count on my partners quite often, but with time, I managed to understand how to build those machines.
-
Documentation could be better done :)
-
Our tool is a bit chaotic. It runs risk of having the thread tangle and us to lose the competition! I would work on this :)