10. Molding & Casting
This week , I will make a keychain one-sided mold.
Group assignment
Adrien beautifully documented our weekly assignment
Requirements
Understanding molding and casting week, for me, is about understanding the limitations of 3D molding, different mills, and how to get a smooth mold.
Design
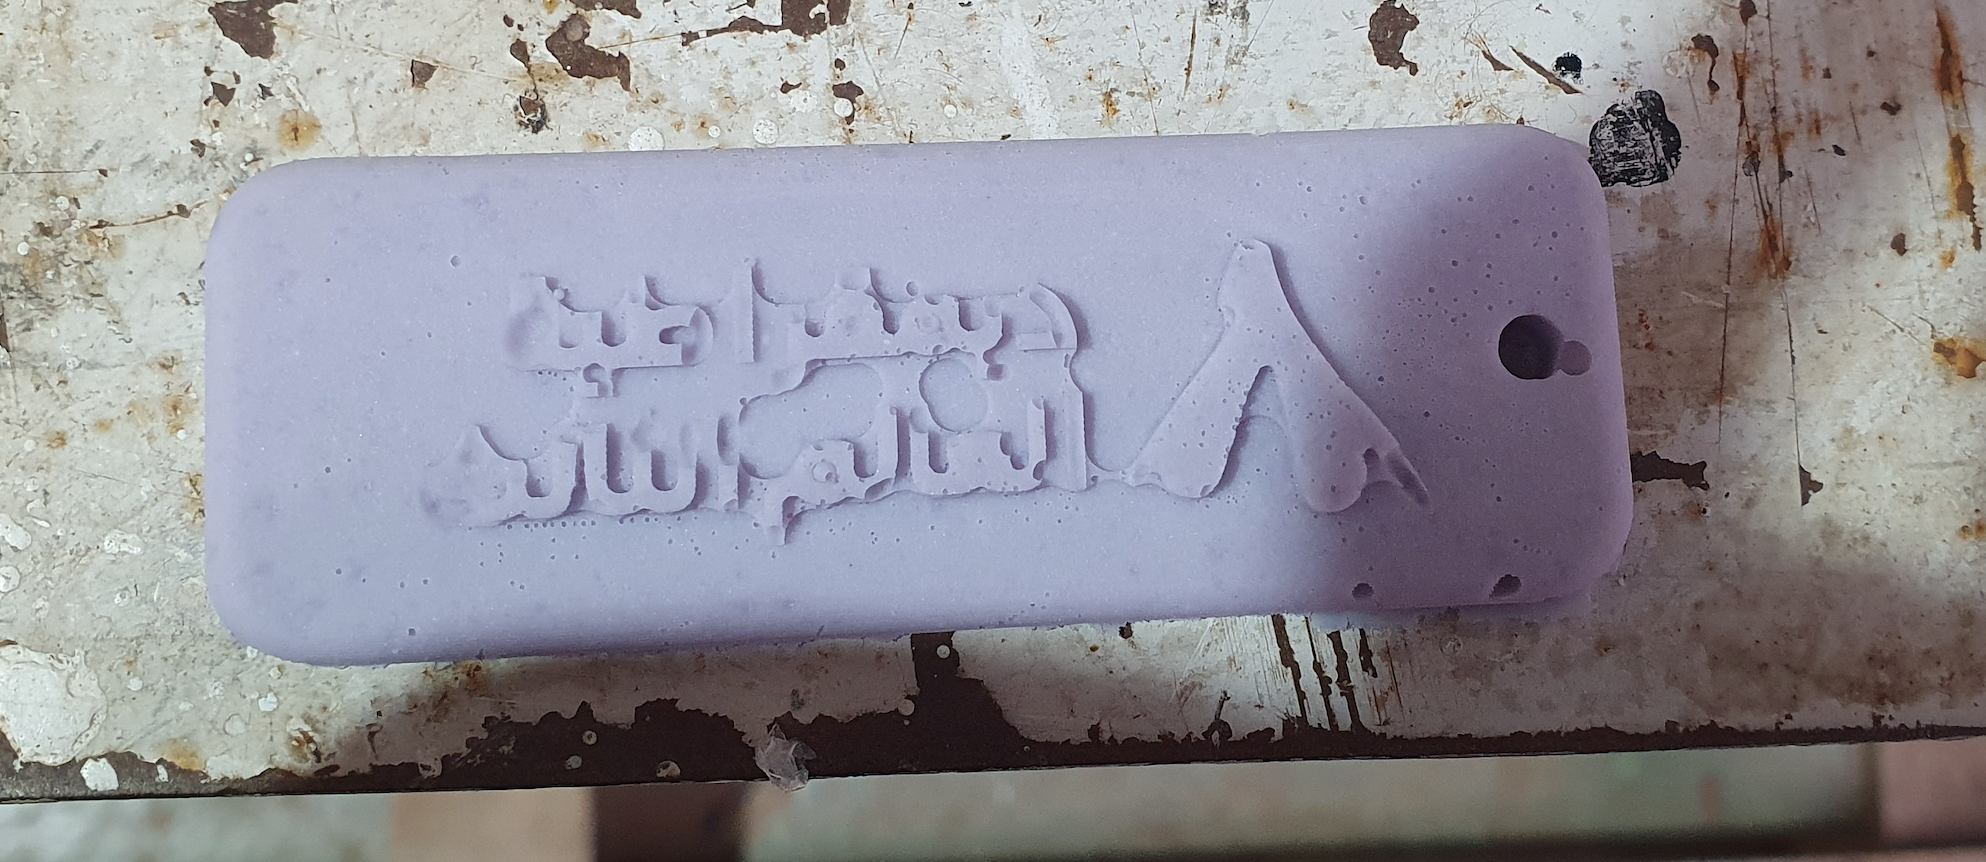
I used fusion 360 to design a simple keychain.
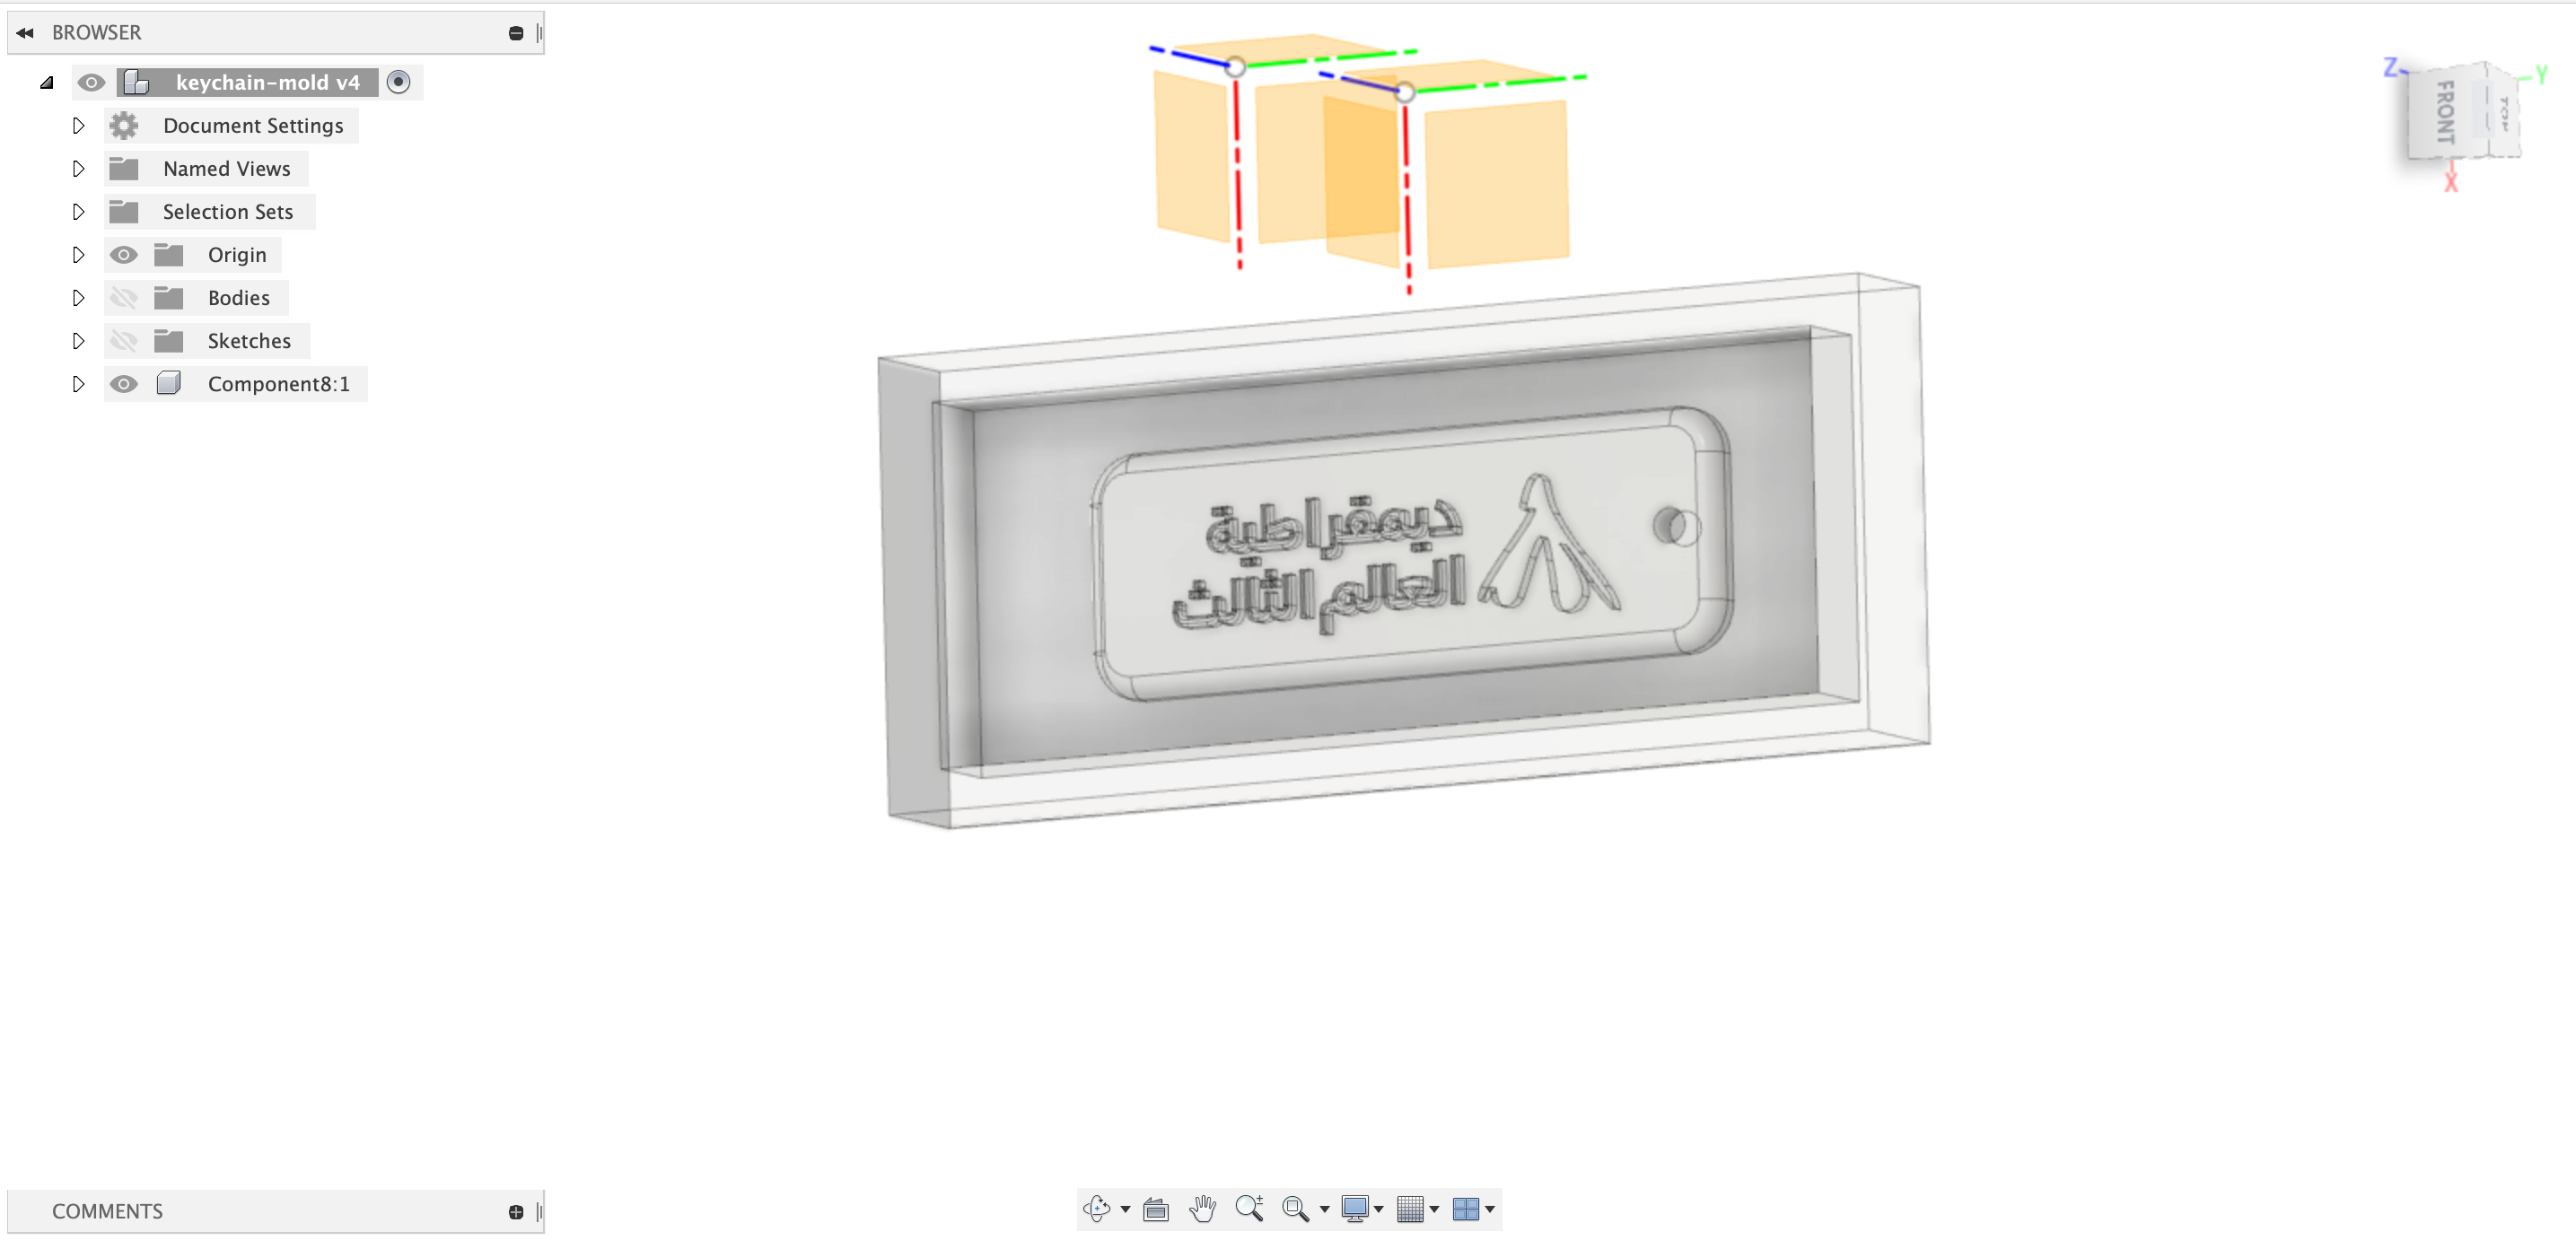
The arabic calligraphy is quite thin and I will need to use a thin mill such as the 1/32 mill. The design went quite simple.
One thing to keep in mind is that, for this assignment, we are: - molding the positive, in molding wax. - casting the negative, within the molding wax. Since the wax is hard, the negative will need to be relatively soft. - casting the final positive outcome of the keychain in the soft mold.
Milling processes
Usually, there are three different steps of milling that we follow to get the best results:
1- Surfacing is to make sure the first layer of contact is plane and soft. Milling work in X, Y & Z axis.
This is usually defined by mm/inch and it is important to have a fat surface to have a plane design.
2- Roughing does what its name implies. It roughly mills the material in order to create the overall shape.
This allows for the finishing to take less time, especially if the mill being used for finishing is smaller.
3- Finishing mills the details of your design for it to be precise. Obviously very much more crucial when working
on molding high precision pieces.
Modela 4
It was quite easy to use Modela 4, especially that it calculates for us the necessary values.
According to my instructor Josep, finding open-source softwares similar to Modela 4 is hard.
1- Import .stl model.
2- Make sure to choose the correct machine, because that would change the timings and
parameters of the milling.
3- Make sure the direction and scale fit on your milling block.

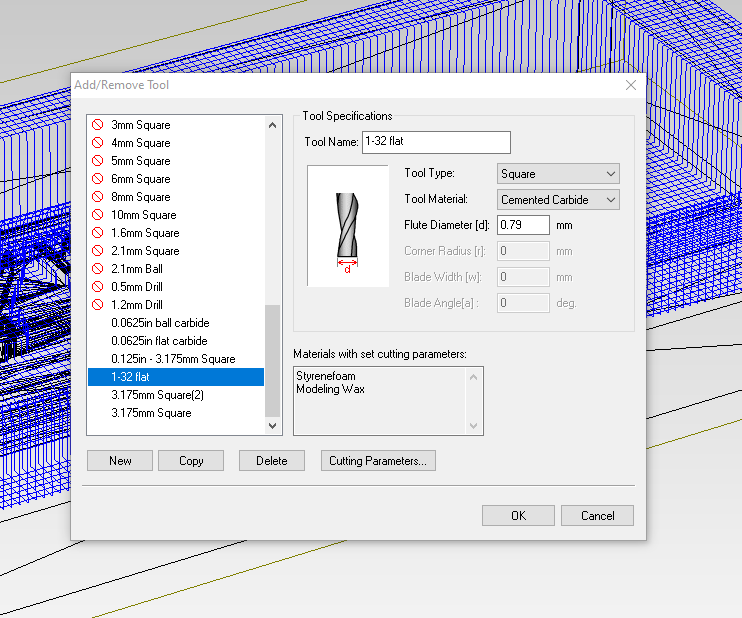
4- Make sure your endmills are all registered.
If not, register them, choose the material to be milled, and register the generated parameters.
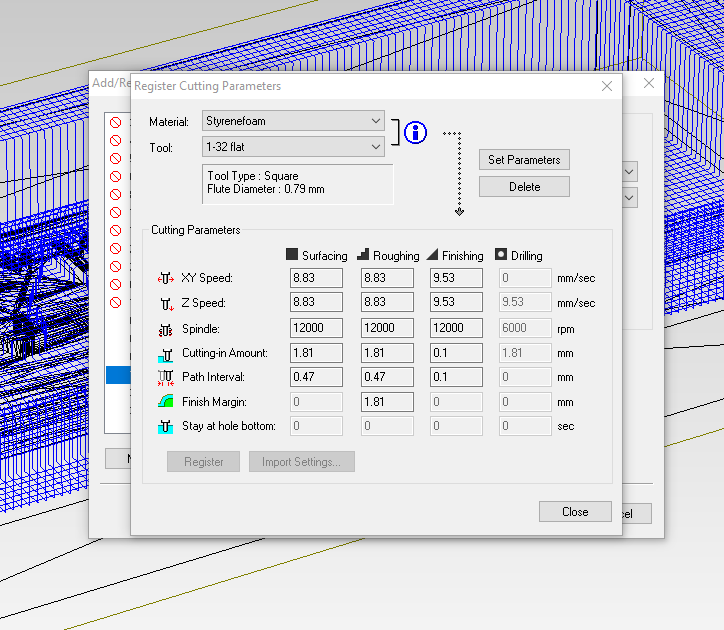
5- In each process, we choose whether we are Surfacing, roughing, finishing or drilling.
This affects the drilling parameters & the tool path to create.
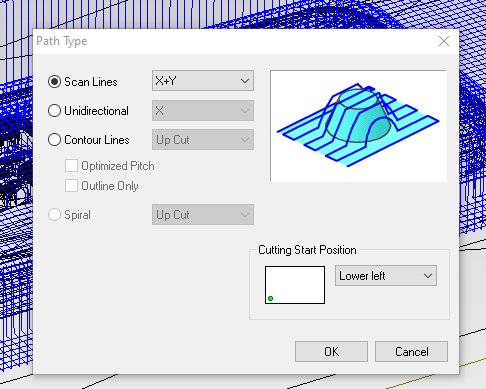
Tool path could be defined by X Scan line, Y Scan Lines, up cuts, etc..
Roughing, for example, is usually done by Up cut because it allows to mill out material faster, without precision (by preciosion, we are talking about machine-evel precision).
While finishing for example, is normally done by following X scan lines, and X+Y lines for more precision.
6- We make sure to choose to adequate tool.
7- Defining the cutting area and depth is important.
They allow us to save time spent on the milling machine.
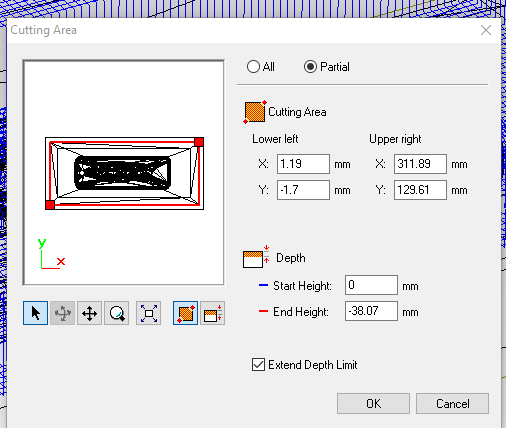
8- Previewing the milling is very important because it allows to see any imperfections that might be taking place.
Setting the cutting area has a poor interface design. Here are some screenshots of inaccuracies that took place
due to that.


9- Once all is good, send Cut. This will generate a .prn file out of the .mpj file generated
by Modela. It might generate a .nccode file based on the machine.
Milling
As I am quite habited right now in milling. The motto is Fix, Set origin, launch, Reser Z for new mill.
Most importantly dont break the mill.
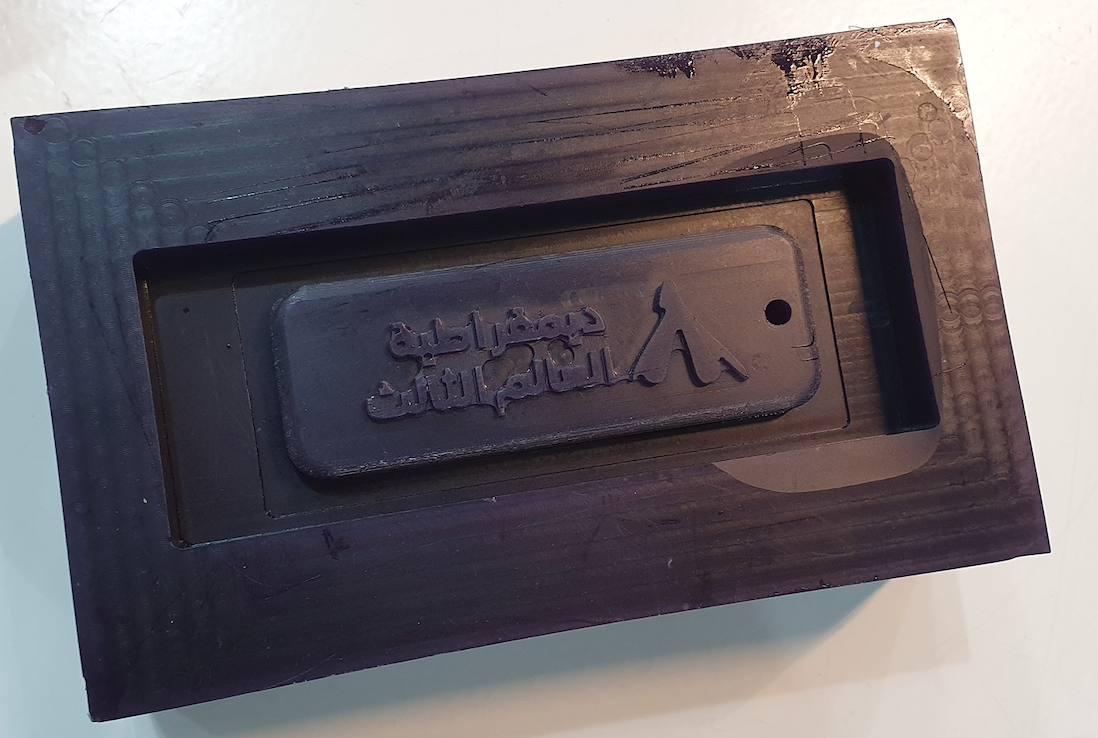
My result wasnt as clean as i wanted, but for now, I will stick to it in order for my other colleagues to use the milling machines. In the last section of this page, I write down what could have went better.
Negative Molding Indications & Material Guide.
There are different materials that could be used depending on the final cast. You can find them in Adrien’s documentation page.
I use EasyPlast 00-40 to make my mold.
It is very important to read the sheet of the material you are using.
It is important to see the hazard identification code and the first aid instructions of each material.
The mold material is usually a mix between agent A and agent B.
The main information to keep in mind are:
Shore hardness which measures the hardness of a material, typically of polymers, elastomers, and rubbers.
Shrinking which is how much a material shrinks after curing time.
Pot Time which is the time that could be used to mix agent A and B.
Curing Time which is the time the material needs to be cured.
Mixture ratio which is very important for some material.
Degassing and whether is it is needed or not.
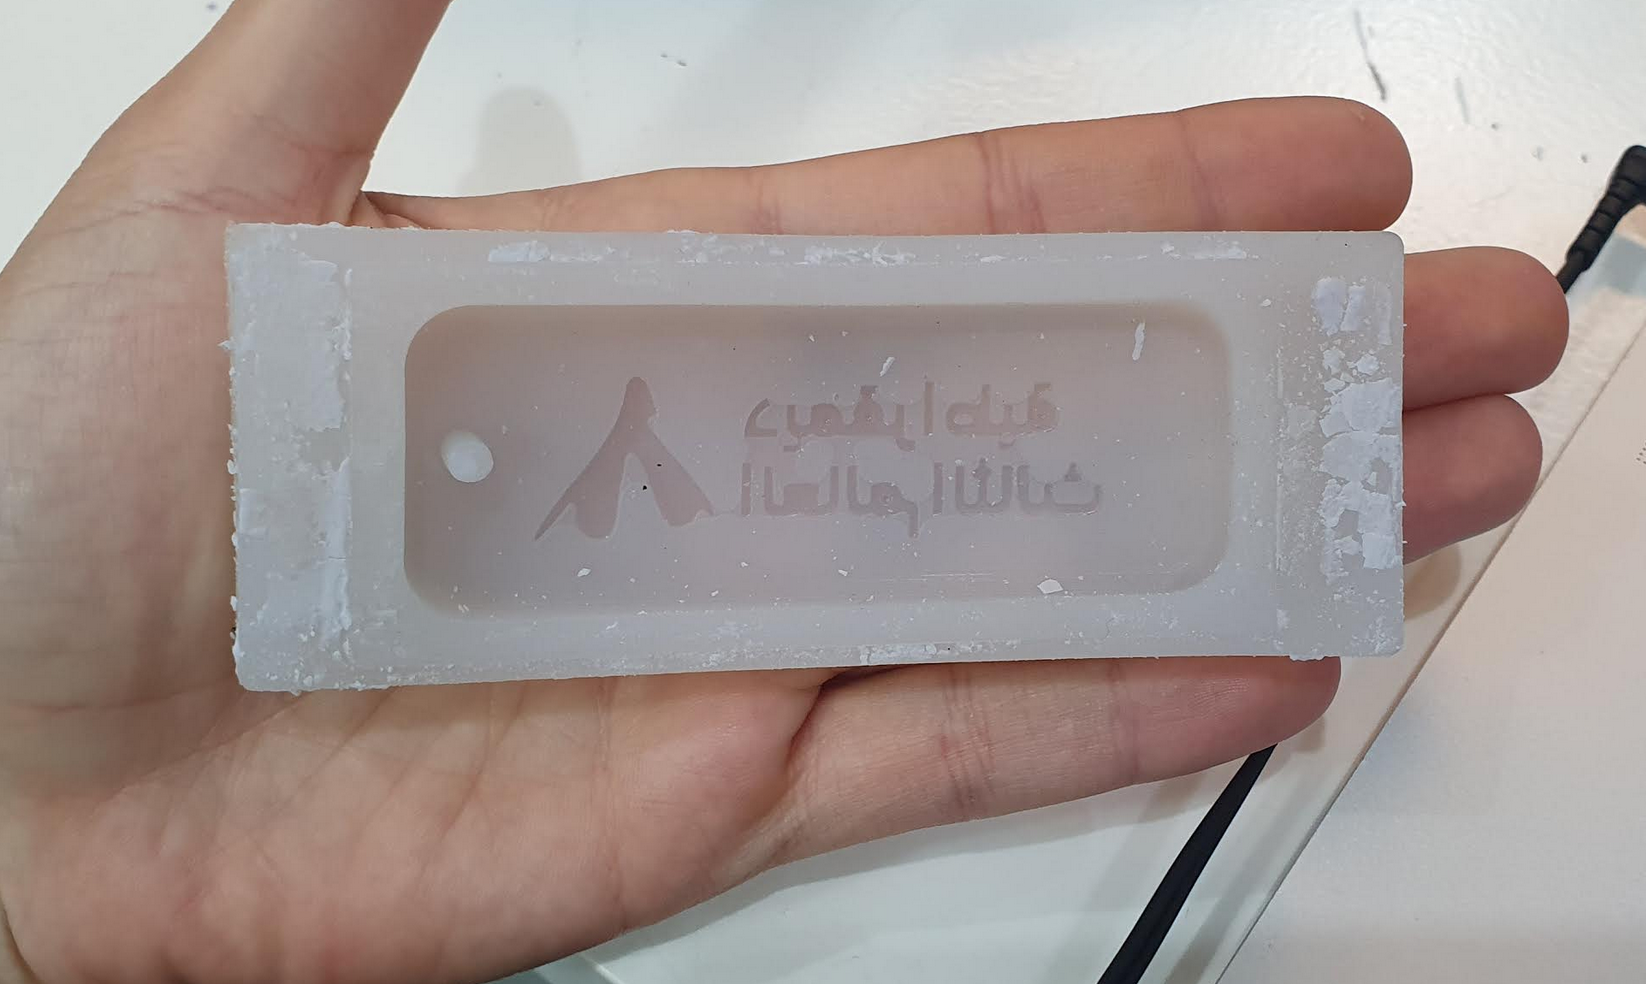
Pouring the Negative Mold
Pouring the silicone into the mold, do not make the mistake I made. SO please:
- pour slowly.
- pour with the mold tilted.
I had to degas with the pressure cook in order to get the air bubbles out.
The curing time of this silicone is between 3 and 6 hours. To make the process faster, i decided to use our ‘pizza oven’.
Since the Wax we use in the lab is a mix of the leftovers of older years, the actual resistance to heat is not precise.
We try to pre-heat the pizza oven up to 80 degrees celsius and then turn it off. This is mainly to avoid the wax melting.
After the pre-heating, I leave my mold in the oven for 30 mins. My mold came out quite fine I would say.
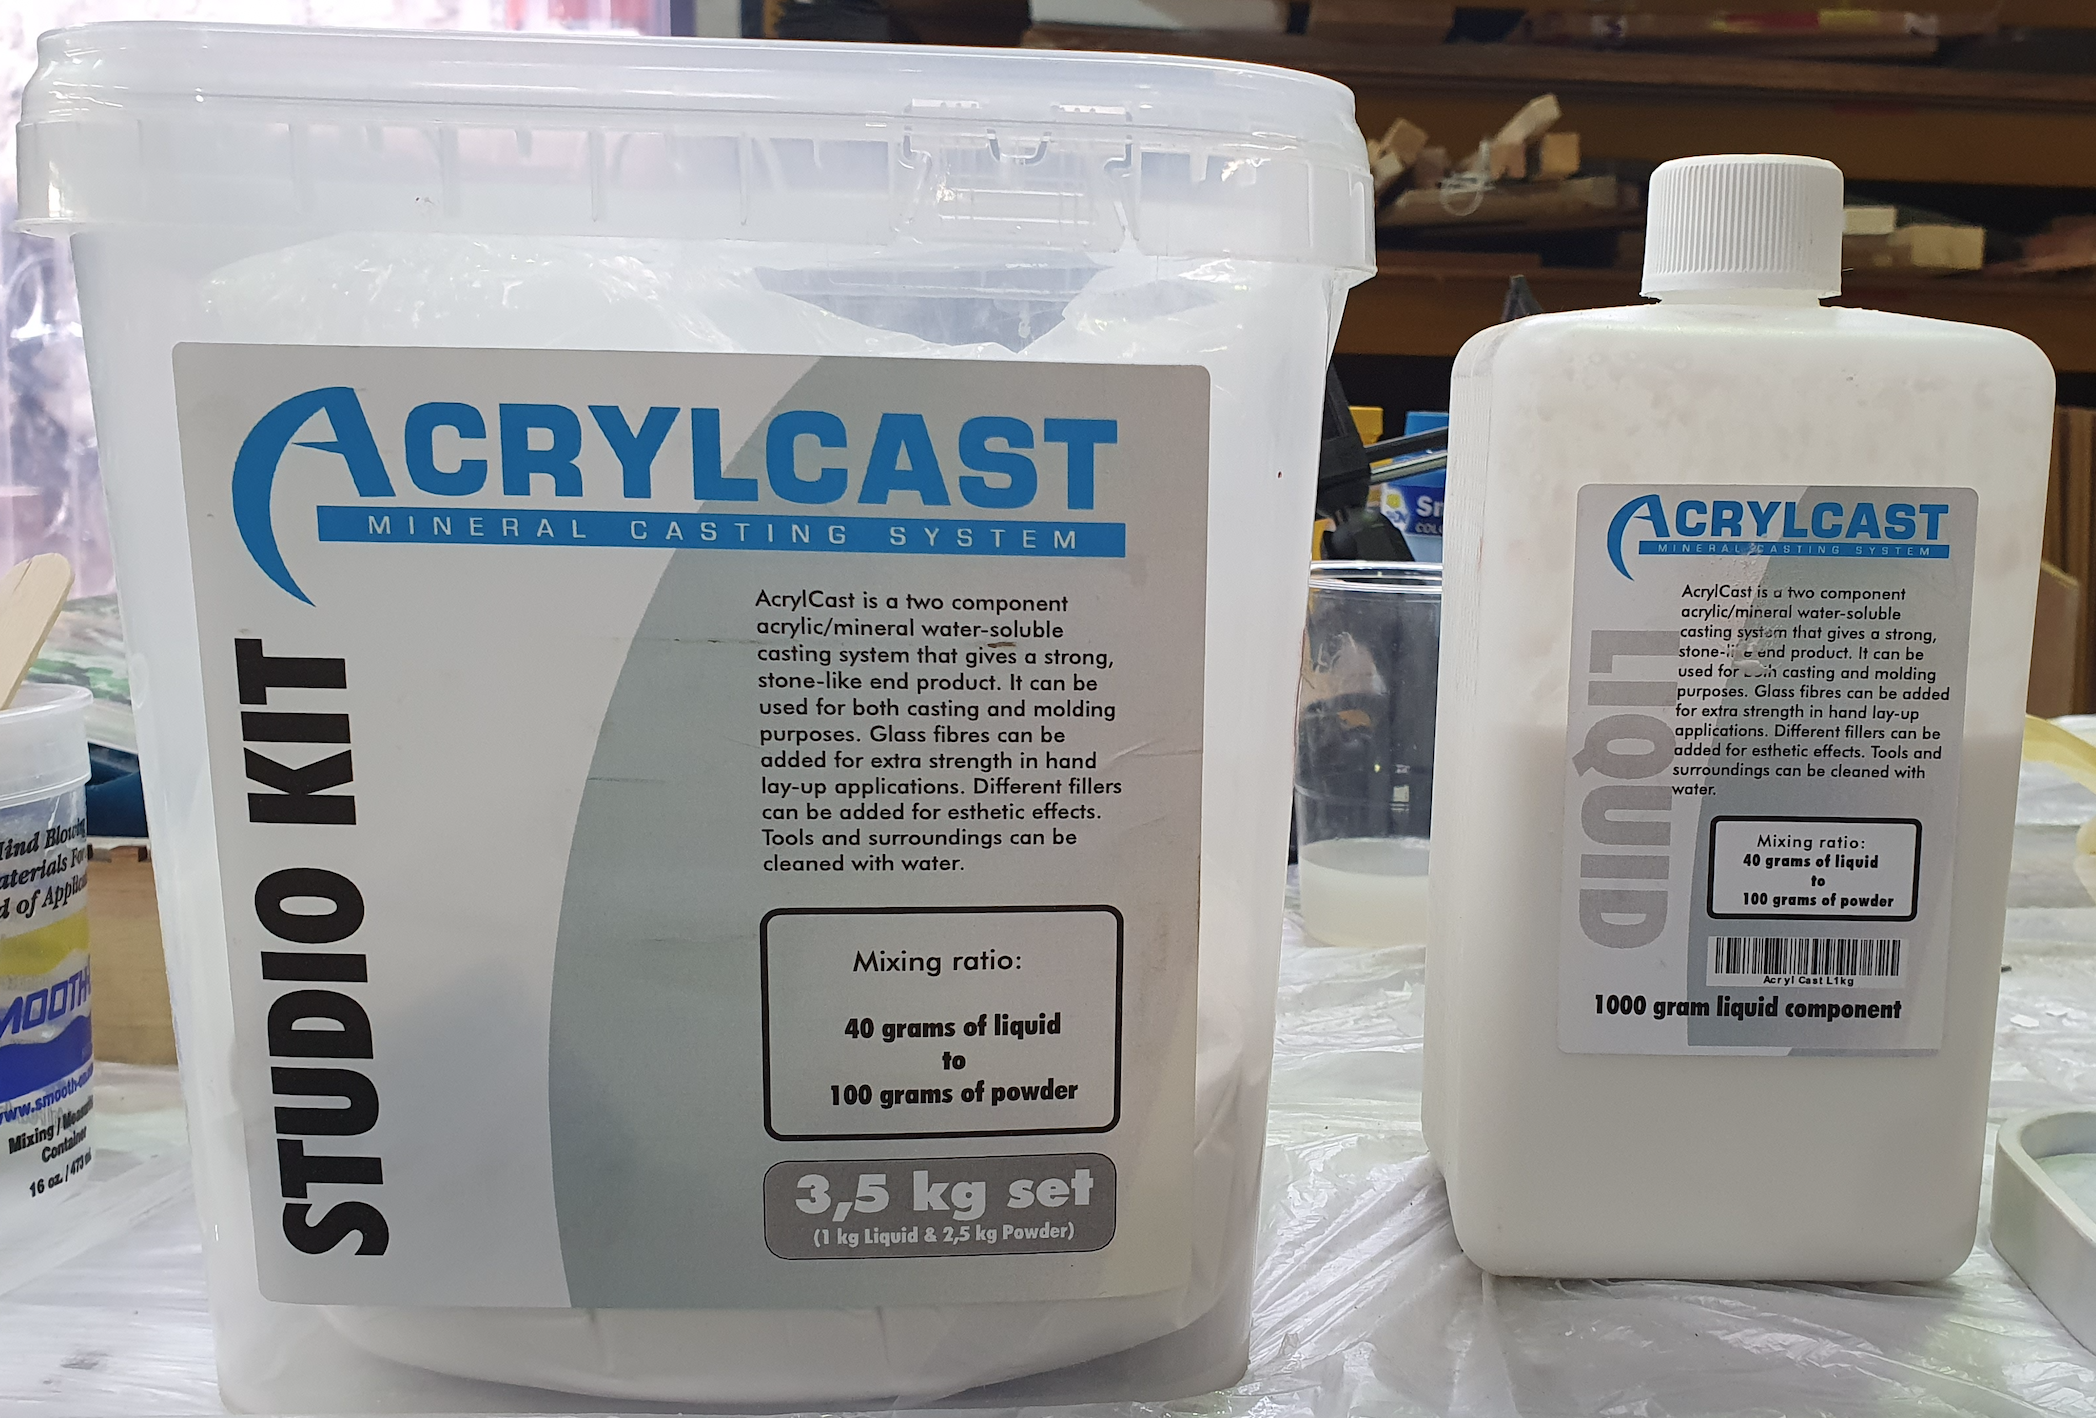
Casting
I wanted to cast my keychain with something quite hard.
So I used the acryplast powder mixed with its liquid solution at a ratio of 4:10, 4 being the liquid.
My instructor Edu told me I can also add more liquid, which will make pot time faster, but will allow me
to fill in the small details.
I mixed the material in a plastic cup using gloves and the glasses, and i add colour to the mix.
I then pour it and try to flatten it with a spatula.

Things to learn:
-
Since Modela is hard to find, I will explore using [Mods] (http://mods.cba.mit.edu/).
Tue’s documentation is a good reference. This entiles having to find parameters specific to the mill being used and the speed of your milling machine. -
Make attention to the distance between details and that they’re not thicker than the thinnest mill being used. In my case it was the 1/32, and i had thinner details.
This could be done directly in 360 by creating cylinders corresponding to the mill sizes.
1/32 inch = 0.79 mm
1/8 inch = 3.175 mm
-
Make sure holes are in a separate process for drilling.
-
Add more liquid in order to allow the small fillings to be filled.
Design Files
These are the final files