05. 3D Scanning & Printing
3D priting is not the funnest nor easiest process. But it is a world, once well explored that allows to create an infinite amount of possibilities.
Group work
This has been taken from Antoine Jaunard phenomenal description of the testing work.
- We picked a test file from Thingiverse in order to test different features of one of the 3D printers we have in Fab Lab Barcelona, the Creality3D CR-10 S5 3D.

This file allows us to test these features: Z-height check, warp check, spike, hole in wall, raft test, overhang Steps 50° - 70°, 2 different extrusion widths: 0.48mm & 0.4mm.
- Slicing:
To be able to print a 3D model, we have to send instructions to the printer, which are written in g-code and tells the motors where to move. To prepare the g-code, we have to slice our 3D model (.STL), to simulate and anticipate how the model will be printed, according to the printer settings and gravity law.
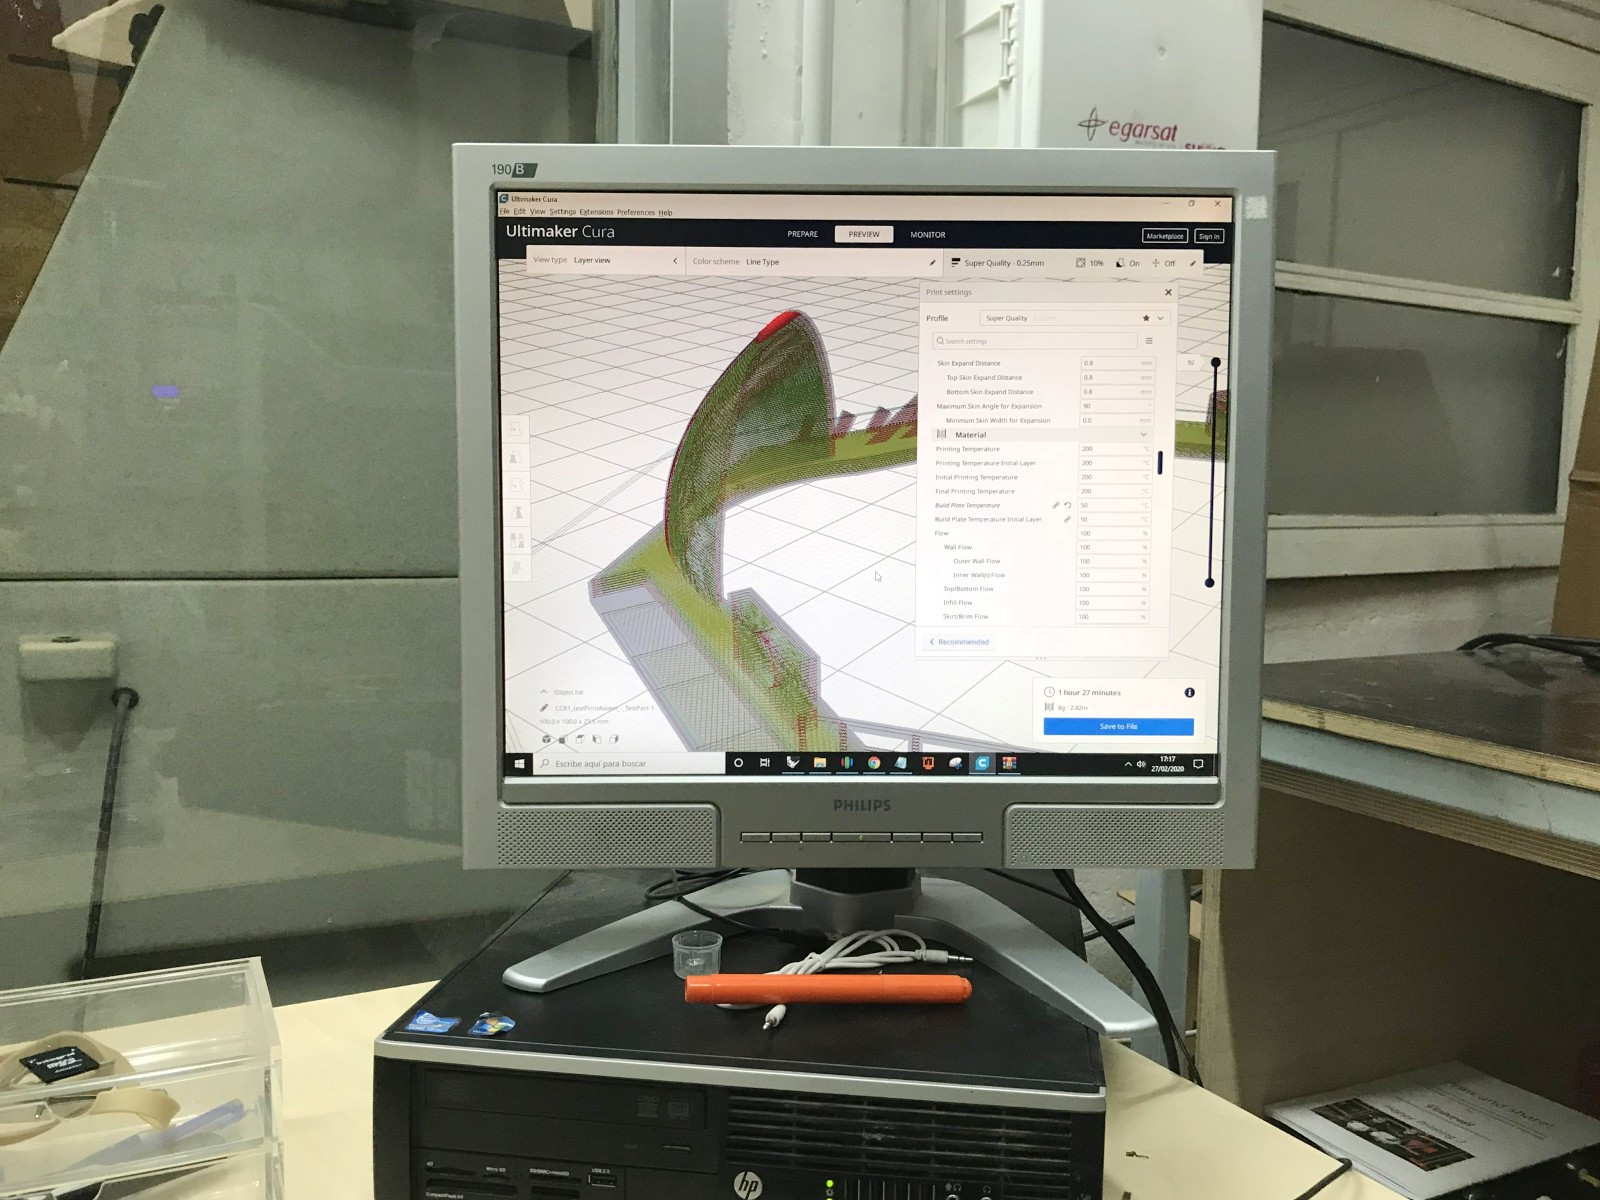
At Fab Lab Barcelona, a computer with Ultimaker Cura is attached to the machines, with all the presets of the differents printers saved in it. It’s therefore easier to directly use it in order to slice our model instead of searching the presets and install them on our personal laptop.
Specific settings
layer height: 0.25mm
Wall thickness: 0.8mm (= 2 lines)
Infill: 10%
Print speed: 60mm/s (= maximum for this printer)
- Printing:
The filament we use is a PLA 1.75mm
It’s a plant-based material made from starches like soybeans or corn. It needs to be heated at 190-200C° to be used.
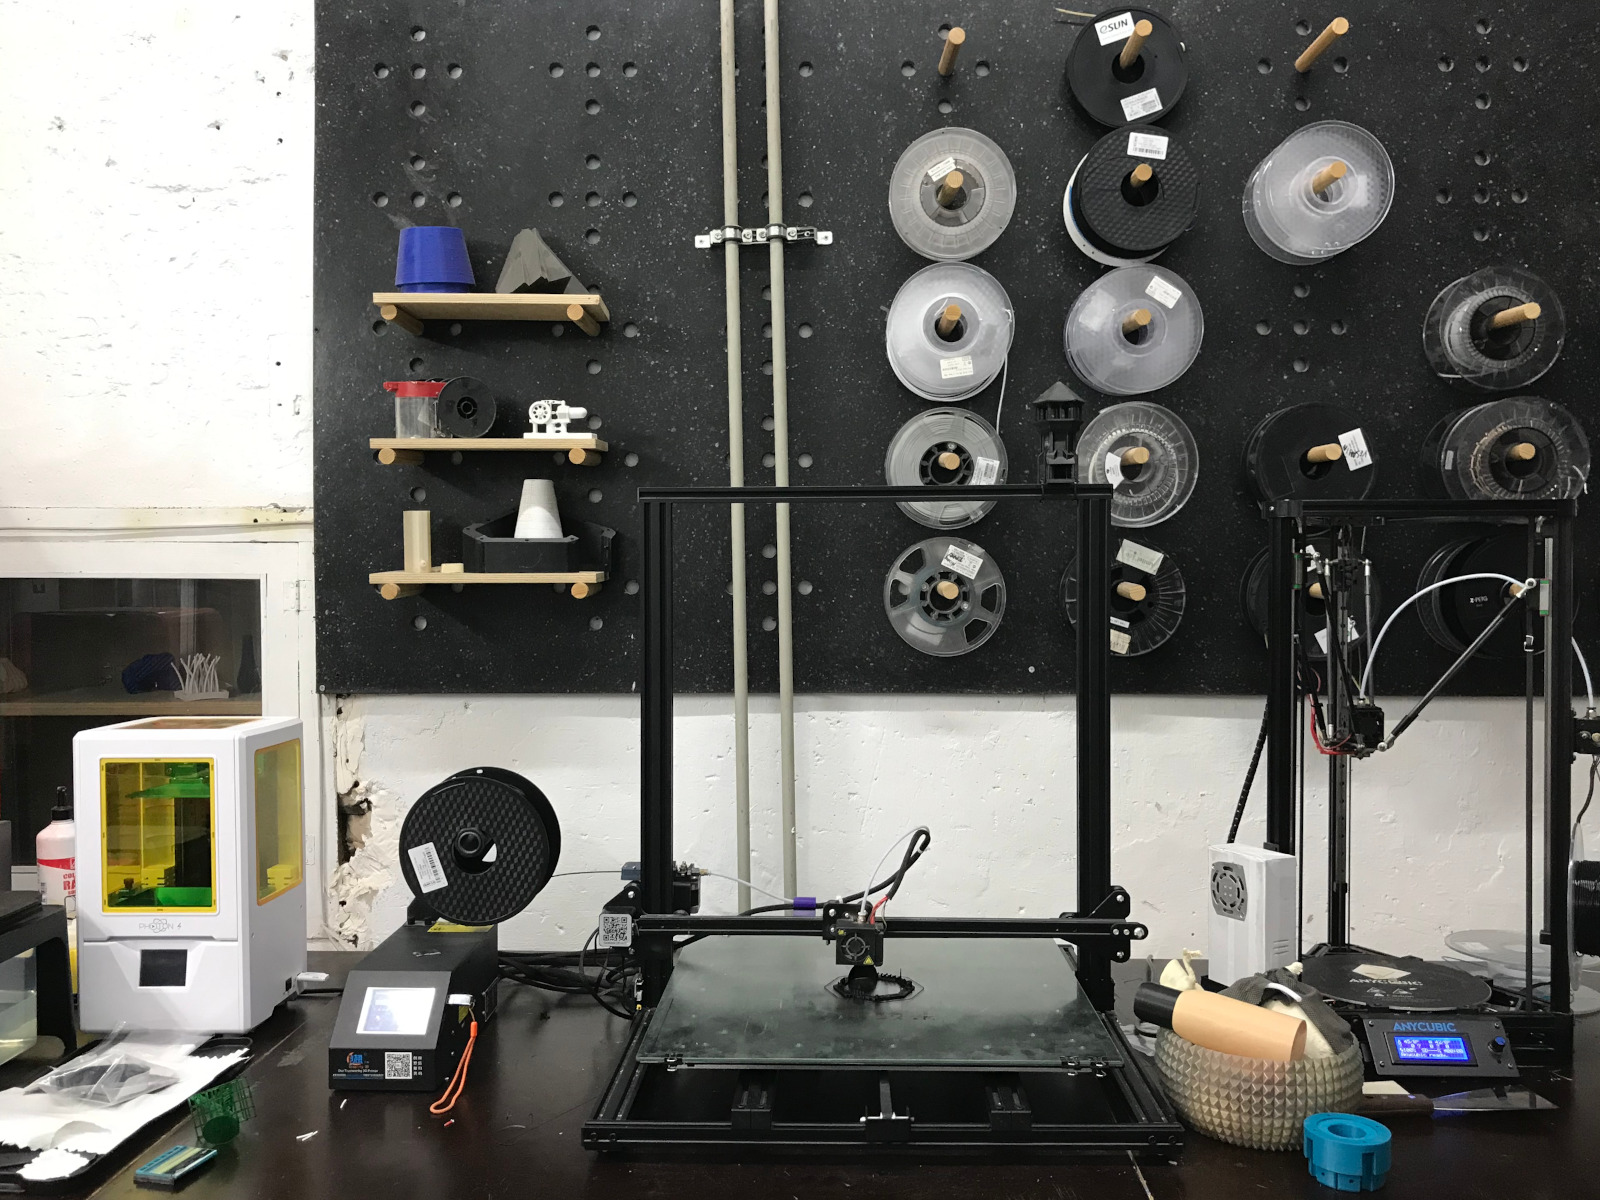
The printing was done in ~90 minutes without any troubles.
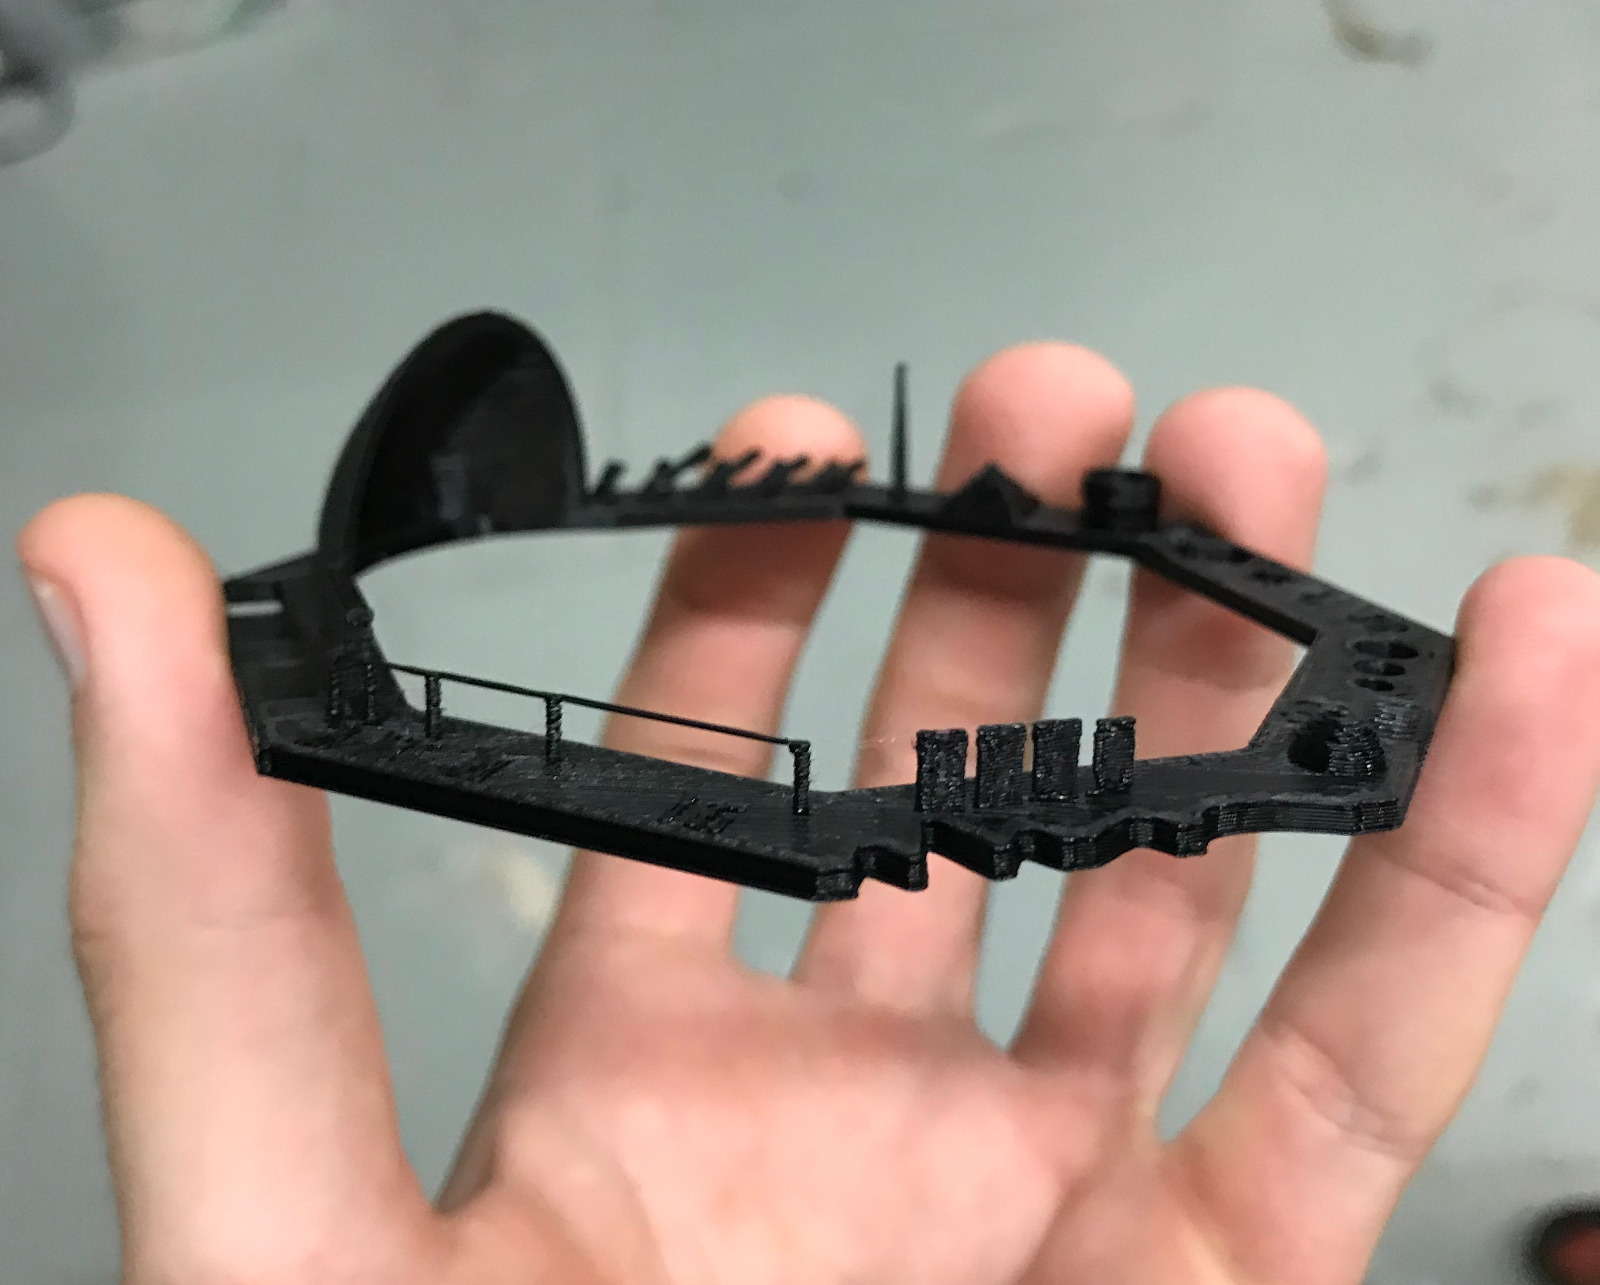
- The result:
As we can see in the images above, the definition of the print is quite good, the details are respected and the print angles can be large (in fact more than 45°). Even the small bridges without support were printed correctly. I am very satisfied with this test and the new possibilities that it lets us see.
3D Scanning
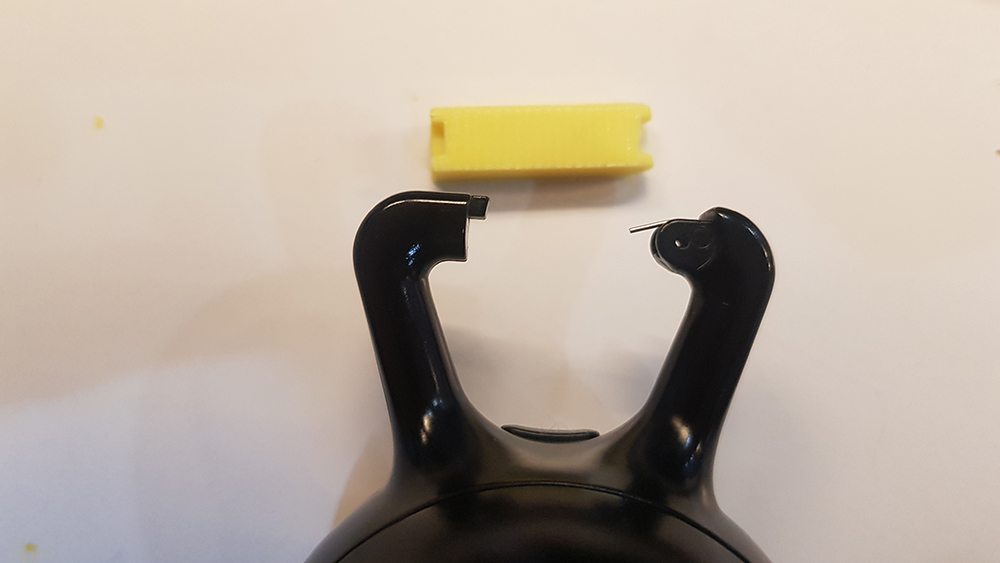
I decided to fix the hanger of my wireless earphones charger.
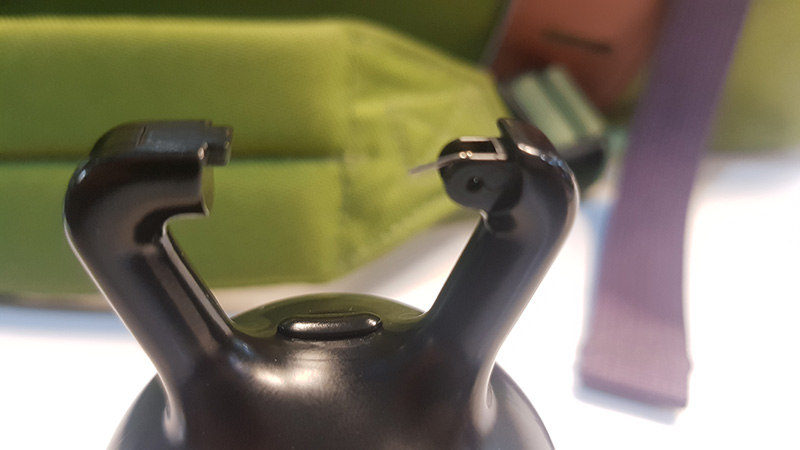
In terms of distances, I used our friend the caliper to get the distances.
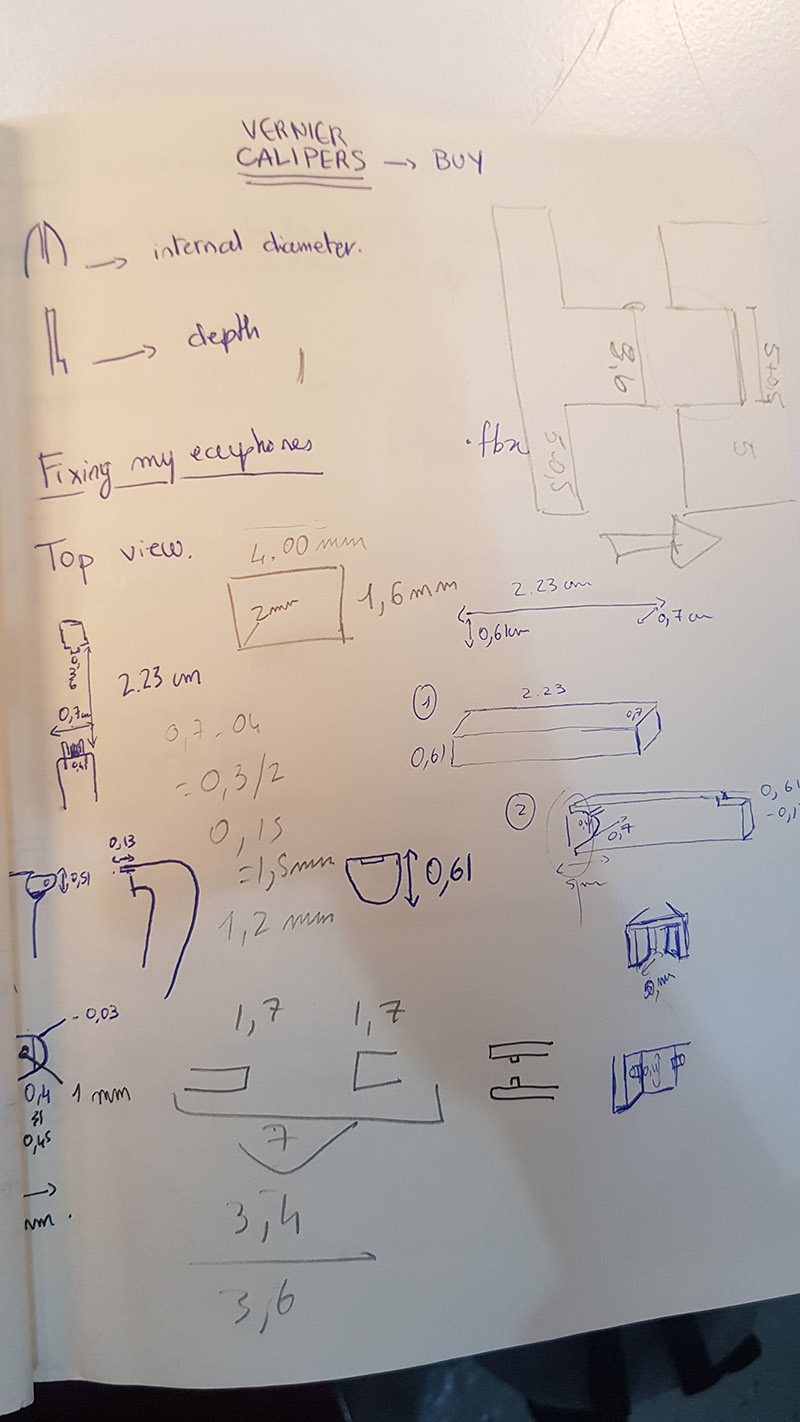
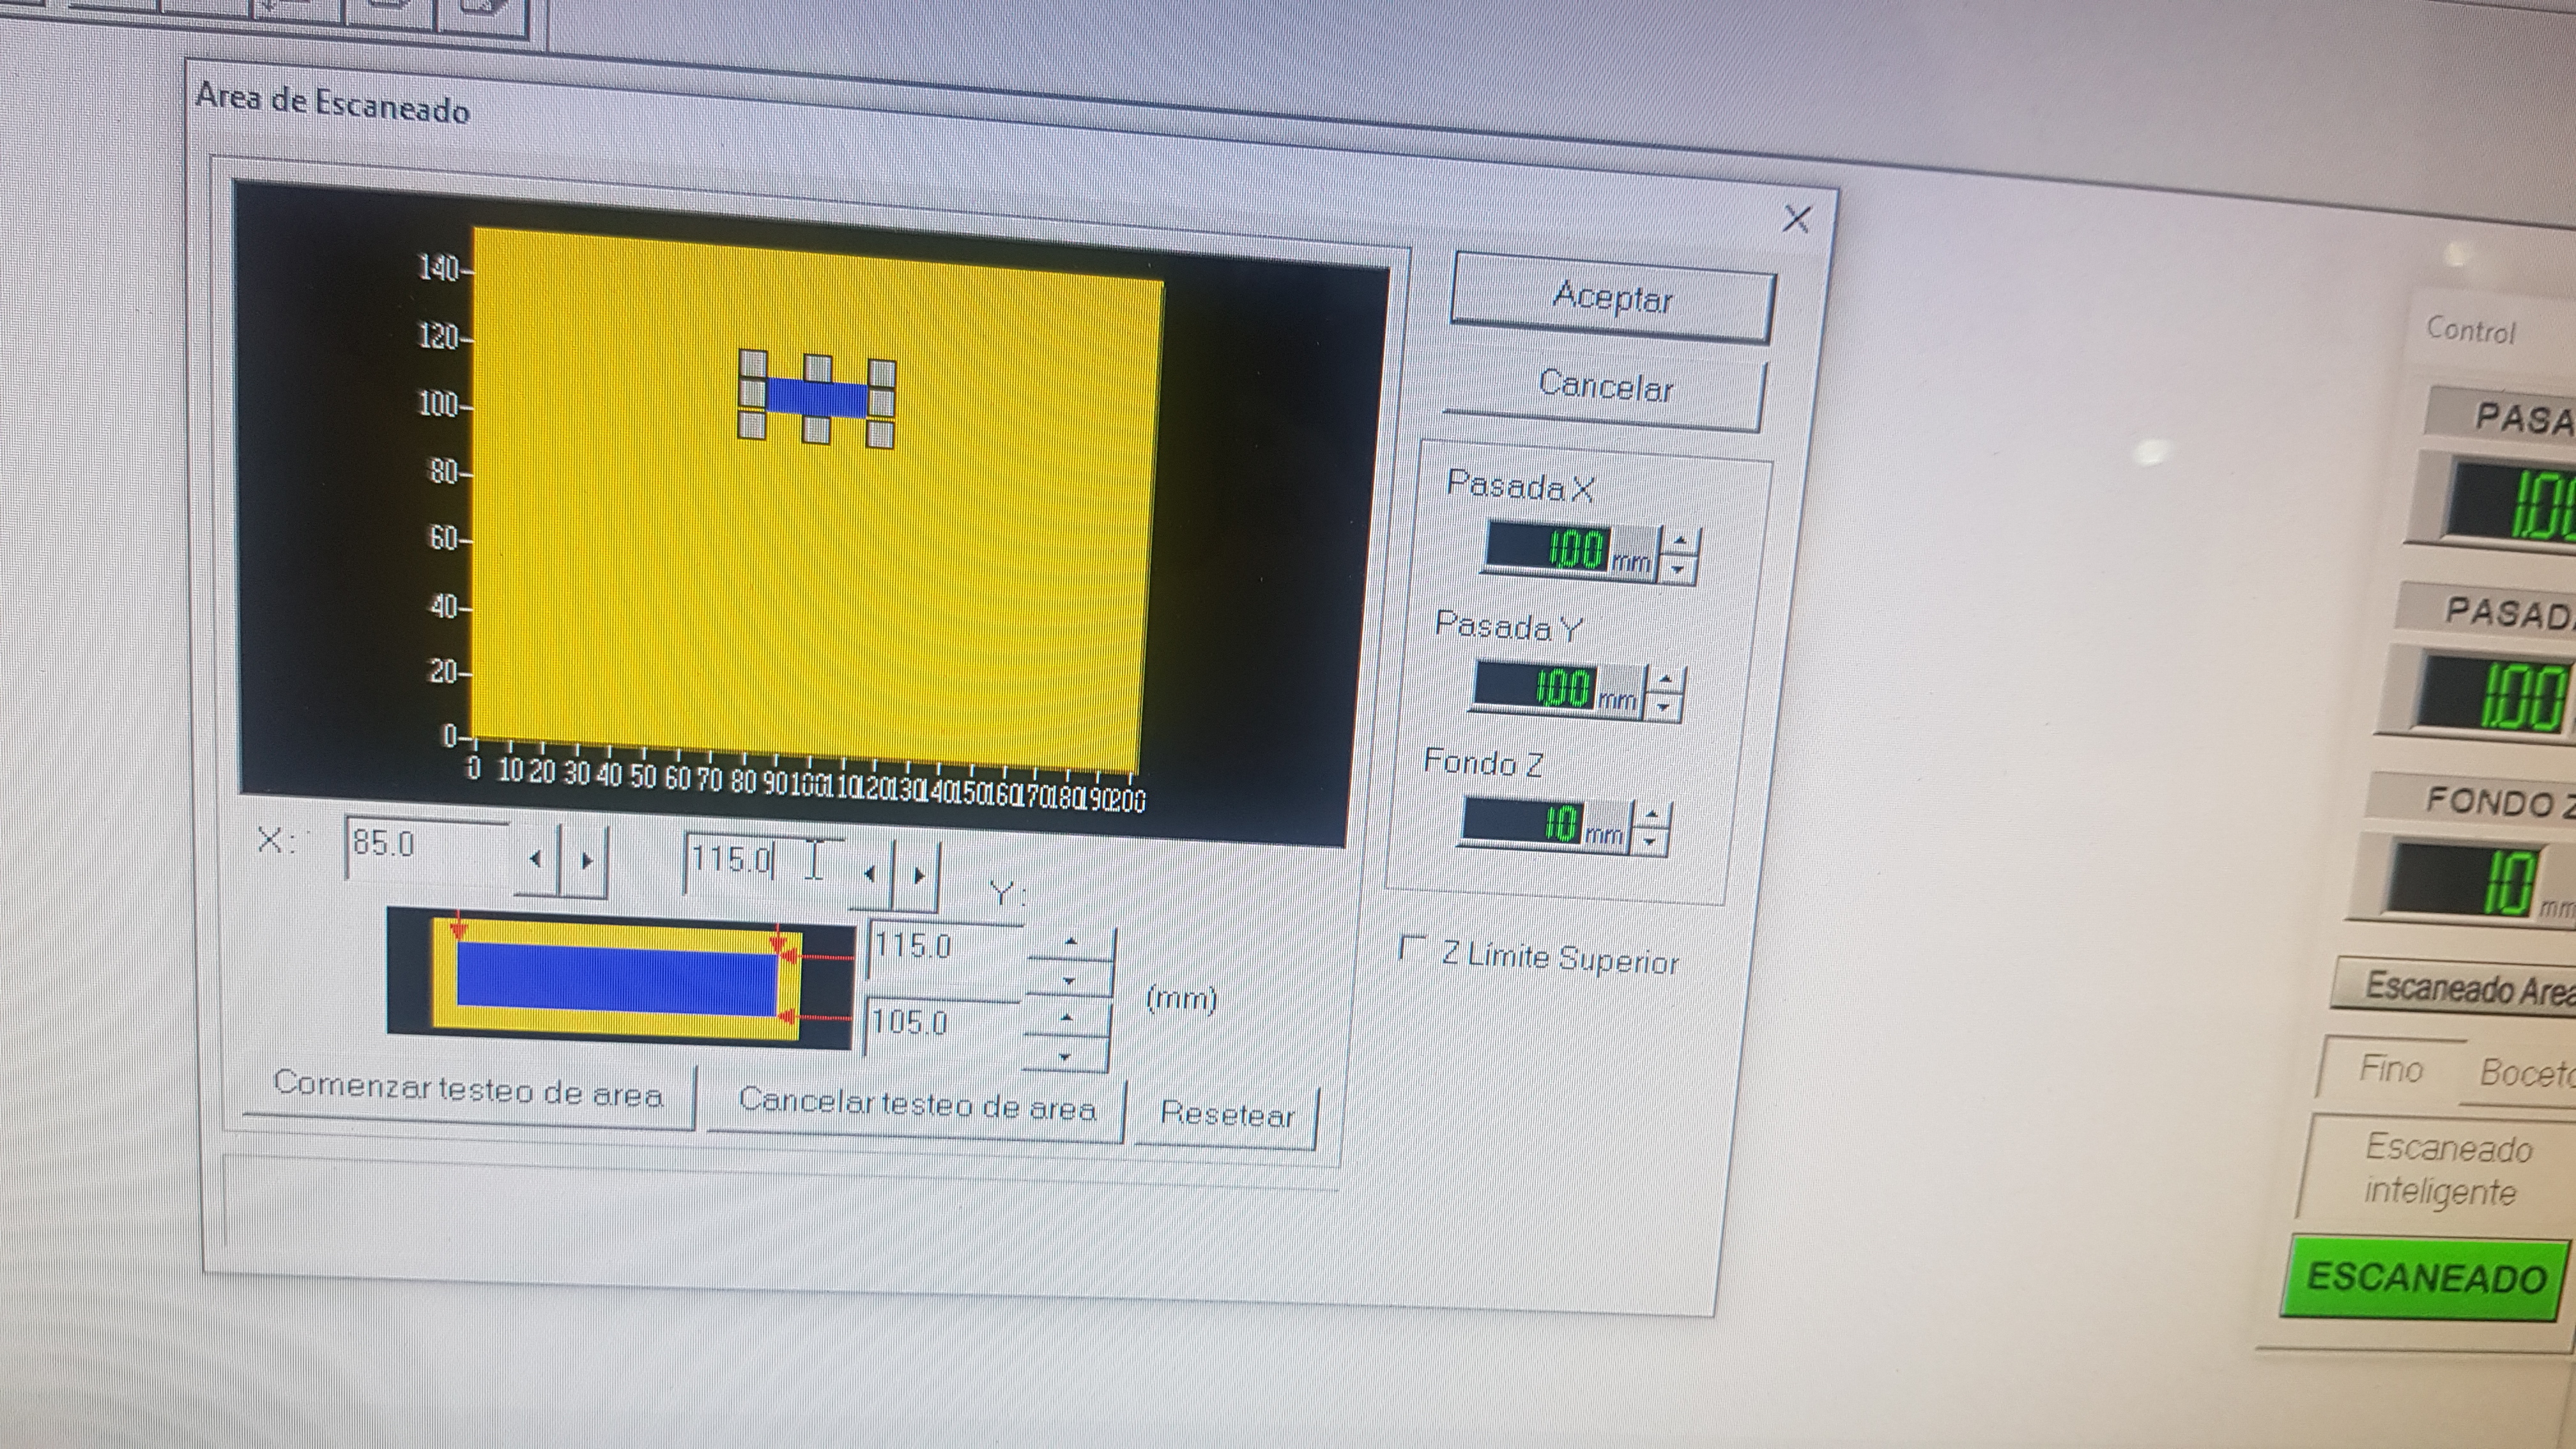
But to do some of the angles & curves, I tested the scan. I used the MDX-20 to scan this part.
This way, I can see better the curves of my part. The scan is a 2D scan.
- Specify the scanning area: I had to specify the periphery that the machine had to scan by measuring the X 7 Y in mm.
-
I measured as well the lowest Z point in order to specify for the machine where to scan.
-
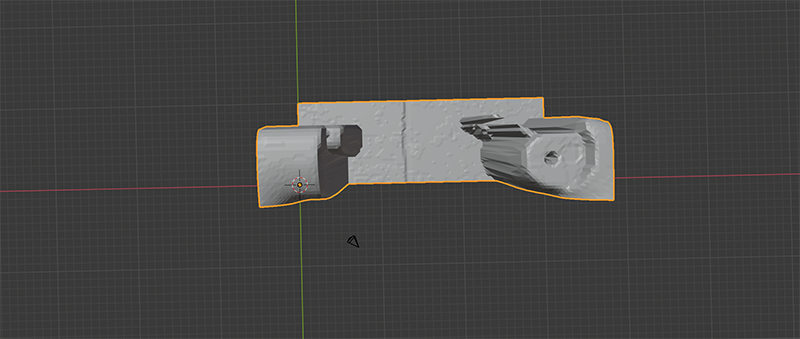
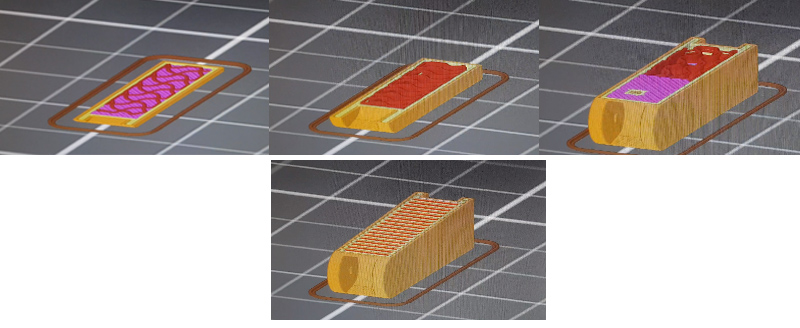
The scanning starts. The lines shown on the preview are quite random & I do not understand what they mean until I export to
.stland open in blender.
- I get this form in blender. The file is not on the scale of the scan. I find it hard to know how to handle blender to get the curves at least to reshape my missing piece.
-
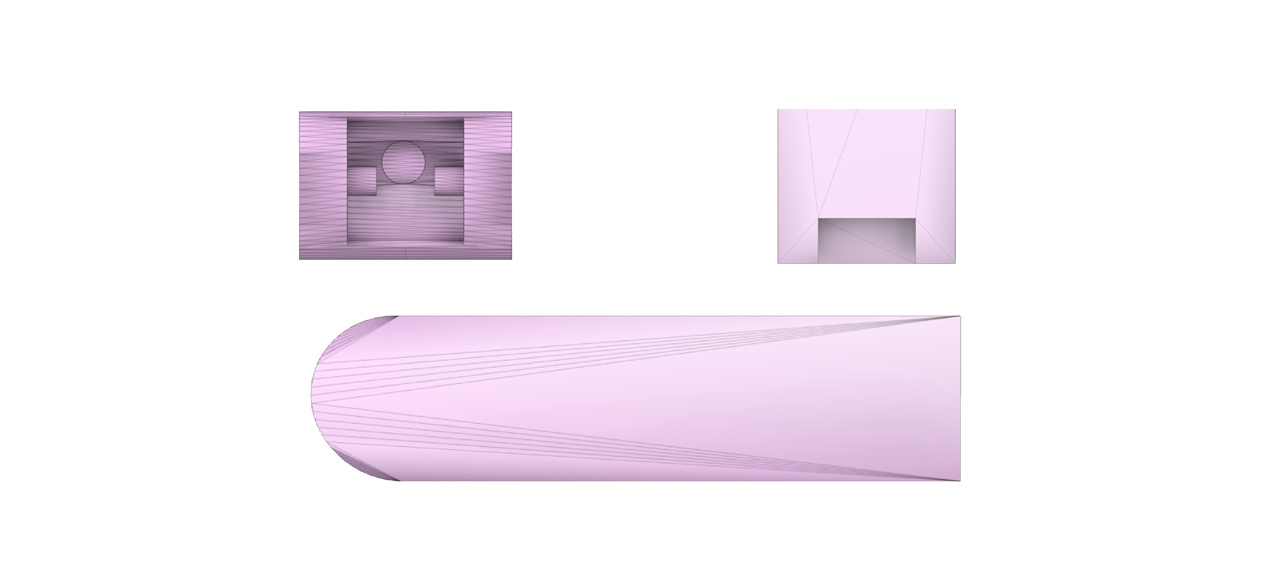
I use a screen capture in order to reconstruct the curves in illustrator. I export as. svg and import to fusion360.
-
I then reconstruct the missing piece using Fusion360.
Note to self: check out AWS for cloud computing to use something like the Kinect camera.
3D Printing
- To print my piece, I export the file to
.stland open it on Cura Prusa
I decide to use the Prusa 3D printer. Since my piece is very small with some details, we use a layer height of 0.2 mm & remove all infills. I used a PLA filament.
Specific settings

layer height: 0.02mm
Print speed: 60mm/s (= maximum for this printer)
The first result has some lessons: - the hole for the needle to fit was too small. - the piece was too big.
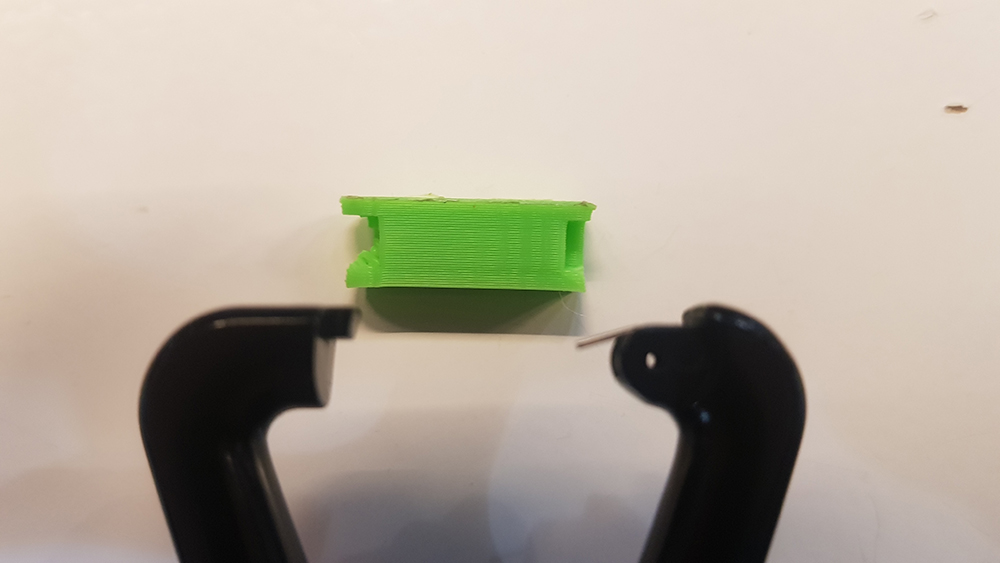
- My second try is with the anticubic 3D printer.
Specific settings

layer height: 0.02mm
Print speed: 60mm/s (= maximum for this printer)
The second result has some lessons: - The orientation led to the internal part melting. - the piece was too small
The reason why I need to do this piece in an additive way is because of the details within the piece that cannot be cut due to the orientation. The problem though is that the details were too small the material was too stiff to be fitted within the charger.
Working files
- STL working file here
Learnings
- 3D printing is amazing once well explored. It is hard to create something based on such small measurements and making it fit.
One way of doing it would be to use soft PLA or TBU.