Week 18
Wildcard Week
MOOD OF THE WEEK

It feels like the end, last real assignment for the Fabacademy... Let's try to enjoy it as much as possible :)
Since it's a wildcard week, we have to test new stuff we haven't tried yet. I don't really want to think, I have too much to do to catch up how I'm late.
I'll do the thermoforming like the others, since it looks nice and new :)
Wildcard week
This week's assignments :
- Group assignment
- No group assignment !
- Han Solo assignment :
- Design and produce something with a digital fabrication process (incorporating computer-aided design and manufacturing) not covered in another assignment, documenting the requirements that your assignment meets, and including everything necessary to reproduce it.
Han Solo Assignment
Step 0: choosing a new technique
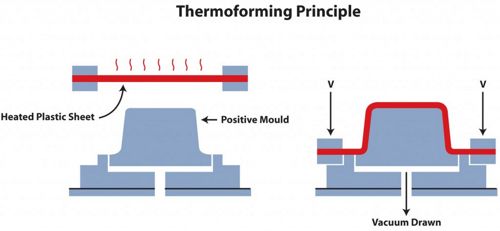
This week I'll try thermoforming. What is it ?
Thermoforming describes the process of heating a thermoplastic sheet to its softening point, stretching it over or into a single-sided mold, and holding it in place while it cools and solidifies into the desired shape. The thermoplastic sheet is clamped into a holding device and heated by an oven using either convection or radiant heat until it is softened. The sheet is then held horizontally over a mold and pressed into or stretched over the mold using vacuum pressure, air pressure, or mechanical force. The softened sheet conforms to the shape of the mold and is held in place until it cools. The excess material is then trimmed away and the formed part is released. Excess material can be reground, mixed with unused plastic, and reformed into thermoplastic sheets.
Step 1 : do a first test
Before doing our own stuff, we tried understanding and testing how the process works for the thermoforming machine we have here. Luc gave us some nice documentations to read before going :
| Name of the documents | Link to website |
|---|---|
| Spec sheet compac mini | https://formech.com/wp-content/uploads/Spec-sheet-Compac-Mini.pdf |
| Vaccum forming guide | https://wiki.imal.org/sites/default/files/vacuum_forming_guide_200715_digital_version.pdf |
| Chocolate molding ! (once you've done the mold in thermoforming) | https://wiki.imal.org/project/chocolate-molding |
Here is what our thermoforming machine looks like :
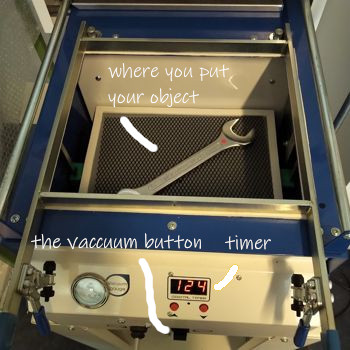

We decided to try thermoforming a fork key ! And it worked pretty well :) The vaccum process is fun to watch ^^
We need to practice a little to make it really work well, but still good to go !
Step 2 : designing something to vaccum form ^^
I had some hard time finding an idea, but then I saw Leo doing a pill organizer for his electronic components. Good idea ! I'll do mine :)
To do the 3D quickly, I used Tinkercad to make my design. Here is what it looks like :
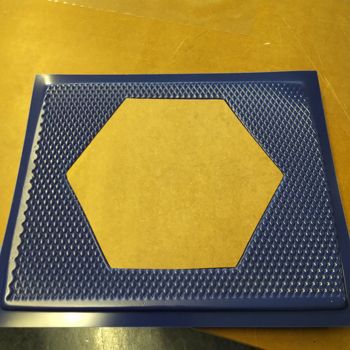
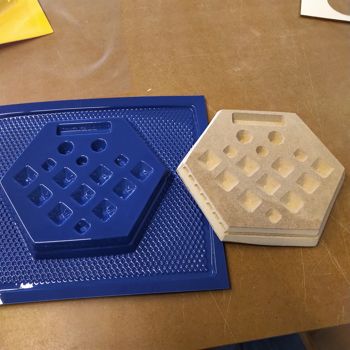
I then used the ShopBot to mill the form into medium wood. I had to be careful and check that my form has at least 5 degrees angles. Otherwise it will be too difficult to unmold after the thermoforming.

Step 3 : starting to vaccuum form stuff :)
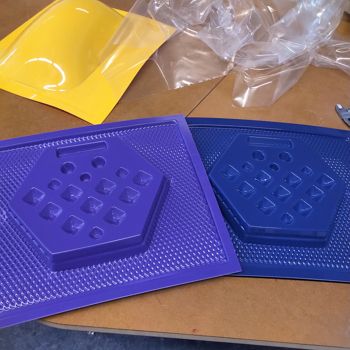
Now that I have my shape, I can do my first tries on my own. And it worked pretty well ! :) I tried twice, end got pretty happy with the results. It gives me a lot of ideas for other fun small projects :)
Meanwhile, here's what my components organizer looks like :)
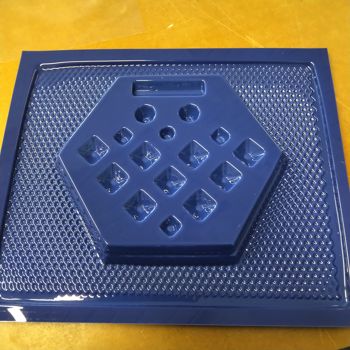
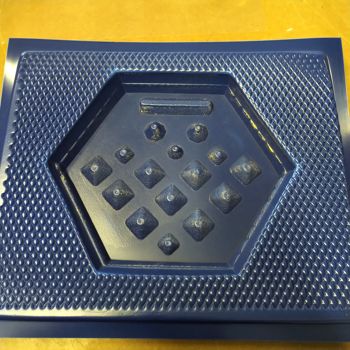
And with components in it :)
BONUS TRACK
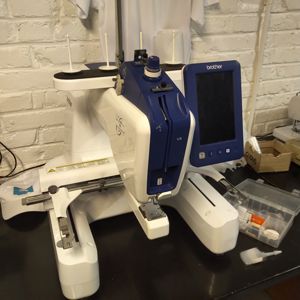
Since I had some time left for this week, I went to my former job's Fablab to try their digital embroidery machine.
I've been wanting to try it for a while, and never got the time. Now is my chance :) It's a cool machine but a pretty sensitive one. Every step needs to be done carefully so it won't break or waste your embroidery.
The one I used here is a Brother VR. Here is the documentation for the machine : https://download.brother.com/welcome/doch100508/vr_som02eu_en.pdf
Step 0 : discovering the machine
What is the point of using a machine to do embroidery ? There are several advantages in using a digital embroidery machine.
- Time: since the hand gesture is replaced by a machine, this one does your embroidery way faster (up to a 1000 stitch per minute).
- Regularity: the machine does its own calculation and fills your embroidery with regular stitches. The lenght of the stitches are really regular.
- Accessibility: the machine definitely gave acces to embroidery to the general public.
Step 1 : creating a design for my embroidery
You have to download a software called PE Design in order to make a file the machine will understand. In order to make it simple, I chose a design I found online. I'm using the version 7, but it's not the last one. Here is the interface :
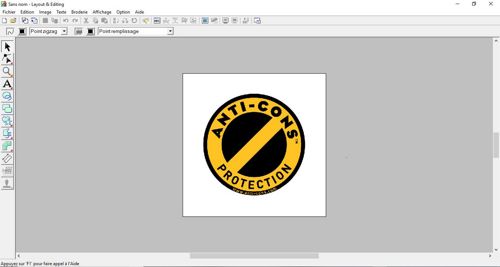
You need to upload your design, it can be a jpeg or a png. If you want, you can also do the design directly in the software.
In order to draw what you want, there are some drawing and text tools on the left panel of your interface.

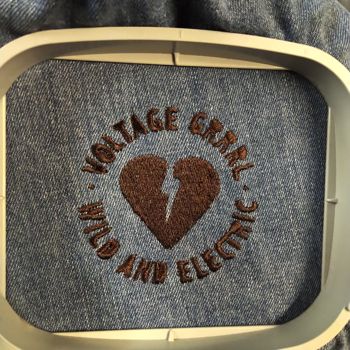
Here is what I drew in the software :)

Now that the design is done, you just have to save your file in a Tajima format (.DST), then do the settings on the machine. Here we go !

Step 2 : doing the settings of the machine
It is not that difficult to install the sewing thread, but you have to follow carefully the instructions and the labels on the machine. They will indicate you where you should put it.

The procedure is a bit long to explain and well described in the documentation of the machine, don't hesitate to check it out if you want to know more :)
You have to install the prewound bobbin. It is the bobin that will be used by the machine to make the stitches. Without it, your thread will only pass through the fabric and won't stay.
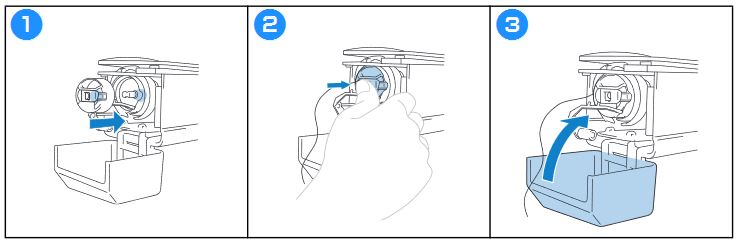
Removing the bobbin case
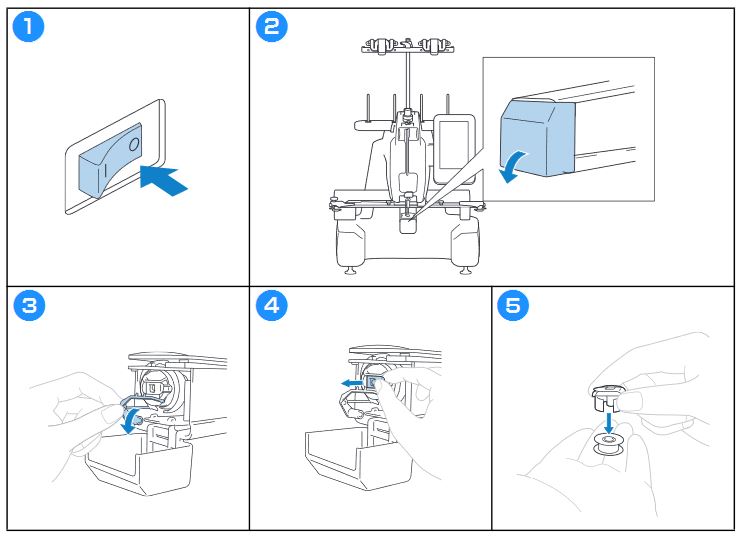
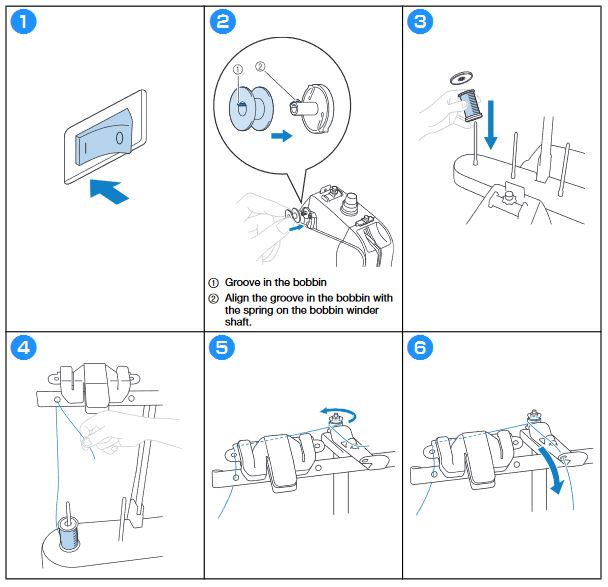
Installing the bobbin
Installing the bobbin case
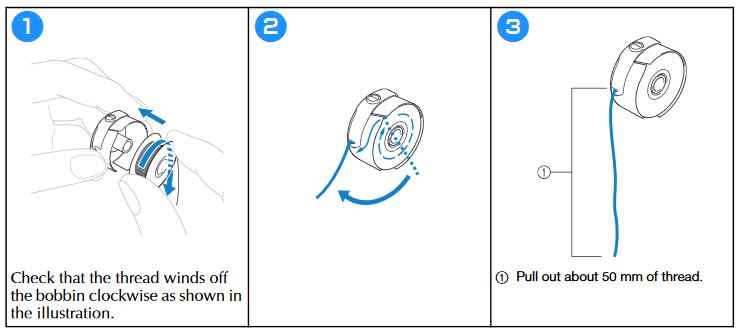
Winding the bobbin
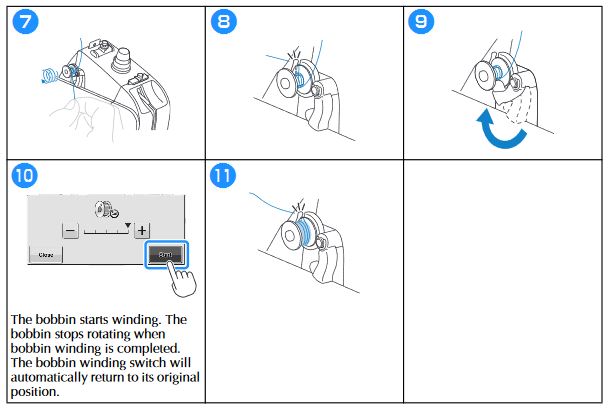
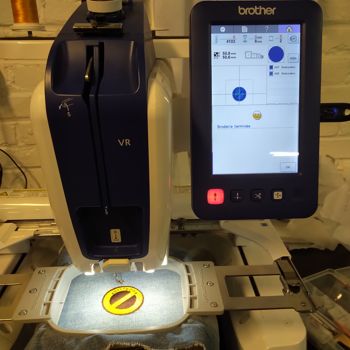
Once you've done all this, here is what your machine should do during it and look like at the end :)
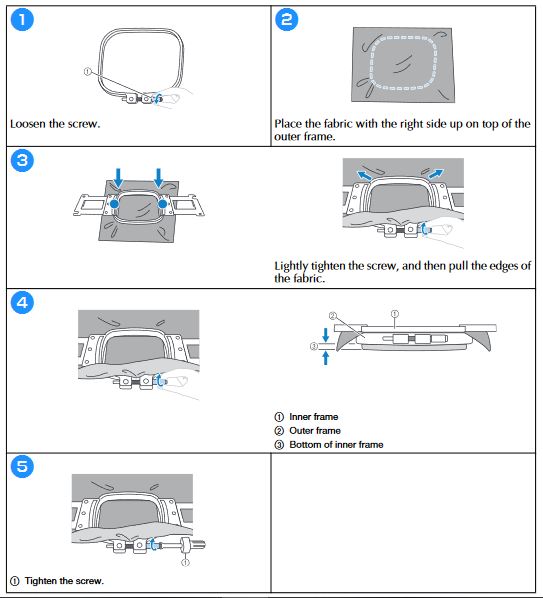
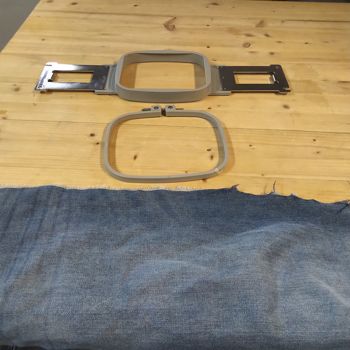
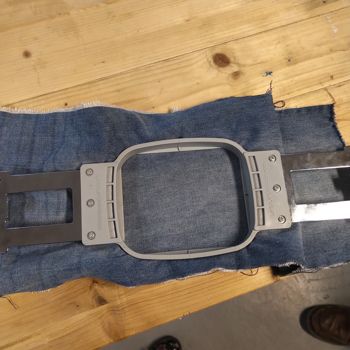
Setting up the frame
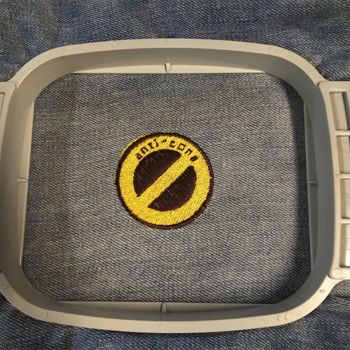
Now, we have to install the frame with our fabric in the machine. Here is the procedure and the pictures from the result you should obtain :)
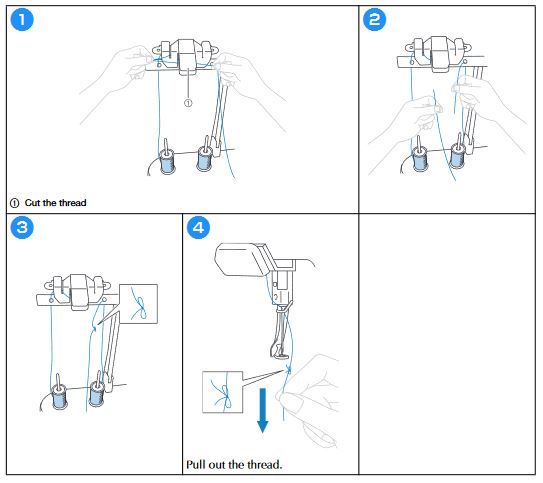
Setting up the upper thread
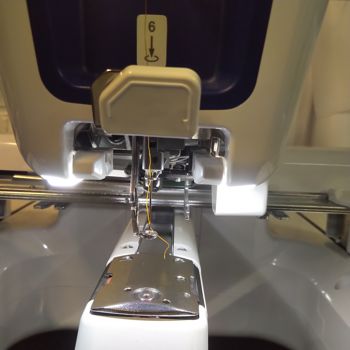
Now you have to install the upper threading and thread the needle before launching your design. In order to do so, you have to follow the labels on the machine. It's pretty easy but I had to be careful all the way cuz if I forget a step, I can break the machine !
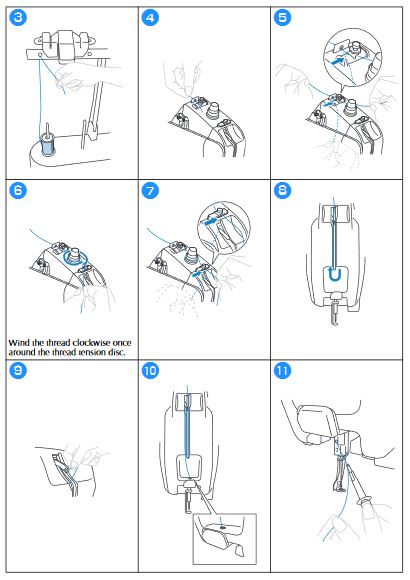
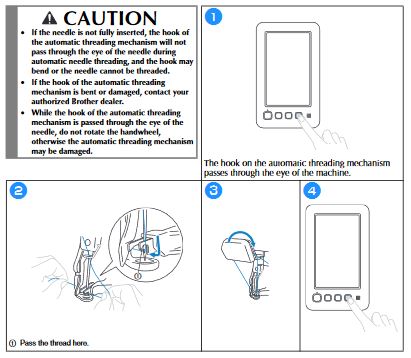
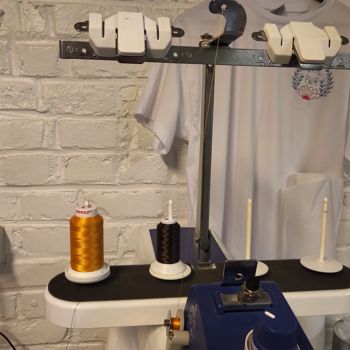
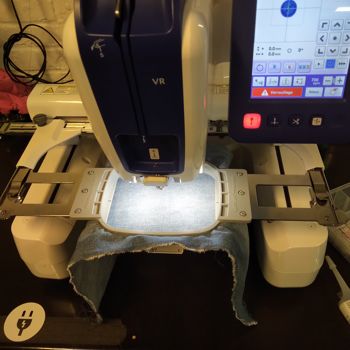
Once you're all set, here is what your machine should look like :)
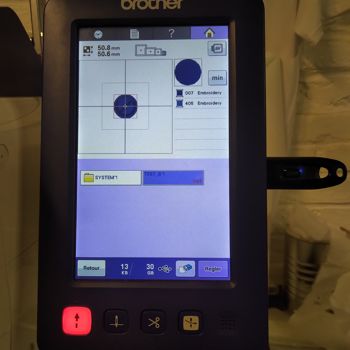
Starting/stopping the embroidery
Starting the embroidery is pretty simple. You just have to select upload your design in .DST format in the machine through an USB key, select it and press the right button :)

As I said before, the machine is pretty sensitive, so always stay close to it when it's working so you be sure to stop it if needed !
Changing the thread
If you do a multiple color embroidery, the machine will stop after it has done its first color and you'll need to change the thread manually during the process.
Here is a video of the machine working :)
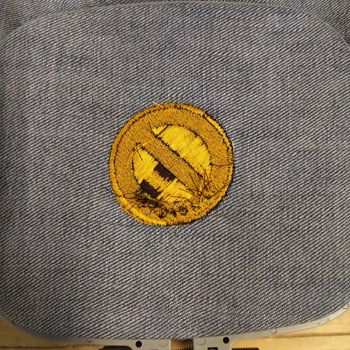
And here is the result ! :) I'm pretty happy with it, like the thermoforming, it gives me a lot of ideas ! :)
BONUS BONUS TRACK : Working on my final project
Like I said before, the end is near and it's time to work on this final project. I had big expectations at first, but then I realised that I have no time for my first idea of project. So, I have to change for something more realistic.
I'm gonna do something with lights, but something that remains pedagogical :) I want to do a beautiful portrait of a great woman that marked the history of programming : Grace Hopper.
Here is the drawing I made that I want to integrate and will inspire my final project. I think I'm gonna play with Charlieplexing, I started doing some research but I'll go deeper into it in the week to come.

This week I did some test with the laser cutter, wood and plexi. It helped me seeing more what I want to do. Here are the results of my "researches" :)
EASTER EGG : Having fun :)
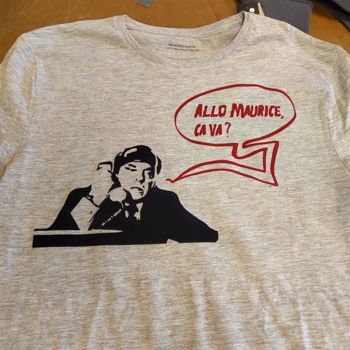
Just to show you, I made a new t-shirt and finished teaching a friend how to make an expoy table :)

Wanna try by yourself ?
Here are all the links to my files, feel free to download them :
| Name of the documents | Link to download |
|---|---|
| Tinkercad file | Pill organizer |
| PE Design files | Test brodeuse - "anti-cons" |
| PE Design files | Test Voltage Grrrl |