Week 11
Hello Input !
MOOD OF THE WEEK

Those past few weeks have been quite a long and painful journey. Feeling quite alone, always on a different shift than the others. So many weeks that I didn't succeed to catch up.
After last week, when I found out that I had to start over my molding and casting (a week that I found pretty easy), I was reaaaaaally depressed.
But this week felt surprisingly good ! Had some time with Adel and Leo, who explained to me a bunch of stuff that helped me understand way more better how to properly machine my boards and how the components work. This allowed me to catch up some of my delayed previous week and have, for once, something to show on an electronic week :)
Input
This week's assignments :
- Group assignment
- probe an input device's analog levels and digital signals
- Han Solo assignments :
- measure something: add a sensor to a microcontroller board that you have designed and read it
Group Assignment
Here is the link to our documentation for the group assignment : http://fabacademy.org/2019/labs/sorbonne/group_work/3D-print/
Han Solo Assignment
Catch me if you can
Another electronic assignment, at my despair. I can't move on since I haven't even done yet my Hello Board from week7. Let's try not to give up yet and machine it again !
To see the schematic and the design of my board, go to week 7 :)
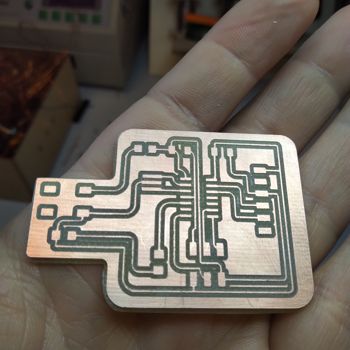
I think this is what you call progression ^^
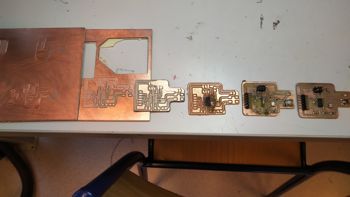
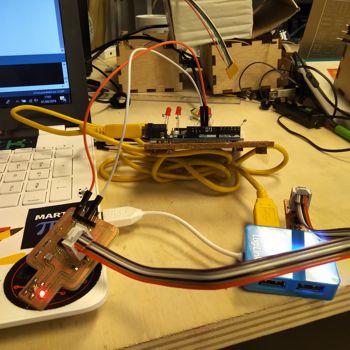
I soldered all the components on it, and succeeded in programming it with Arduino and the FabISP. Here's two weeks in one ! I'll write down what I did in the weeks associated.
I succeeded but it was not effortless. I had some trouble connecting my board with Arduino. I just wrote a simple blinking program and tried to upload it on my board.

I did some errors on the soldering with my Attiny and my ISP, and got my crystal wrong... Had to review some basic primary math program : apparently 8mhz is not the same as 20mhz ^^
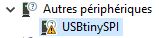
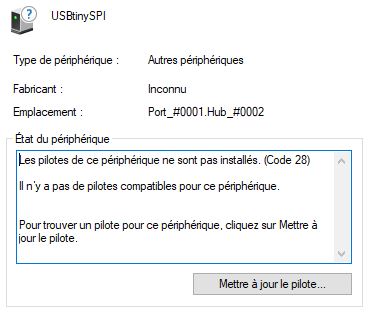
A little tip for Windows Users : when you use the FabISP, you have to install a driver so your computer can be able to read it :) Here's a link : AdaFruit Drivers
Yeah, it works ! :)

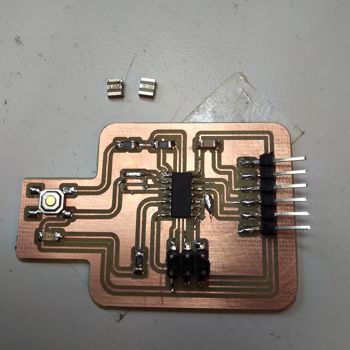
Step 1 : choosing a sensor and designing my board
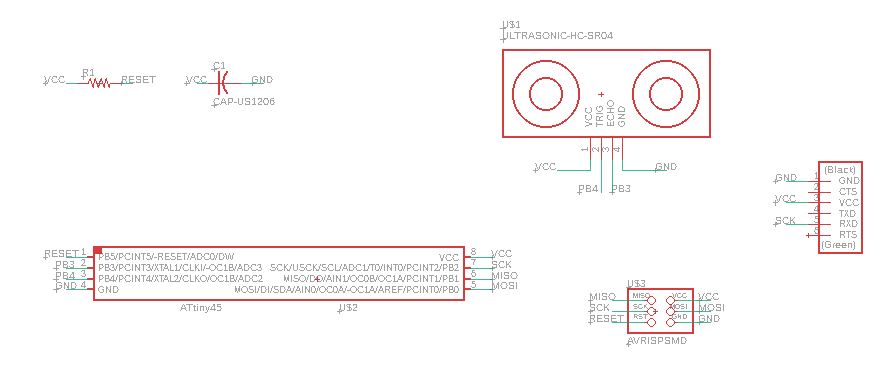
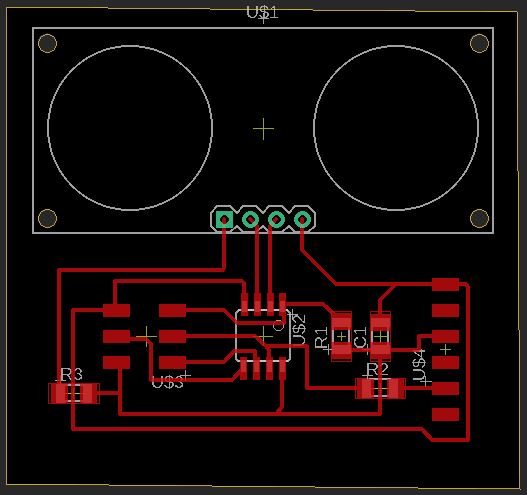
I chose the sonar, since I already knew how to use it on Arduino. Here are my schematic and my board.
I didn't have the proper component symbol on Eagle, so I had to download a library to find it. There was no SMD symbol, so I used a female connector. Here's the link to the library I found :
Step 2 : machining and soldering the board
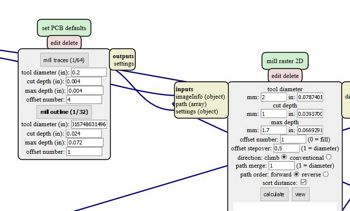
Adel explained again how to do the settings on mods. Here are the correct ones for the board we have now (0.1 mm V mill) :
settings inline

settings outline
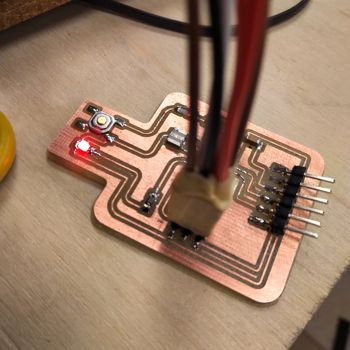
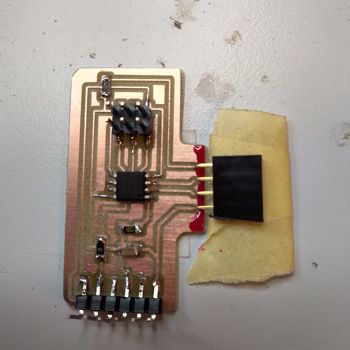
Here is the final result, I'm quite proud of it !
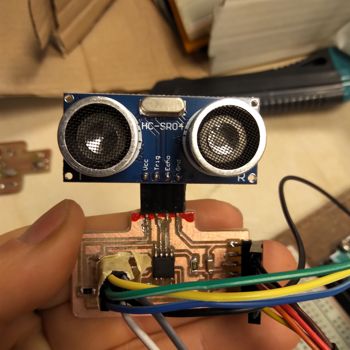
A little tip if you have a component that touches the copper where it shouldn't, you can put some nail polish to isolate the different parts !
Step 3 : programming the board
I first did a montage with a breadboard and a Arduino. Didn't take pictures of the montage but I have the screenshot of the code working.

Here are some of the tutorials that helped me to understand how the sonar works :
| About the sonar sensor | Links |
|---|---|
| Complete guide to ultrasonic HC – SR04 Sensor | https://randomnerdtutorials.com/complete-guide-for-ultrasonic-sensor-hc-sr04/ |
| Arduino - Ultrasonic Sensor | https://www.tutorialspoint.com/arduino/arduino_ultrasonic_sensor.htm |
| Serial Sonar Sensor: ATtiny85, HC-SR04, and Arduino SoftwareSerial | http://projectsfromtech.blogspot.com/2013/08/serial-sonar-sensor-attiny85-hc-sr04.html |
| Chika Makes Things 2016 | http://fab.cba.mit.edu/classes/863.16/section.EECS/people/Eke/wk11_outDev.html |
| About the SoftwareSerial library | Links |
|---|---|
| SoftwareSerial exemple | https://www.arduino.cc/en/Tutorial/SoftwareSerialExample |
| How to use Arduino SoftwareSerial? | https://www.theengineeringprojects.com/2017/01/use-arduino-software-serial.html |
I had some issues connecting and programming my Hello Board with Arduino, so it was way easier for this one. The main issue was in getting a proper information from the sensor.
I then realised that when I played in the serial monitor with the baud rate, information changed.
At first it didn't gave me any results, but then it started talking gibberish...
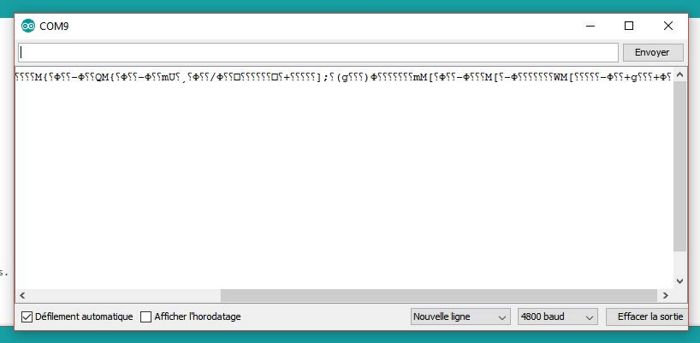
...and asking questions in what I think is chinese... progress ?
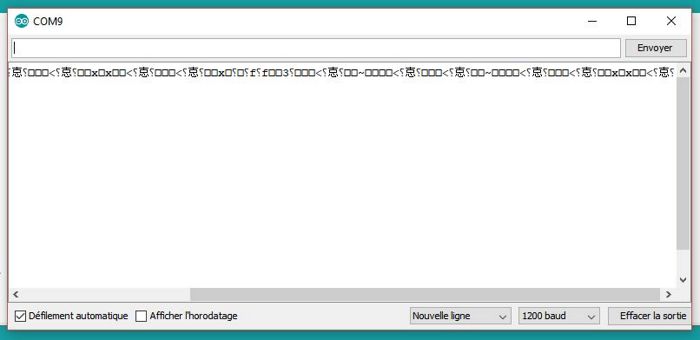
And finally, I found a baud rate that worked !

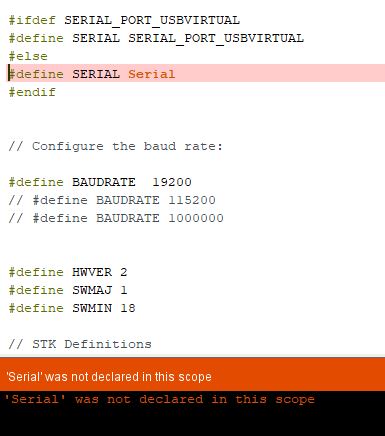
UPDATE : finding out more about the Baud Rate
I finally had some time to understand more how the baud rate works.
The baud rate is the rate at which information is transferred in a communication channel. In the serial port context, “9600 baud” means that the serial port is capable of transferring a maximum of 9600 bits per second. Here is an illustration that shows you how it works :
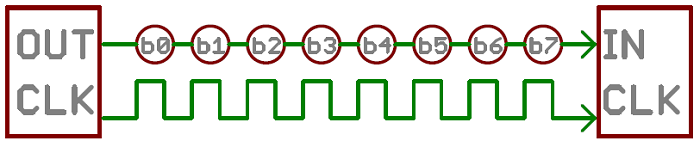
If the information unit is one baud (one bit), the bit rate and the baud rate are identical. If one baud is given as 10 bits, (for example, eight data bits plus two framing bits), the bit rate is still 9600 but the baud rate is 9600/10, or 960. We always have to configure BaudRate as bits per second.
Standard baud rates include 110, 300, 600, 1200, 2400, 4800, 9600, 14400, 19200, 38400, 57600, 115200, 128000 and 256000 bits per second.
The higher a baud rate goes, the faster data is sent/received, but there are limits to how fast data can be transferred. You usually won't see speeds exceeding 115200 - that's fast for most microcontrollers. Get too high, and you'll begin to see errors on the receiving end, as clocks and sampling periods just can't keep up.
That's the reason why I had trouble making my component communicate with my board at first, I didn't chose the proper baud rate, so they couldn't talk to each other properly ! :)
I dicovered that when you select a `clock` in the Arduino IDE, it didn't fuses the board to correspond to the selected times.
To define the clock, you just have to define `F_CPU` (written #define F_CPU) in C. By default, Arduino doesn't fuse the board and the timer stay in his default value.
So the easy solution would consist to just set the internal clock at 1Mhz and the serial communication on the baudrate 9600 works just fines. Instead of the the 8mhz I used in my settings in the Arduino IDE.
Madjid told me that another solution would be to go to AVR calculator, but I'm not really confortable with it. Still I found a great website explaining how to use it with the Arduino IDE : https://www.instructables.com/id/How-to-change-fuse-bits-of-AVR-Atmega328p-8bit-mic/.
That's the reason why there was a shift between the baud rate of my code and the one of the Arduino IDE monitor.
Wanna try by yourslef ?
Here are all the links to my files, feel free to download them :
| Name of the documents | Link to download |
|---|---|
| Arduino file | Sonar Arduino Code |
| Eagle files | Sonar Schematic File |
| Eagle files | Sonar Board File |